

This summer celebrates the 10 year milestone of loving and living in our Chicago home! To celebrate, we’re sharing the unbelievable before and afters of our long, slow renovation. See Part I here!
Welcome to Part II of our 10 year house-iversary celebration! If you missed Part I, which walks through the first floor of our home, you can check that out here
In This Post
What Makes a Two Flat, a Two Flat?
While a lack of accurate historical records makes tracking the exact history of our home nearly impossible, we have some fairly good suspicions of what she’s been through since being constructed in 1887. Based on research our home slots nicely into the Victorian / Queen Anne style (#3 here) that was popular in Chicago in the decades surrounding the turn of the century.
We suspect that our home was originally constructed as a single family home. At some point, it was converted to a two flat, meaning that there was a nearly identical apartment the first and second floors with a shared common staircase. When we purchased the home, which is zoned for two units, we combined the first and second floors back to their original single family floorplan. With a few adjustments, of course.
Craft Room
Due to the long, narrow nature of Chicago lots and homes, many historical homes feature long, narrow rooms that can be tricky to design around and make functional. By the time we got around to designing what is now our dedicated craft/styling/shipping room, we knew just what to do!
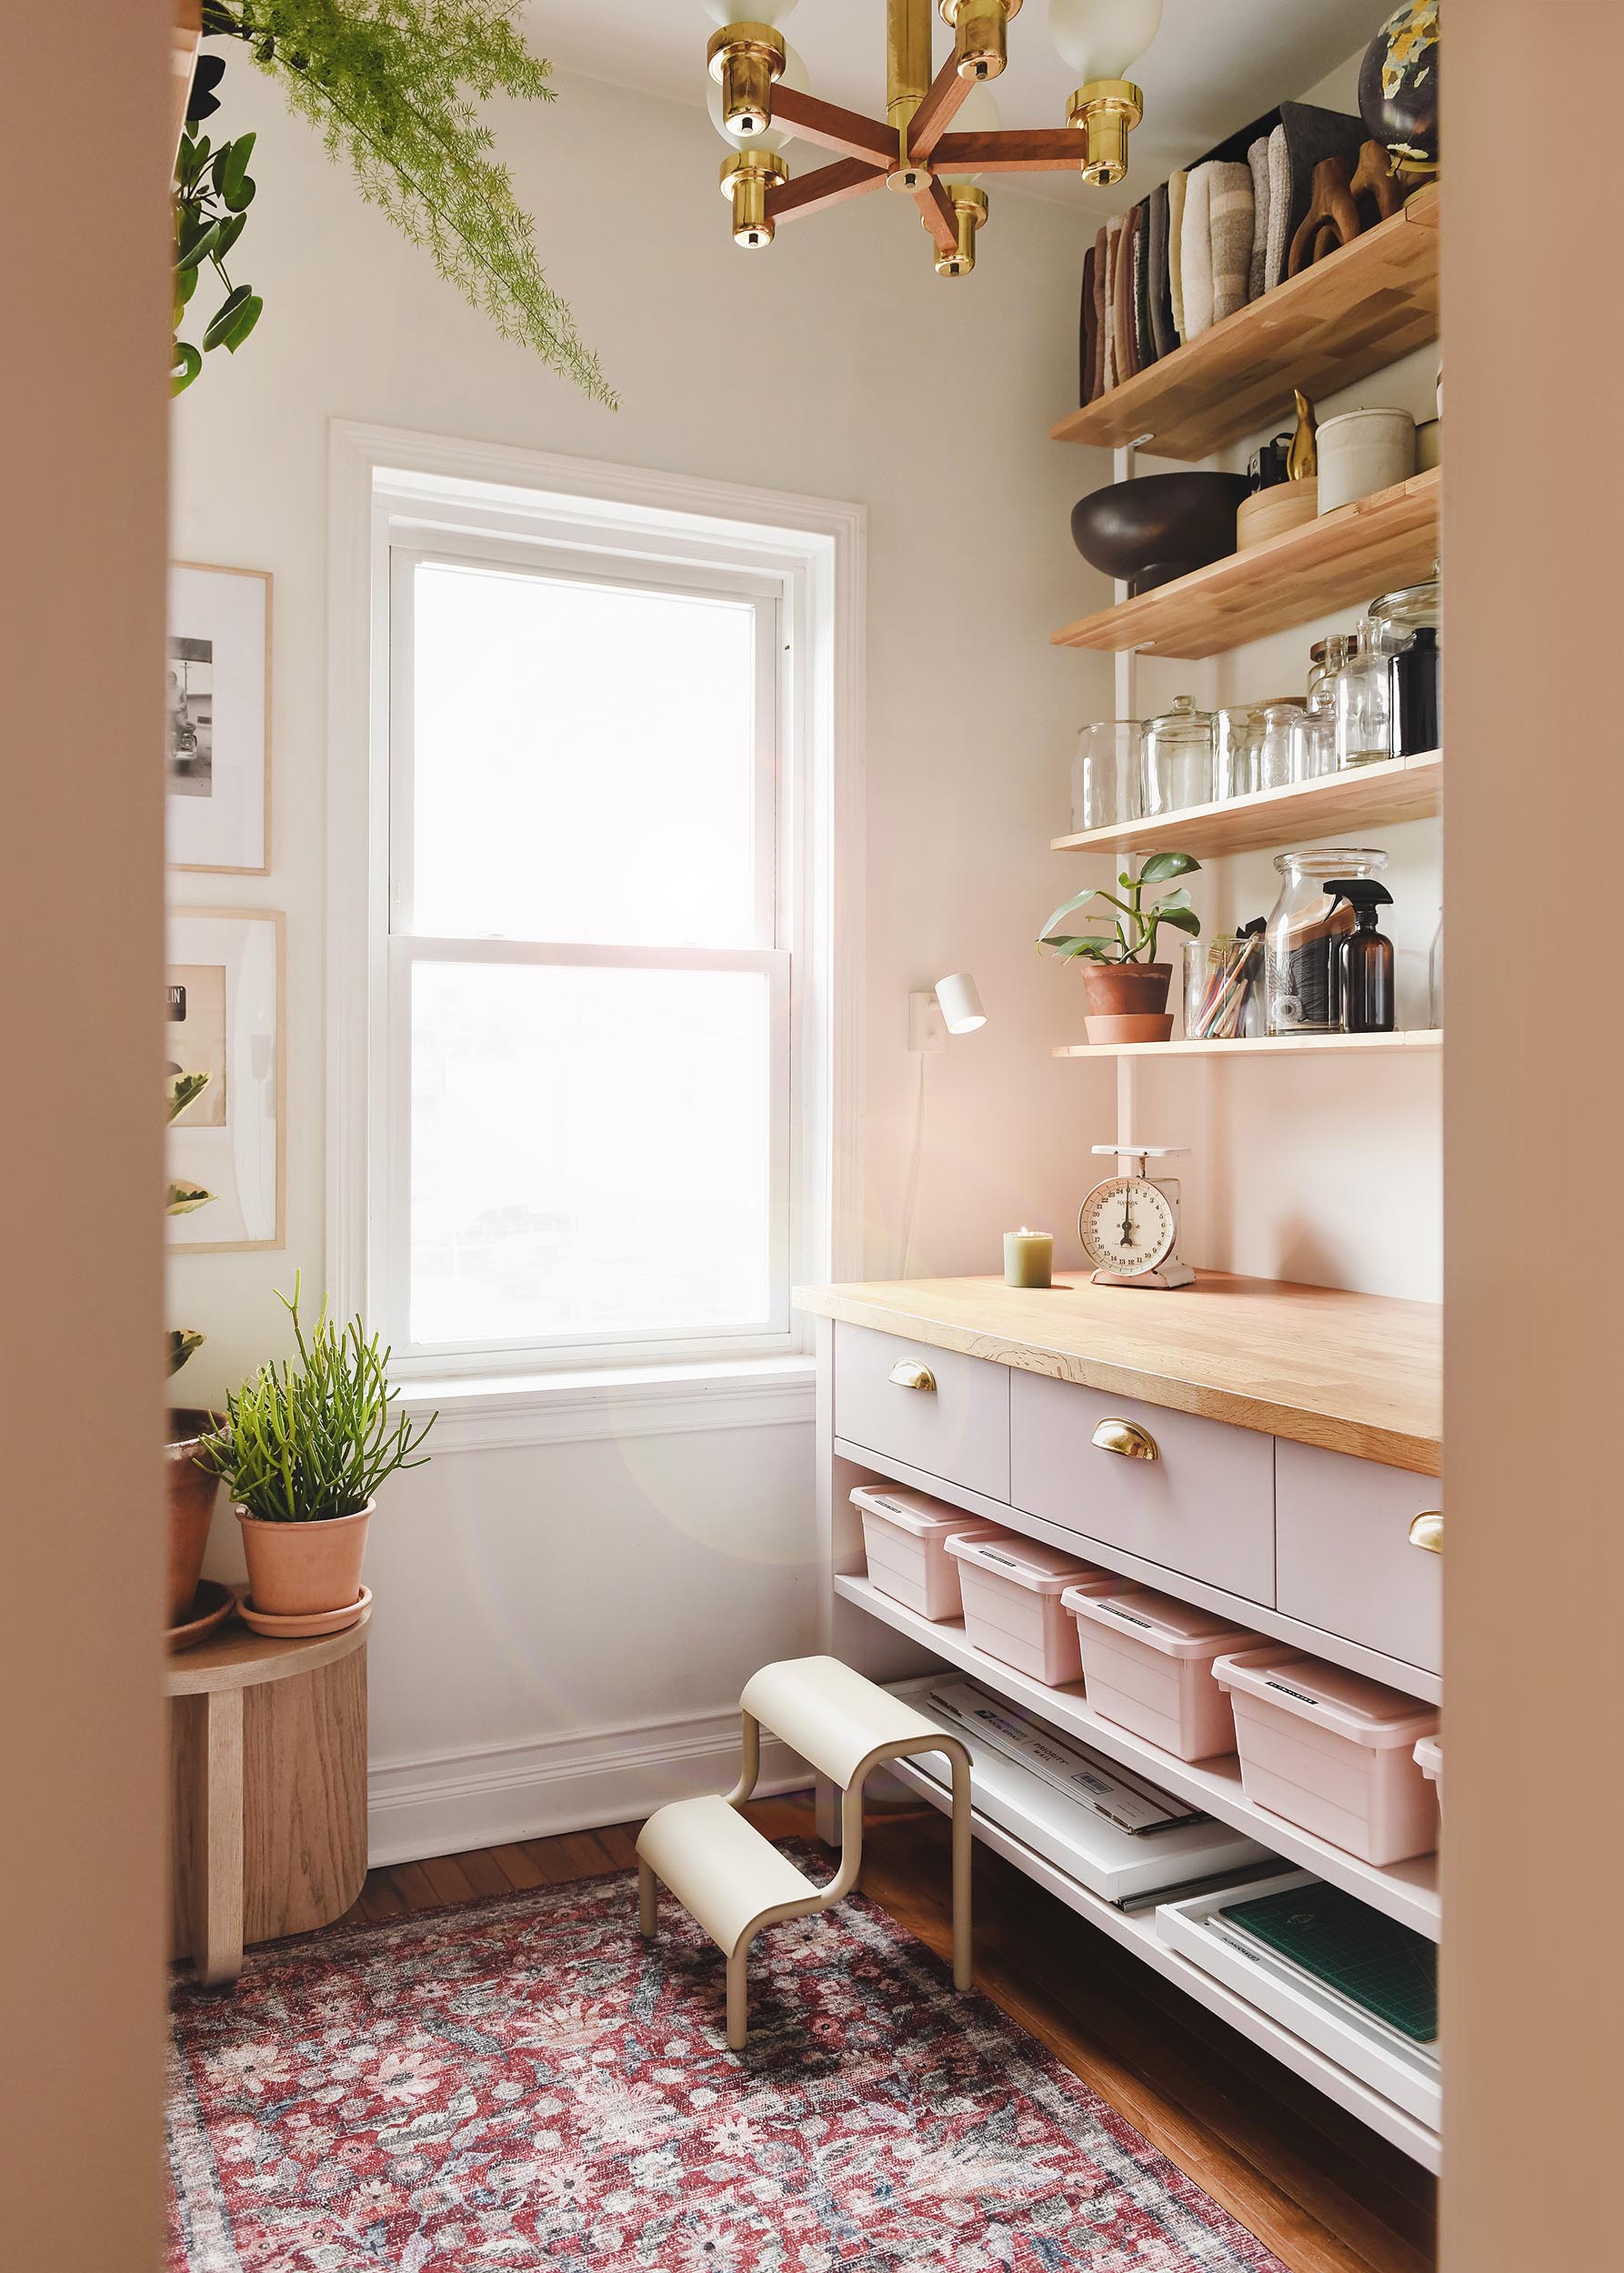
This room sits directly above our home’s foyer, and clocks in at a small but mighty 7′ x 7′ footprint. When Kim was still painting pet portraits, this served as her command center and shipping room. Now it functions as our upstairs do-it-all space. We wrap gifts, store our styling essentials and keep organized bins of colored craft paper, glue guns and all of the odds and ends associate with Lucy’s craft projects.
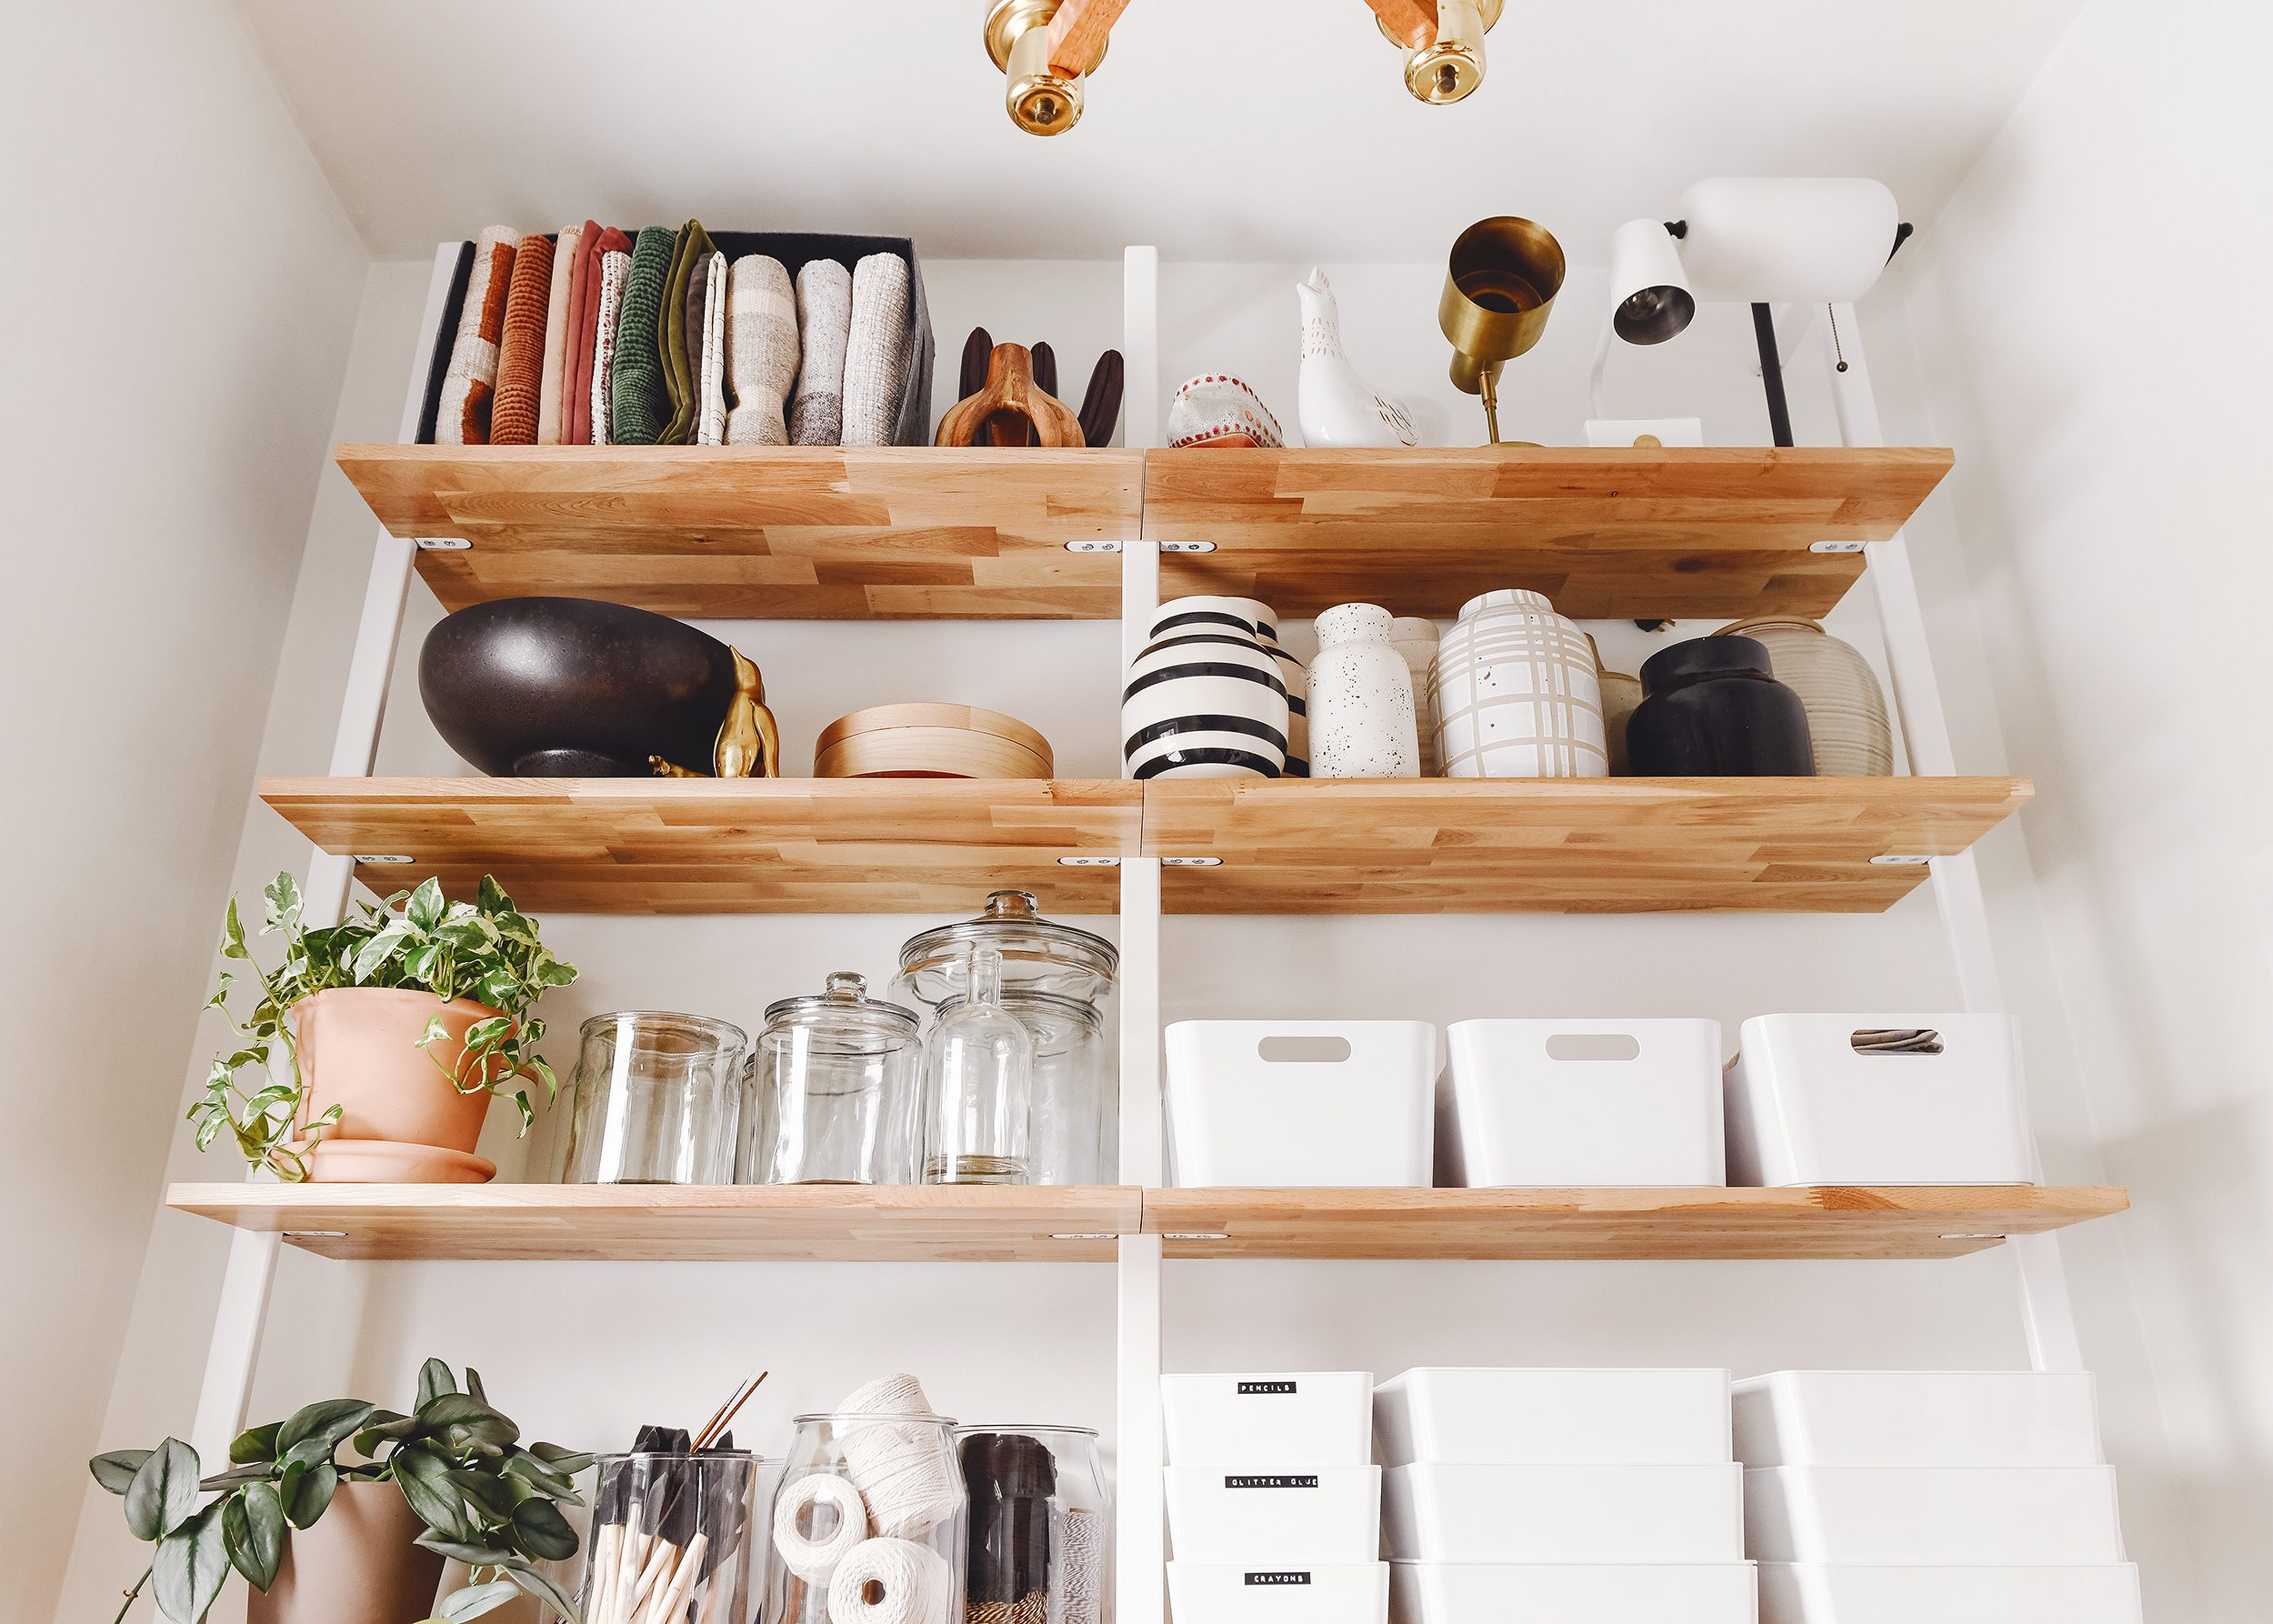
The addition of these sturdy Climb modular ladder shelves from EQ3 allowed for impressive vertical storage and sturdy load-bearing capacity. The weight of all of these glass and ceramic items really adds up and these shelves handle it with ease.
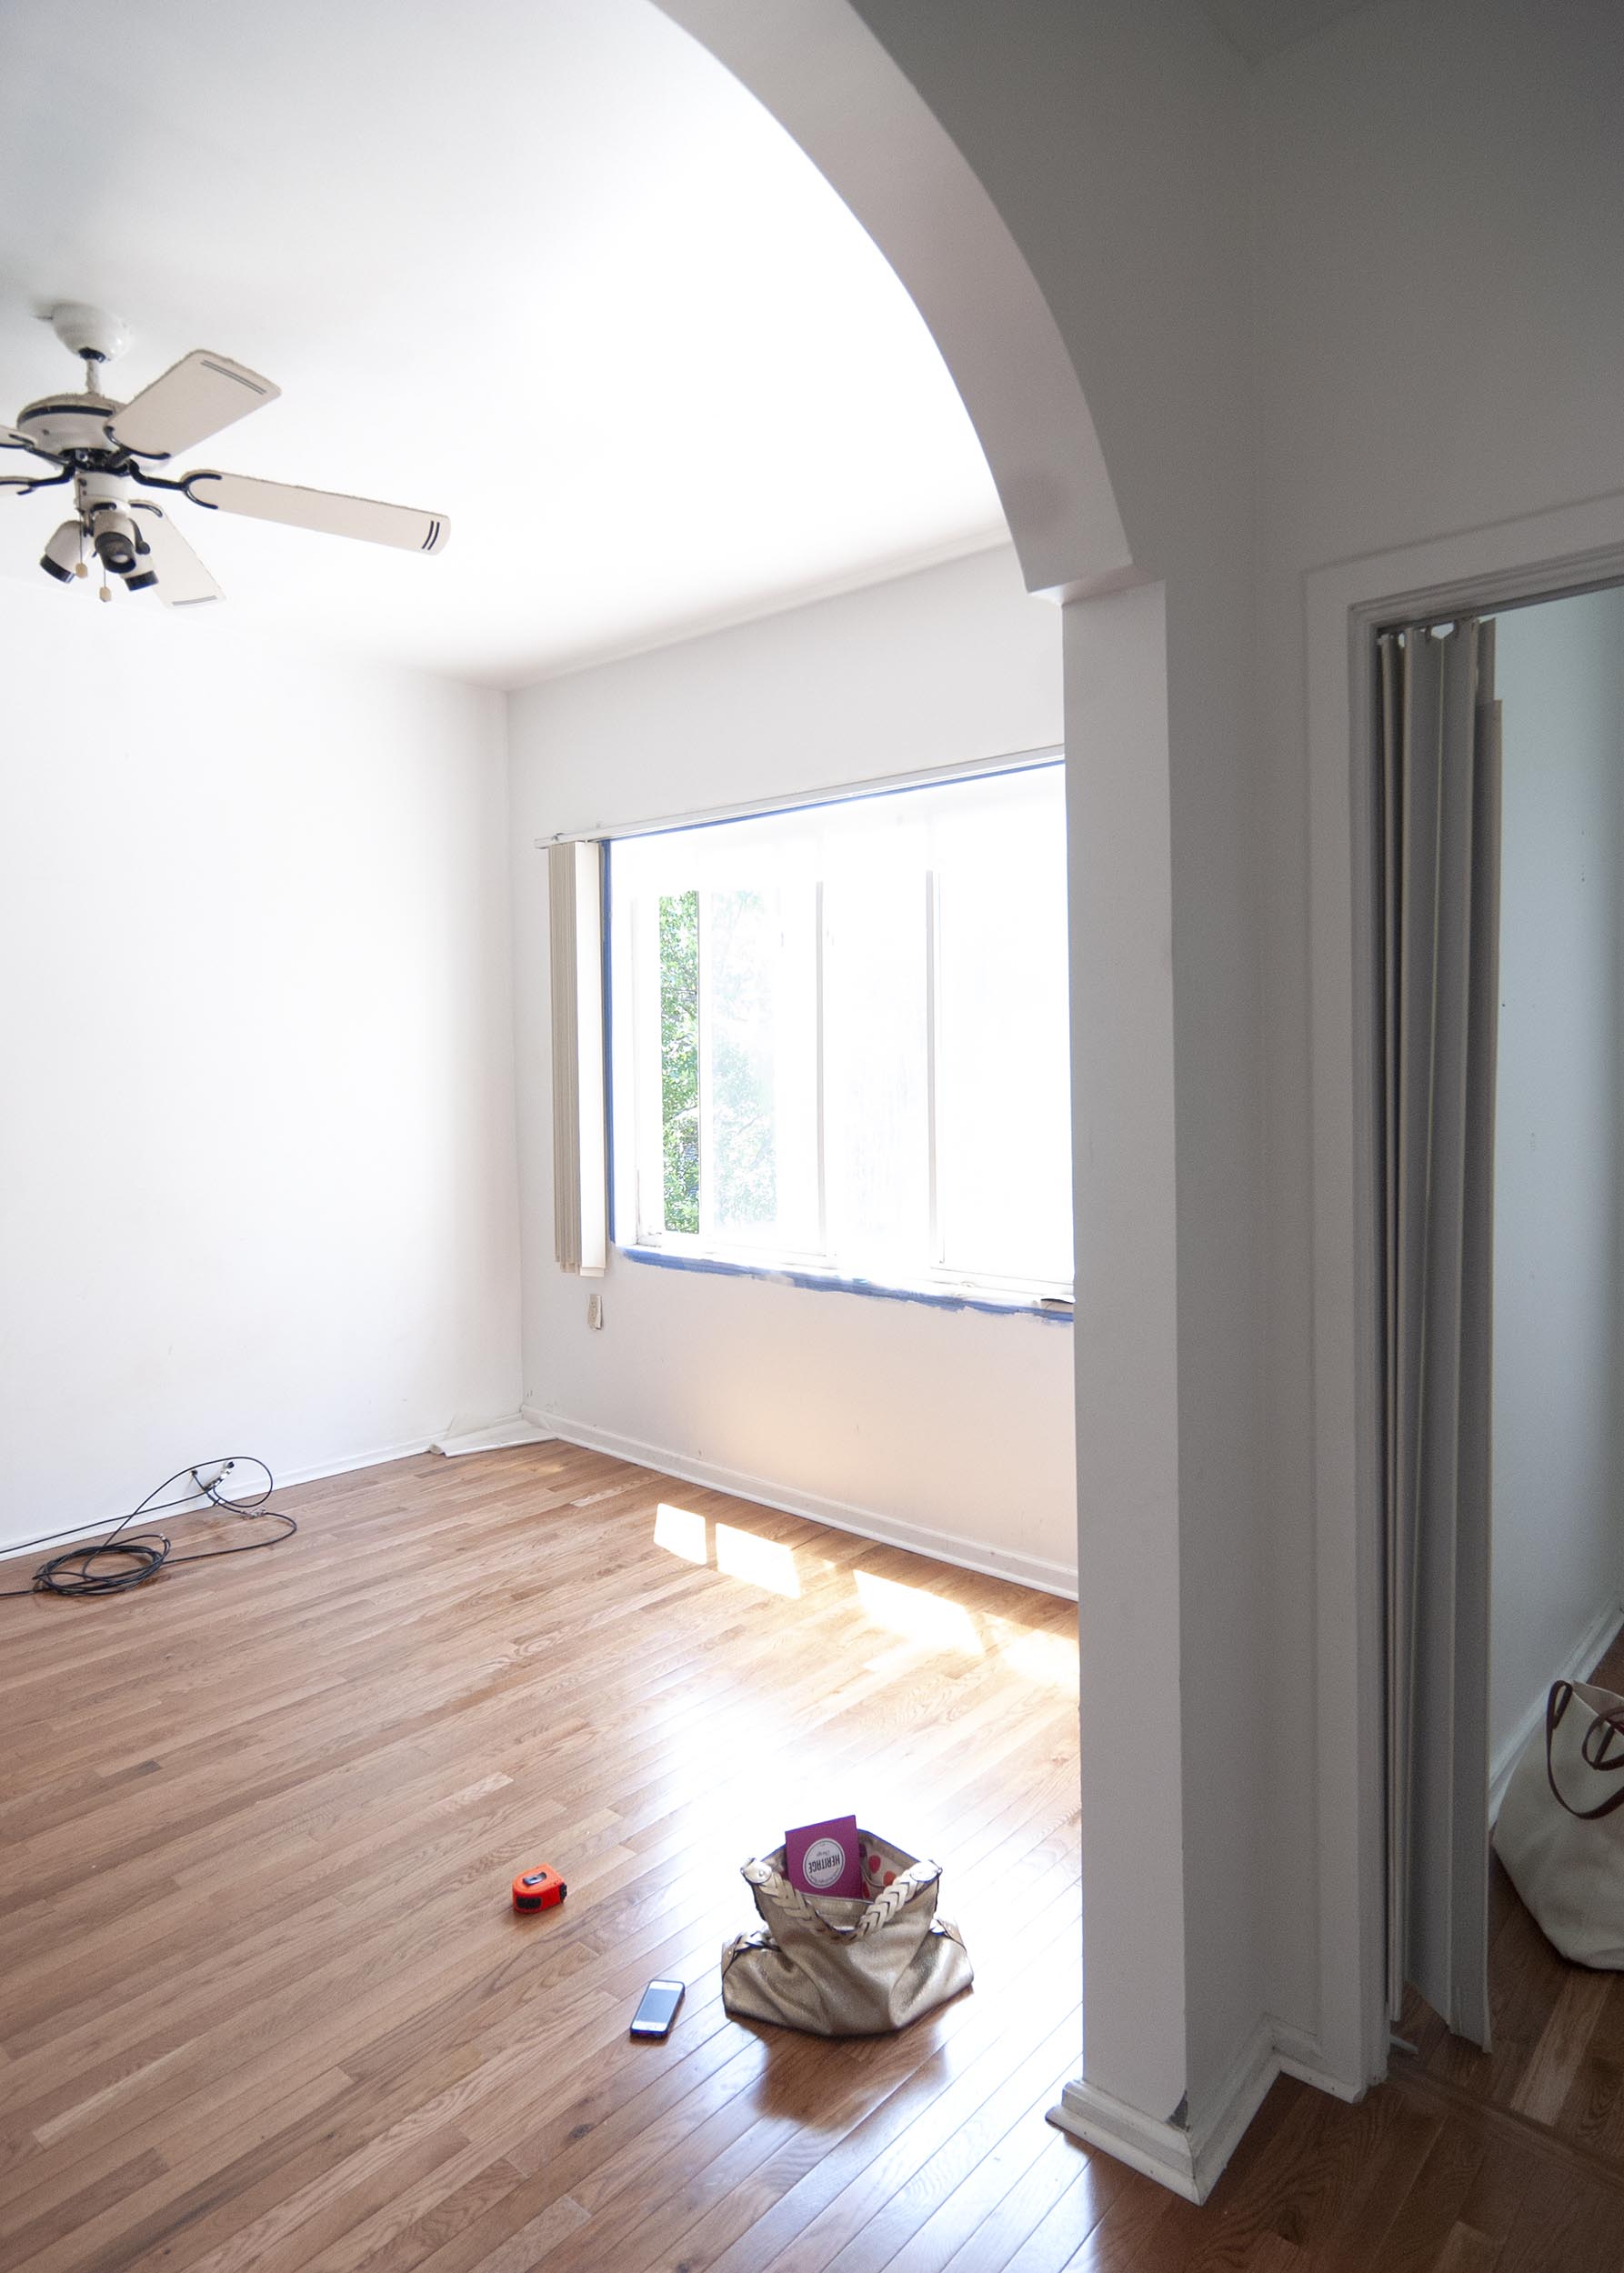
From Home Studio to Play Room
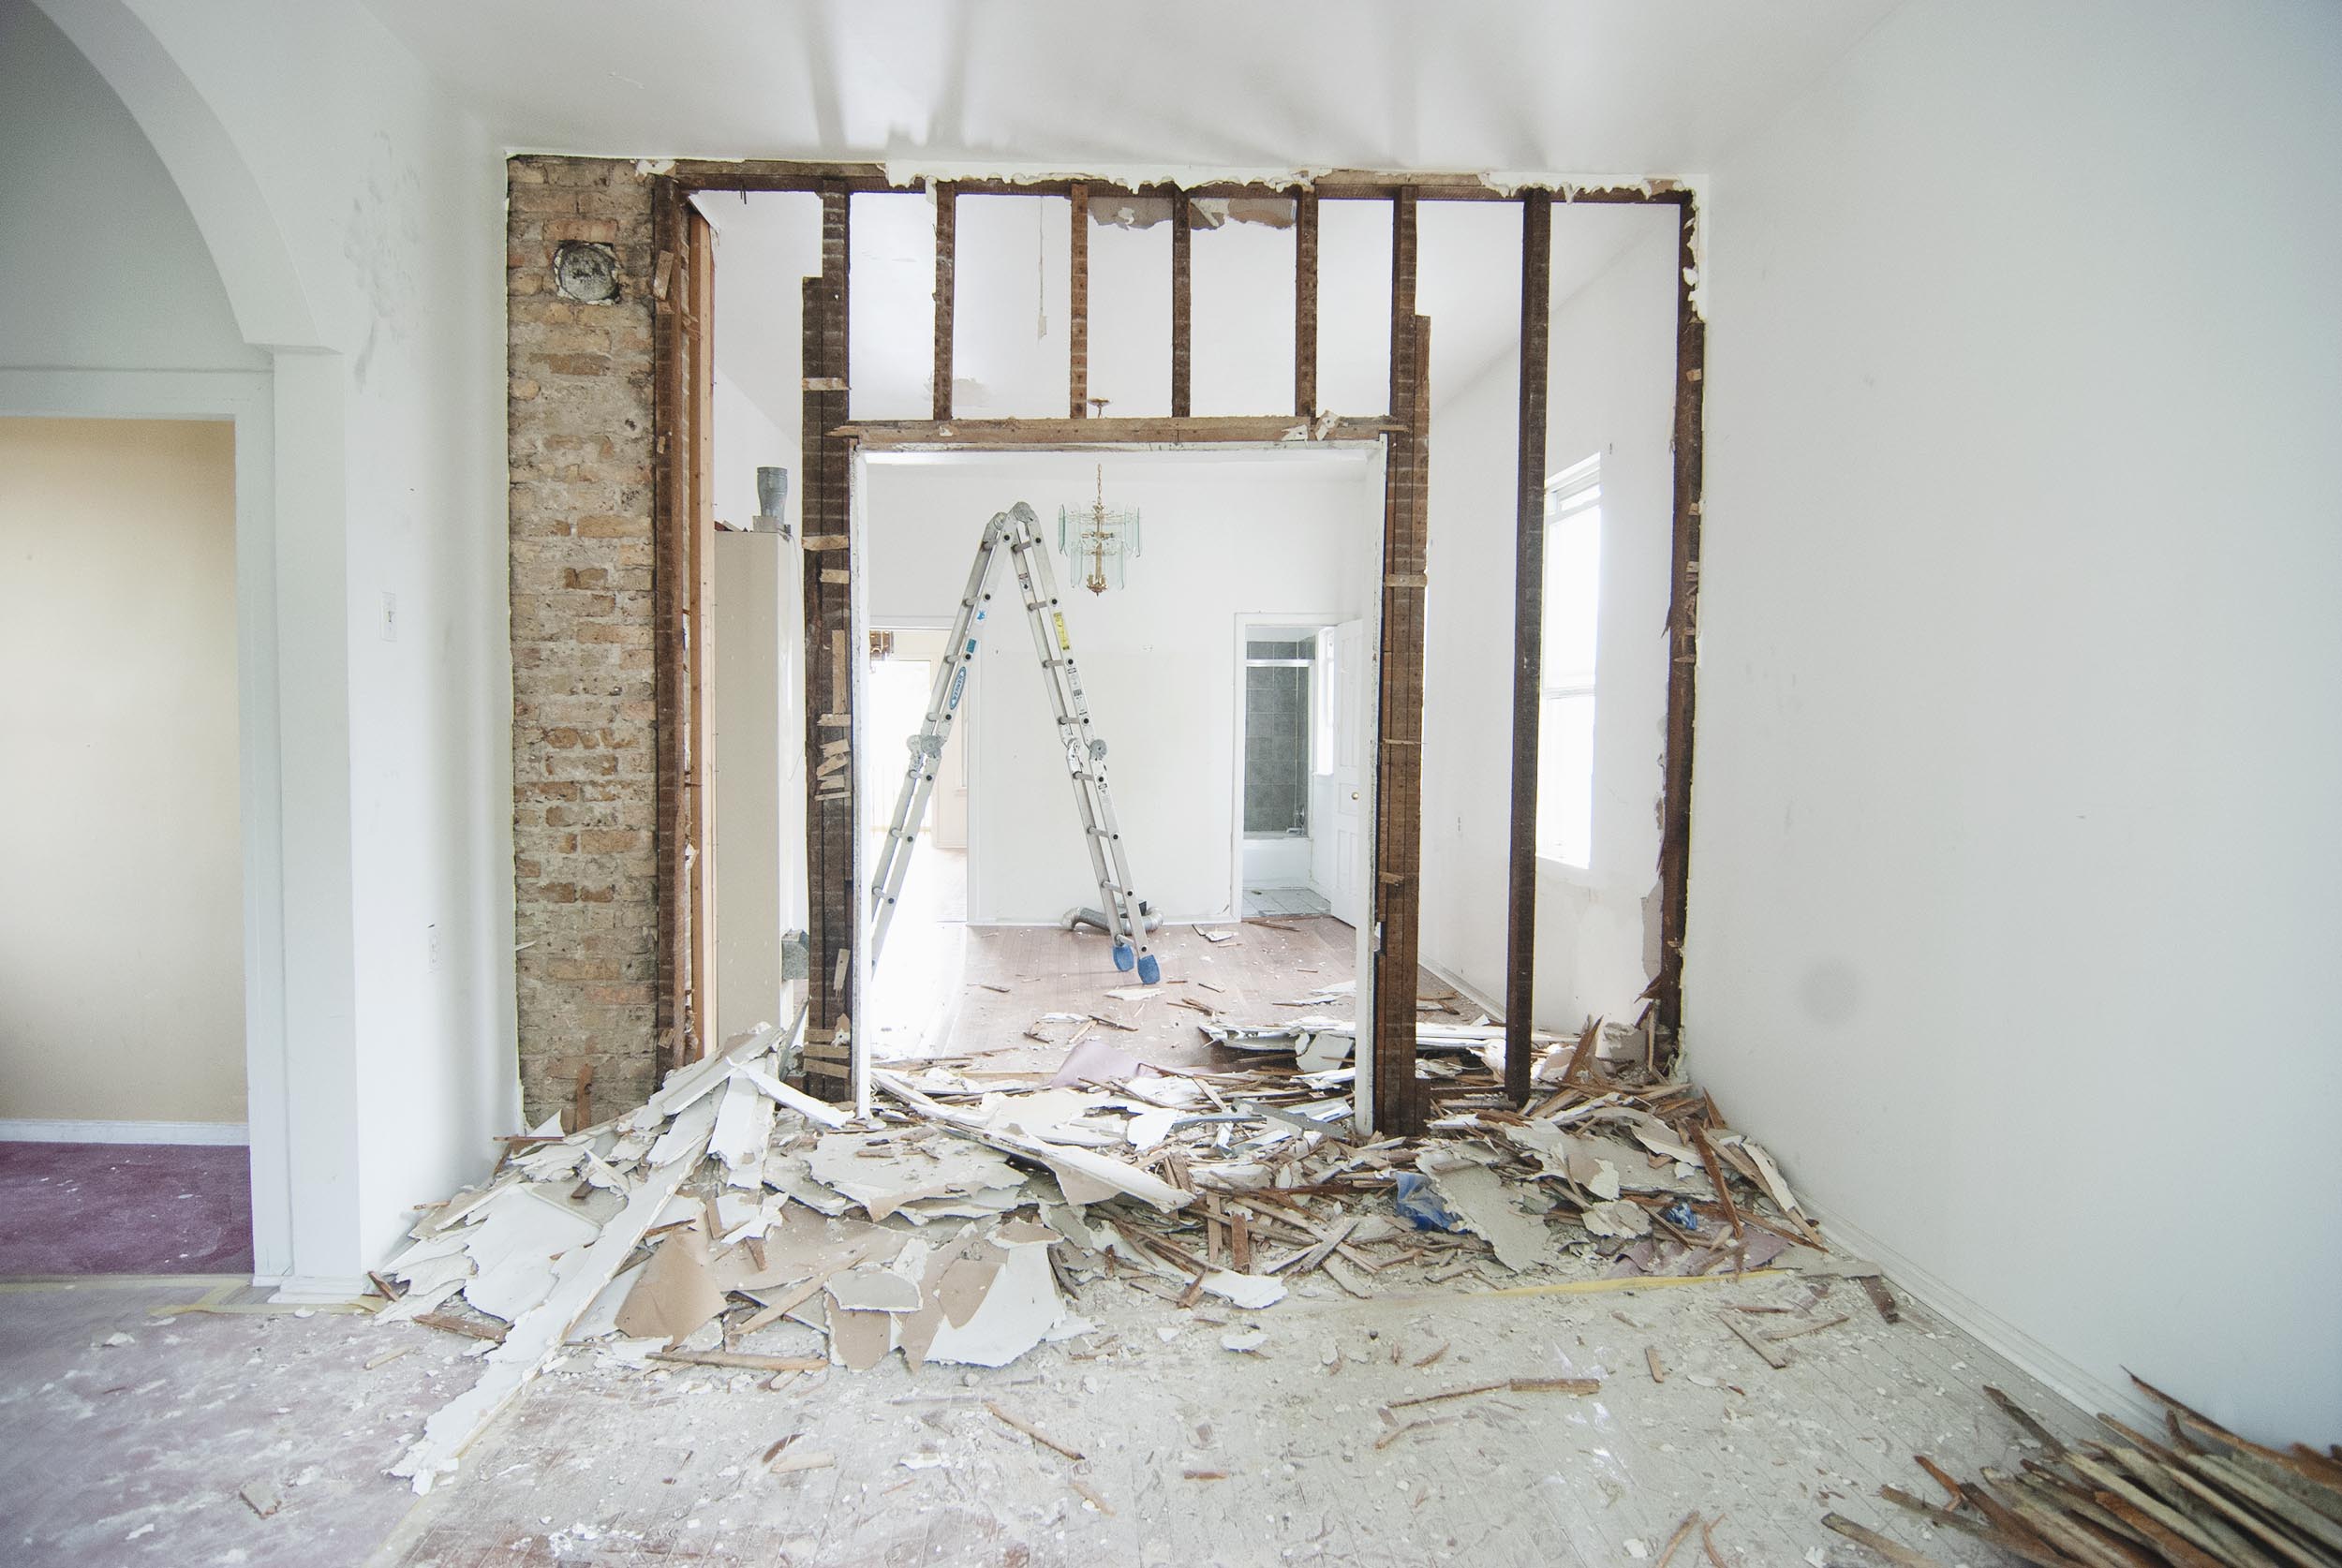
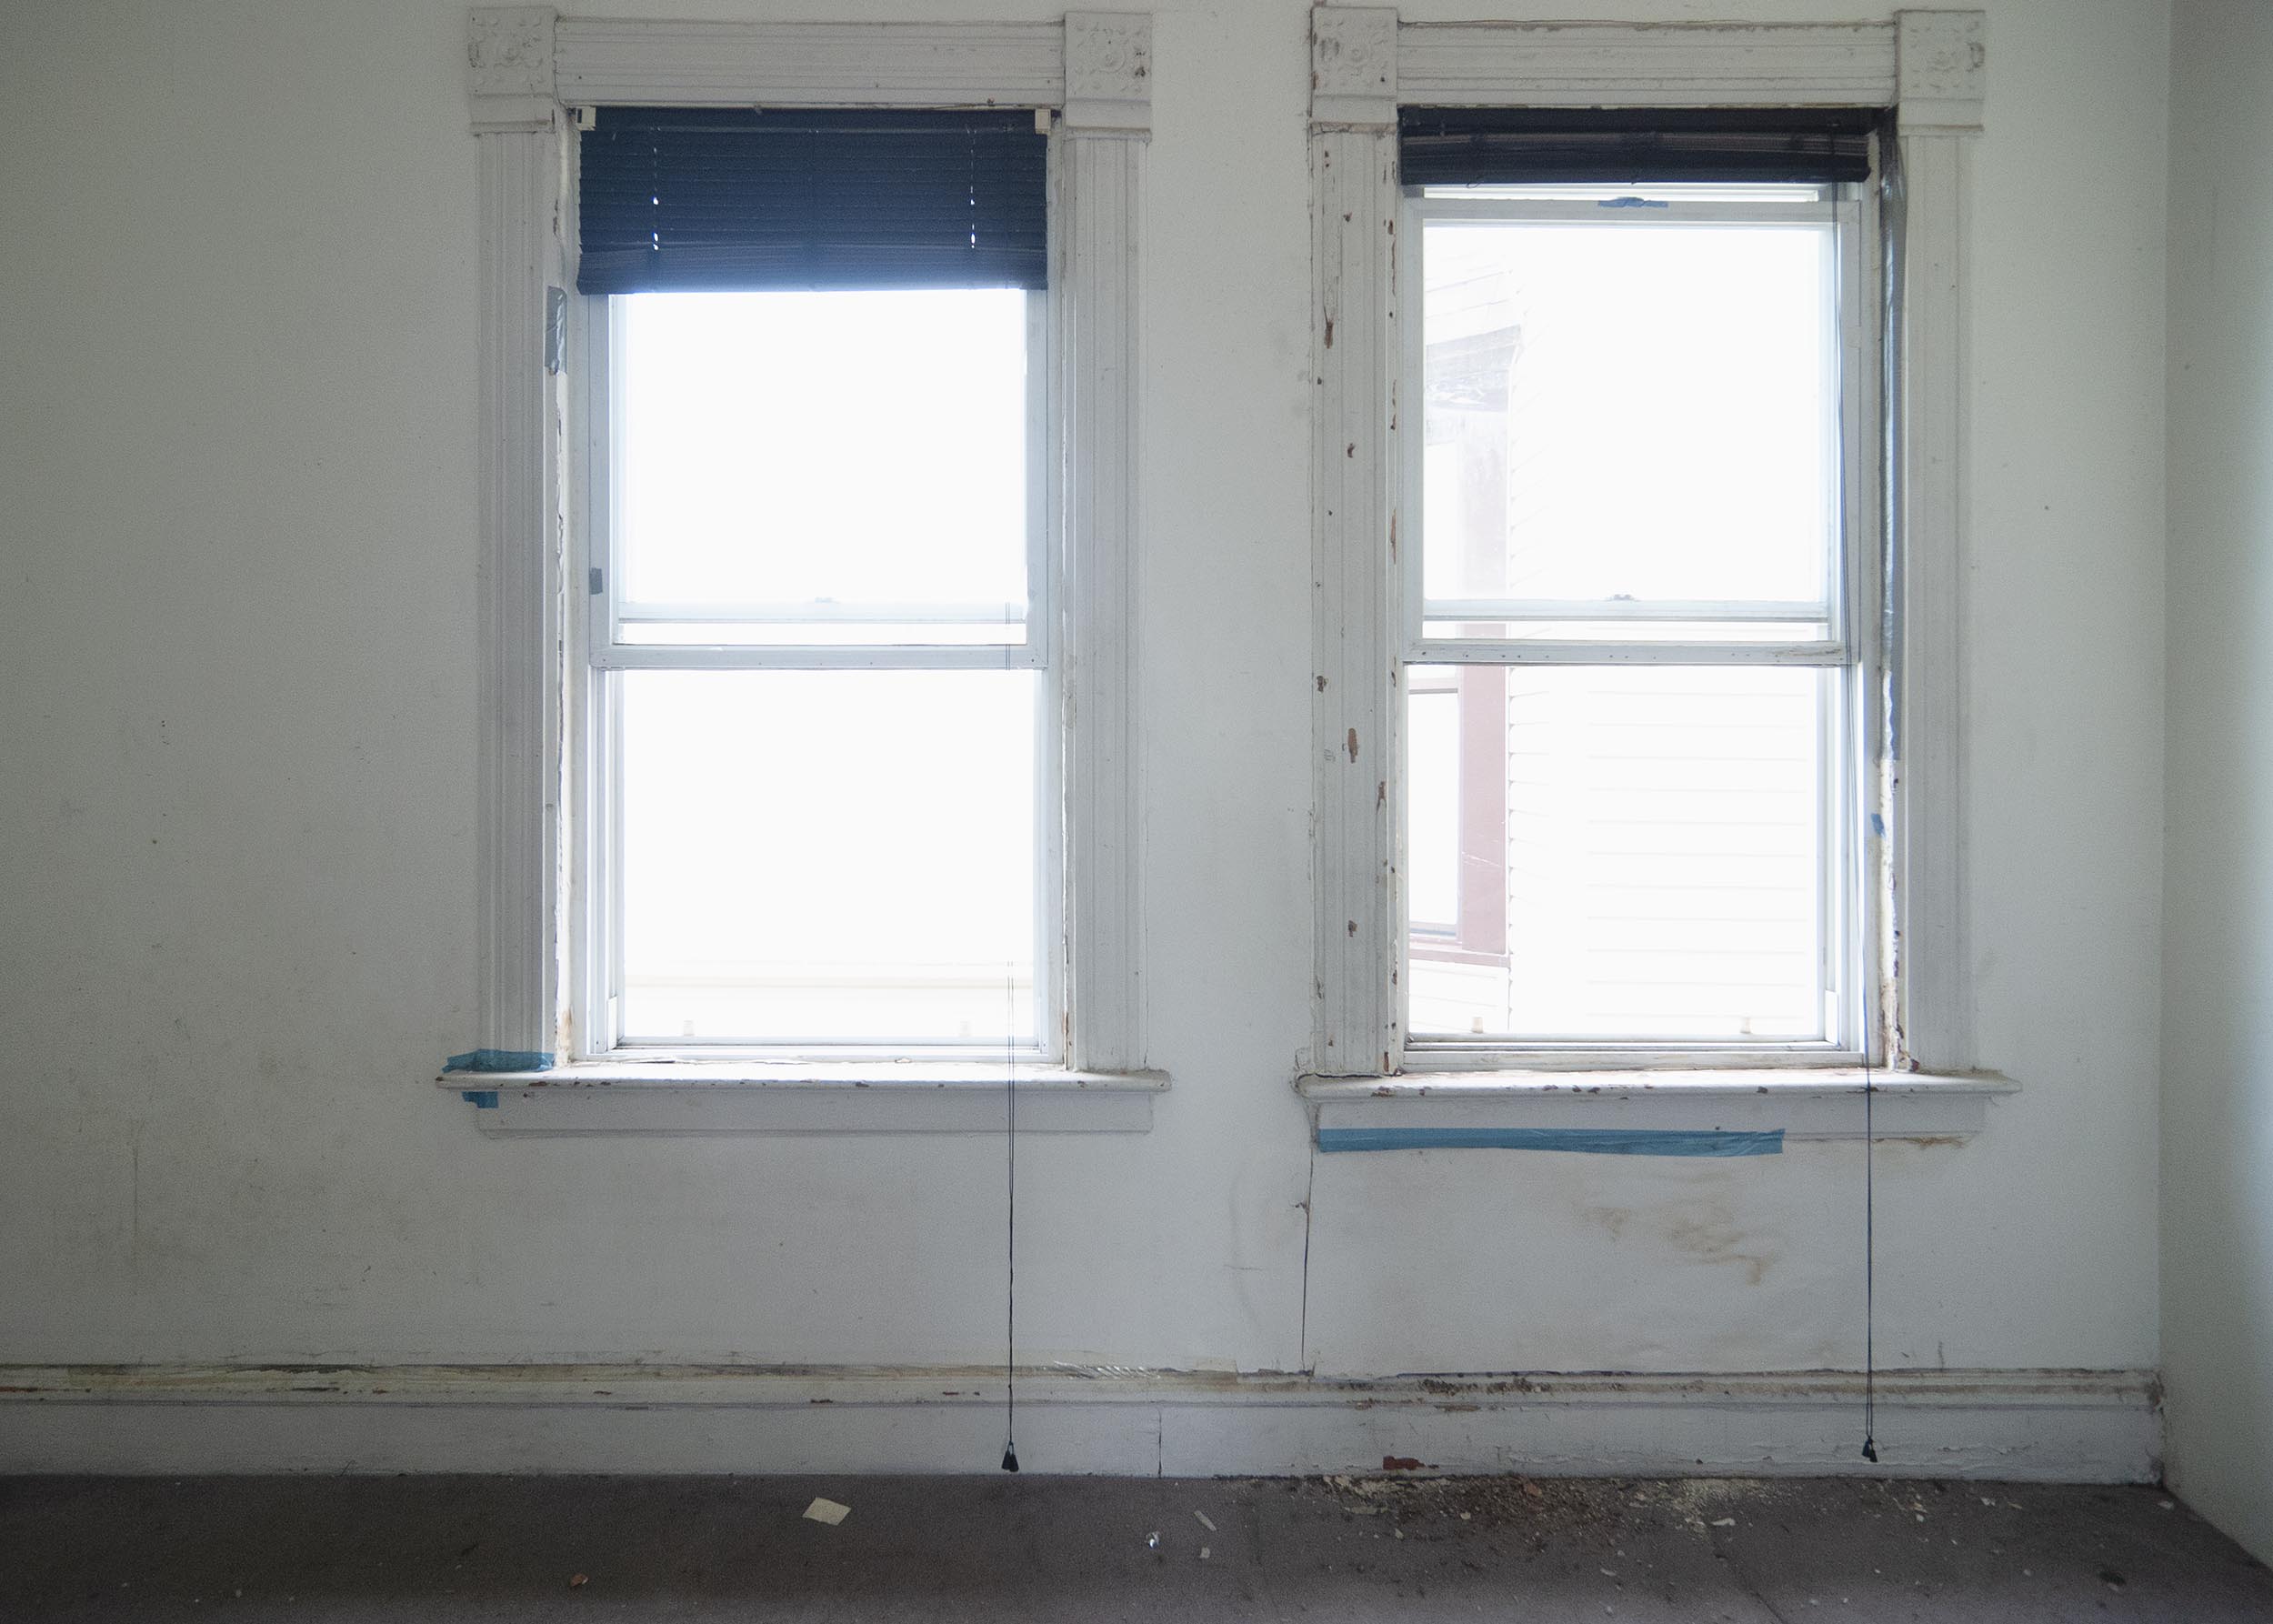
What was once a musty, drafty living room is has been transformed into a multitude of spaces during our time here. Our entire second floor gets loads of natural light since there are windows on three sides, so auxiliary lighting is only necessary once the sun goes down. Our home has a relatively unique setting by Chicago standards in that the home next door to the south is a single story, so beautiful southern light isn’t blocked. To the north, our neighbor’s home is set back toward the alley, so we receive full natural light on that side as well. It’s truly unique and one of the big motivators for selecting this house.

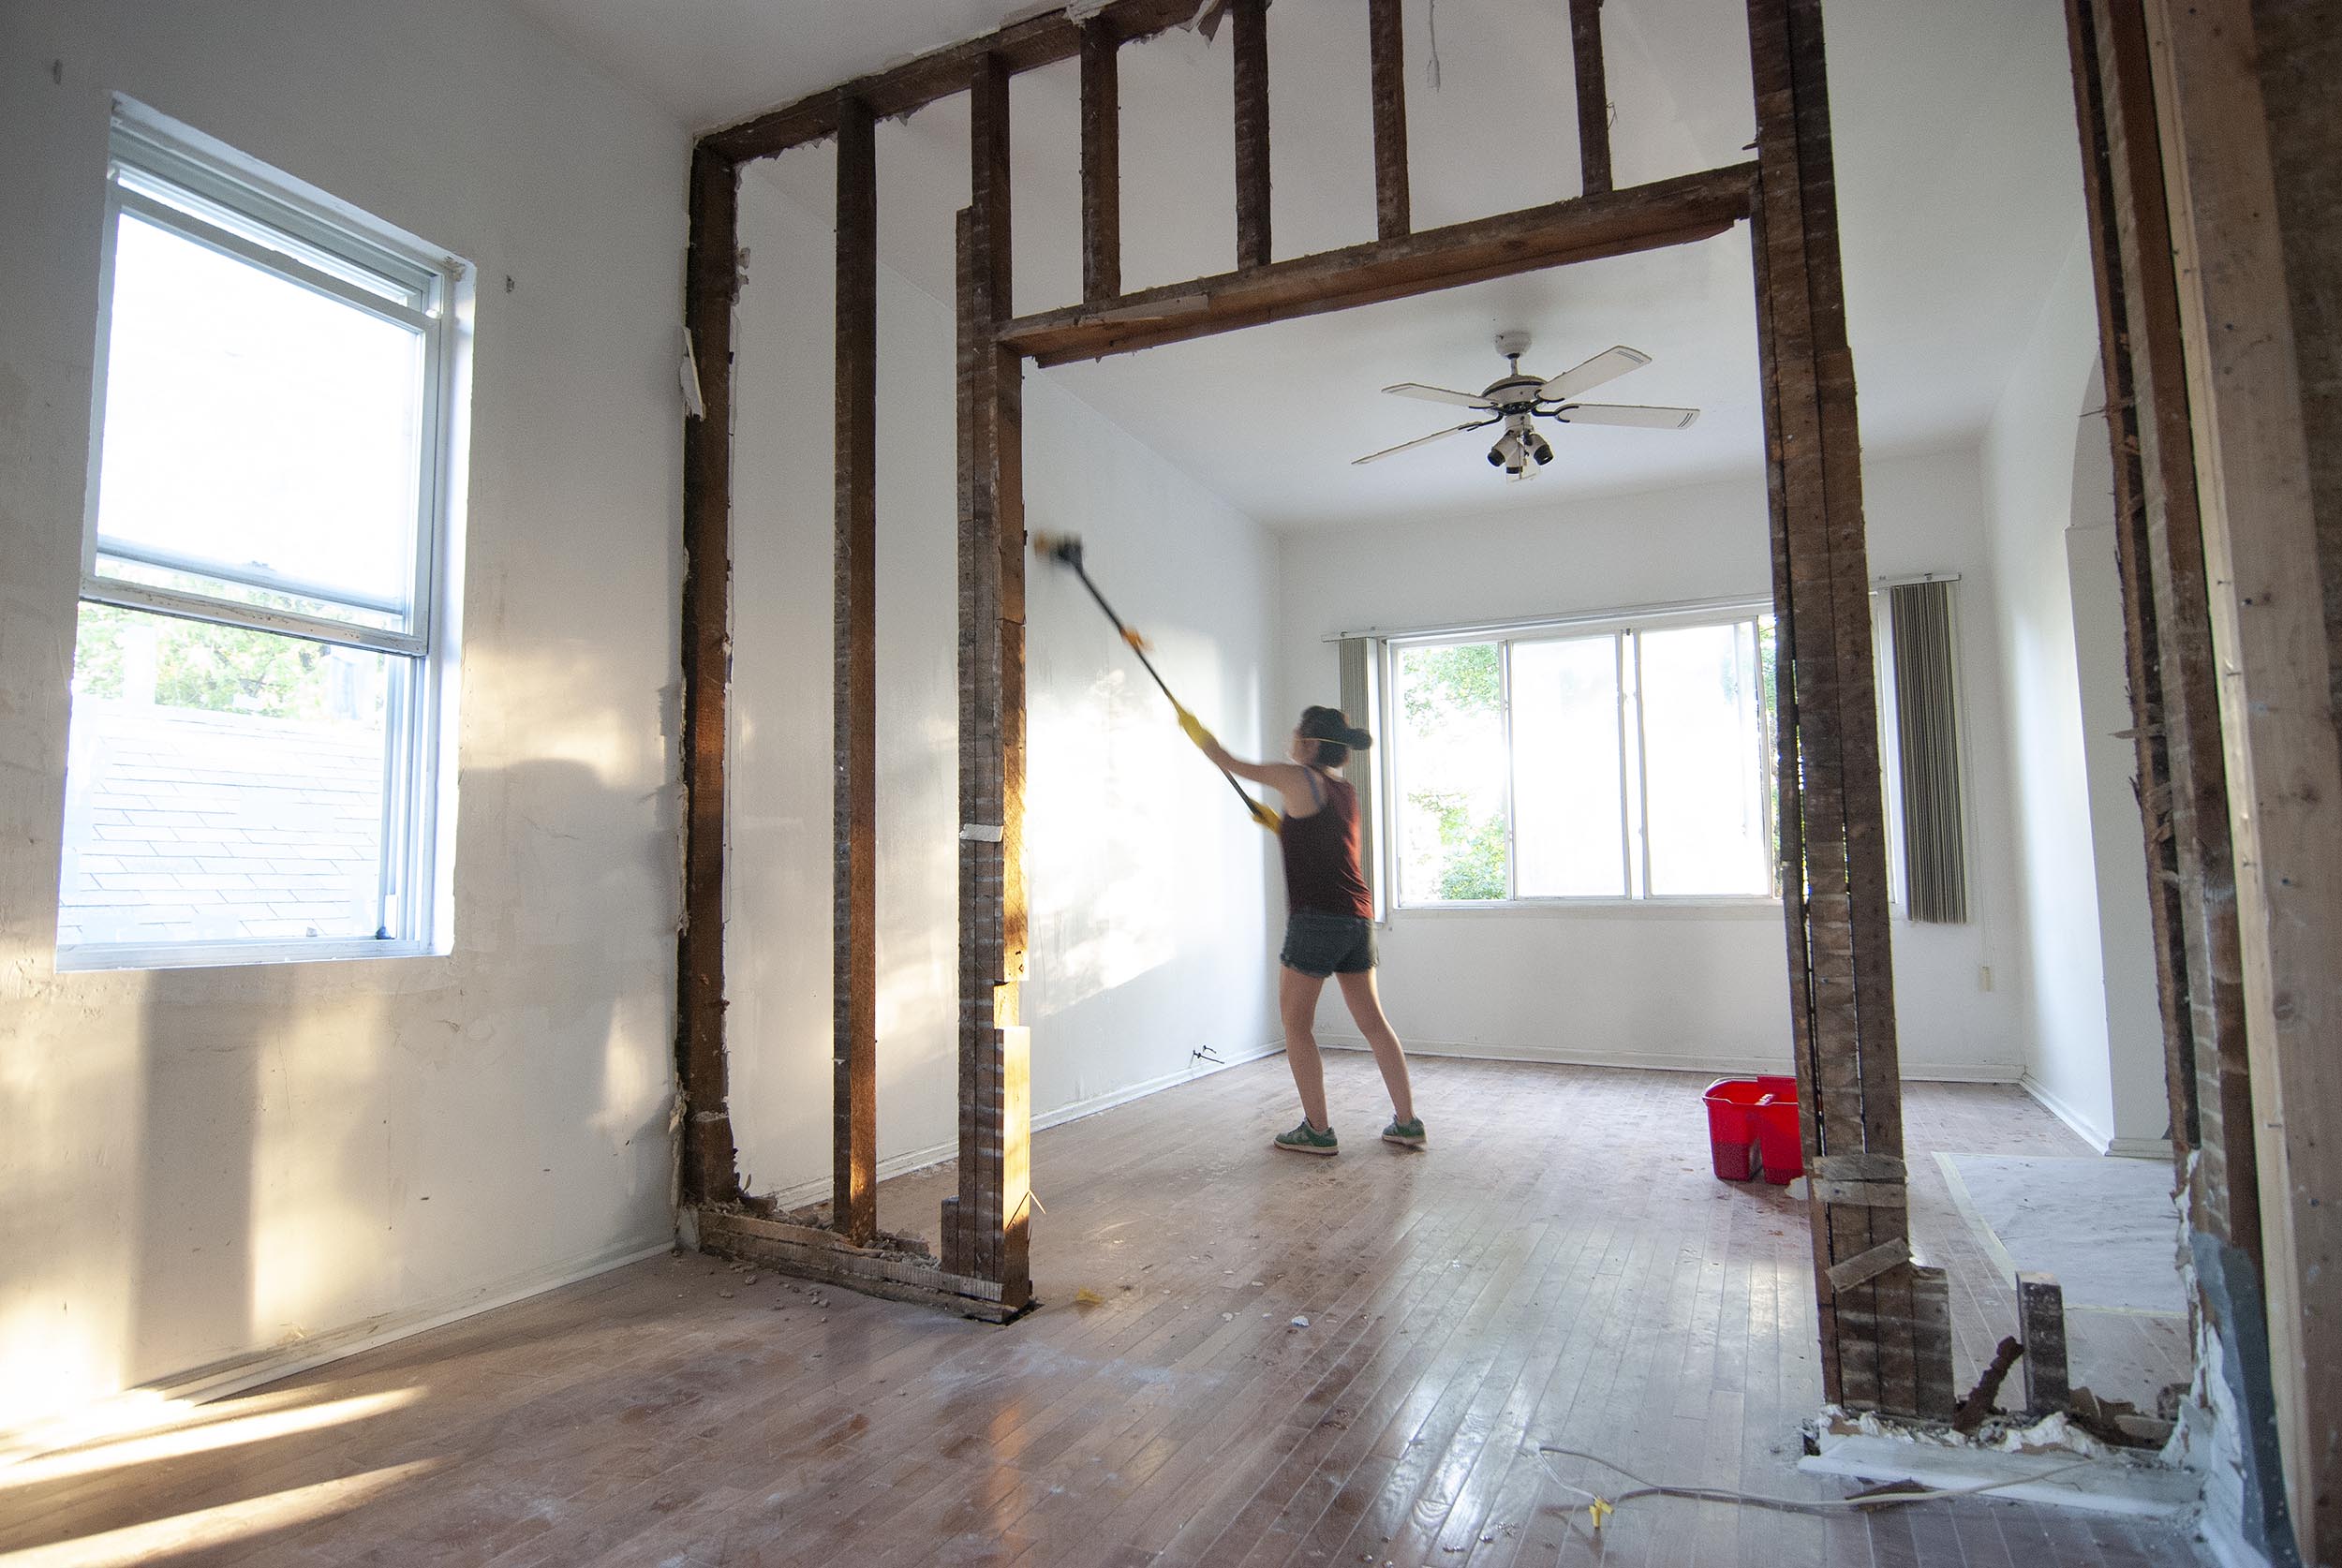
As we mentioned in the Living/Dining room section of part 1, the previous owners had made some interesting choices when it came to structural stability. As the floor of this room was raised from below using an elaborate system of bottle jacks, it was determined that the former dividing wall in the upstairs space wasn’t load bearing and we could do with it as we wished. We promptly removed the drywall and had the whole structure removed in a few hours. It was an early win that really boosted our DIY confidence.
Shortly after our little Lucy was born, I left my corporate sales job to work full time on YBH with Kim, who had been at it full time for many years prior. What was her solo office space would now need to make room for a second full time team member, so we made a few adjustments and got right down to work.
The good news is that betting on ourselves paid off and we successfully replaced my corporate income within the year. The bad news is that we started to feel constrained by working in our ‘office’ which was alllll the way upstairs and away from coffee, food and the best sound system in the house. By this point, Lucy was also growing bigger and needed a little more creative space than her little nursery could provide…
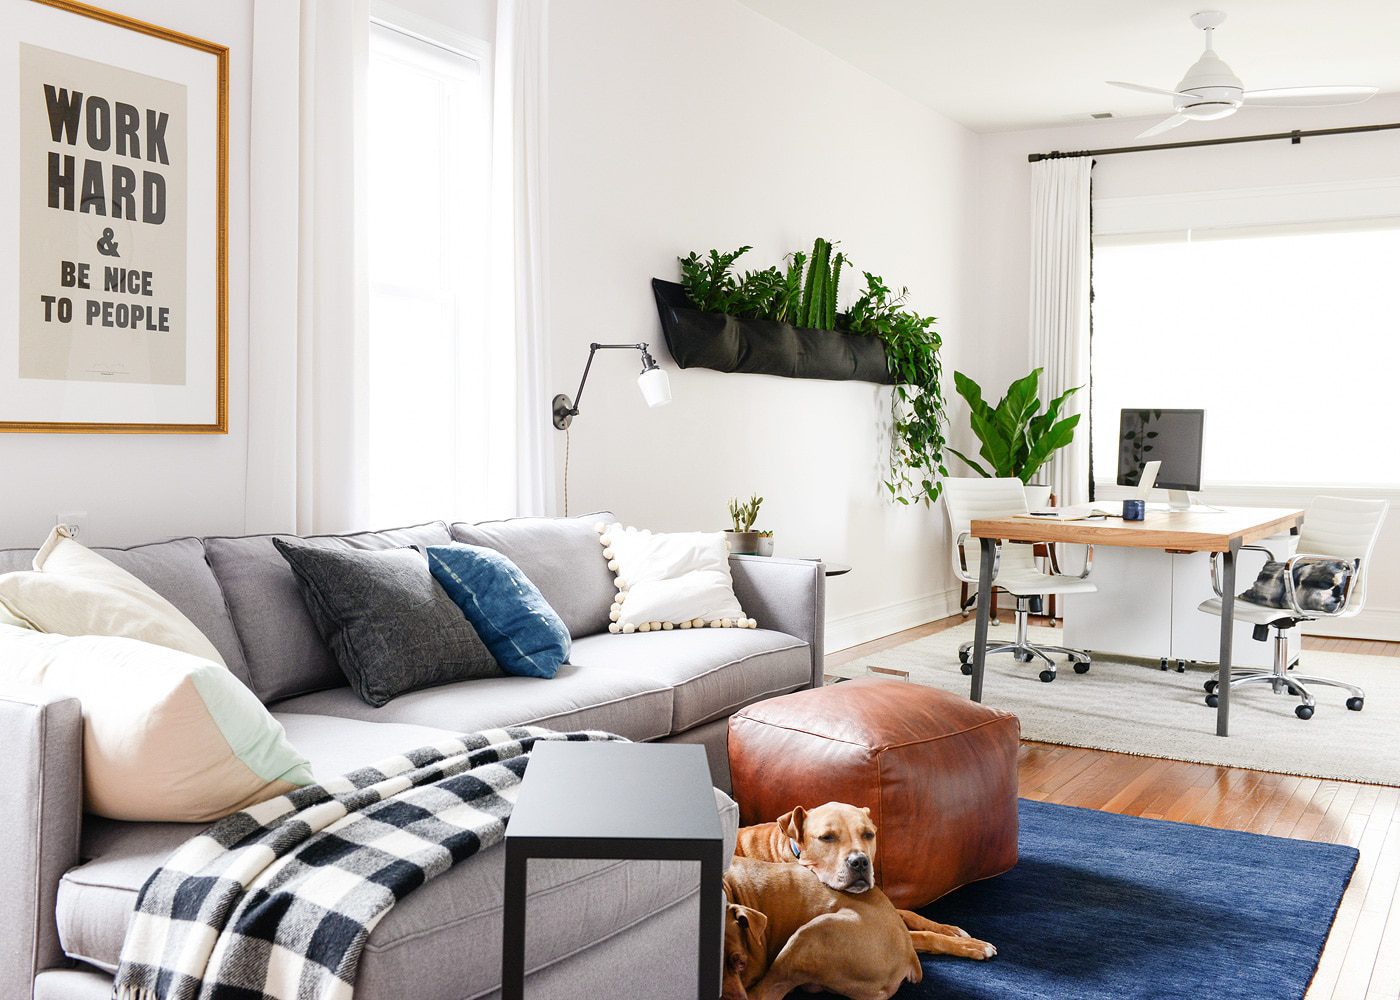
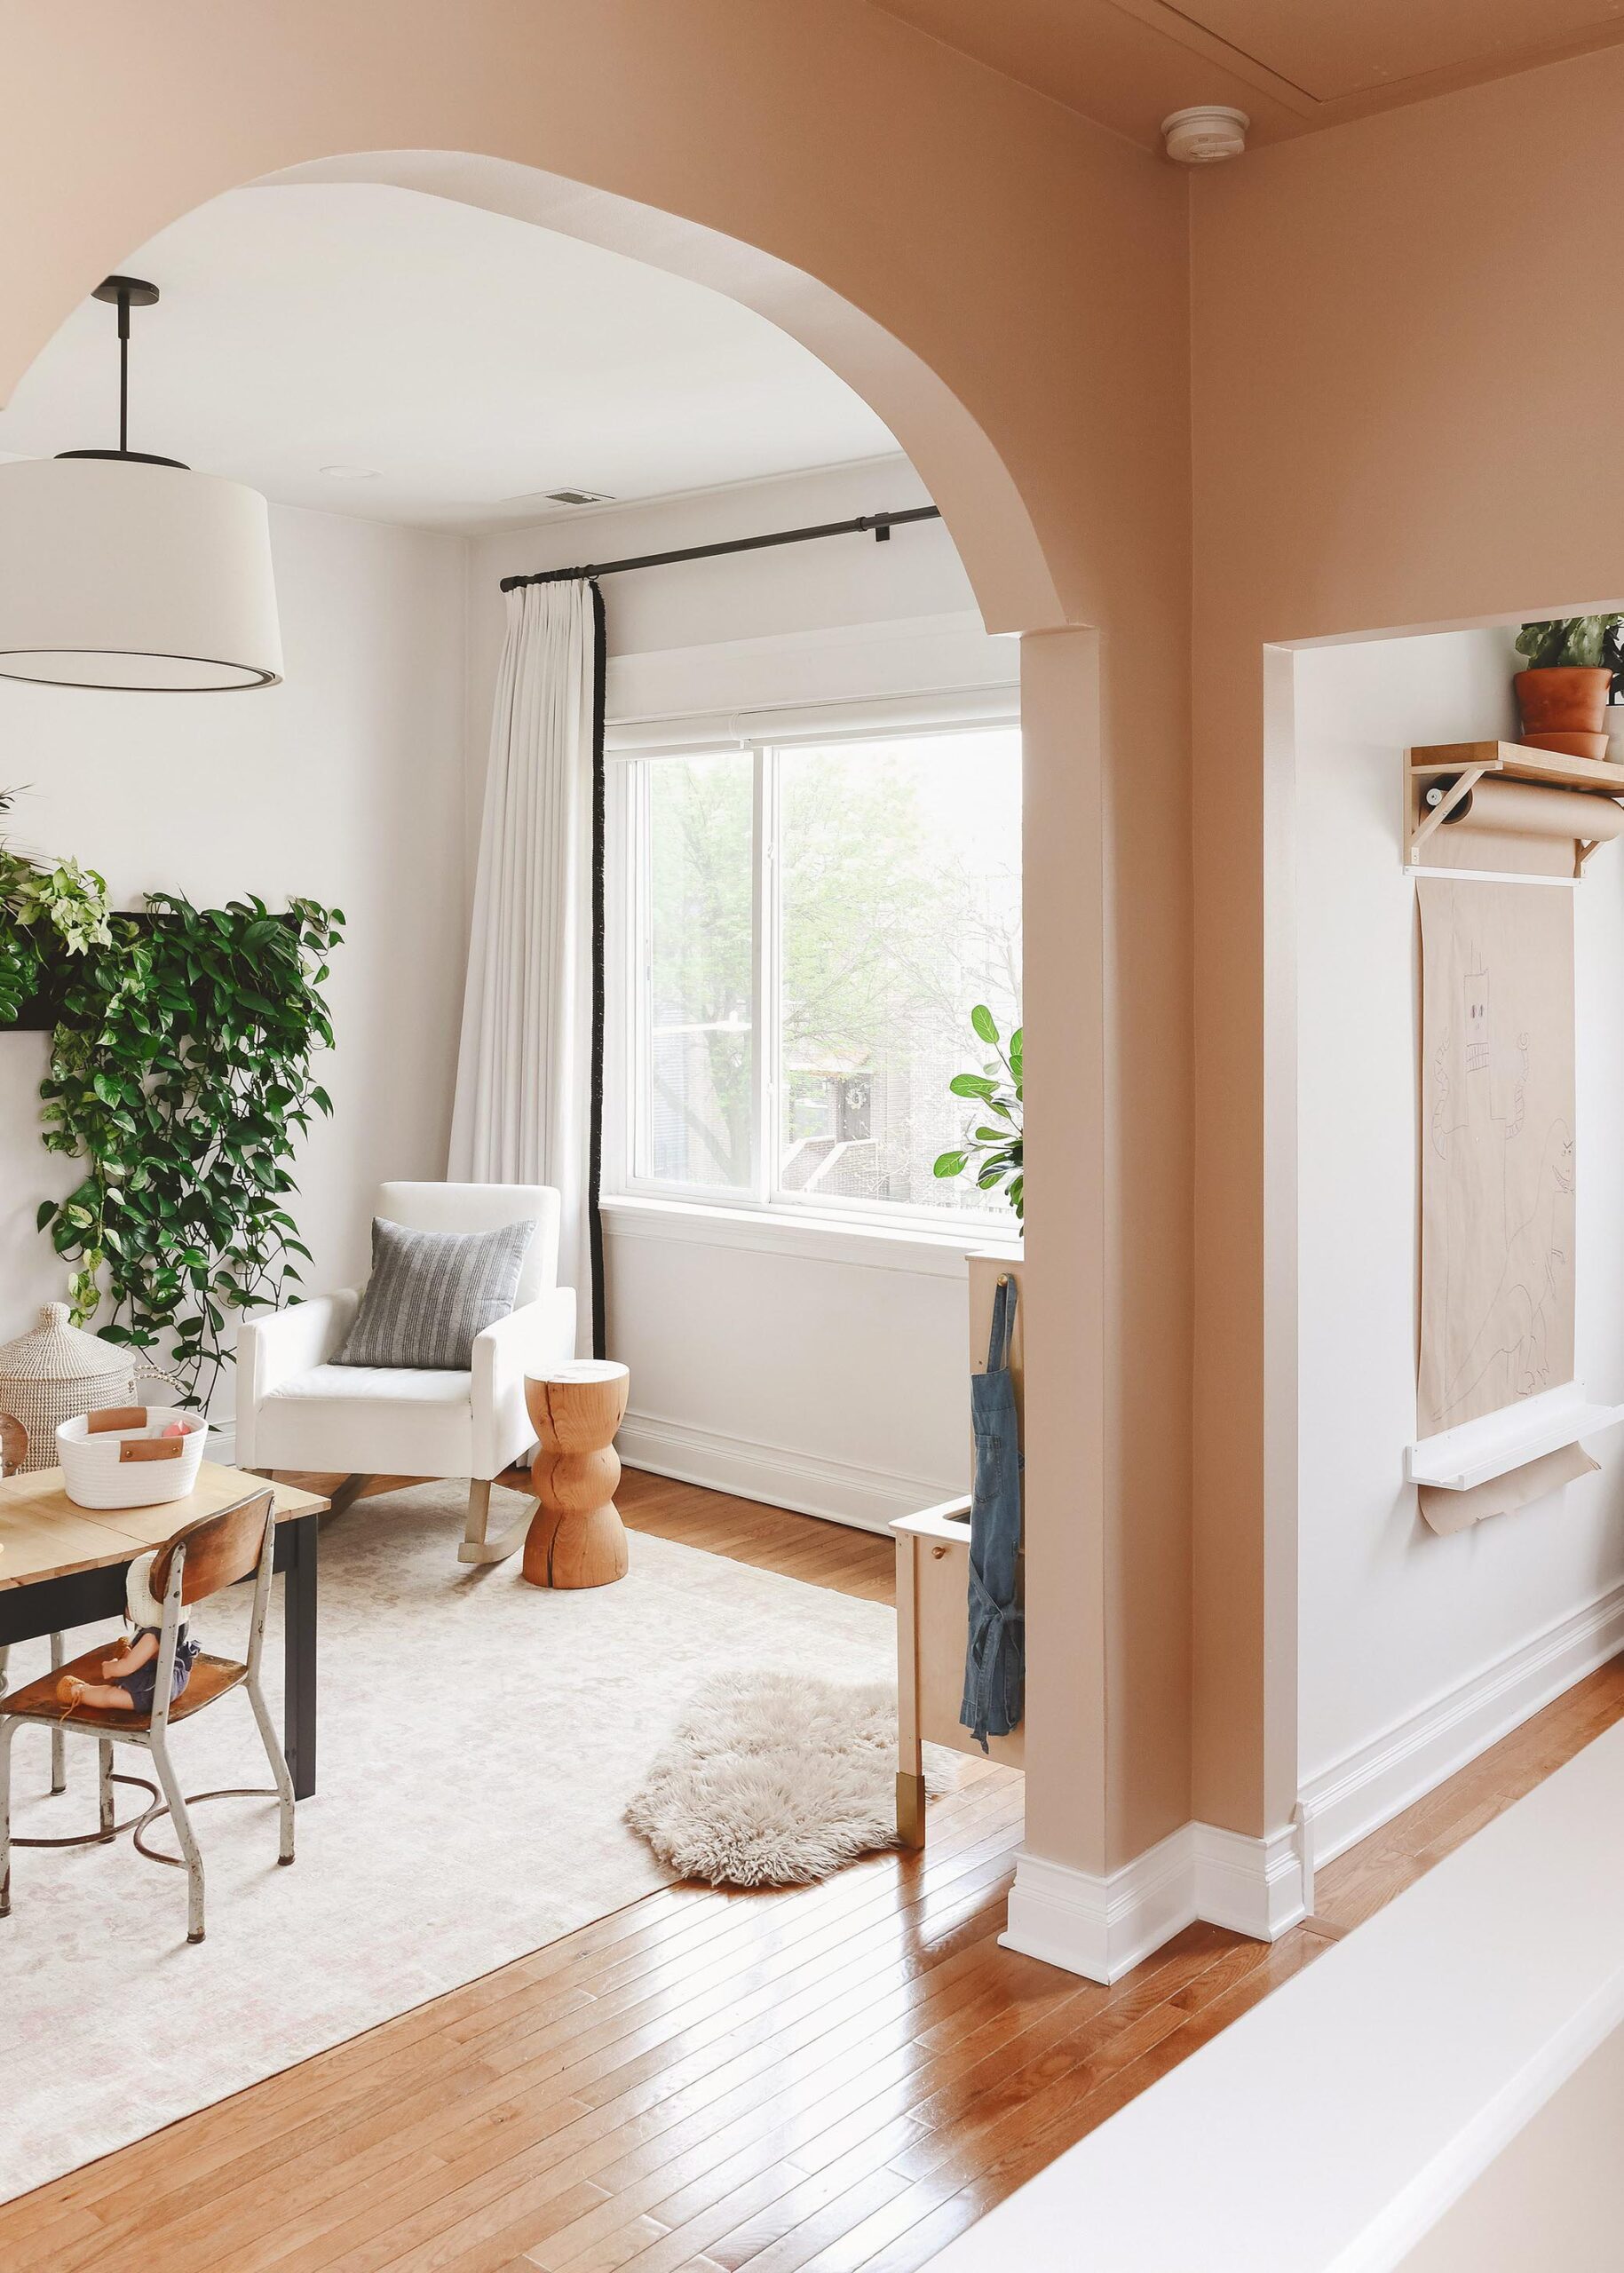
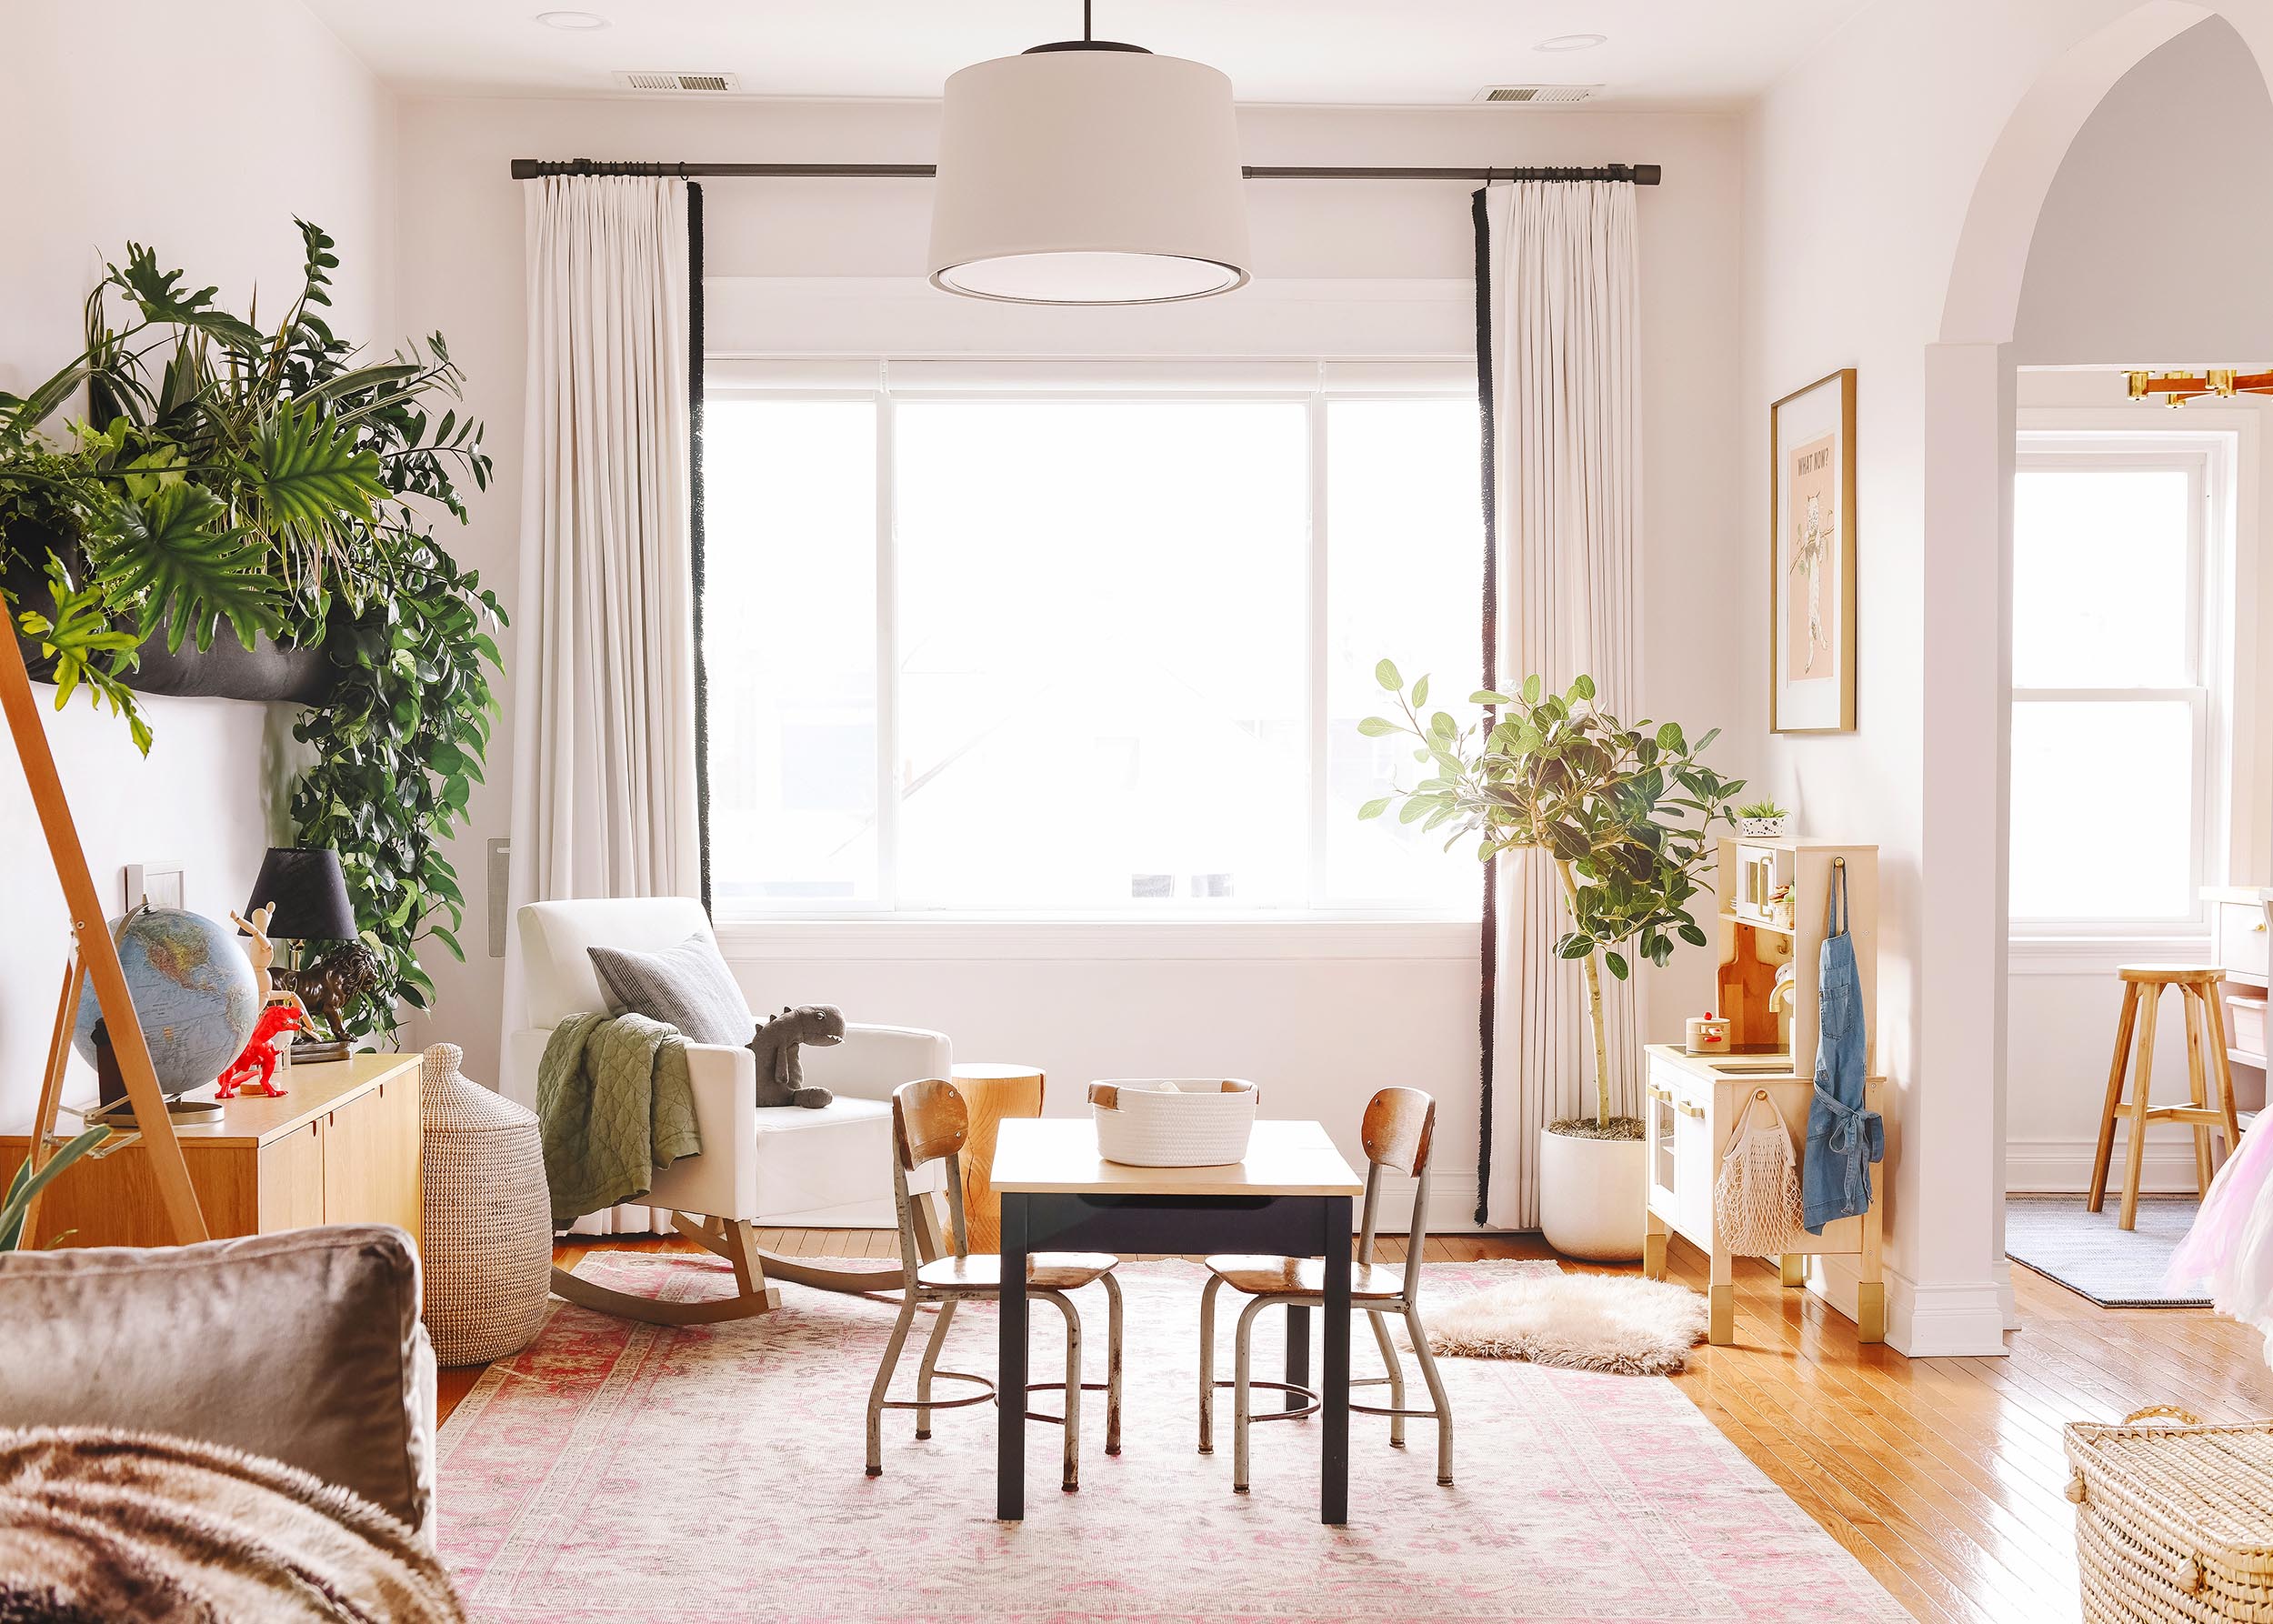
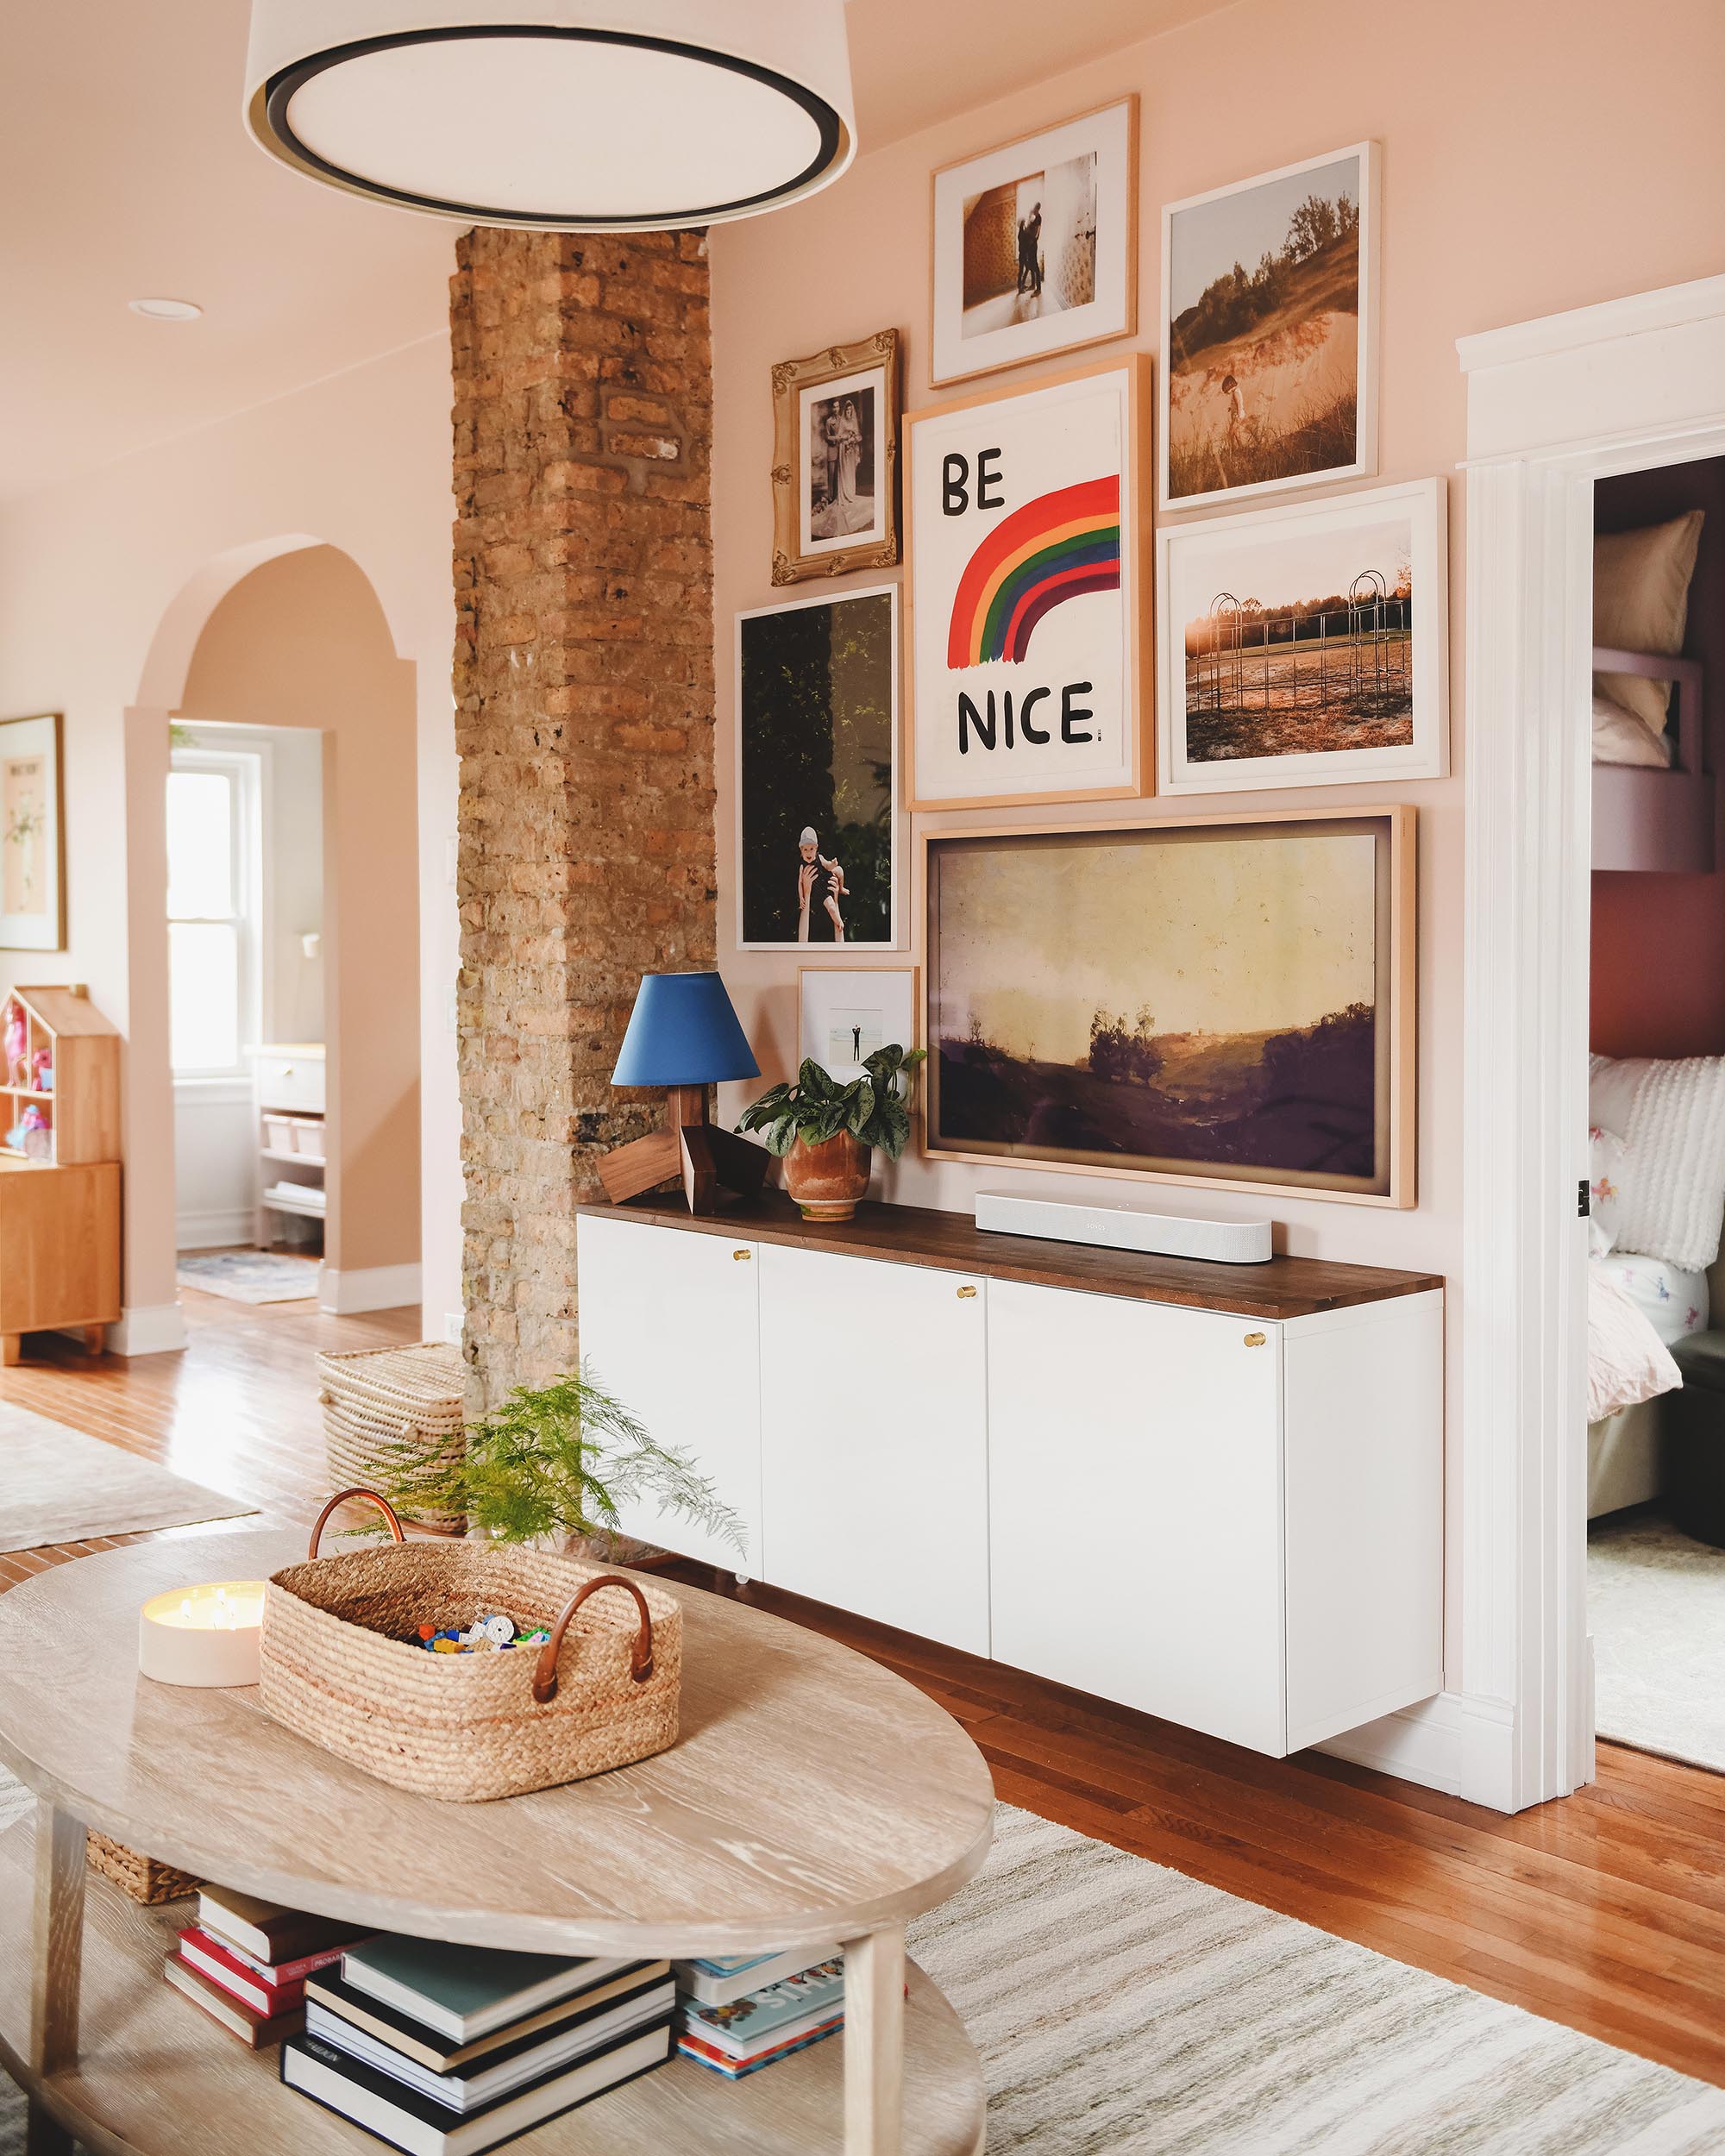
…so, we decided to move YBH HQ down to the dining room table with our little credenza taking up ‘office’ storage duties. This allowed us all the space we desired to turn the main second story common area into the living room/playroom of our family’s dreams. The front half or the room is mostly a play/art/creative space for Lucy. The back half of the room is our family room. More on that below!
Family Room
As we mentioned up above, the floor of this space was wildly bowed toward the middle of the room due to some previous structural shenanigans. Our second floor used to look like a halfpipe in a skatepark.

Once the crooked wall was removed and the floor was lifted to a point that it was much more parallel with the earth, we turned this space into a cozy little family sanctuary.
We’ve cycled through a couple of different seating arrangements in this room, but settled on the sofa that was once destined for the Two Flat when we were considering using the first floor unit as a short-term rental.

Like the front half of the shared space, the Family room is light, bright and open. We tend to use this space as a wind-down spot at the end of the day. Lucy also likes to catch a few episodes of Bluey here on Saturday mornings while mom and dad catch an extra hour of weekend sleep. While our downstairs living room is where we entertain guests and spend most of our time, this space is designed more for ‘us’. It’s cozier, more intimate and more playful.
From Scary Room to Lucy’s Room
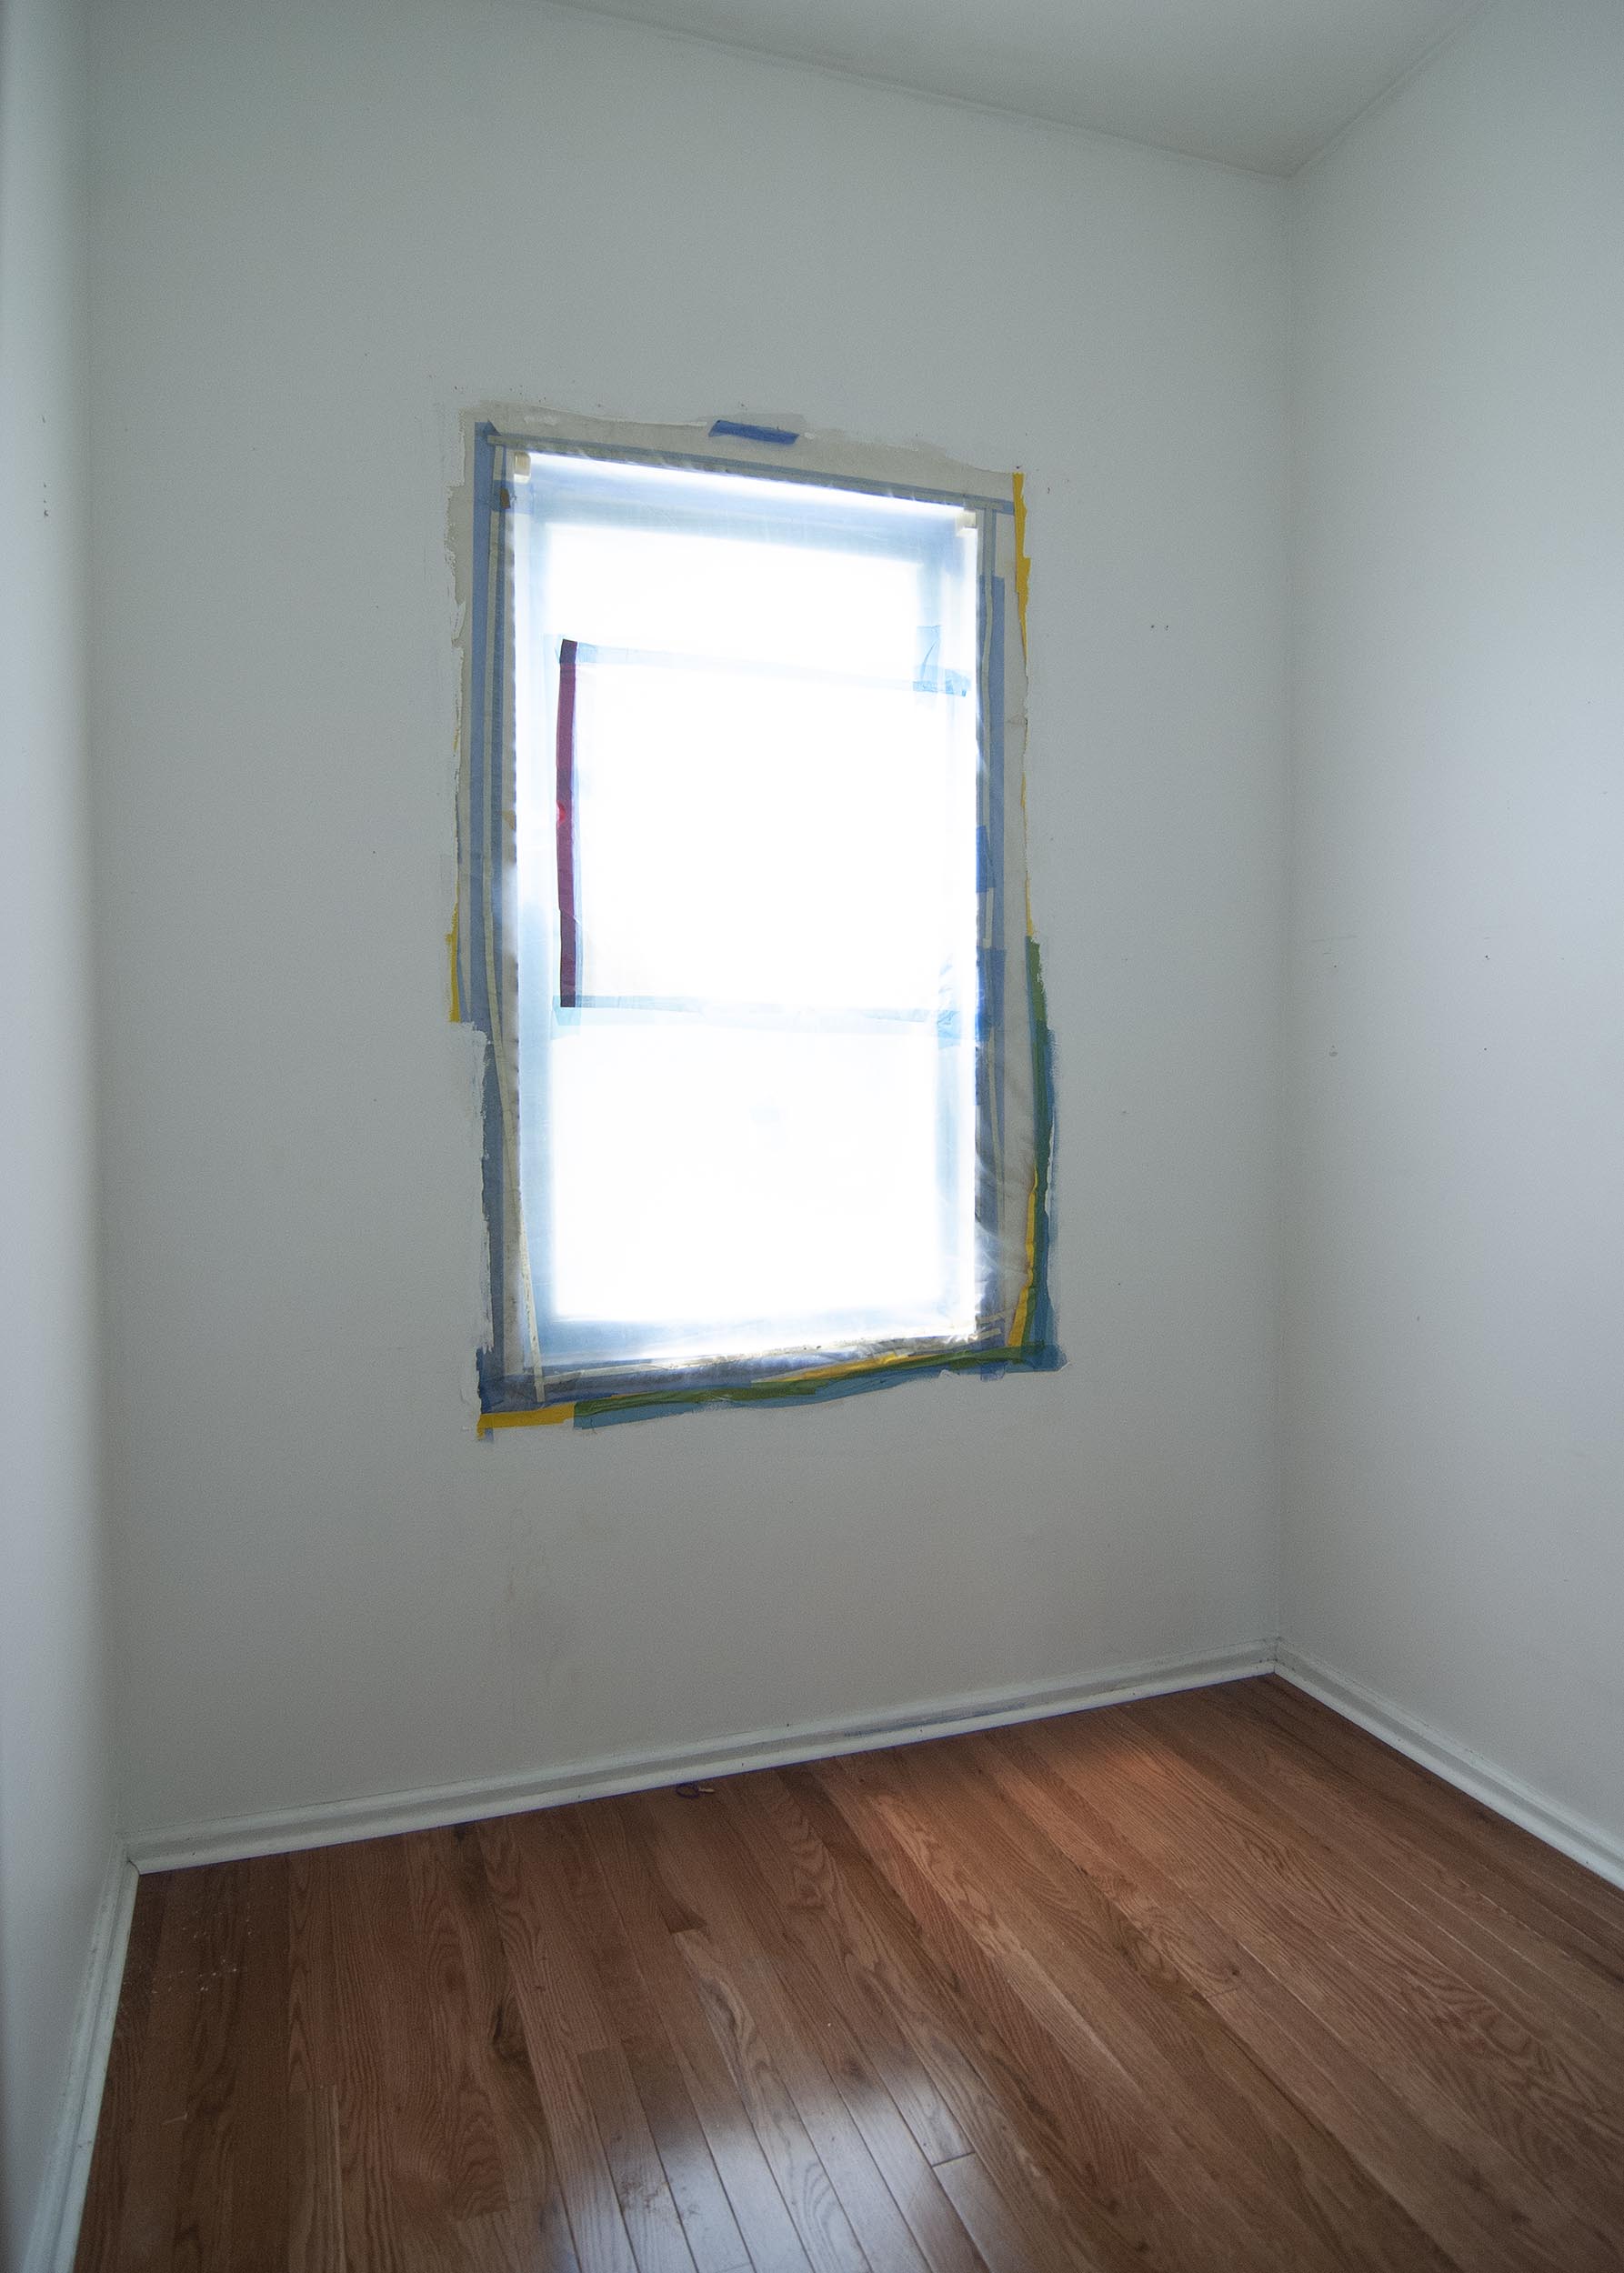
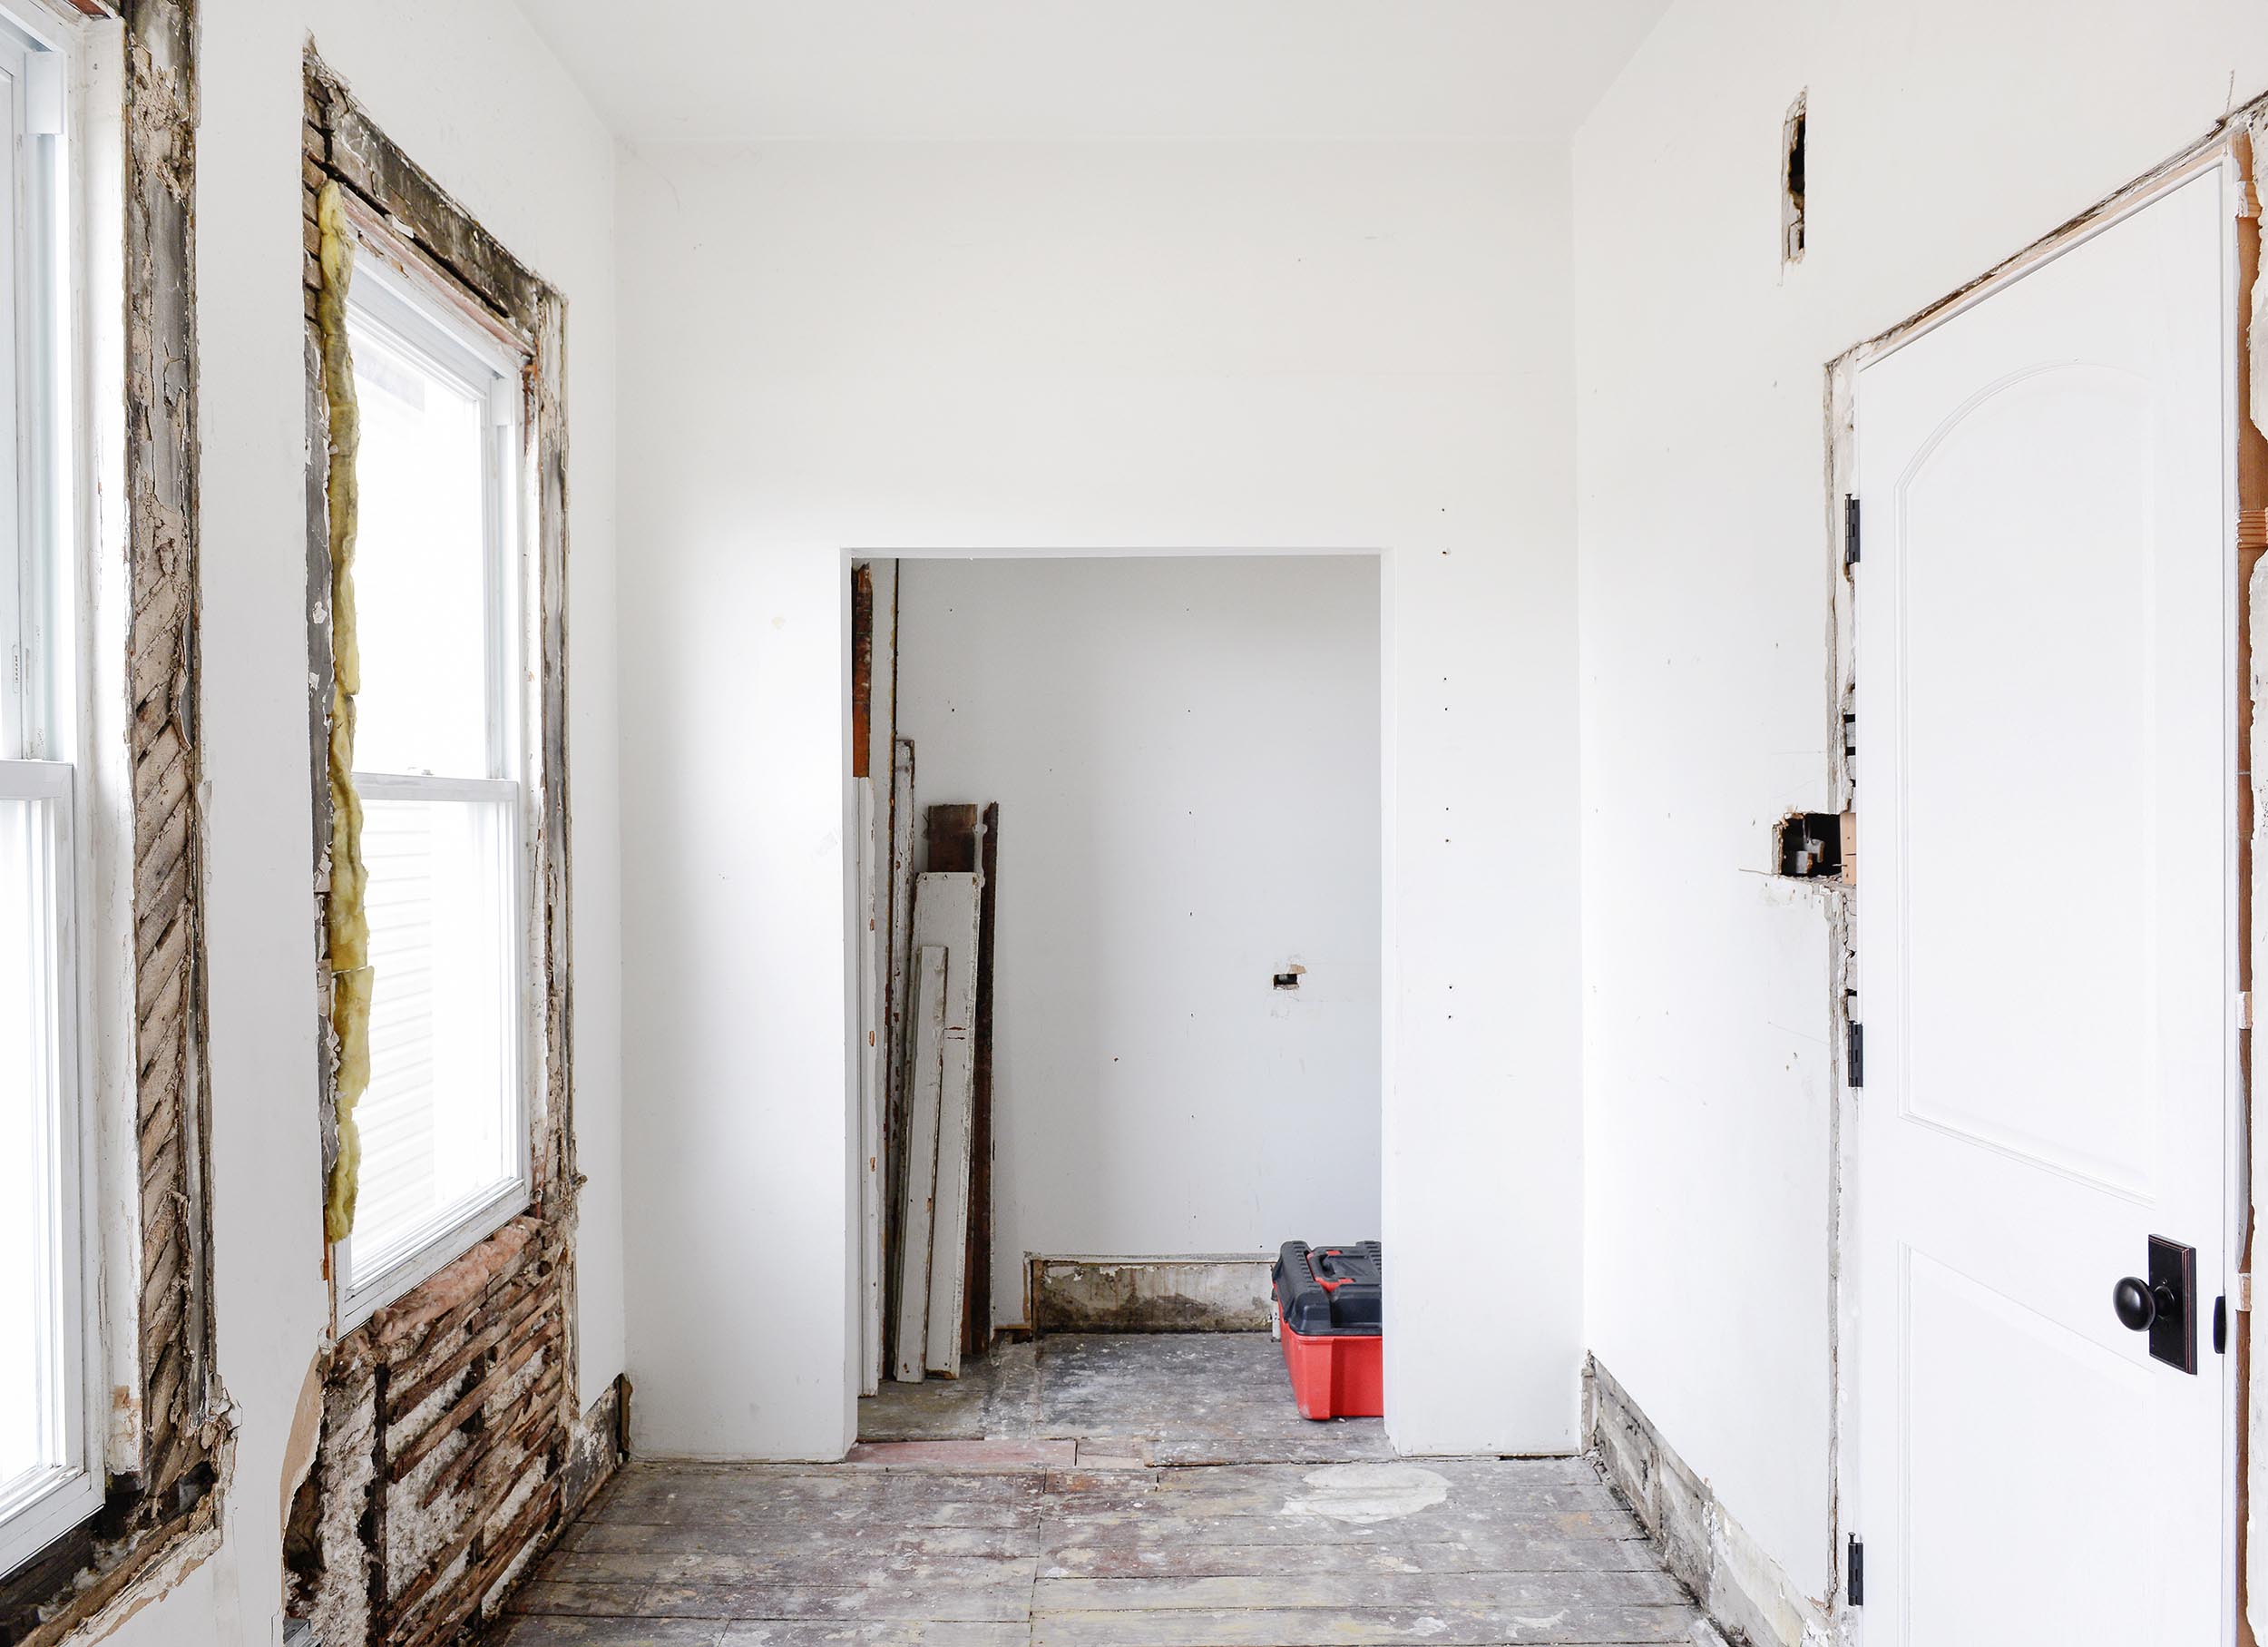
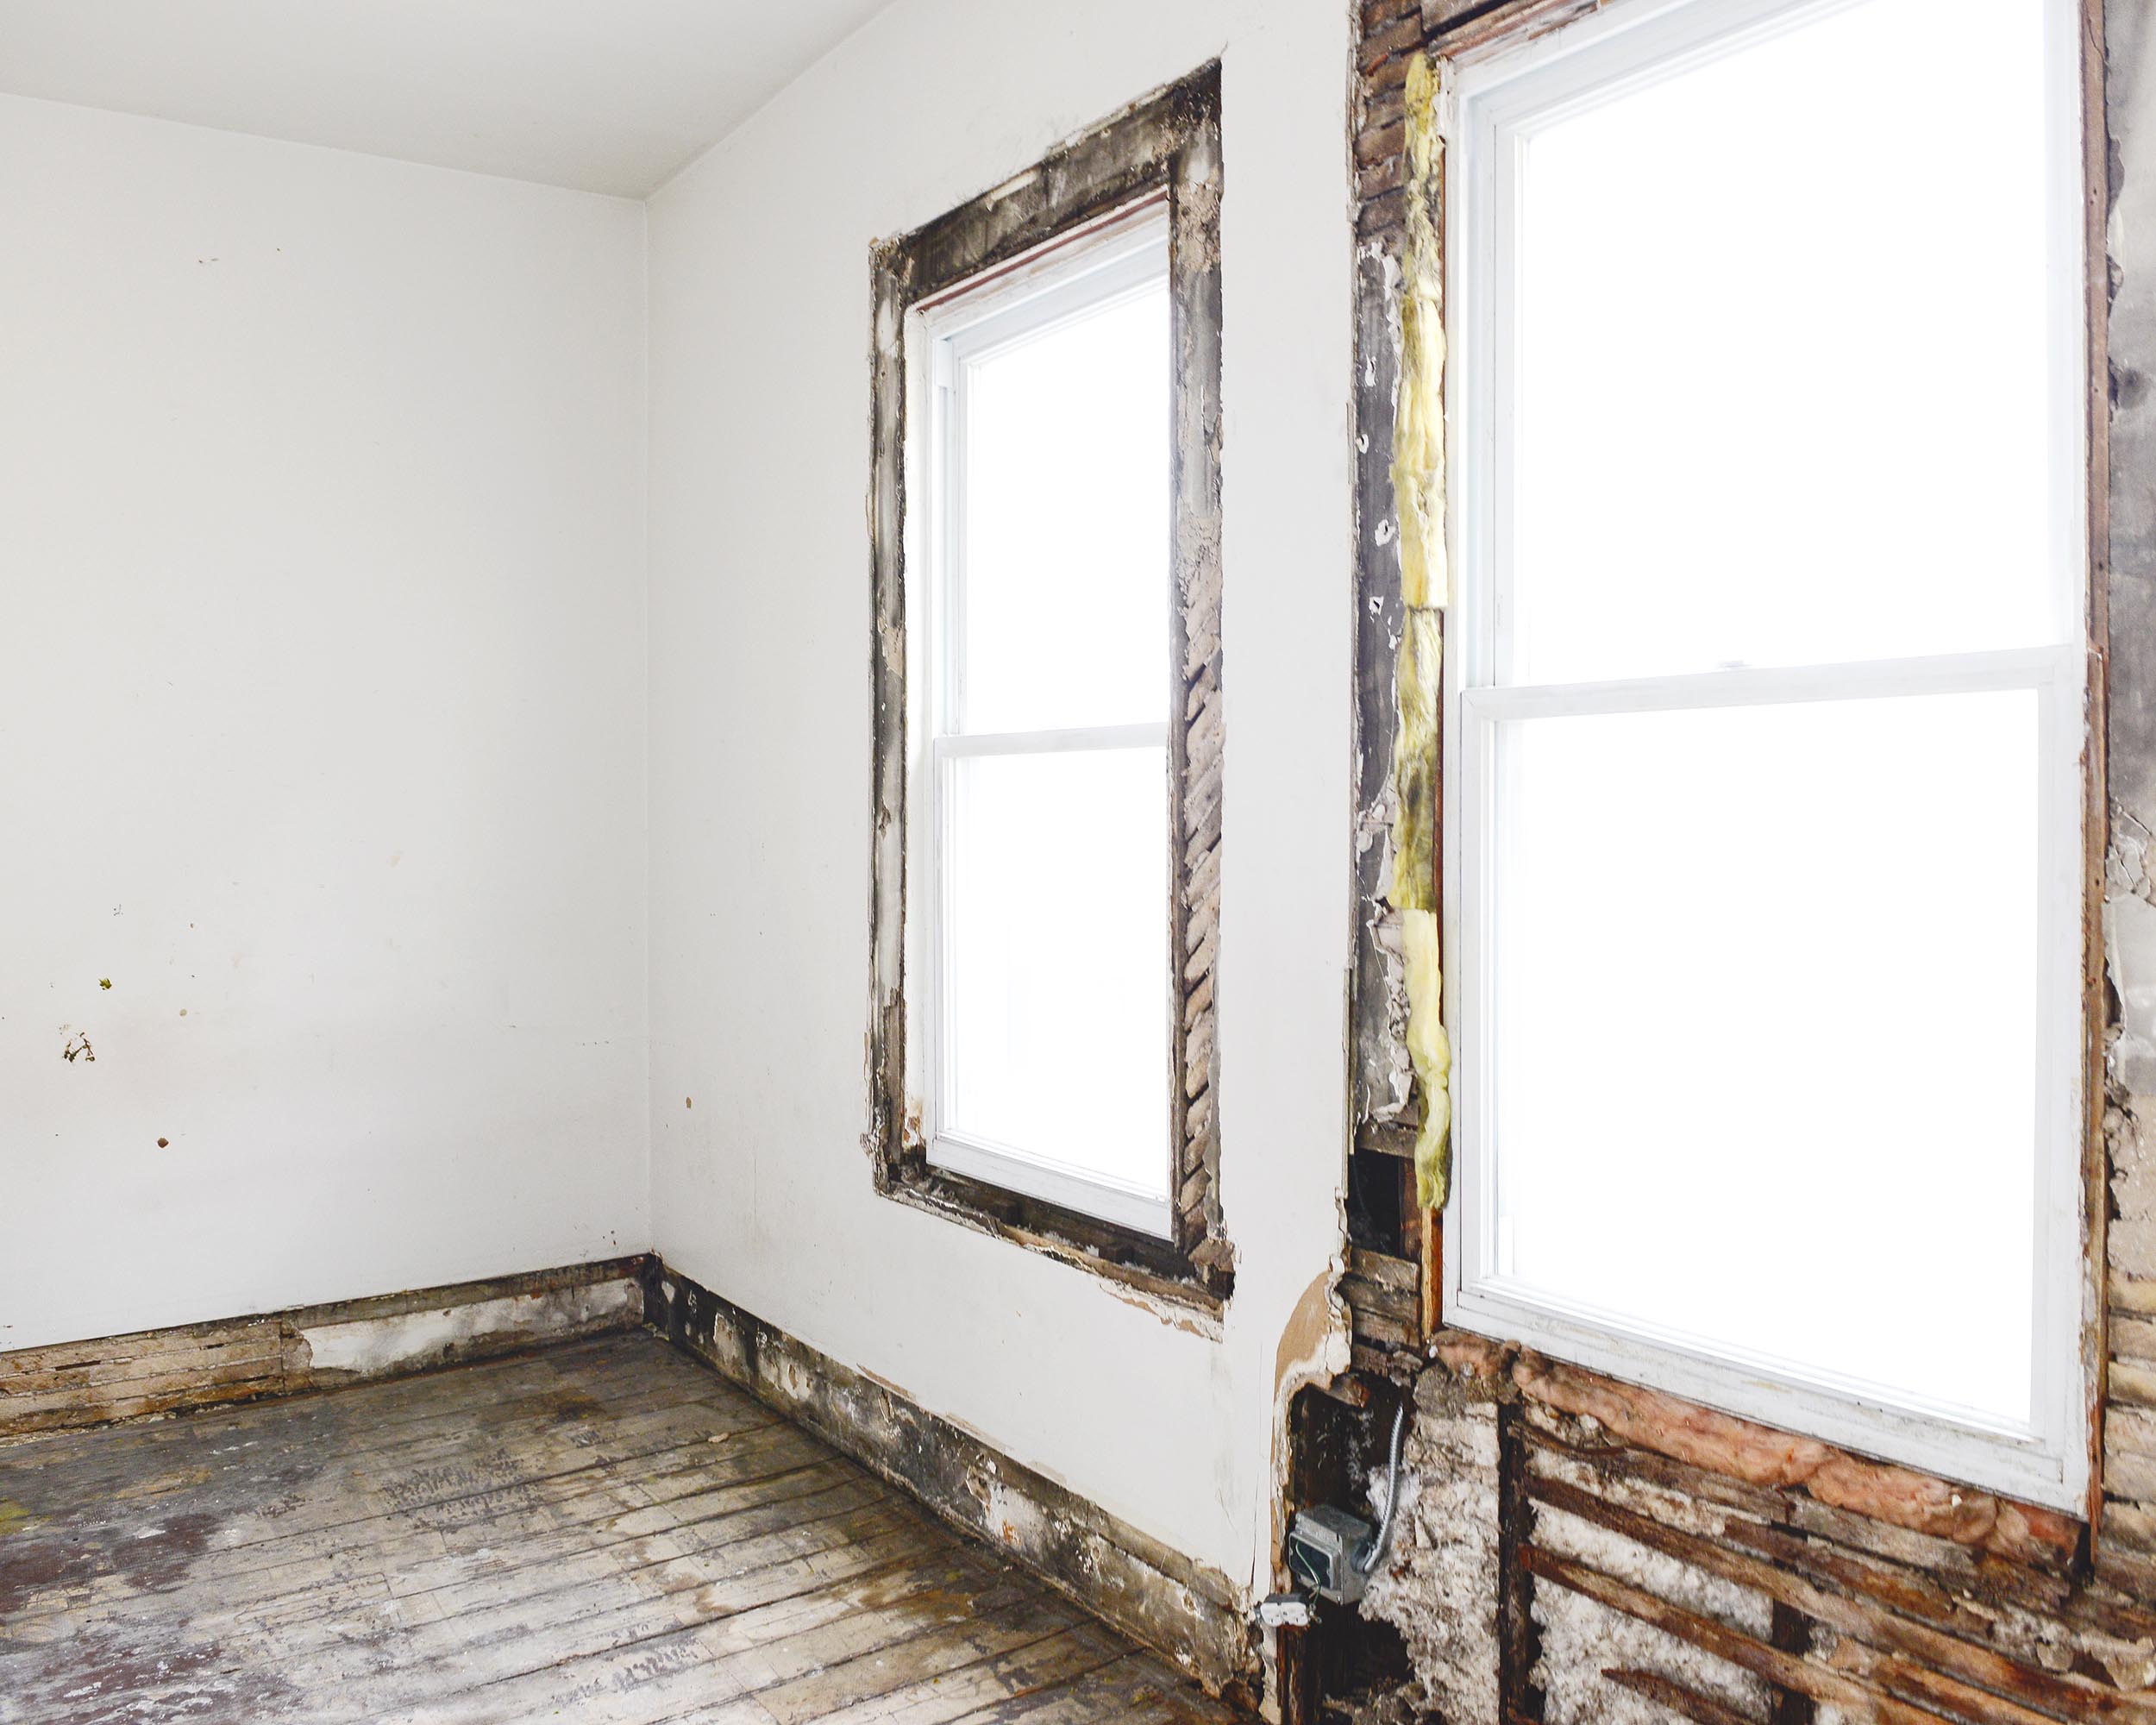
We’ve made so much in the room once dubbed ‘The Scary Room’ that we sometimes forget how bad it was when we purchased the home. The once-purple carpet was soaked in pet waste, the plaster was crumbling, the windows leaked and the millwork was falling off the walls. Right away, we pulled the carpet, did some deep cleaning and for many years the door stayed shut. Like always.

The Scary Room became a catch-all space for extra furniture and artwork the had no other home. When we finally dove in to replace the failing windows, it also received electrical updates, drywall and insulation repairs and matching hardwood flooring installed by yours truly. We preserved most of the original millwork and turned it from a mildly useful no-mans-land into…
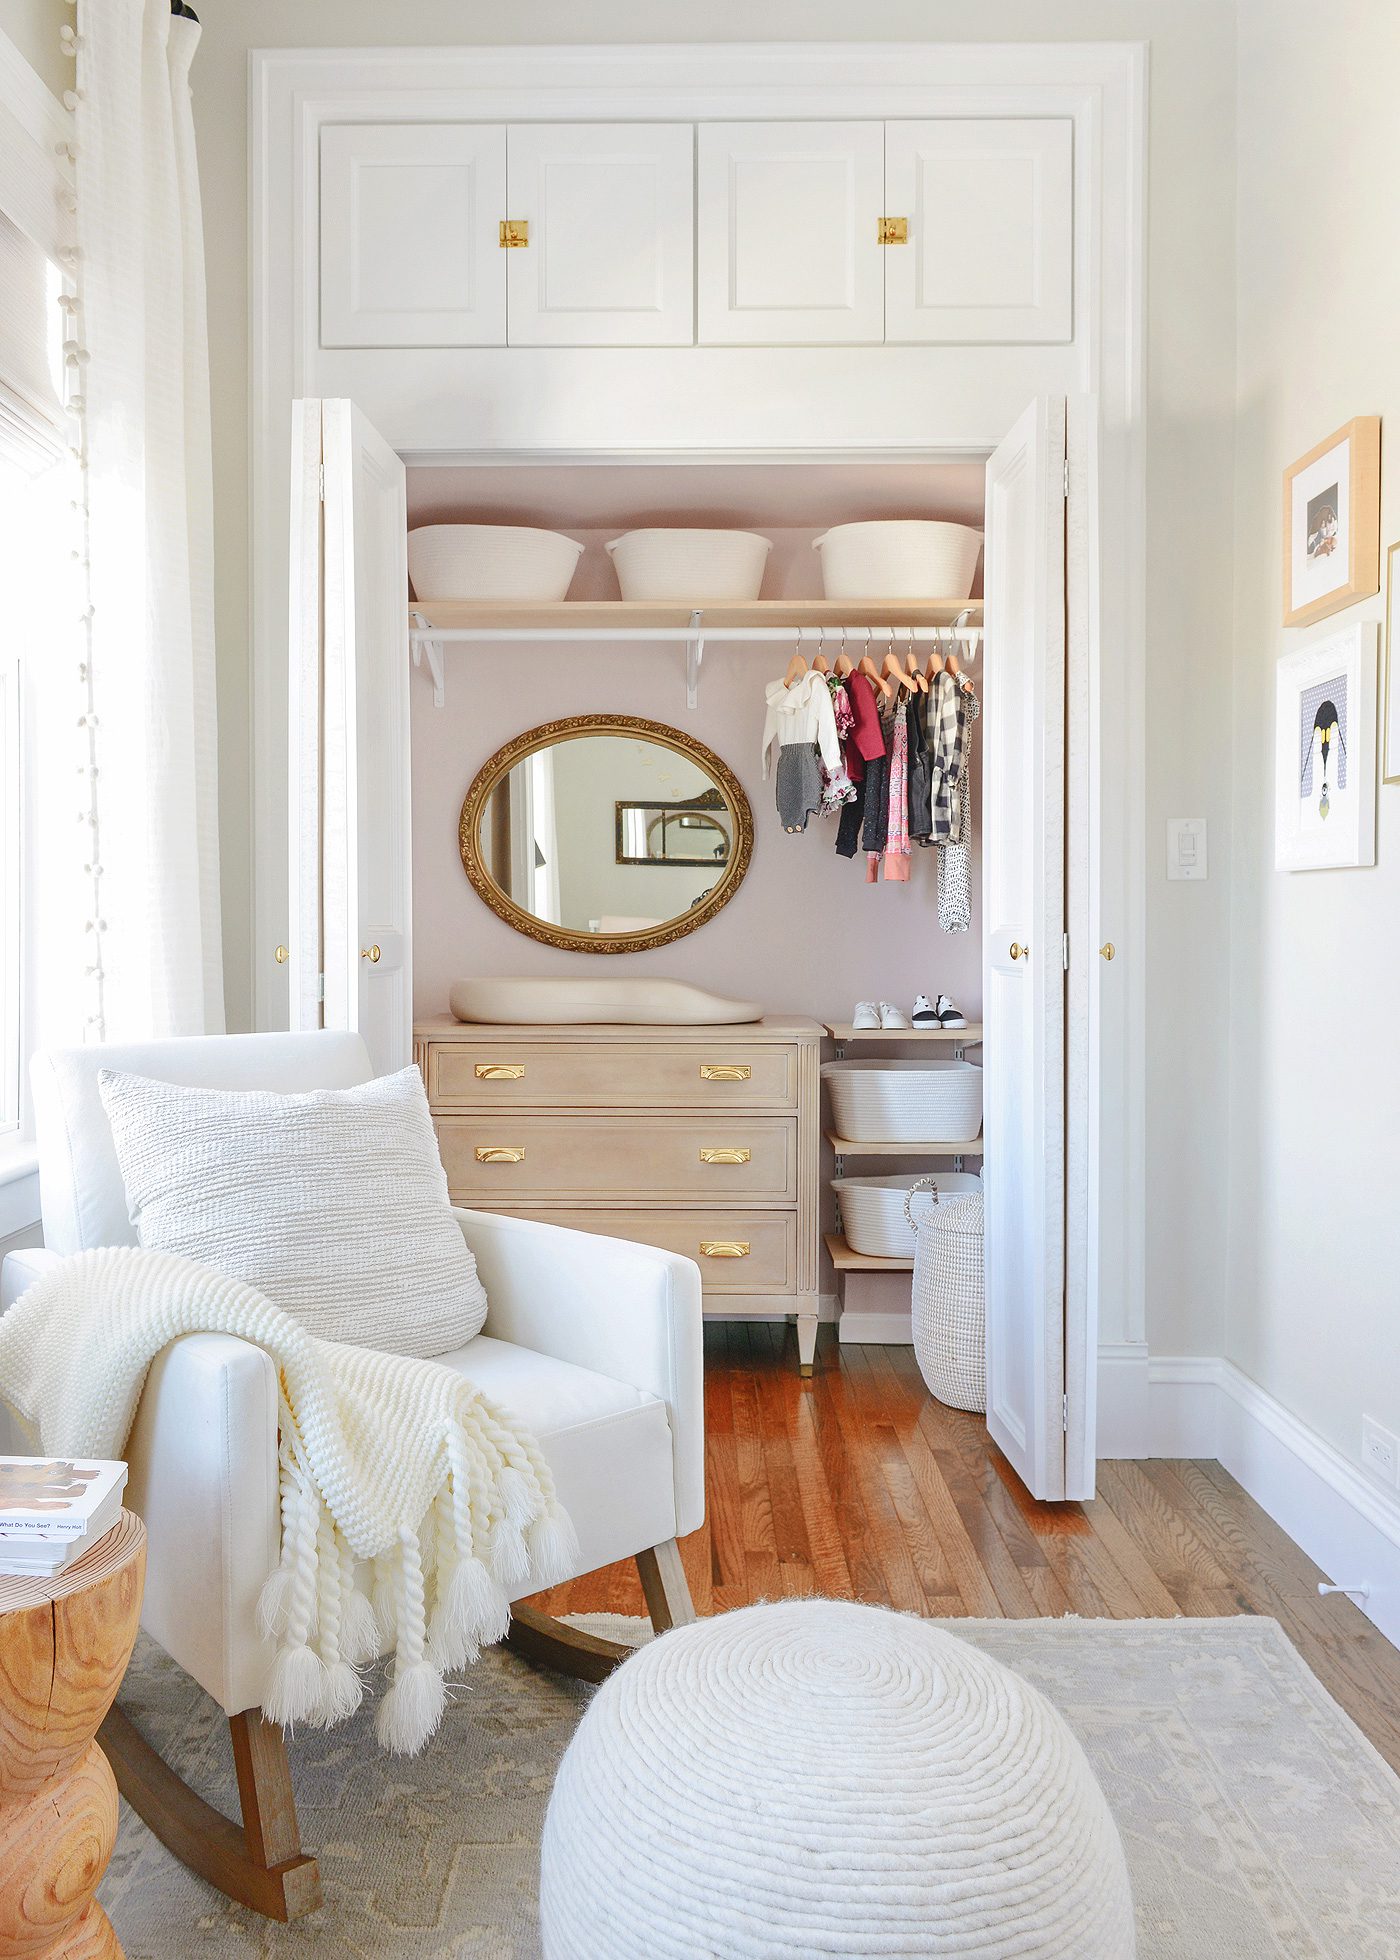
…the cutest little nursery we could have ever imagined. We wanted Lucy’s first space in our home to be special, so we hustled to get it completed in time for her big debut. The closet was completely reimagined with deep cabinets above custom trimmed doors. We created a unique millwork combination to match the salvaged original pieces. the room was new from top to bottom and we all loved it.
It’s hard to believe that the two shots below are of the same space!
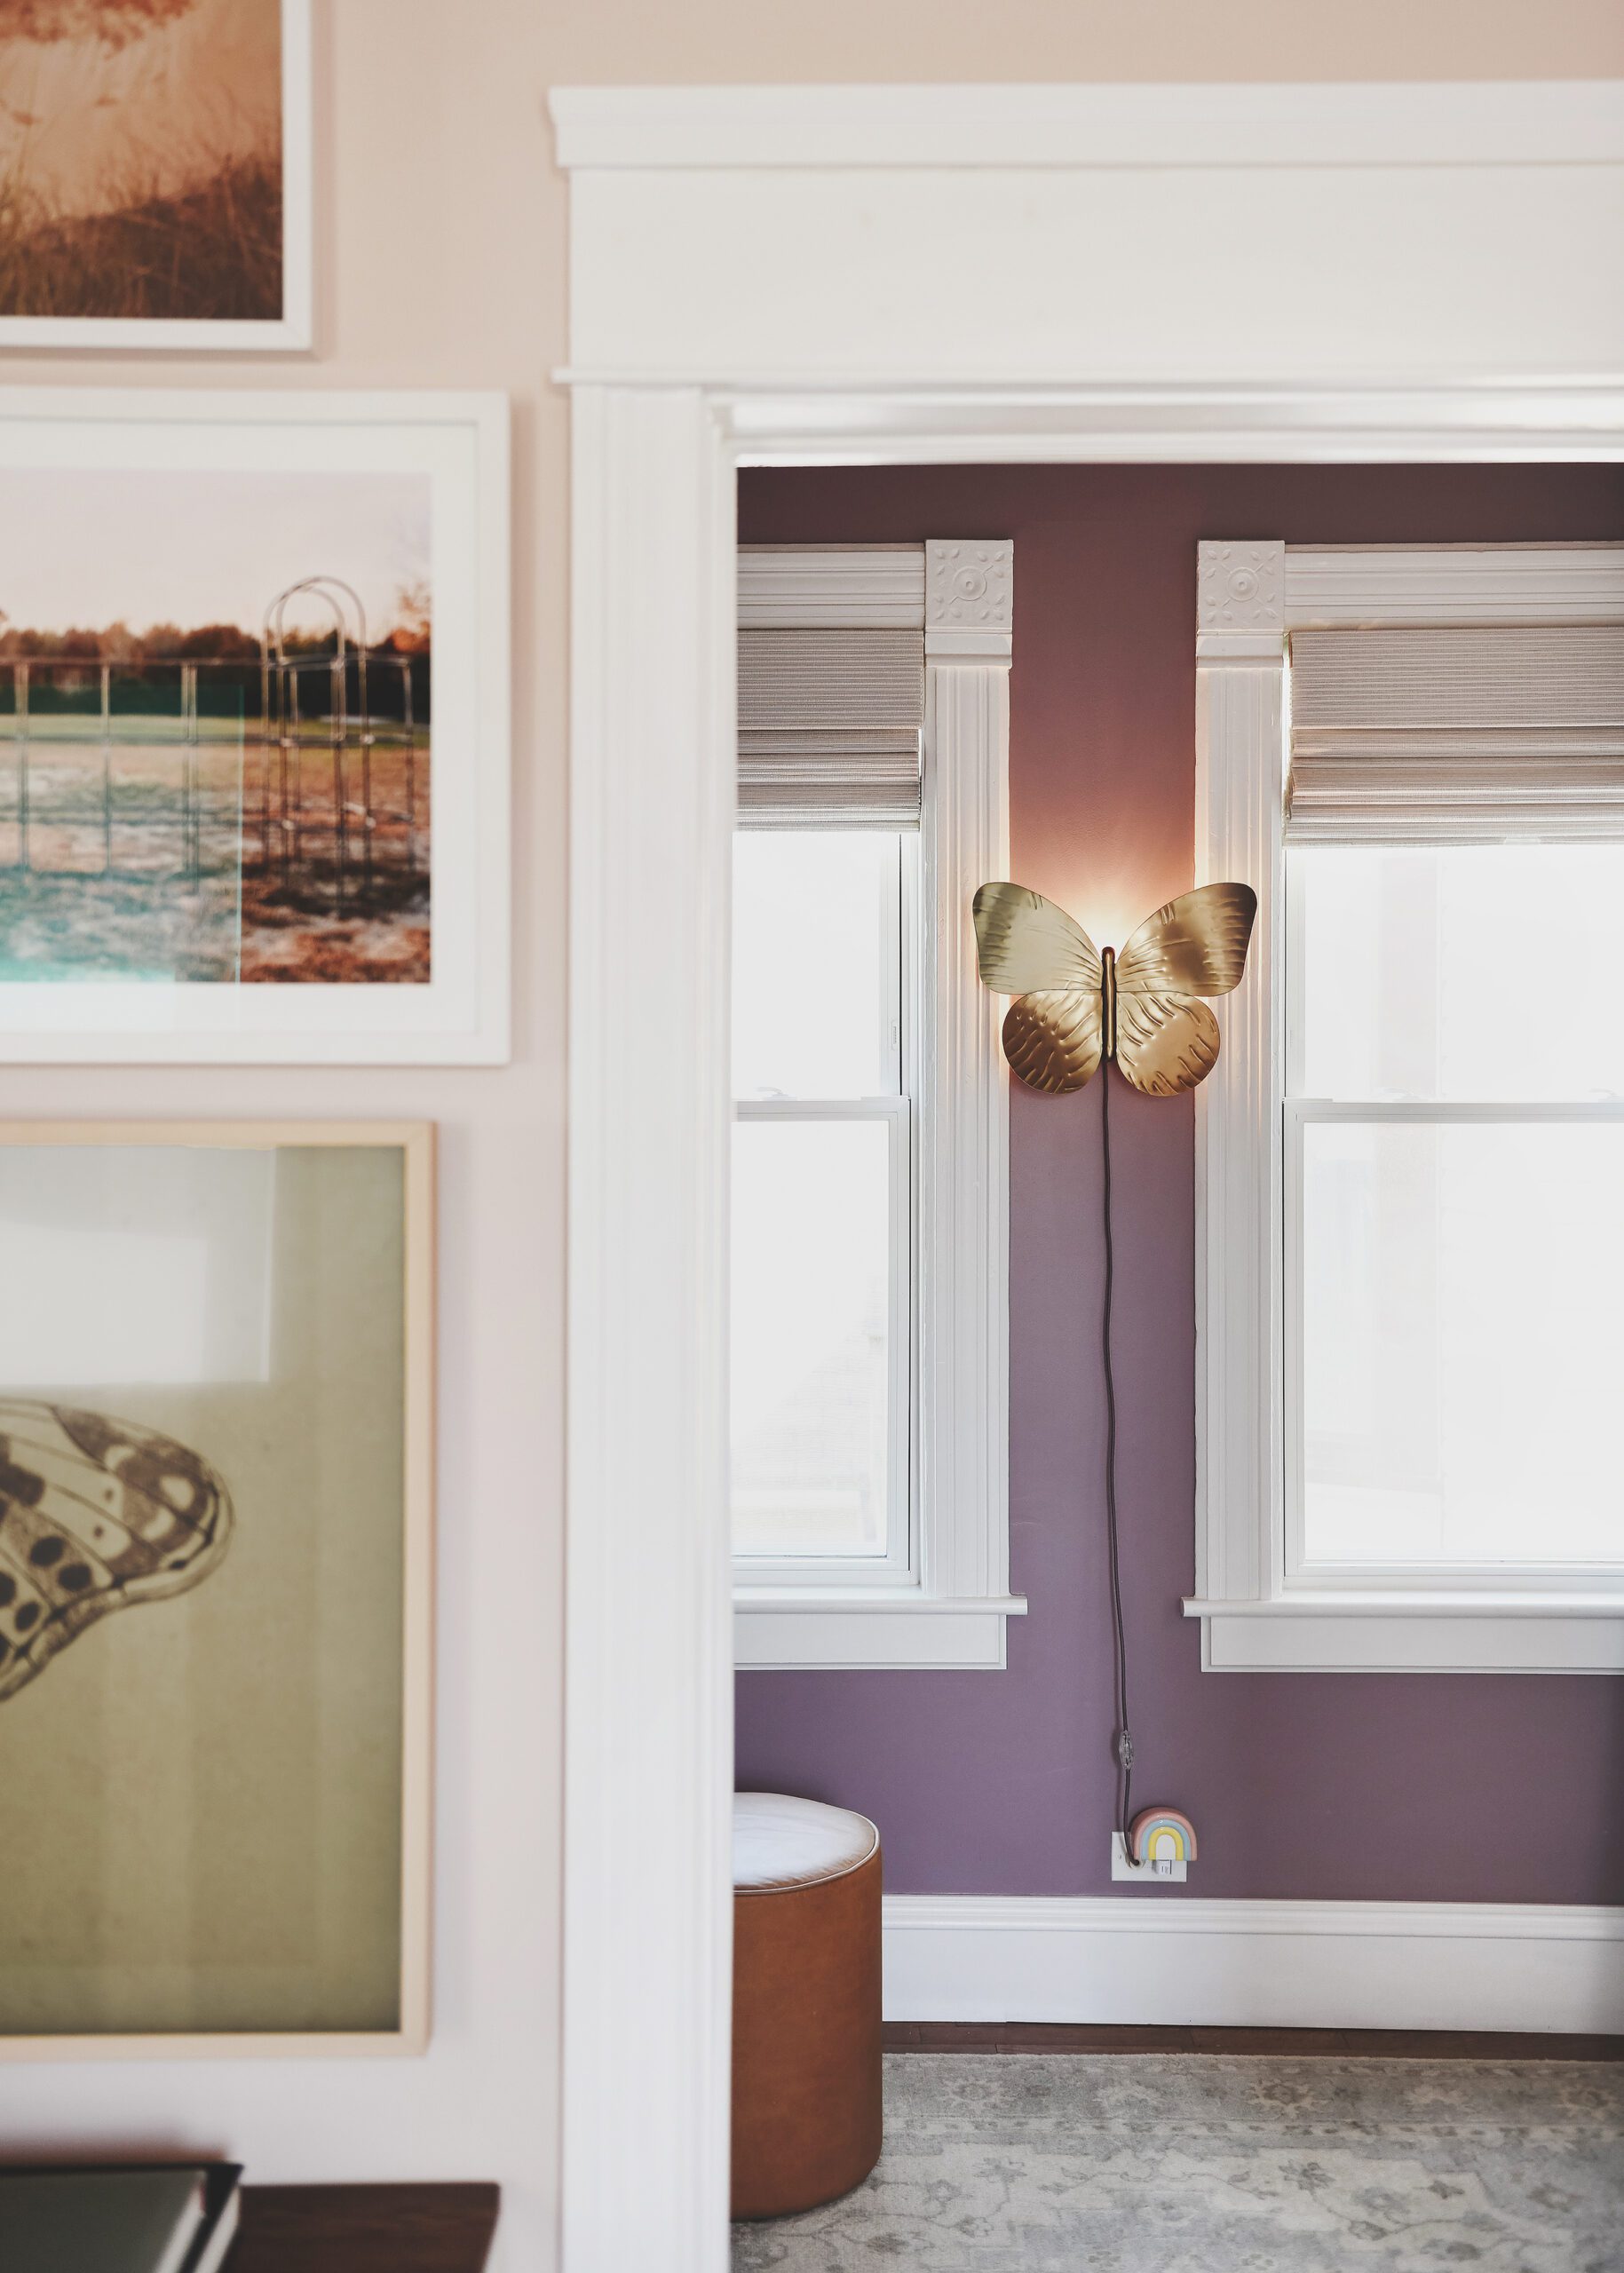
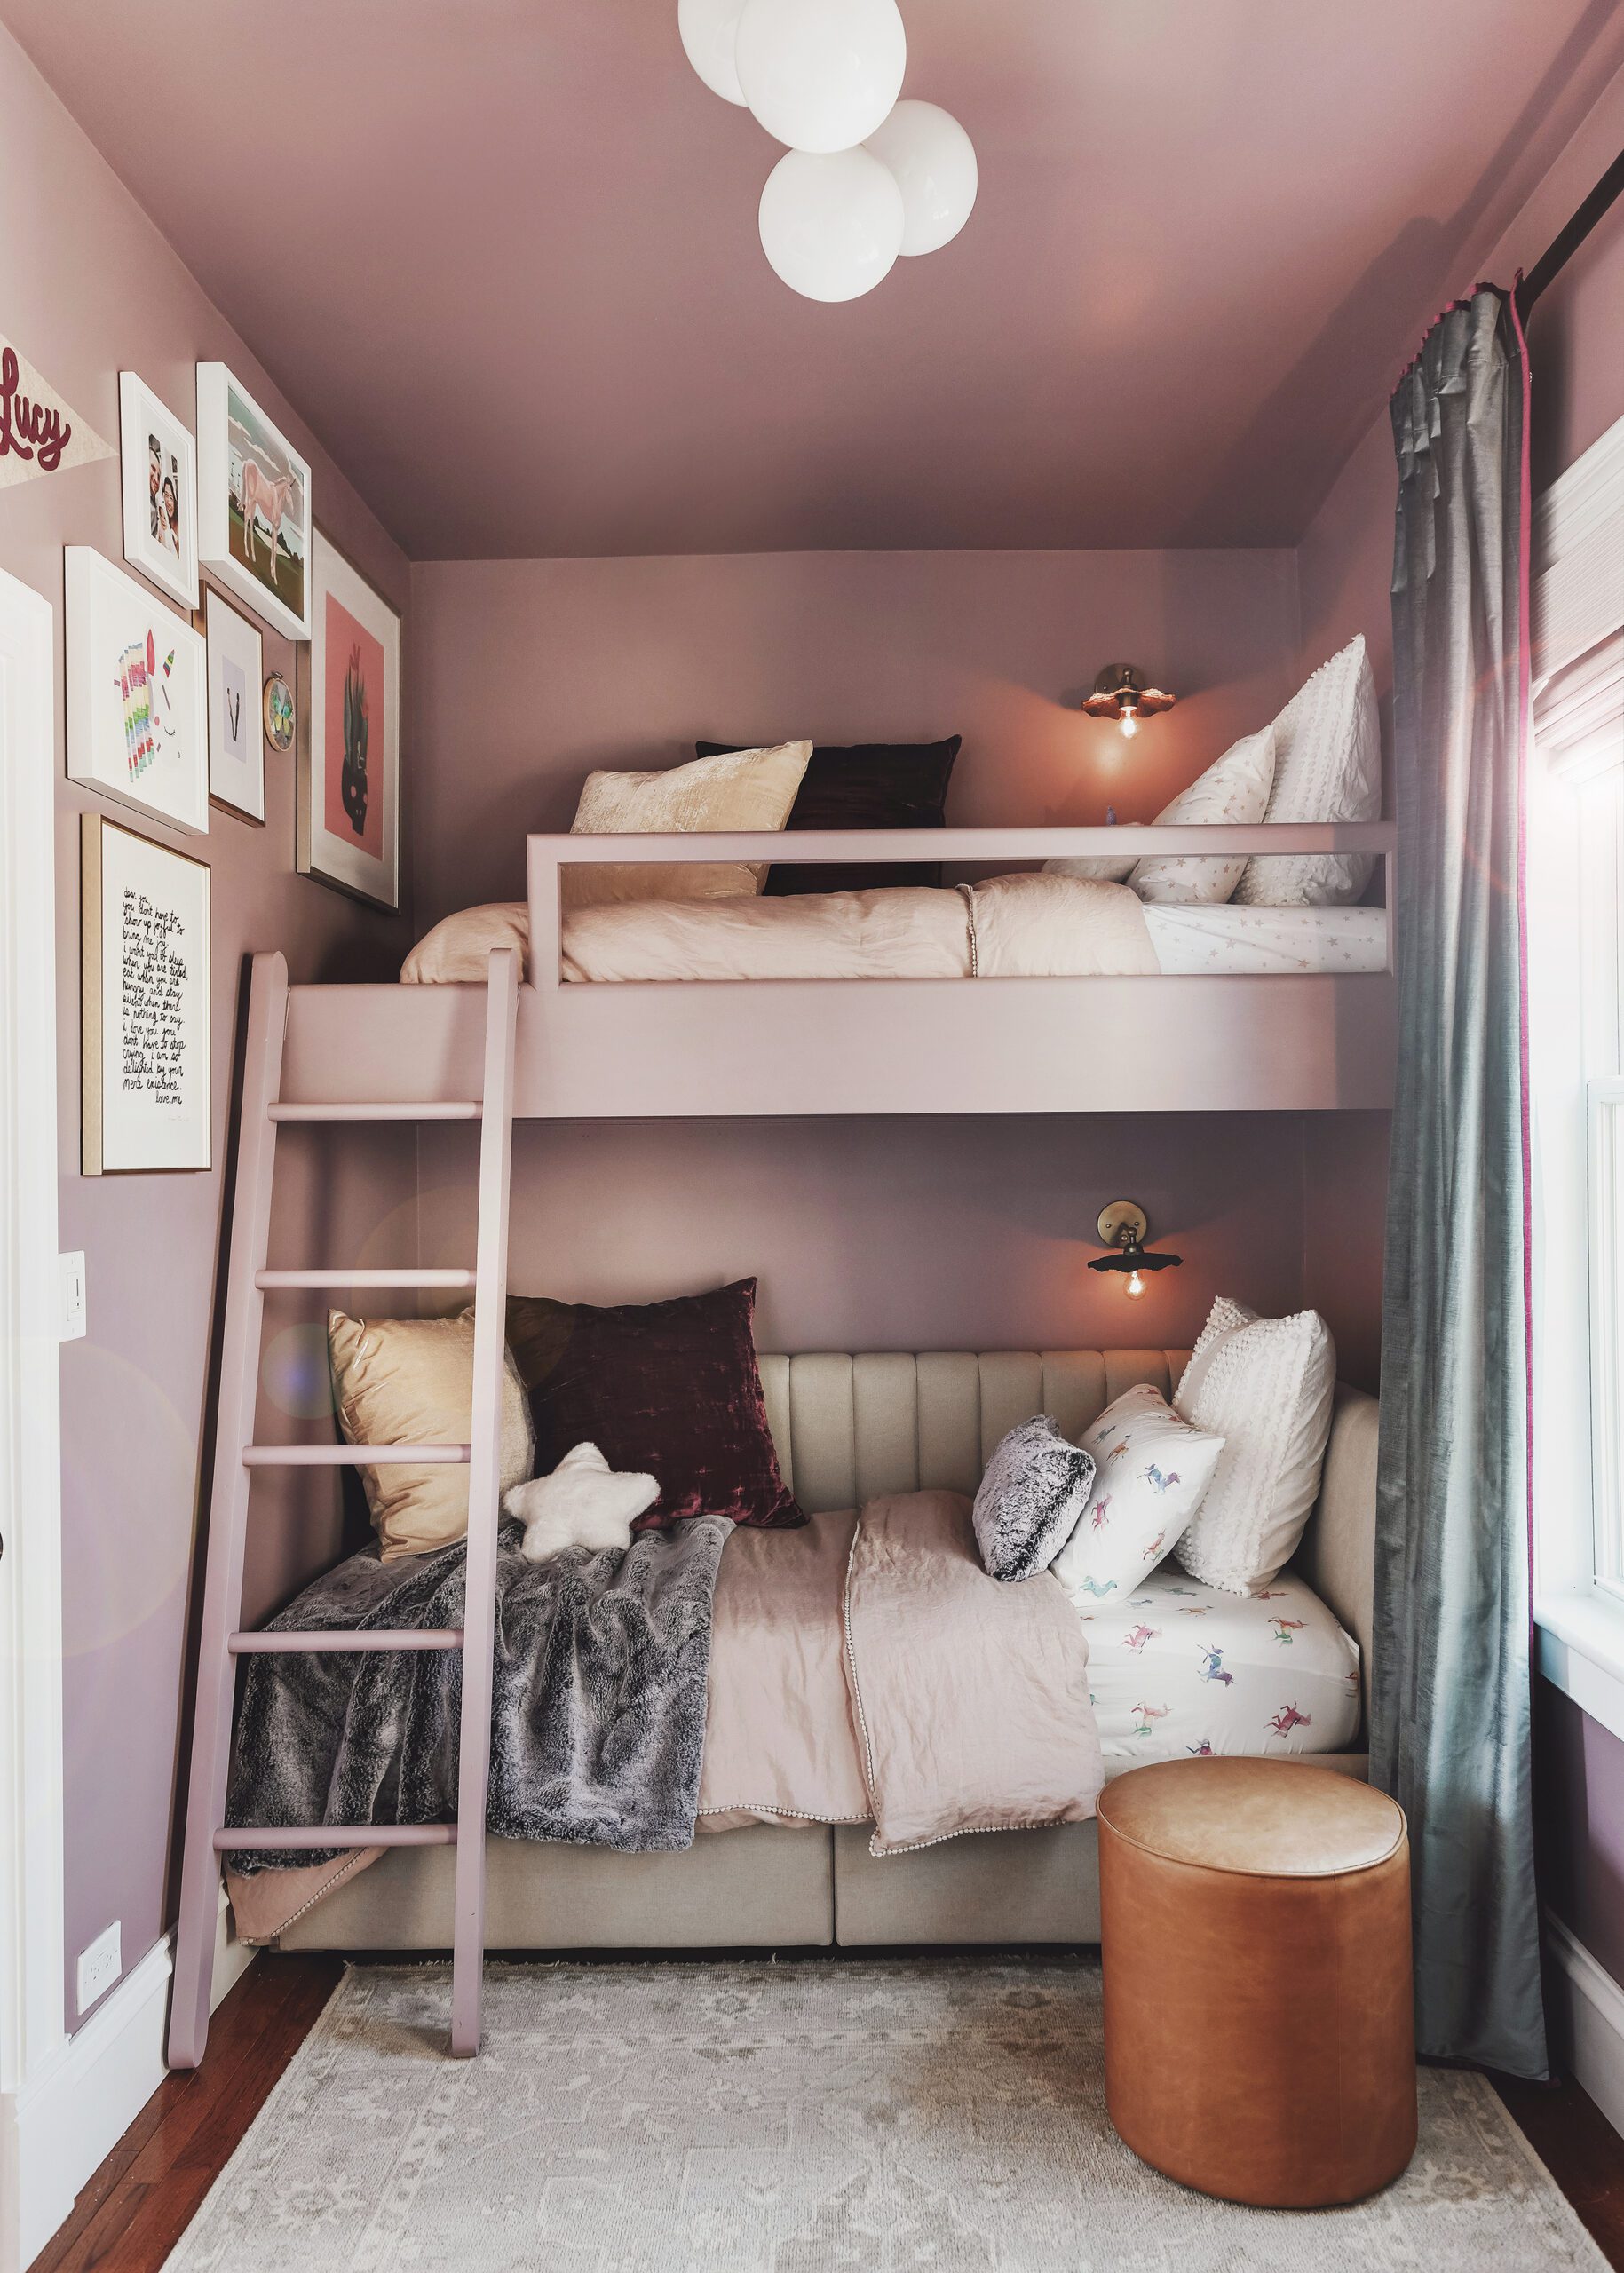
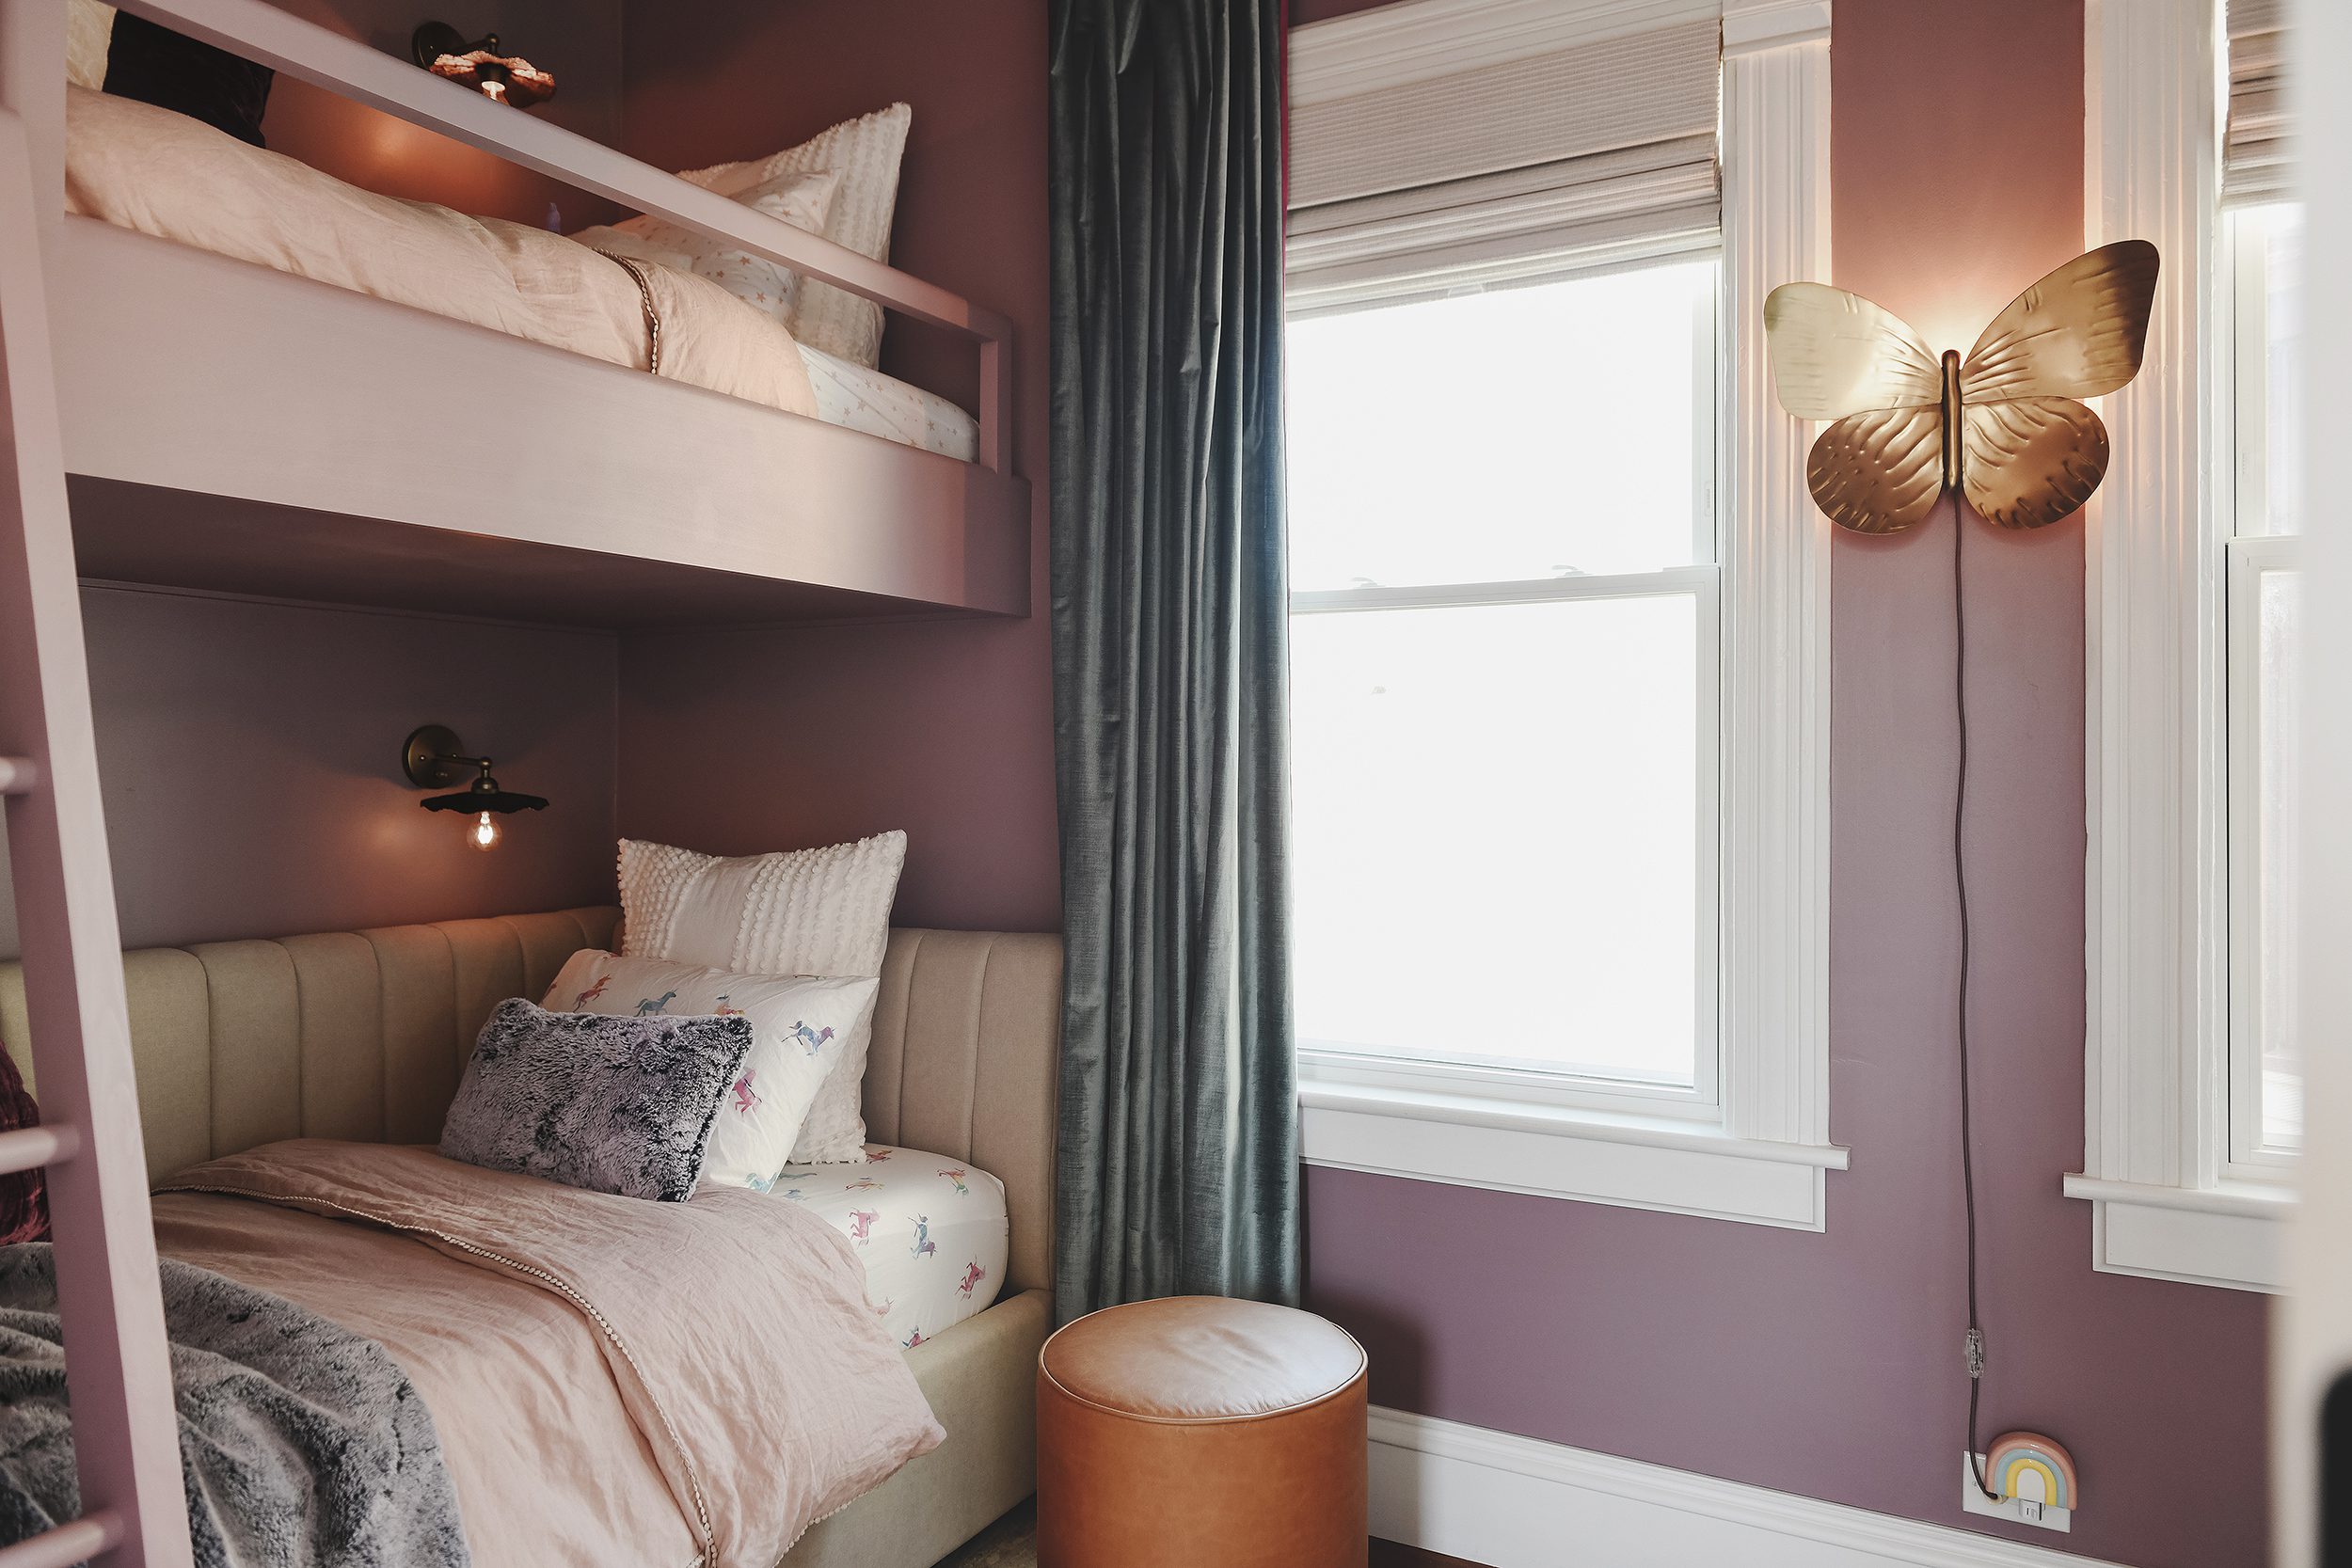
As Lucy grew and grew, we knew the nursery space wouldn’t suit her needs forever, so we started plotting for her ‘big girl bedroom’. We asked her what she wanted (bunk beds, purple walls, lots of butterflies, rainbows and unicorns) and did our best to merge her want list with our design preferences. We think the resulting space is a beautiful reflection of who she is and the things that she loves, while not feeling out of place with the rest of our home.
While her built in top bed is technically a loft, she loves her custom ‘bunk bed’ with hidden storage and charging stations and a custom ladder that we constructed after a we discovered a lack of available options.
This second rendition of Lucy’s space was a labor of love. For us, the most important aspect is that Lucy loves it as much as we do. Again, it’s hard to believe that the two photos below are of the same space from the same angle!
Primary Bathroom
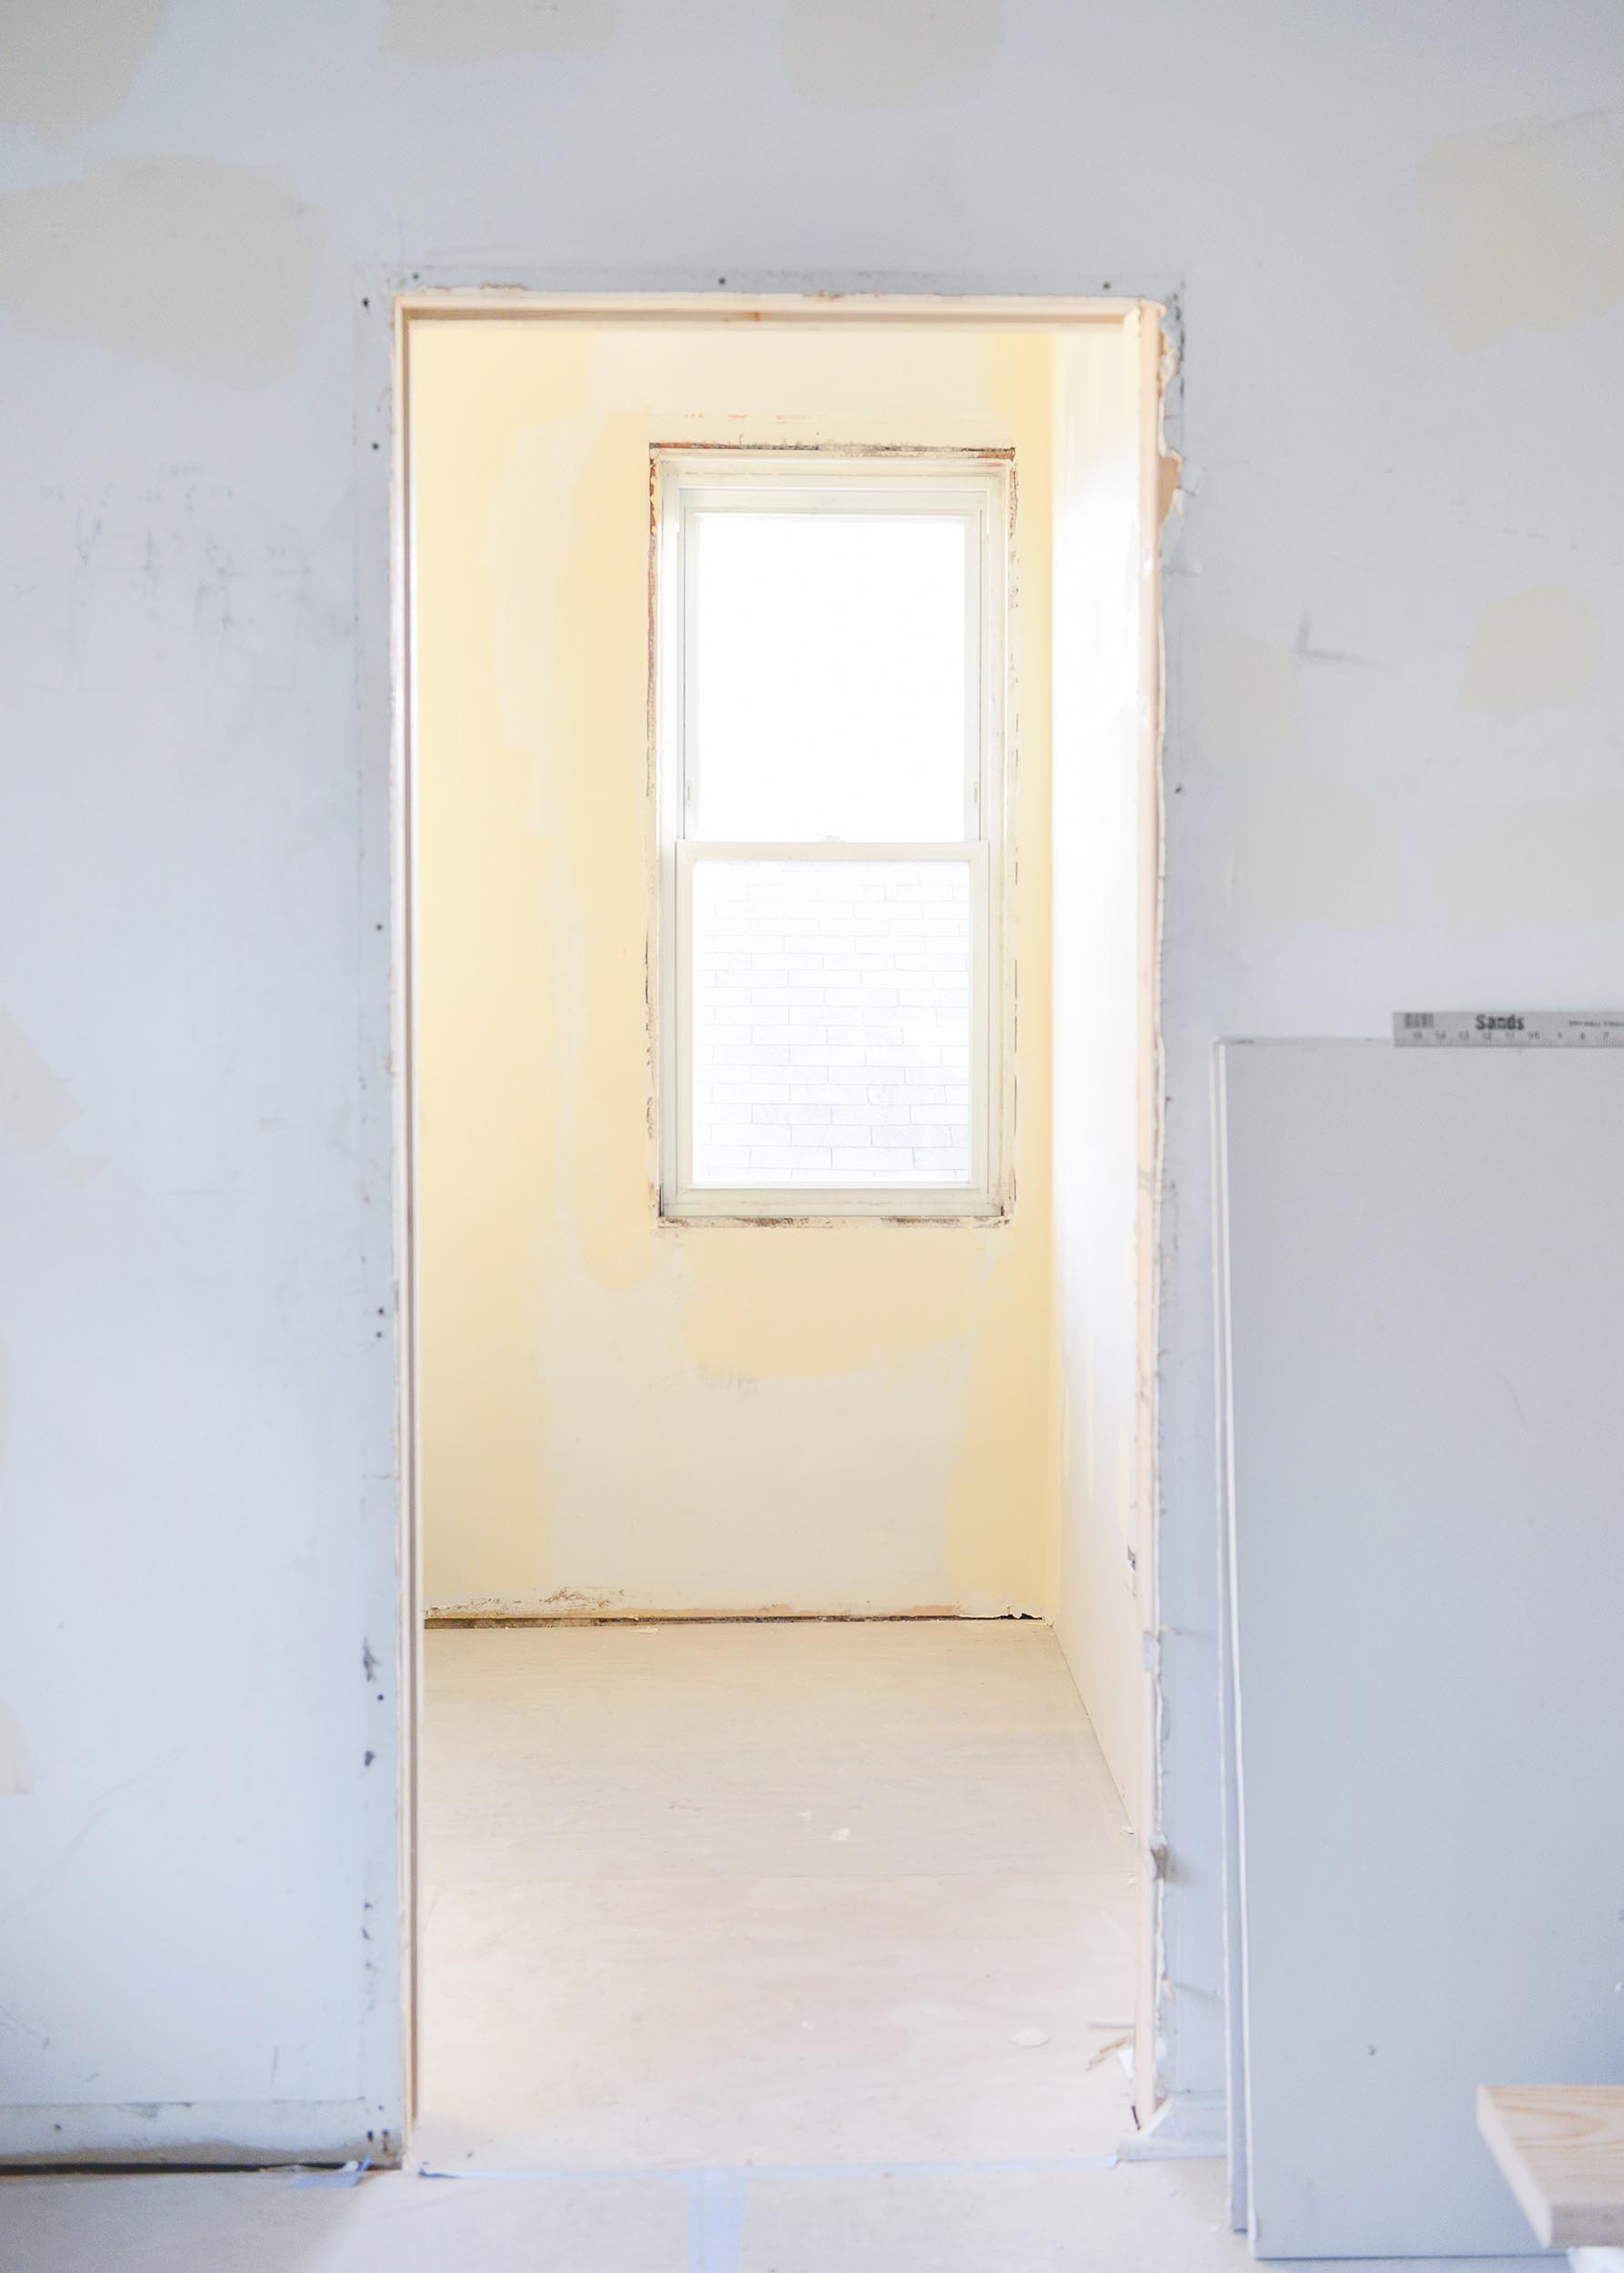
The second floor bathroom can’t truly be discussed without talking through the changes to the primary bedroom and (now) laundry room, so I’ll probably jump around a bit in discussing these next three spaces. The construction and reframing of all three happened at once to shape out the rear portion of the second floor and keep things incredibly functional.
Like most spaces in the home, we dove in with an initial deep clean, duct taped some loose tiles to the floor and used the space it was. While we devoted our time and budget to to other priority areas, we began to envision a new layout that would give us a much better floor plan. Here’s where we started in the bathroom.

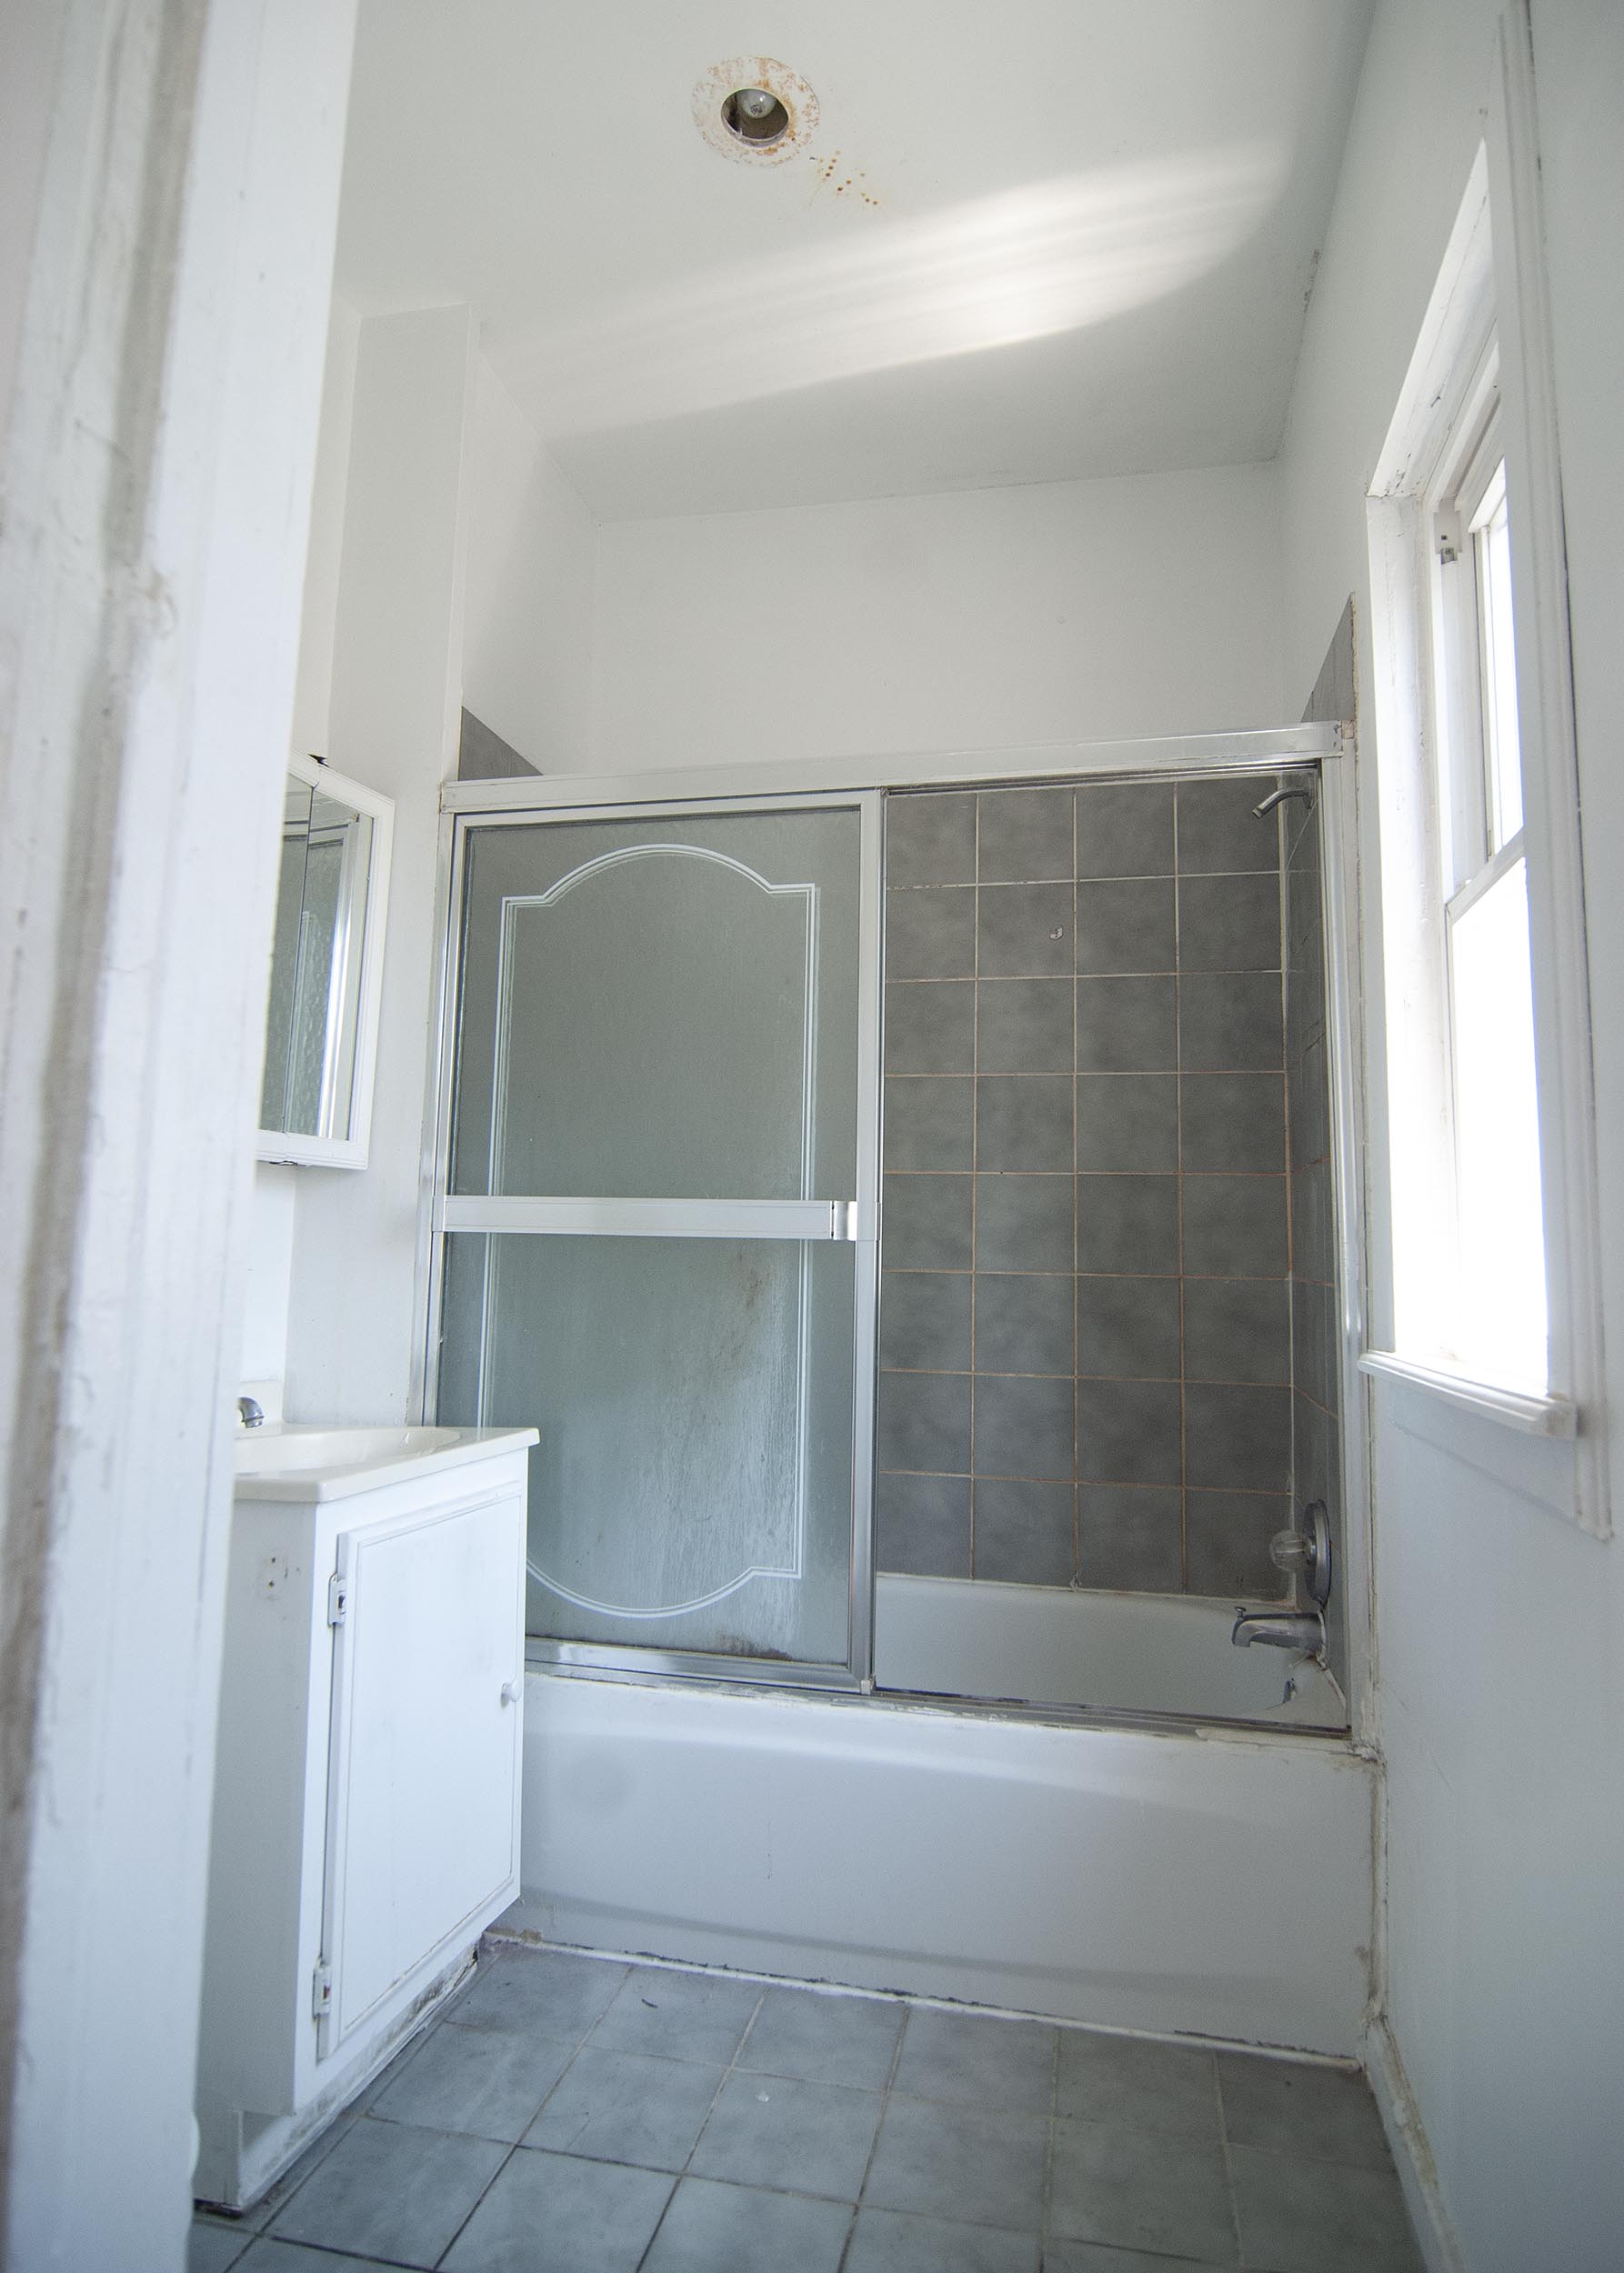
And here’s where we finished! As you might notice, the room is almost three feet longer than when we moved in, but more on that shortly since that change is tied so deeply to the laundry room that was once a bedroom. And the bedroom that was once a kitchen…

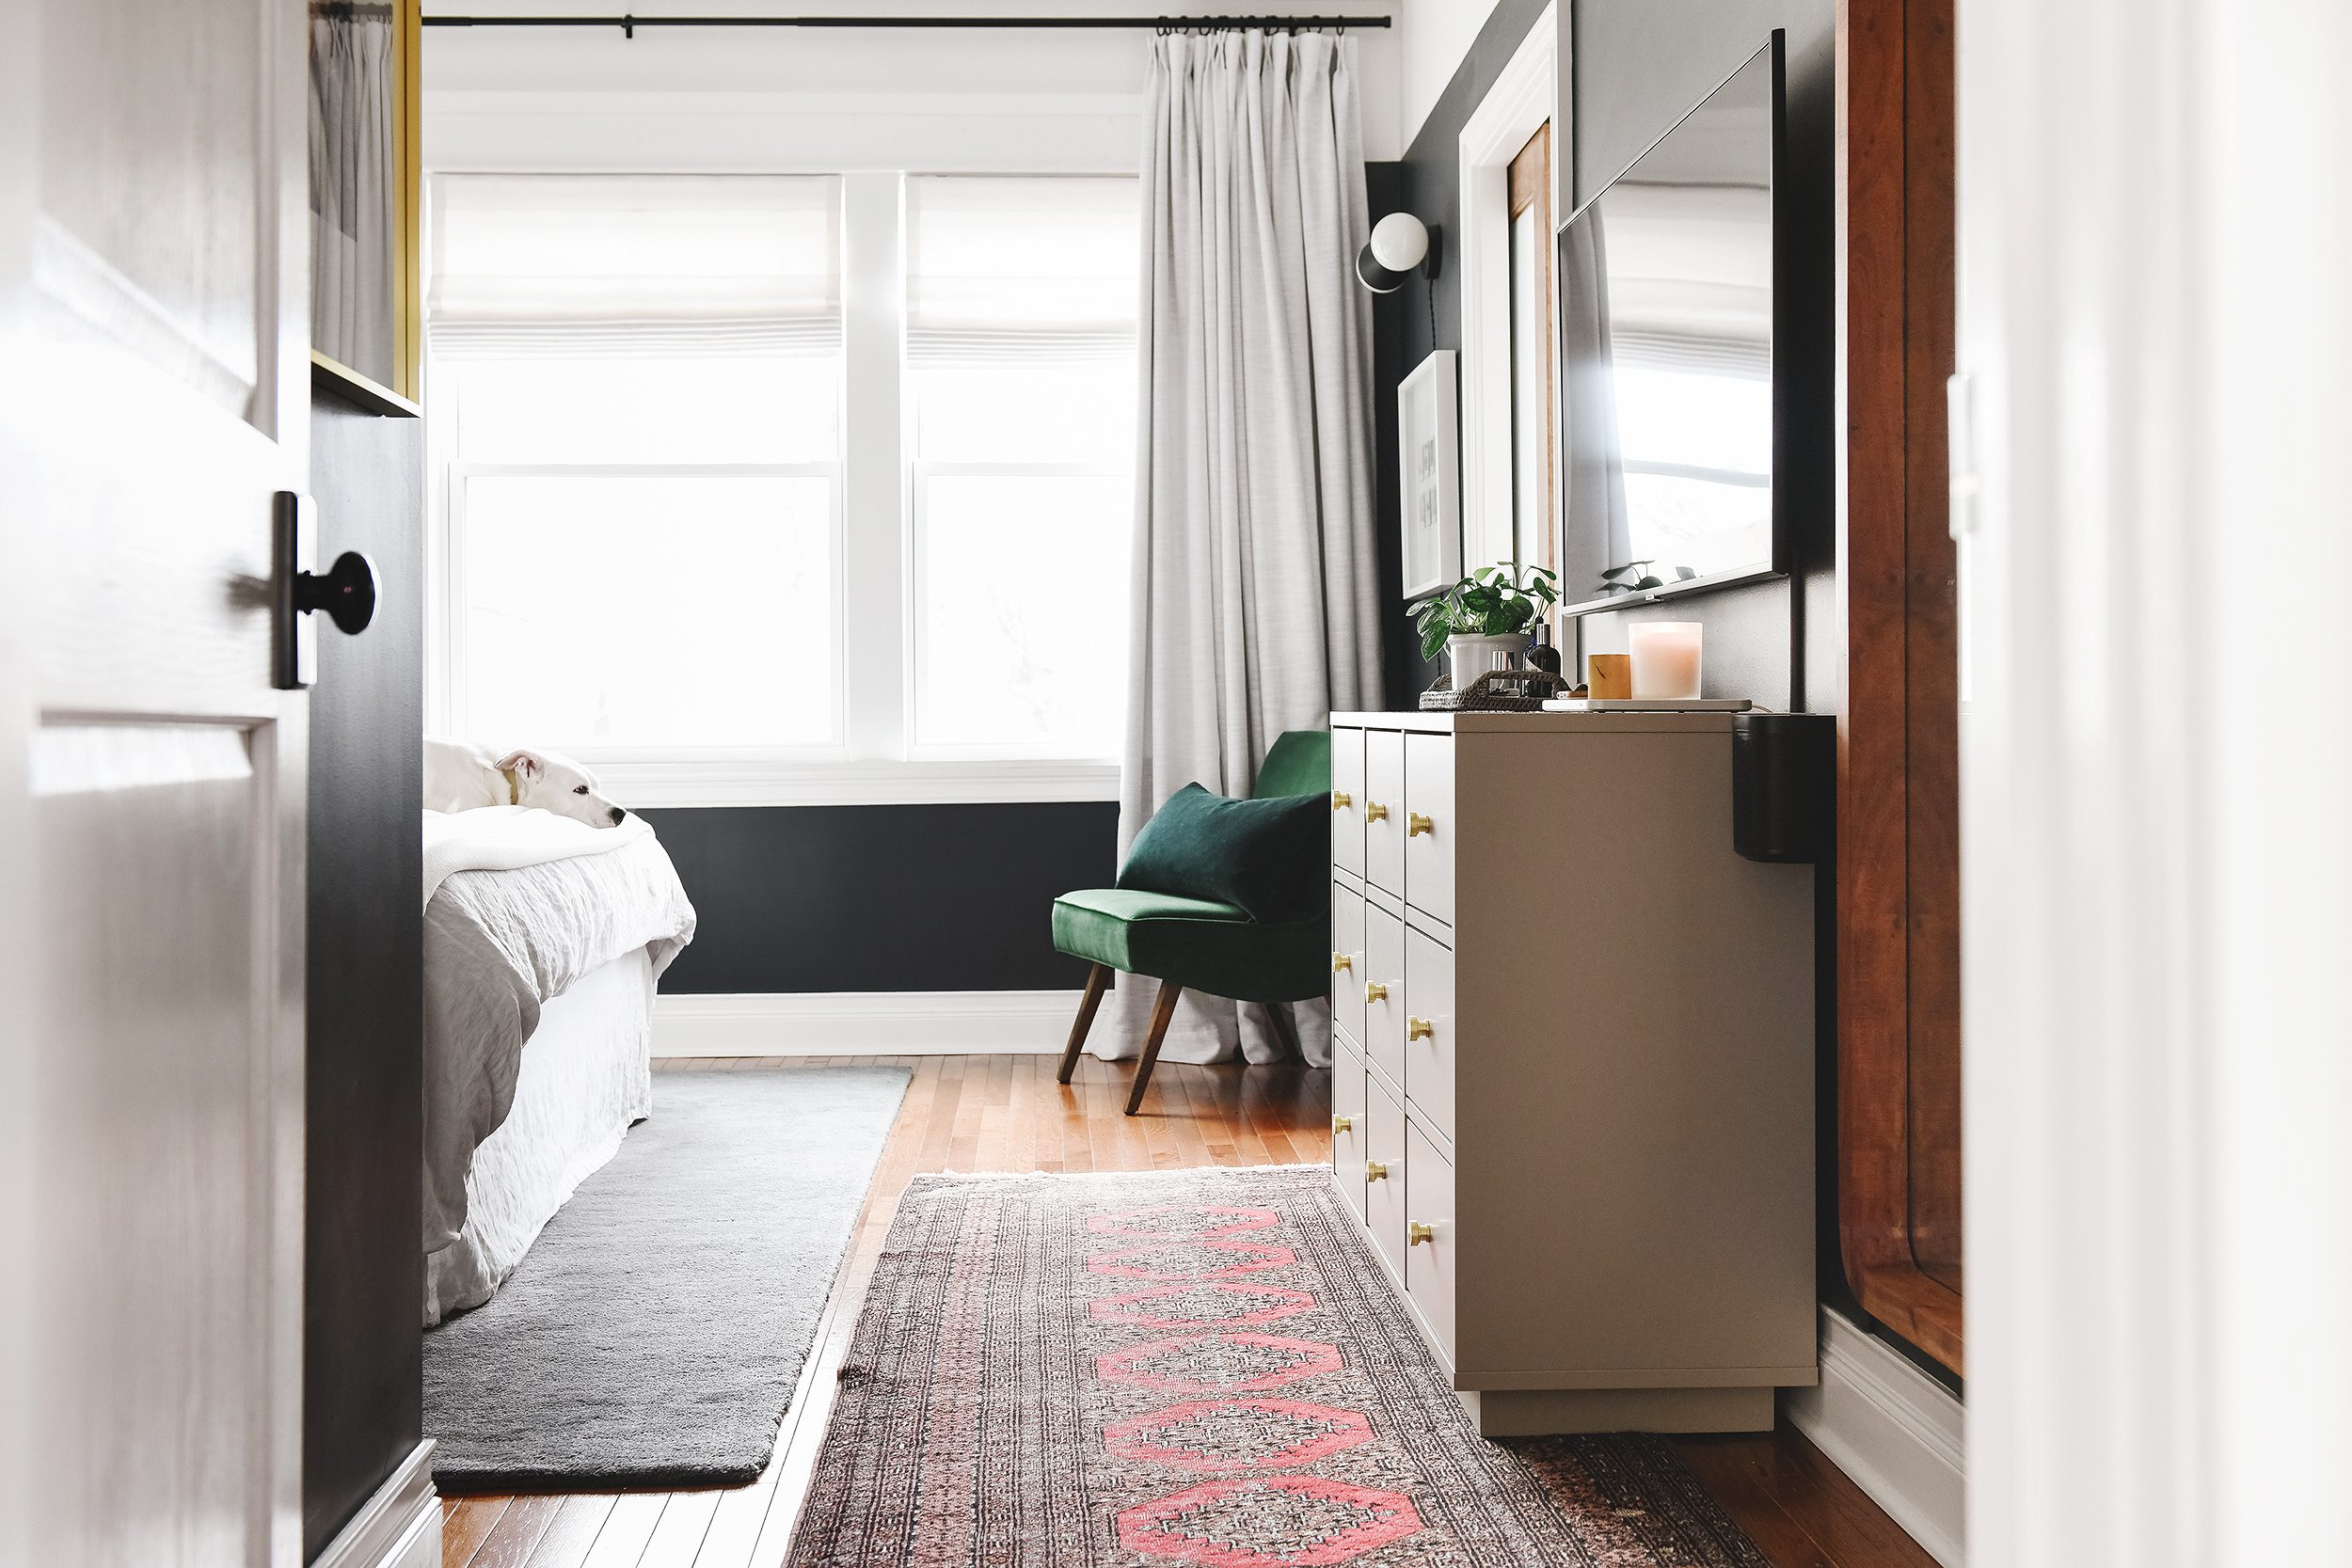
Primary Bedroom
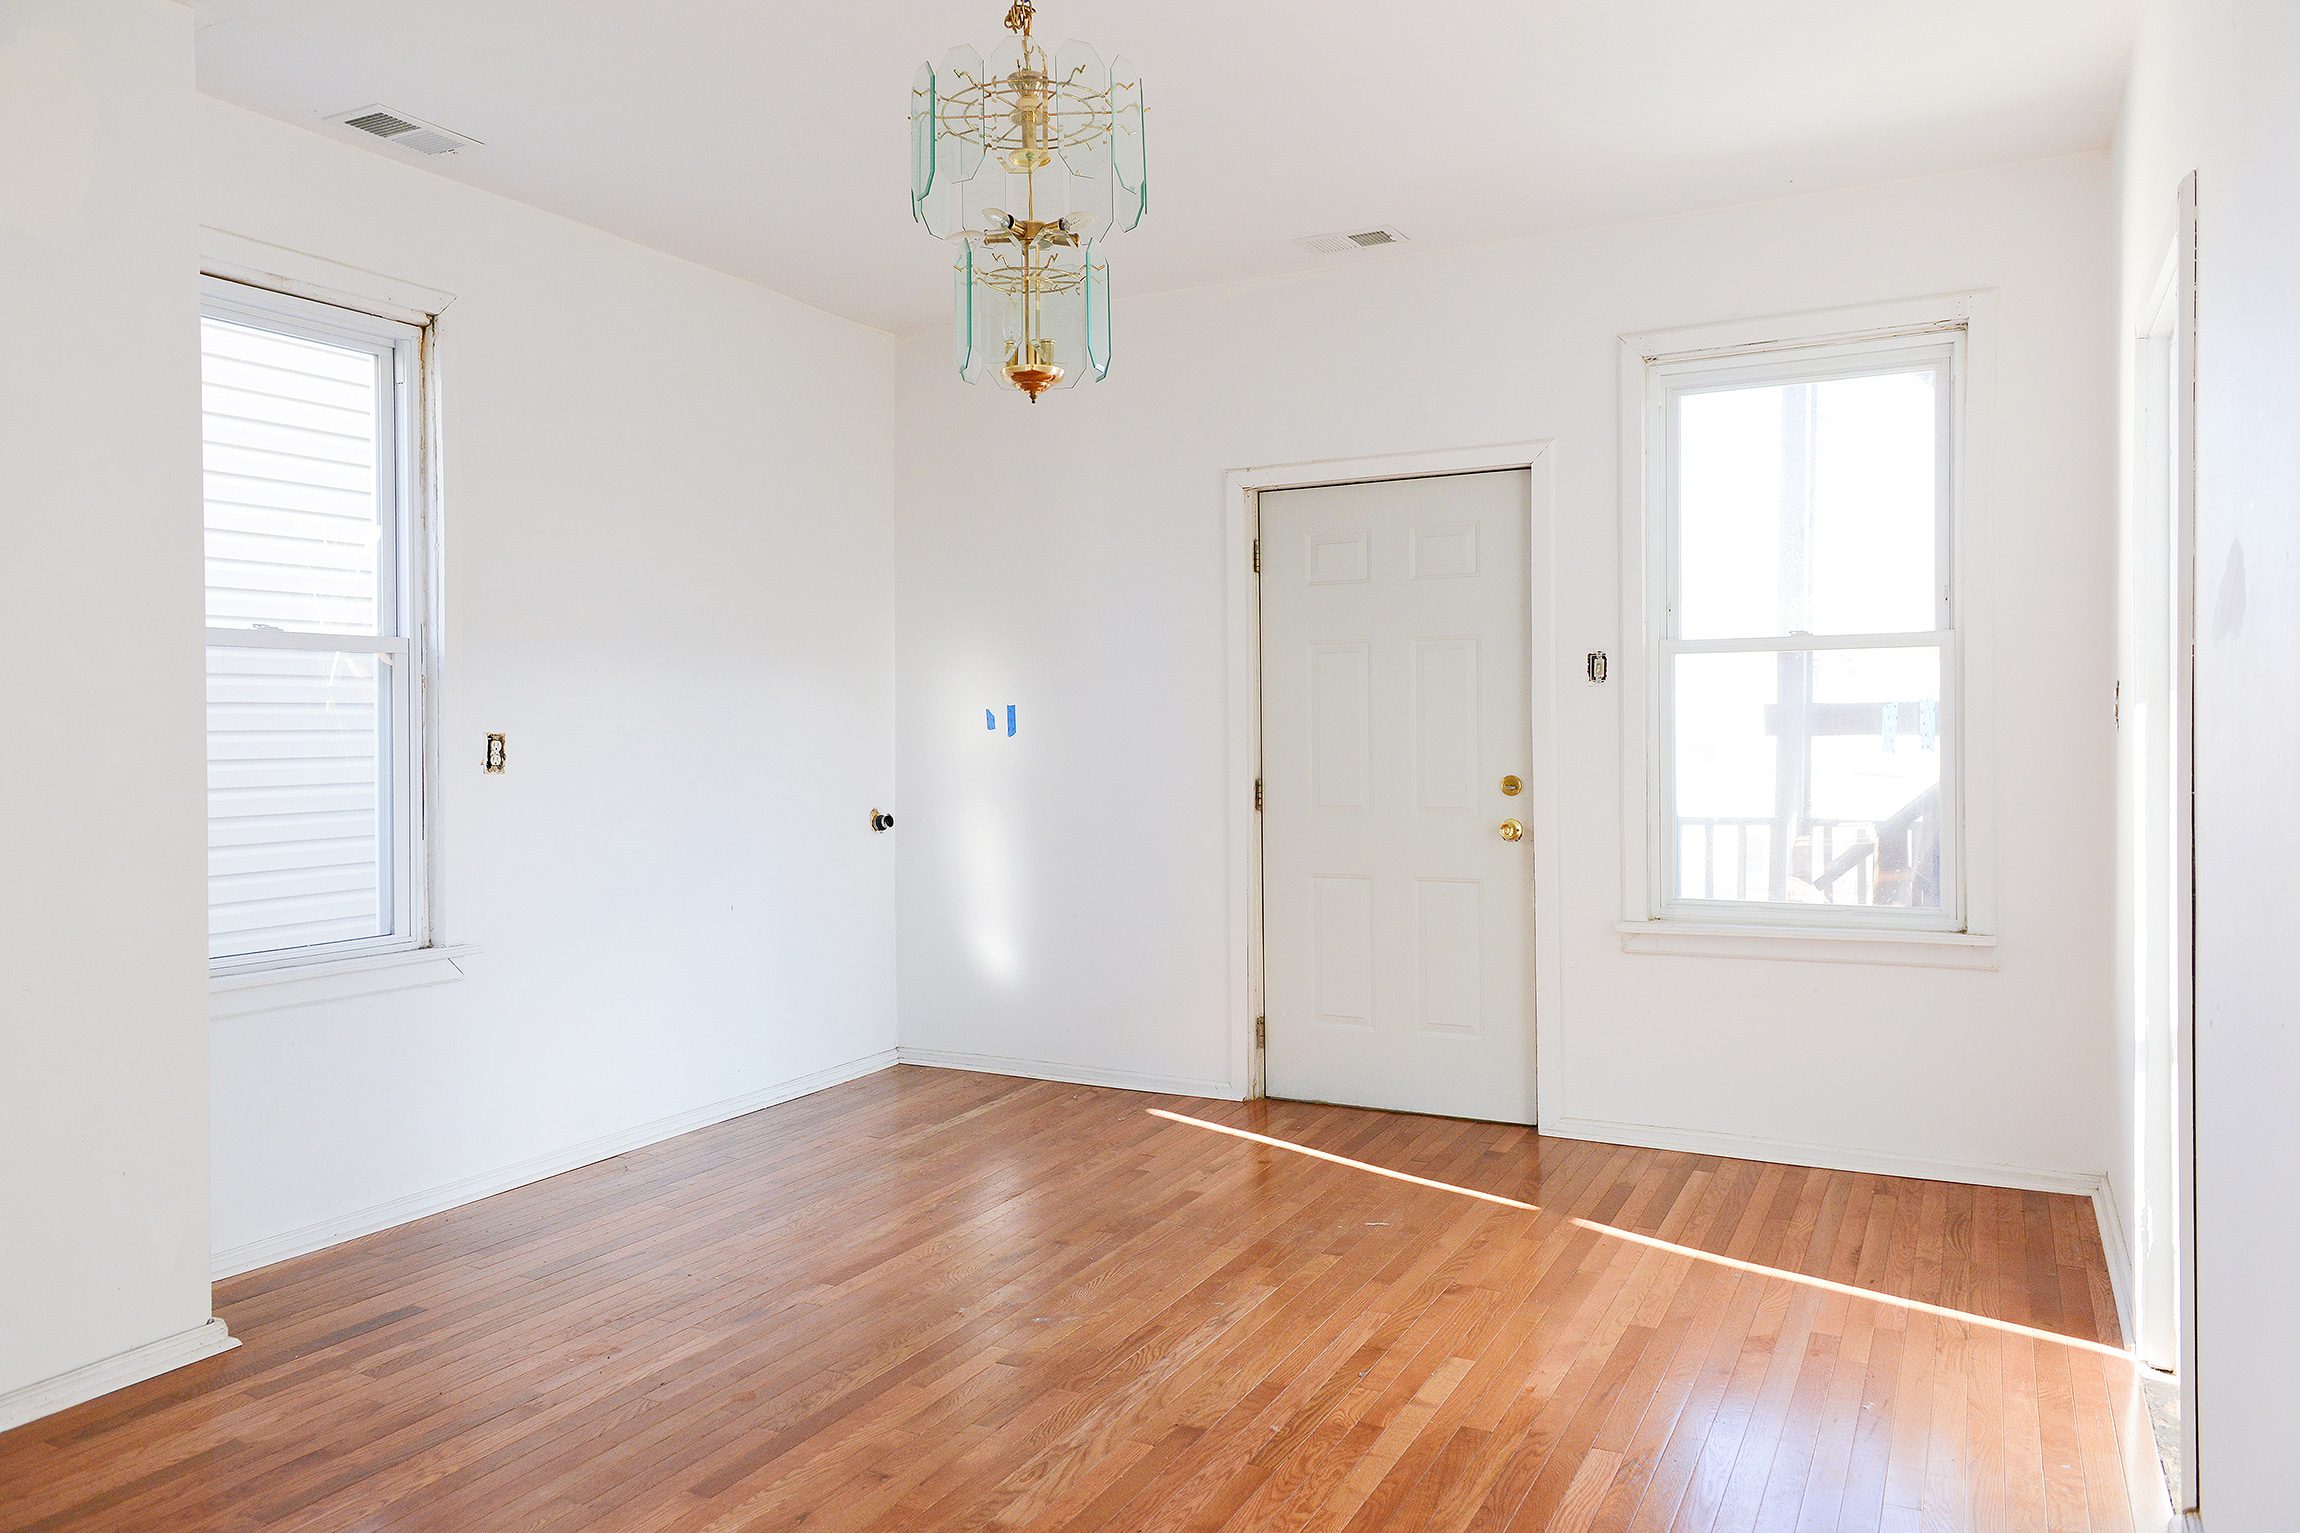
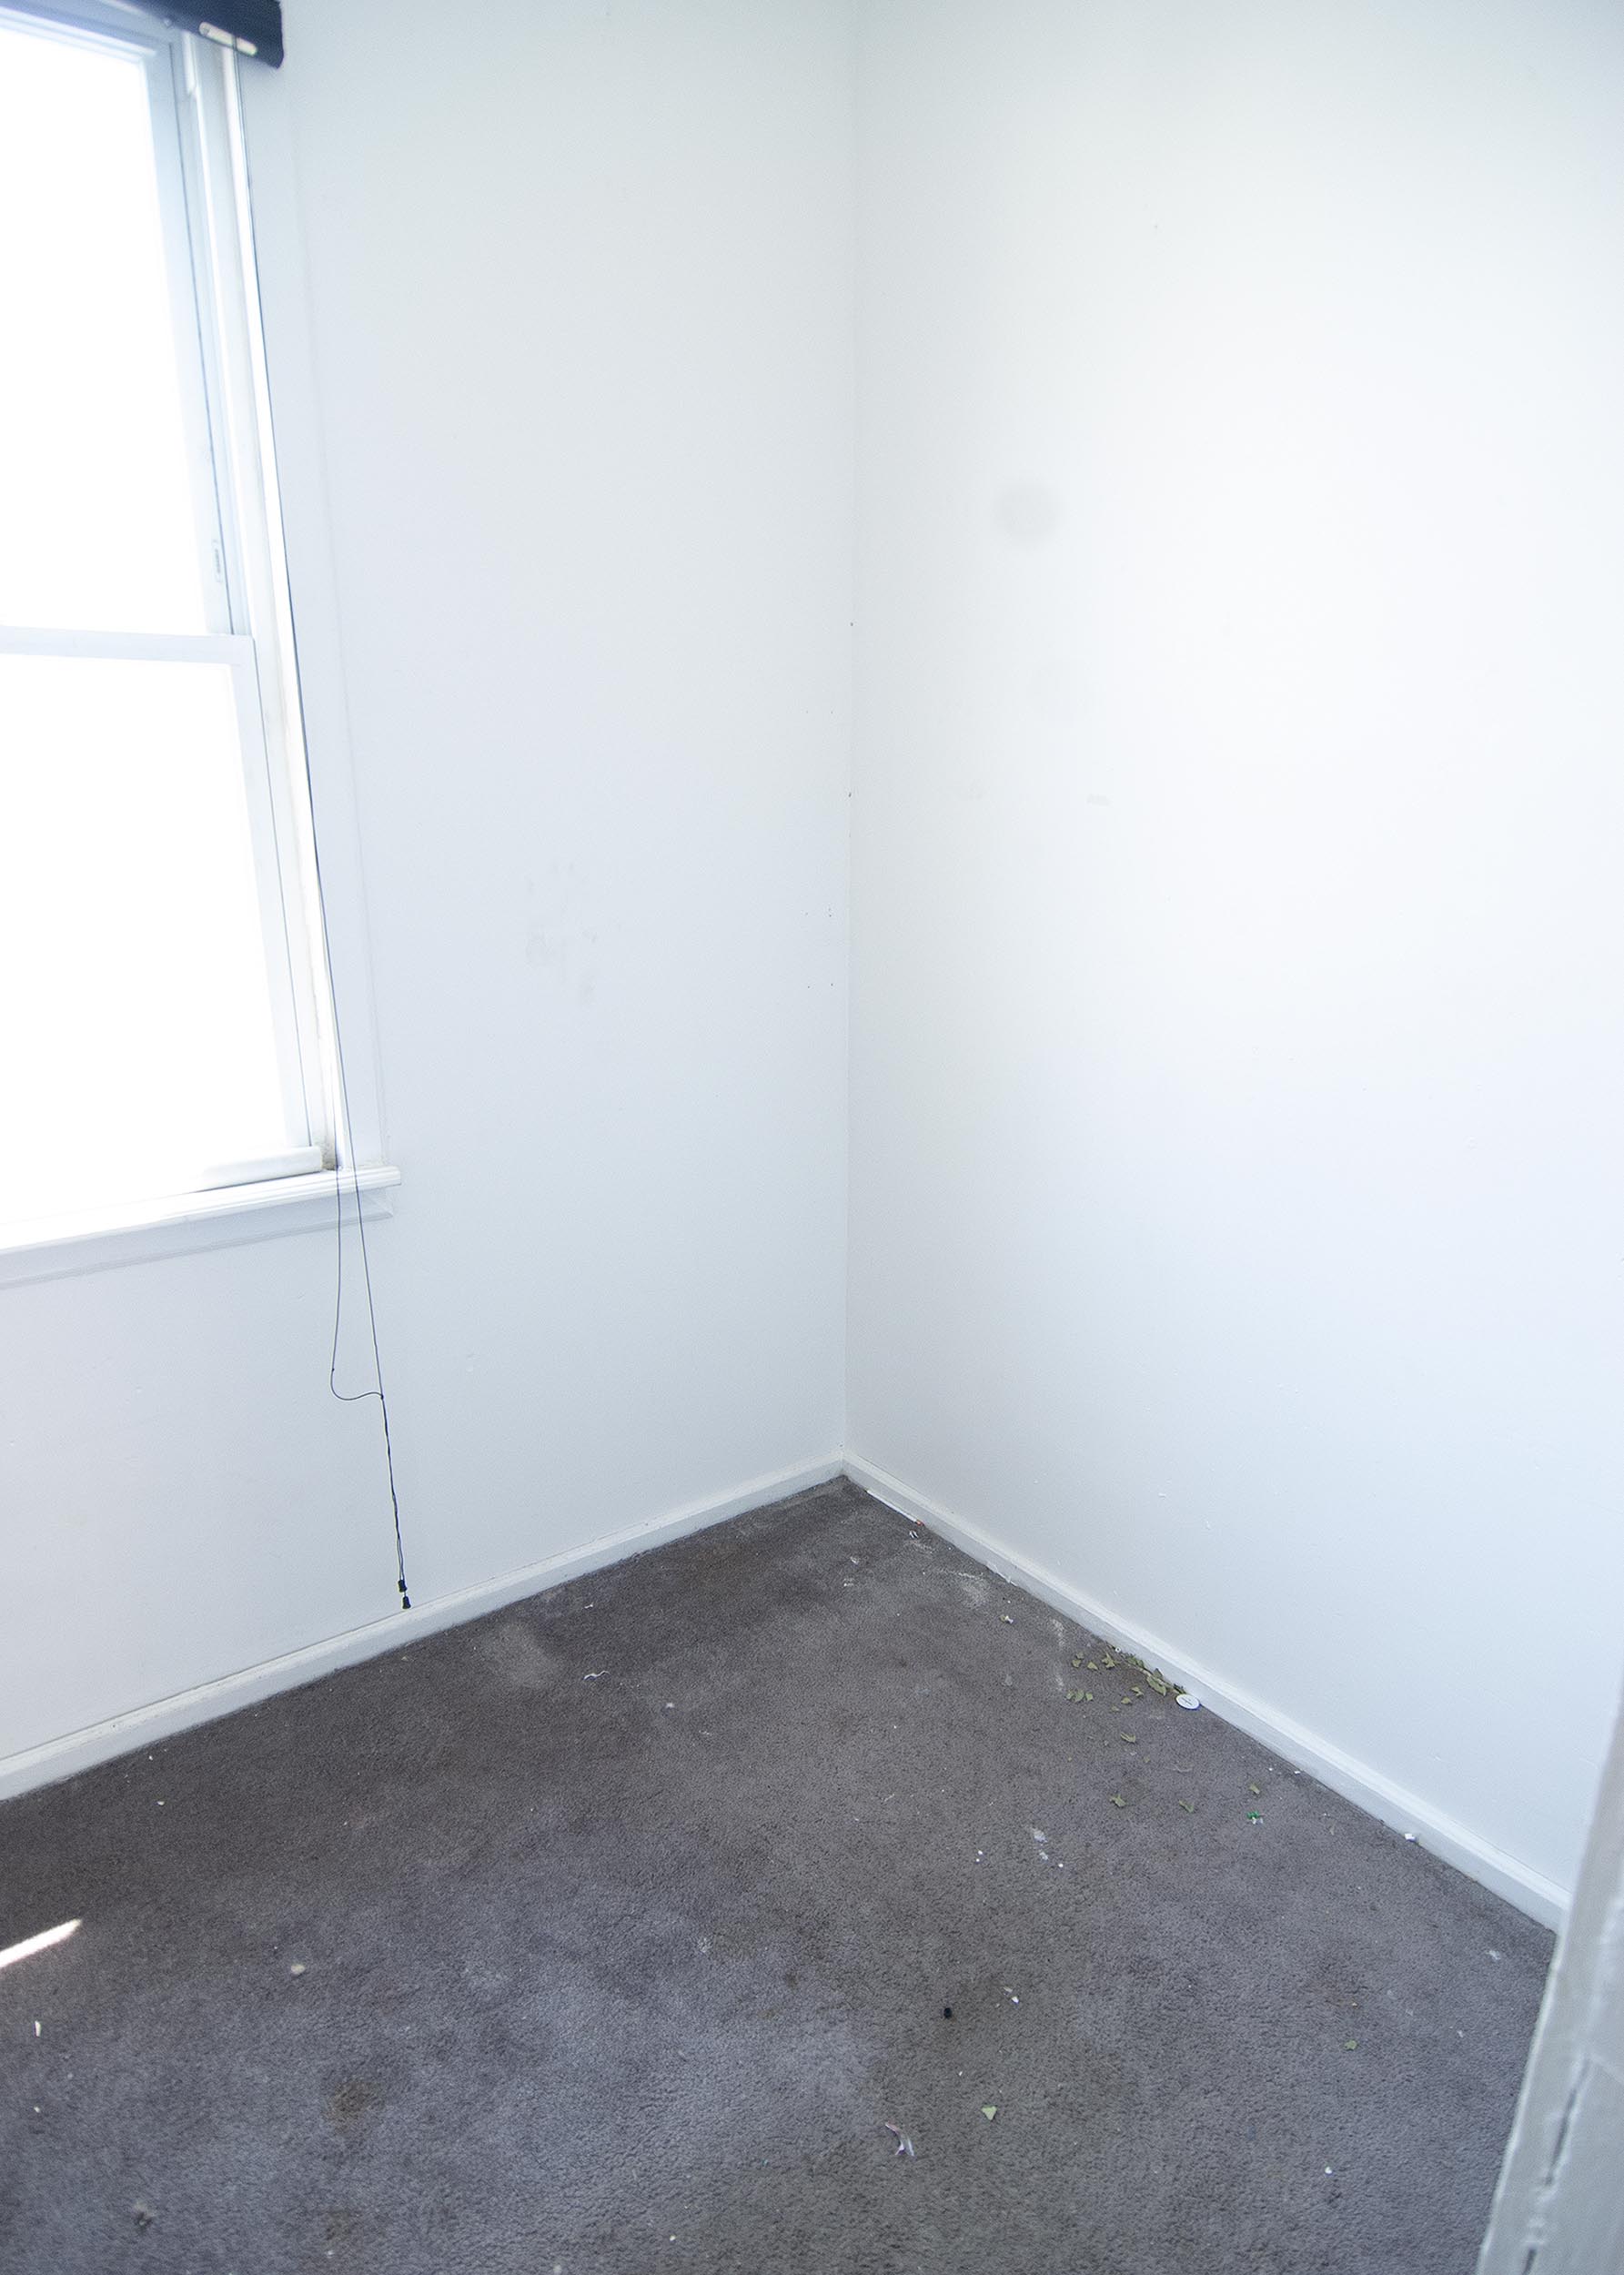
Yes – It’s true. Our primary bedroom was once the kitchen of the second floor apartment. See that little black pipe sticking out of the wall in the back corner of the photo below? That was a discharge pipe for an in-kitchen washing machine. When the cabinets and appliances were removed from this space to prepare for the transition, we experienced natural horrors of the flora and fauna variety that we won’t describe in detail here. Let’s just say we had our trusty exterminators on speed dial and that we smelled things we hope to never smell again. But! With hard work, patience and a great team of contractors, we turned this…
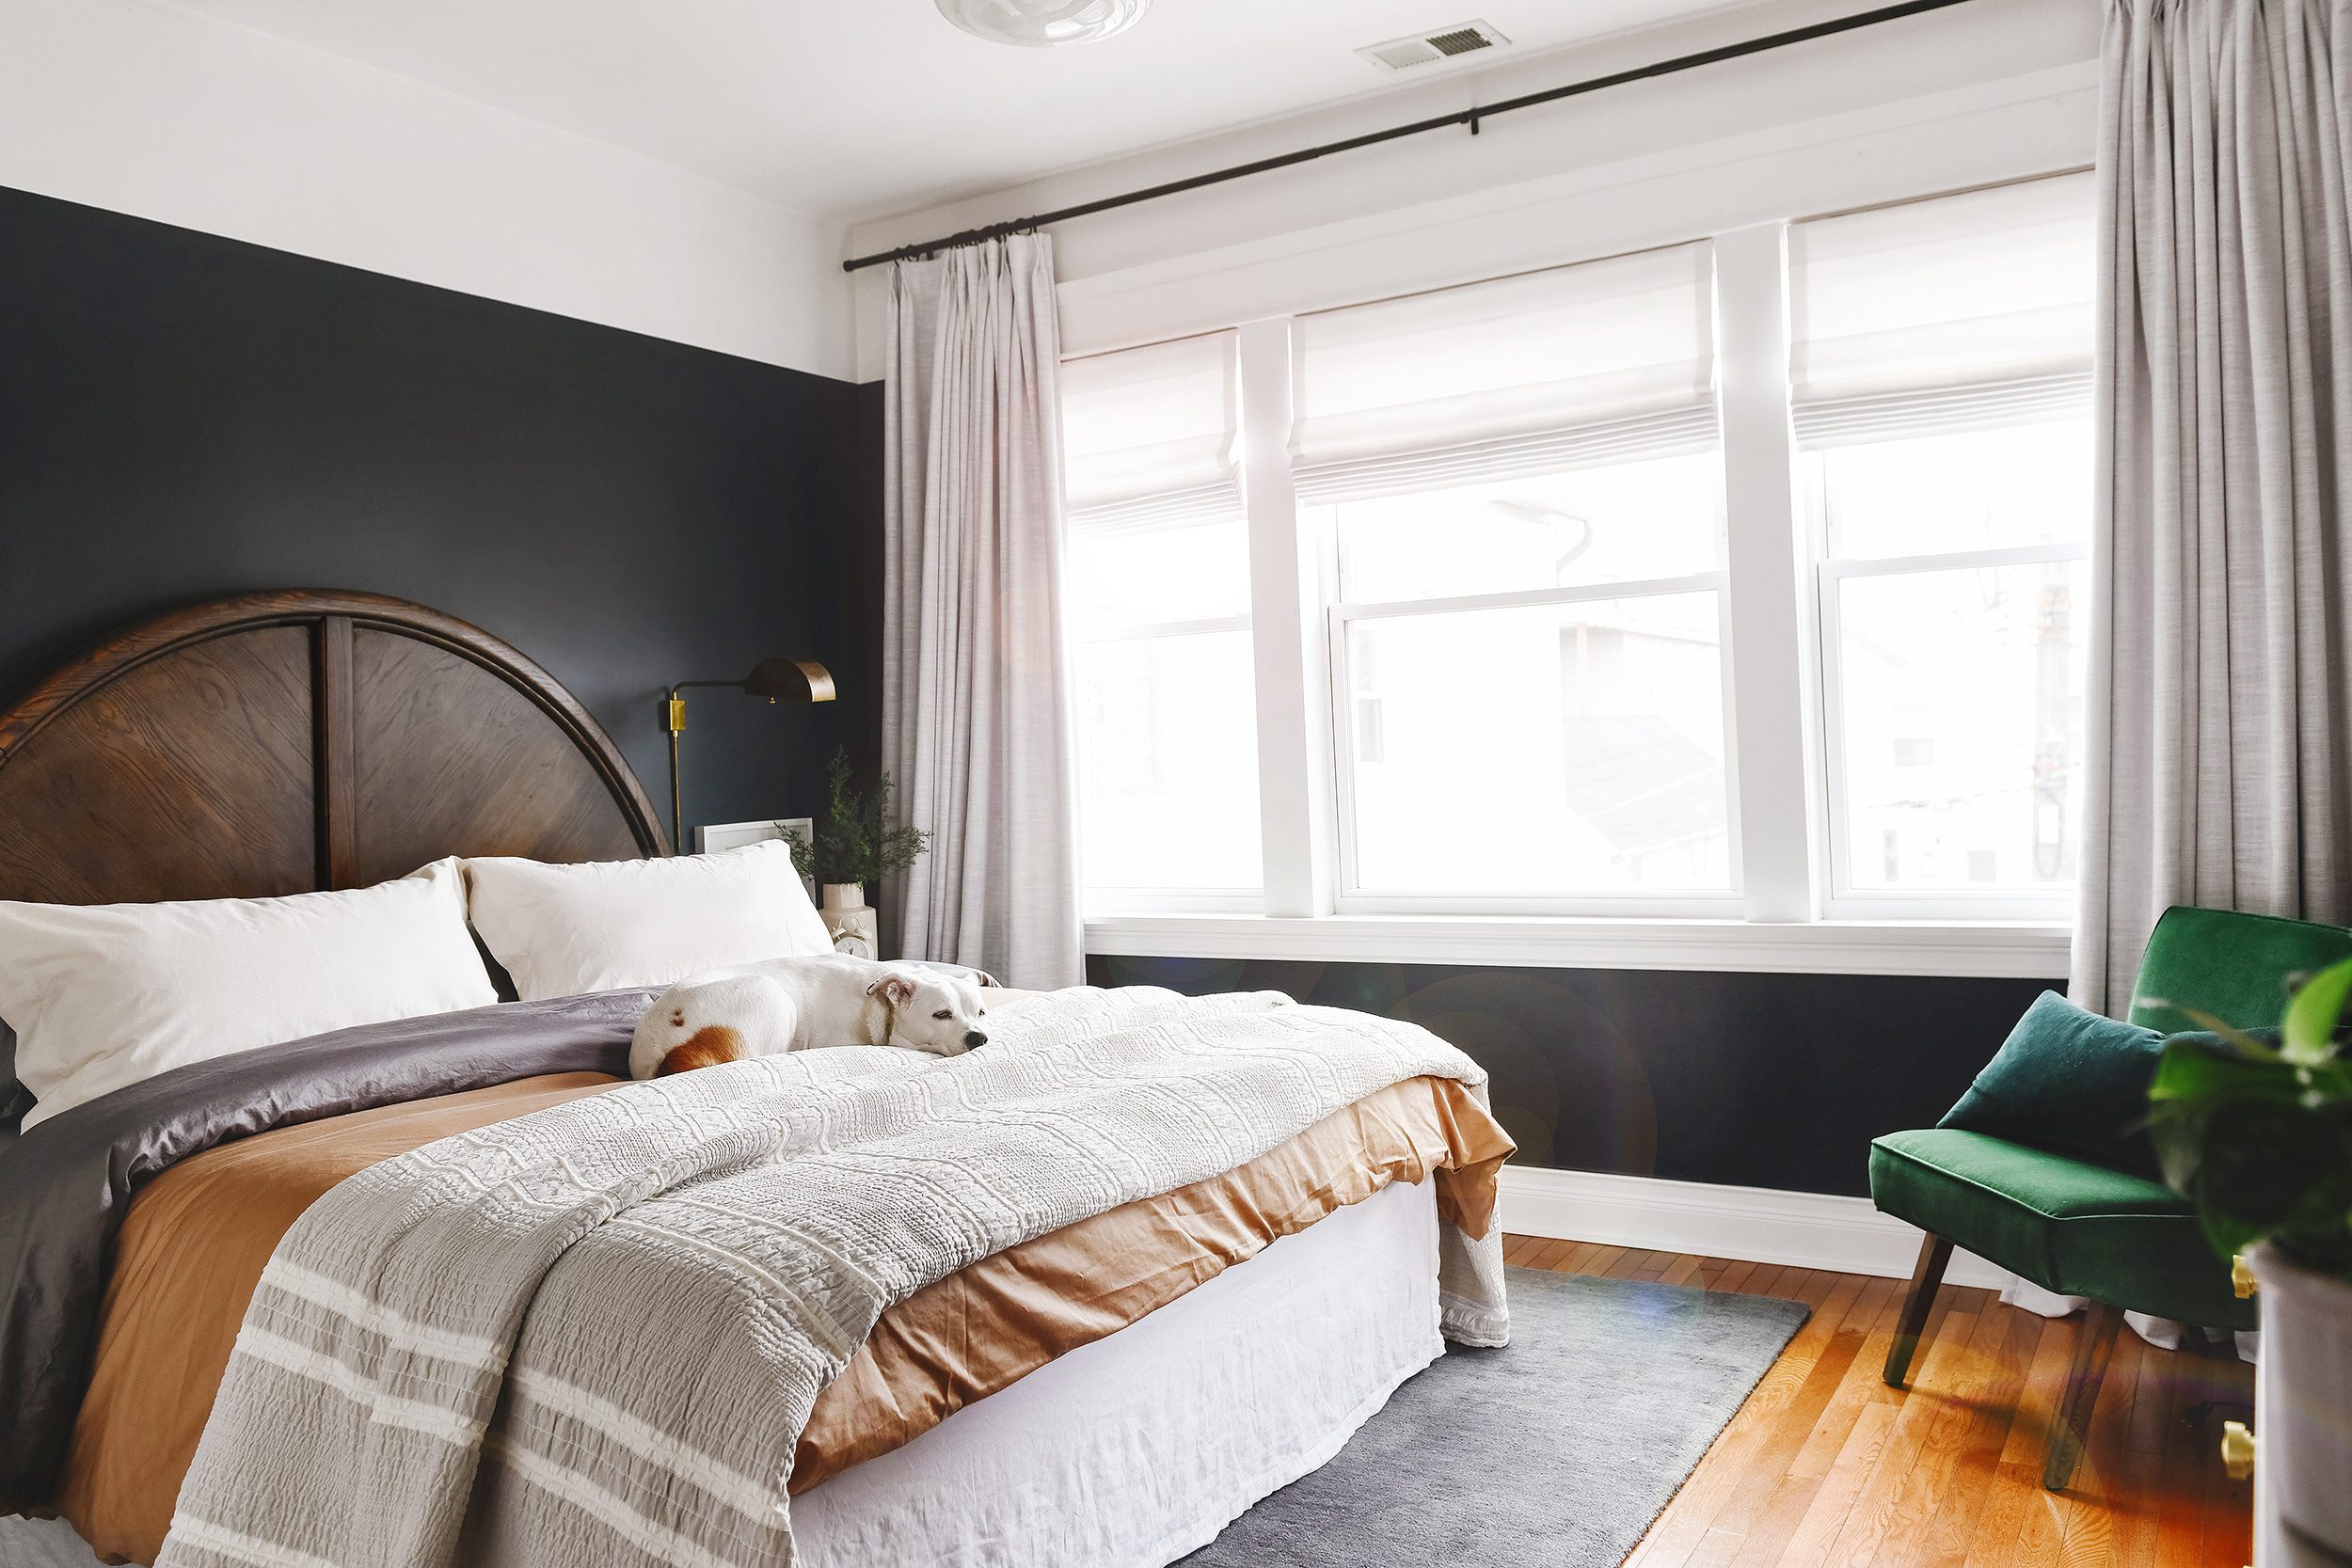
…into this! What was once a door to a rickety back deck/staircase scenario is now a huge bank of three windows. What was once a window that looked solely out onto our neighbor’s siding now features the headboard that is one of our favorite second-hand finds of all time.
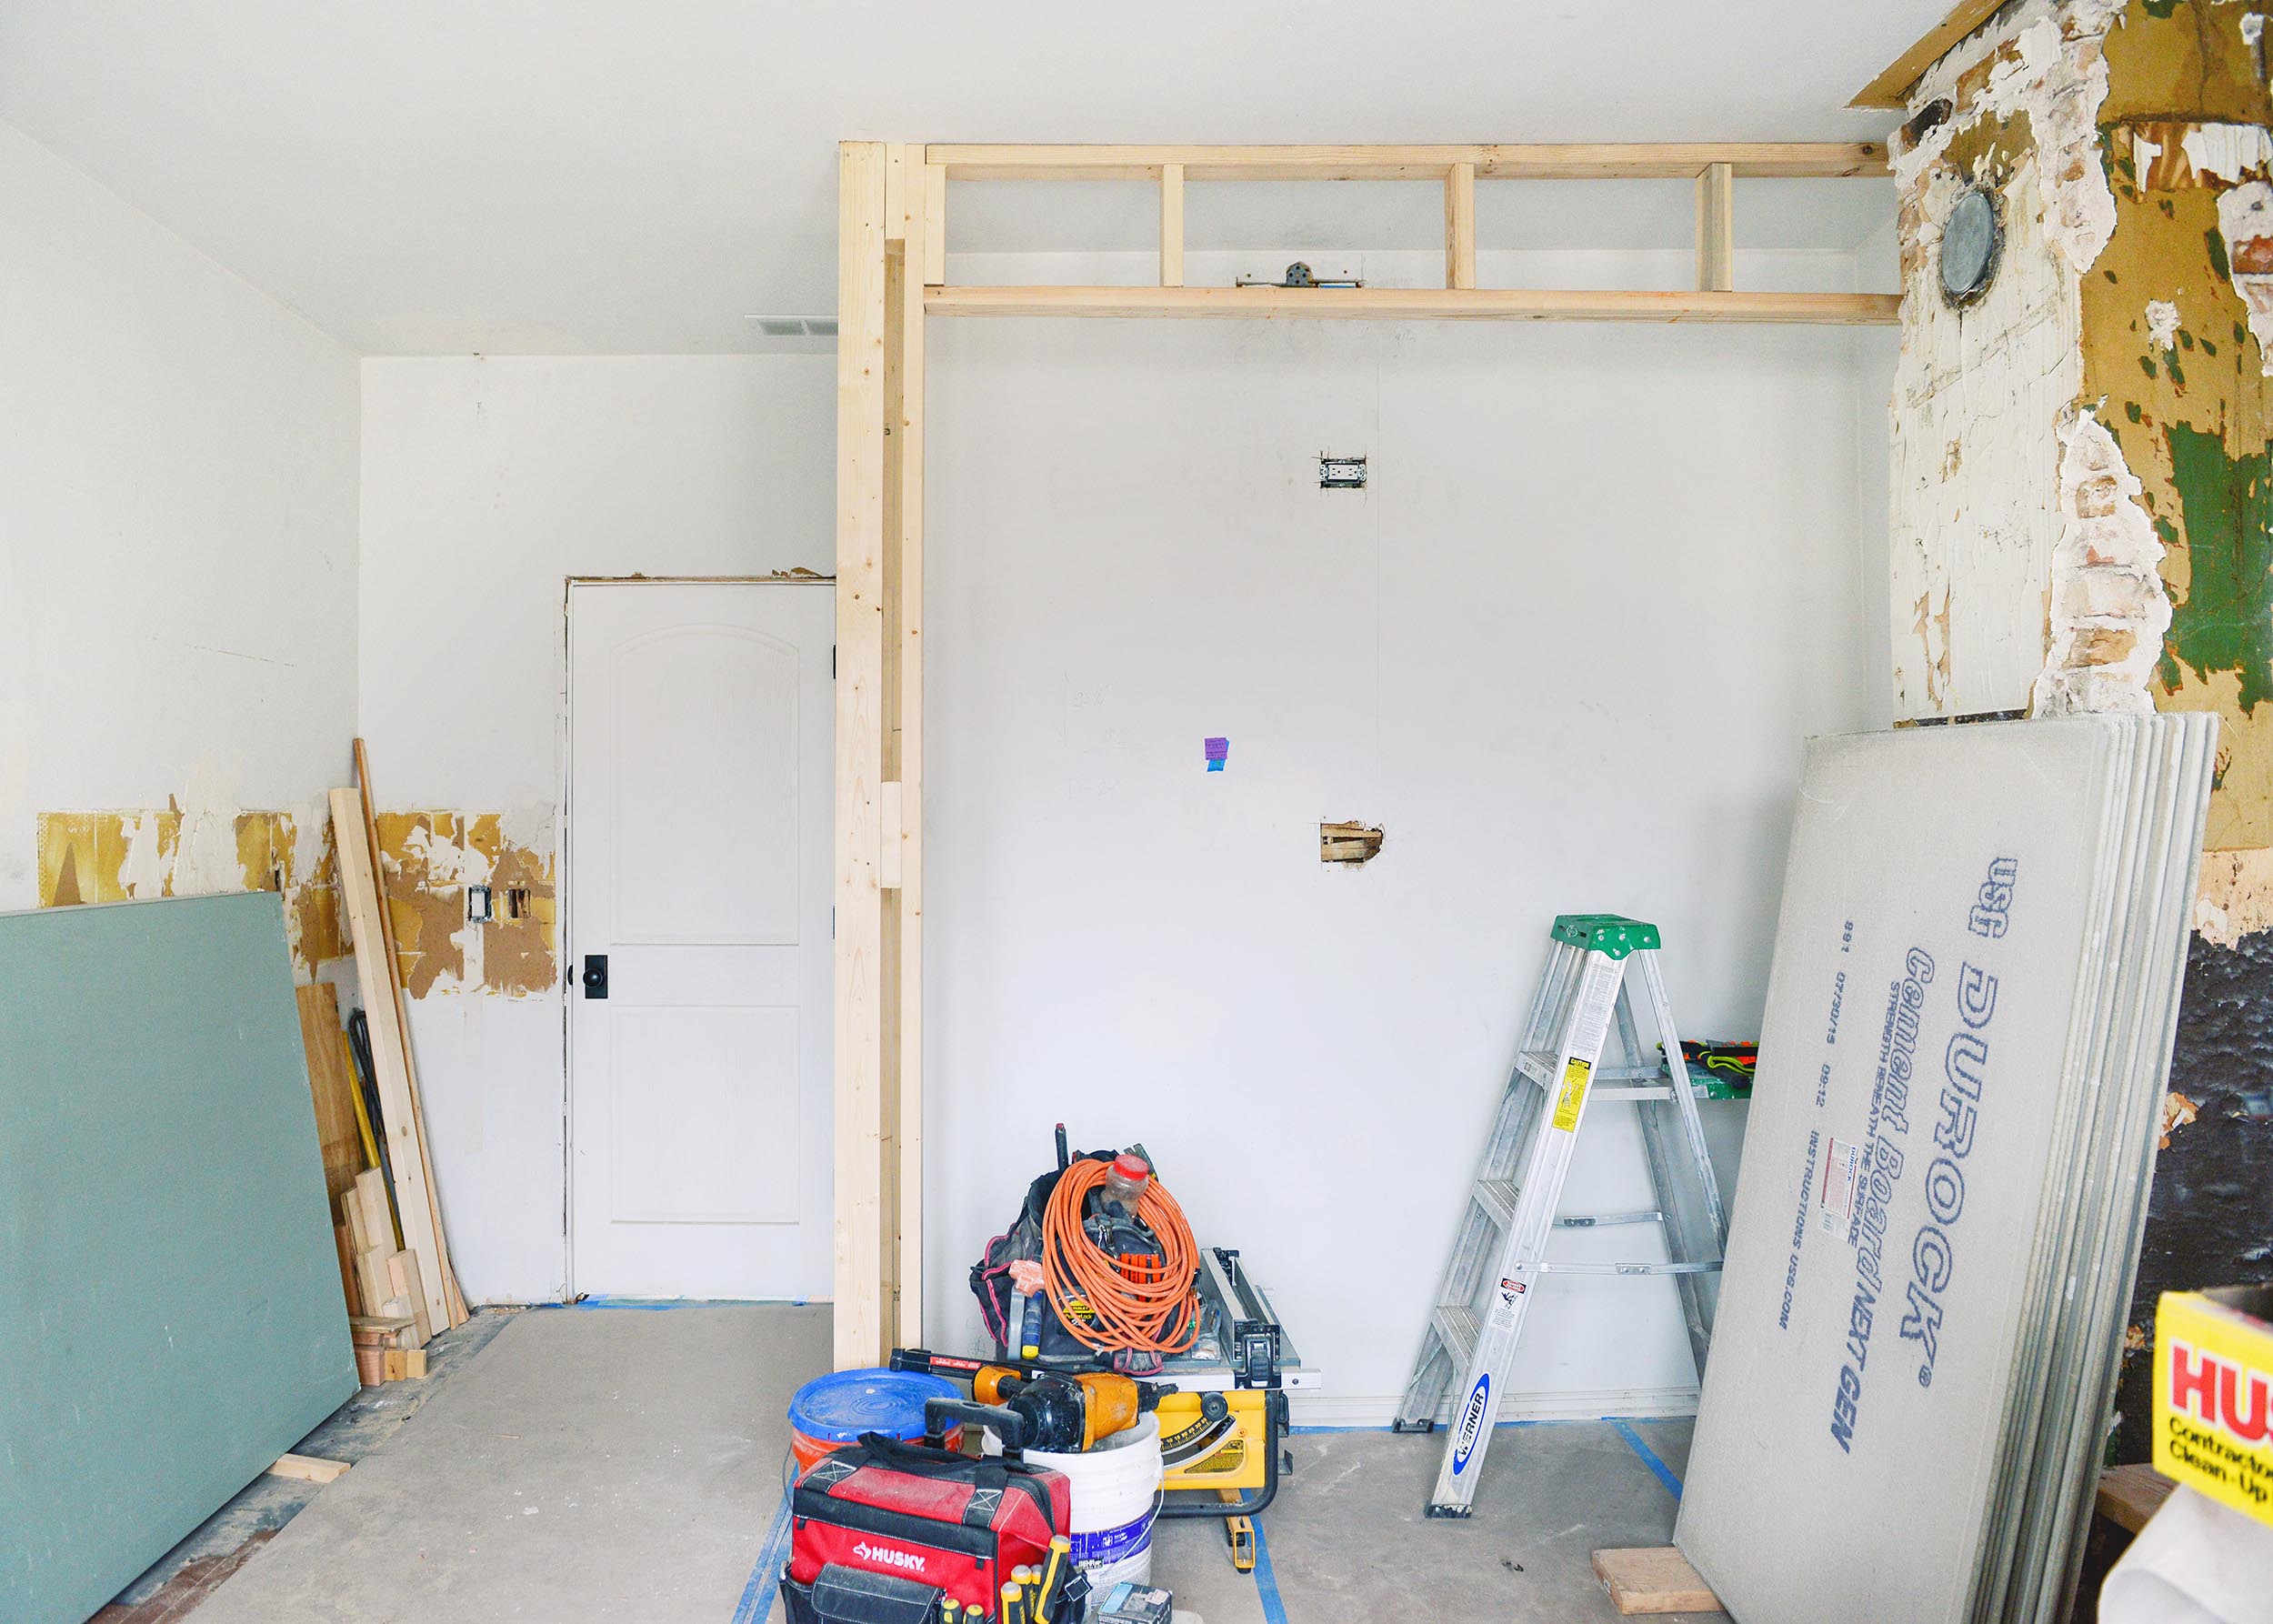
Much like we eliminated soffits and odd angles throughout the rest of the house, our biggest obstacle in this room was the former chimney that we thought was completely non-functioning. It turned out that it housed a vent pipe for the former furnace location, which we cleverly routed through the back of Lucy’s closet!
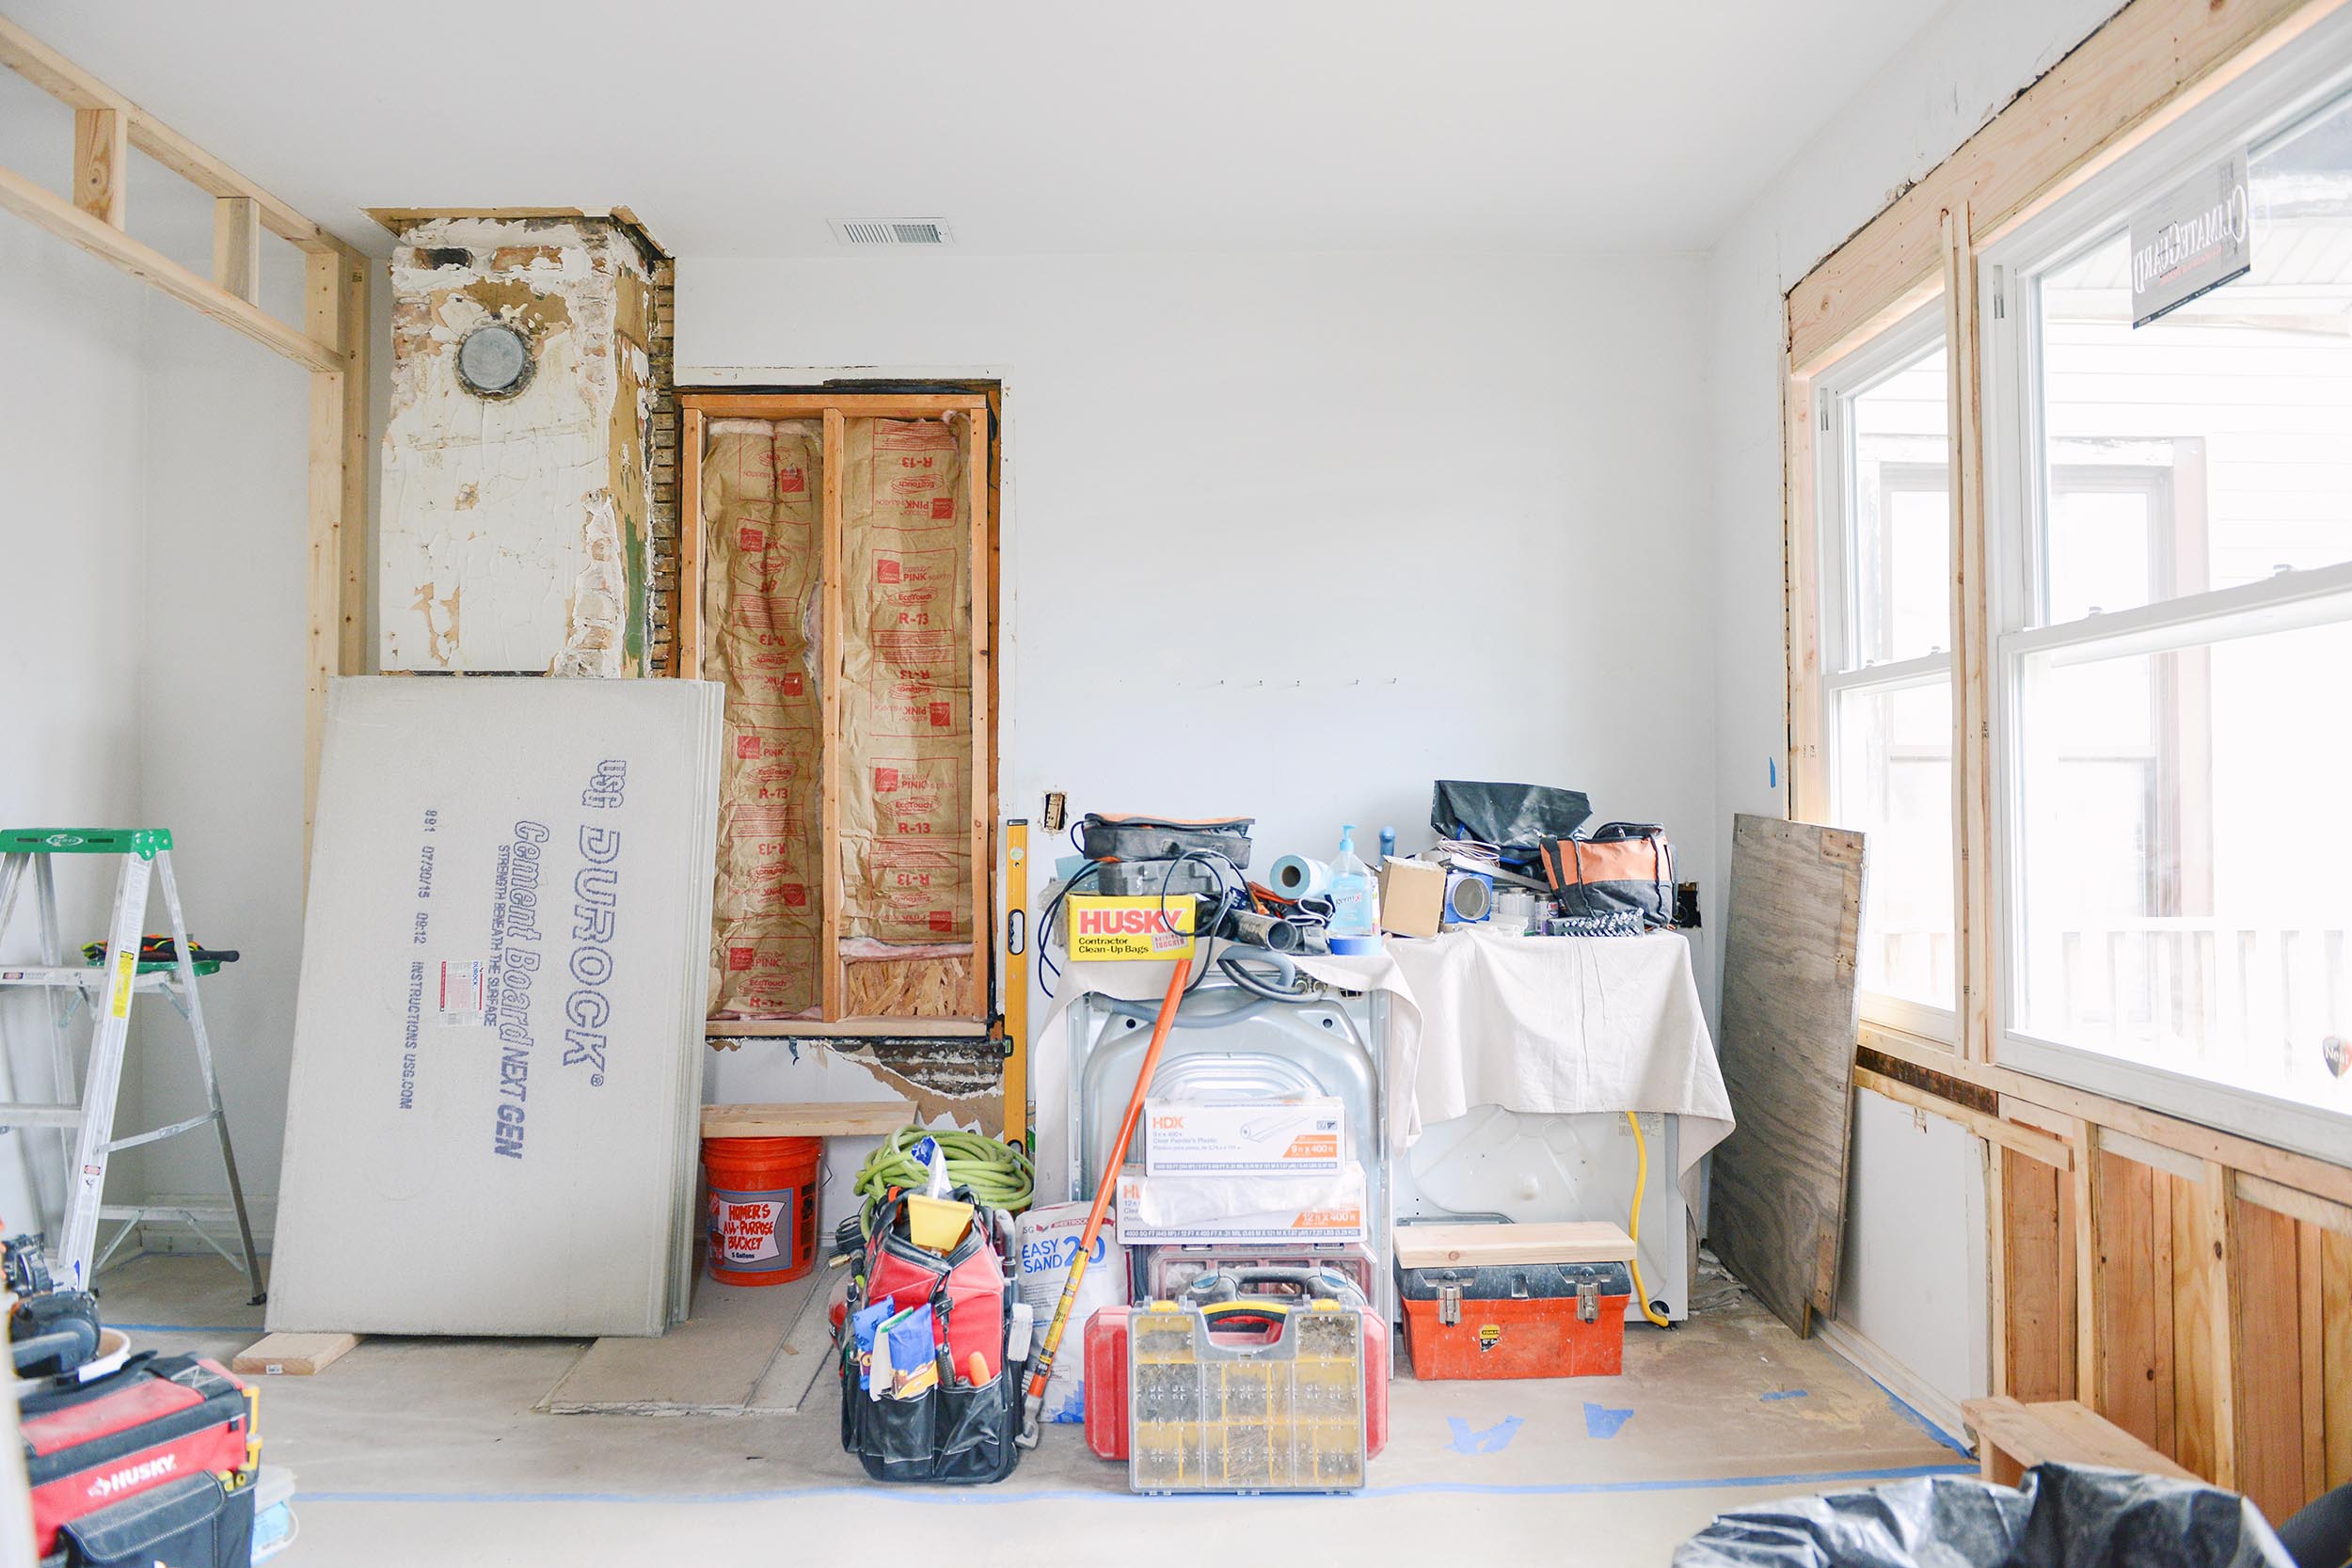

This photo shows the before before from the day we got the keys. Those mismatched cabinets got painted and repurposed for our garage workspace, and the freestanding furnace was sent to the scrapyard.

The framing we installed to house our slide-in IKEA pax wardrobes was a game changer. It extended the wall adjacent to the door by around two feet to give us the feeling of an ‘entryway’ into the bedroom, which we love.
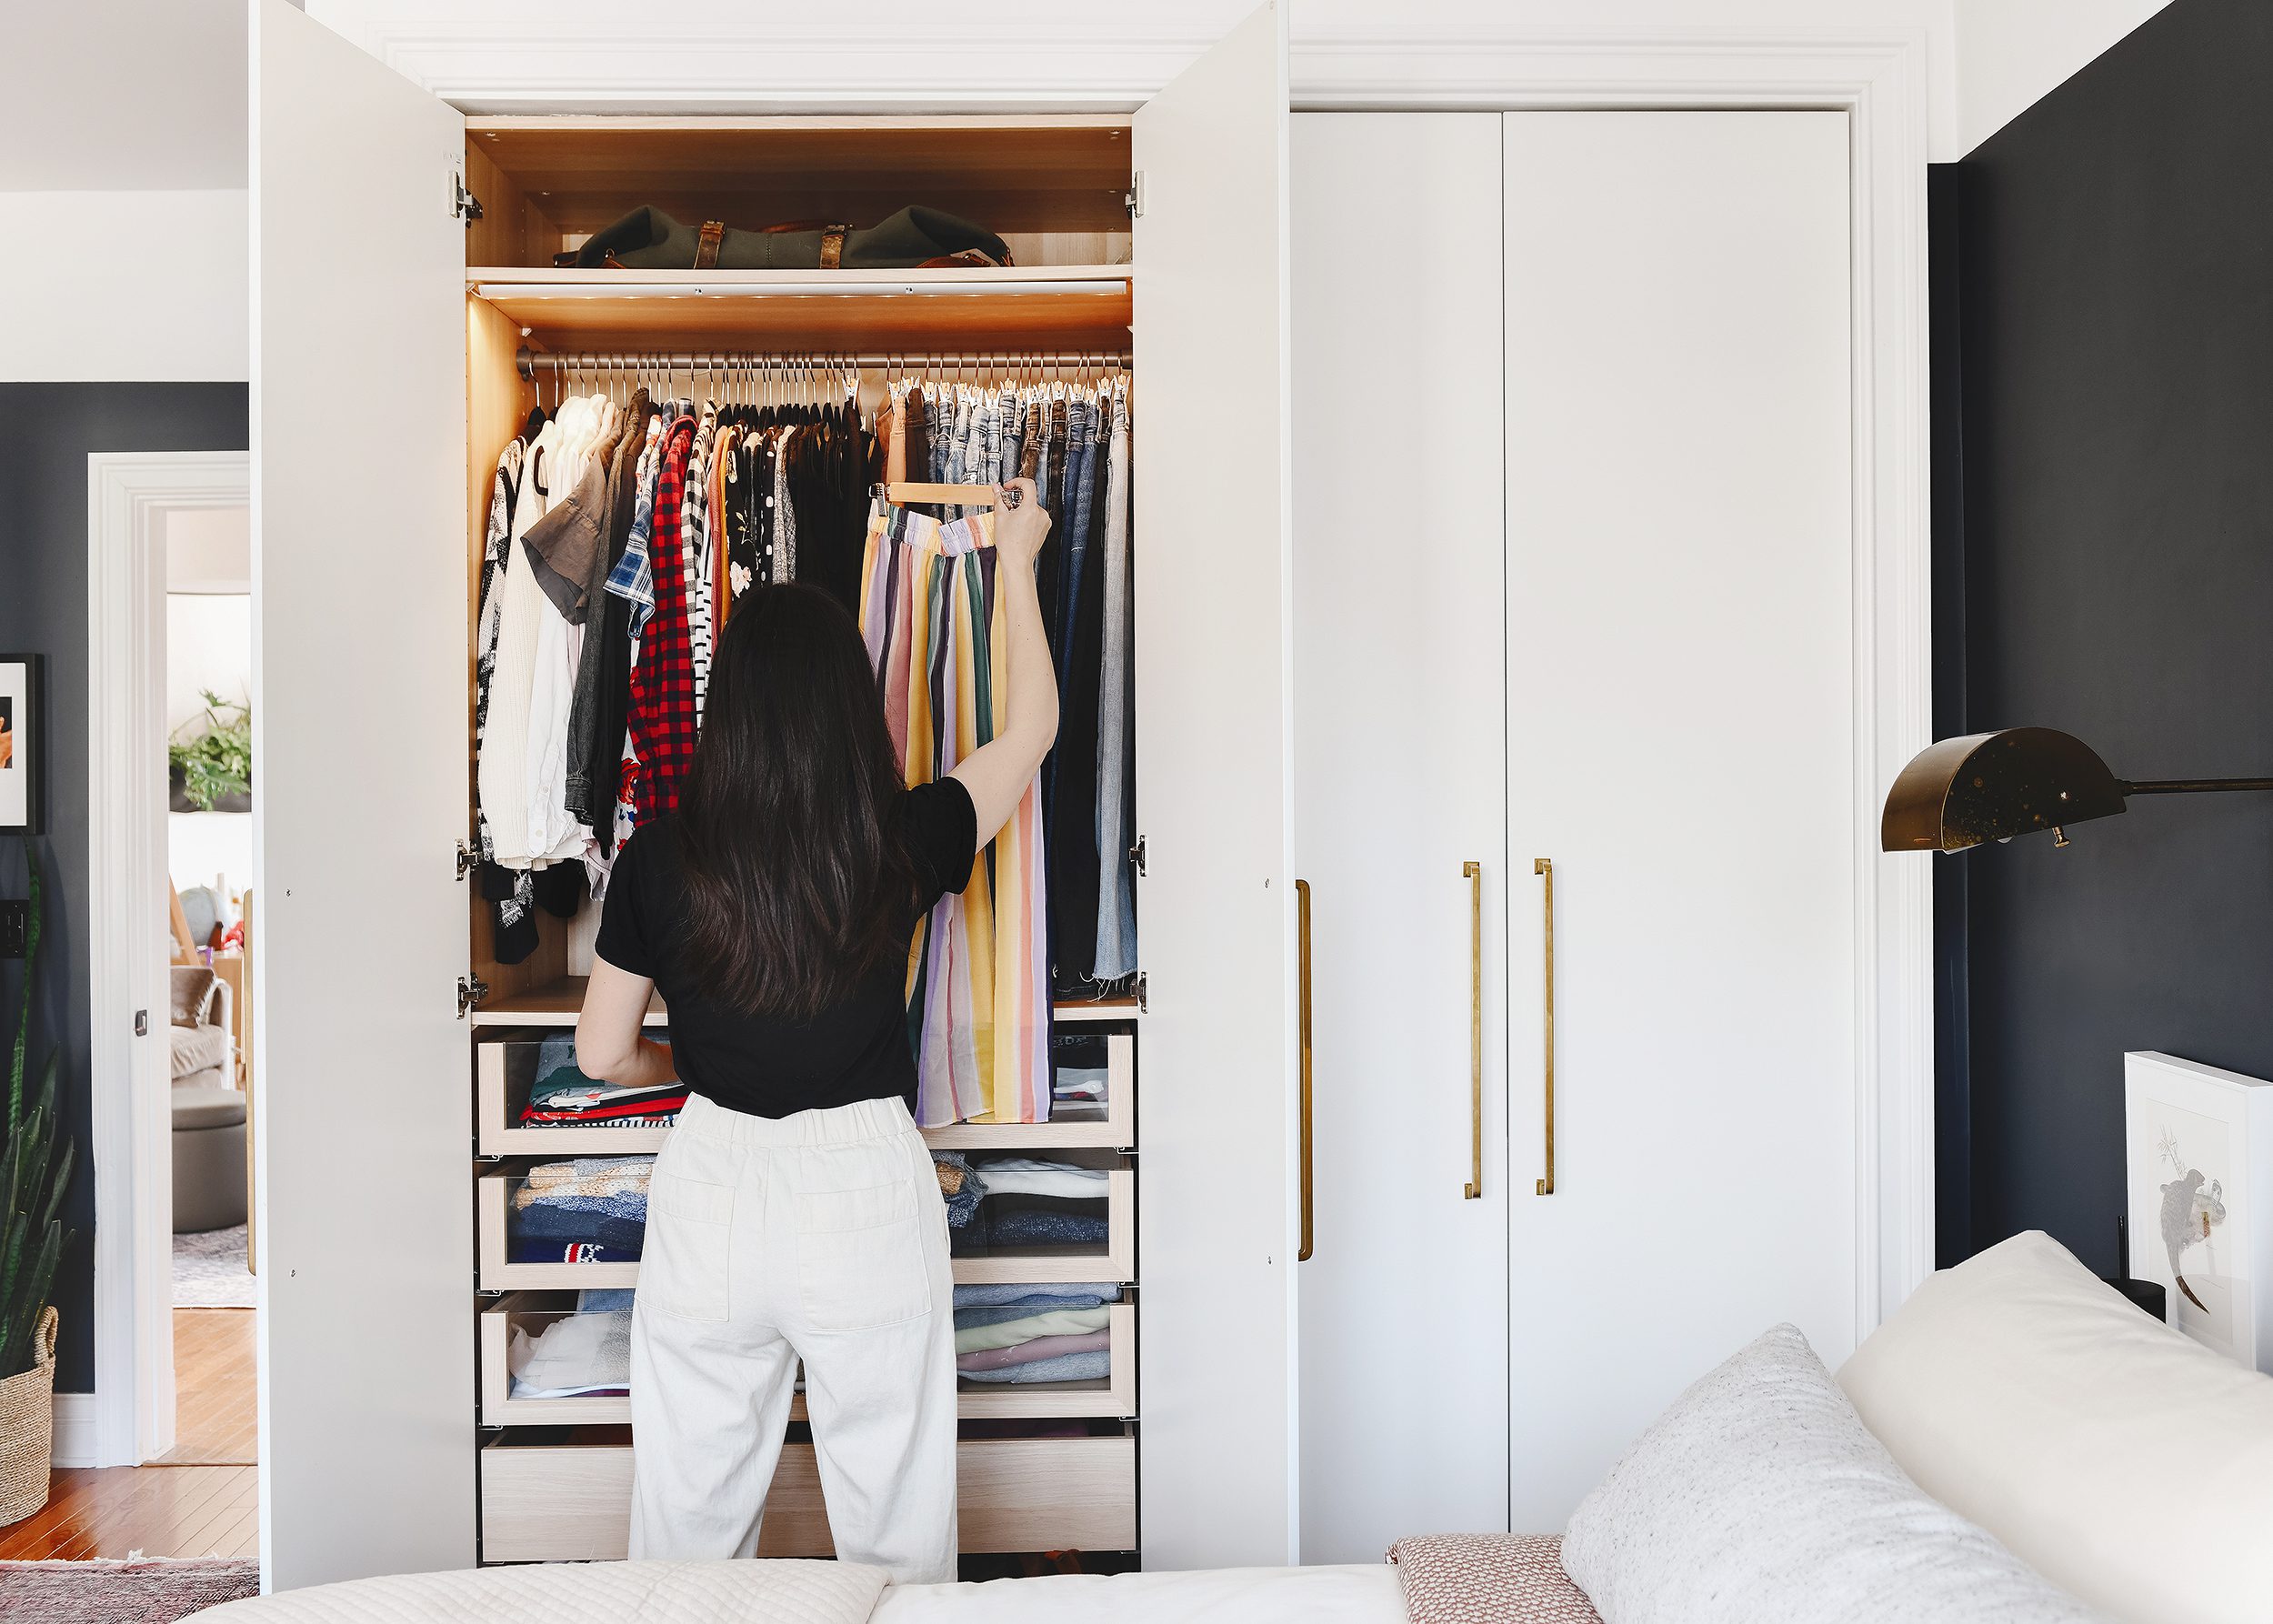
Once completed, this bedroom has seen very few changes over the years. The large mirror does an incredible job of bouncing light around the room. This room is cozy yet sophisticated and there’s no other space we’d rather rest our heads at night!
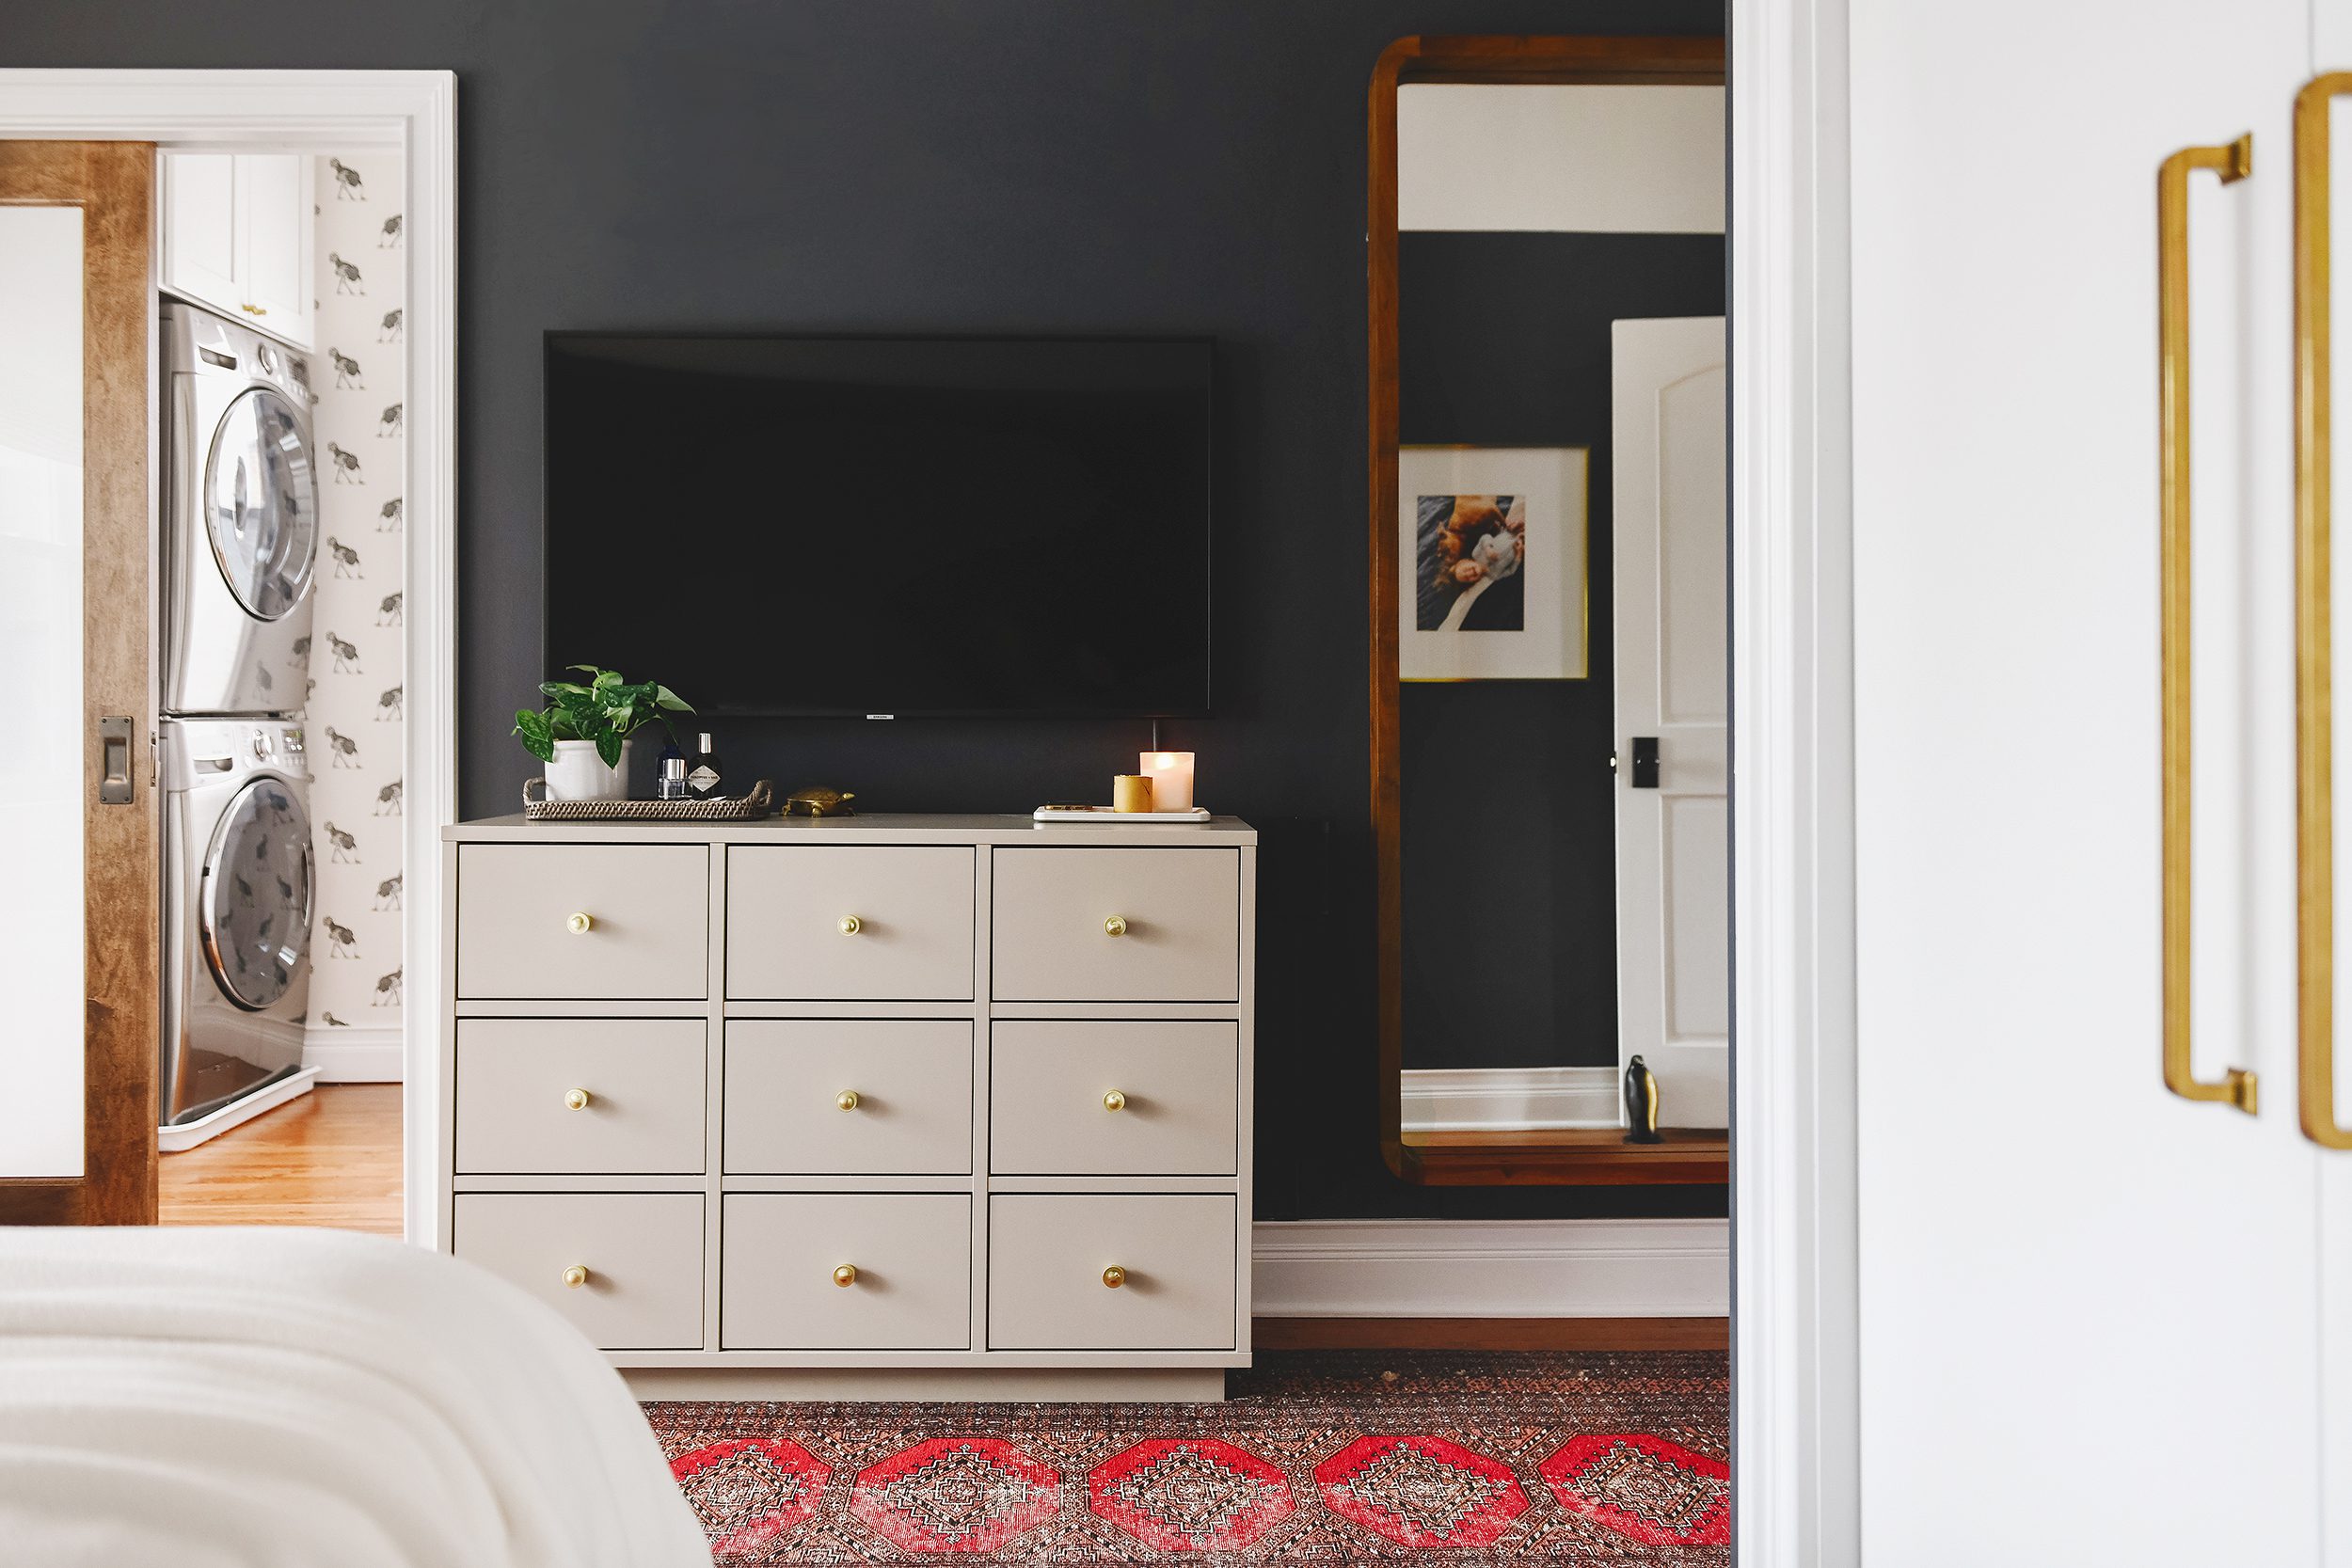
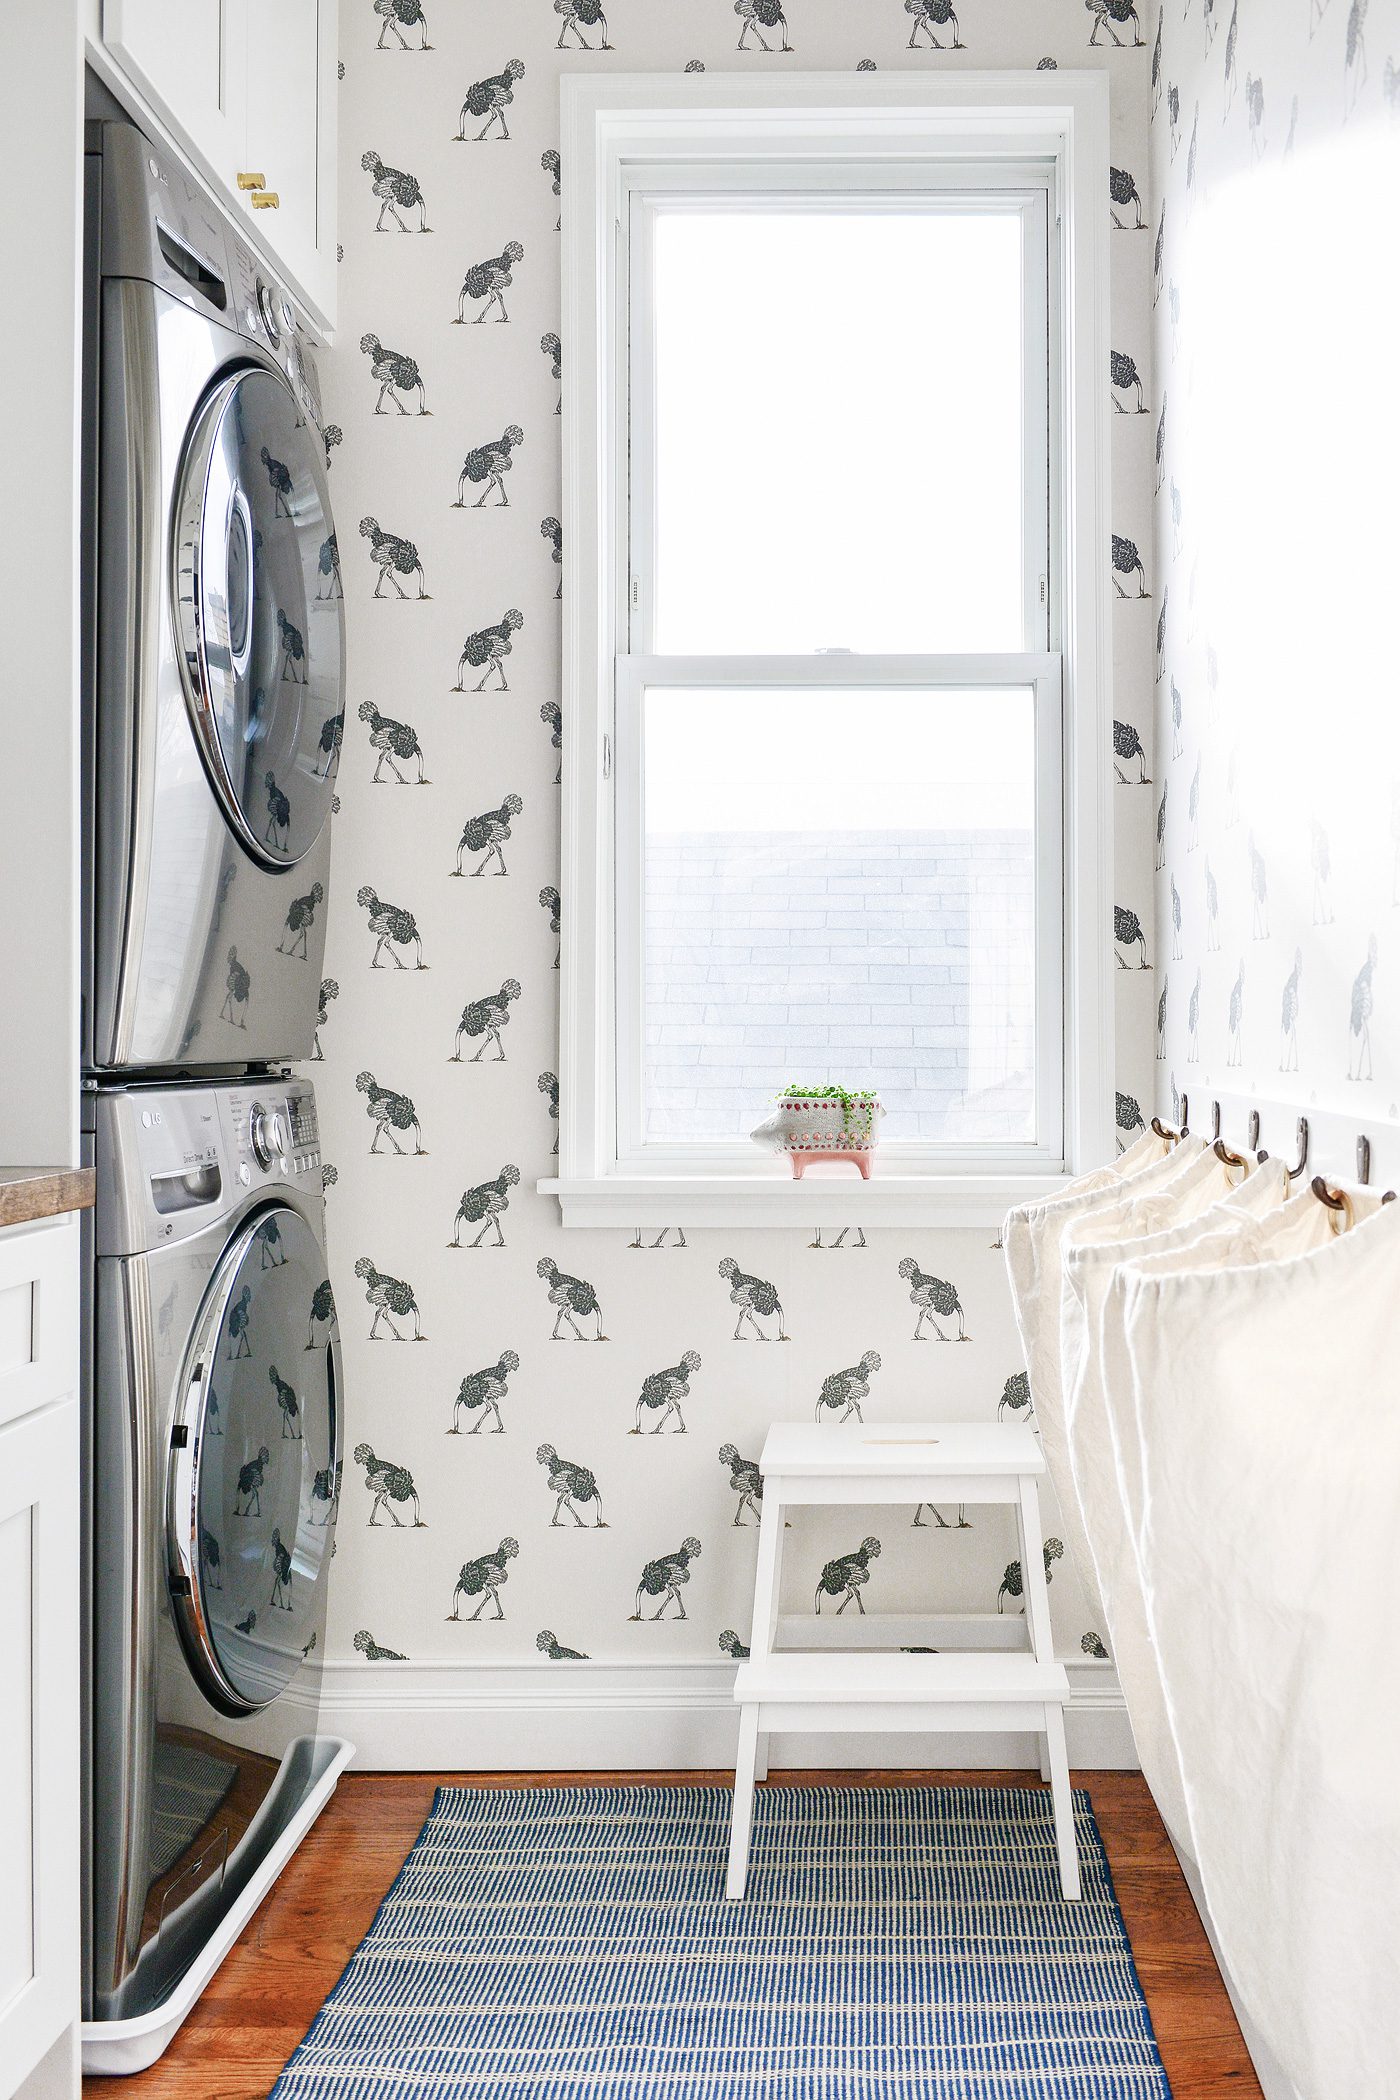
Laundry Room
We’ve mentioned many times before that Chicago homes are full of lots of odd little rooms that different folks use in different ways. Our current laundry room is no exception! Previous to our time here, it functioned as a tiny bedroom, right off the kitchen. In order to make space for a significantly larger bathroom just on the other side of the right wall in the photos below, we pushed the wall to take about three feet of space from the laundry room.

We’ve gotten lots of… ummm… feedback in the past regarding our decision to prioritize an en-suite laundry room over an en-suite bathroom. We always encourage folks to make design decisions for themselves and this decision really, really works for our family. We’ve never regretted the decision to keep the bathroom off of the common area since it’s the only bathroom on the second floor.
Evolving Together
This home has grown and evolved with us over the past decade as have all of you. Whether you’ve been following along since day 1 or you’ve found us somewhere along our current home’s transformation, we appreciate you! Your thoughtful feedback pushes us to think outside the box and makes us better designers.
You’ve supported our small business by commissioning pet portraits, as our long term tenants and as guests at our Tree House, and we wouldn’t be here, doing what we do, without that support. With great gratitude, thank you!
You can see the evolution of our home renovation on the room makeovers page, shop any room in our house, and see a complete before and after slideshow. See Part I of this post right here!


Incredible! So enjoyed this miniseries. Happy 10 years! Love following along. :)
The laundry room makes so much sense to me! I also spent 17 years in a 1 bathroom home with laundry in a central location so that could be why. I am a new follower so this condensed recap was useful! Your home is lovely!
I’ve only been following for about a year and a half so some of these are brand new rooms for me! I love the colors you have chosen in your home, particularly the pink and peach tones. Do you have a list of paint colors somewhere? Thanks!
Hi Kristy! We’re glad you’re here! All of the paint colors in our home are outlined by room under the shop our house page. Hope this helps!
A little behind on commenting, but such an incredible transformation! And you didn’t even show the guest room or backyard (not to mention apartment)! You all are so inspiring.