

Today we’re walking through how we built a DIY plinth base to elevate the look of our IKEA BRYGGJA dresser. This easy project only took us a couple of hours and was completed with scrap wood we had on hand!
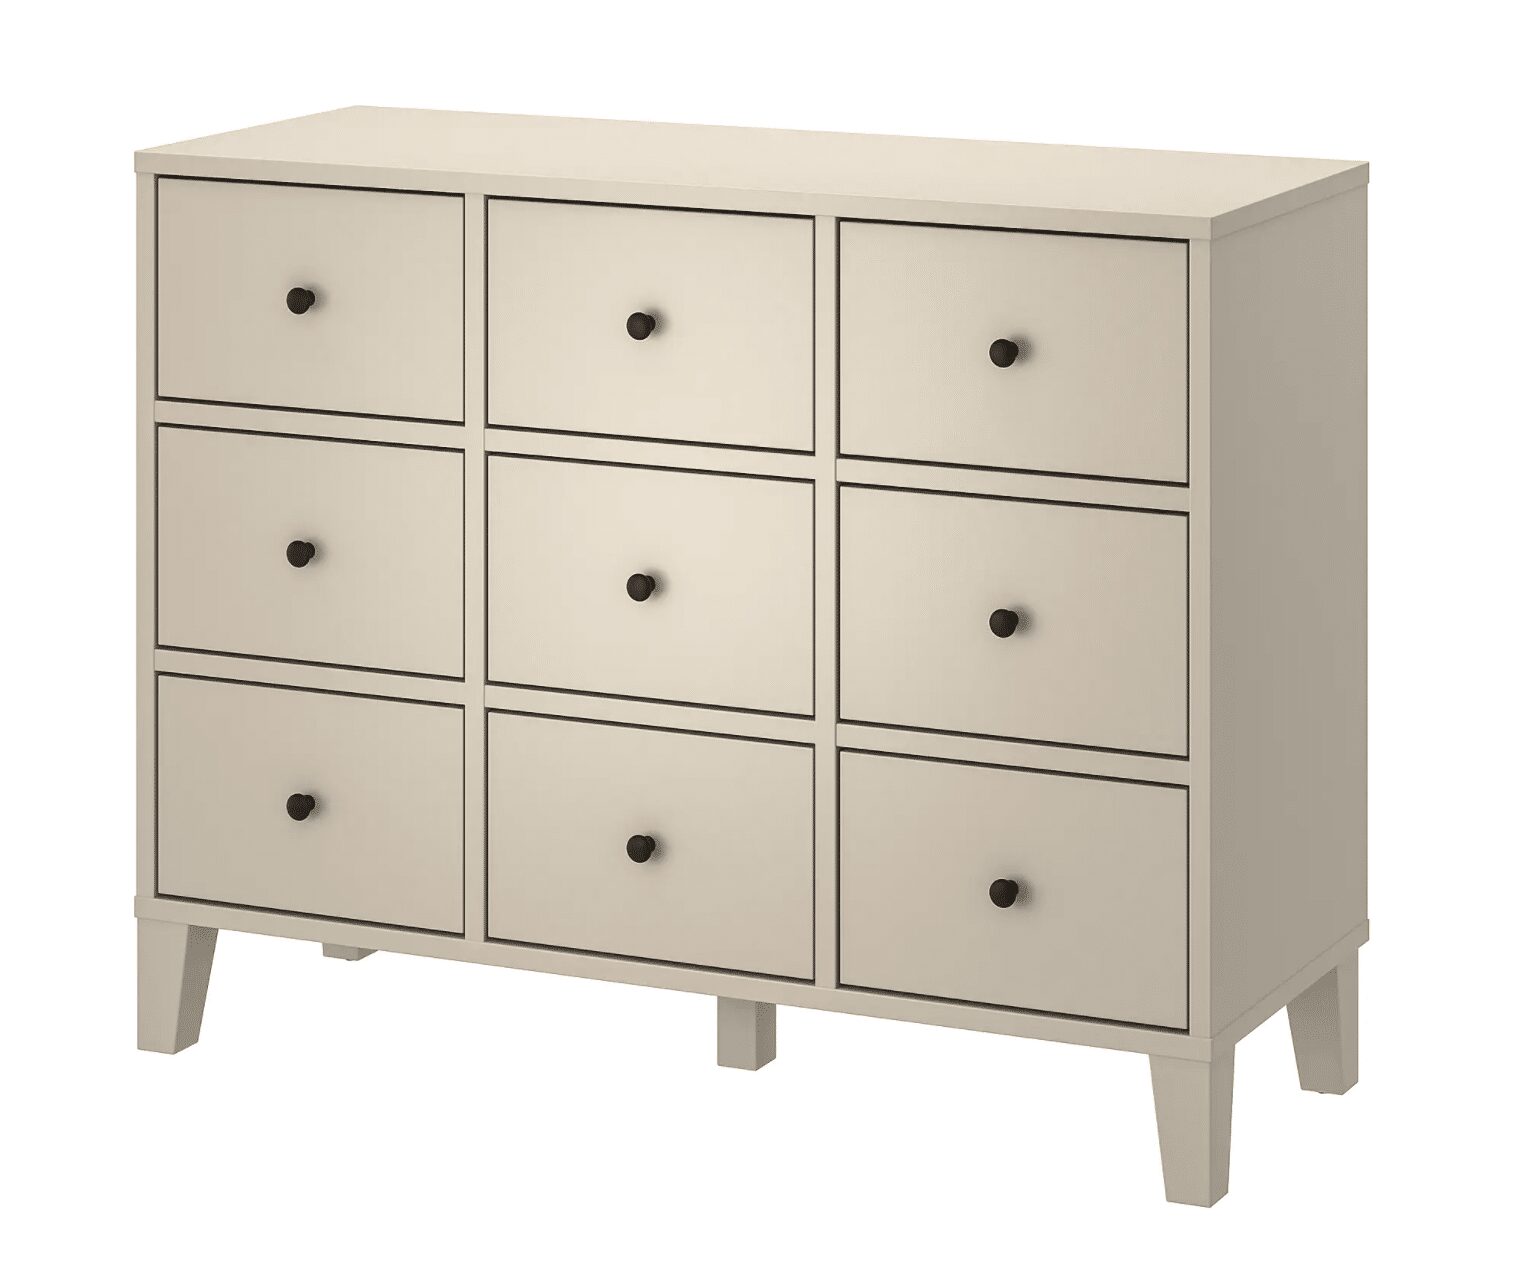
Whether you’ve been around for awhile or you’re relatively new, you probably know that we have a hard time leaving well enough alone. IKEA’s BRYGGJA 9-drawer chest is a handsome piece of furniture with a neutral beige tone and clean lines that allow it to blend in with almost decor style. It’s an IKEA goodie! The BRYGGJA has simple legs give the piece a sturdy look and feel, but Kim had a slightly different style in mind. She’d gone down a rabbit hole of pricey plinth base dressers and couldn’t find one with the dimensions we were after, so we decided to create our own plinth base version using the BRYGGJA!
In This Post
Scale + Dimensions
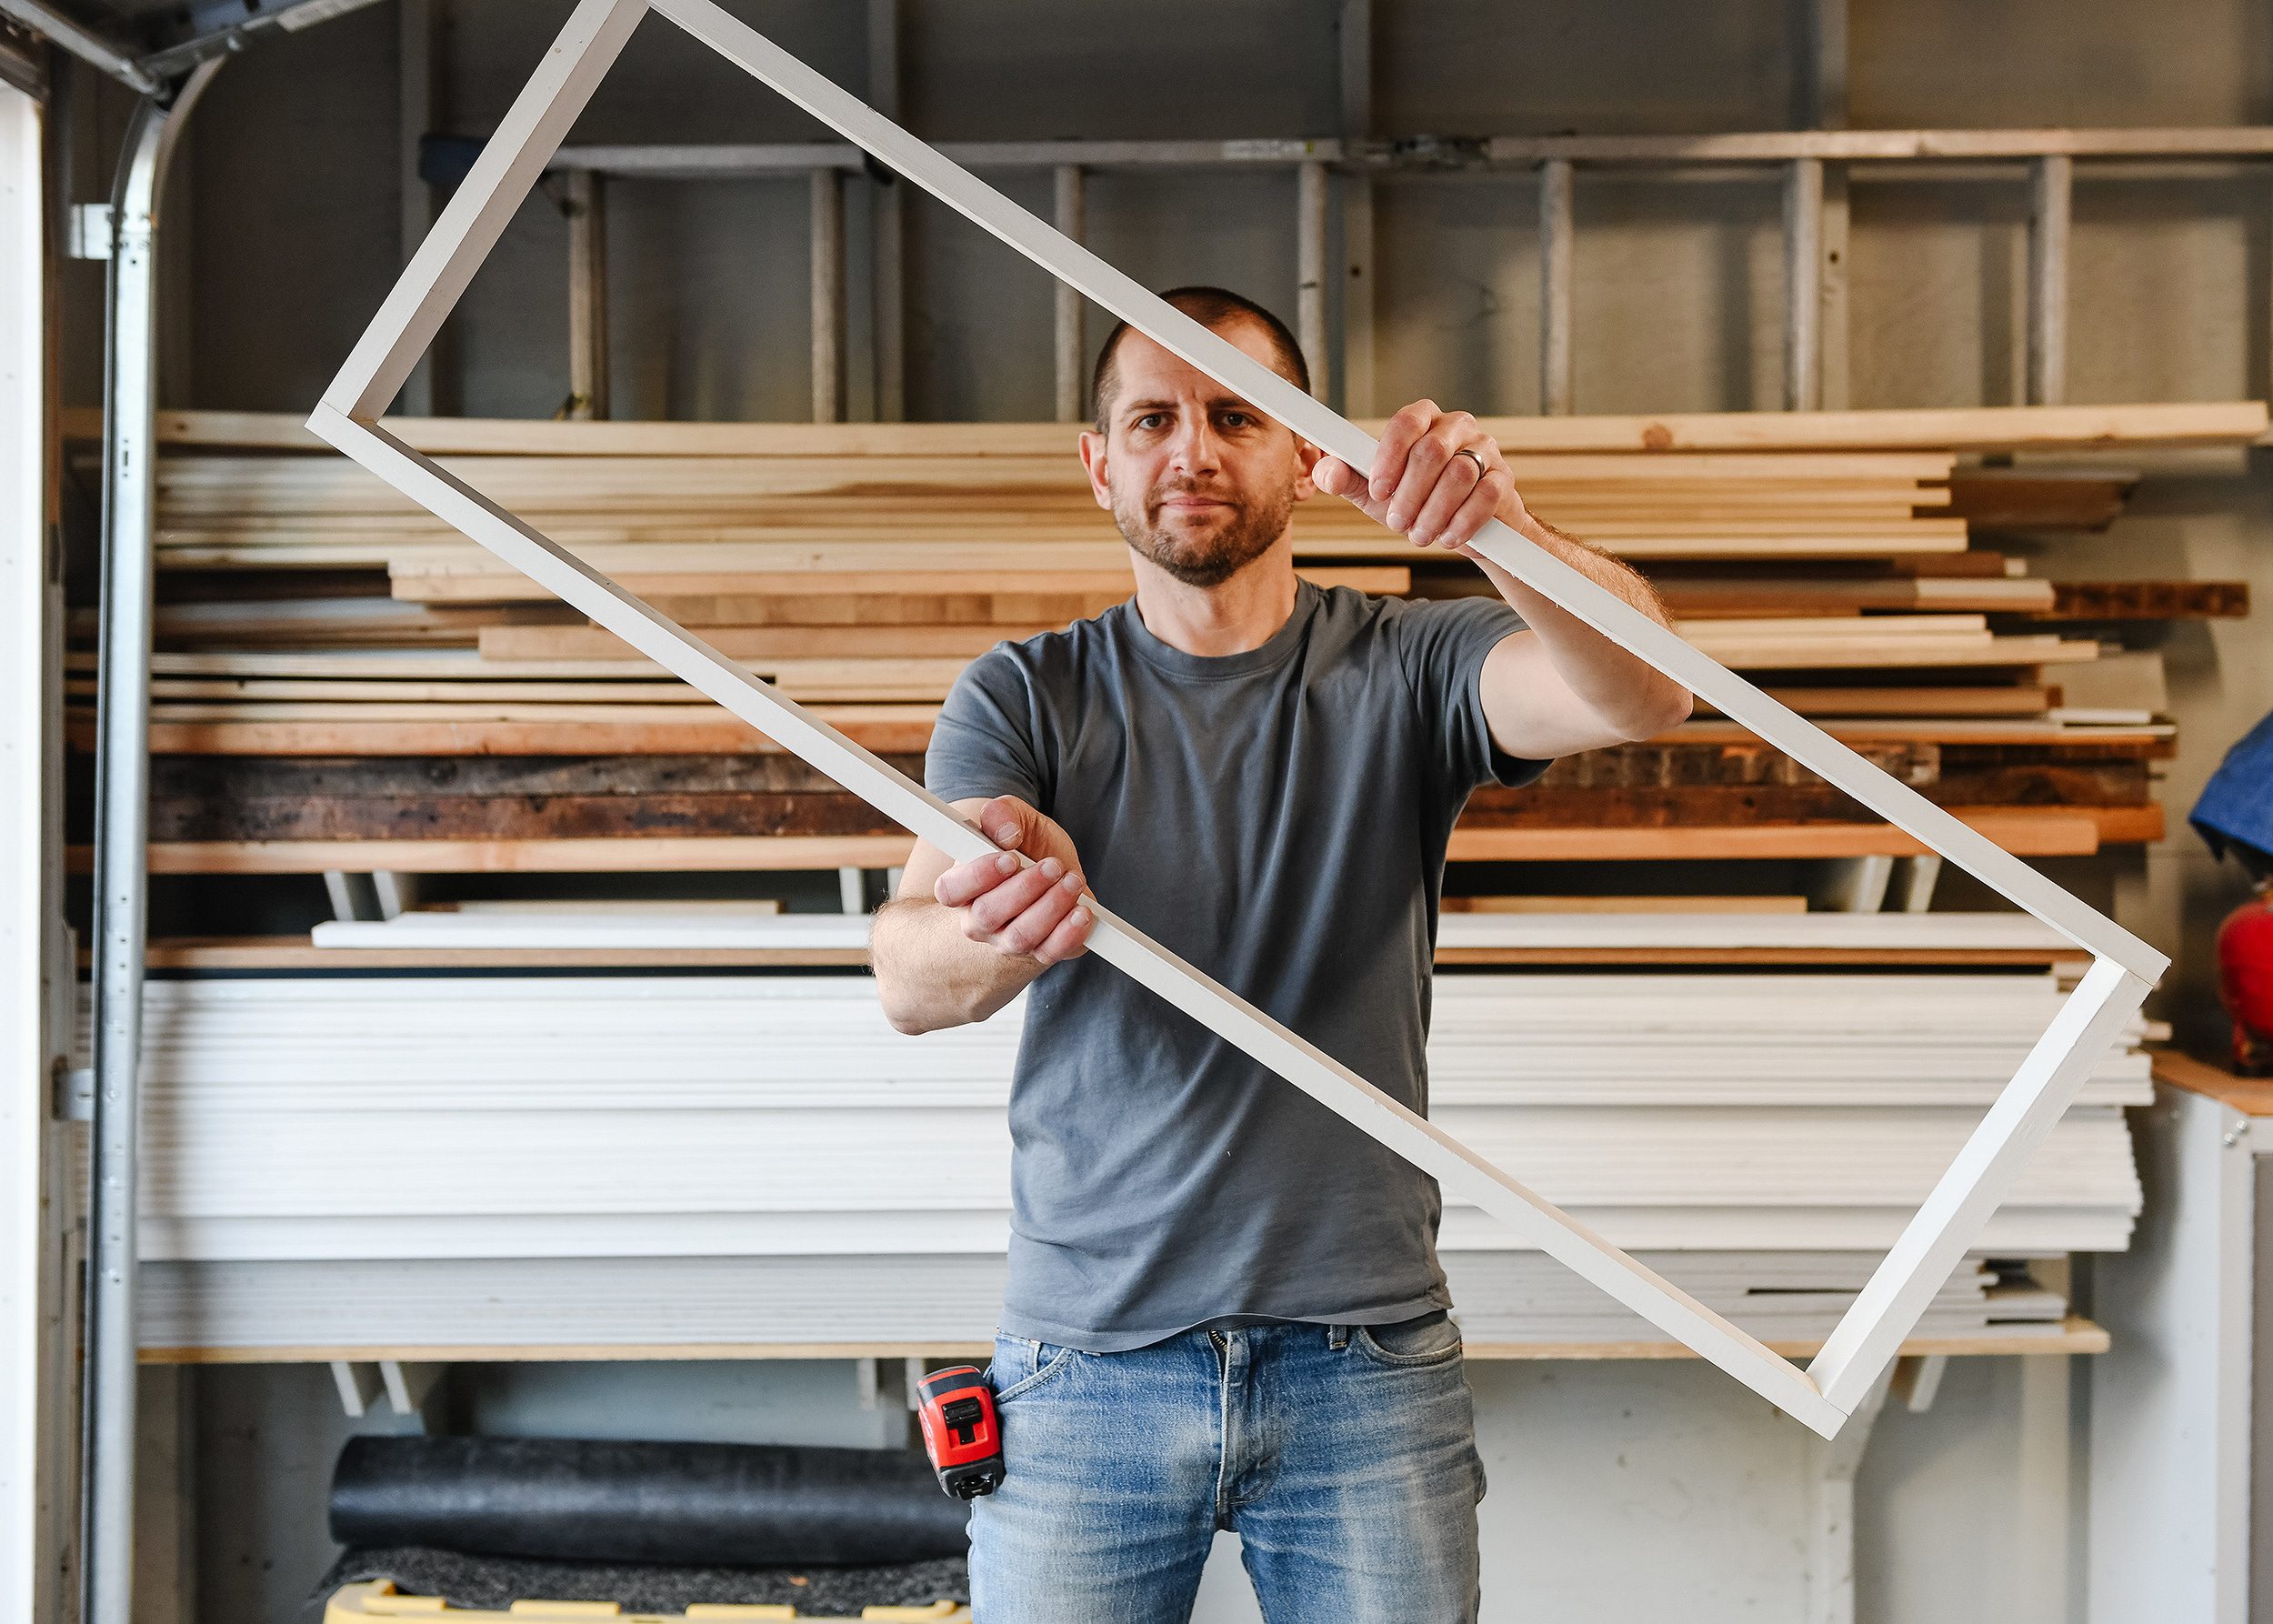
After looking through Kim’s inspirational images (like this or this), we decided that a base that was inset by roughly 1 1/2″ on all sides would give us the look we were after. The BRYGGJA measures 46 1/2″ w x 16 7/8″, so the exterior dimensions of our base ended up at 43 1/2″ x 13 3/4″. We began by building a simple box out of 1″ x 4″ boards that we had in the wood pile. To get the height just right, I ripped them down to 2 1/2″. This could have been achieved by buying 1″ x 3″ boards, but we used what we had on hand and saved a trip to the hardware store.
Construction
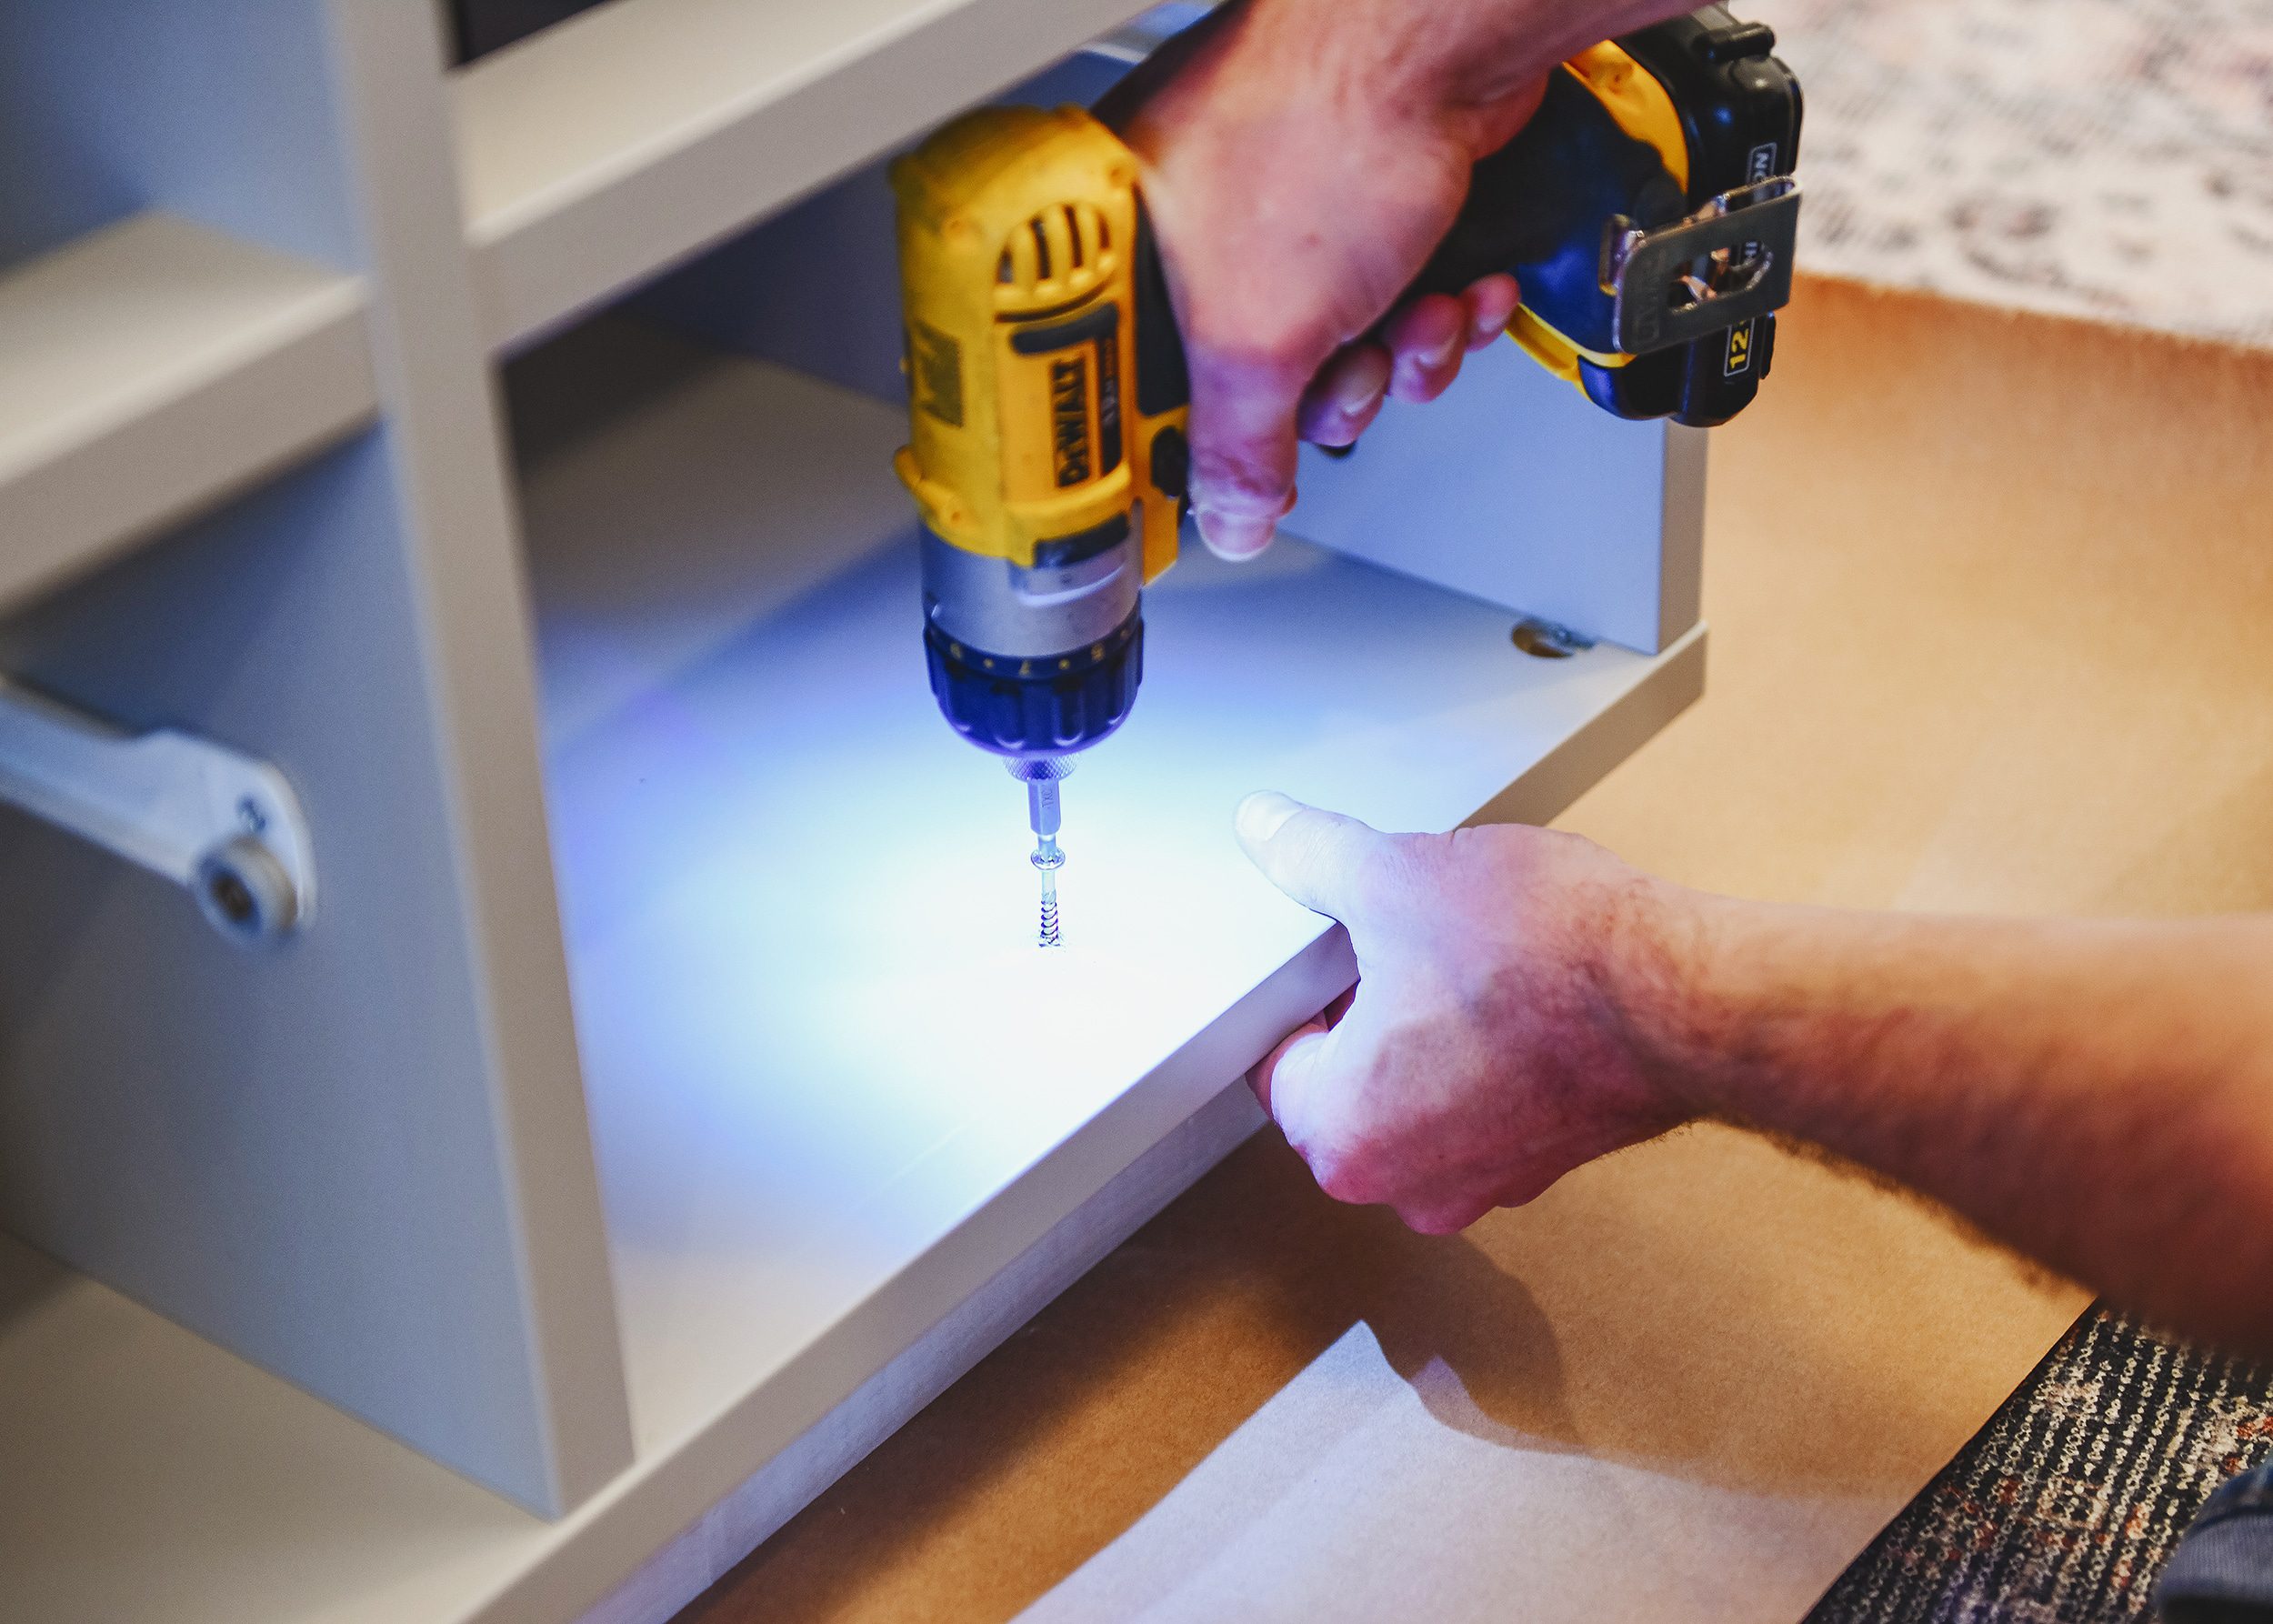
In order to keep hole-filling to a minimum, we glued all of the joints and fastened the boards together with our cordless nailer. If a nailer isn’t part of your tool arsenal, this could easily be constructed with screws and a bit of wood filler or spackle to smooth out the holes.
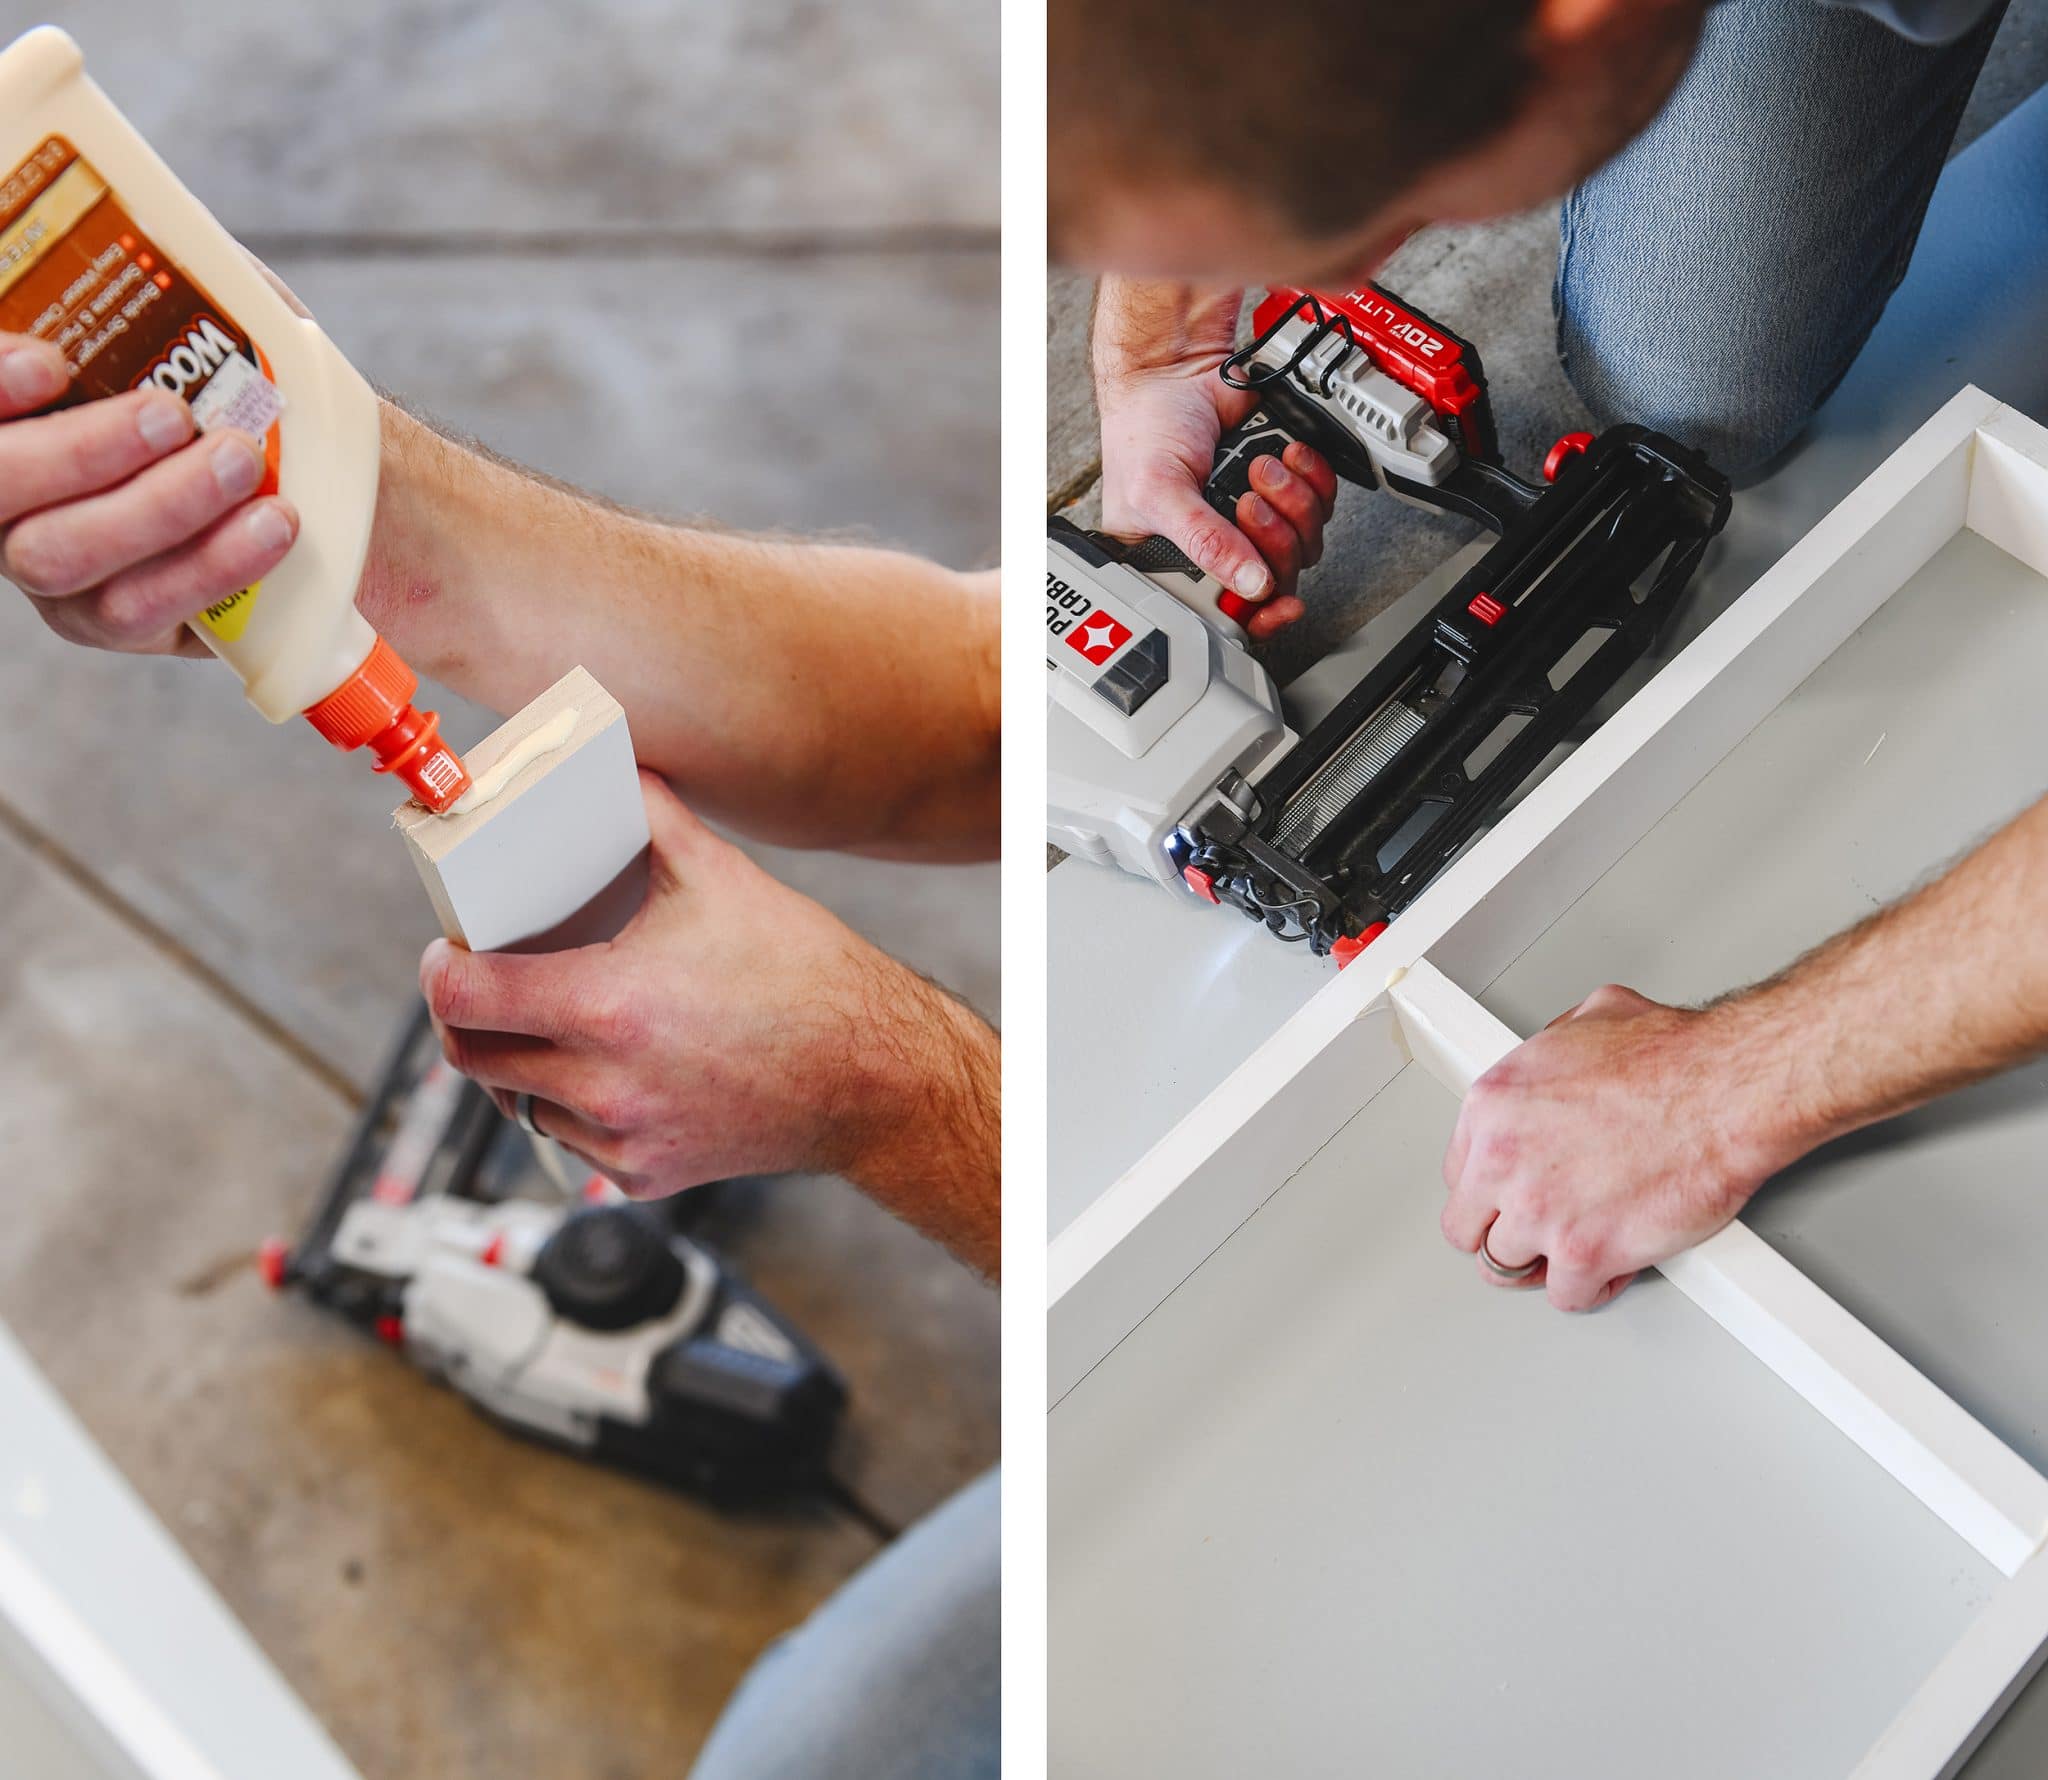
For added stability, we added two central supports to our box frame to help it support the weight of the dresser. These were strategically placed to divide the base into thirds and mirror the construction of the dresser itself.

Finishing + Installation
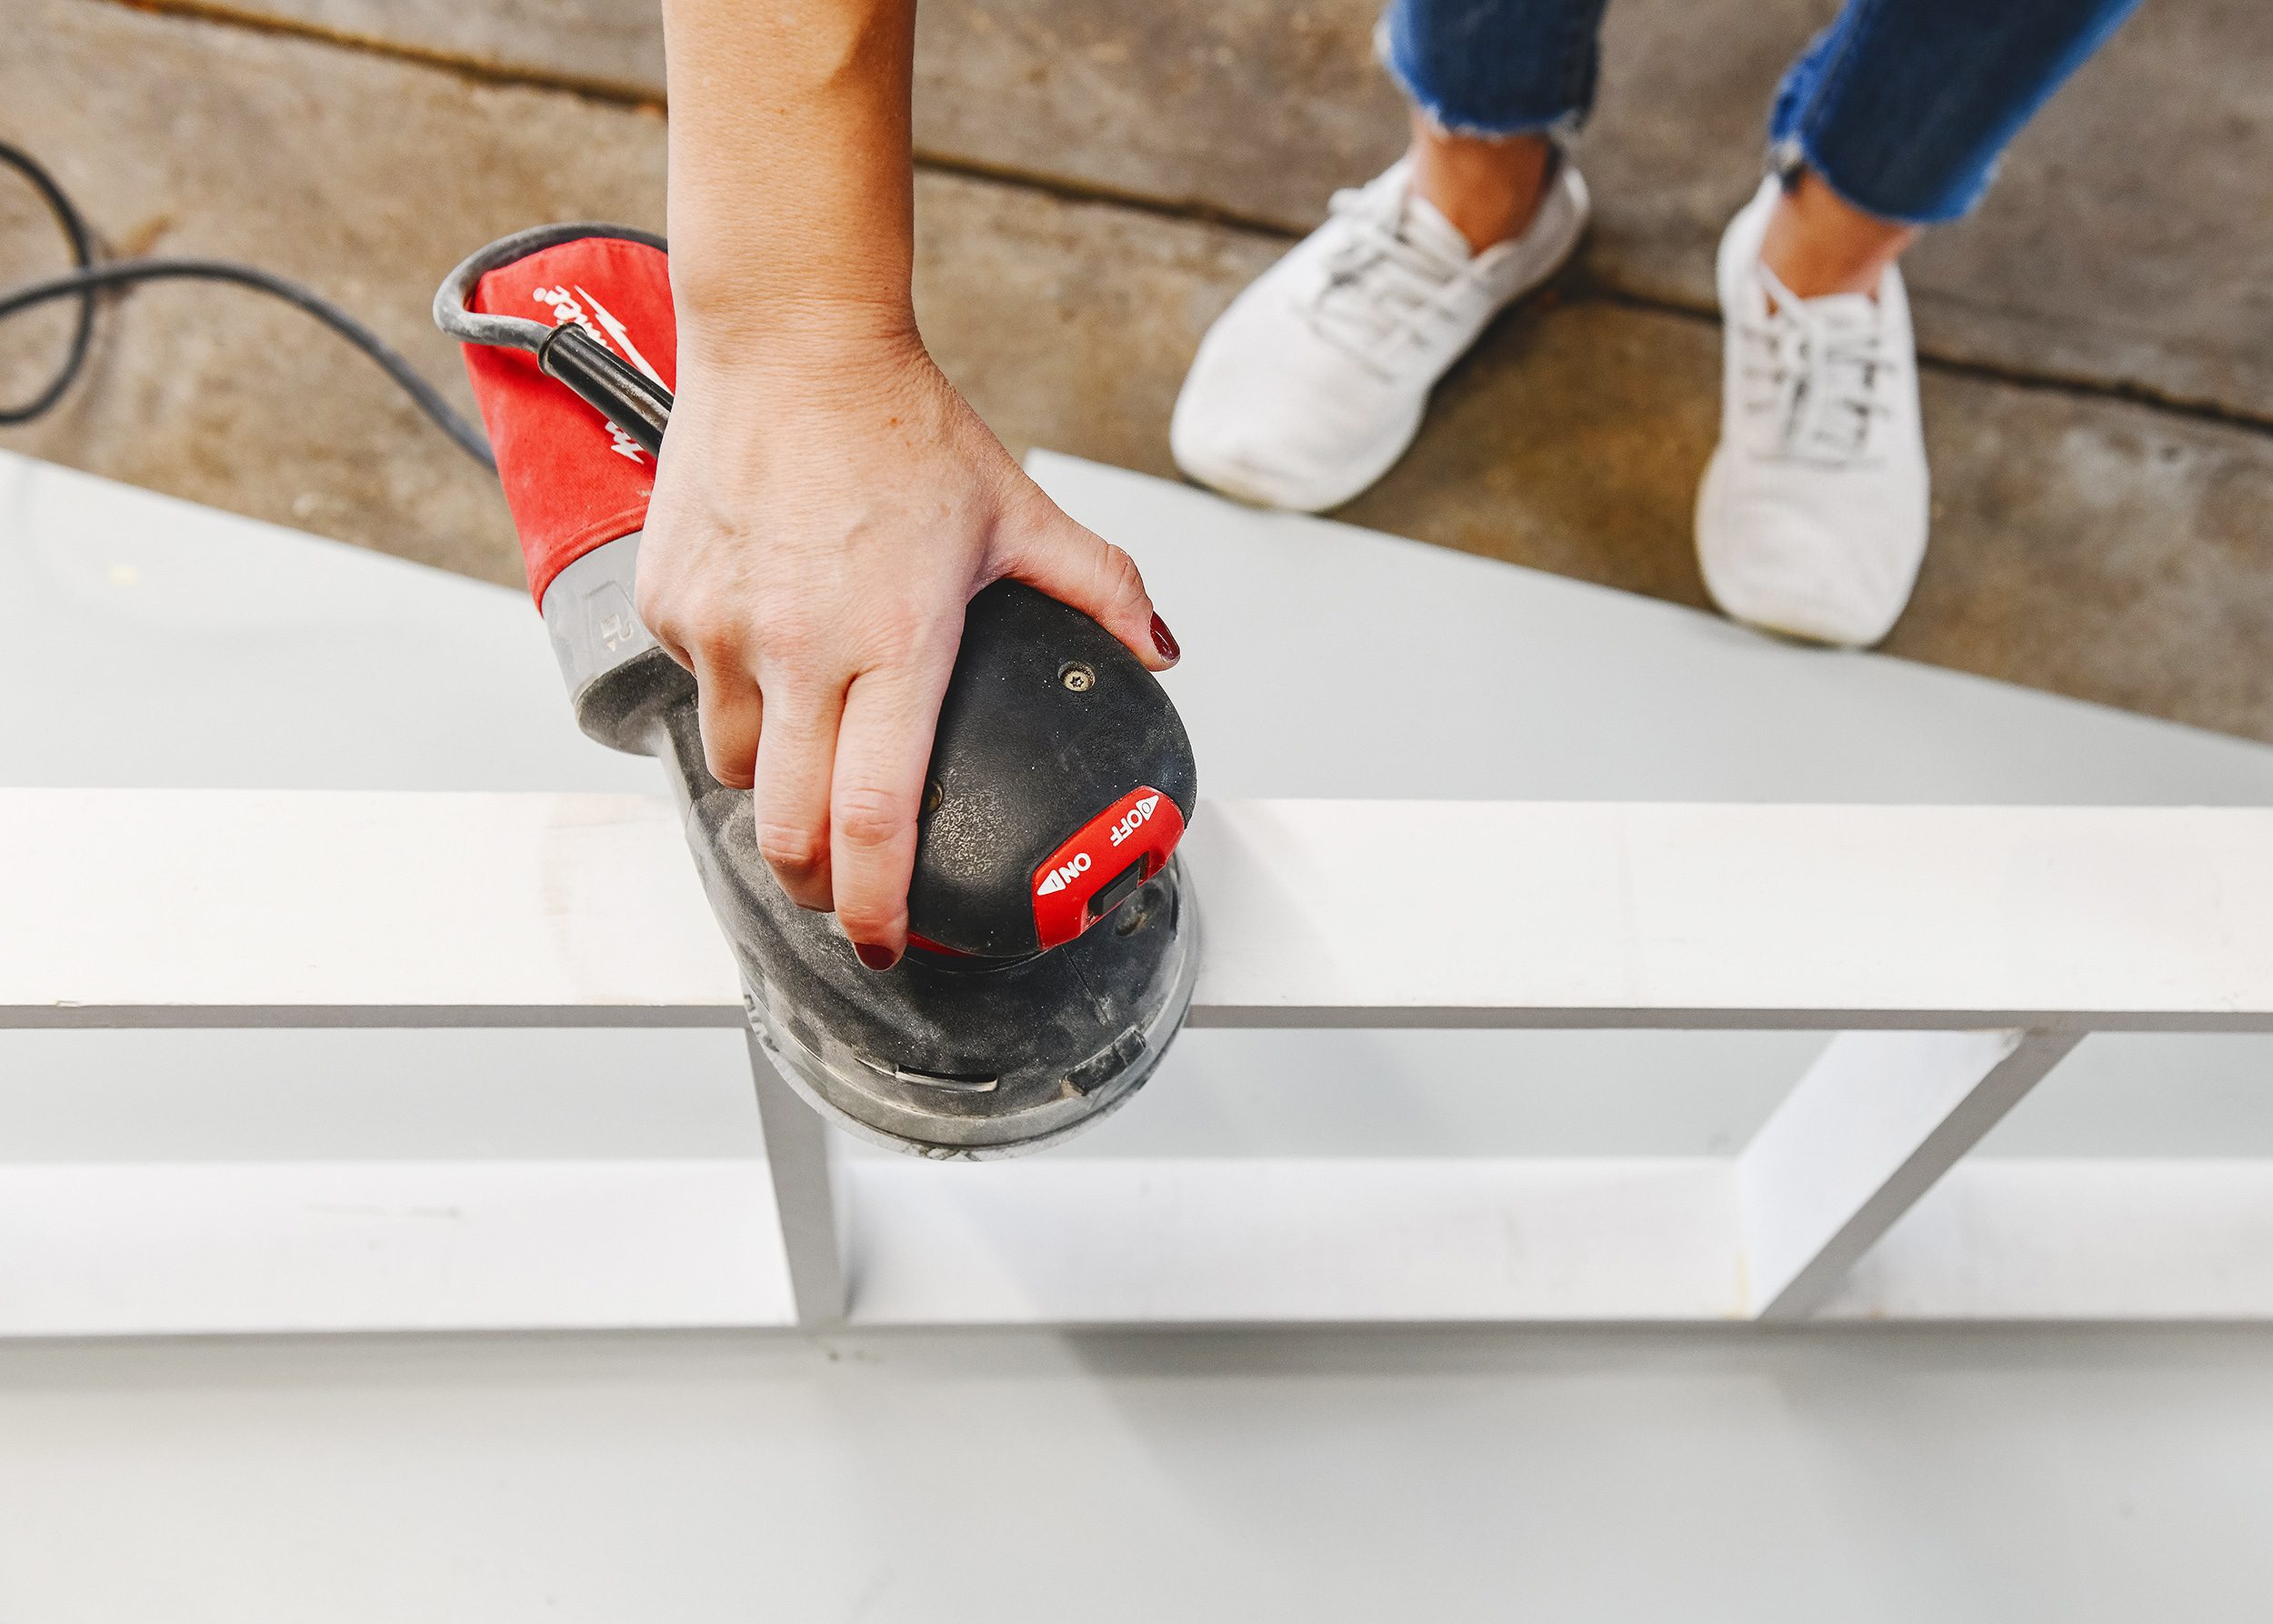
Once the plinth base frame was complete, we filled all of the nail holes with spackle and gave it a light sand with the random orbital sander.
Then it was time to attach the dresser to the base! We placed the dresser directly on top of the base, ensured that it was evenly spaced on all sides, then screwed through the bottom of the dresser to attach them together.
Paint Matching
In order to match the base color to the dresser as closely as possible, Kim took one of the legs with her to our local Sherwin Williams store to have it scanned and color-matched. The code below was perfect, so if you decide to take this project on yourself, simply bring this photo to your local paint store and they should be able to duplicate the color for you!
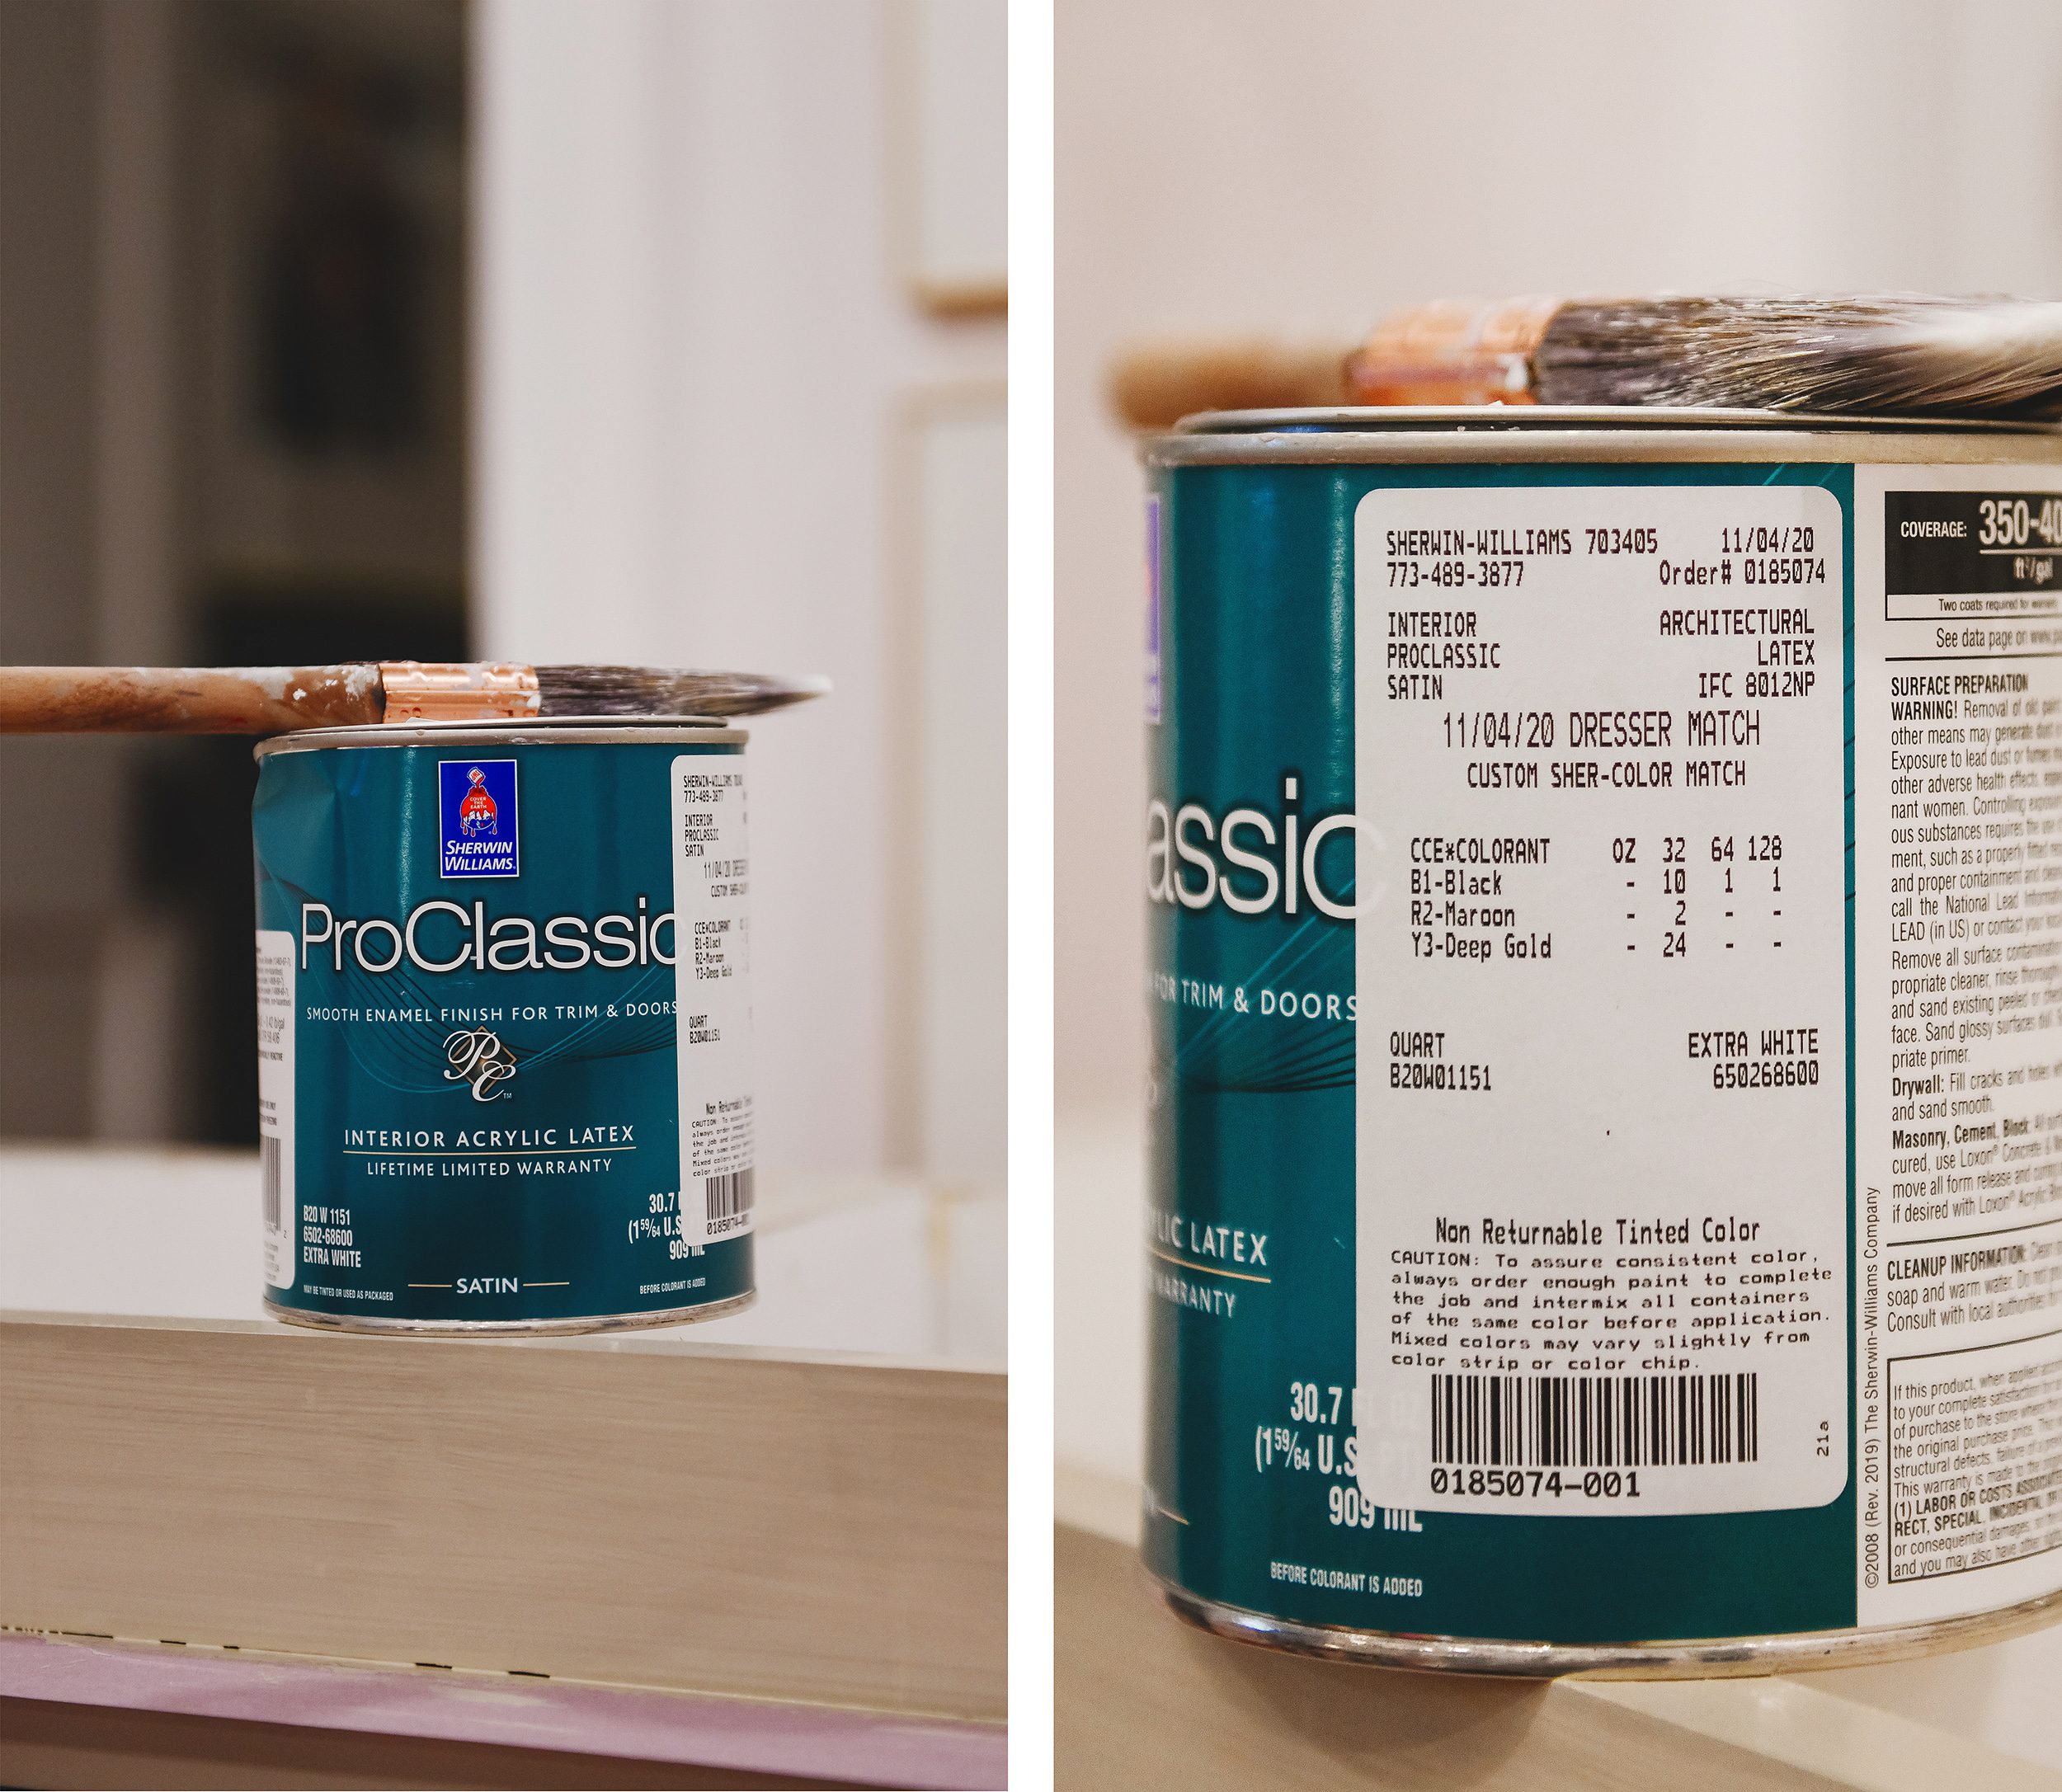
Once we confirmed that the color was perfect, we flipped the dresser over, taped off the bottom and hit it with a couple of quick coats. We gave the paint time to cure overnight and moved it into place in the morning.
Final Touches + Custom Hardware
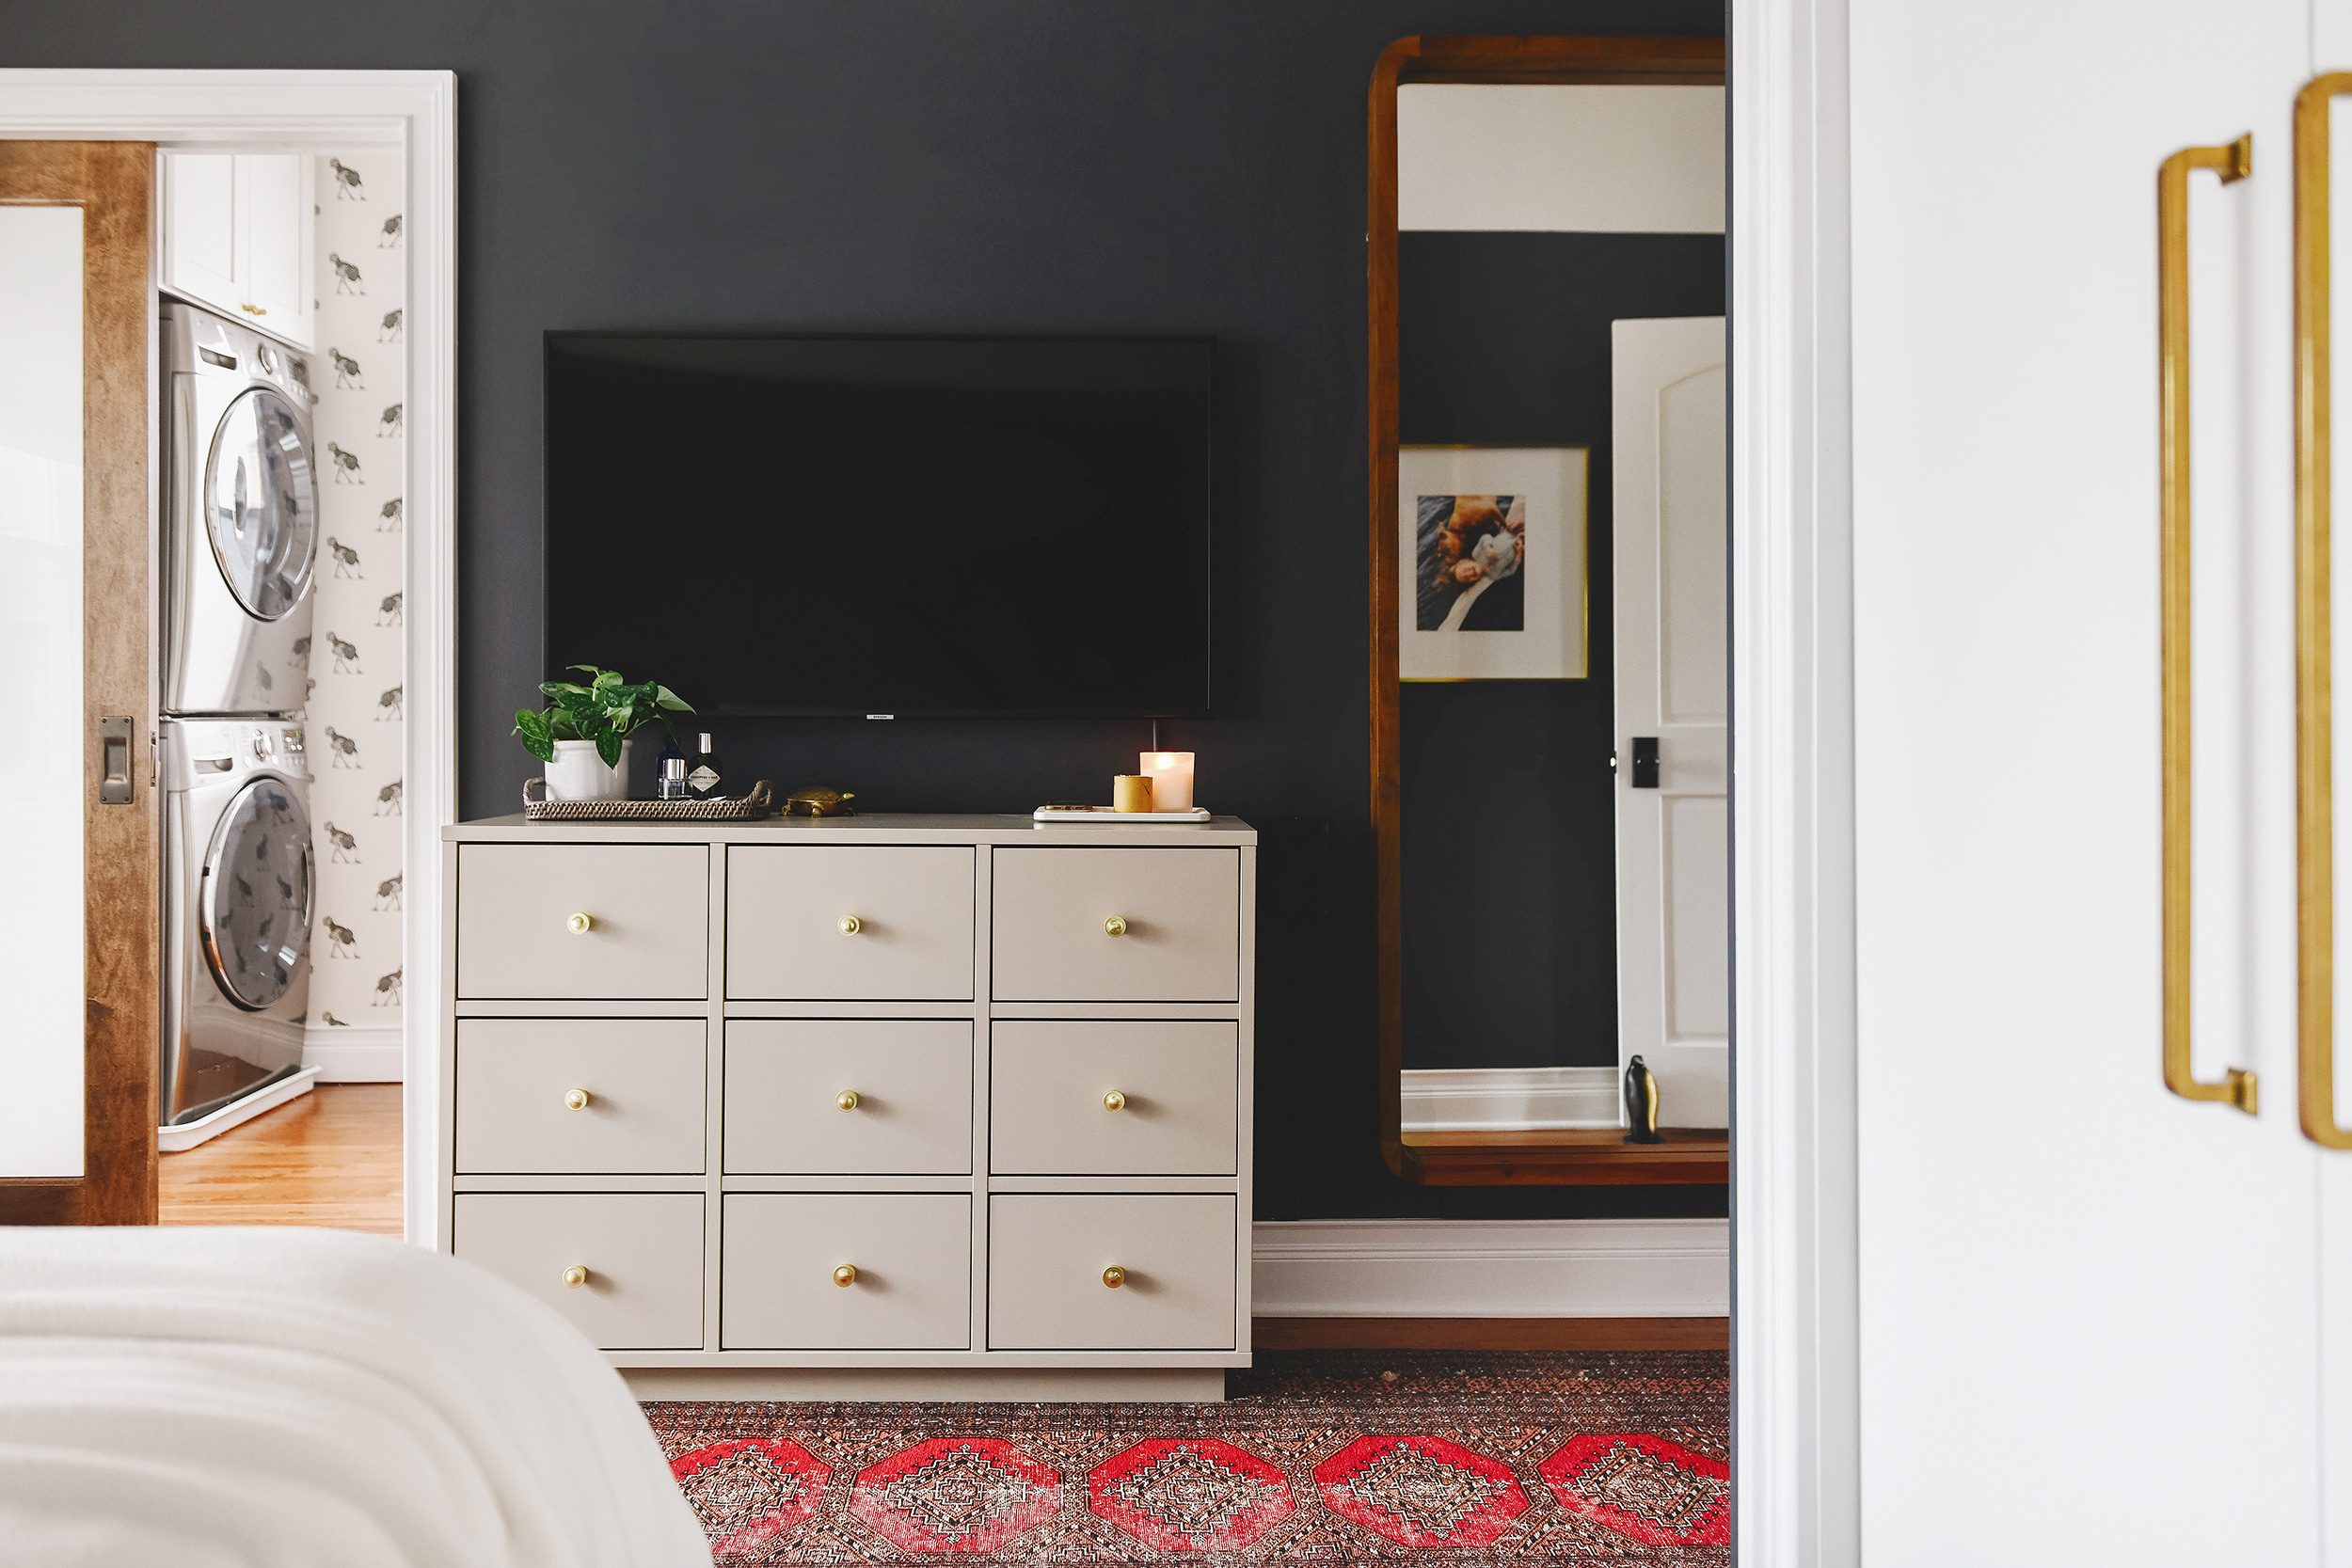
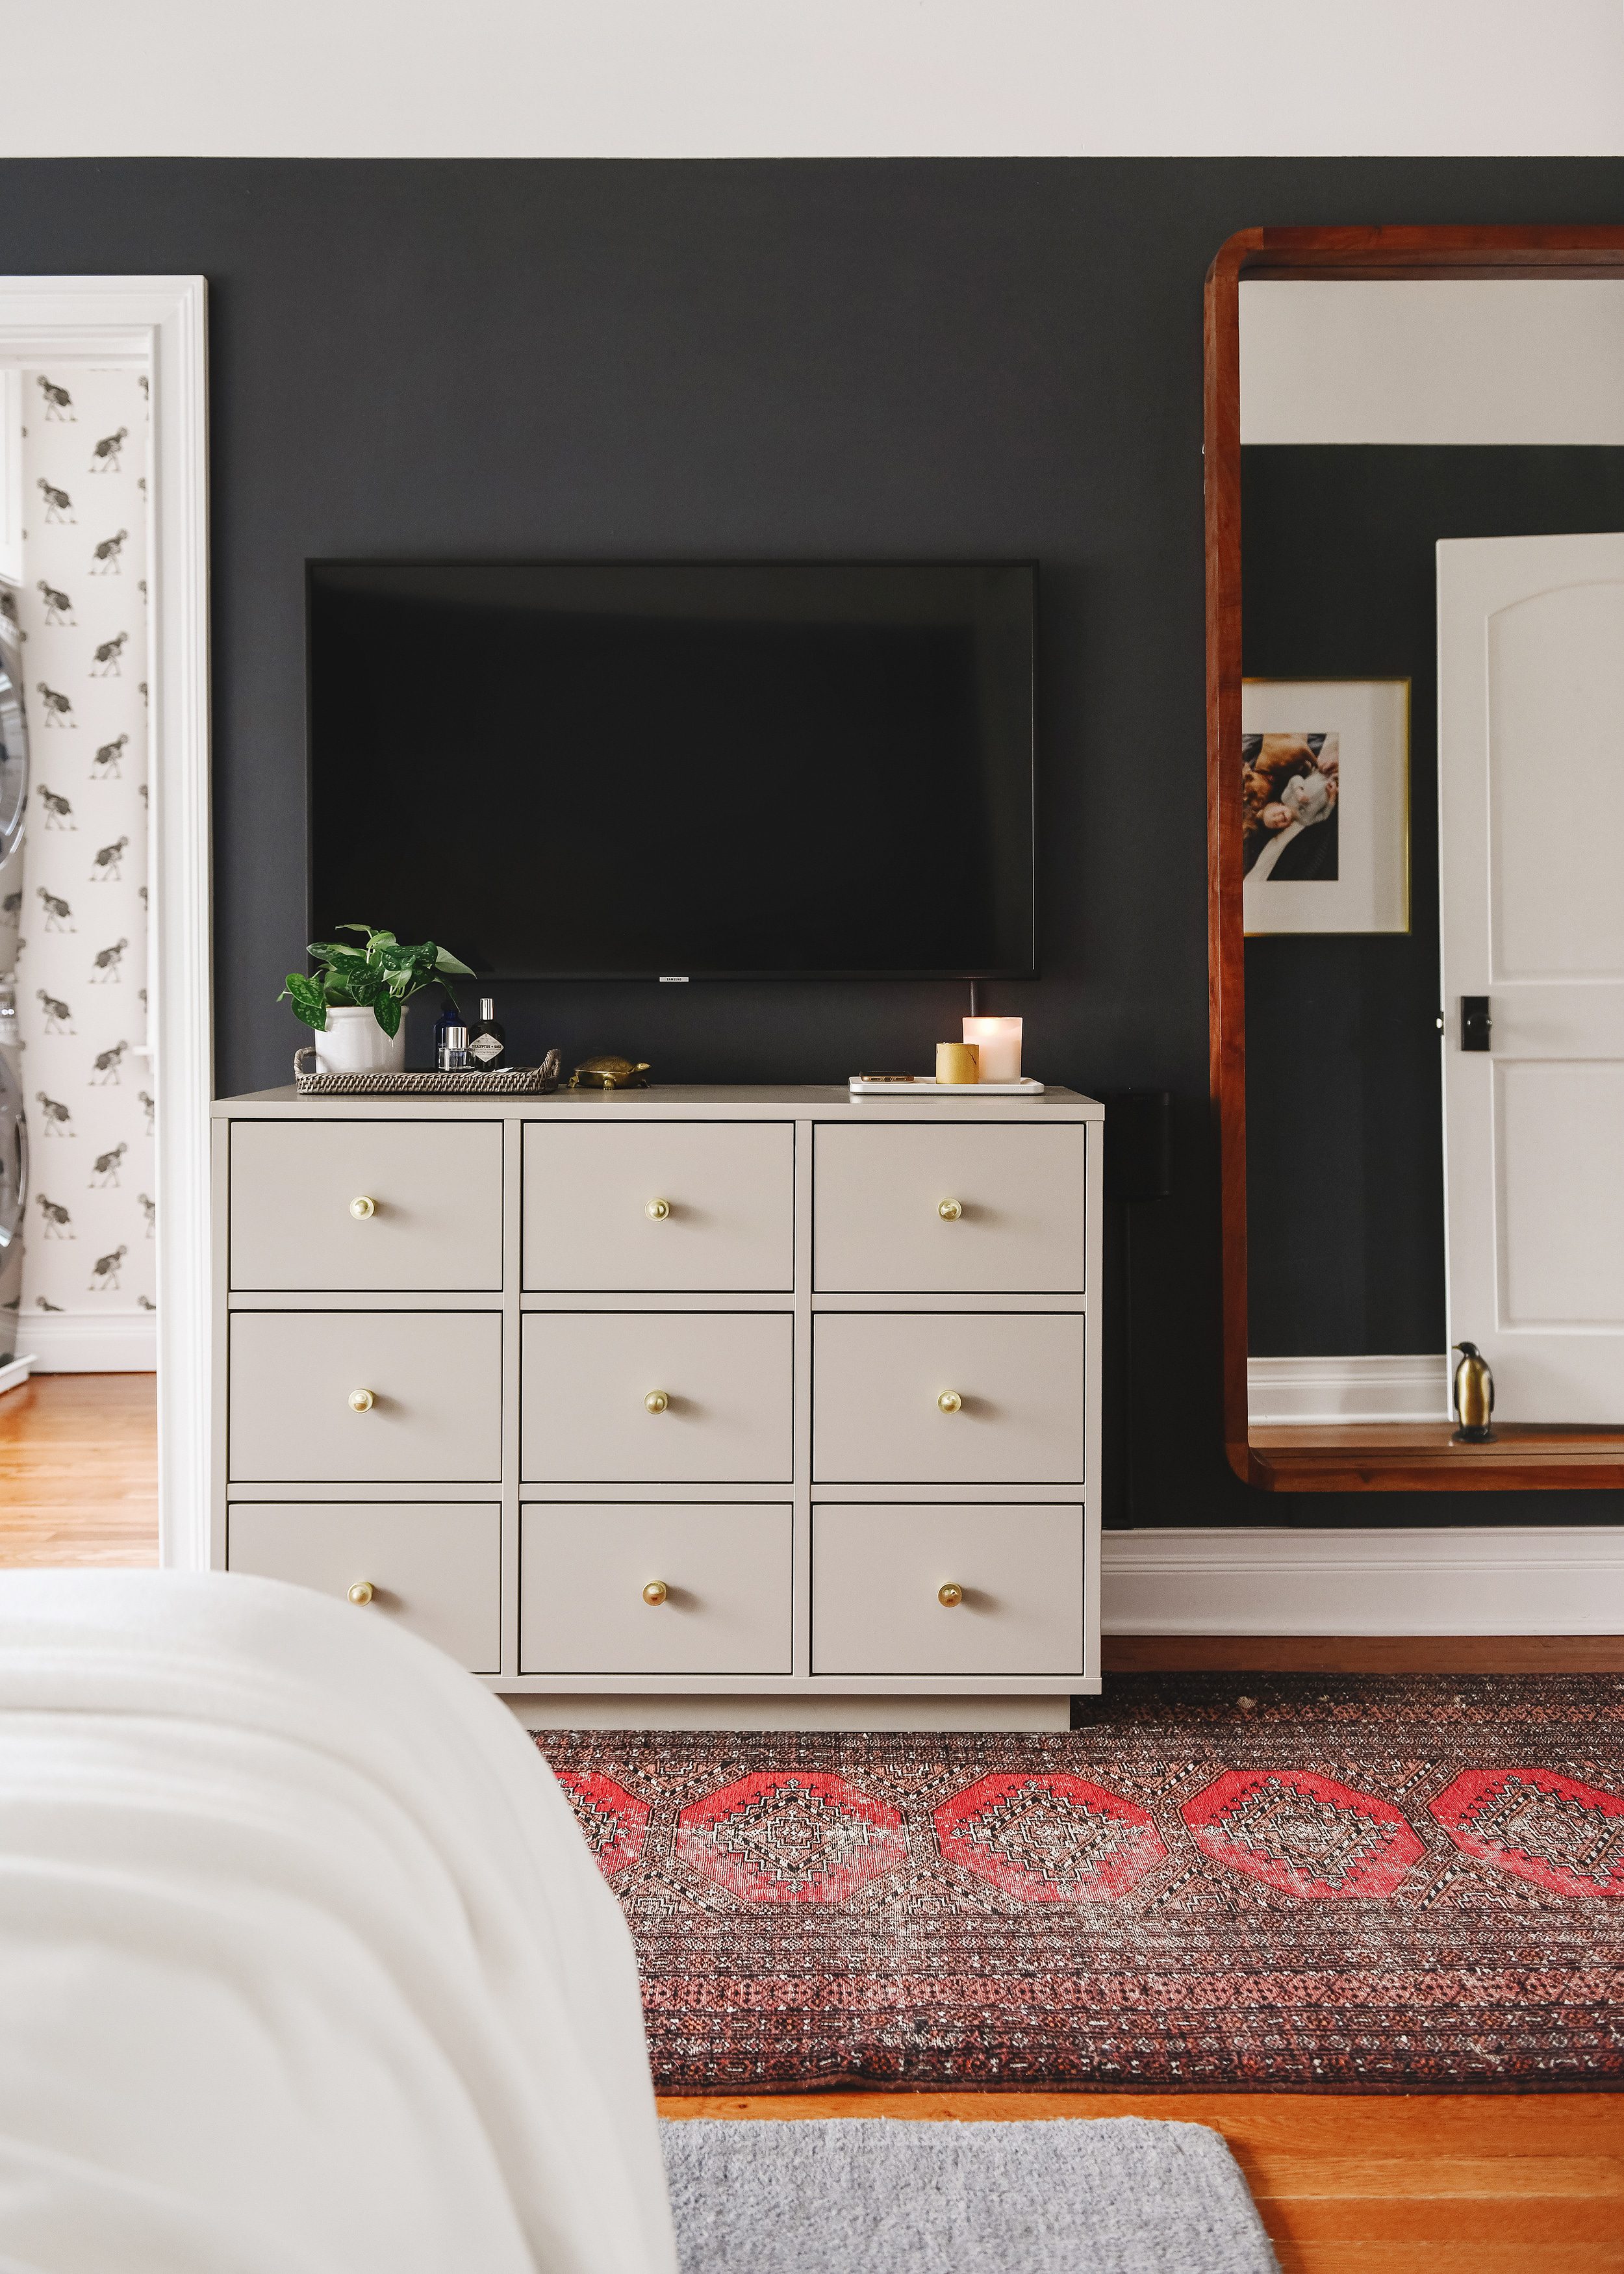
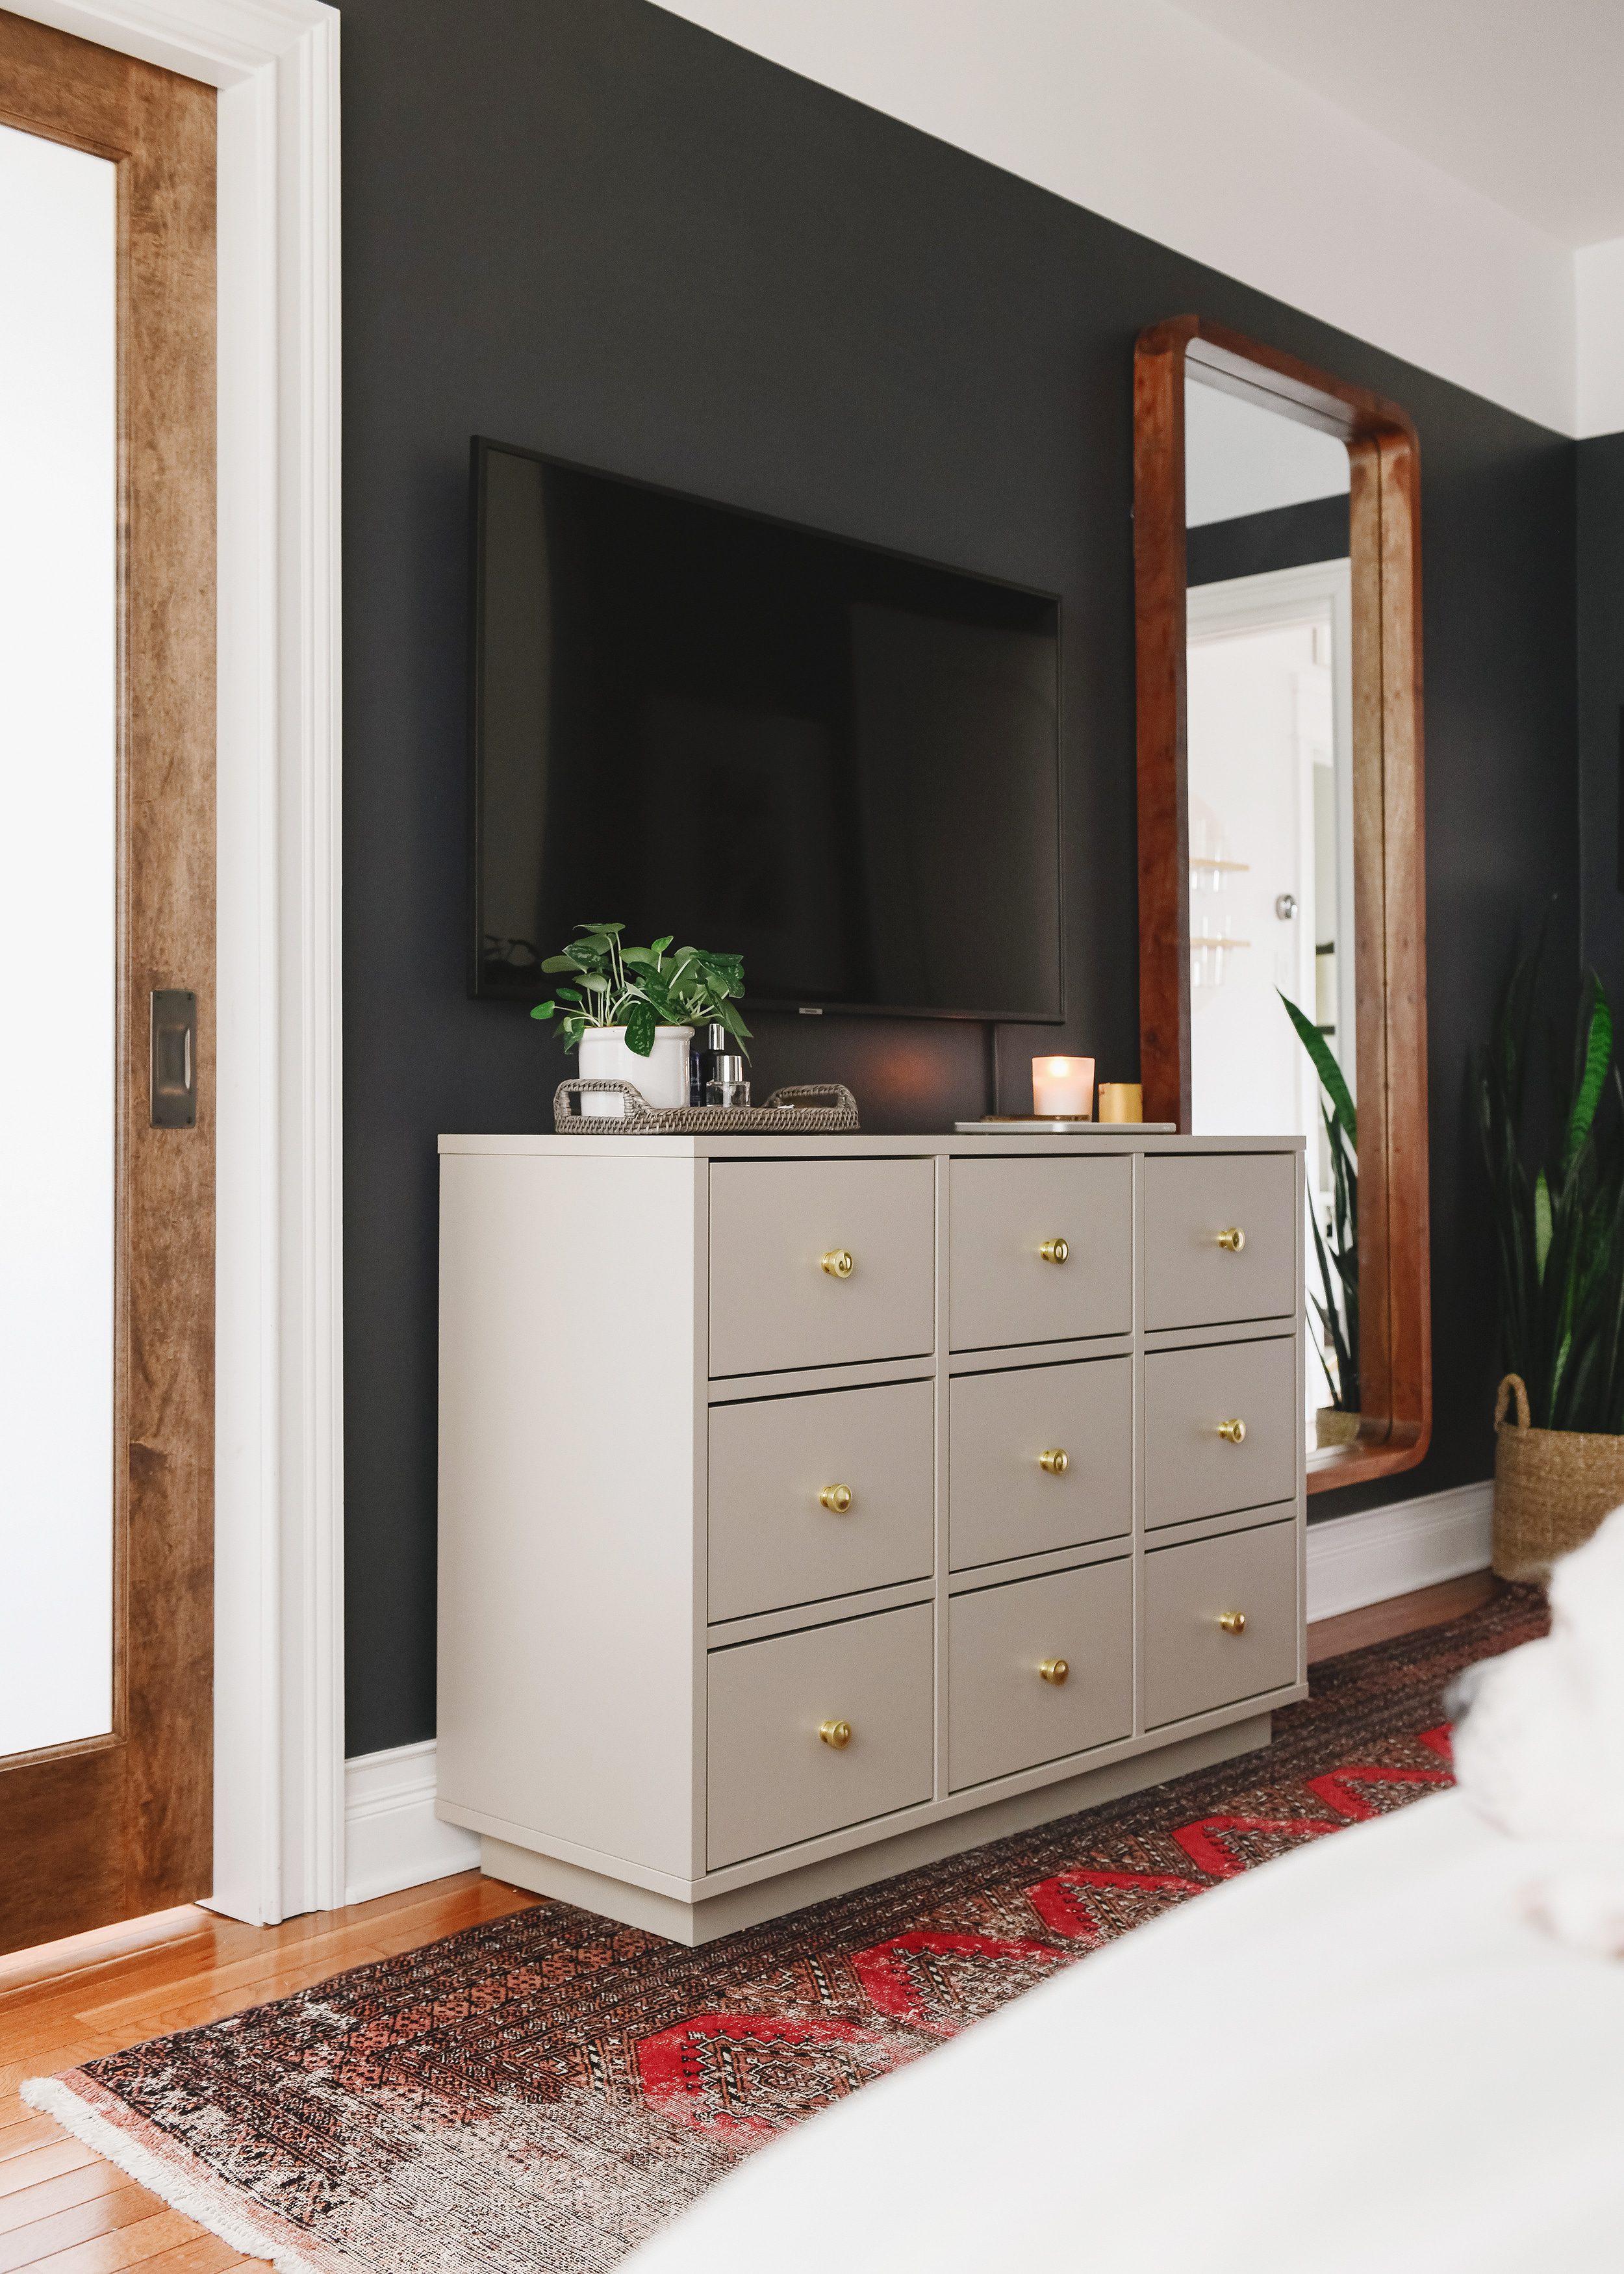
We love the way the beige tone of the dresser plays with our dark bedroom walls (BM Raccoon Fur). It also helps to draw attention away from the television we installed above it – more on that debate soon!
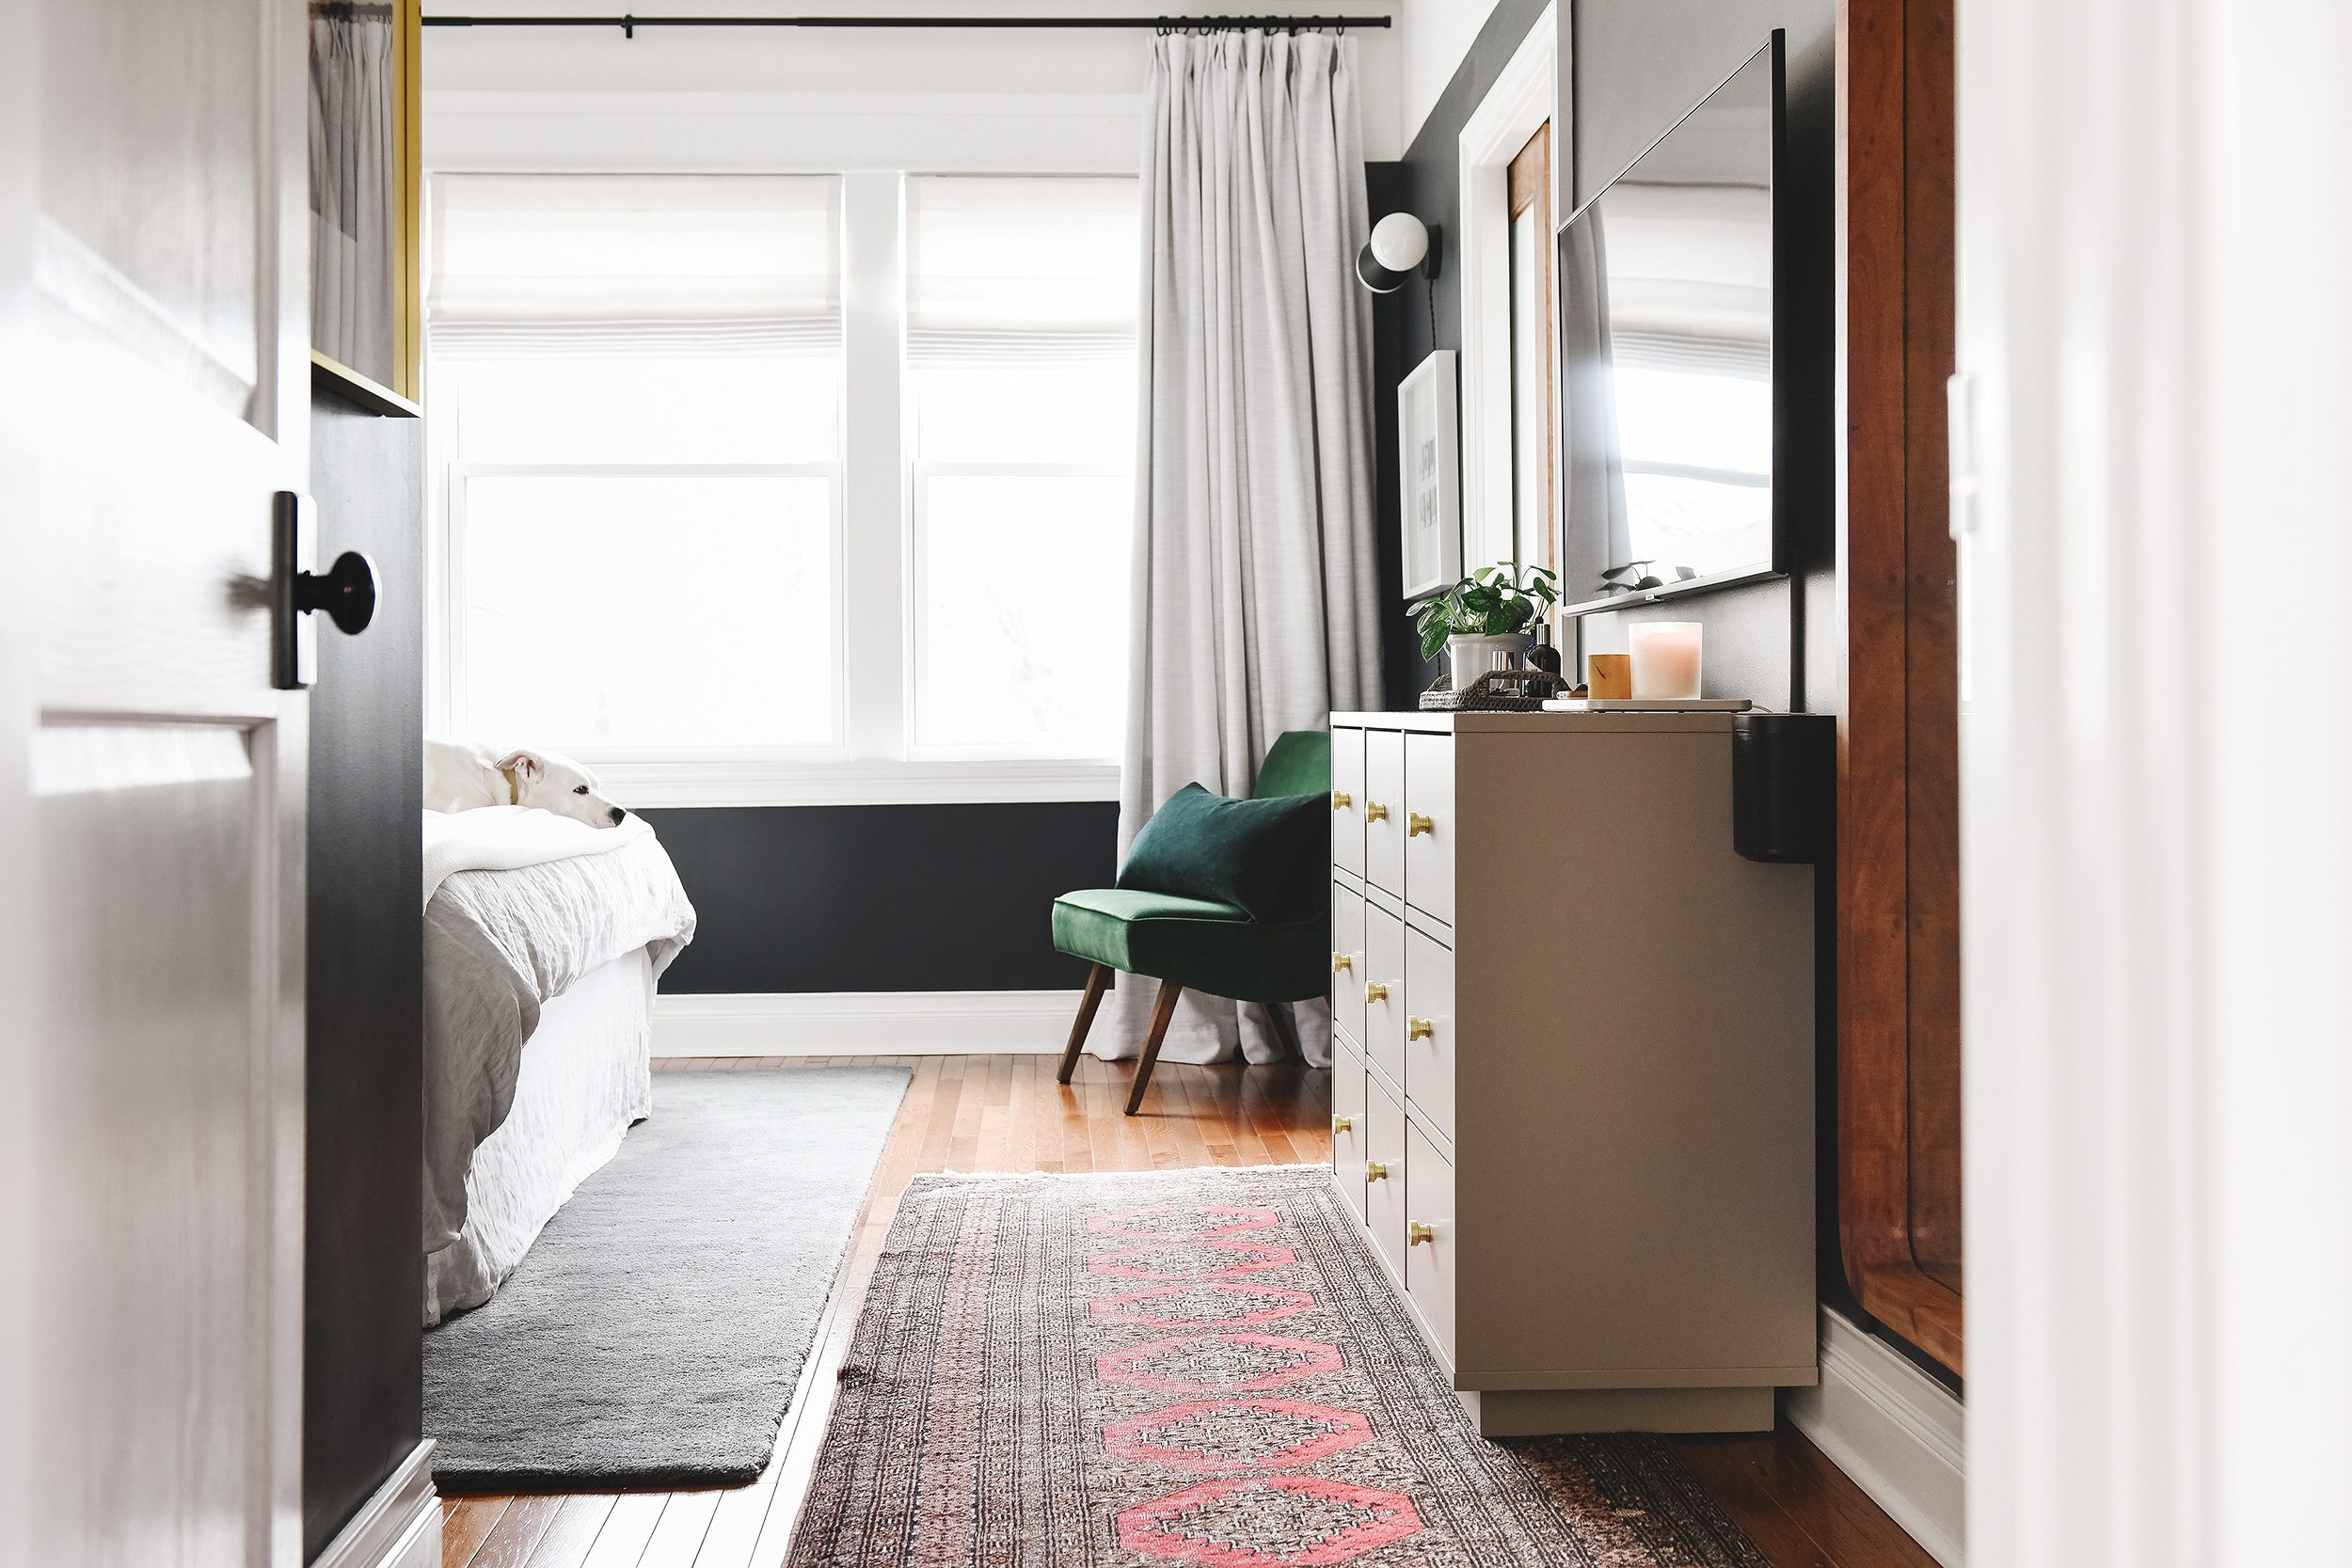
In another example of our inability to leave well enough alone, we also nixed the black mushroom knobs included with the dresser. After ‘interviewing’ a few other knob candidates, we landed on these brushed brass 1 1/4″ knobs that play nicely with the tones of the dresser and, we think, further elevate the look and the rest of the finishes in our room.
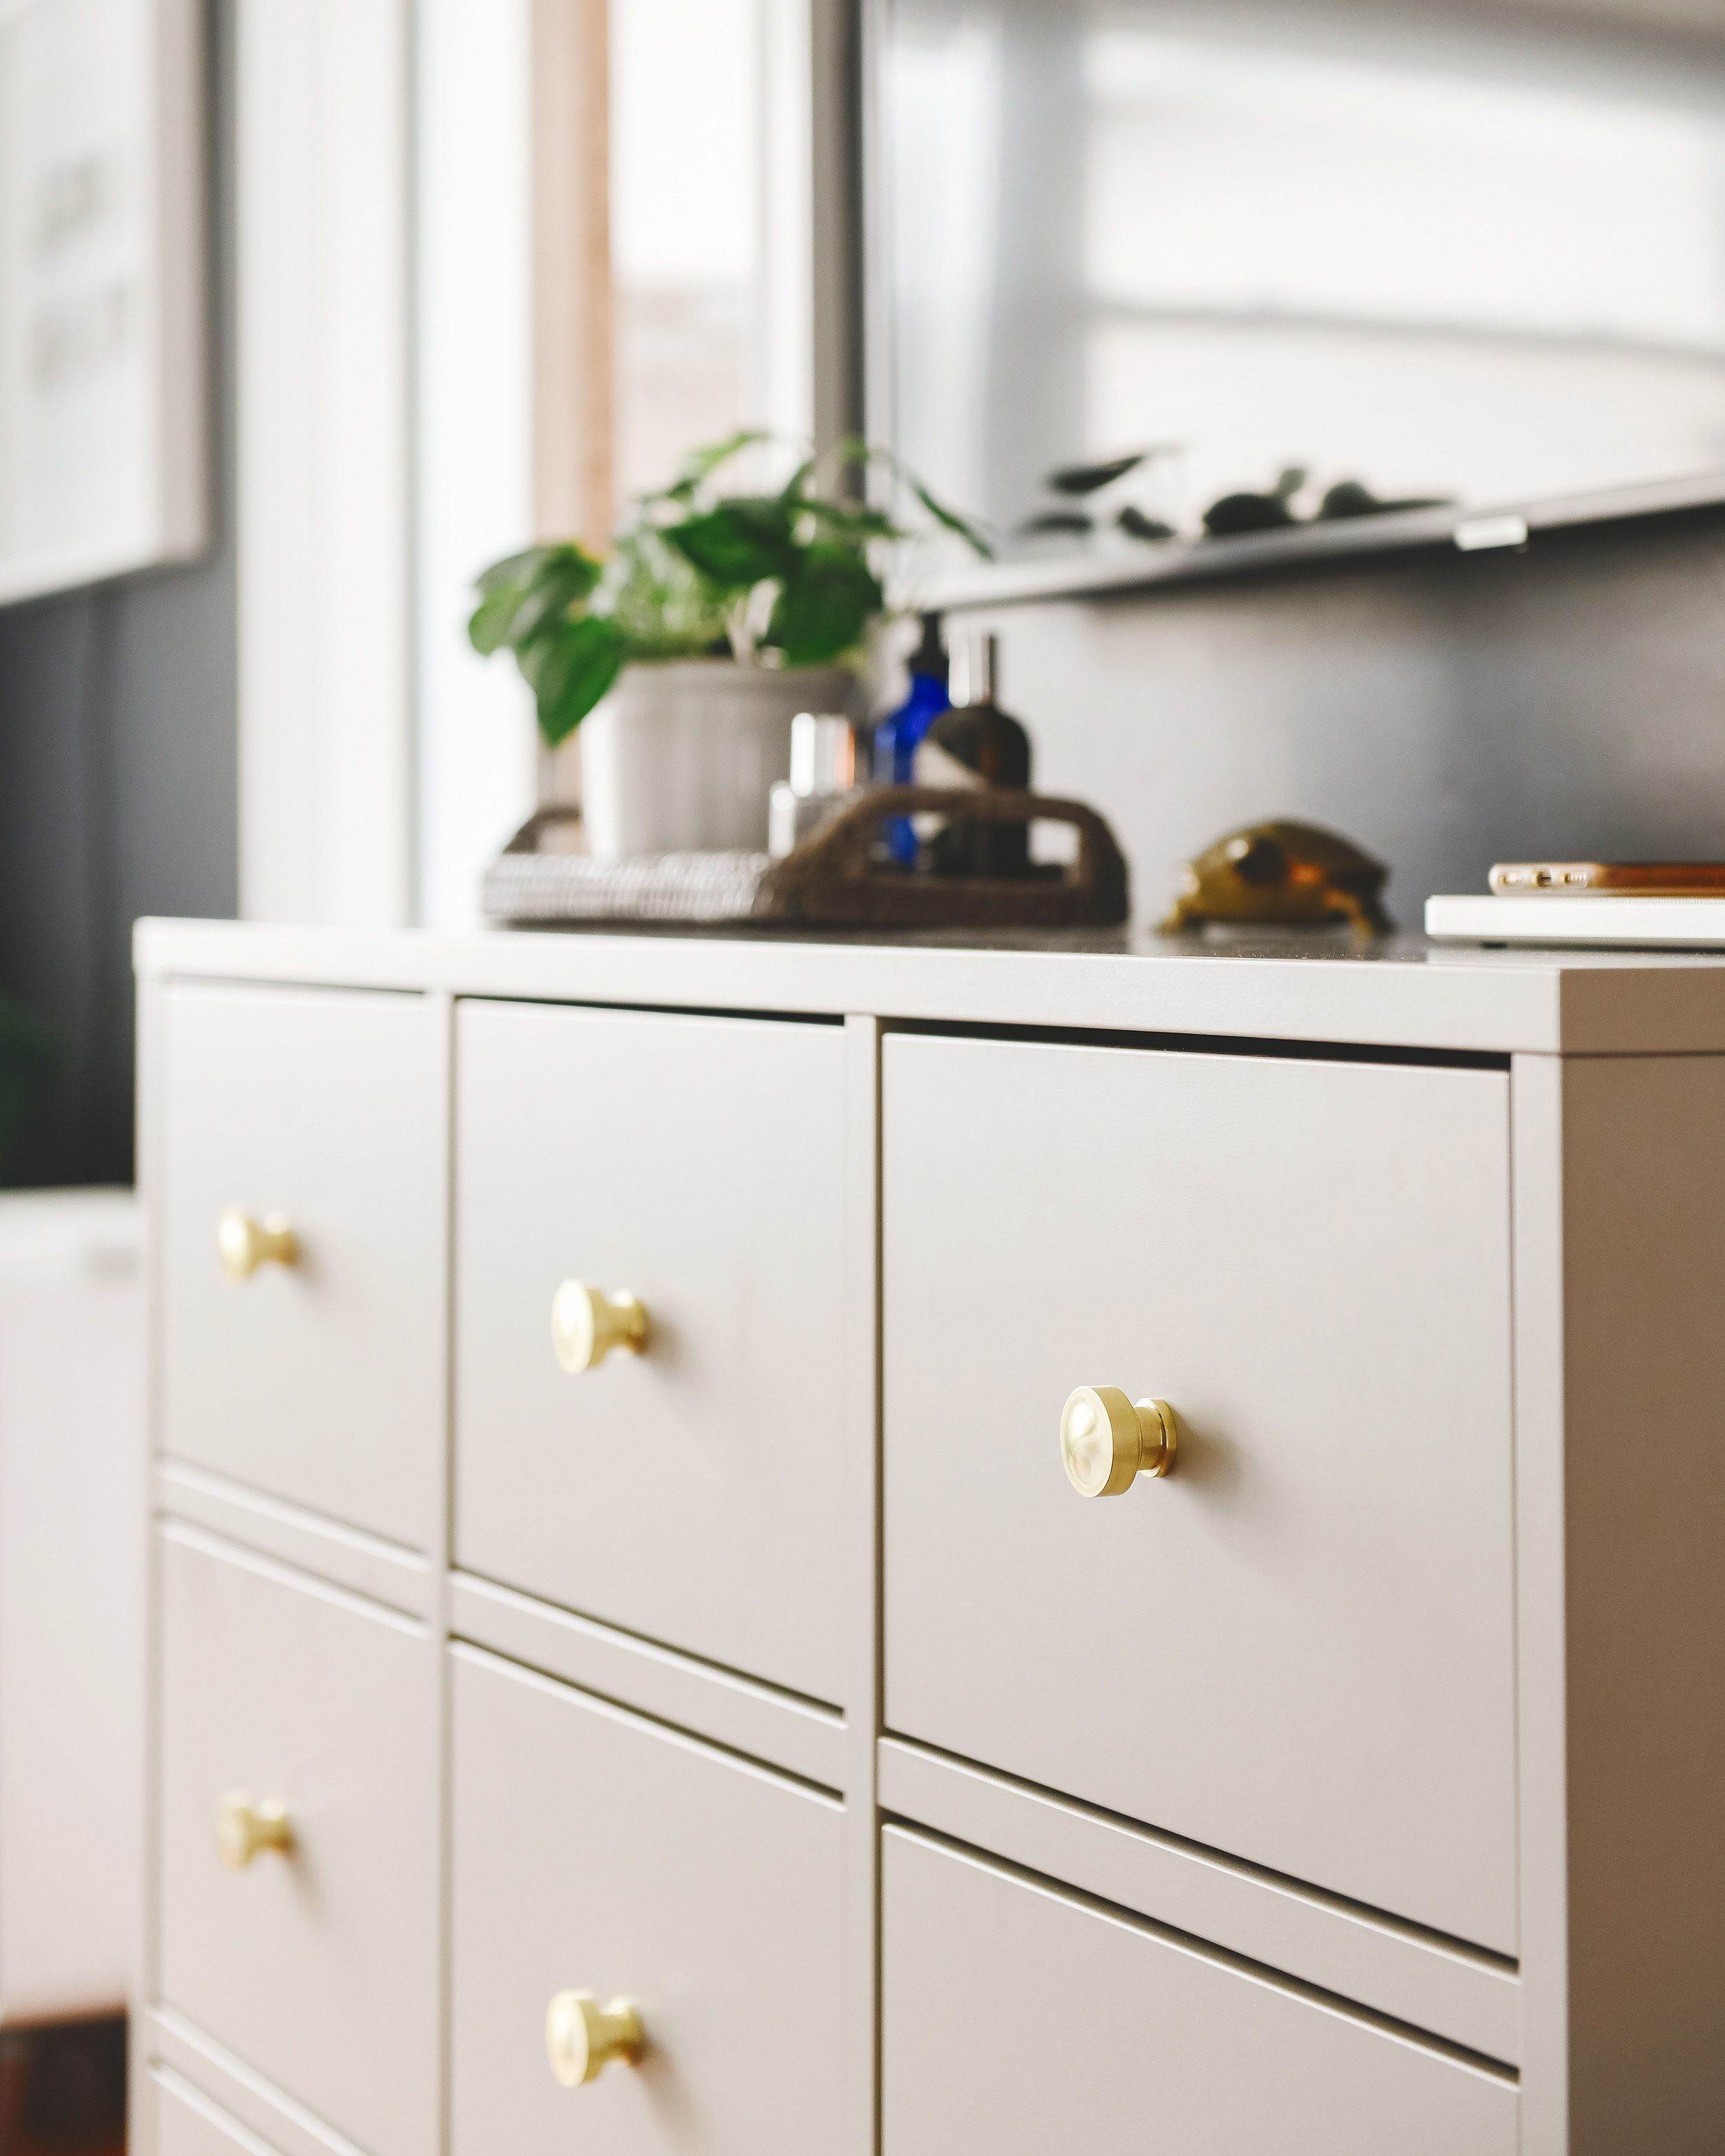
The completed dresser feels stable and solid, but we used the included safety bracket to attach it semi-permanently to the wall for peace of mind.
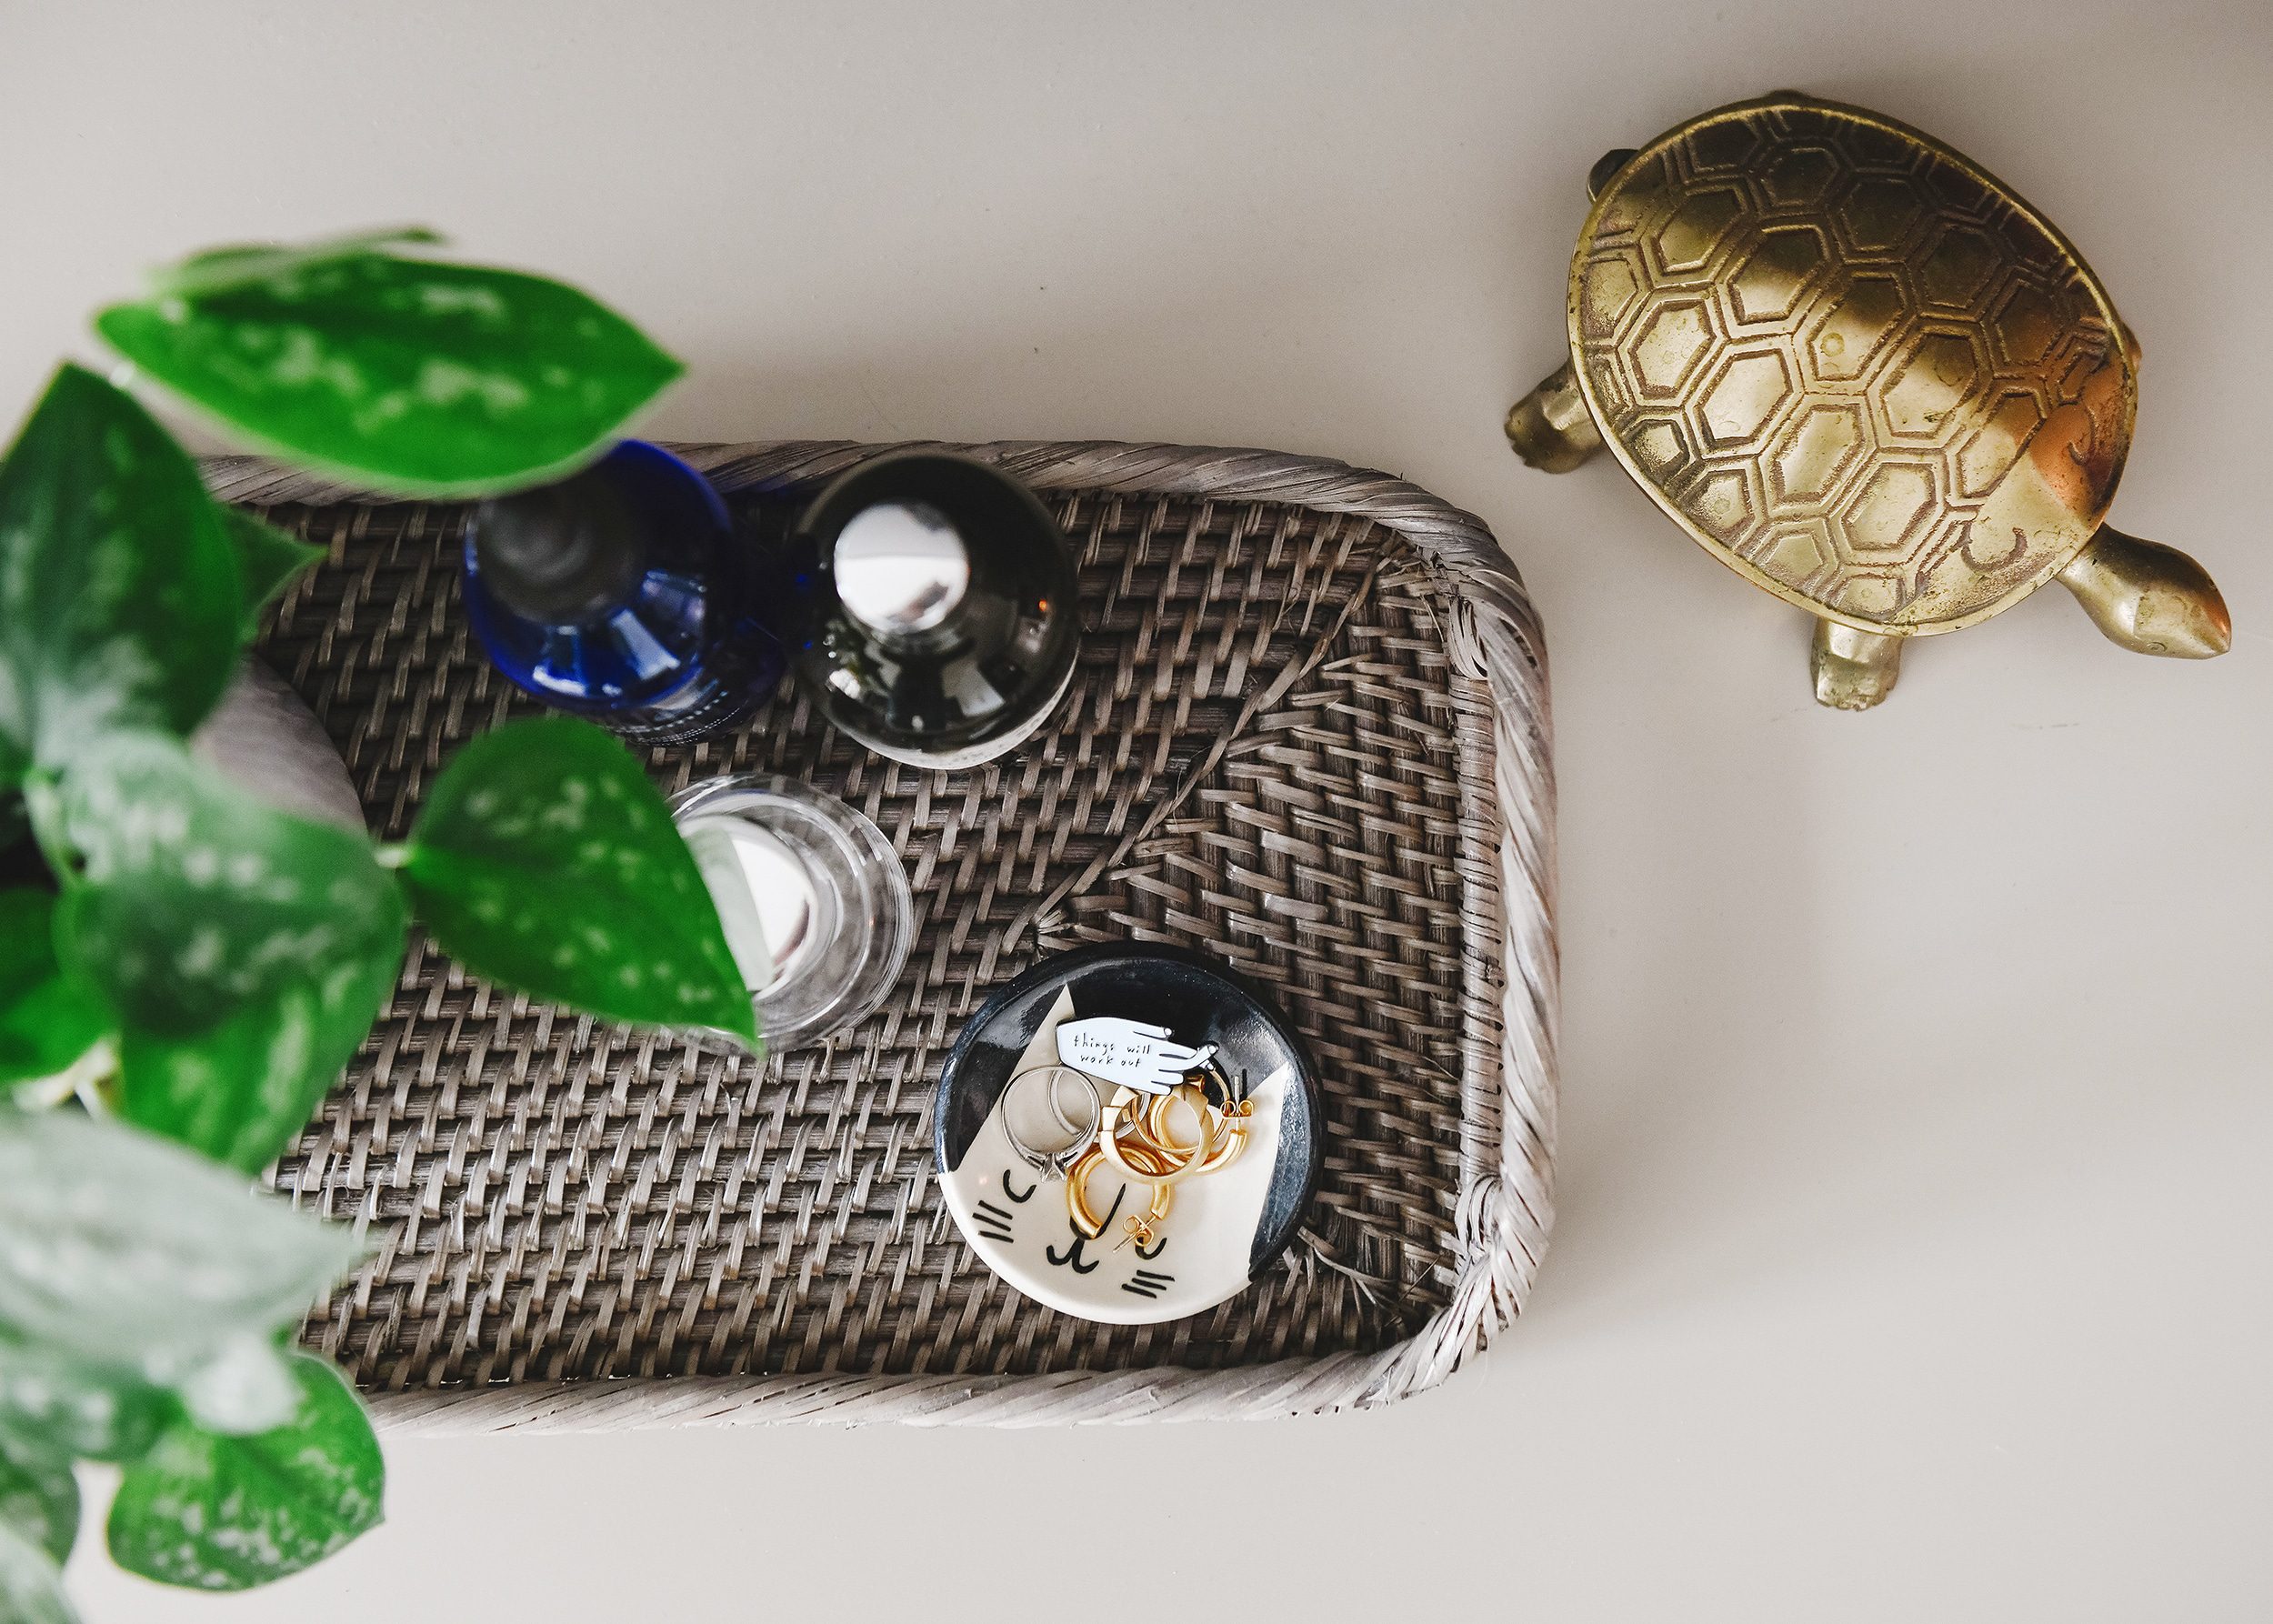
It’s odd to think that up until this point, we’ve gone without a dresser in our bedroom. Kim’s former floating vanity served as a bit of a catch-all, but it wasn’t quite large enough for any meaningful storage. Now, a couple of baskets on top of the dresser corral small items and offer space for a wireless phone charger.
After a couple of small tweaks, the IKEA BRYGGJA turned out to be the perfect piece for our space and our needs! We’re using it to store socks, underwear and smaller items, but we probably wouldn’t recommend it for use as your only dresser. The drawers are vertically deep (top to bottom), but horizontally shallow (front to back).
They’re shaped in such a way that would only allow for one tall stack of t-shirts or folded pants, but they’re perfect for small items that might otherwise require dividers! I imagine it would be great for toddler clothes, art supplies, or a playroom (for all the Legos and tchotchkes), too. In our case, it’s the perfect complement to our built-in PAX systems and the smaller capsule wardrobes that we both keep.
We hope this customization tutorial brings some inspiration and we’d love to see your take on this easy hack!
In This Post:


This looks fantastic!! The new base looks completely integrated, like that’s how it’s always been. It’s such a gift to see how you are continually making your home and furnishings work harder for you. Such an inspiration!
Thanks for the kind words, Julia!
I really appreciate this, thank you! It’s a big goal of ours this year to fine tune our home juuuust so.
This is a great Ikea hack, very approachable yet really elevates the whole look to be pretty classy. Nice one!
Aw, thanks!
Looks fantastic! I love the knobs. I spray painted my Hemnes dresser knobs gold for now. But I may have to swap out for these knobs. They look so great in your pictures. So I bet they are even better in person!
Thank you, Betsy!
Love love love! I have a Hemnes dresser in desperate need of updating, this fun base might be just it! Thank you guys for being continually inspiring.
We’d love to see your finished product if you tackle this DIY!
Great post! This was exactly what I was looking for. I found a wonderful big cabinet for a vanity, but it had LEGS. And I live in dusty Arizona. Who in the world wants to do all the extra dusting underneath a cabinet? Thanks so much!