

Bats are super cool. They eat loads of insects every night and some studies even suggest that the mere presence of bats is enough to keep annoying mosquitoes away. Plus, they’re fun to watch! Bat boxes are a great way to attract bats and keep them coming back to your yard, but some commercial options cost hundreds of dollars. We’re walking through the steps to build your own DIY bat box for $20 or less!
Happy Halloween! While bats are synonymous with the spookiest of holidays, they’re not spooky at all! They’re incredibly mosquito-gobbling machines that you actually want on your property! We see bats pretty frequently at our Michigan Tree House, but we love the idea of attracting them and encouraging them to stick around. When we saw a pitch for beautifully designed bat boxes on a recent episode of Shark Tank, we were inspired to try our hand at building a DIY version!
In This Post
Bat Box Mounting Location Requirements
Before we get started on the tutorial, a functional bat box that will attract (and hopefully retain) bats requires a few key mounting location features:
- The location should receive direct morning sunlight. East or Southeast facing is best. Bats prefer temps from 85 – 100 degrees Fahrenheit so the sunlight helps them stay warm and comfortable!
- Mounting position should be 10+ feet from the ground with no obstructions below the box to allow for free flight into and out of the box.
- There should be a water source (lake, pond, river, stream) within 1/2 mile of the box.
Bat Box Construction Requirements
Ideally, there should be…
- … a narrow opening of around 3/4″ across the bottom to provide security and deter predators.
- … a ‘landing pad’ with a grooved or textured surface.
- … dark stain or paint for better heat retention, however, a lighter finish is OK in warmer climates.
- … caulked/sealed joints to keep out drafts and elements.
- … a sloping roof to allow for drainage.
- … ventilation to allow for internal temperature regulation.
Note: Bat boxes can be built in many shapes and sizes. Some even have multiple chambers inside that can accommodate hundreds – yes, hundreds! – of bats. We started small with a single chamber box that uses minimal supplies. With the exception of the exterior-rated plywood, we had everything else on hand!
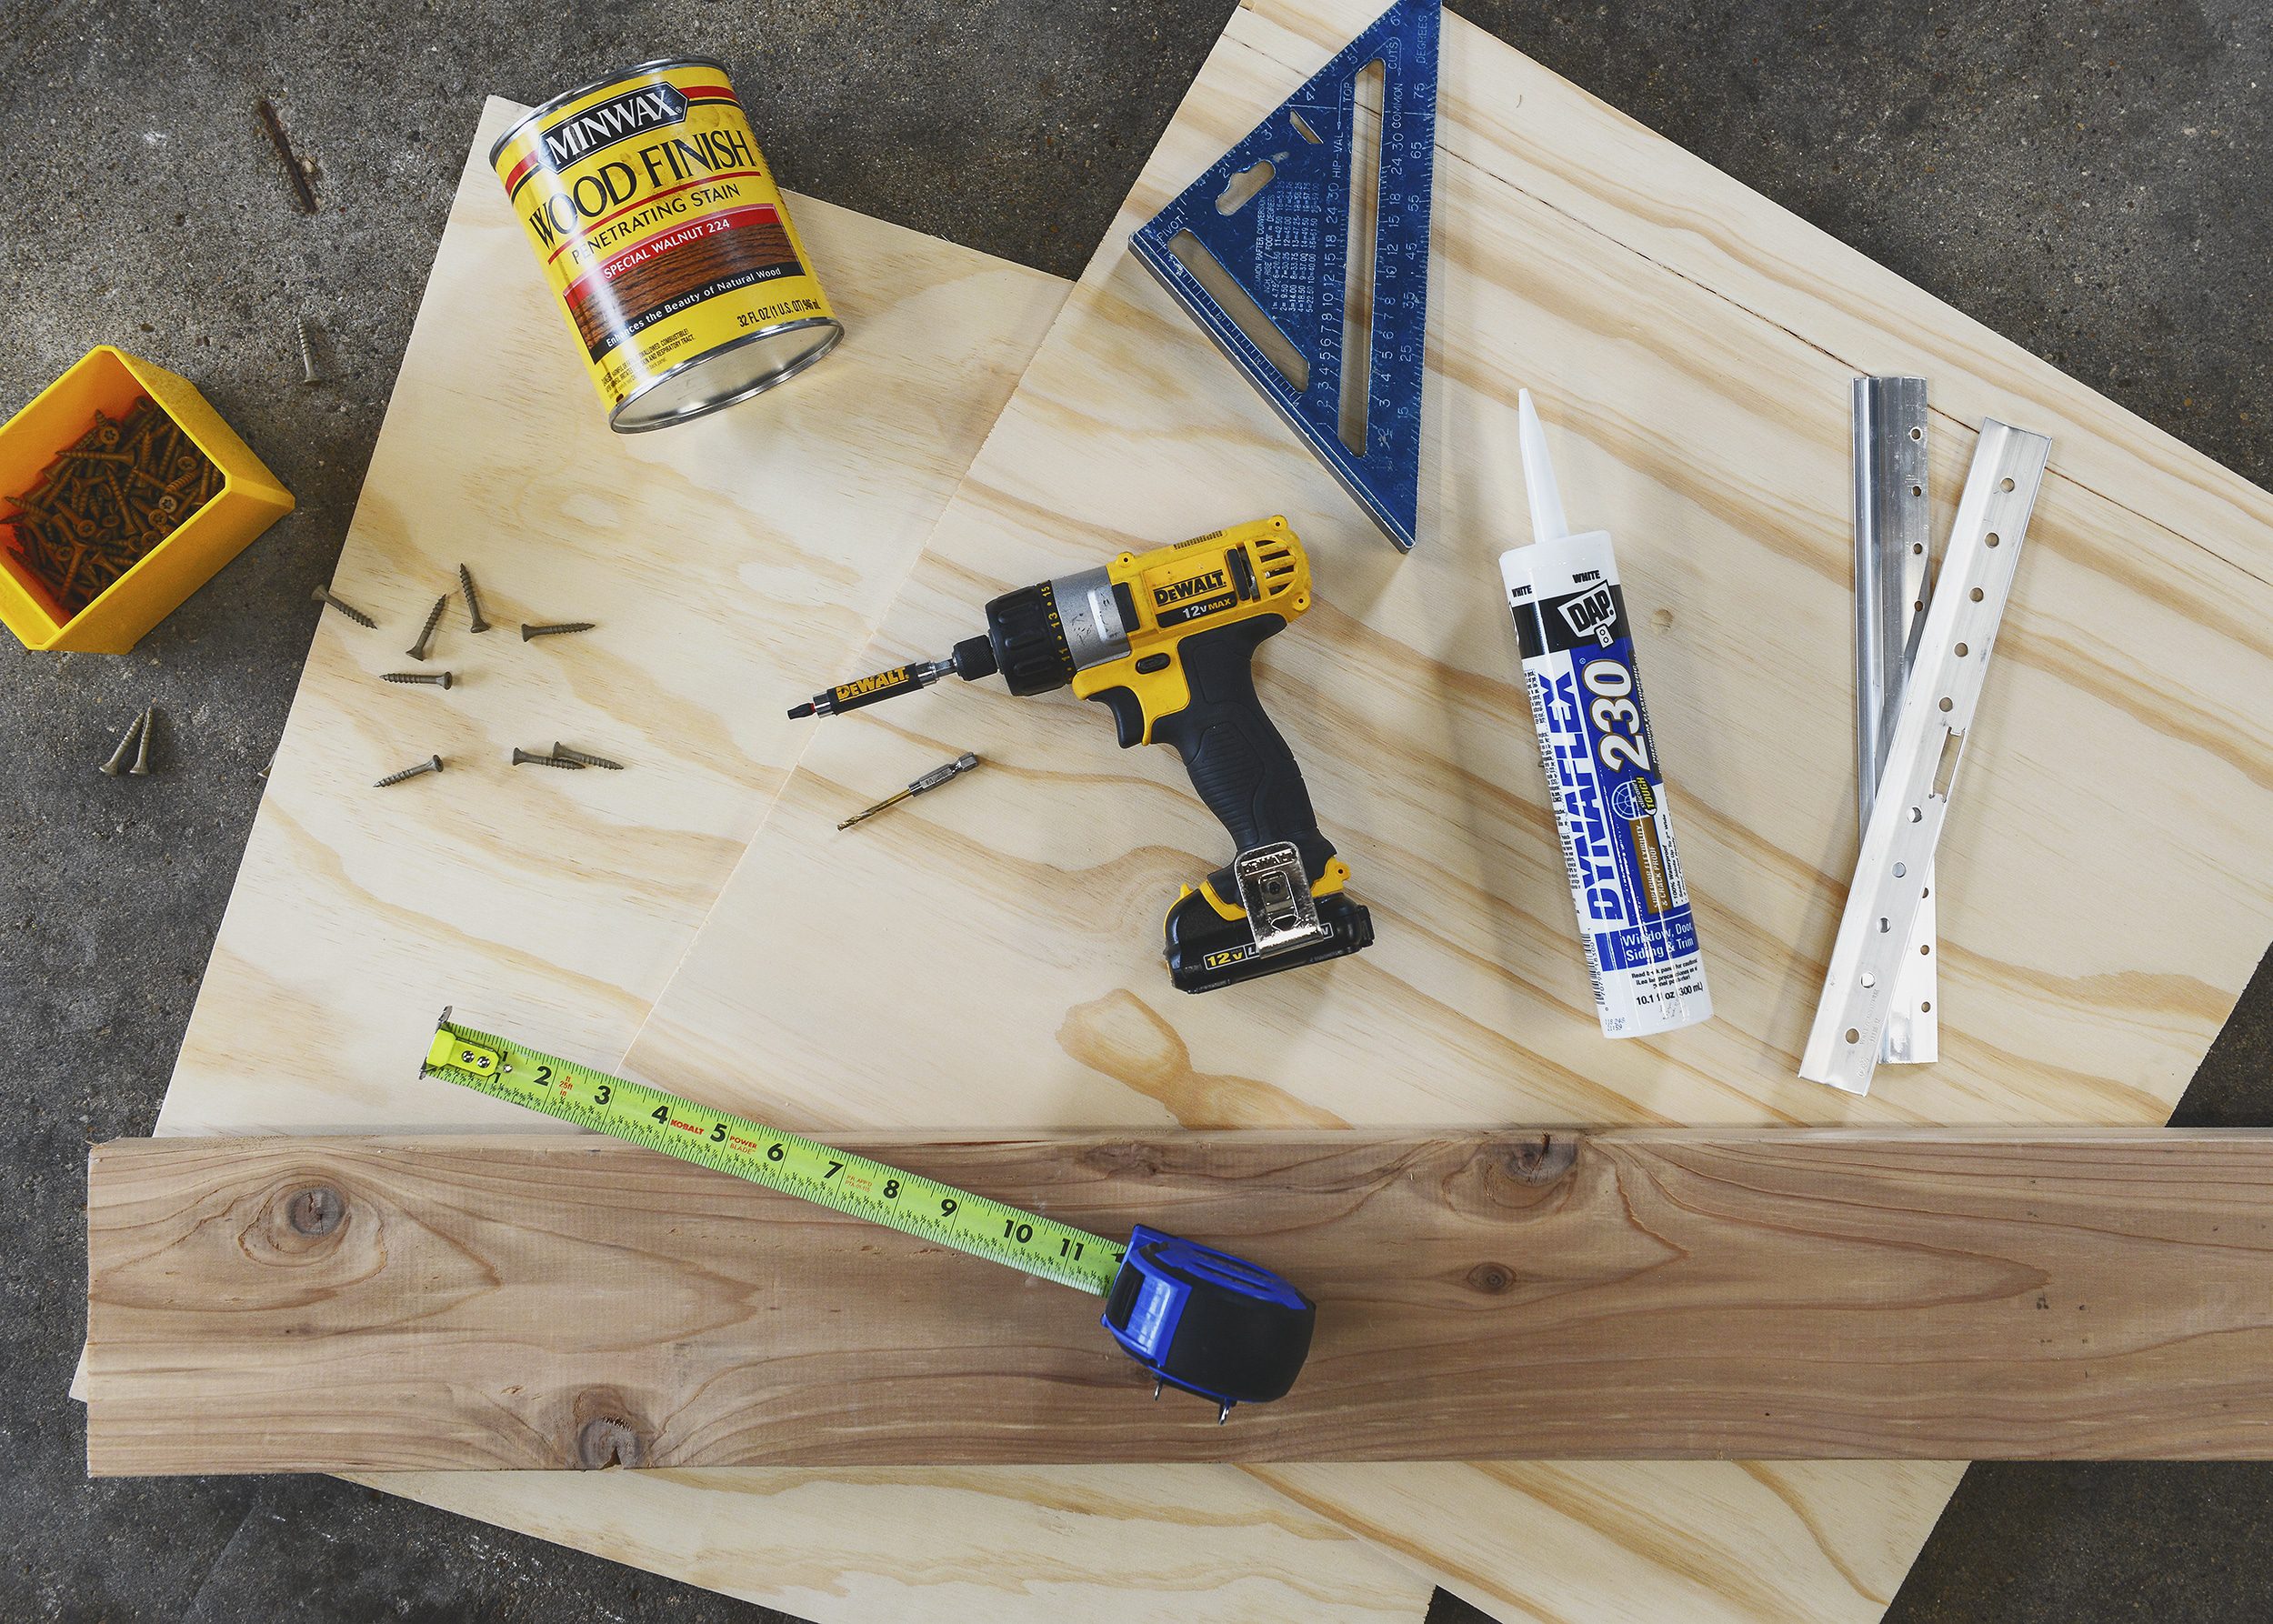
Tools + Supplies Used for 18″w x 24″h Box
- Drill + Coated 1 1/4″ deck screws (Option 1, our anticipated construction method): preferred if painting box
- Nail gun + 1 1/4″ nails (Option 2, our final construction method): preferred if staining box
- 2 x exterior grade plywood sheets – 1/2″ x 2′ x 2′
- 1 x cedar or pressure treated 2″ x 4″ x 6′ board
- 1 x cedar fence picket (or use leftover plywood)
- Caulk
- Tape Measure
- Pencil
- Table Saw (optional)
- Miter Saw (can also use hand saw)
- Aluminum mounting cleat
- Speed square
- Sanding block
- Stain of your choice (+ Polycrylic) or exterior grade paint; darker finishes should be used in cooler climates
- Aluminum French cleat (for mounting)
Prepping the Front + Back Panels
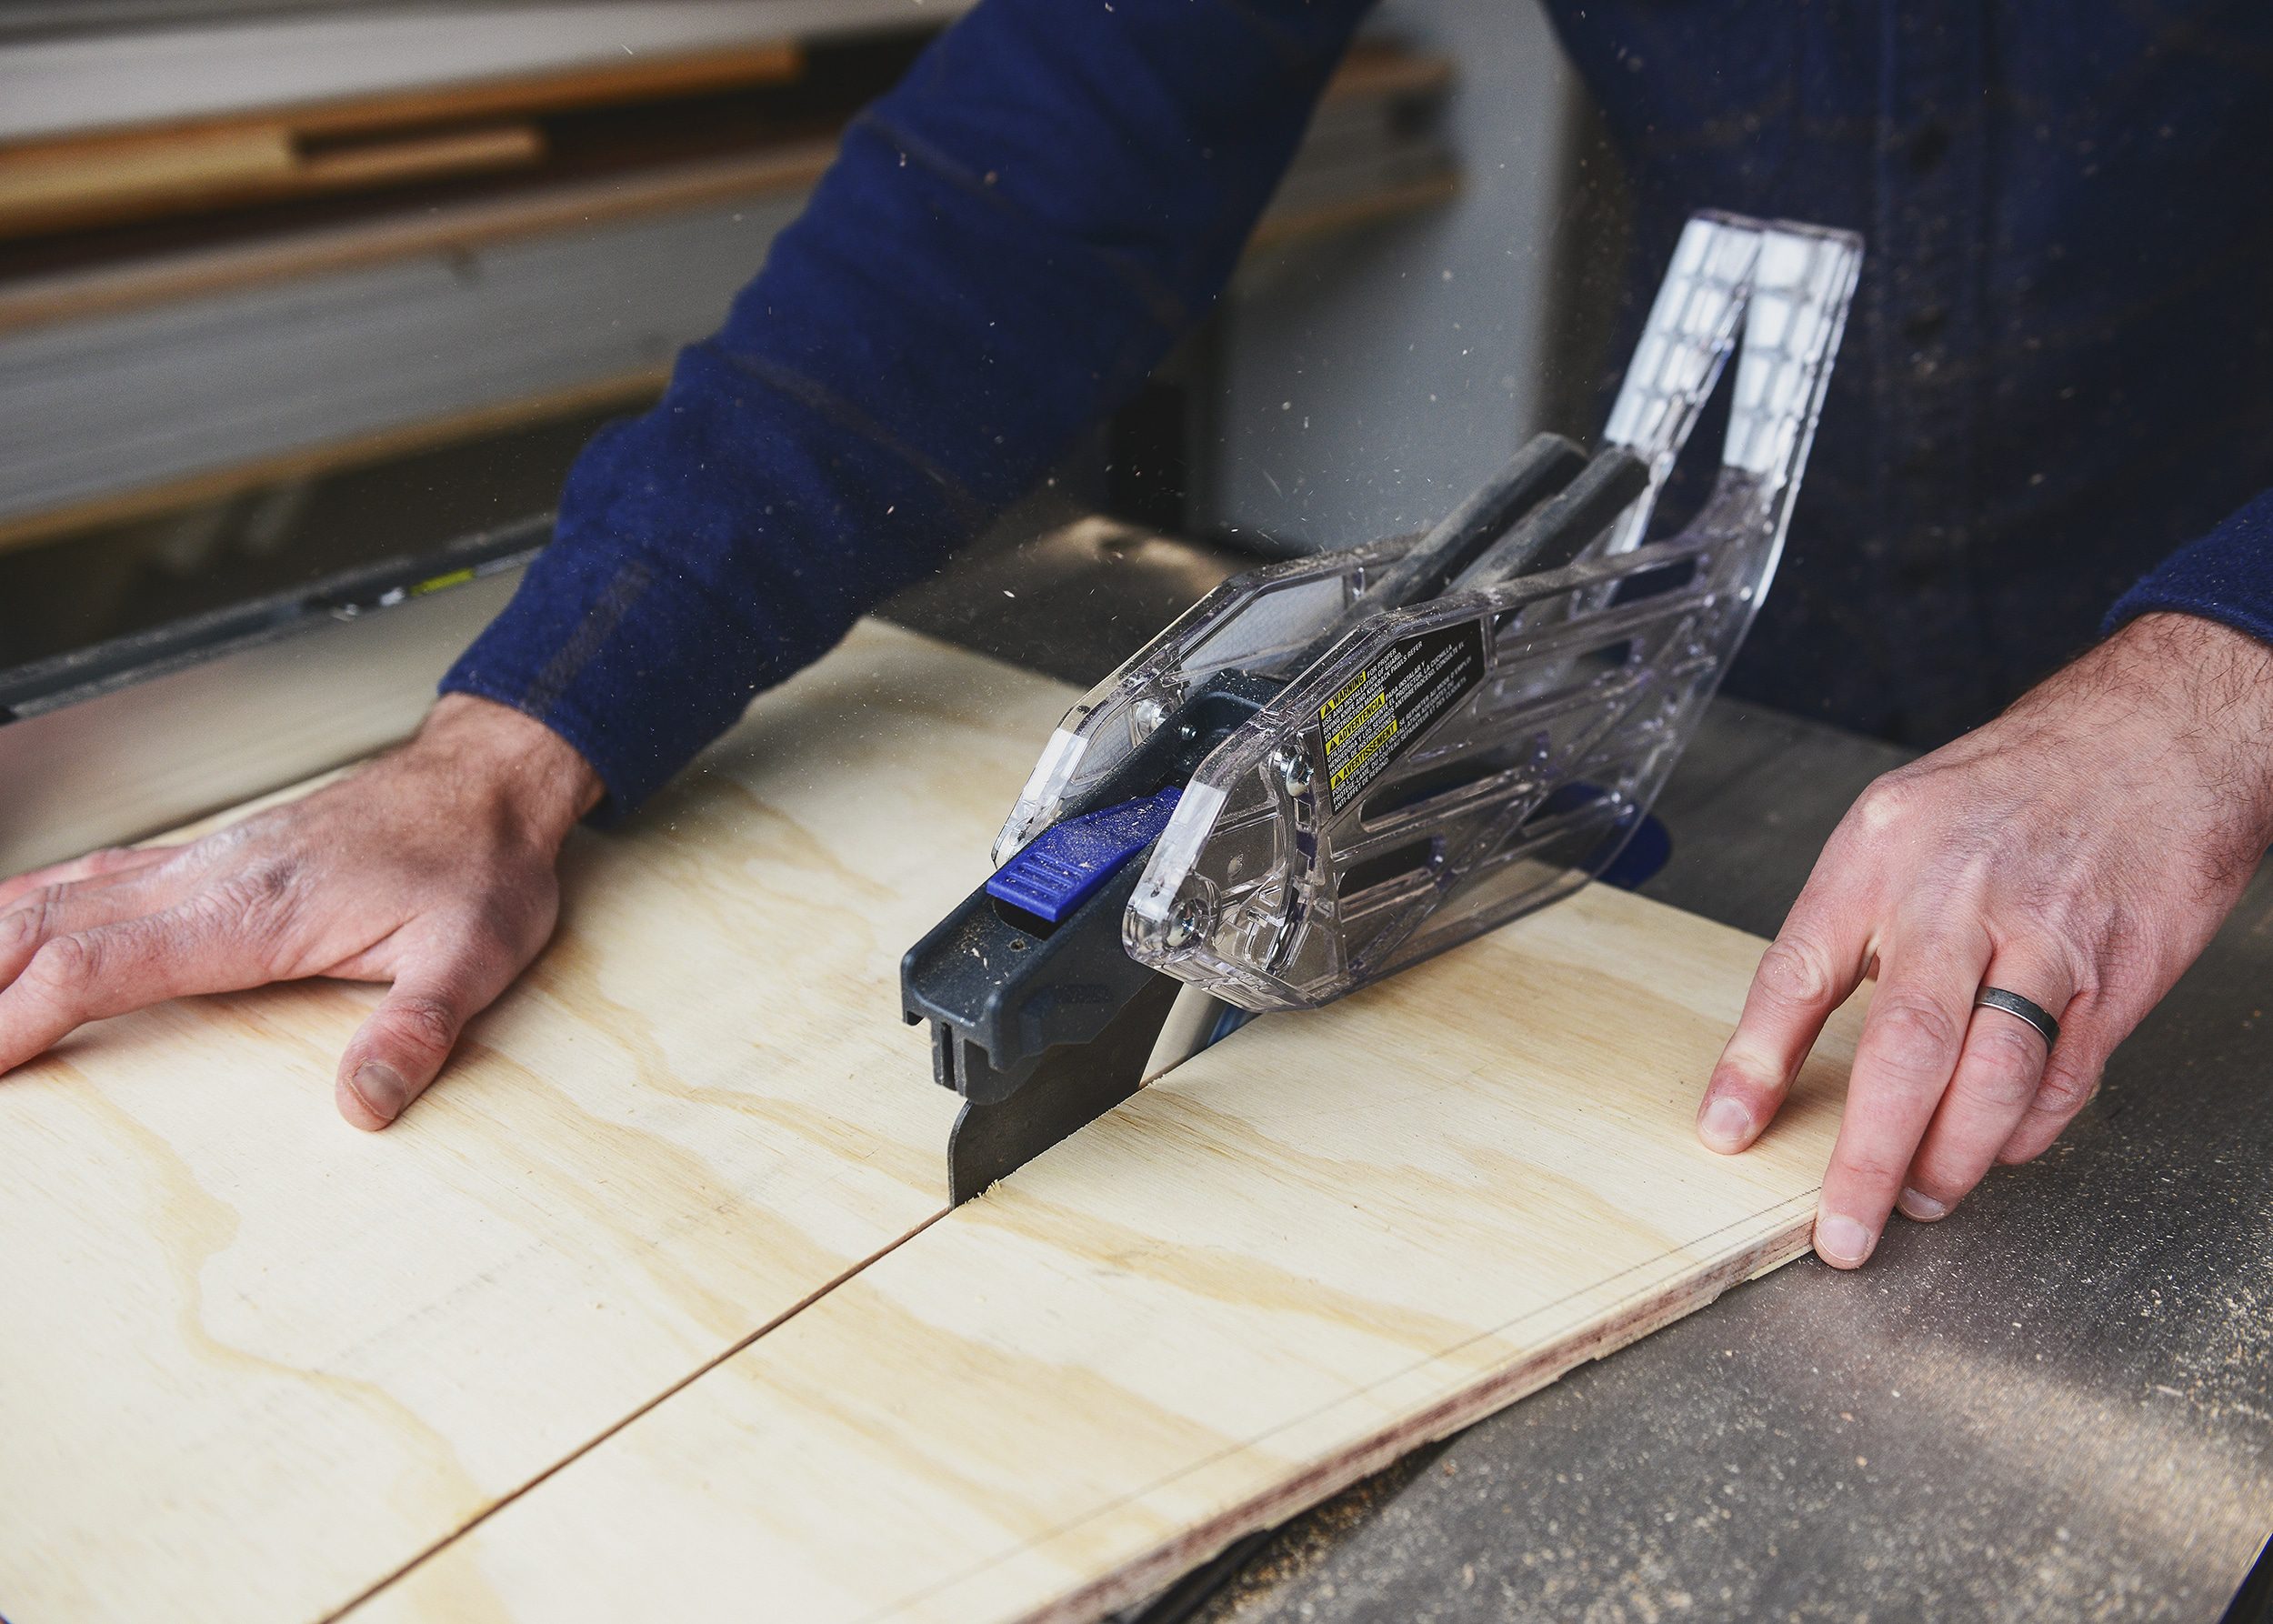
We started by cutting each of the 2′ x 2′ panels down to an 18″ width. Once we were happy with the size of the front and back panels, we were ready to provide traction for our flying friends! For aesthetics and durability, we chose to cut shallow grooves on the interior surfaces of the plywood. Think of it as a tiny lil’ bat ladder!
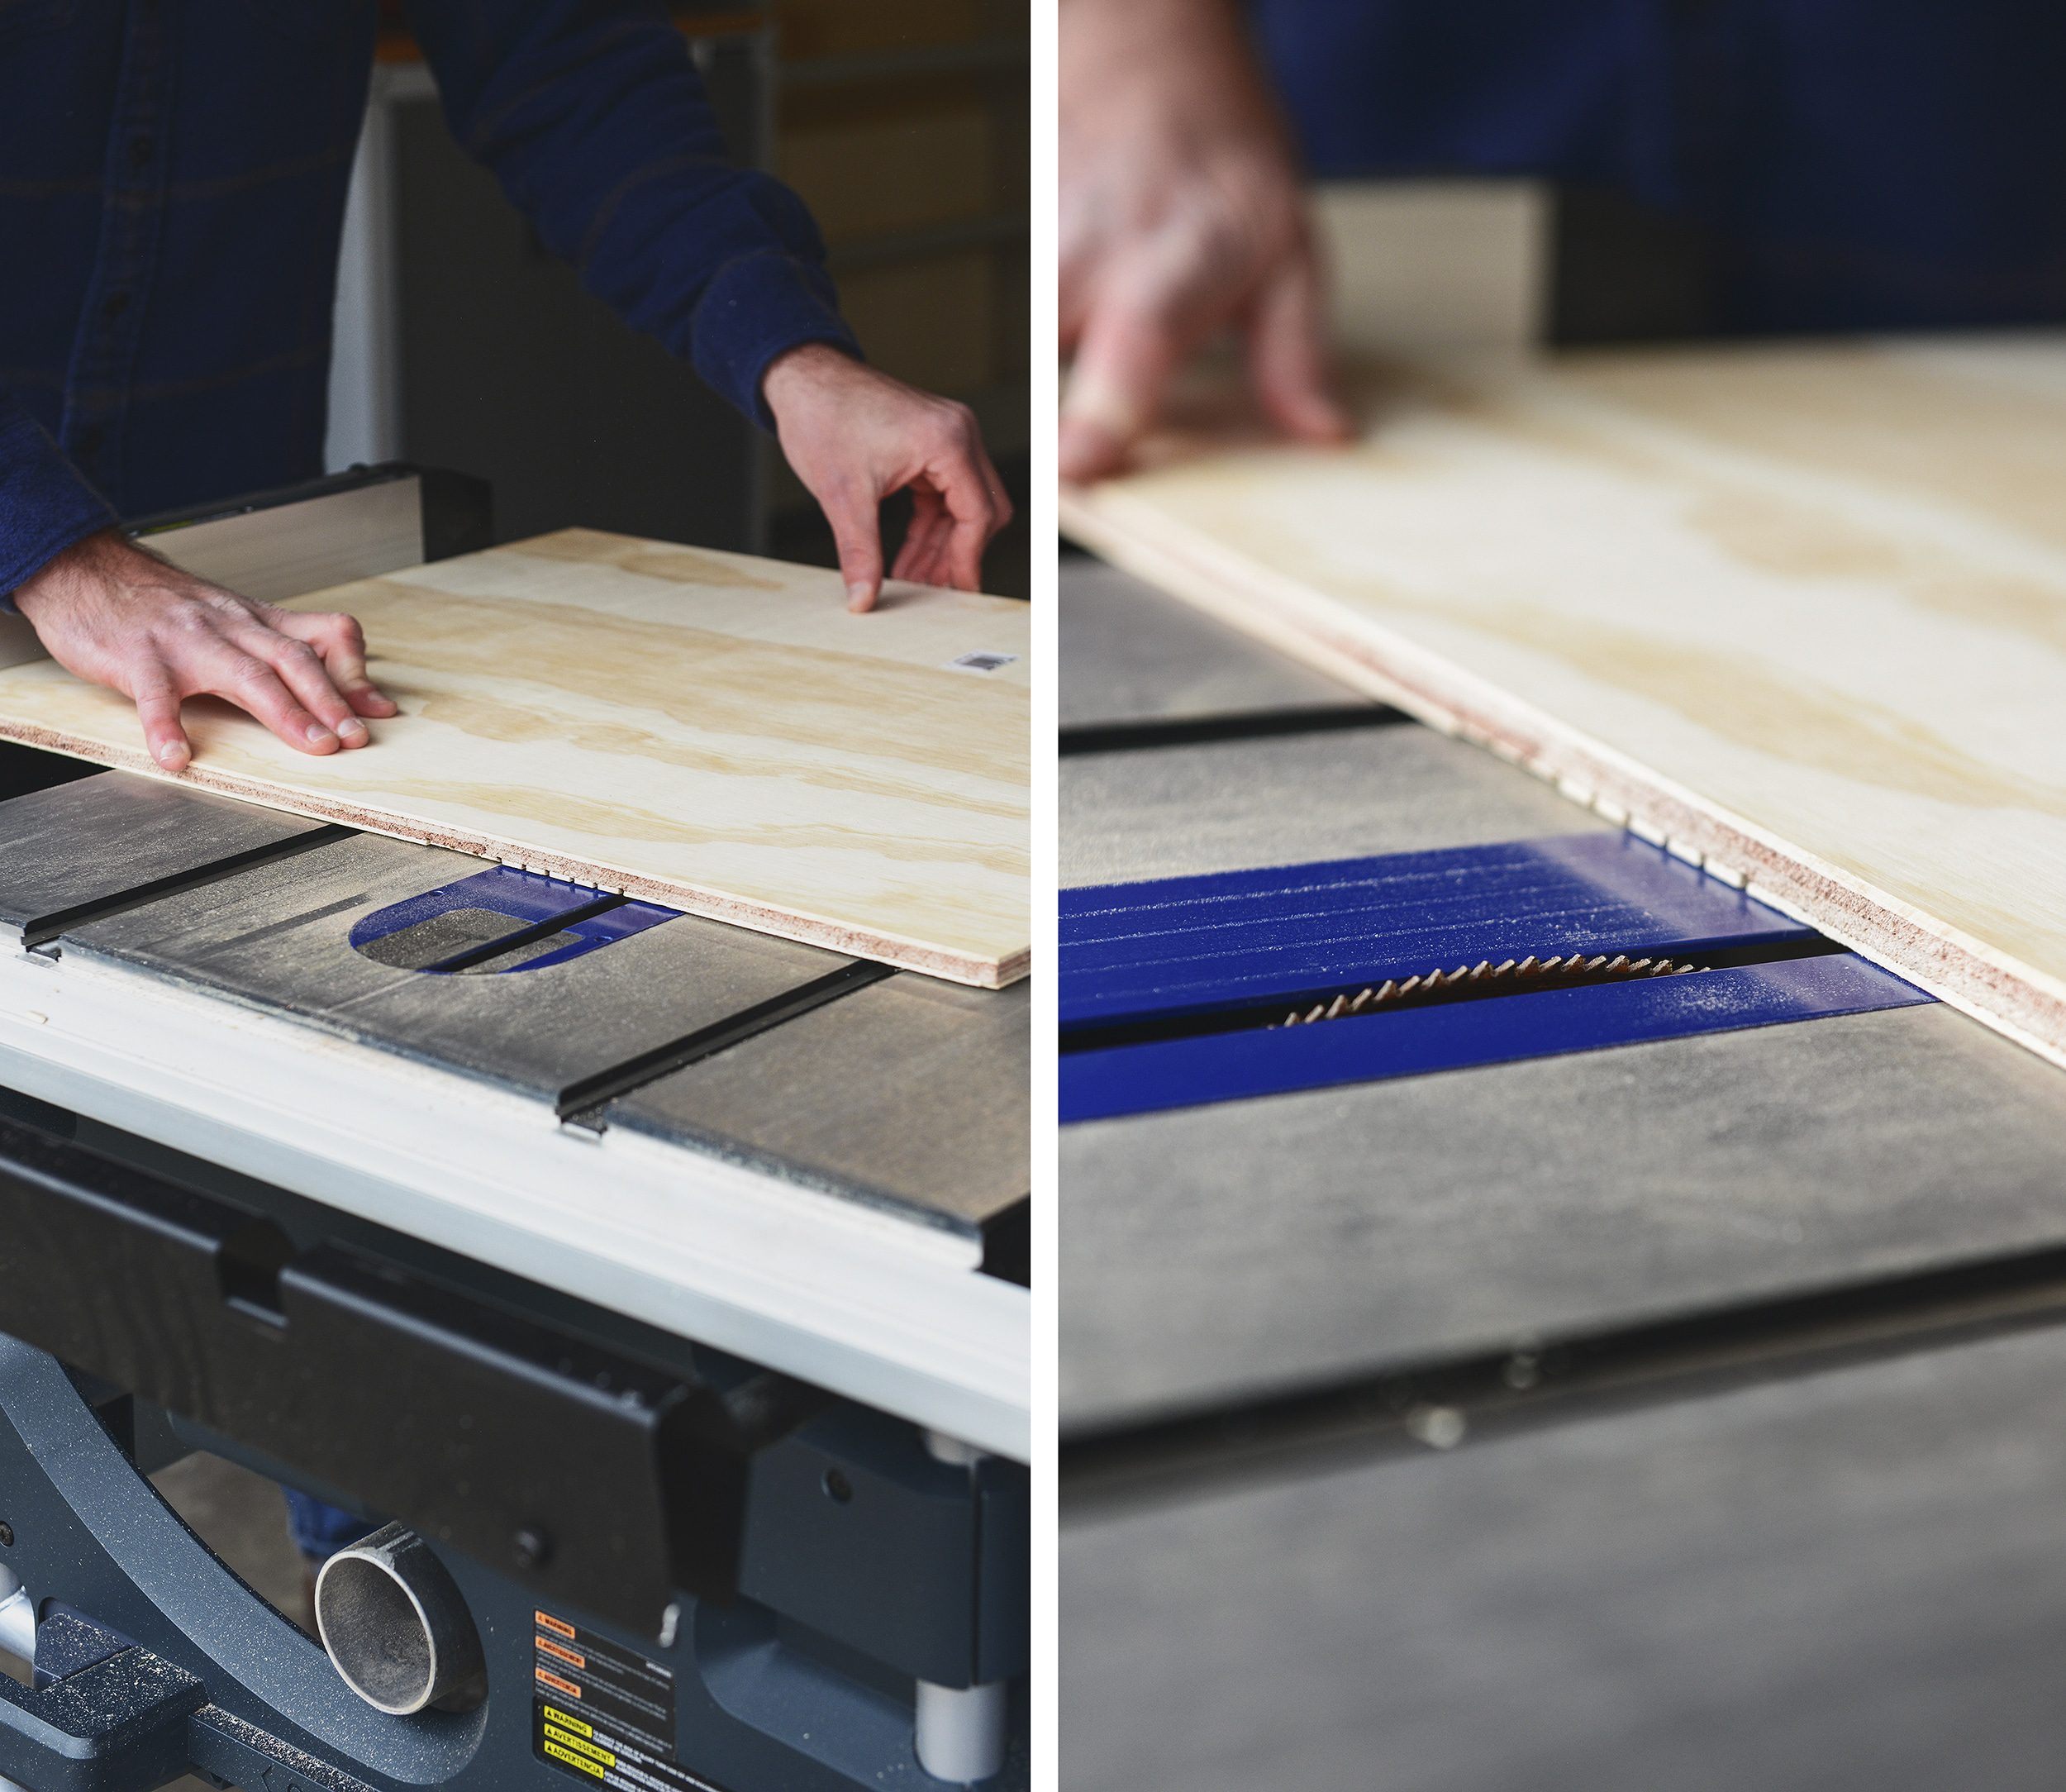
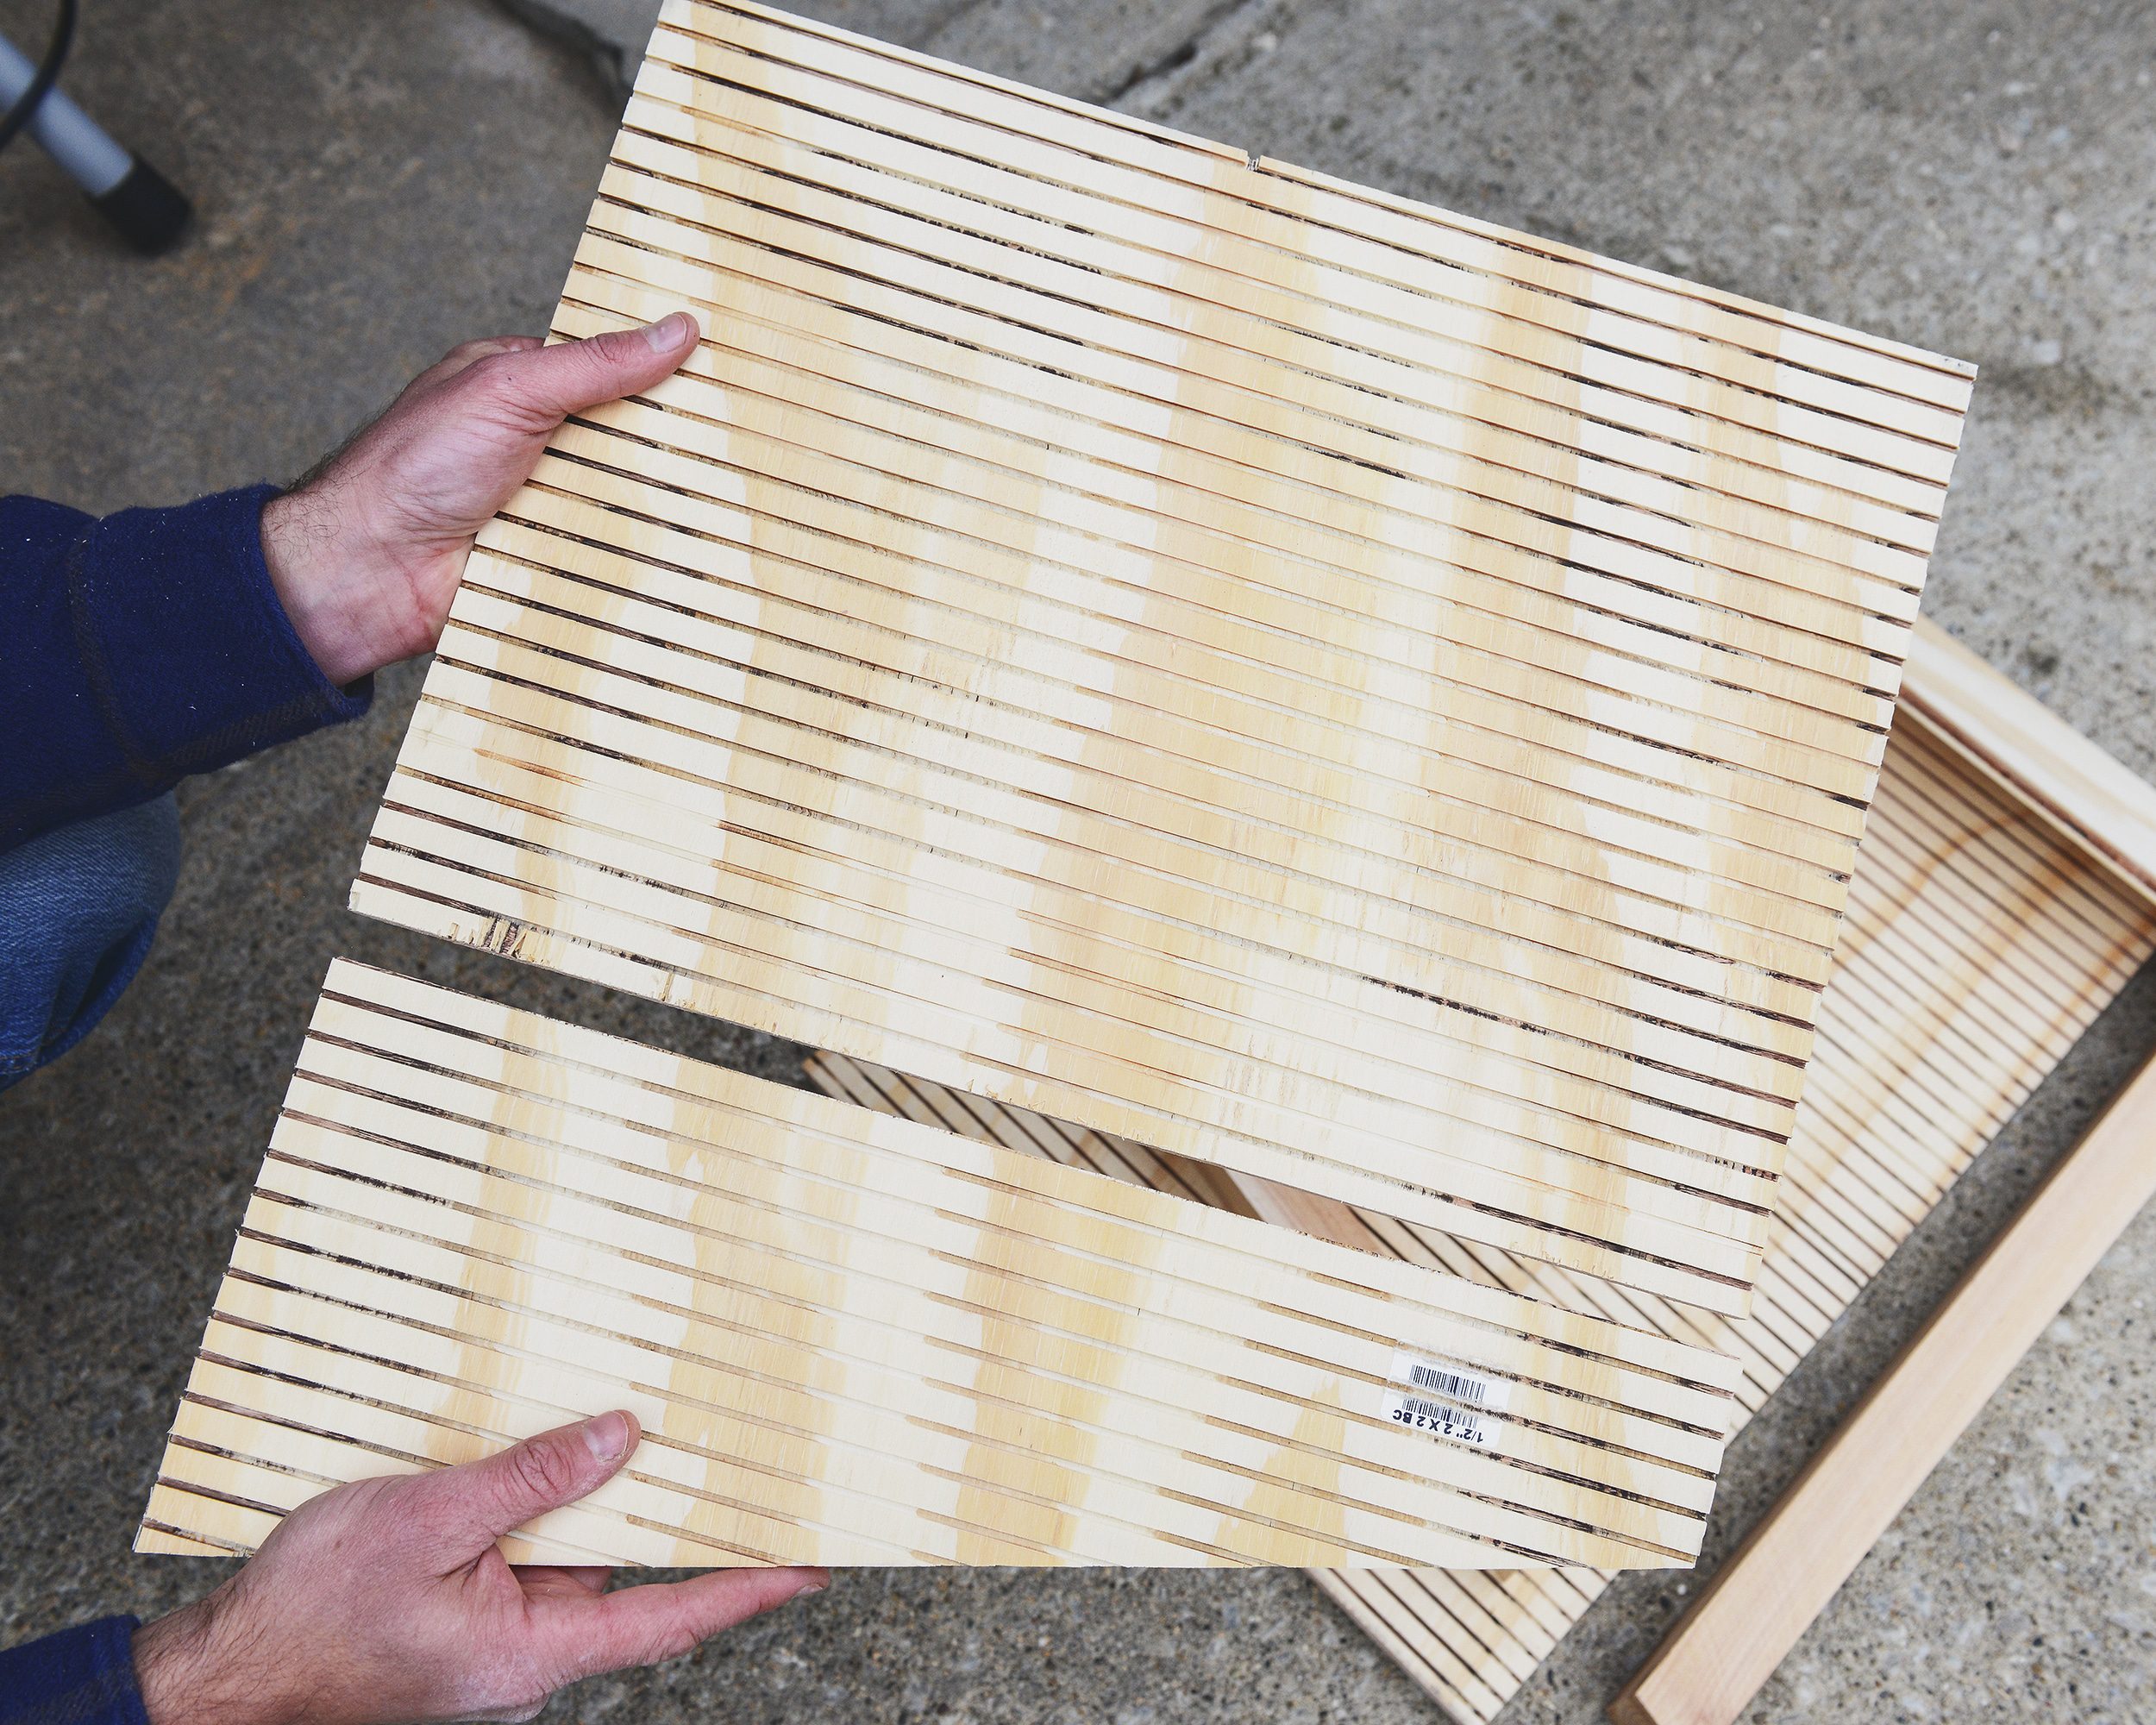
We set our table saw blade so it protruded 1/8″ above the table surface. We then passed the plywood over the saw every 1/2″ until both interior plywood surfaces were completely grooved horizontally from top to bottom. Making 48 cuts in each piece of plywood was pretty labor intensive, but the results were great.
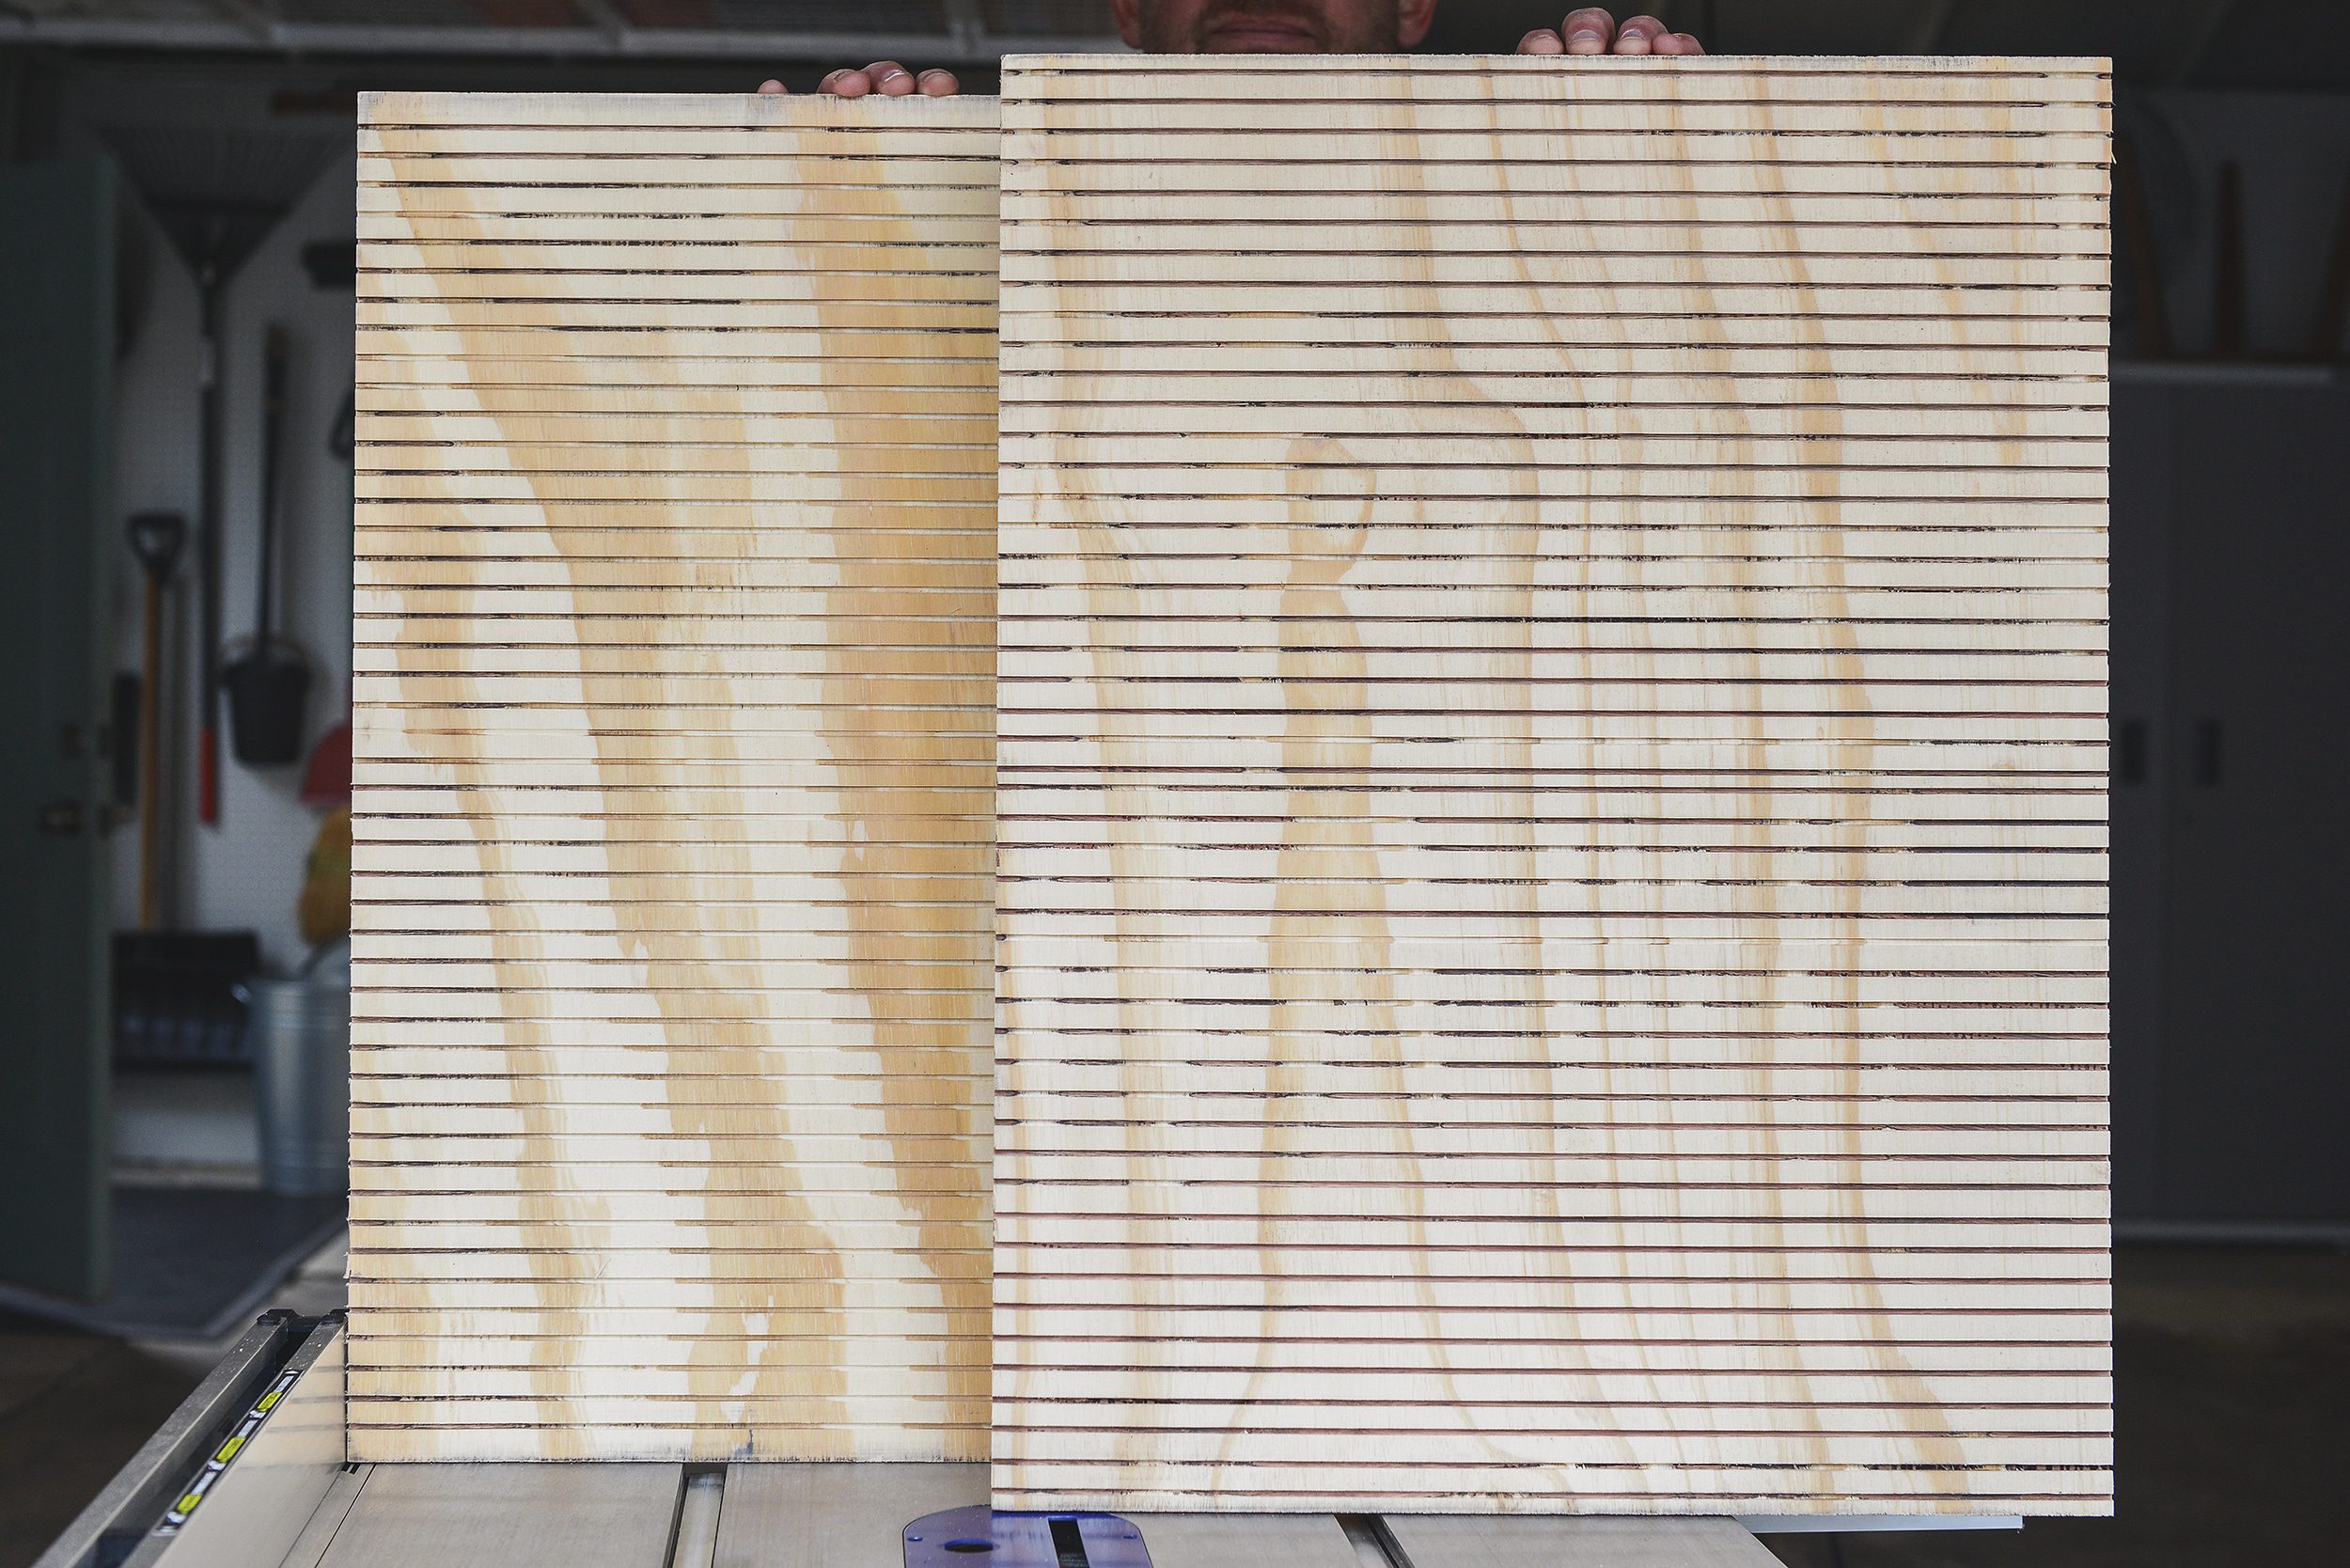

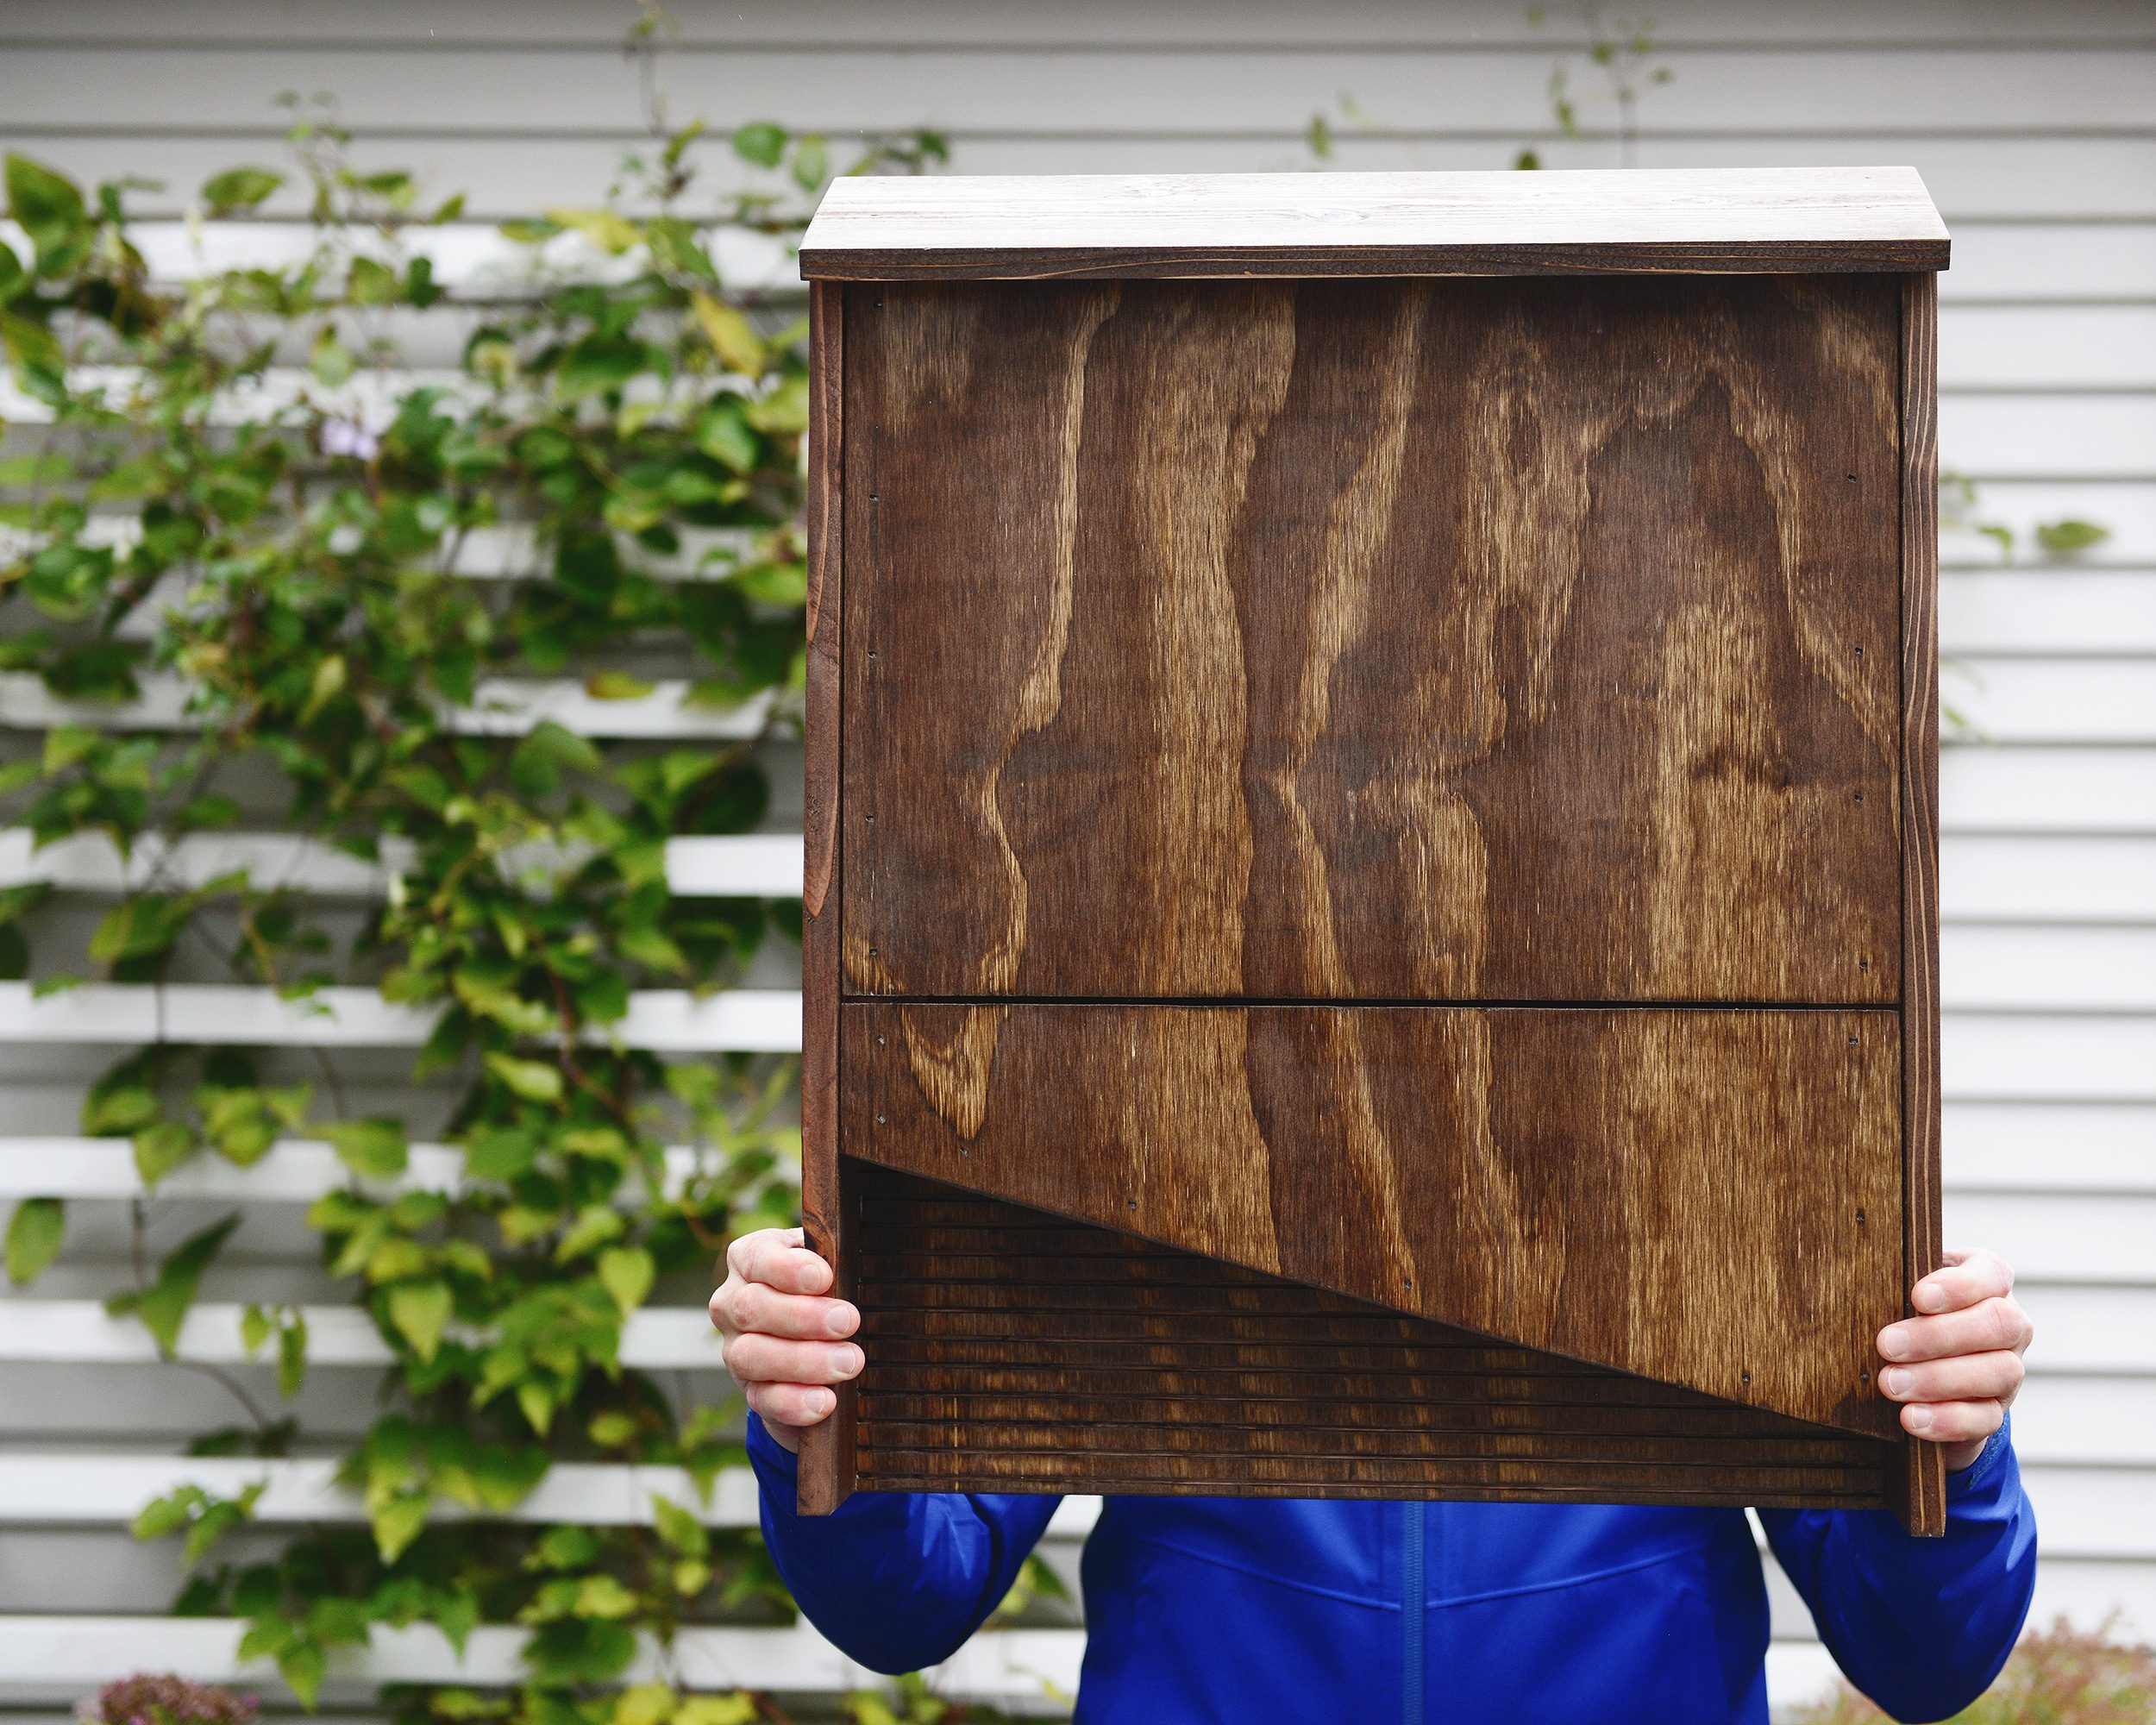
Now that we were fully grooved, we decided on the final design and cut the angled bottom of the front panel. This diagonal angle provides visual interest and gives the bats a secure place to land before they climb up the grooves into the box. Next, we cut this front panel into two pieces near the bottom. This allows for a 1/16″ vent for temperature regulation inside the box.
Tip: Have fun with your bat box design! We wanted to keep ours pretty simple since it will be mounted to horizontal vinyl siding.
Building the Walls and Floor
With the front shape finalized, we were able to make the cuts for the vertical ‘walls’ of the box. We used leftover cedar 2’x4′ pieces from our lumber pile and ripped them down on the table saw to a final thickness of about 2″. If a table saw isn’t accessible, 2″ x 2″ lumber would work perfectly here. We then traced the outline of the front panel and cut the bottoms of the walls to match. Next, we stubbed in a ‘floor’ that helps to keep the cavity of the box open, but reduces the size of the opening to deter predators from entering. Remember, bats prefer an opening of around 3/4″. Extra caulk was applied and everything was nailed into place at this point.
Note: The ‘floor’ piece should not be attached to the back panel, where it would block access from the ‘landing pad’. It should be attached to the front of the box to allow the bats free upward motion.
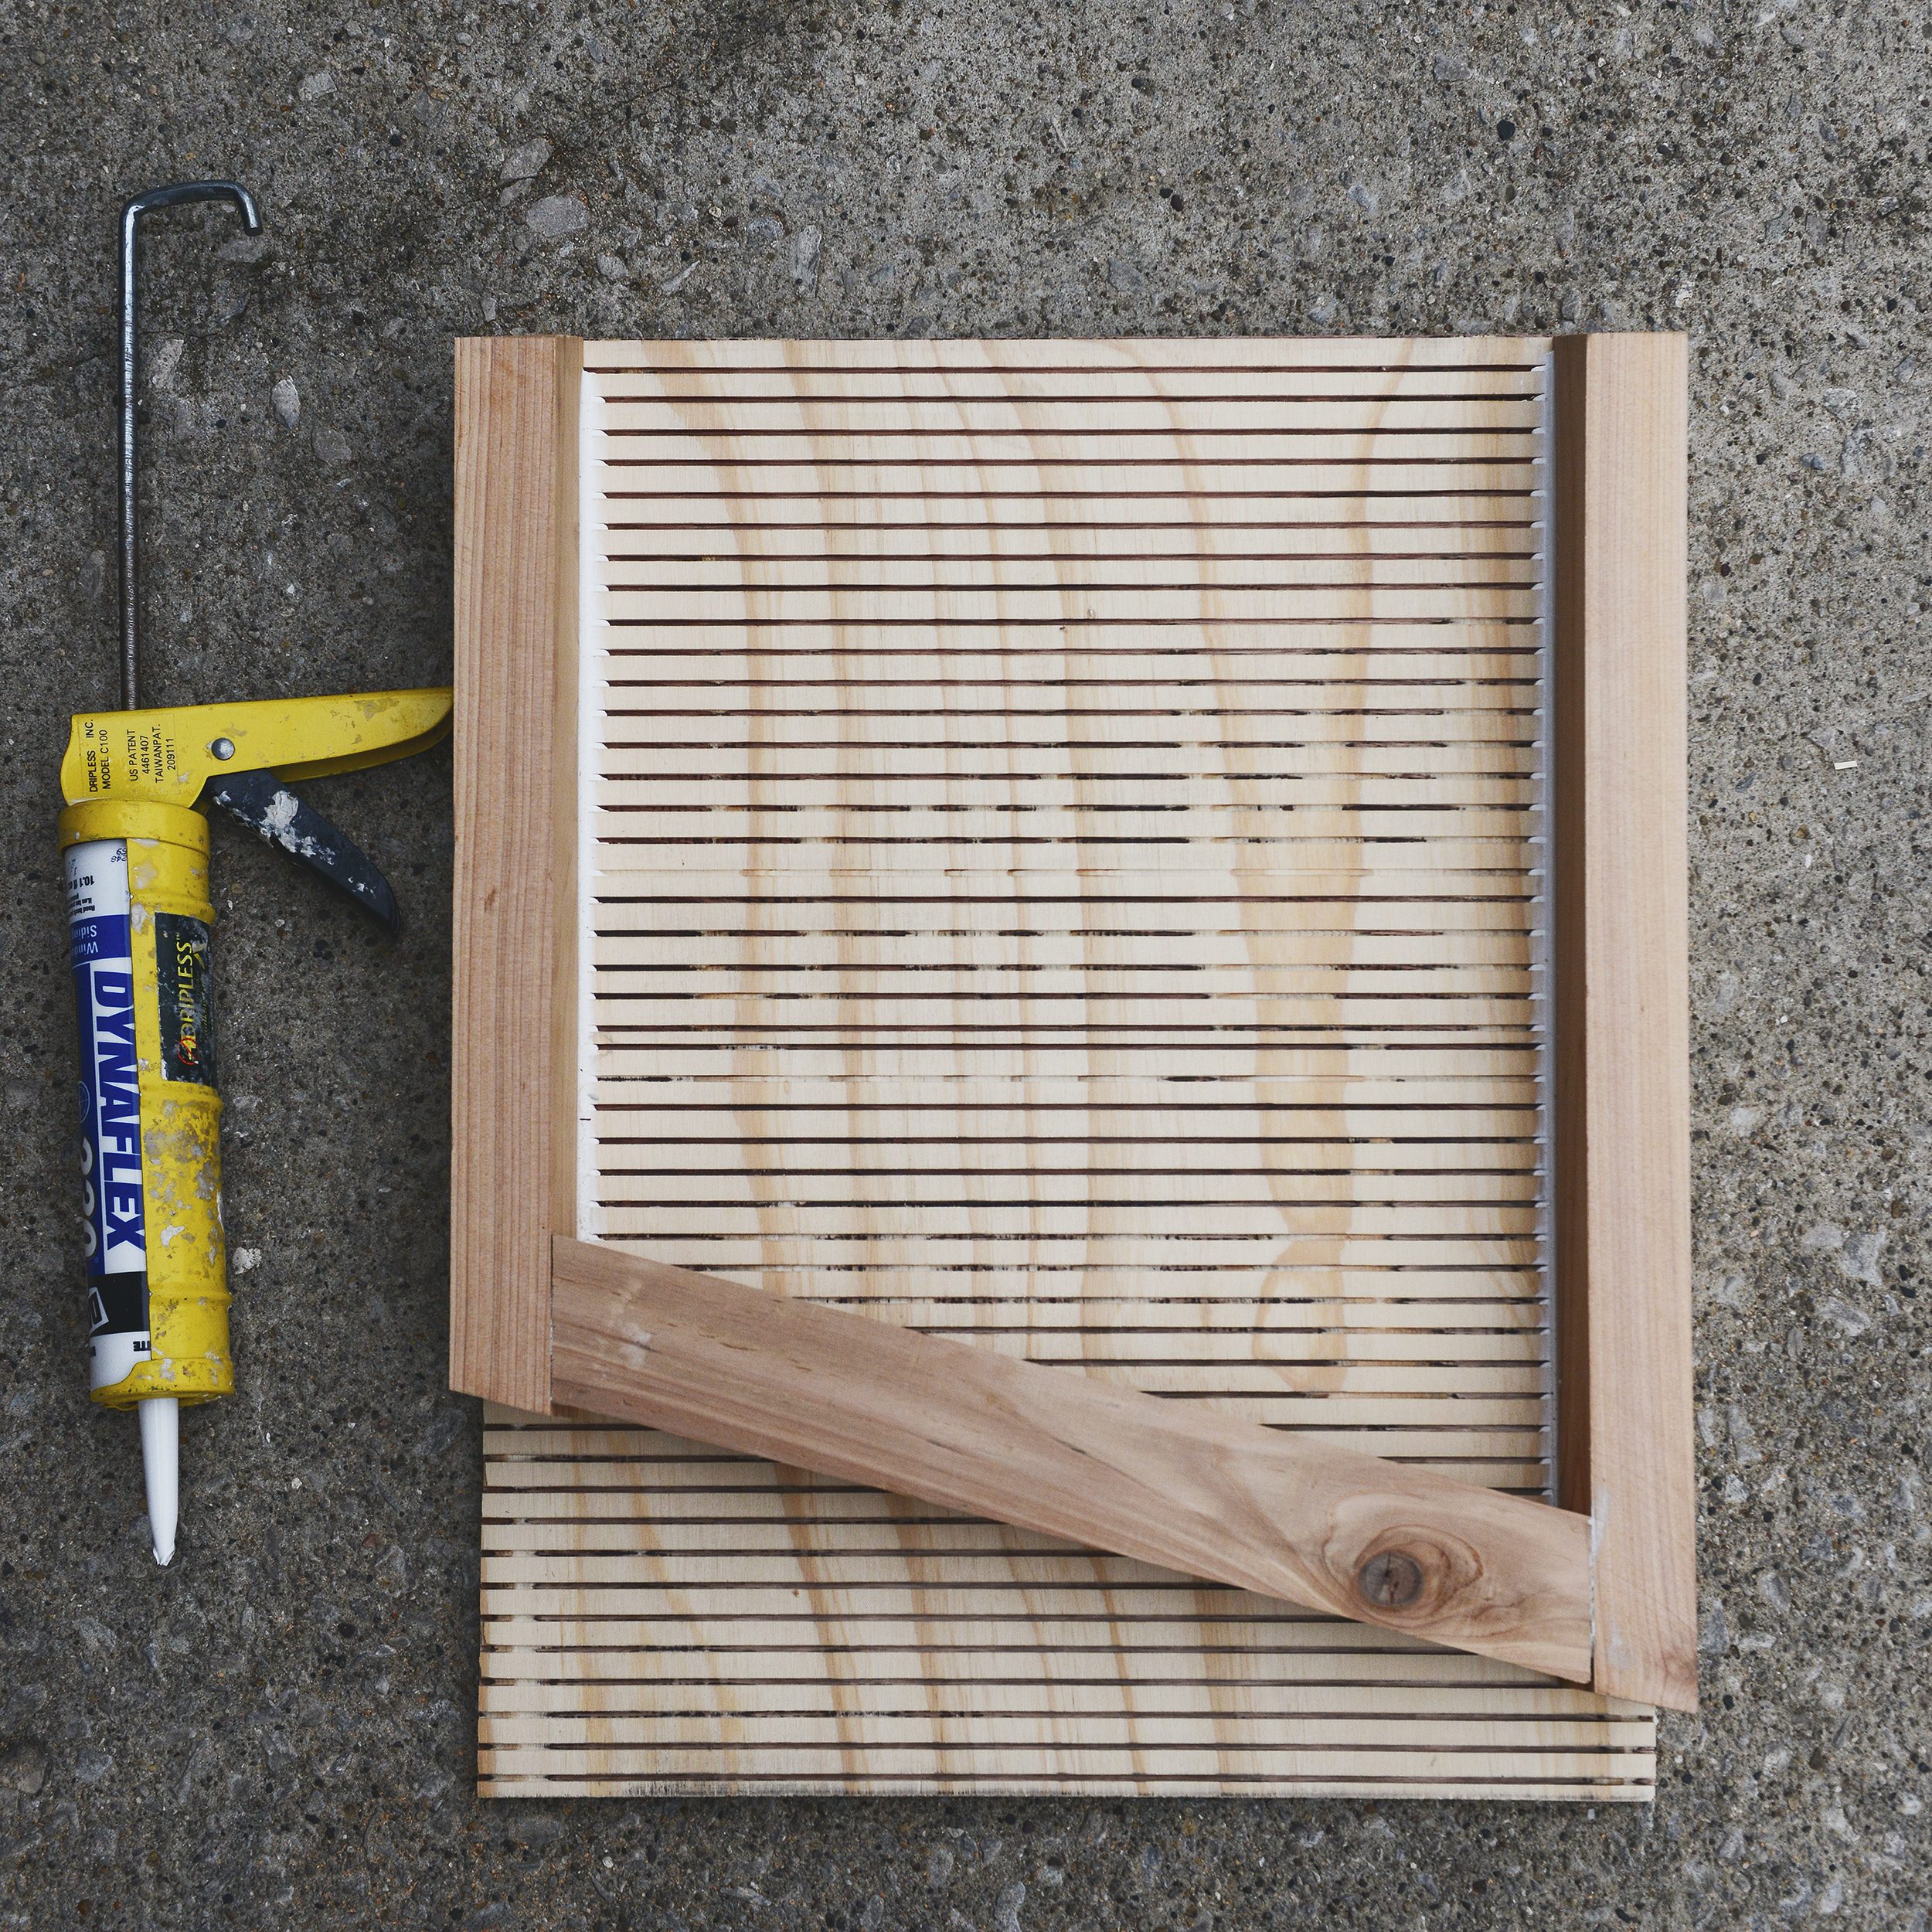
We then applied liberal amounts of caulk to the surface of all cedar shown above and used our air nailer to fasten the front panel (grooves facing in!) and roof onto the box. We also opted to cut cedar side panels (using the optional cedar fence picket) that finish off the box nicely and should help keep drafts from making their way inside. The step is likely unnecessary, but we love the finished look!
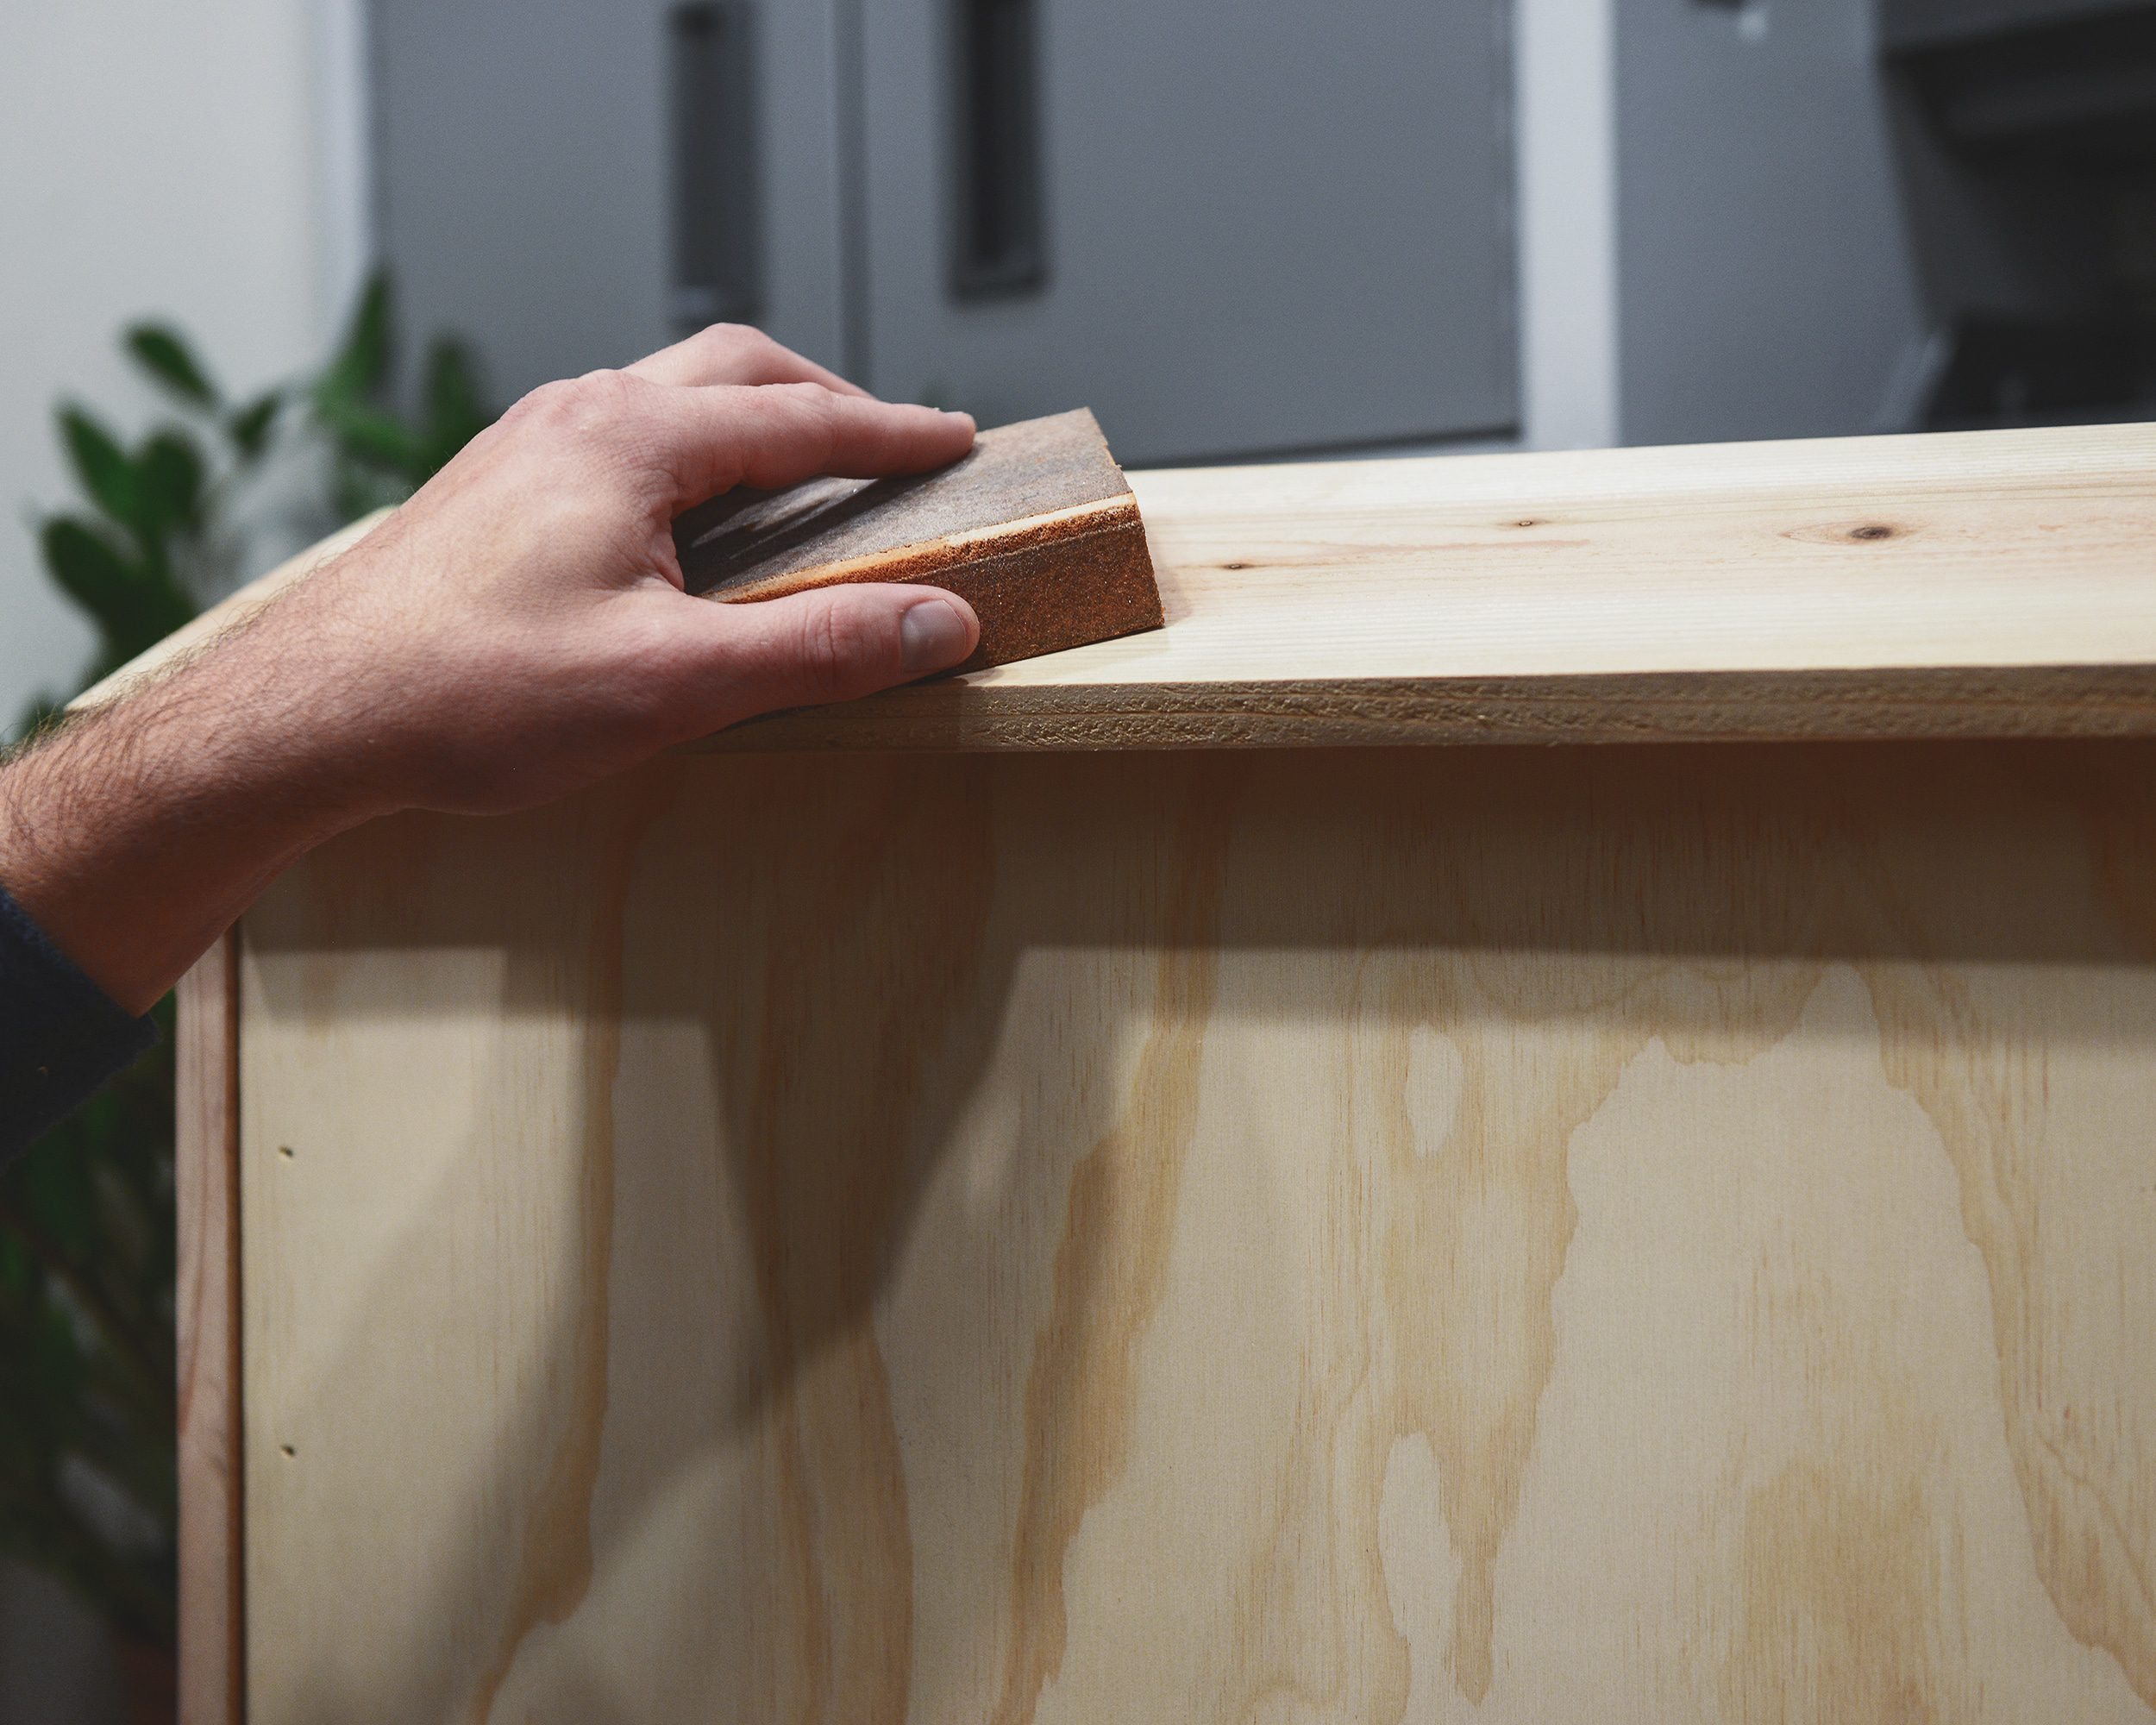
Sanding + Finishing
We gave everything a half hour of dry time to allow the caulk to cure, then gave the entire box a thorough sanding. This smoothed things out and provided a uniform surface for stain application.
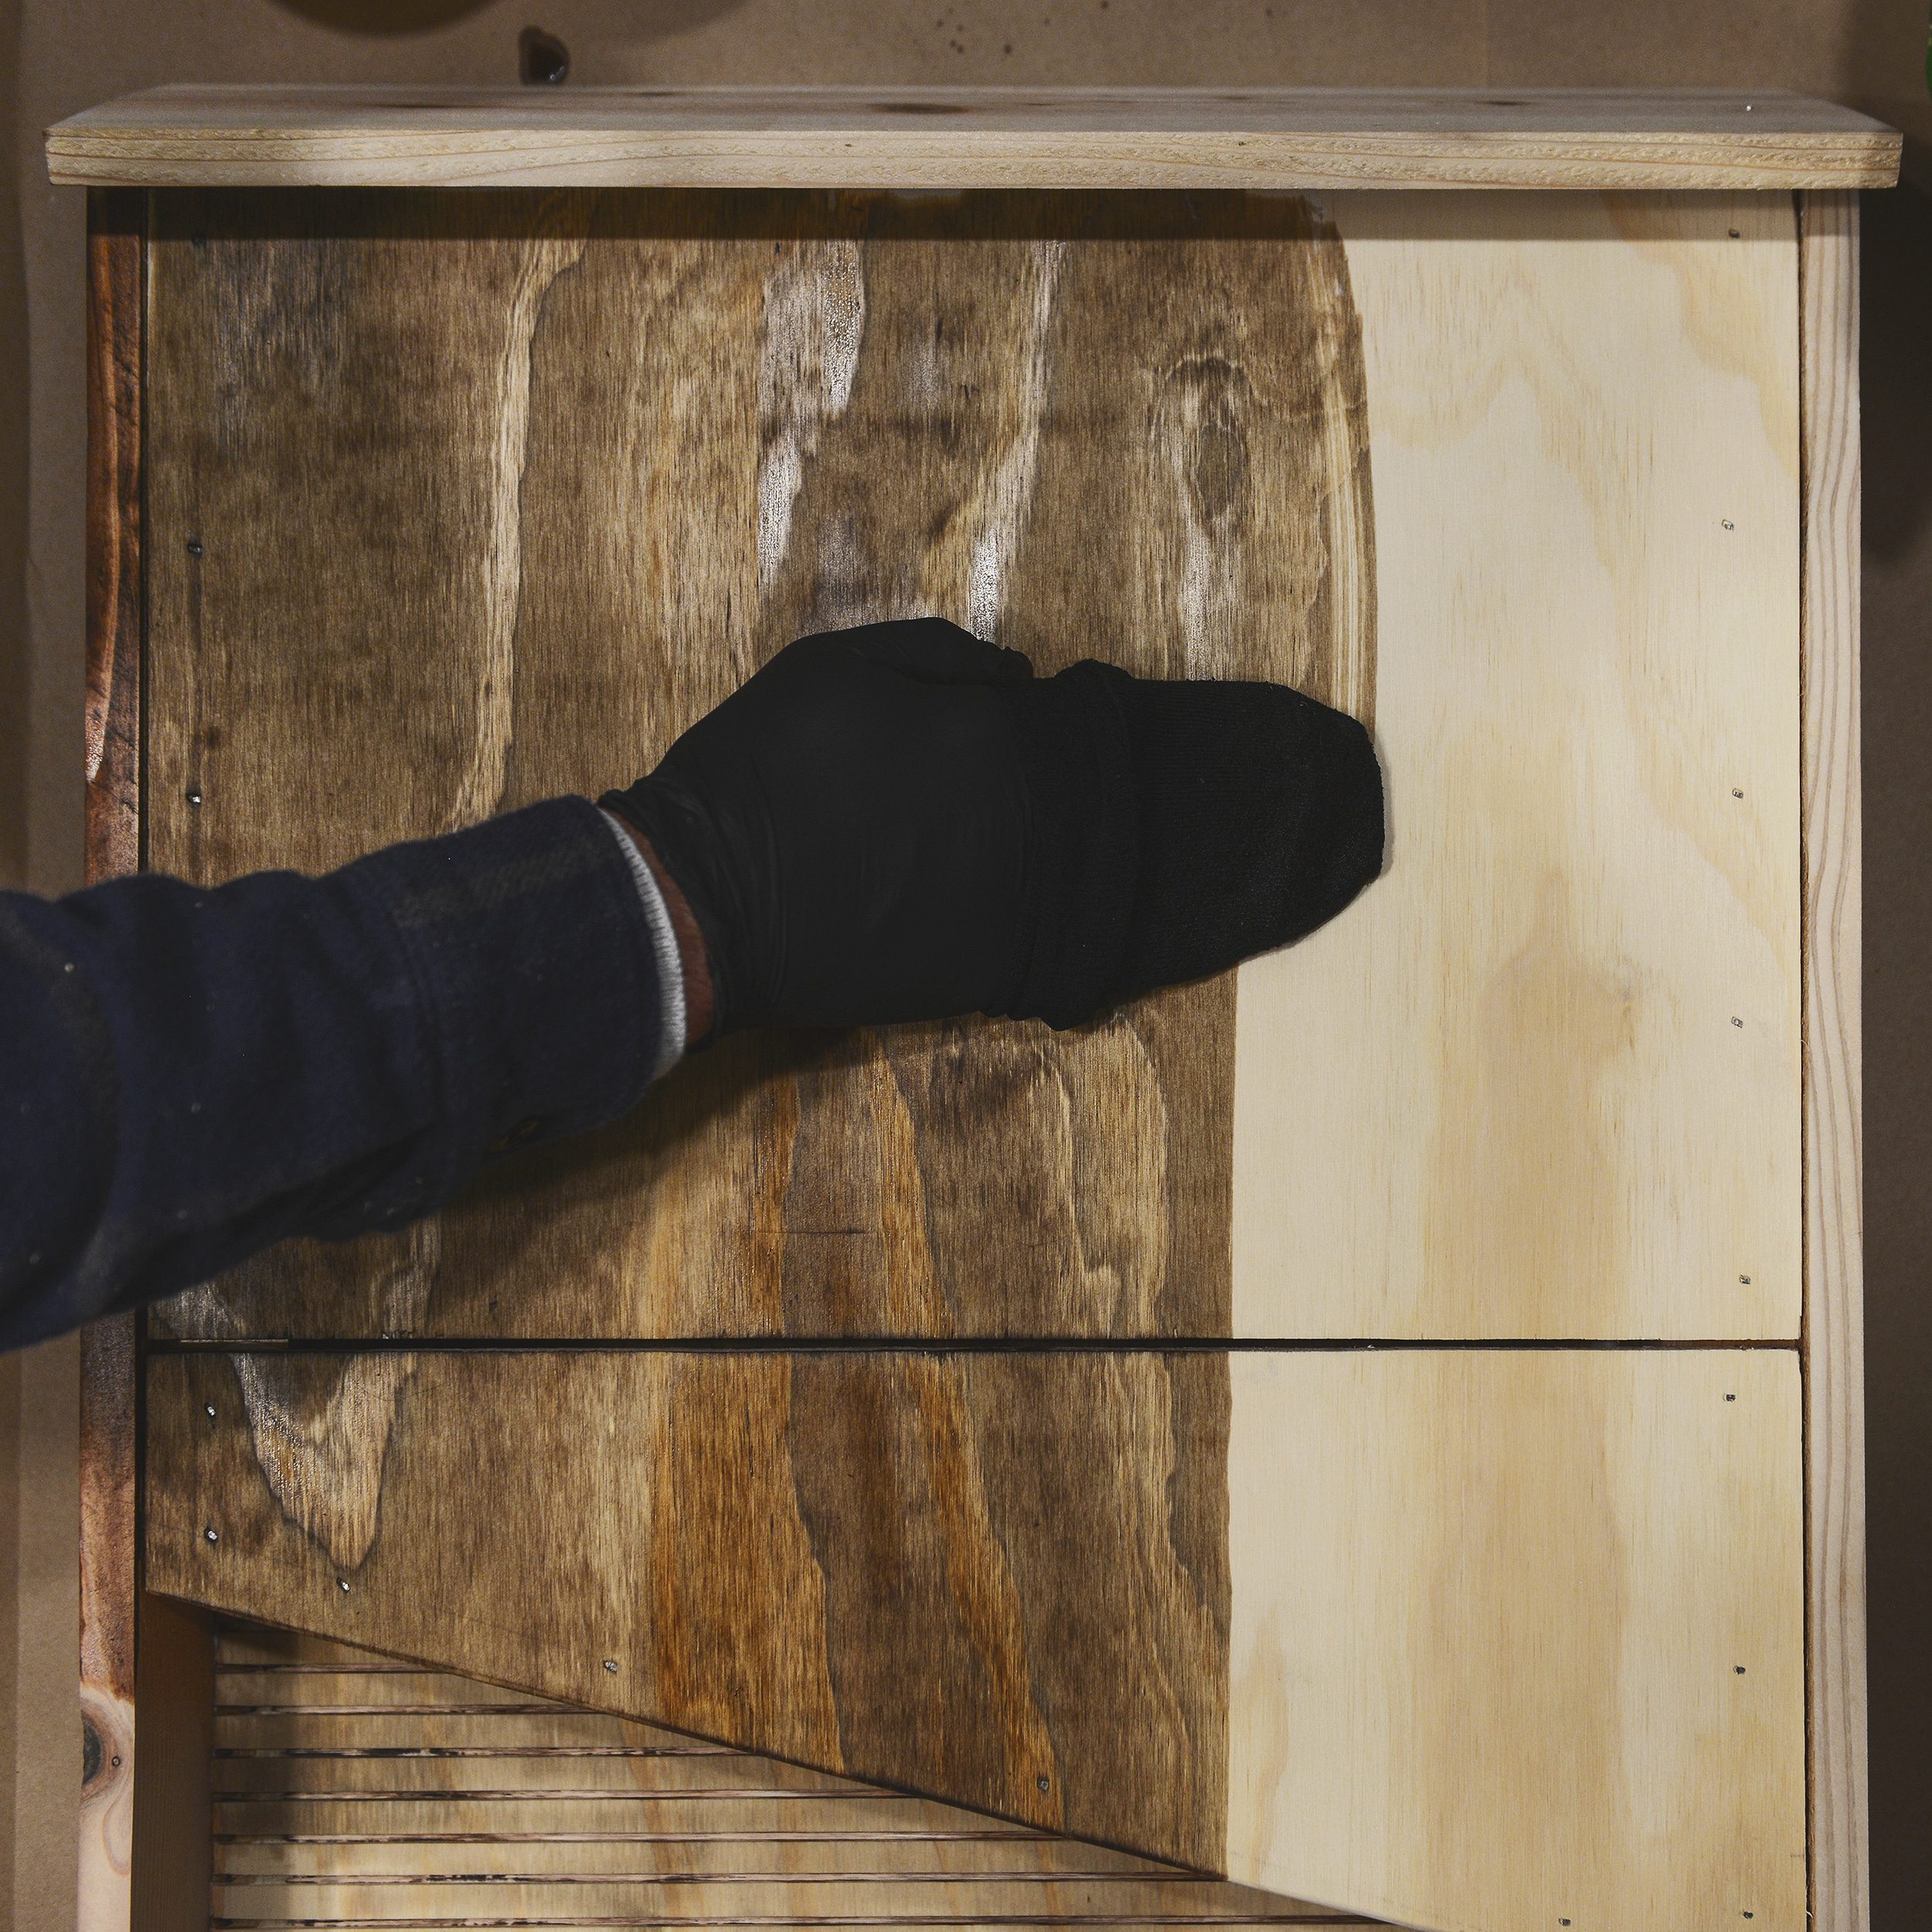
With construction and sanding complete, it was time to wipe on our stain. We keep a small box of old rags, tattered socks and torn t-shirts on hand for projects like this. Stain can really ruin your day if you’re not careful! We used Minwax Special Walnut for a medium brown finish that will blend nicely into our wooded surroundings.
The last step was to apply two thin coats of matte Polycrylic to protect the wood further. If exterior paint were used in place of stain, this step would be unnecessary.
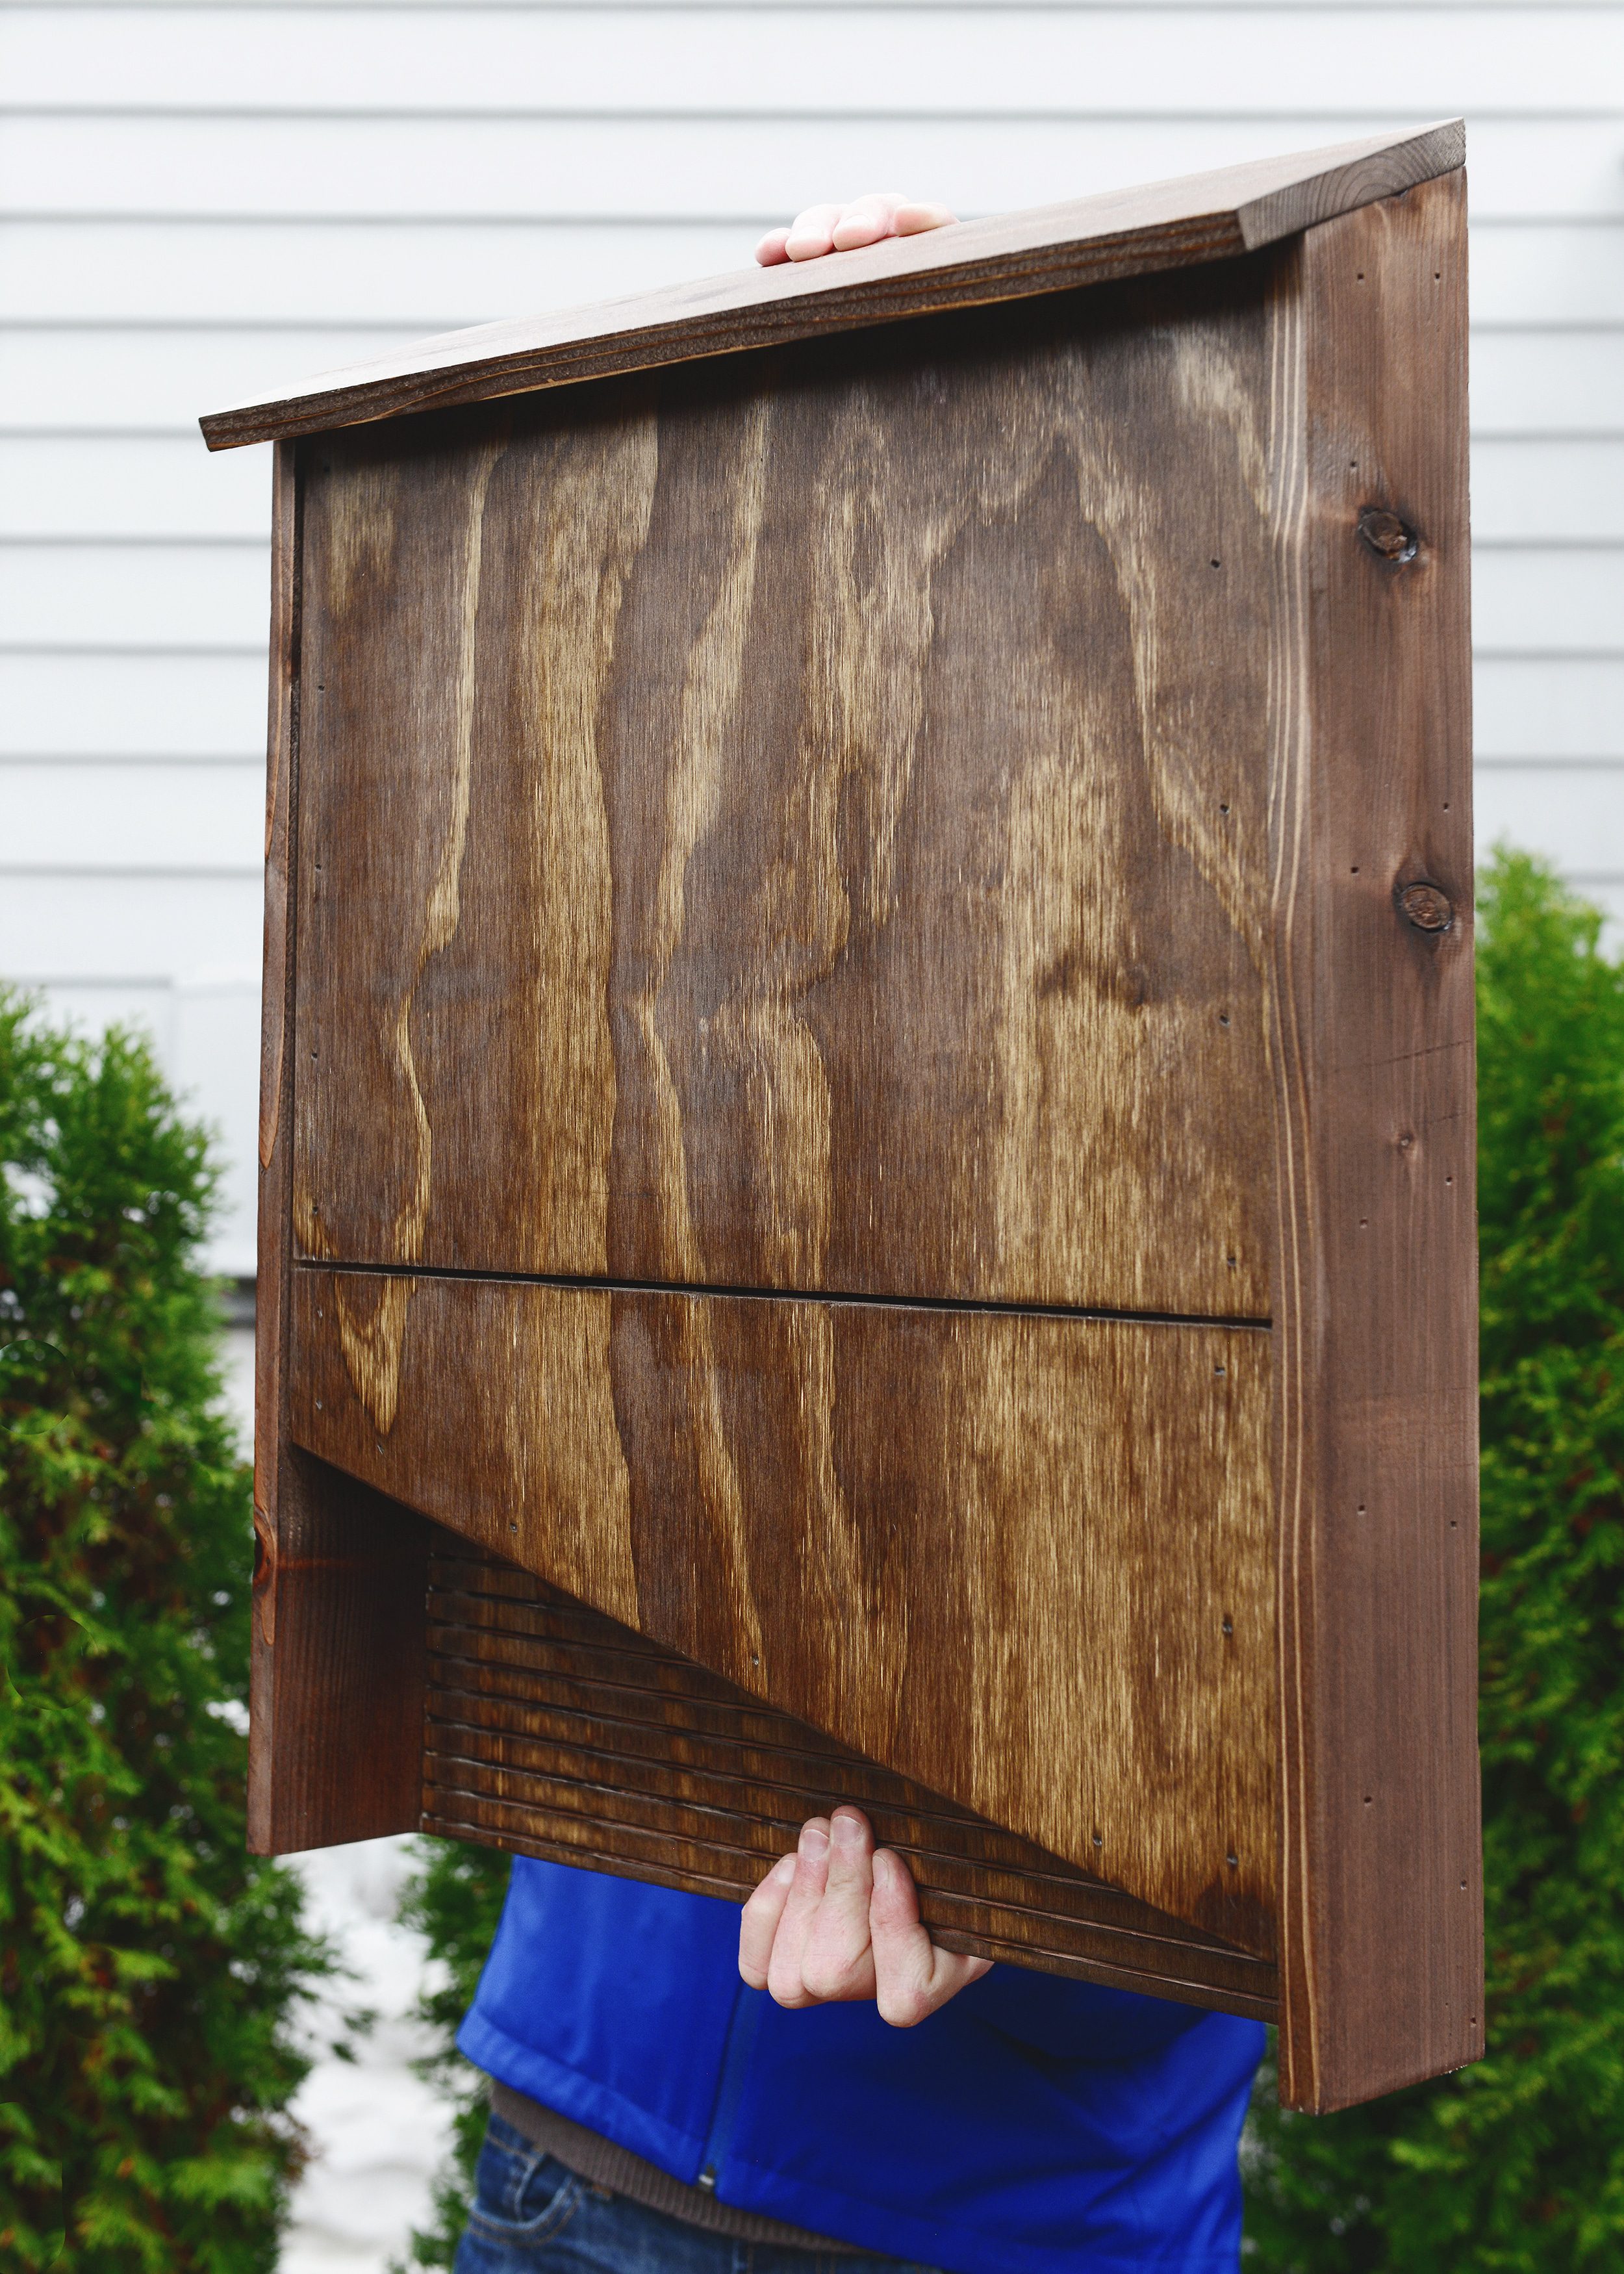
The Finished Product
Done! The final dimensions ended up around 19″w x 25″h x 4.5″d. This should provide enough cavity space for bats to cling to the interior of the front and back walls while keeping them warm and cozy!
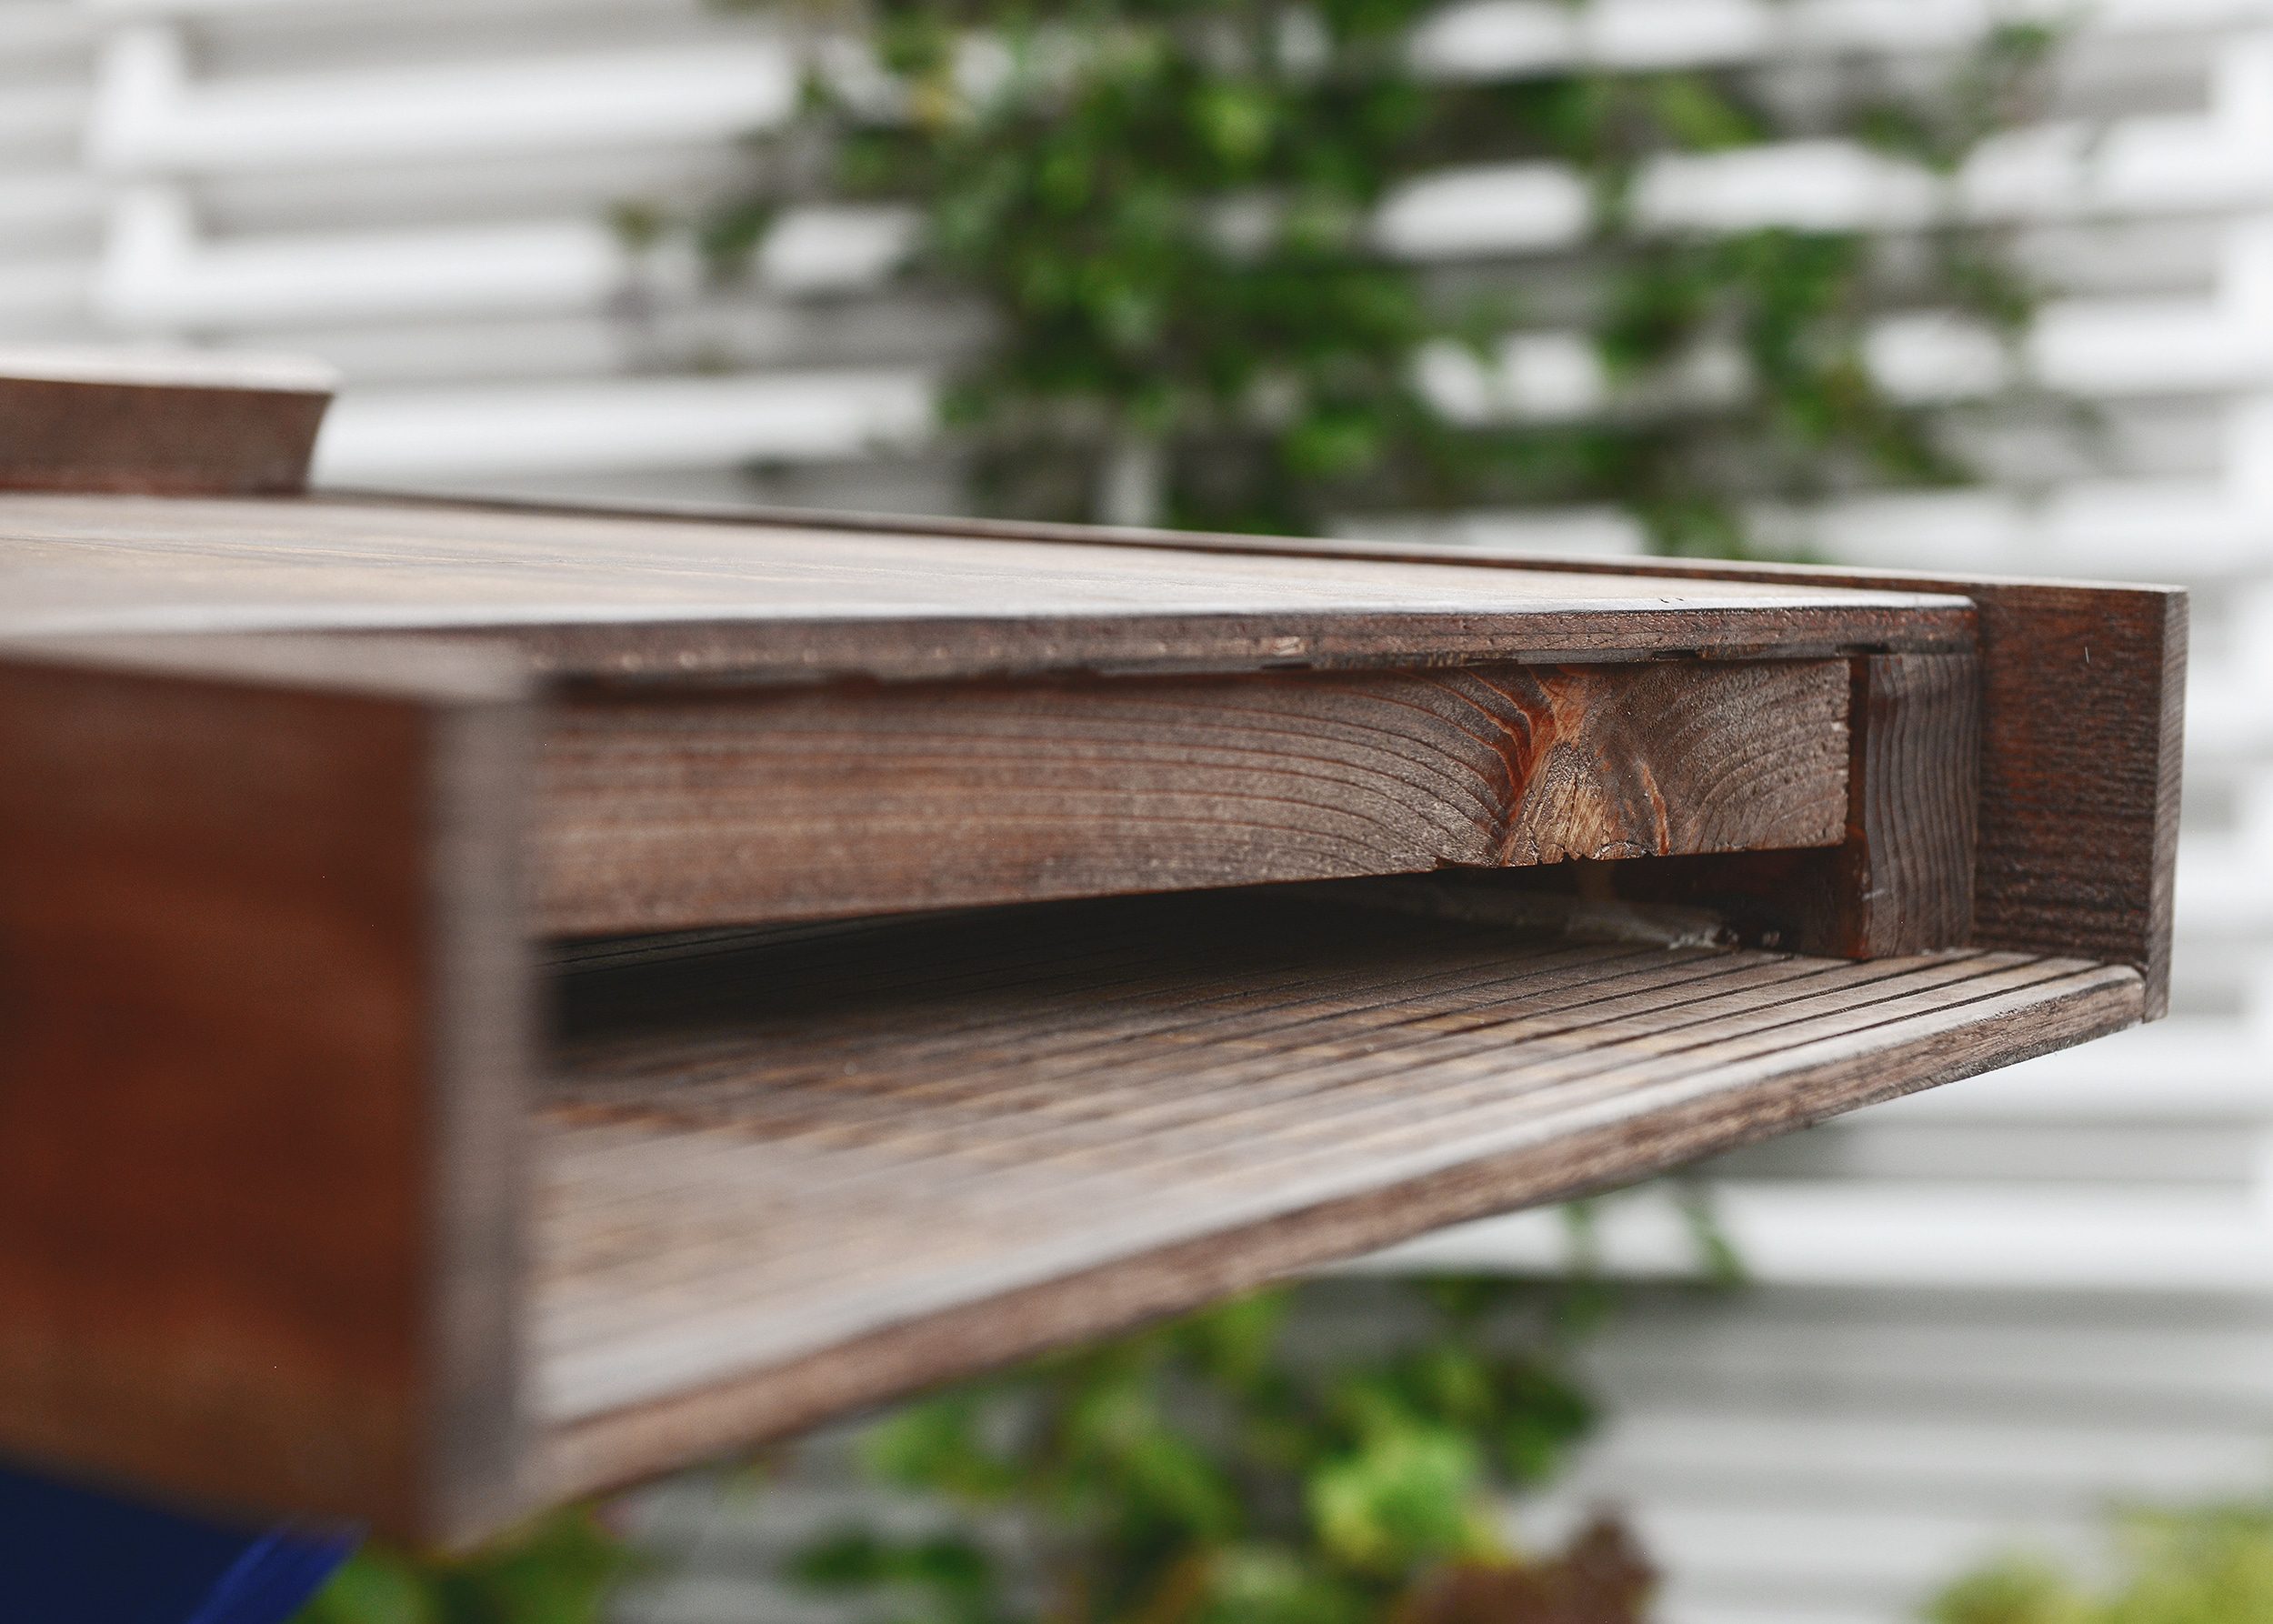
The photo below illustrates our note from above regarding the ‘floor’. Notice how it’s attached to the front panel of the box as opposed to the rear? Remember to maintain vertical access from the landing pad.
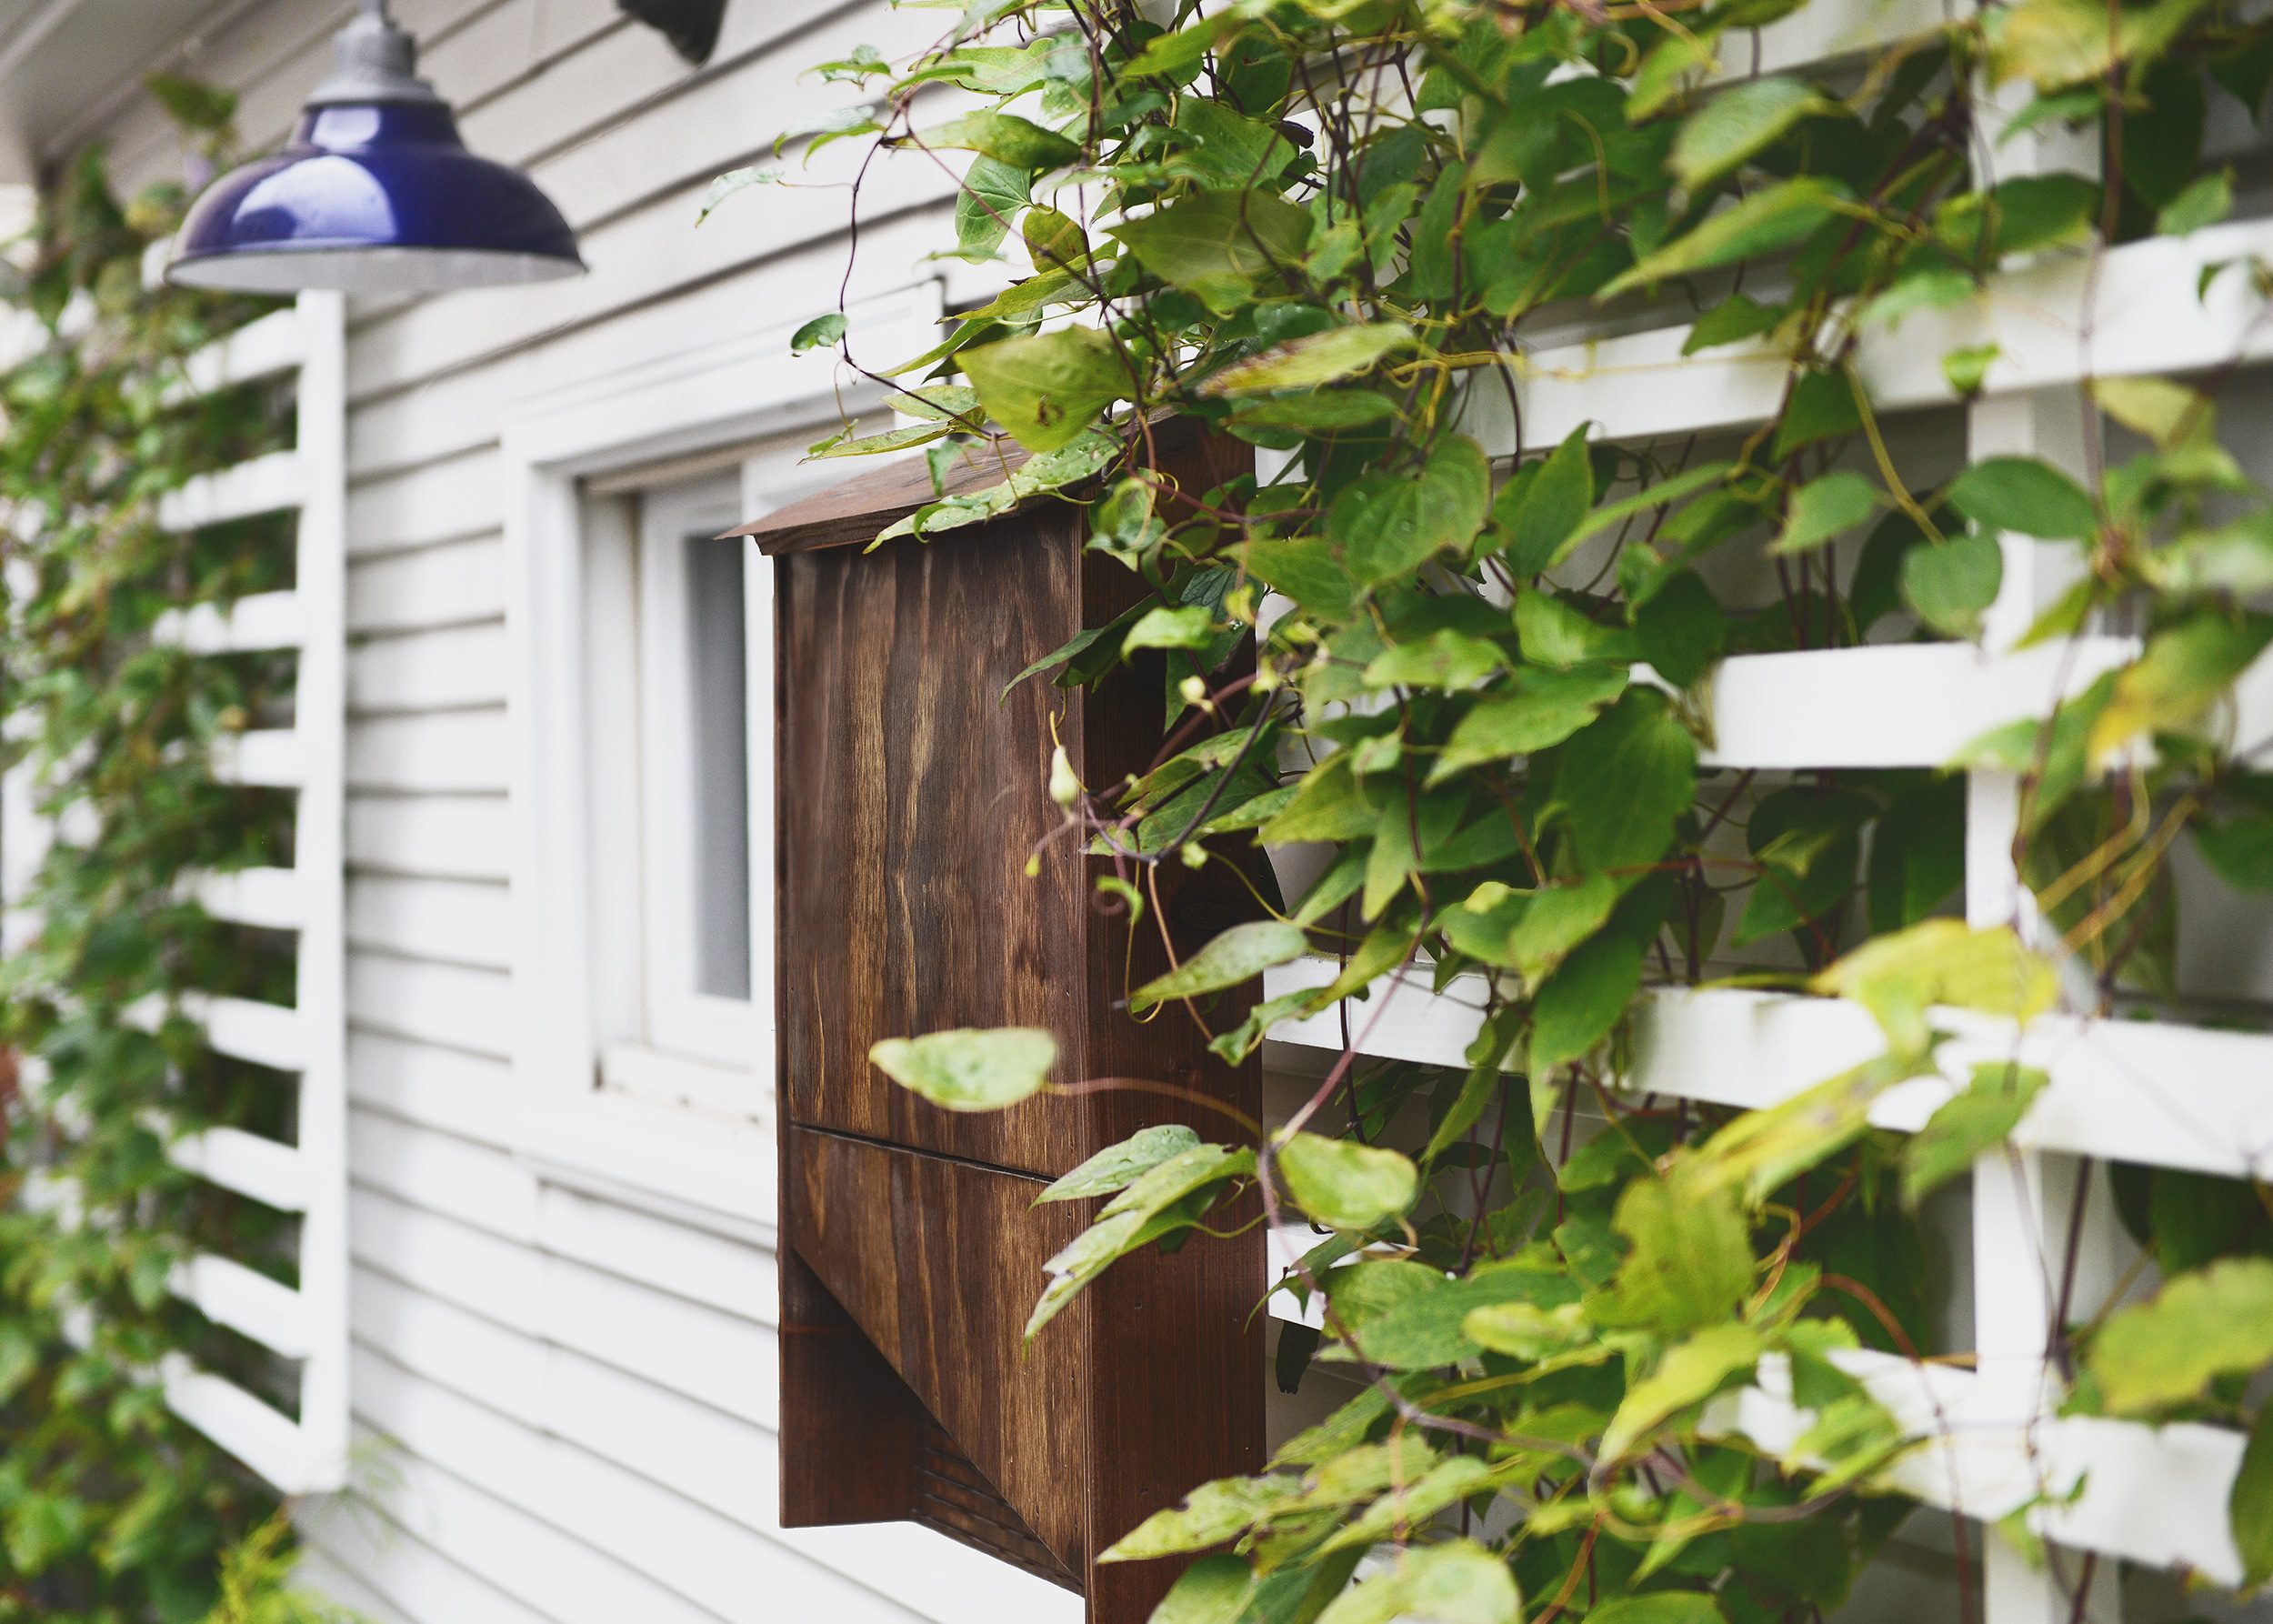
Ultimately, our bat box will be mounted on our Tree House using an aluminum French cleat, but for fun, we wanted to show you how cozy it looked at our Chicago home:
The beauty of this design is its potential to be tweaked for simplicity! We added the diagonal cuts for visual interest, but if access to a table saw and miter saw isn’t available, all cuts could be made at 90 degrees with a hand saw. Most big box hardware stores will also cut plywood for free on their panel saw, leaving only the walls, roof and floor to be cut at home.
Happy bat box making and again, Happy Halloween!


This is so cool! You guys of course made all the details look so exact. We’re going to need to see the bat box being used!
Thanks Ashley! We’ll update as soon is it’s occupied!
We have a bat box! It’s called my attic, unfortunately. Nothing nicer than a nice warm attic! We’ve had them squeak out the tiniest opening and fly around inside the house twice (once with my dog leaping and chasing it – humorous, but terrifying!) and had one terrify a contractor when rebuilding a section of the house. Honestly, I actually do like bats and love what they do for the environment and bug control but in your house they can be a real pest. We had a control company come and investigate and they did discover that yes, we had a small family there, but at one time we had a whole colony living in the attic. There’s still a lot of cleanup to do which we’ll get to. I’m sure you already assumed you’d get responses like this! :-) I hope you follow up and let us know if this works and you actually do get bats living there! Happy Halloween!
Hey Michelle! We definitely want to keep the bats outside the house! The idea of an entire colony in the attic is a bit unsettling! We hope our local bats take up residence in the appropriate house soon and will update when they do.
Can you show a bit more detail of the cleat than shown in the parts picture? Thanks!
The cleat isn’t attached to the box quite yet! We need to get to Michigan to determine final mounting position before we install everything. This is the cleat we’ll be using!
Thanks. Now I can envision how it works.
this is really neat… please please please do a follow up to let us know if the bats are using it!
We will! Most of the info we found online says it can often take 6 months to 2 years before bats move in, but we’re hoping for much quicker occupancy!
Love this and love bats and the work they do! Just one note of caution – their poop (guano) will pile up below wherever you mount this box. It takes time for it to build up to something really noticeable for a box this small, but just be mindful of where you’re mounting, how much clean up you’re willing (or will need) to do, etc. Good luck!
Thanks for the heads up, Kara! We’ll keep an eye out once we’ve established a few ‘residents’!
It makes great fertilizer for your garden. And it will be free!
(Well, maybe the cost of the box.)
Bats are amazing little creatures! I’m glad you’re giving some of them a home. One note of caution: if a person handles a bat or wakes up to find a bat in the room where they were sleeping, they should be vaccinated against rabies. The vast majority of bats are healthy and helpful, and protect human health by keeping mosquitoes (and the germs they carry) at bay. But it’s good to remember where the limits of contact are to keep ourselves safe.
Agreed, Elizabeth! We’ll be observing from a safe distance for sure.
I love bats but there’s been a small hawk living in my neighbor’s tree for a few years, so I’ve had pretty limited wildlife. It seems the hawk has recently moved out, though, because just in the last couple of weeks I’ve noticed a few bats coming around! I will definitely be making one of these to encourage their residency :)
Hi Stacy! We definitely have a few raptors around Tree House as well, which I think are equally cool. Hopefully this box will give the bats a save hideaway from flying predators so we’ll get to keep seeing both!
This is such a beautiful project! We have a massive palm in front of our rental property that houses who knows how many bats? They love it – it gets direct morning sun – and before we moved, I loved sitting on the porch at dusk and watching them fly out.
Can’t wait to hear more!
Very cool! We’re hoping for a similar experience as we sit around the campfire in Michigan!
Great job! Bats are amazing. There’s a quirky podcast called “ologies”. The host, Alie Ward, recently did an episode with a bat expert. Perhaps something fun to listen to on your drive back to or from Michigan. Happy Halloween!
Oh how cool, thanks for the rec!
Building and nature… two of my greatest loves. Ha,ha. Bats are awesome. Thanks for sharing the build!
[…] plan de boîte de chauve-souris à chambre unique de YellowBrickHome peut être construit pour moins de 20 $ et est fabriqué à partir de […]
That’s a fine looking box, but mounted in a highly inappropriate place on the side of the white house! Even if it’s temporary, this is a really poor example to show for all the folks who might unthinkingly do likewise. First, it’s much too low, being about the level of a first-floor window, 5-6 ft off the ground when the bare minimum, according to bat conservation groups, is 10 feet. Secondly, right next to a trellis?? That’s literally a ladder for predators – cats, racoons, snakes – to go right up and grab the resting bats out of the house :(
If you’re going to leave this picture up, please at least modify the text to point out that this is is just to show how it looks on the house, and it will NOT be installed here (and why). The bats will thank you!
It does. And they did.
Came across this while looking for bat house plans. Very helpful — except I am wondering why one suggestion was pressure treated wood? They have removed all items made from pressure treated wood out of playgrounds and it is not recommended for veggie gardens, so why would that be okay for bats? I also wonder about using paint or sealer inside? What function does that serve when balanced against toxicity?
[…] CHECK HERE […]
[…] yellowbrickhome […]
[…] Details here […]
Nice House, I just have one question, Why do you need a 72 inch board if you aren`t using it for the post. You have leftover wood. I was wondering if that was recommended or if it was required for those exact dimensions for the pressure treated wood?
We made the box with wood we had on hand. Depending on the size of the box, you may be able to get away with a shorter board, but we wanted to avoid a trip to the hardware store.
I got it, sorry I was so abrupt, thank you so much for helping me with this.