

We’re talking through all of the steps involved in hanging our DIY porch swing in its new location on our renovated Chicago front porch as well as additional tips to hang your own porch swing!
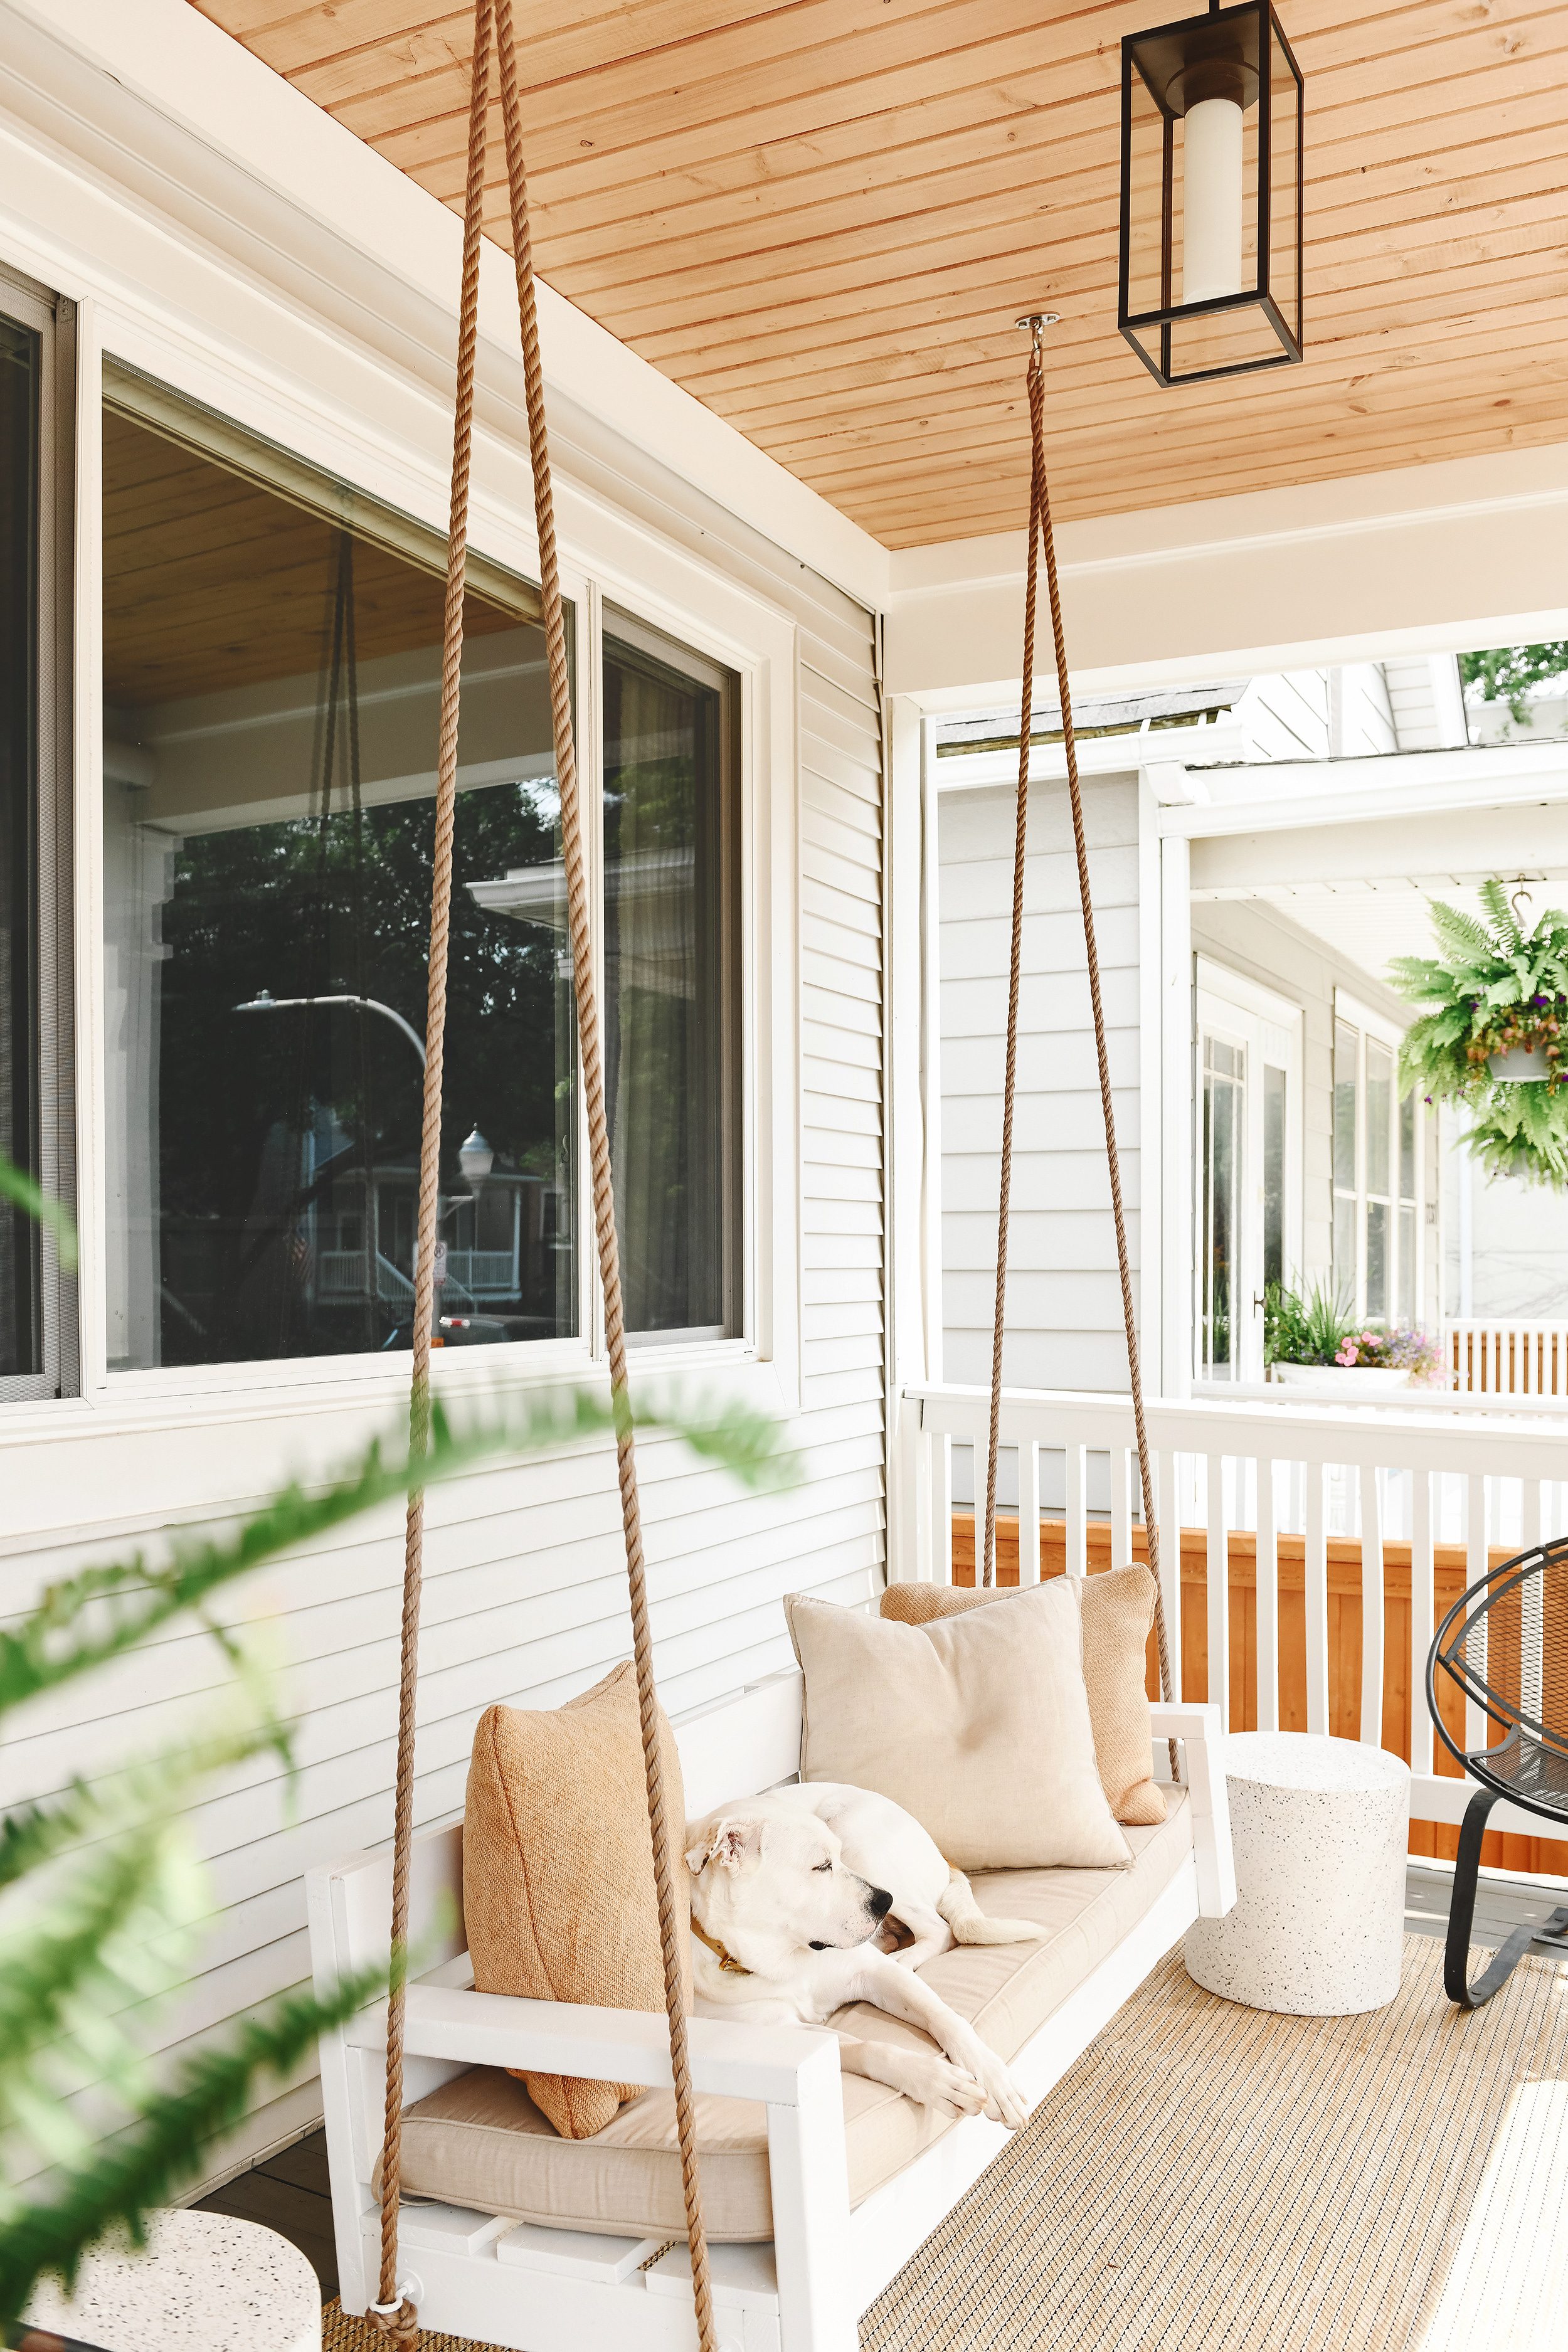
The DIY swing that we built a few year ago is one of our favorite spots to relax in our Chicago home. We built it a few years ago and have since painted it also recently changed the scale of the seat to allow for more optimal space planning. As the refresh of the front of our home neared completion, it was time to get the swing hung up in its new location! This is how we got it done.
Here’s what you’ll need:
- Tape measure
- Pencil
- Masking tape
- Stud finder (optional)
- Drill and various bits
- Swing hangers, vertical or horizontal
- Porch Swing (obvs)
In This Post
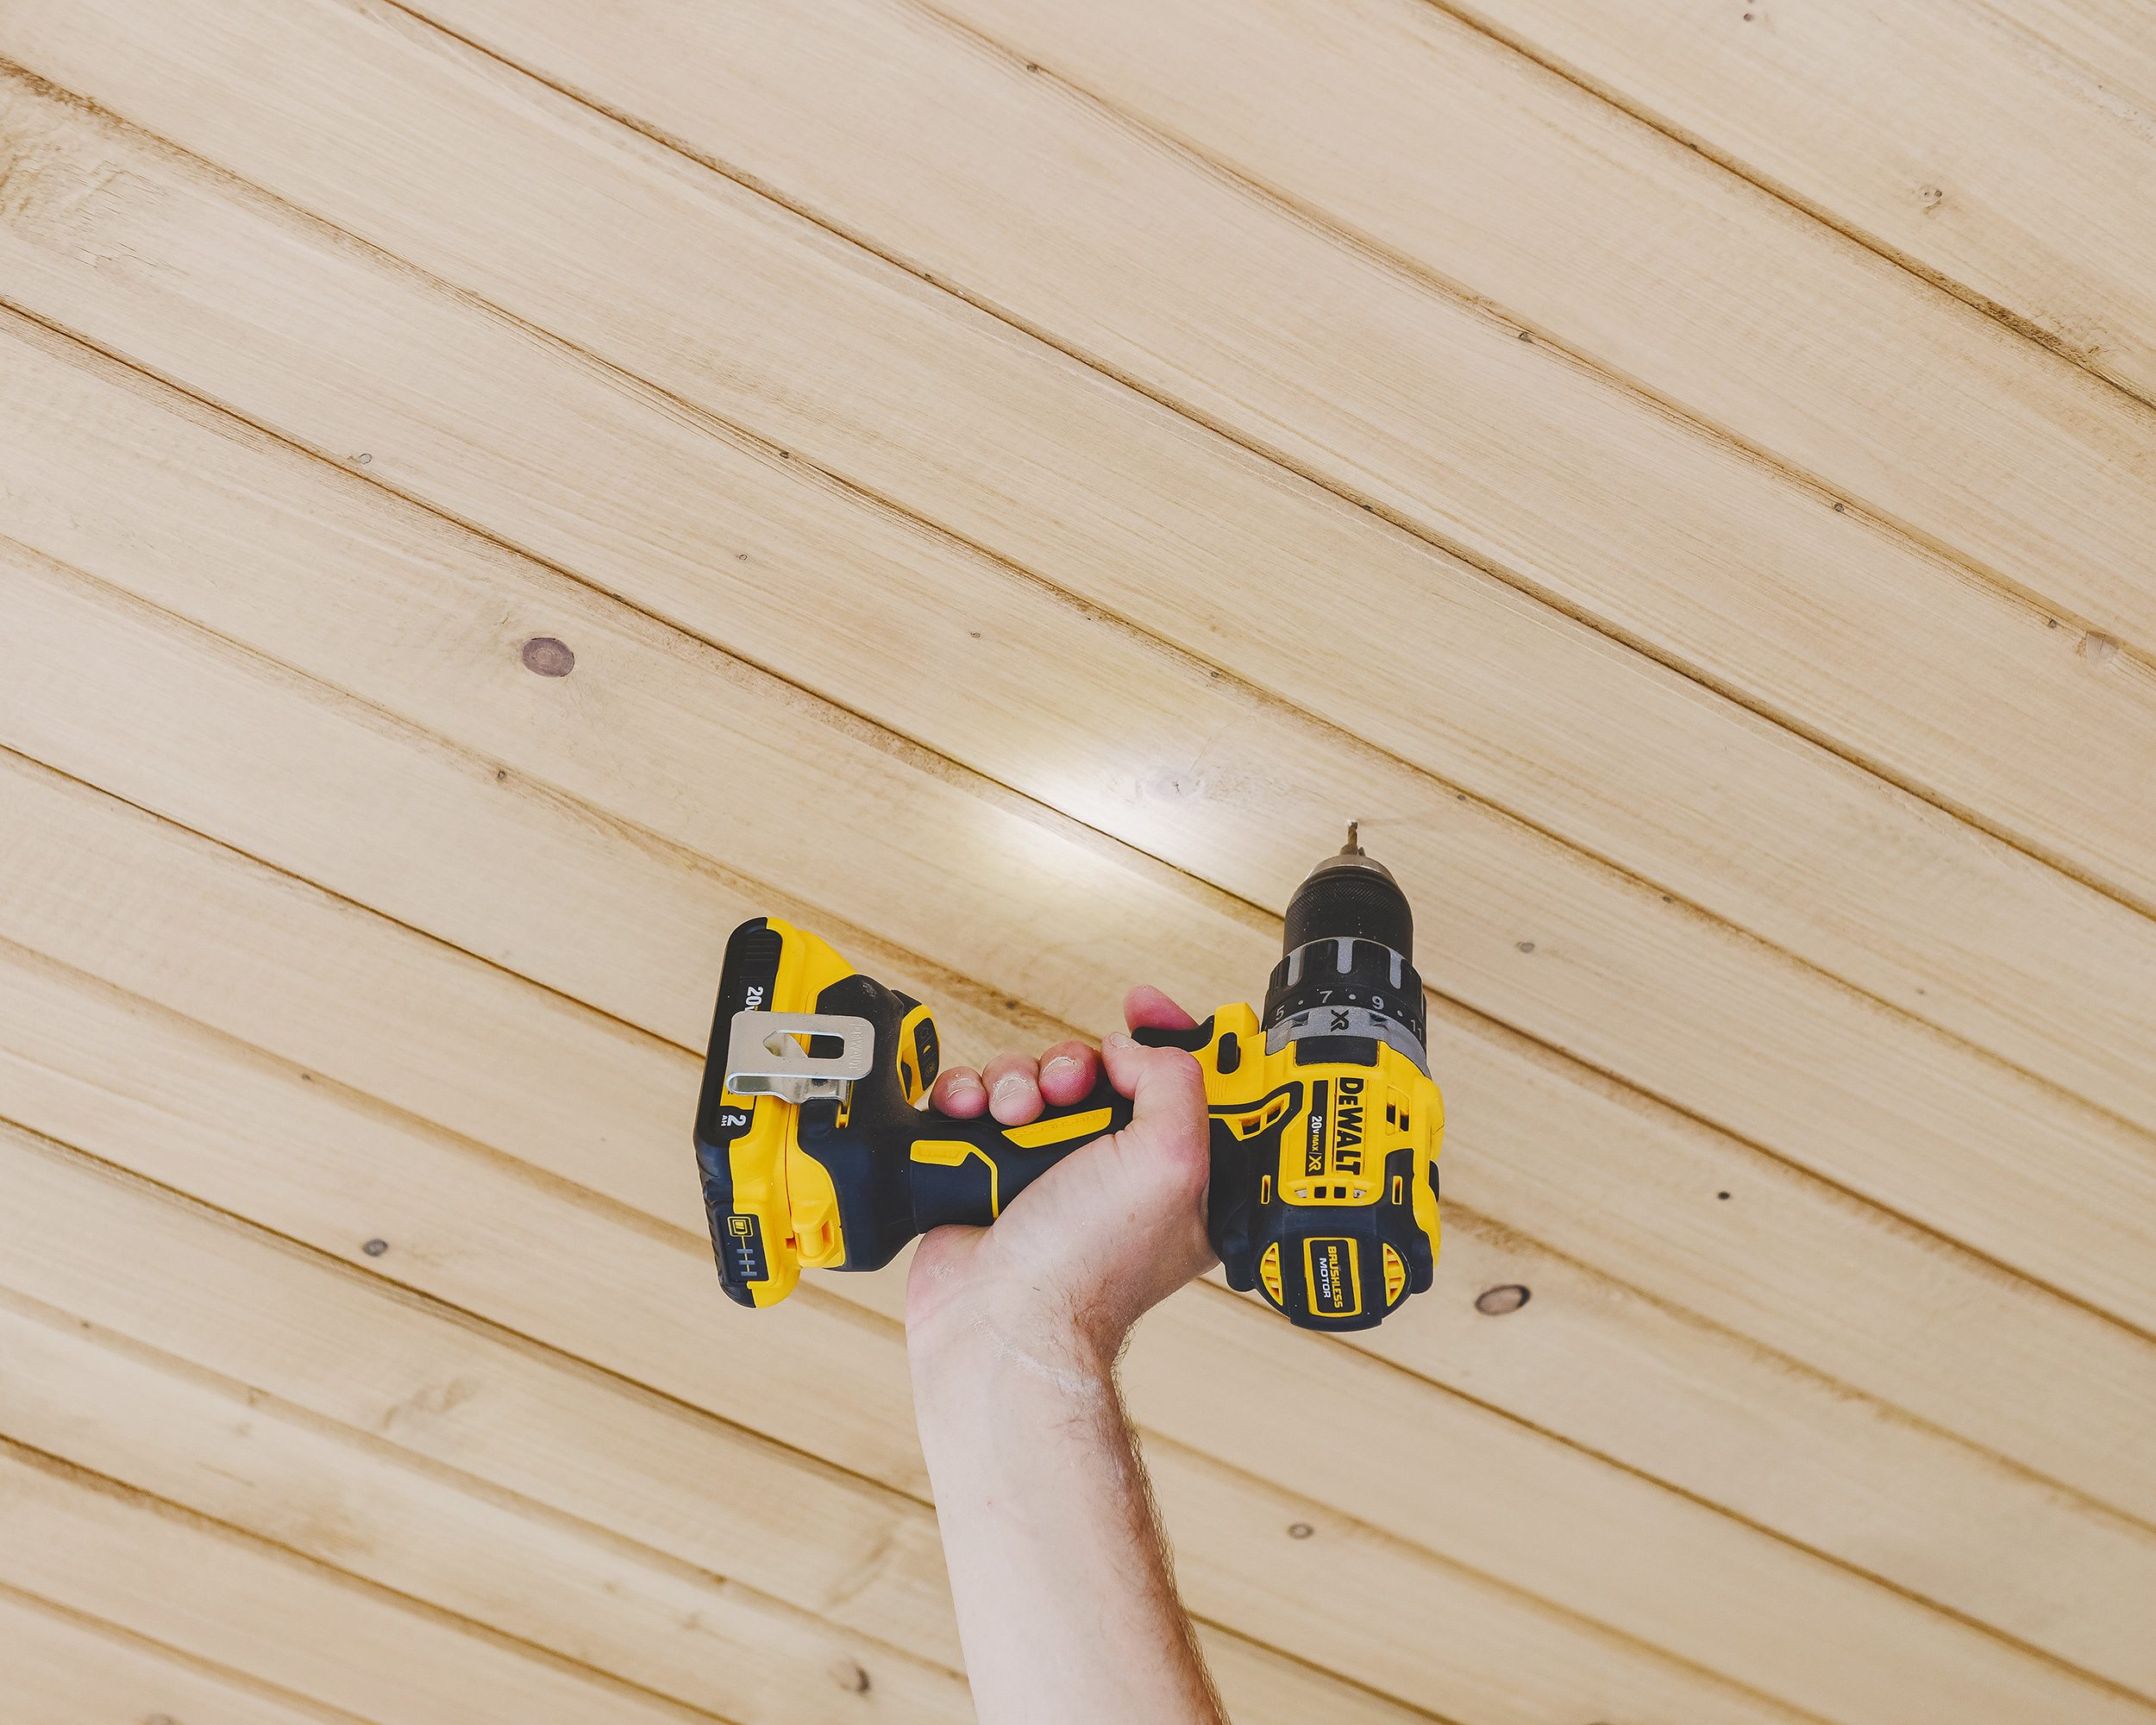
Step 1 | Locate Structural Celing Joists
Locating the structural ceiling joists is the most important step. The swing must be installed into structural supports to avoid the risk of falling. In our case, we were in the process of revamping our front porch with new trim and a wood beadboard ceiling. Since our ceiling was already being replaced, we had our contractor add extra wood blocking between the joists to give us lots of flexibility for the final mounting location. All we had to do was measure and locate the blocking then move on to the next step.

Since most ceilings won’t be entirely removed prior to the swing being installed, the first step is to determine your ceiling type. The most likely materials are:
- Wood or beadboard like ours
- Aluminum
- Vinyl
With any of these ceiling types, there are a few tricks you can utilize to help with joist location. The joists most likely run from the house toward the front of the porch, but that’s never guaranteed. With thin materials like vinyl or aluminum, a stud finder (especially one with a ‘deep scan’ function can be very useful.
In the case of a wood or beadboard ceiling, the presence of finish nails is a great indicator of joist location.
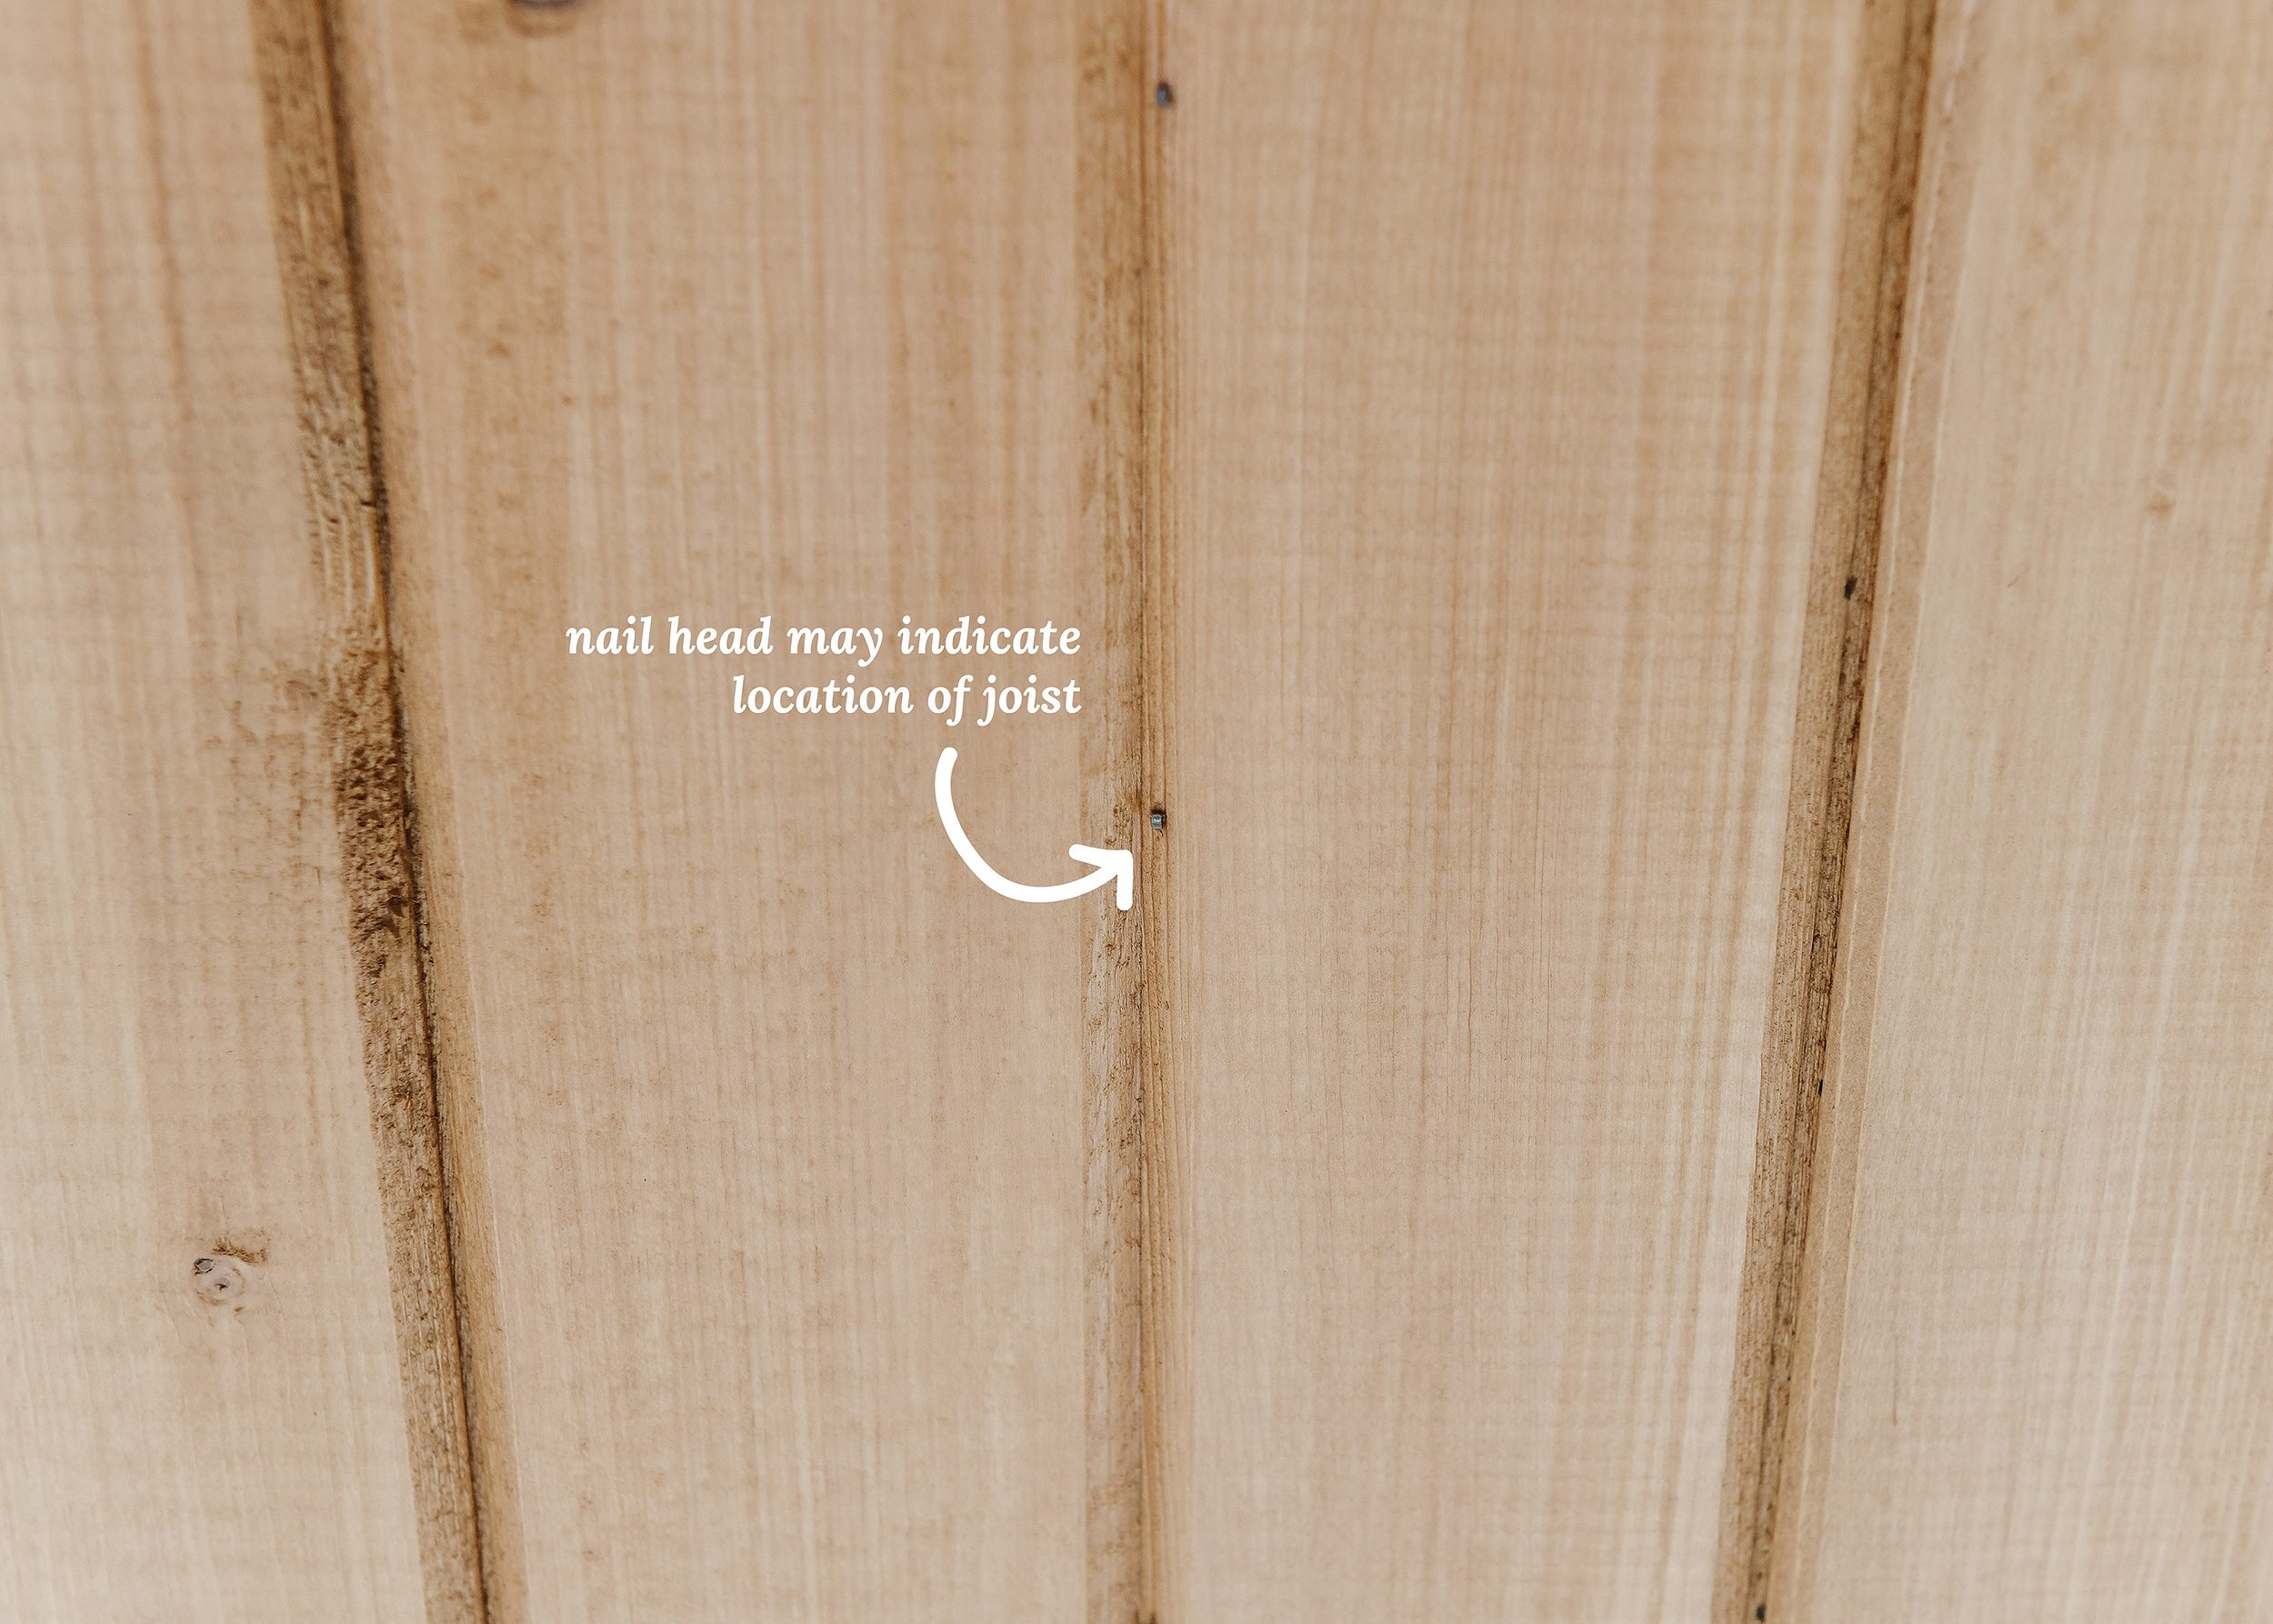
Once the joists were located with a fair degree of confidence, we used our smallest drill bit to drill an exploratory hole to confirm the presence of a joist. Had we missed the mark, we could easily fill the tiny hole with wood putty and dab it with stain to make it invisible.
Lucky for us, the added blocking and careful measuring added up to correctly locating the joist on the first try! Nice.
Step 2 | Order Swing Kit Based on Joist Direction
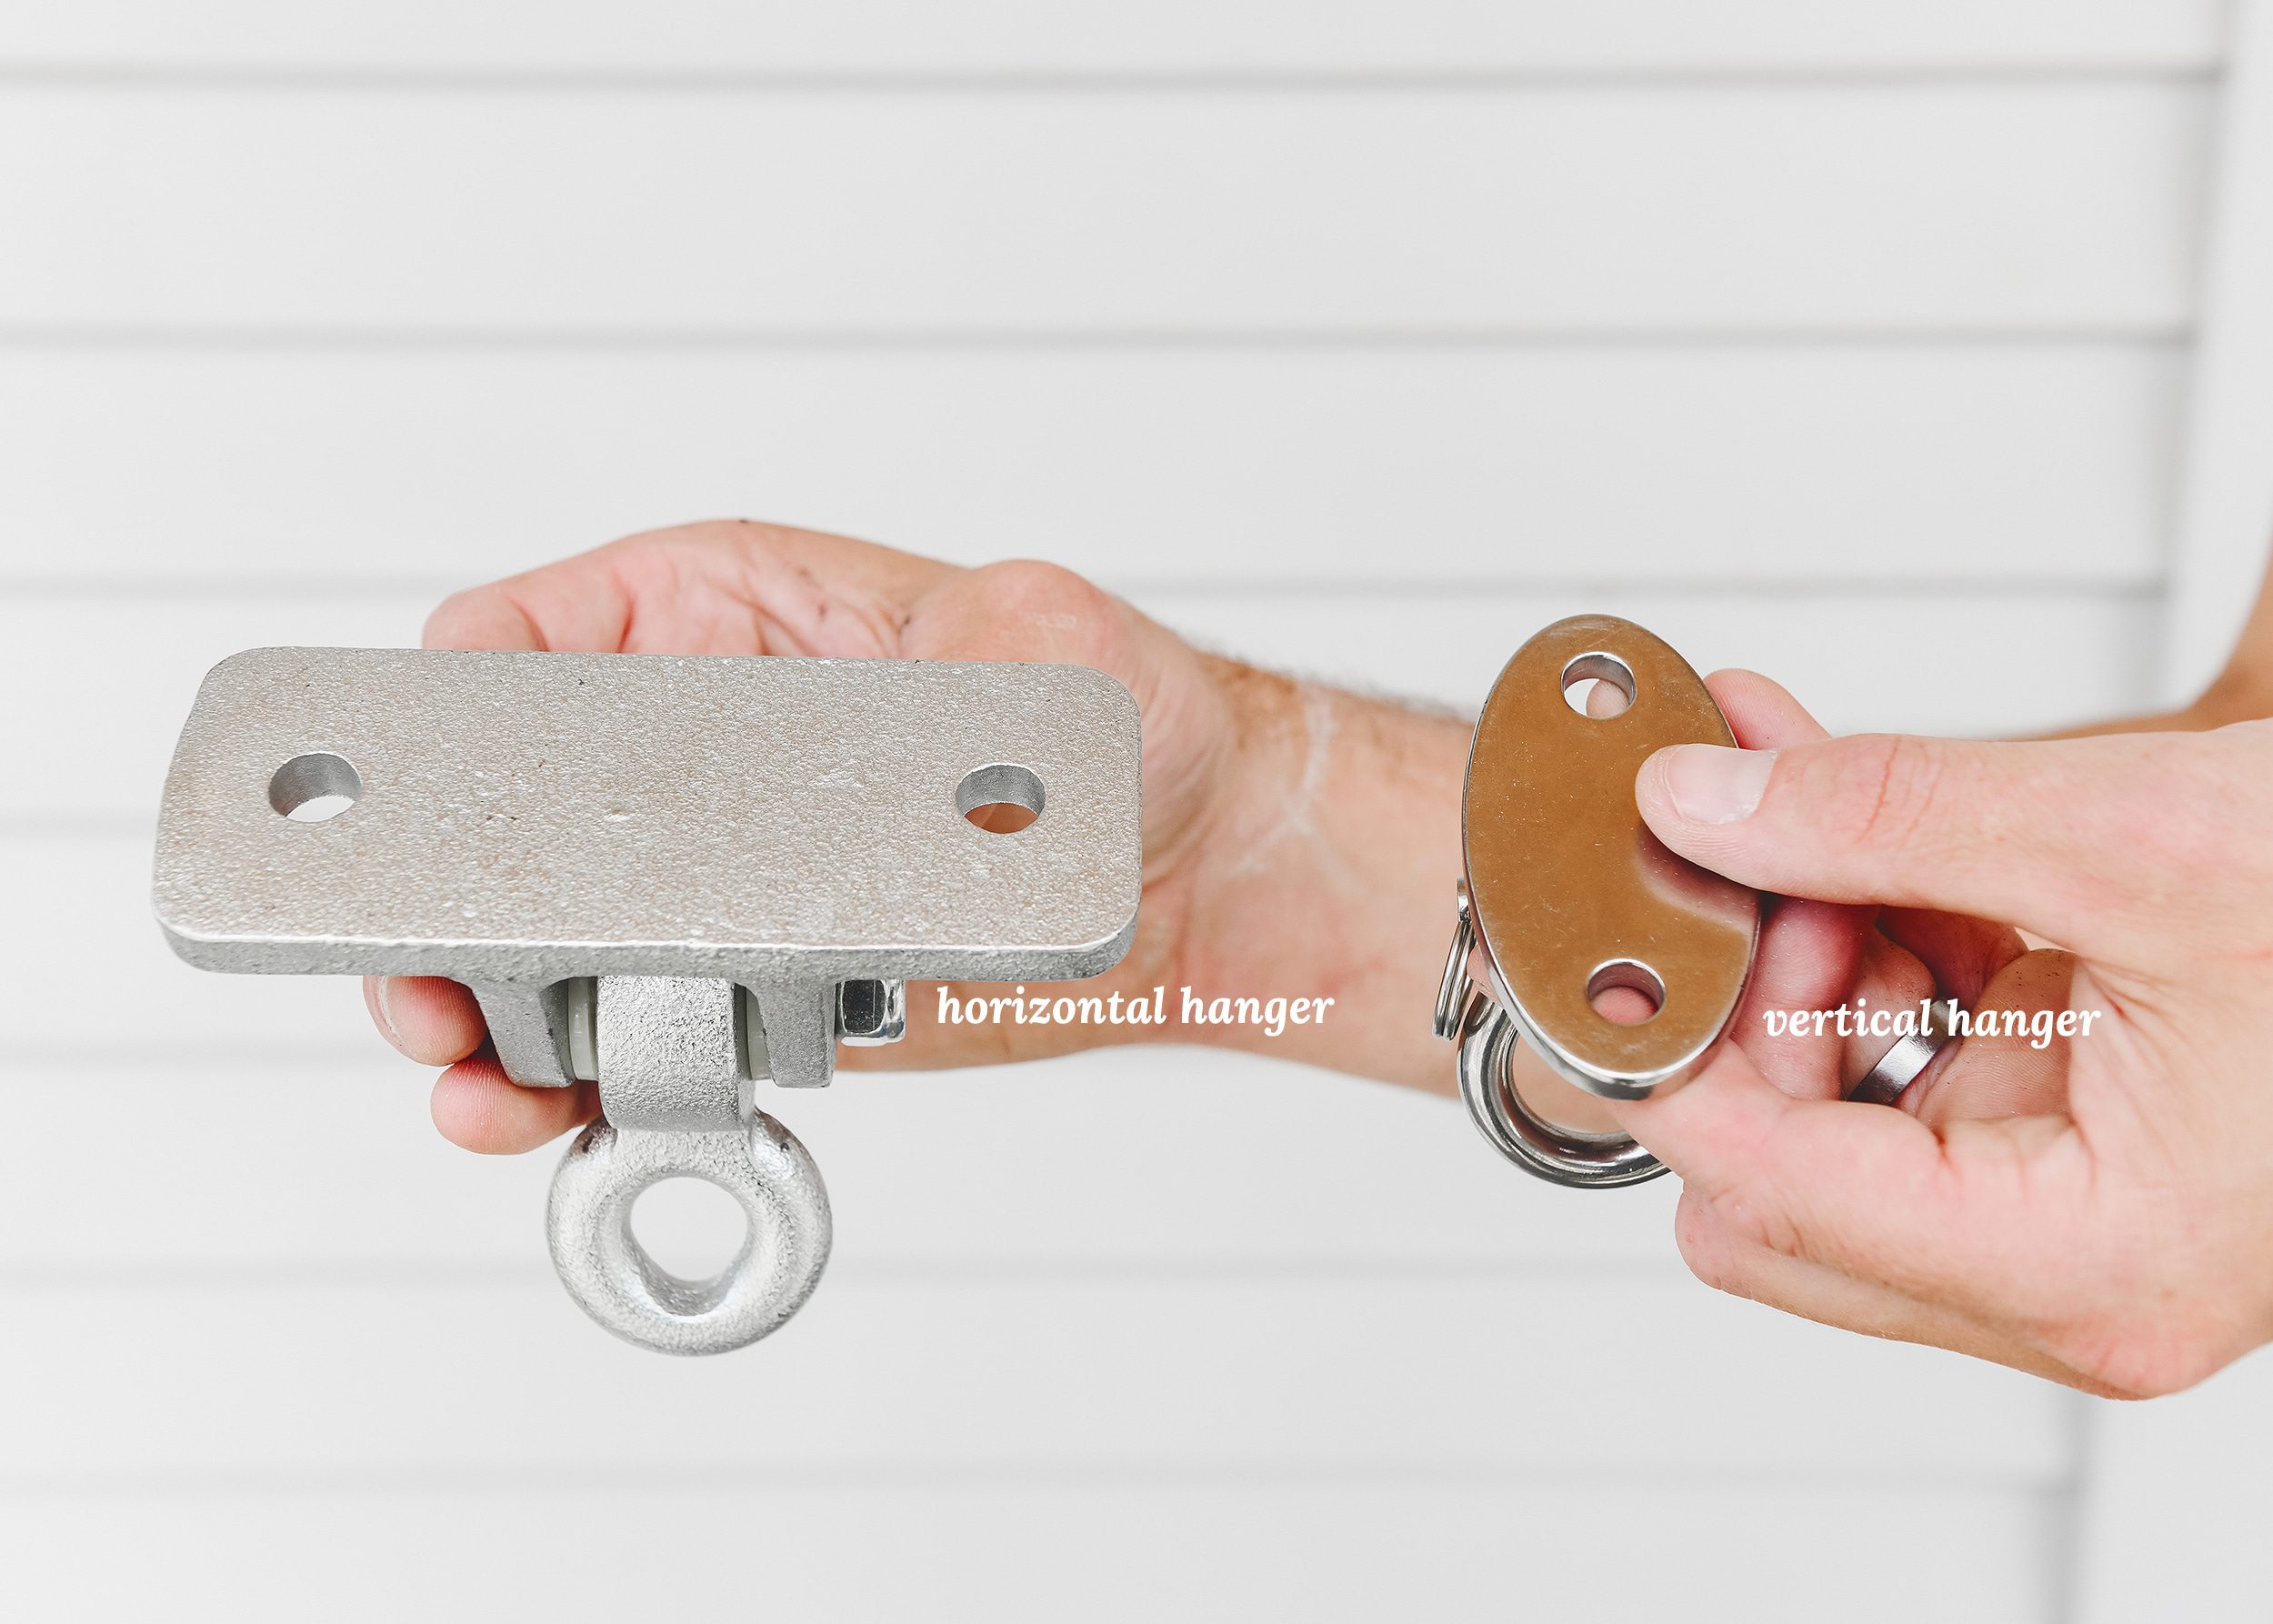
Once the joists are located and their orientation is determined, it’s time to order the swing hanging kit. There are two common orientations that can be helpful for different joist situations.
- A horizontally oriented hanger (below left) has the two mounting holes oriented perpendicular to the way the swing pivots.
- A vertically oriented hanger (below right) has the two mounting holes oriented parallel to the way the swing pivots.
We purchased both in preparation for our project, but found the more compact shape and stainless finish of the hanger vertically oriented kit on the right to be better suited to our situation.
Now that we’d determined the joist location and our preferred hanger type, it was time to mark our locations and get them installed!
Step 3 | Mark Location and Install Swing Hangers
When measuring and marking drilling locations, we like to put down a layer of masking tape (purple for delicate surfaces is our favorite) to avoid touch-ups later.
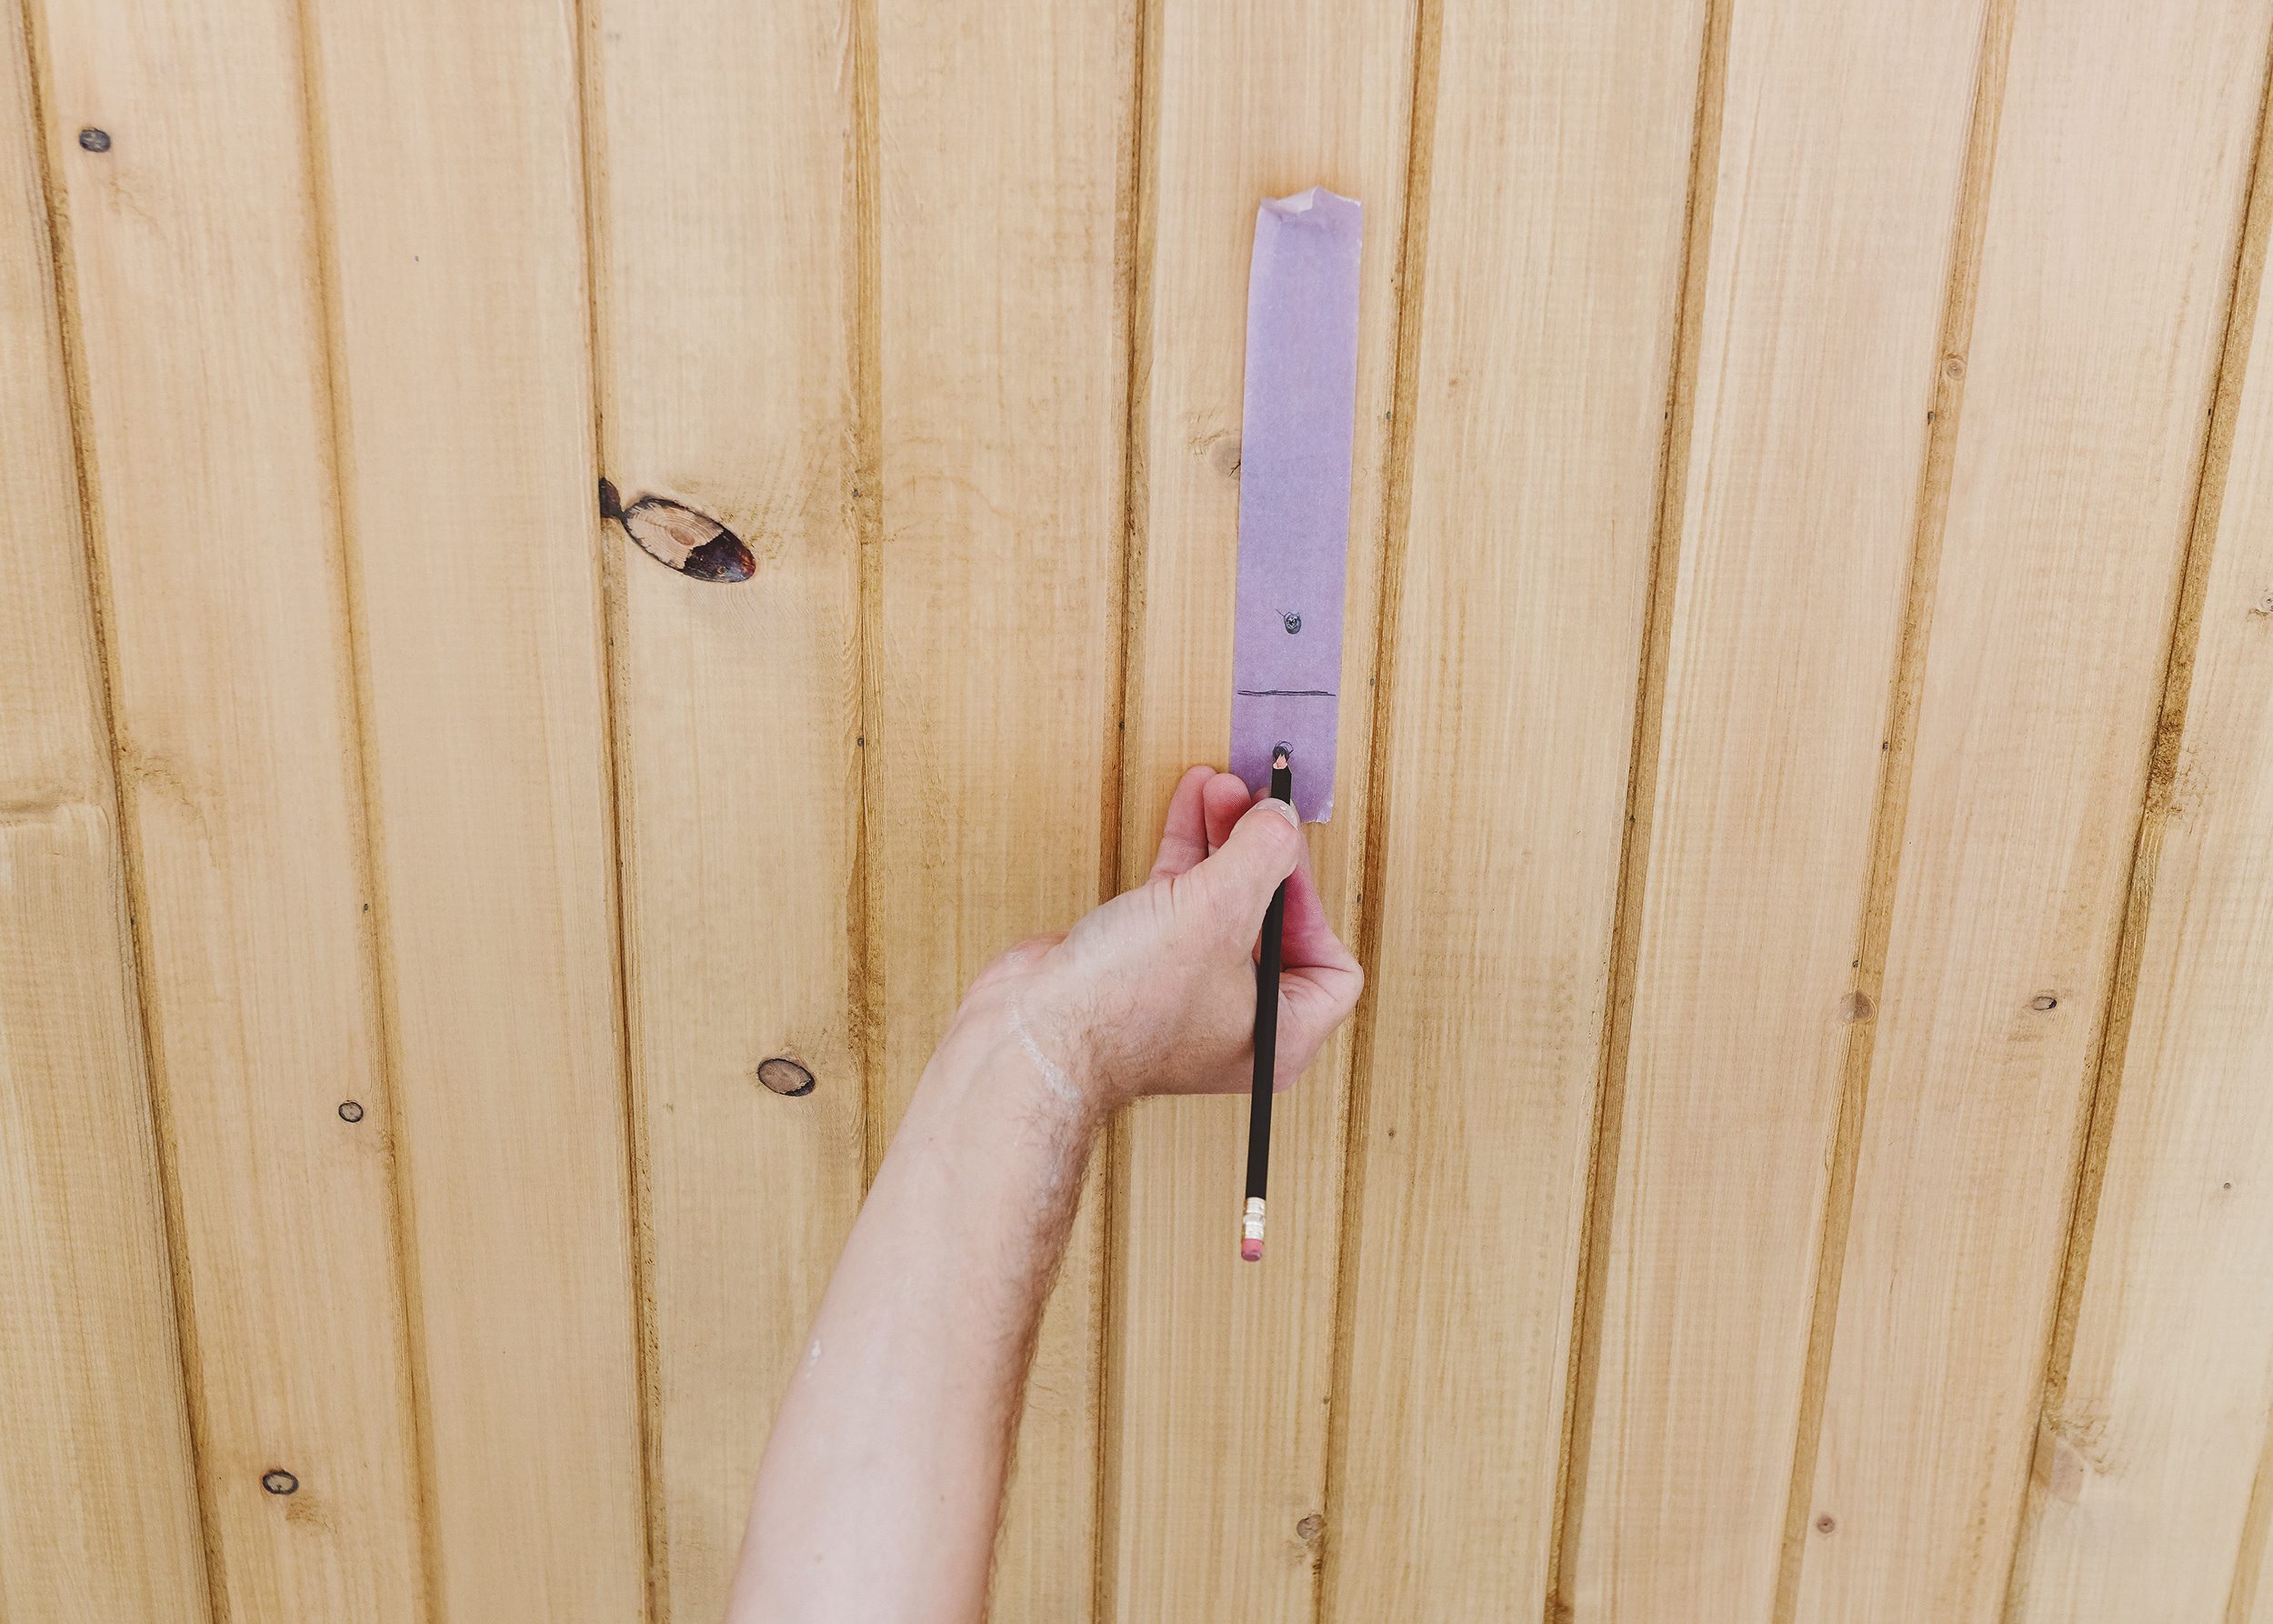
A few words on spacing here; internet searches commonly turn up recommendations of at least 2.5 – 3 feet of space both behind and in front of the swing. This seemed very excessive to us, so we conducted a few very unscientific tests and settled on a distance of around 20″ behind the swing. Sure, it might be nice to have a few extra inches of breathing room back there, but our porch is small and we won’t treat the swing like we’re on a playground. That said, if you’ve got the extra space, it’s probably not a bad idea to use it.
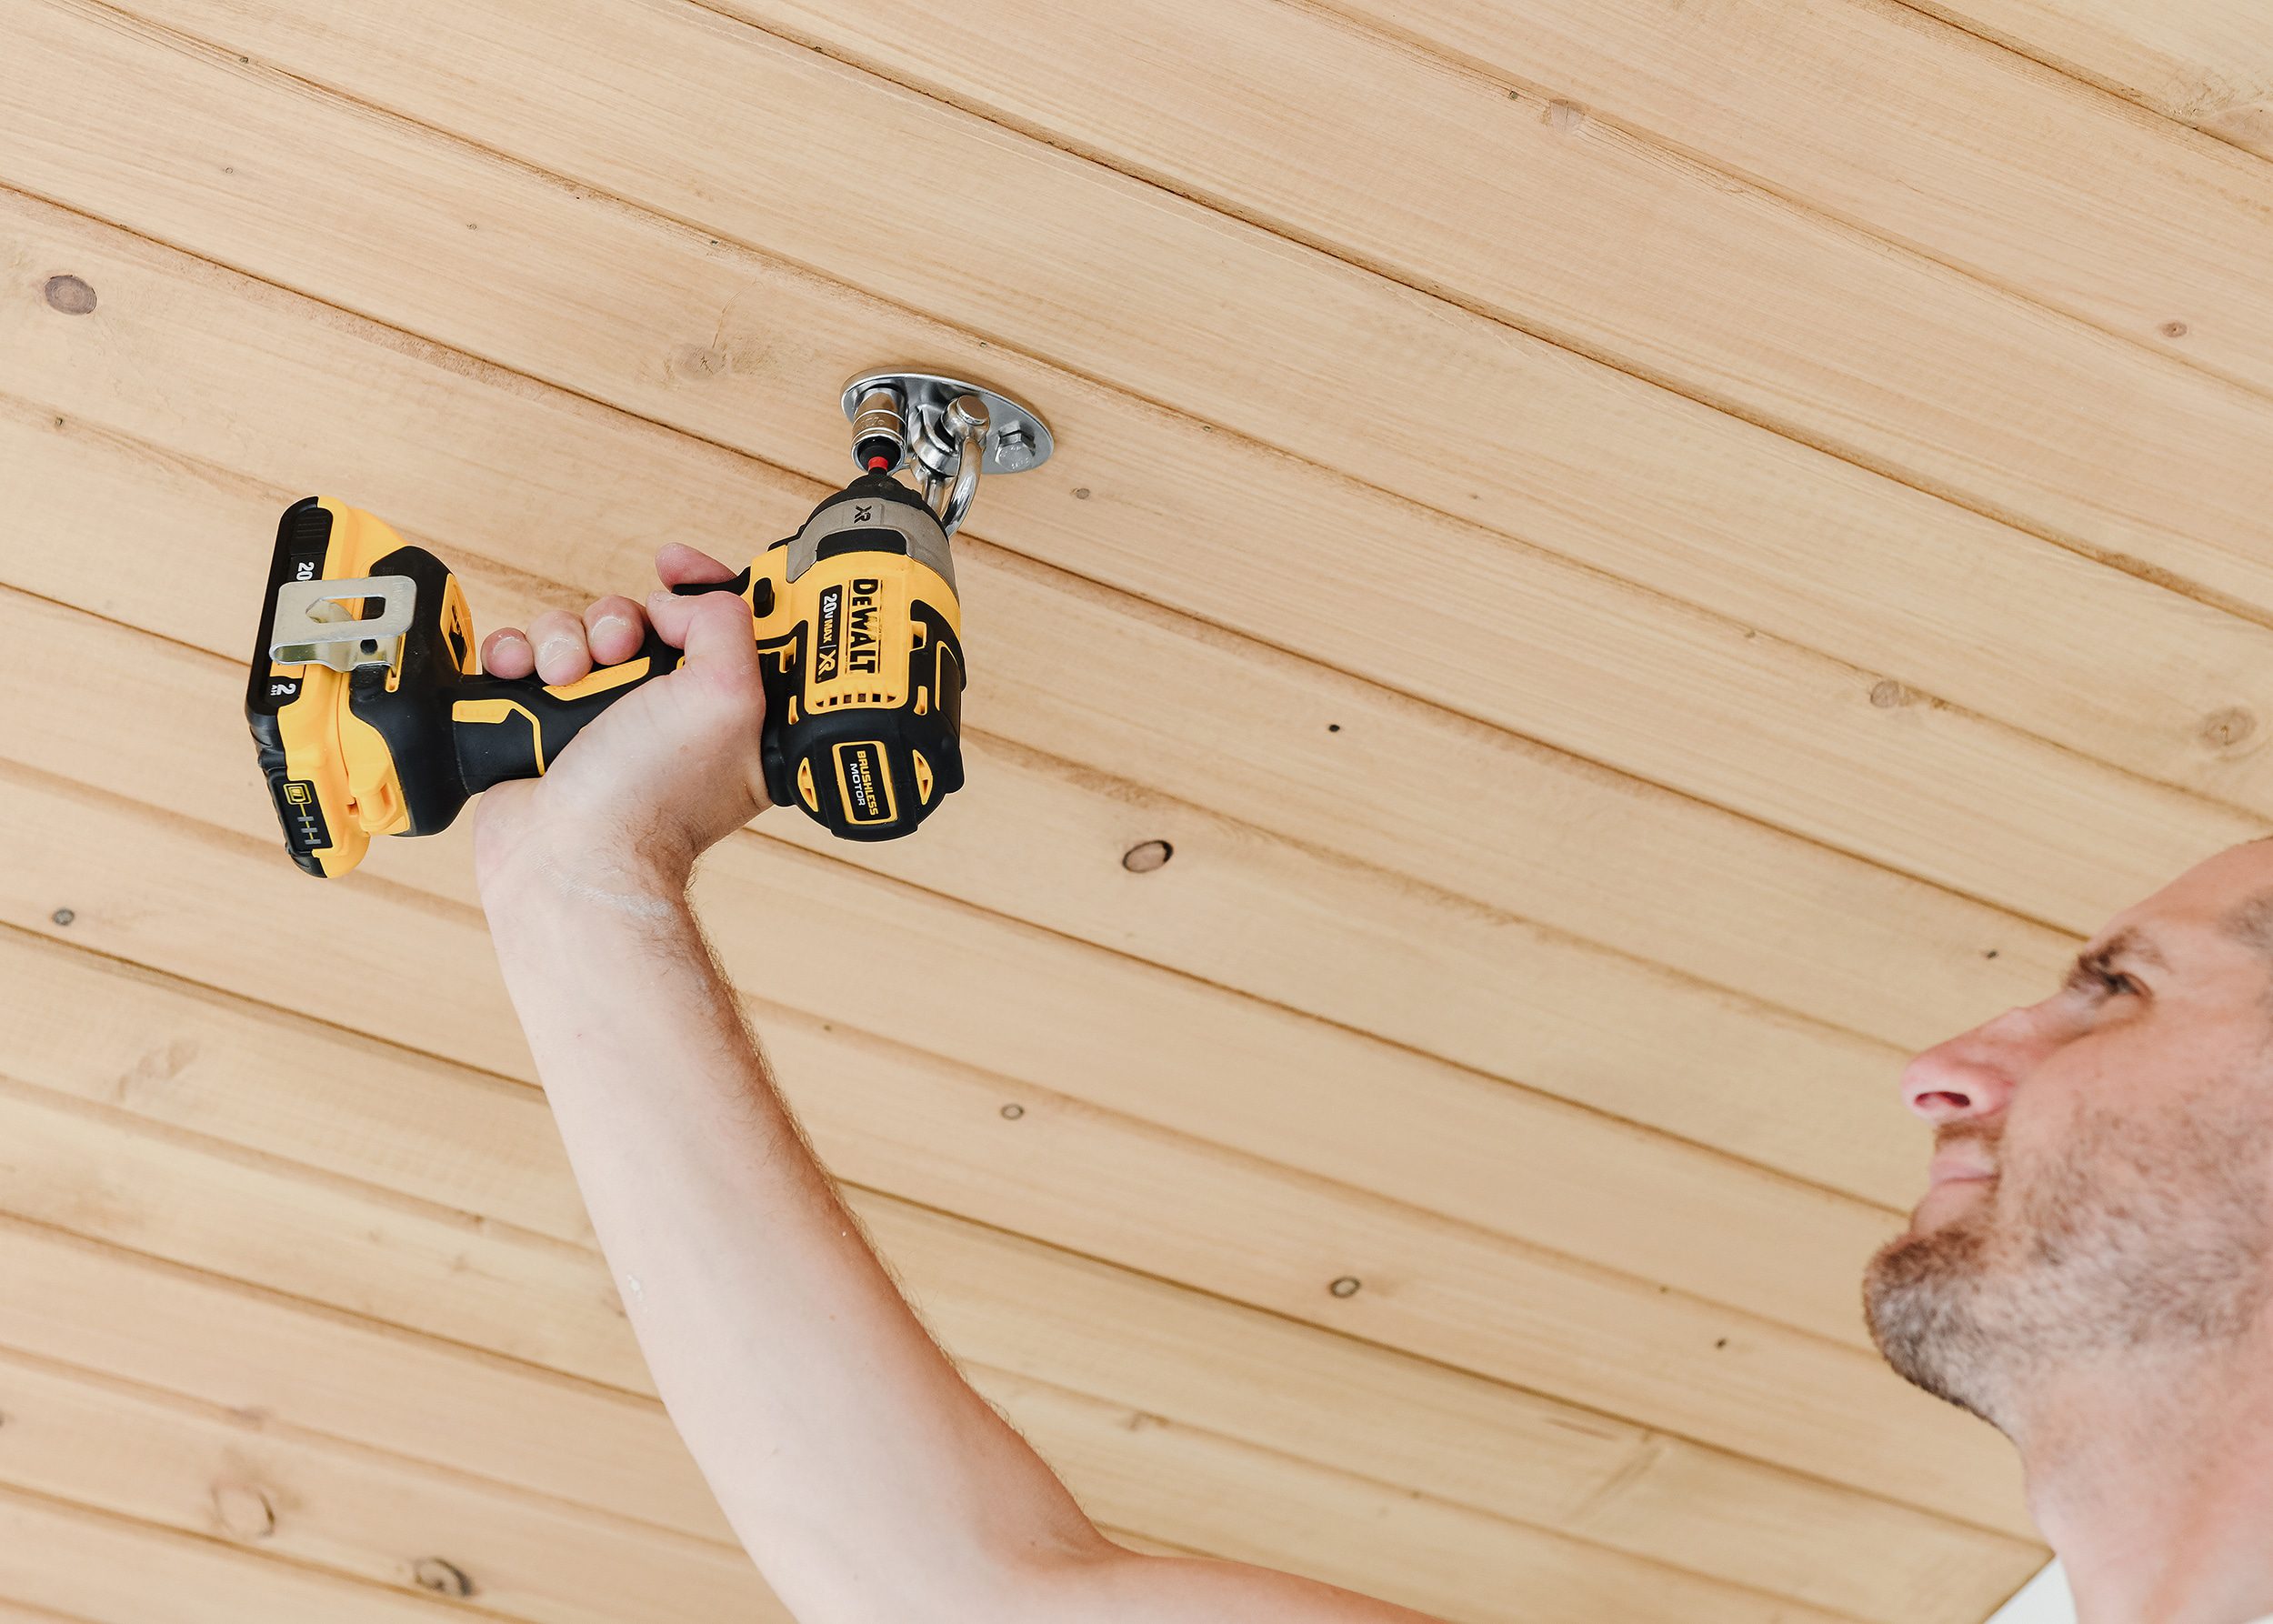
Once we were happy with spacing, we drilled larger pilot holes and used a socket adapter on our impact drill to fasten with the included lag bolts. Those swing hangers are gleamin!
Step 4 | Hang Swing and Adjust Height Accordingly
With the hangers in place, we were ready to hang the swing. Regarding height, internet searches generally recommend 17-19 inches for seat heigh, but we’re all kind of short around here and we wanted to swing to feel casual for both adults and kiddos. We settled on a height of right around 15 inches, including the cushion.
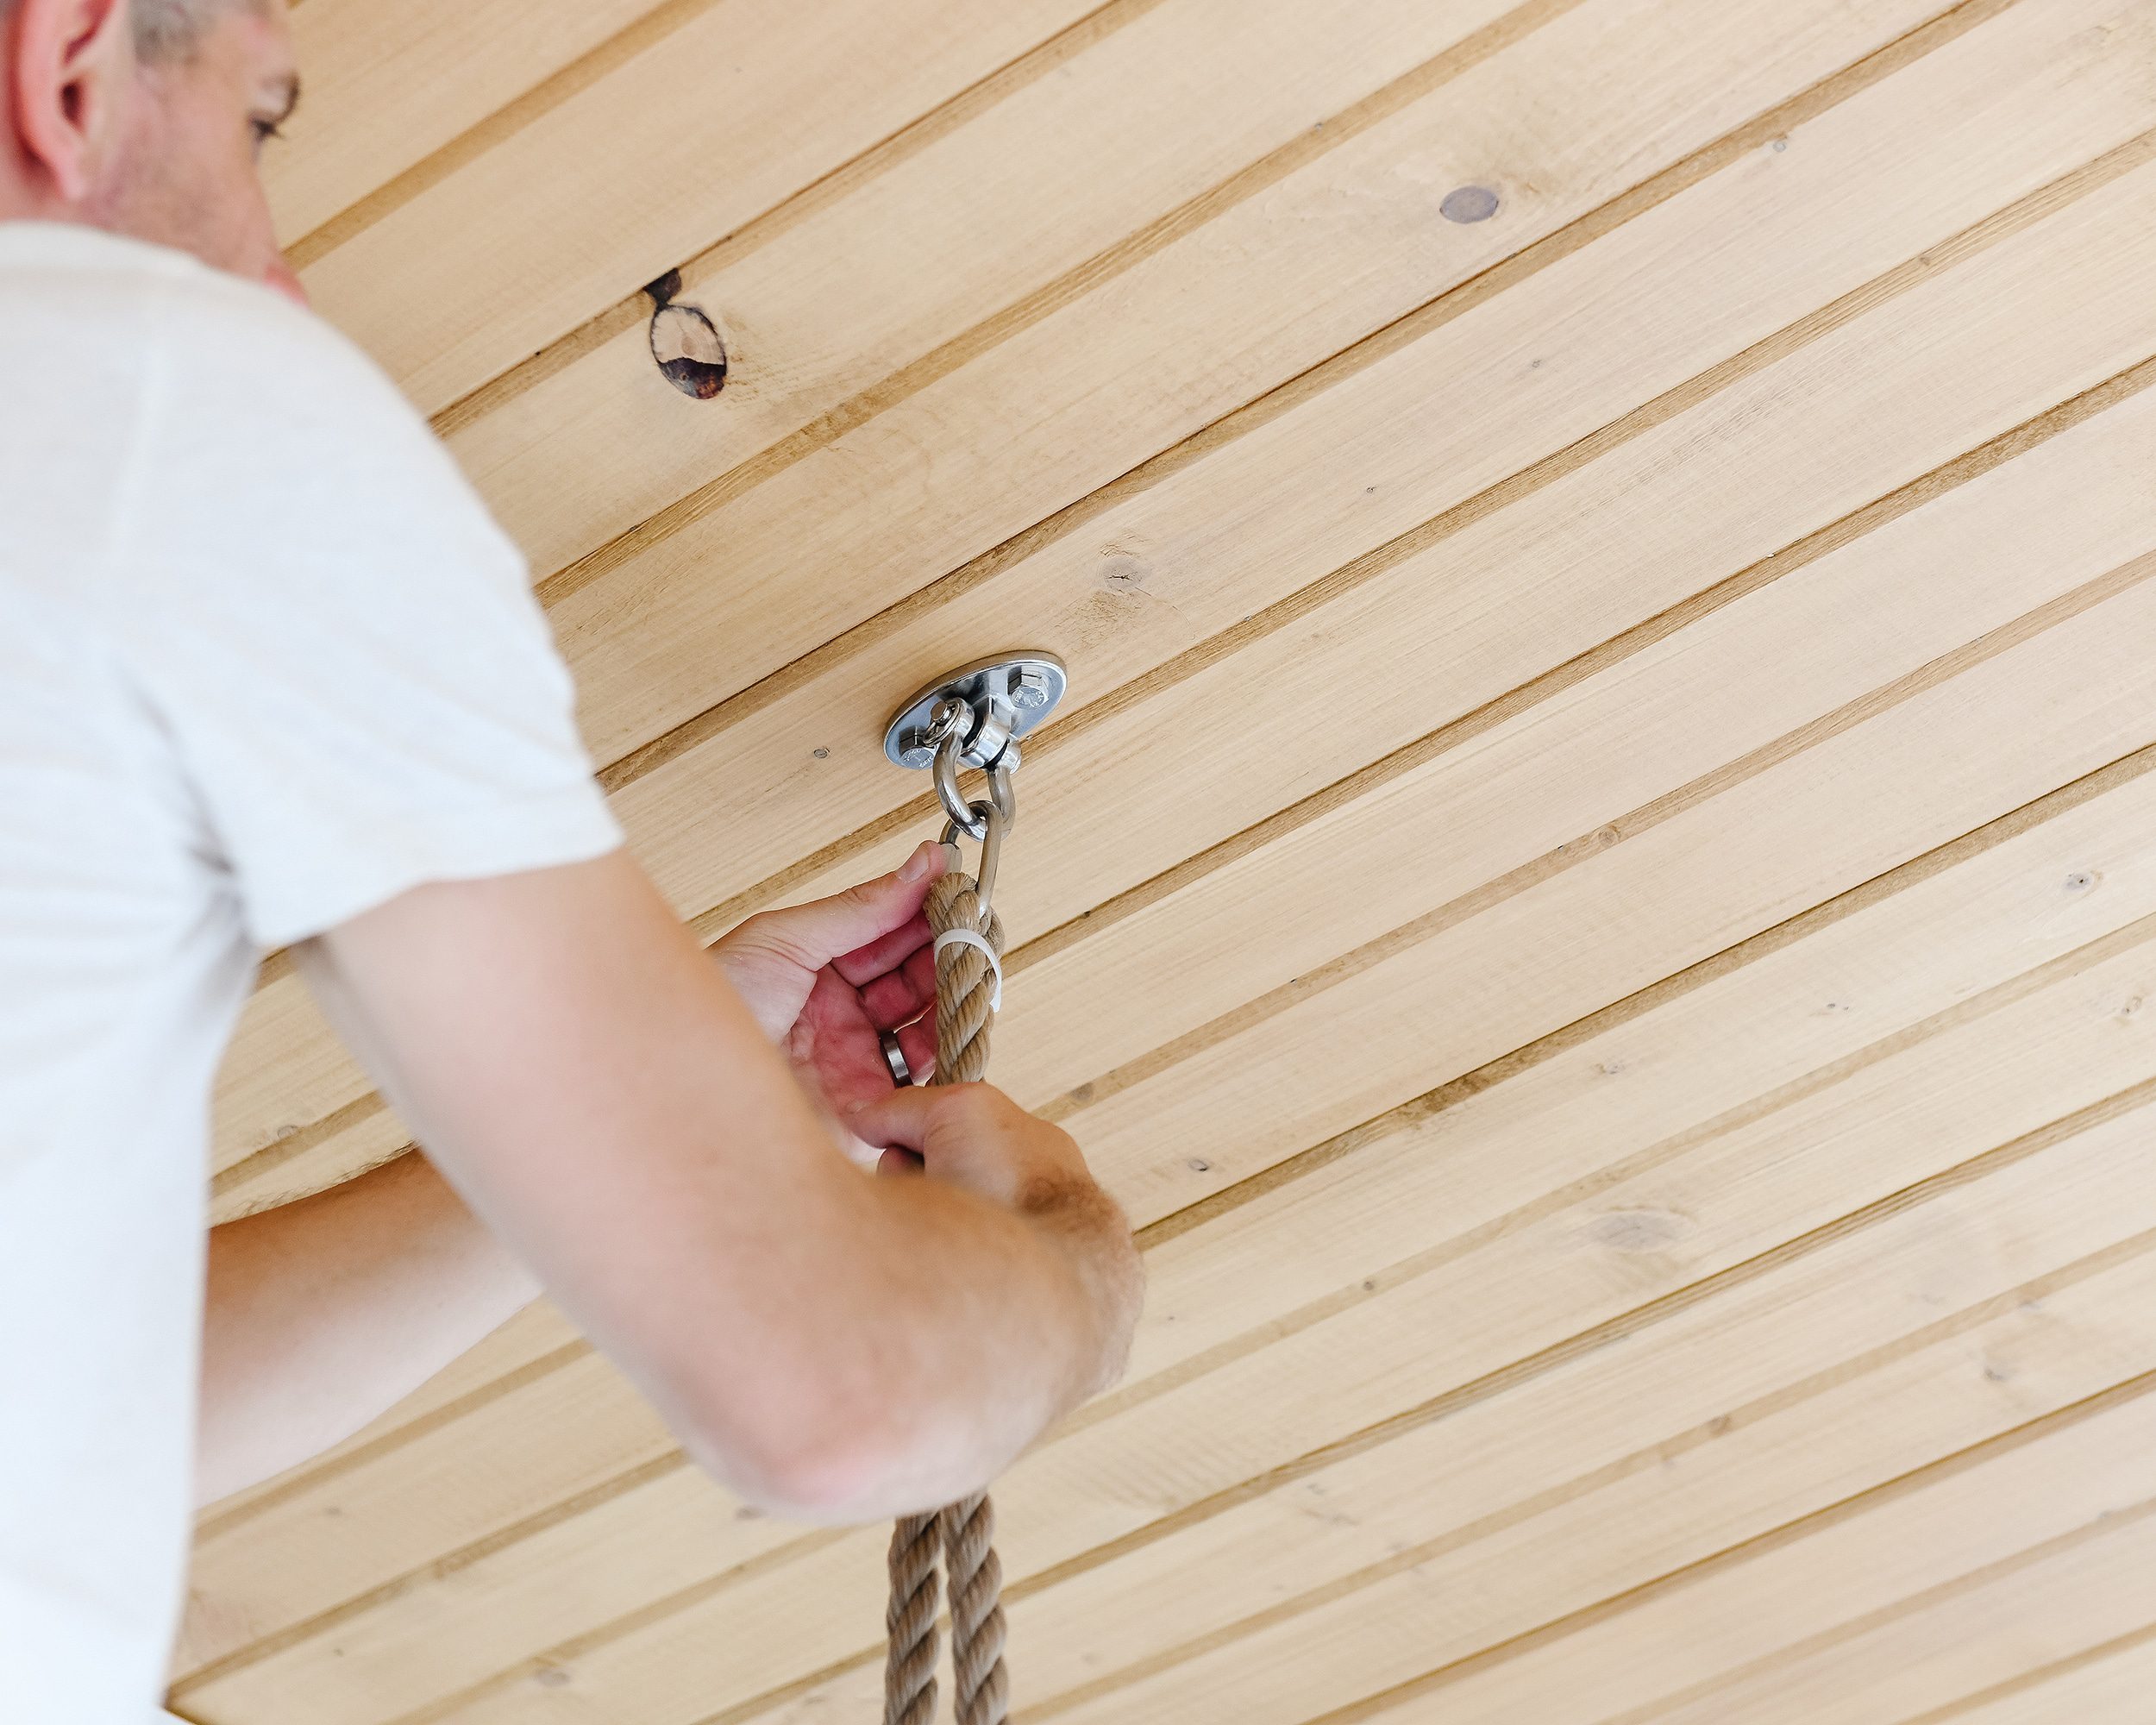
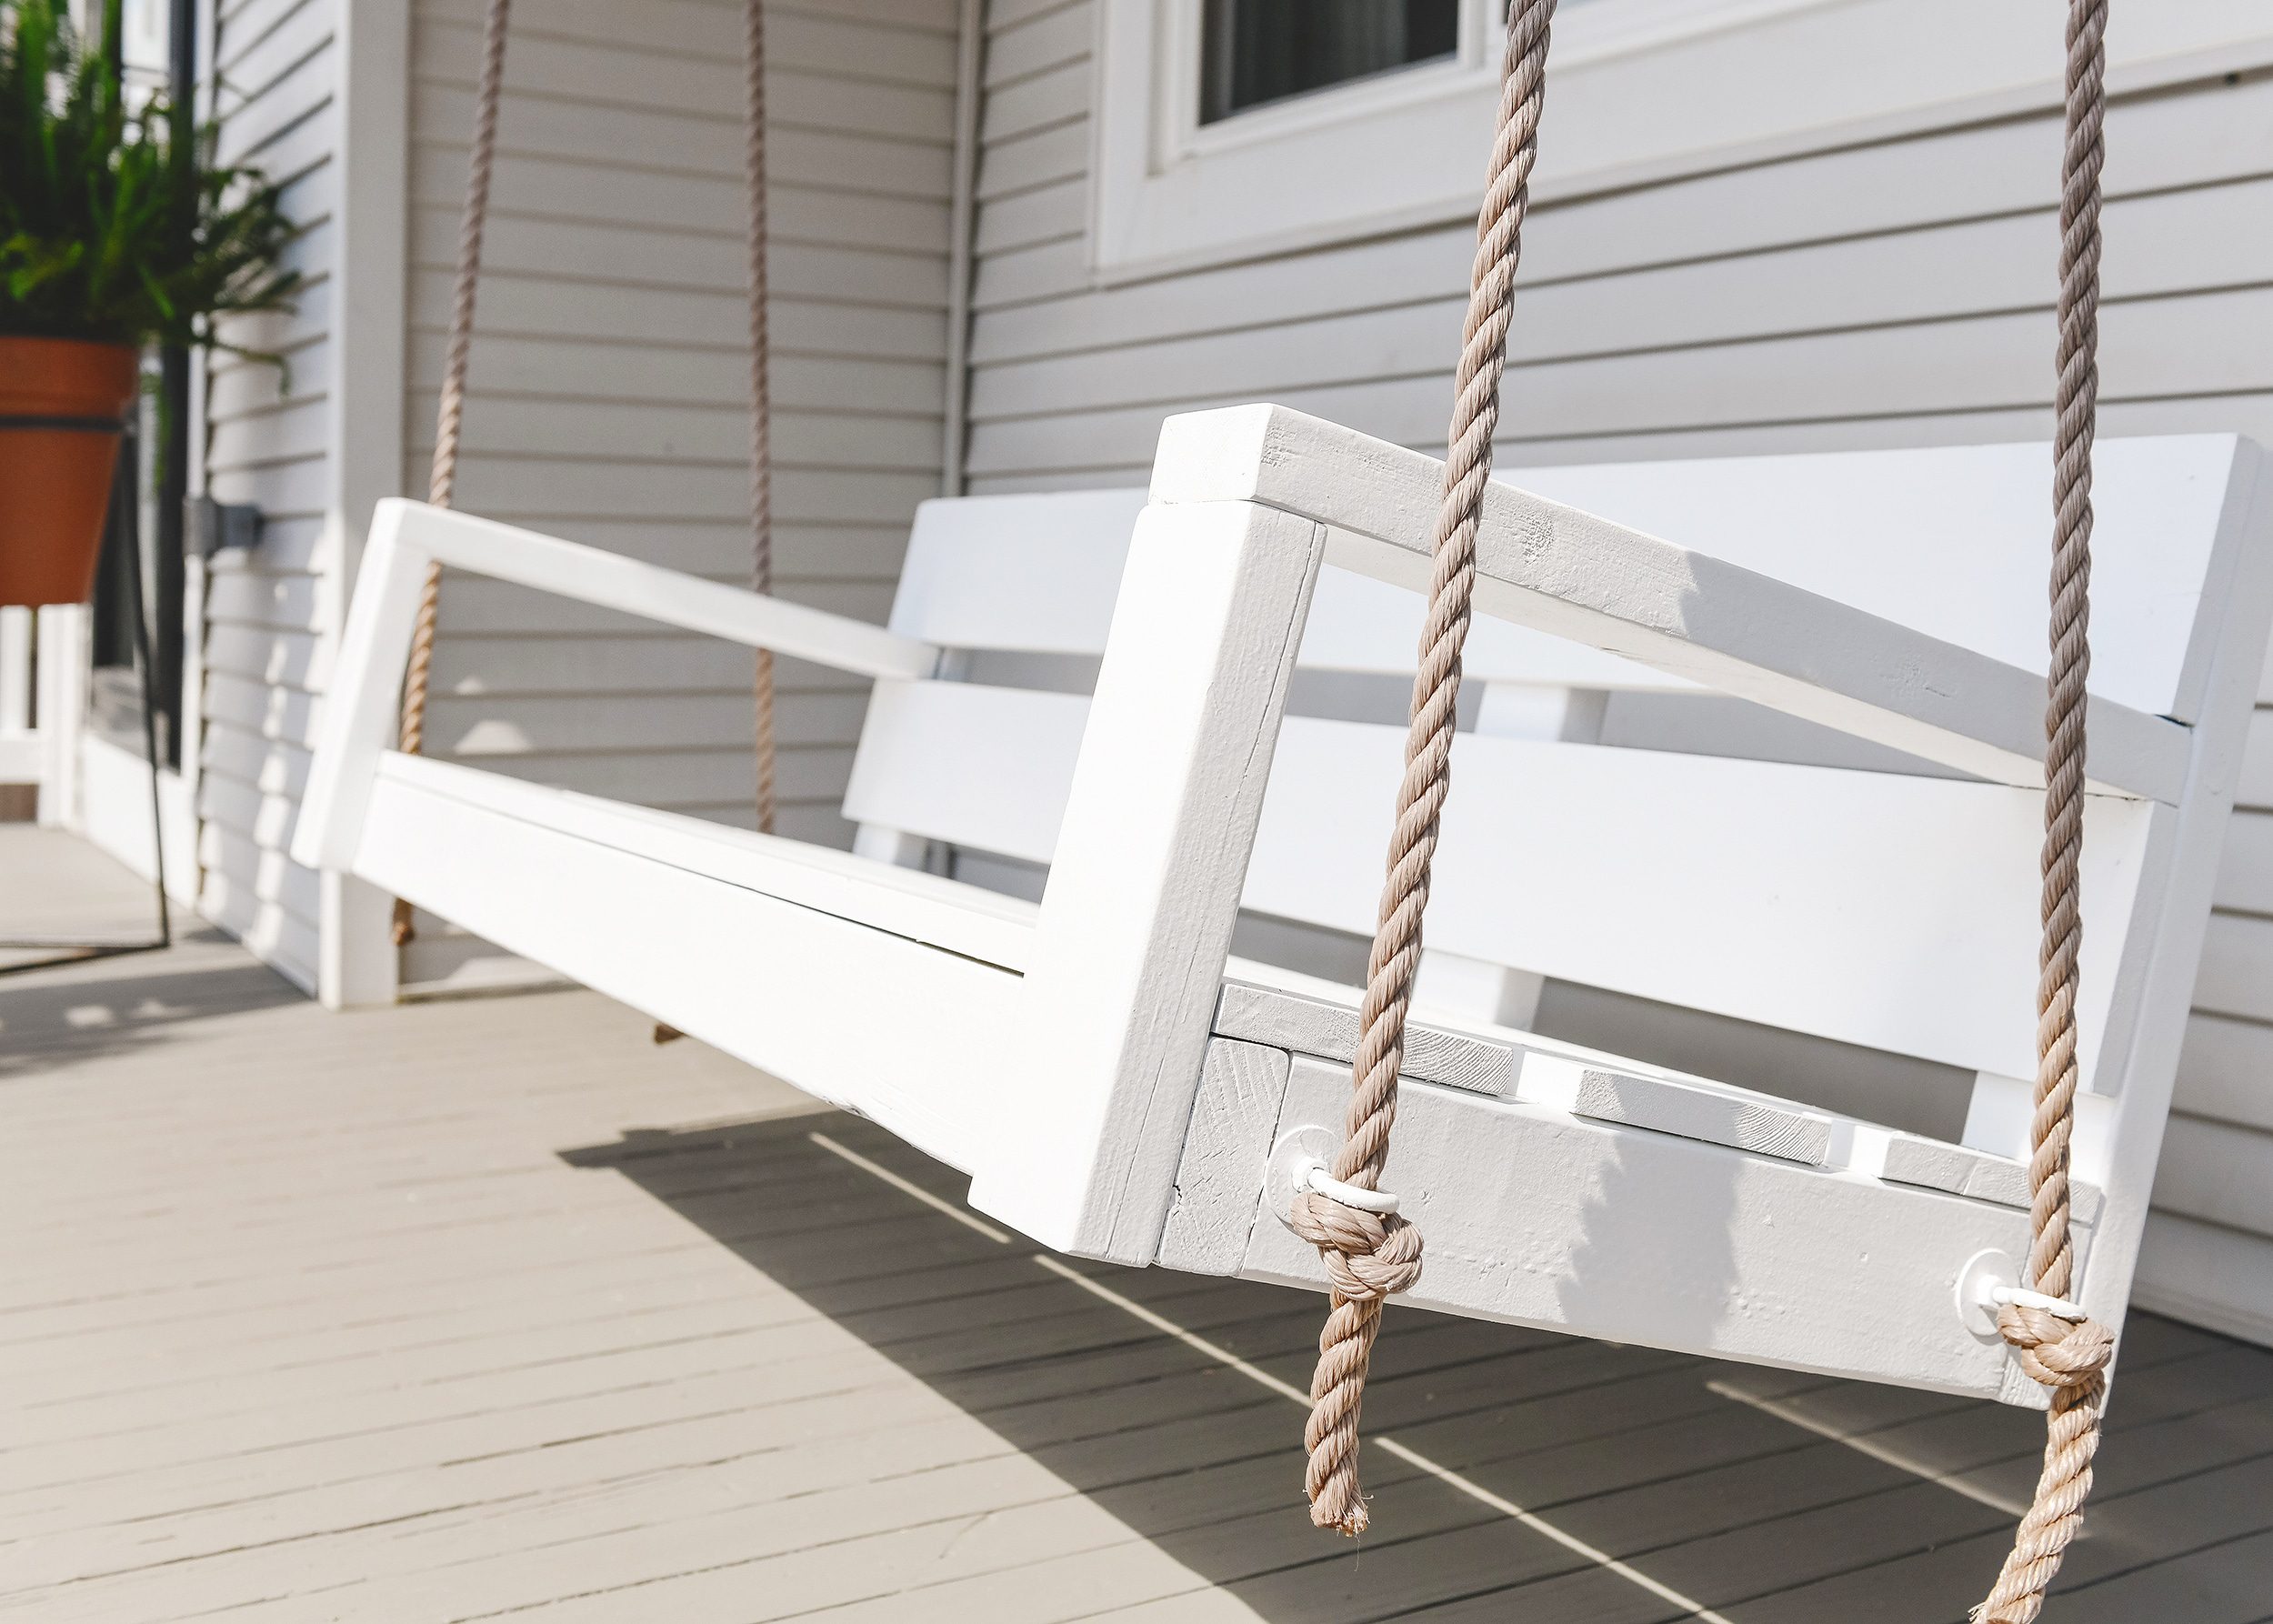
Rather than use the traditional chain that’s provided with many off-the-shelf swings, we used tan nylon rope for a more natural look that’s completely weatherproof. It’s held up incredibly well for the last few years and doesn’t fray or splinter like rope made of natural fibers.

Big sturdy knots anchor the swing through the eye bolts in the base and keep us elevated. We left a bit of extra rope at the ends to keep the look a little more playful. This will also allow us to adjust the height down the road if we ever find it necessary.
This swing has already seen a number of iterations and is now on its second placement on our front porch. We love the new view looking directly onto the street and sidewalk where we can say hi to passing neighbors and all of the adorable dogs that live nearby. If you need us, you can find us out here pretty much all summer!


Thanks for sharing this! I was wondering, what did you change about the swing, other than the color, from the earlier swing tutorial?
We made it less deep to accommodate facing the street (since our porch isn’t very deep).
Hi! How much clearance is around your swing? Could it hit the house or railing if being swung aggressively? I don’t know how much space I need to account for! Thanks!
Ours is 18” from the house and we haven’t hit it once. If swung aggressively, sure, it might hit the house.
Hi! Do you mind telling me the size of your swing and the cushion on it? Also where you found the swing cushion? Thank you!
Did you make the swing yourself or purchase it? Thank you.
We built it ourselves! Plans are linked in the post.
Could you tell where you purchased the roping ?
I believe we found it at our local Home Depot!
You have a fastener at the top of your rope where it connects to the swing hanger. What did you use to cinch the rope? Appears as a zip tie in the photo…is that correct?
Yup! We just used a heavy duty zip tie to keep the rope from shifting fore and aft. It’s worked perfectly so far. Hope this helps!
This is so so cute!! How is your rope holding up? I live in all four seasons so if I did something like this I’d probably have to store it over the winter.
This rope has proven to be nearly indestructible! We leave the porch out in all 4 seasons here in Chicago and it looks like it did the day we installed it.