

We’ve taken you on a virtual garden tour, shared the laundry room and kitchen, and today, we’re officially introducing the bathroom! The room is small, but has the capability to be highly efficient. Unfortunately, the condition in which we received the space had a poor layout, builder grade finishes (of the worst variety) and very poor ventilation. Before it was rented to our previous tenants, it was thoroughly cleaned and painted, and all that time ago, we thought, not bad! The shower was sparkling and the walls were clean, but after four years of abuse, it was looking rough.
Let’s take a closer look:
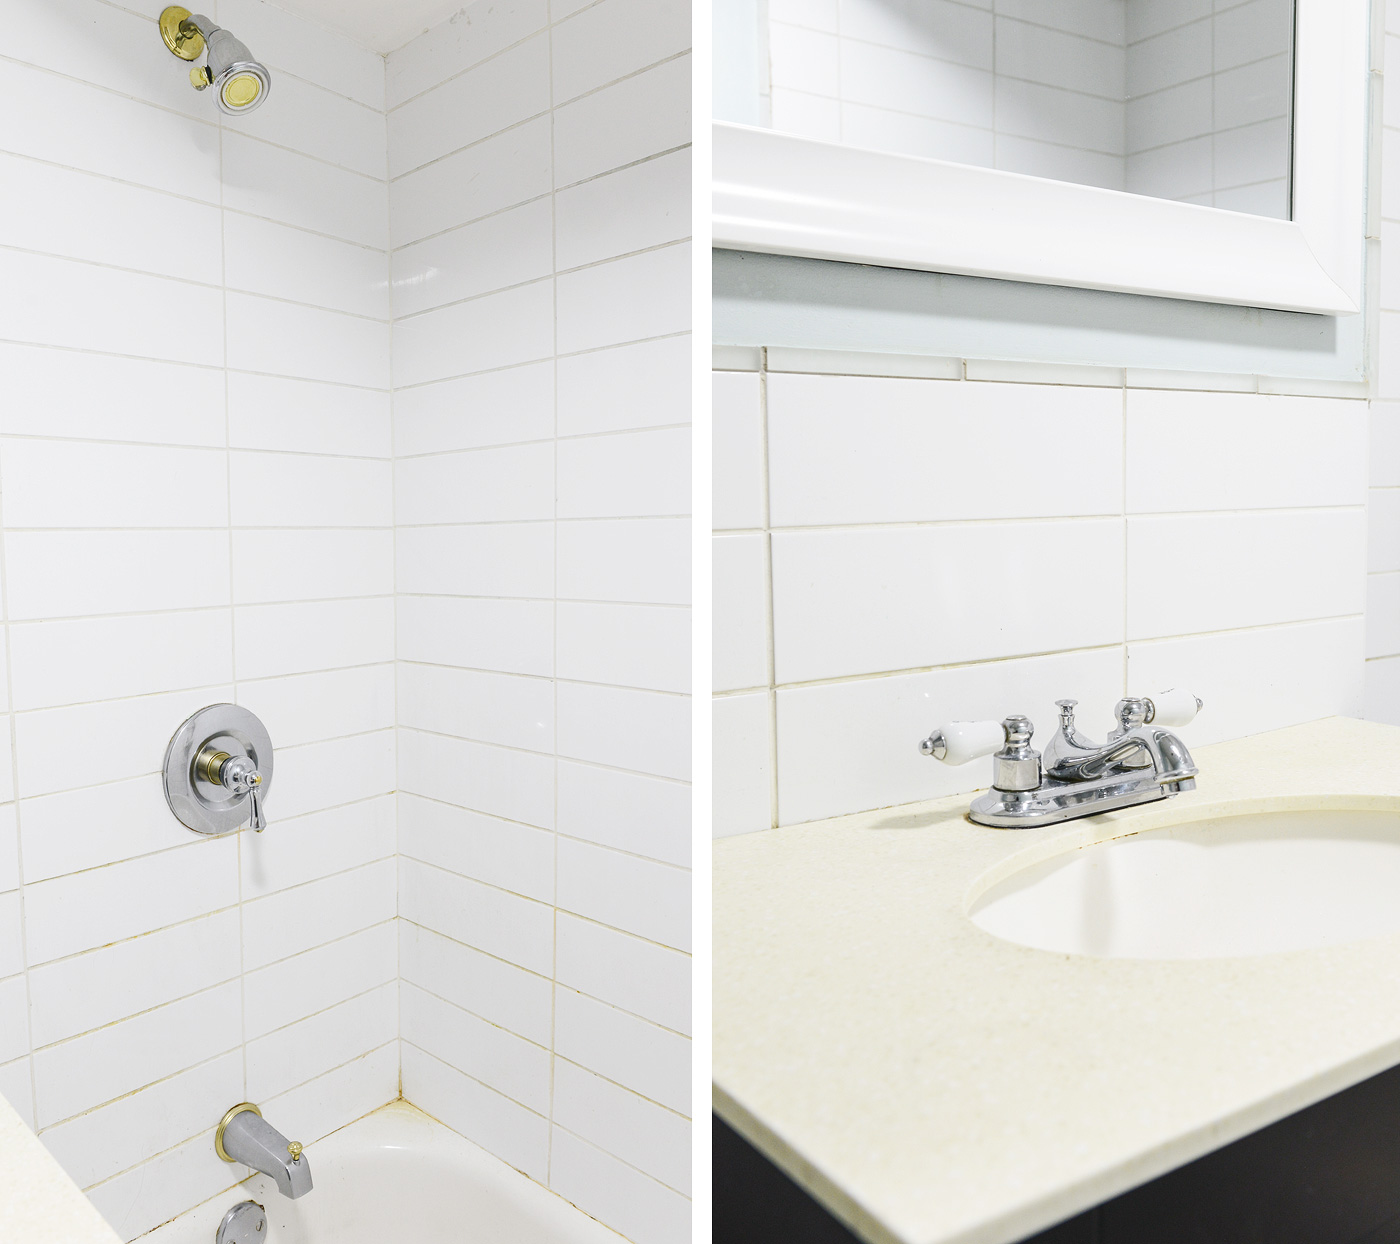
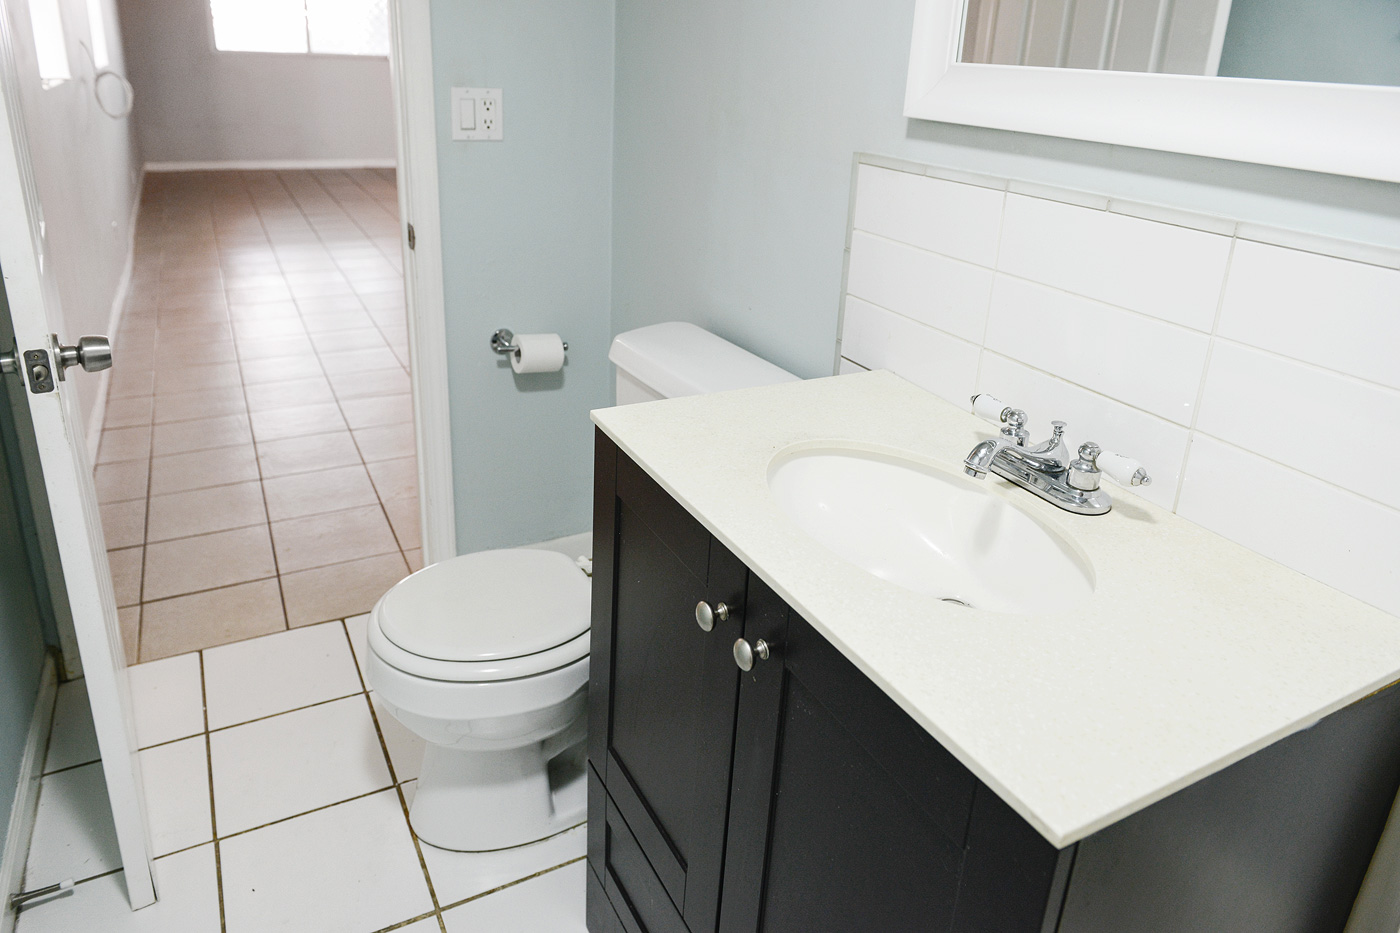
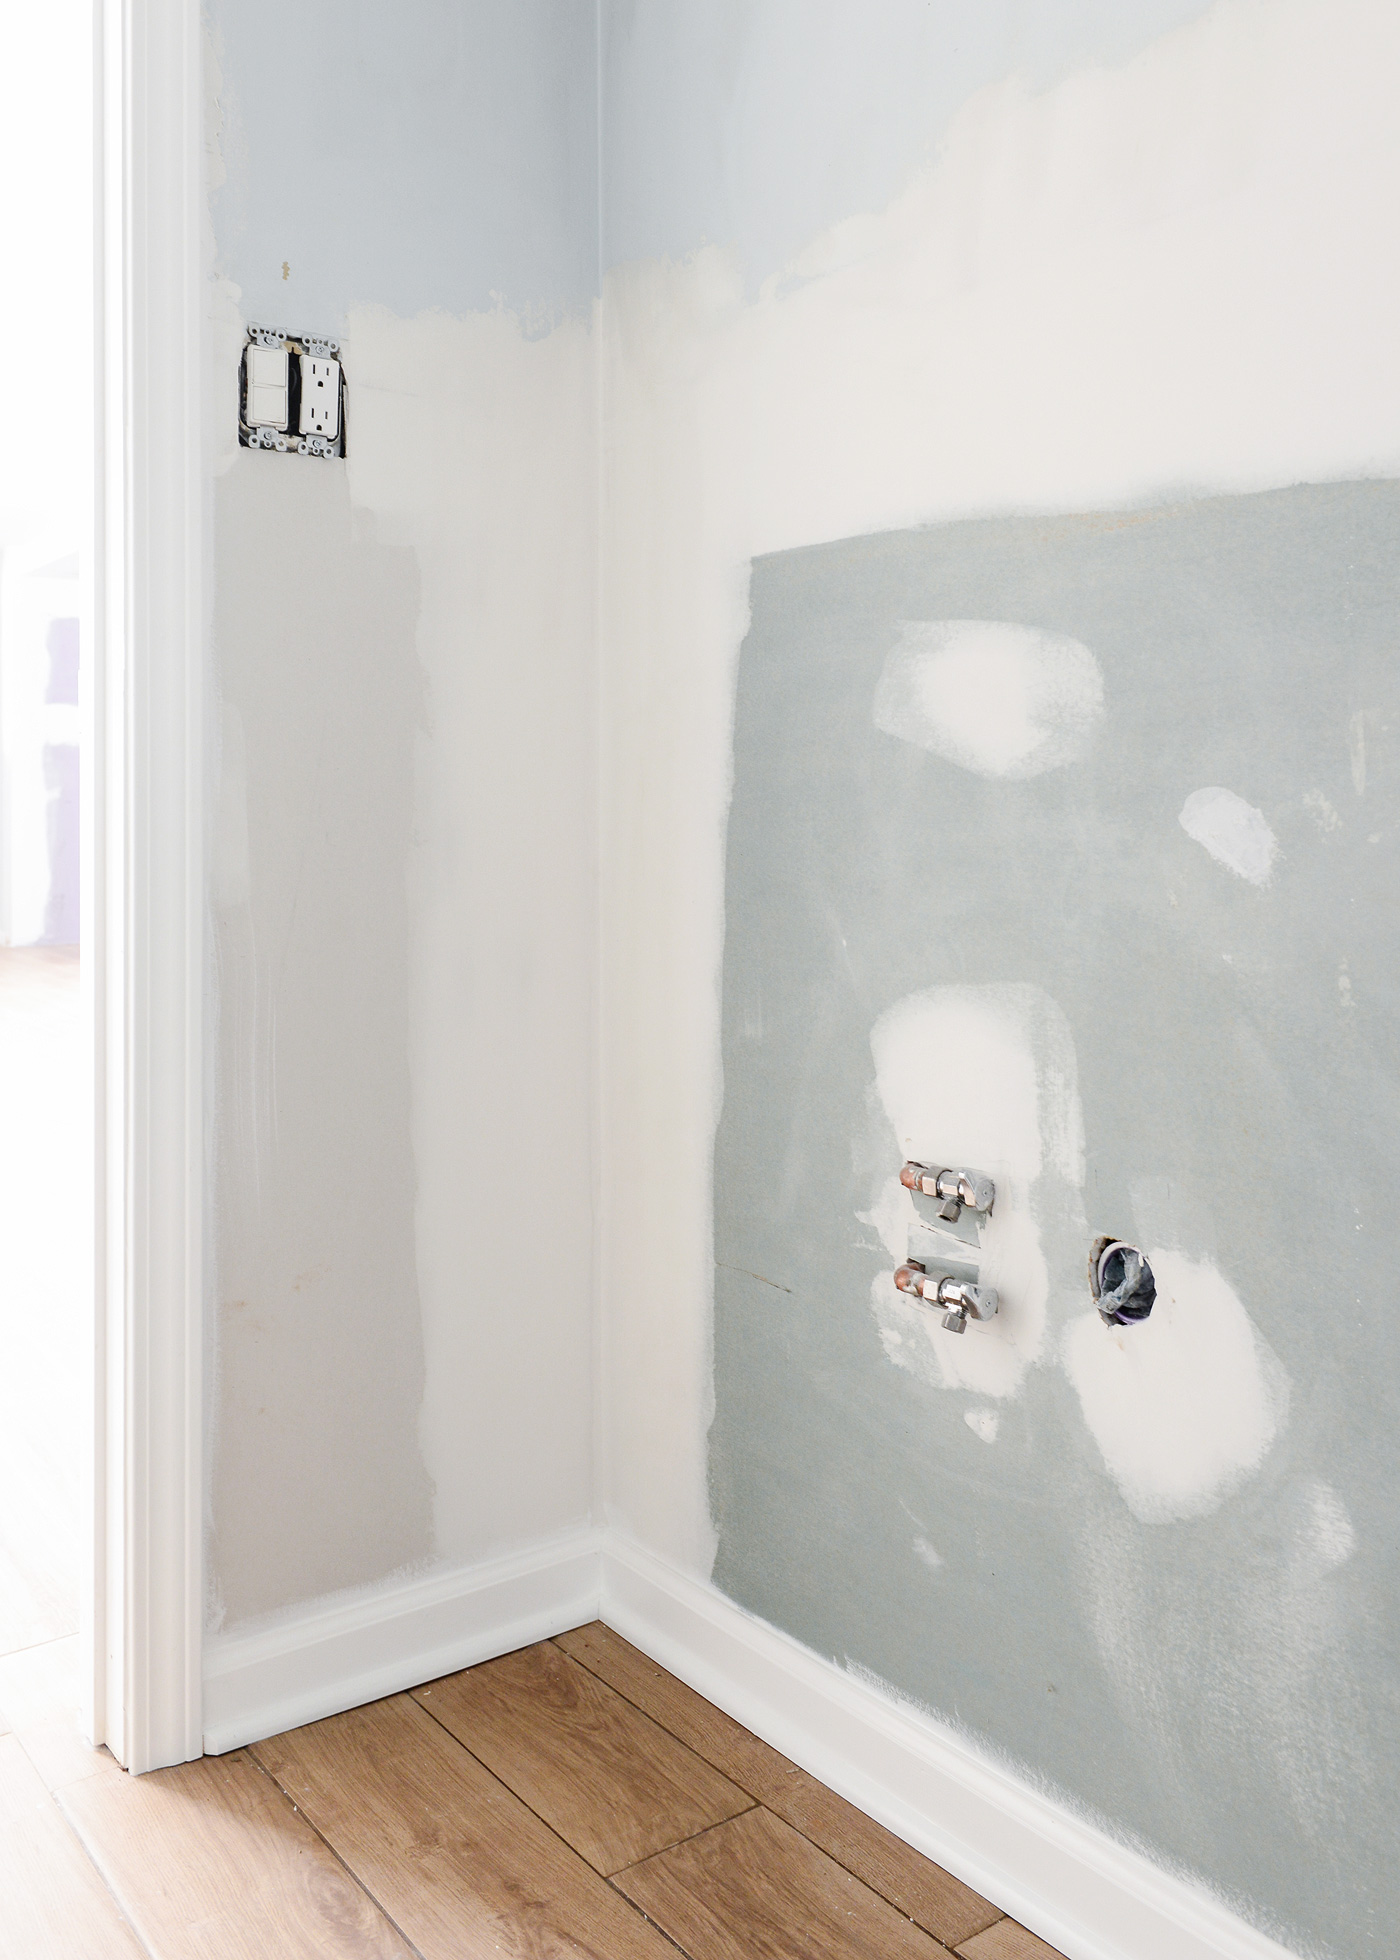
The fixtures in the shower are a mix of brass and chrome, and while we love each of those finishes independently, we’ve learned that we really, really don’t love them together, that is, on one piece. We’ve also learned that the shower set is a no-name brand, and while we thought we’d replace them with universally friendly shower parts, we were in for a rude awakening. Not even universal parts worked for this shower, which had the most bizarre fittings we’ve seen and were near impossible to track down. Eventually, we did find replacement parts at a specialty shop (The Faucet Guy for Chicago locals), but not without first selling our souls and emptying our entire wallet. Below is obviously the before; afters to come soon!
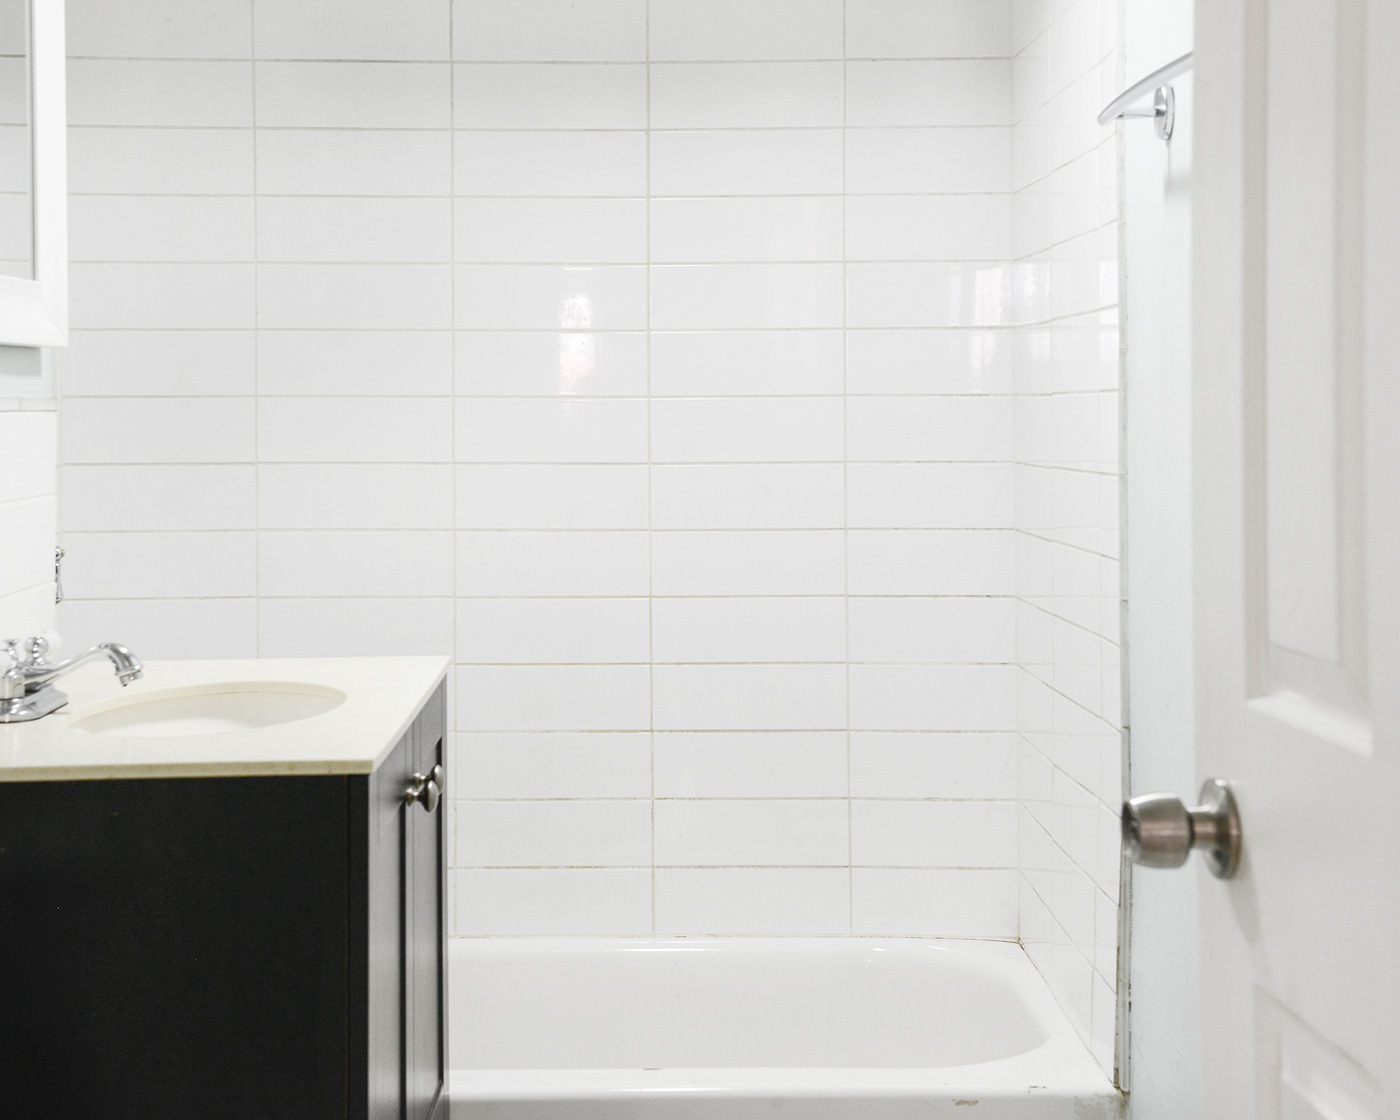
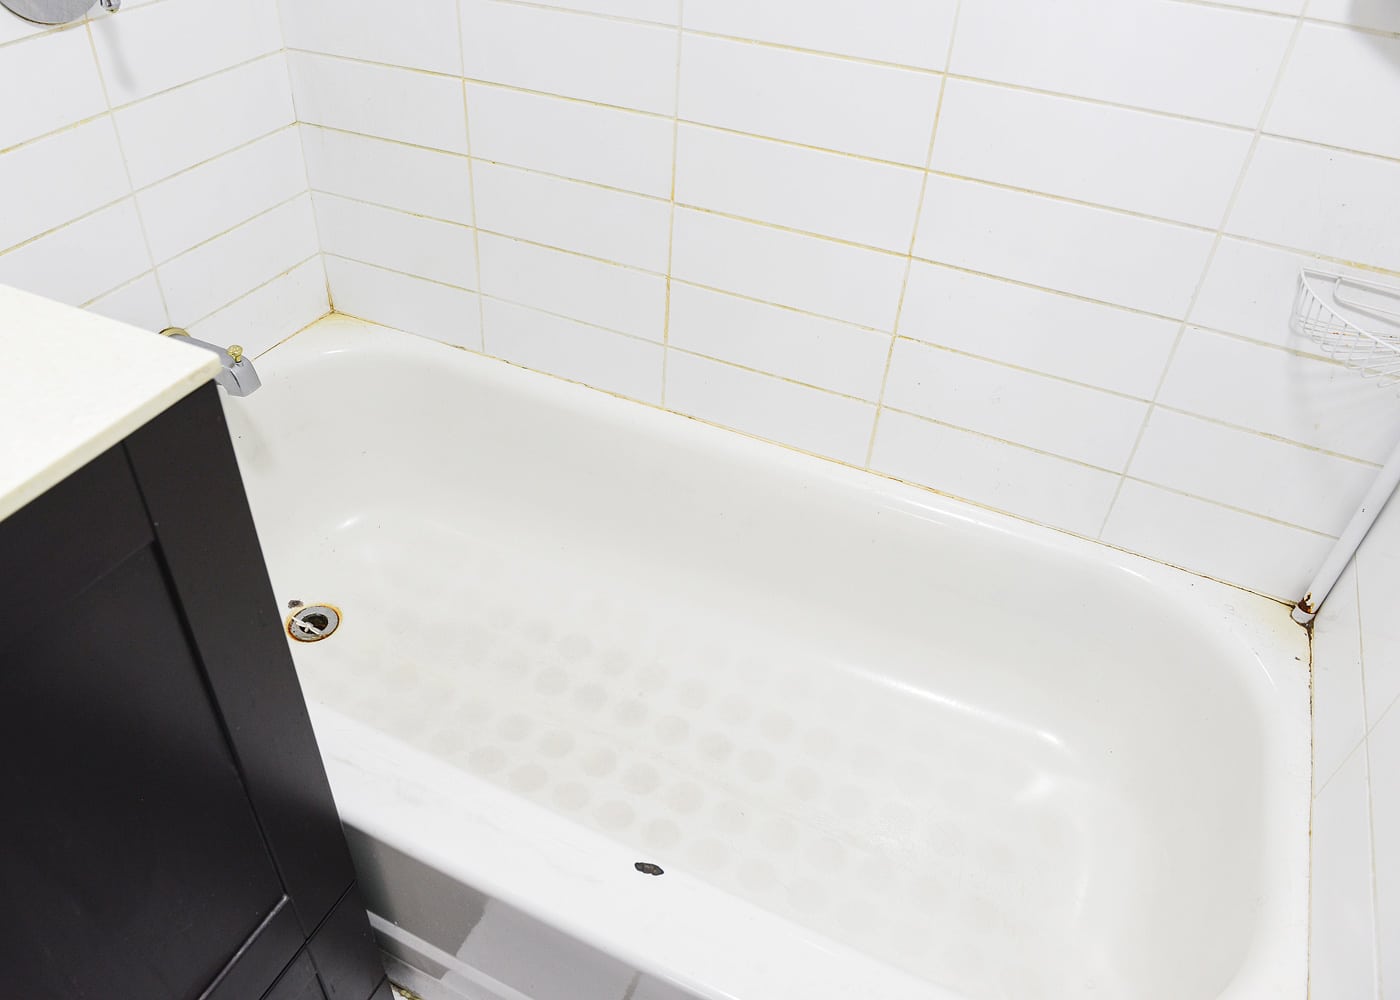
The vanity was snug to the tub, and it was only after we pulled it out of the room that we realized it was completely water logged down the side panel. The tub was rusty, and despite our best cleaning attempts, we couldn’t get it to look much better than what you see below! There were chips in the enamel, and the tile had certainly seen better days.
A lot of the muck, grime and mildew in this room was due largely in part to the ventilation, which was never properly routed to the outside. We only found this out when our contractor did some investigative digging on the job, and he explained that the ceiling vent was simply blowing between the floor joists above! Essentially, all the moisture from the bathroom was trapped in the ceiling, which never fully allowed this room to dry properly. Fun! To be honest, we weren’t surprised, because we had a similar discovery in our own bathroom during last year’s renovation. We’ve learned to bite our tongues (hard), ask how much to fix this?, and move on with our lives.
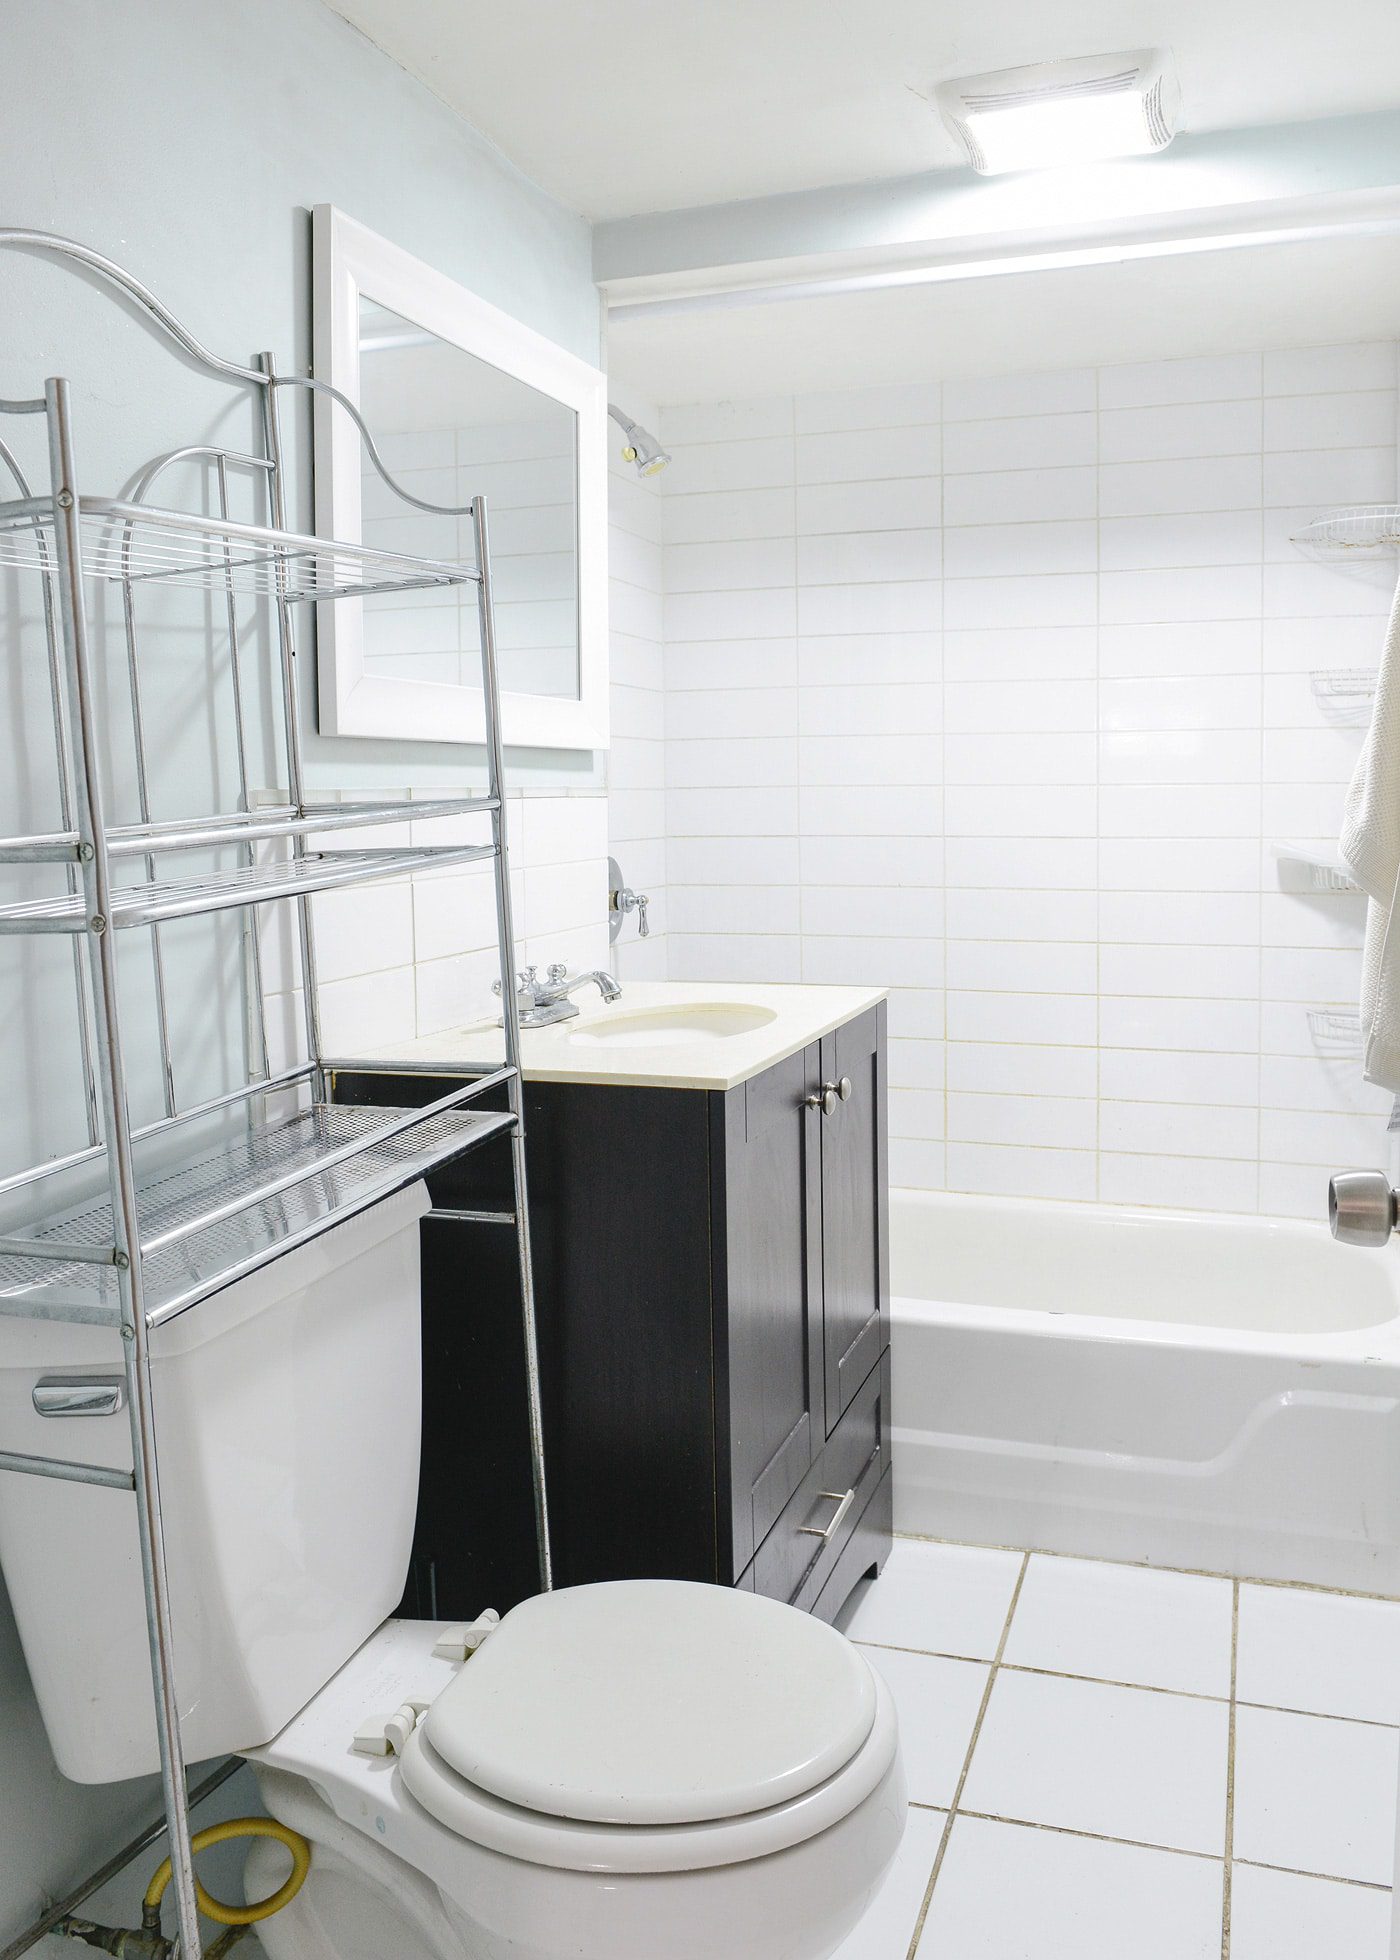
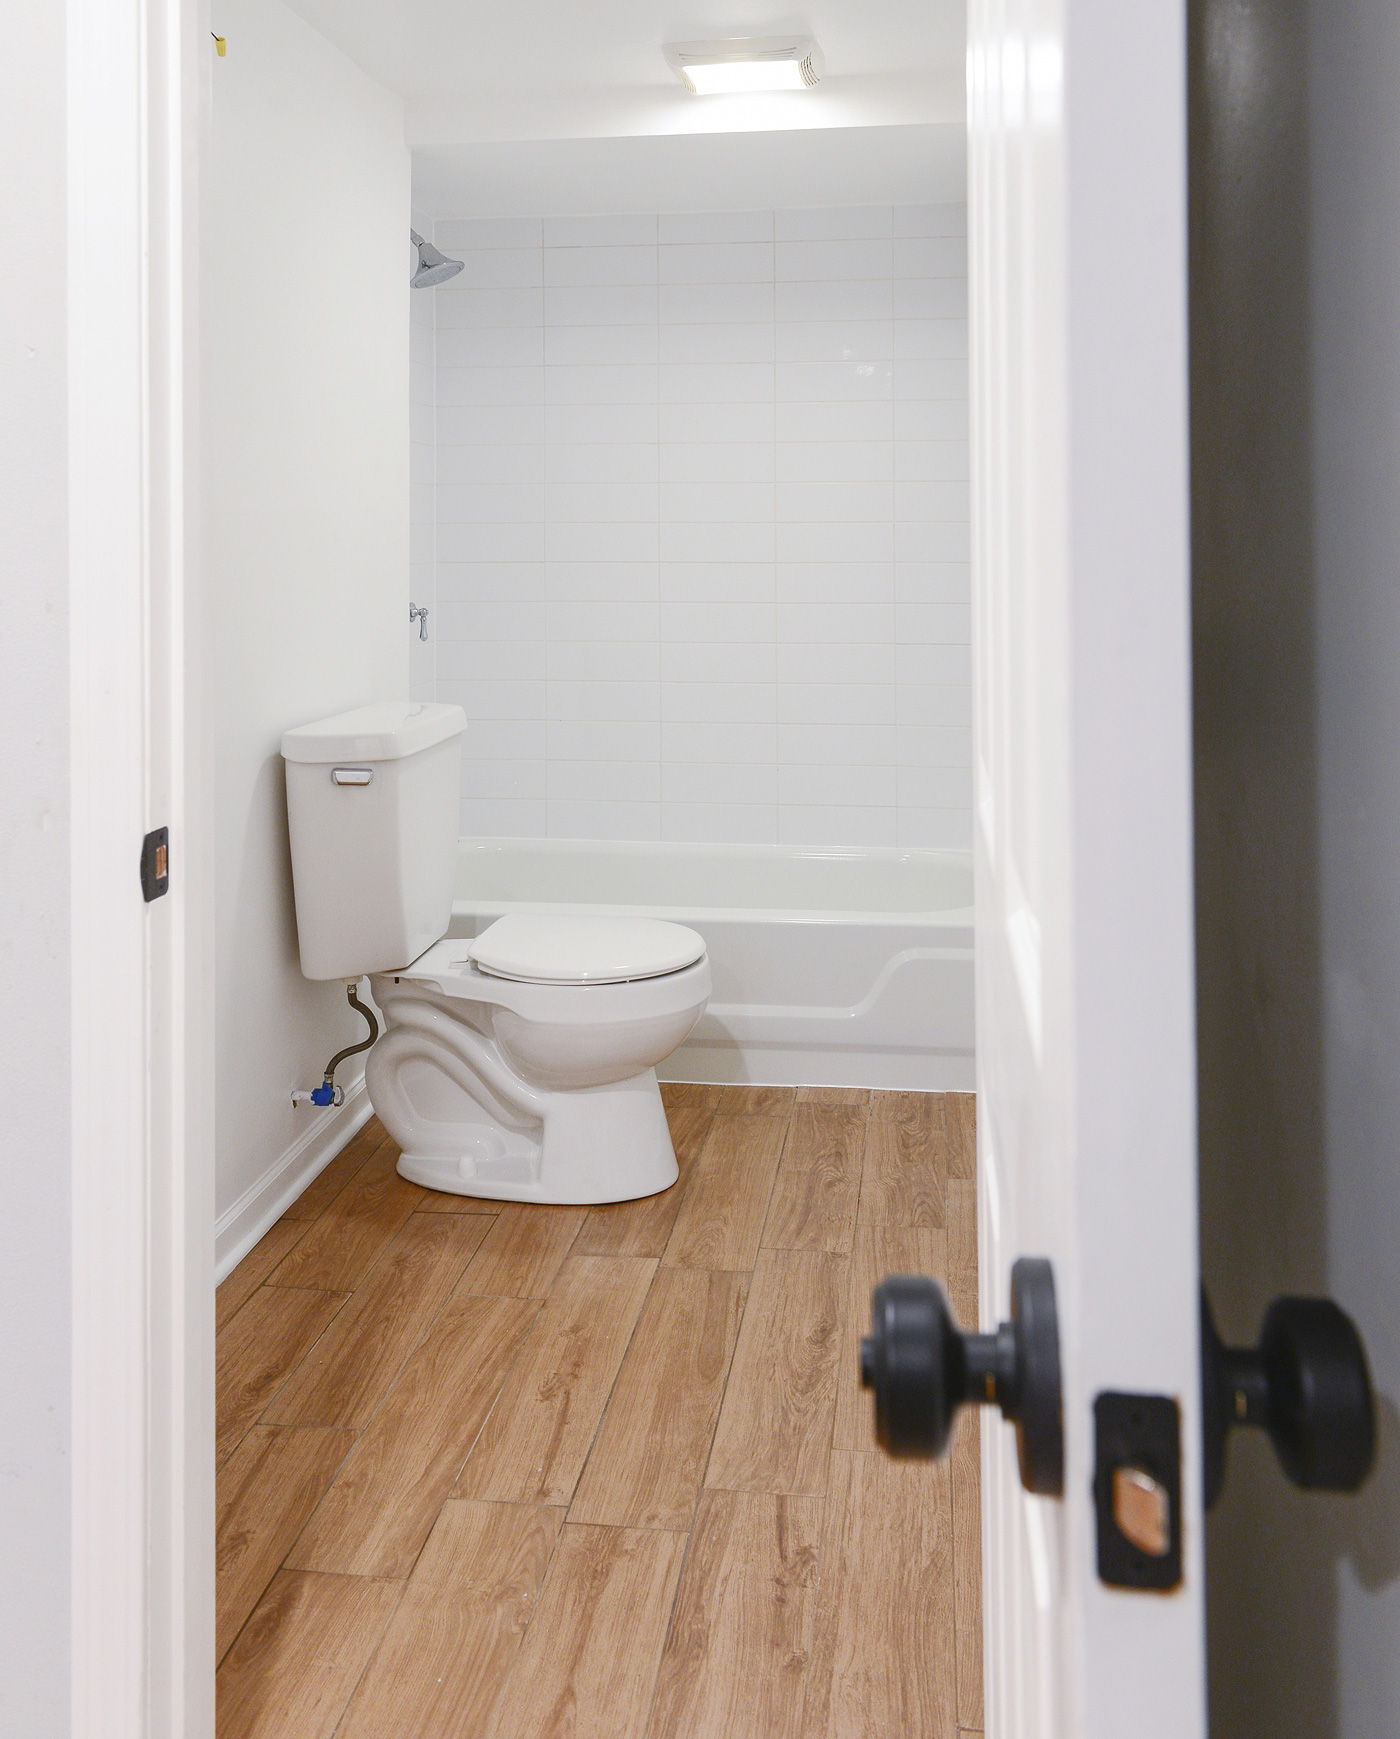
Facing the other way – oh, dear – where do I even begin? This view shows off the mismatched tile from room to room (with no effort in pattern continuity), which you know we’ve already taken care of (so, so much better!). The door opens into the bathroom, which is neither good nor bad, but in our case, the toilet was installed a good 2′ from the wall to accommodate the in-swing. Two feet! Two feet of wasted space in an already little bathroom!
We knew we could do much better. Bathroom, you have so much to give!
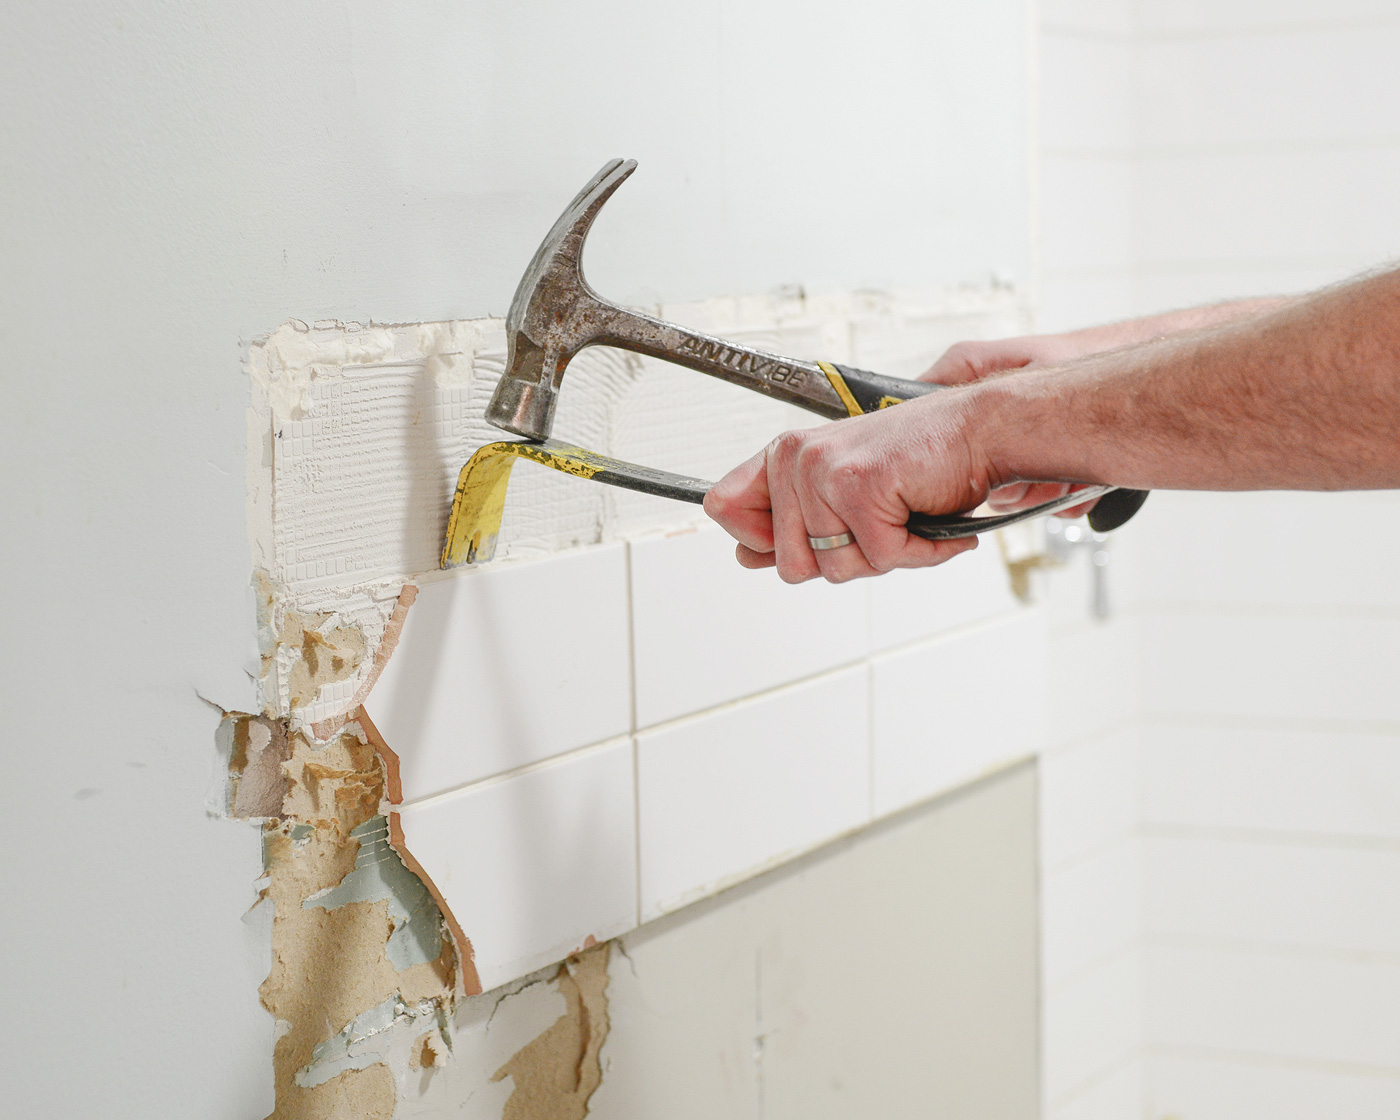
Before the new tile flooring was installed, Scott and I got started on some of the initial demolition. We removed the toilet and vanity, and we pried off the small stretch of wall tile (outside of the shower). In doing so, we found that the original drywall was poorly taped, and we were able to easily pull down that entire section of wall! Welp, down it came.
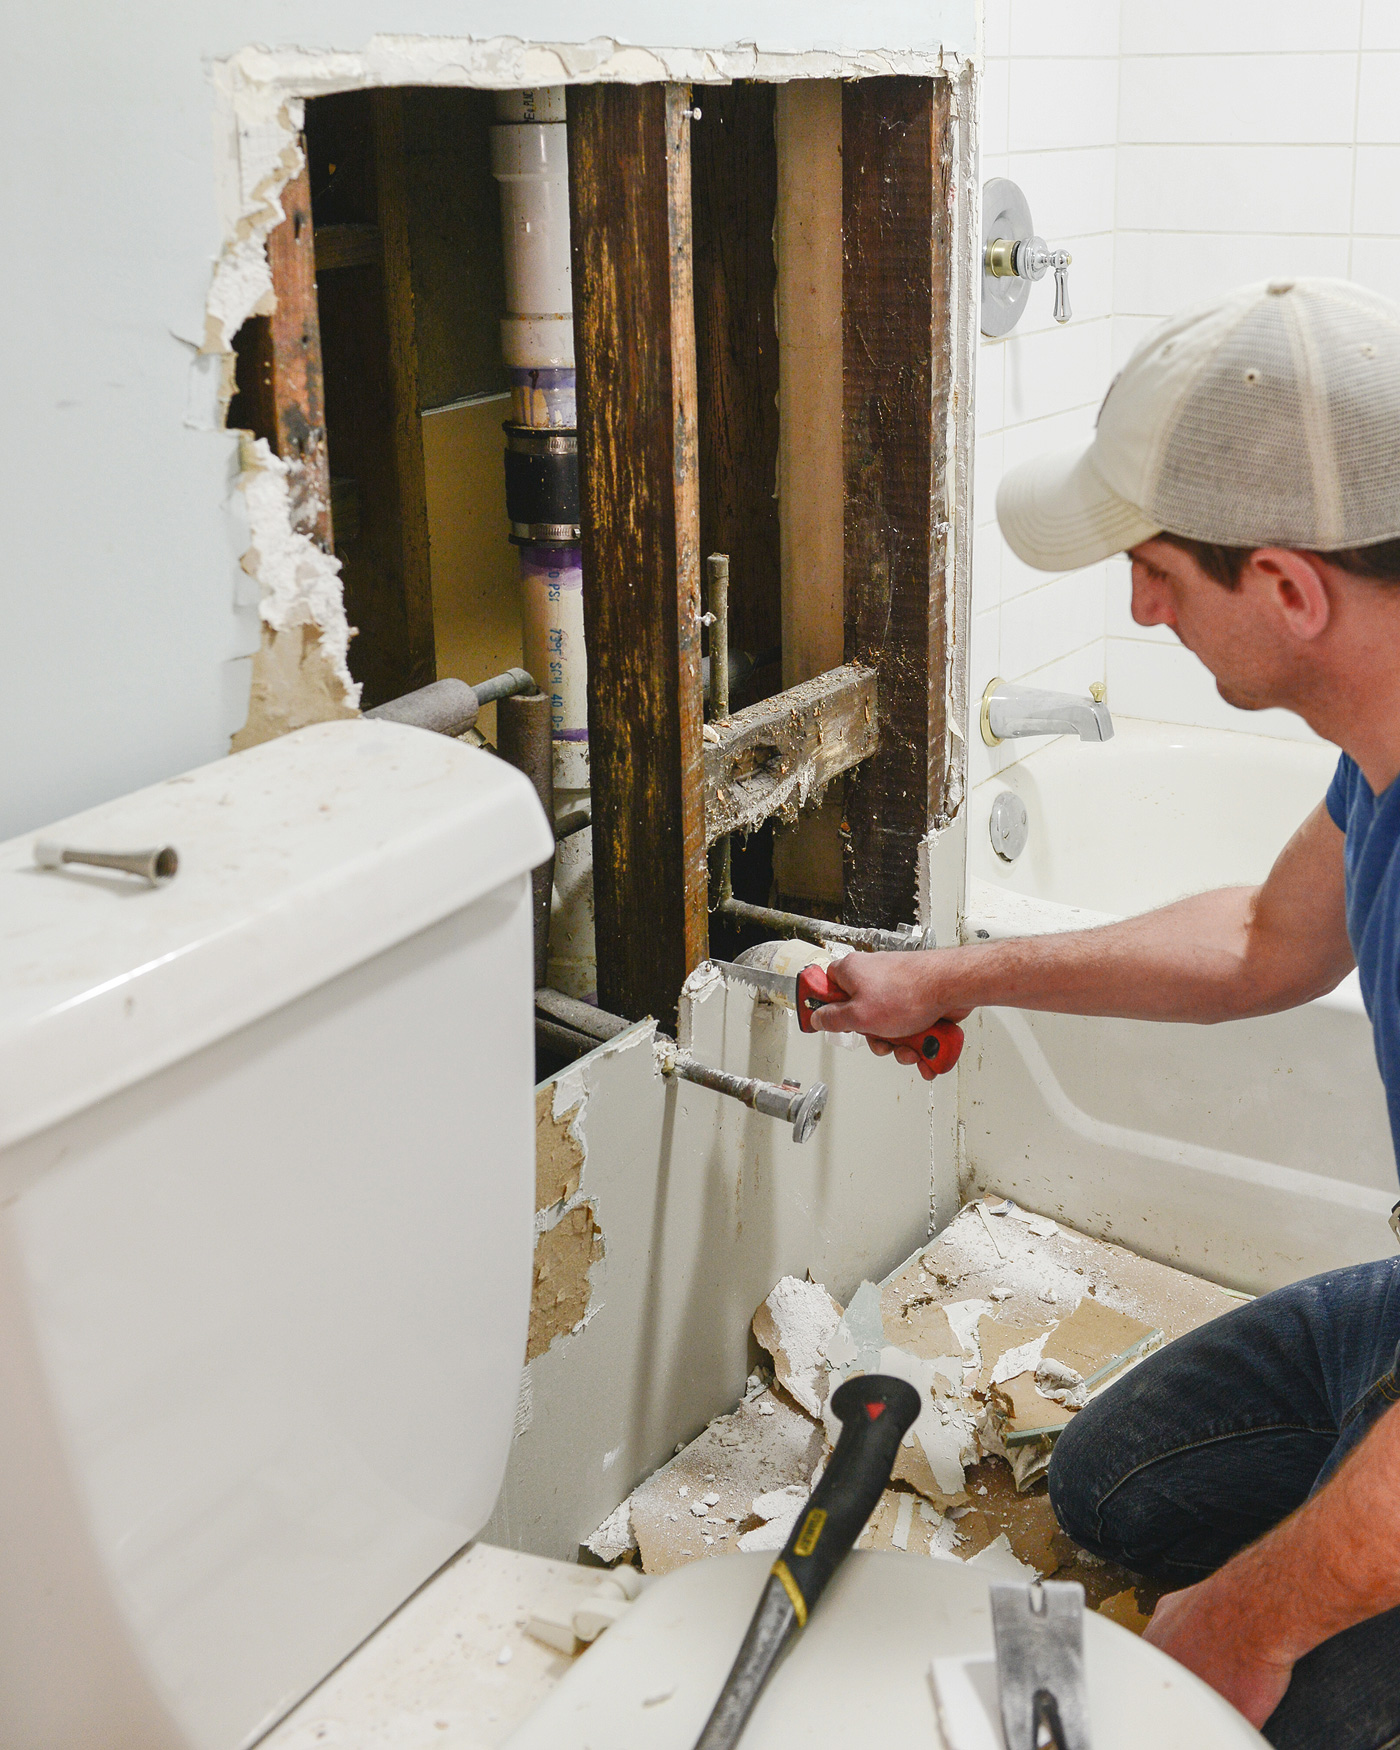
It was at this point that our contractor stepped in. On their to-do list:
- Swap the plumbing for the toilet and vanity
- Add a junction box above the vanity for a sconce (the only lighting in the room came from the vent fan!)
- Install a new door that would swing away from the bathroom
- Vent the fan to the outside, so moisture could be released properly
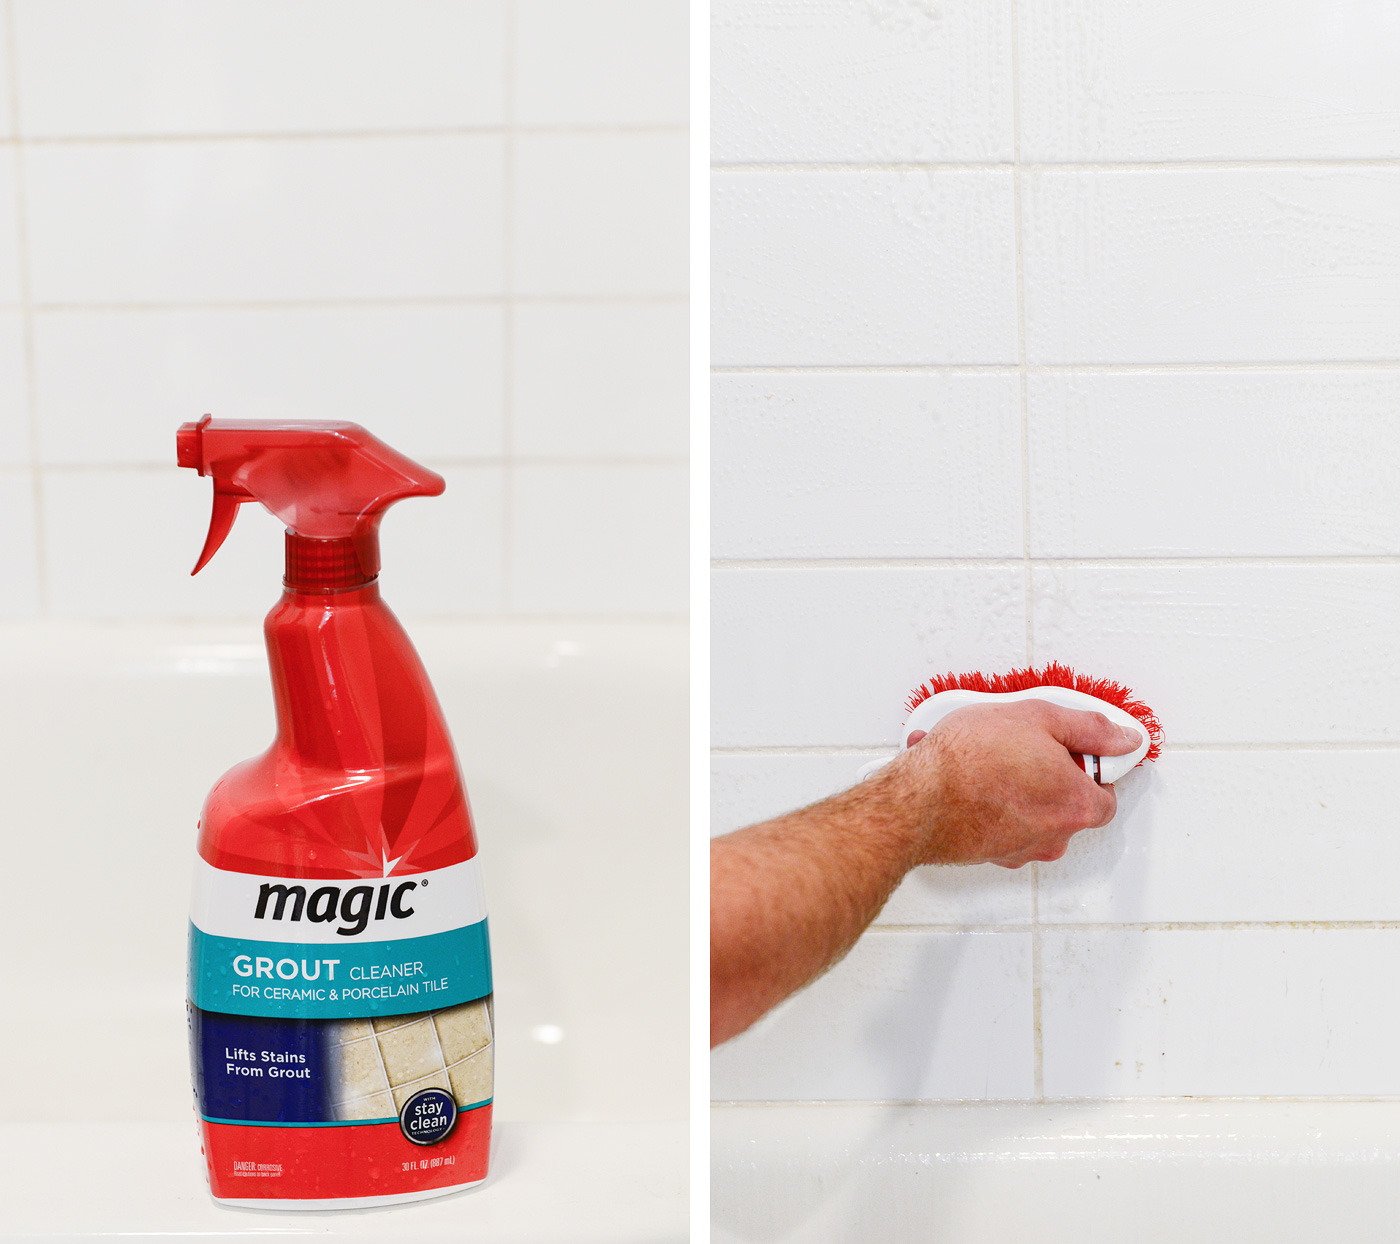
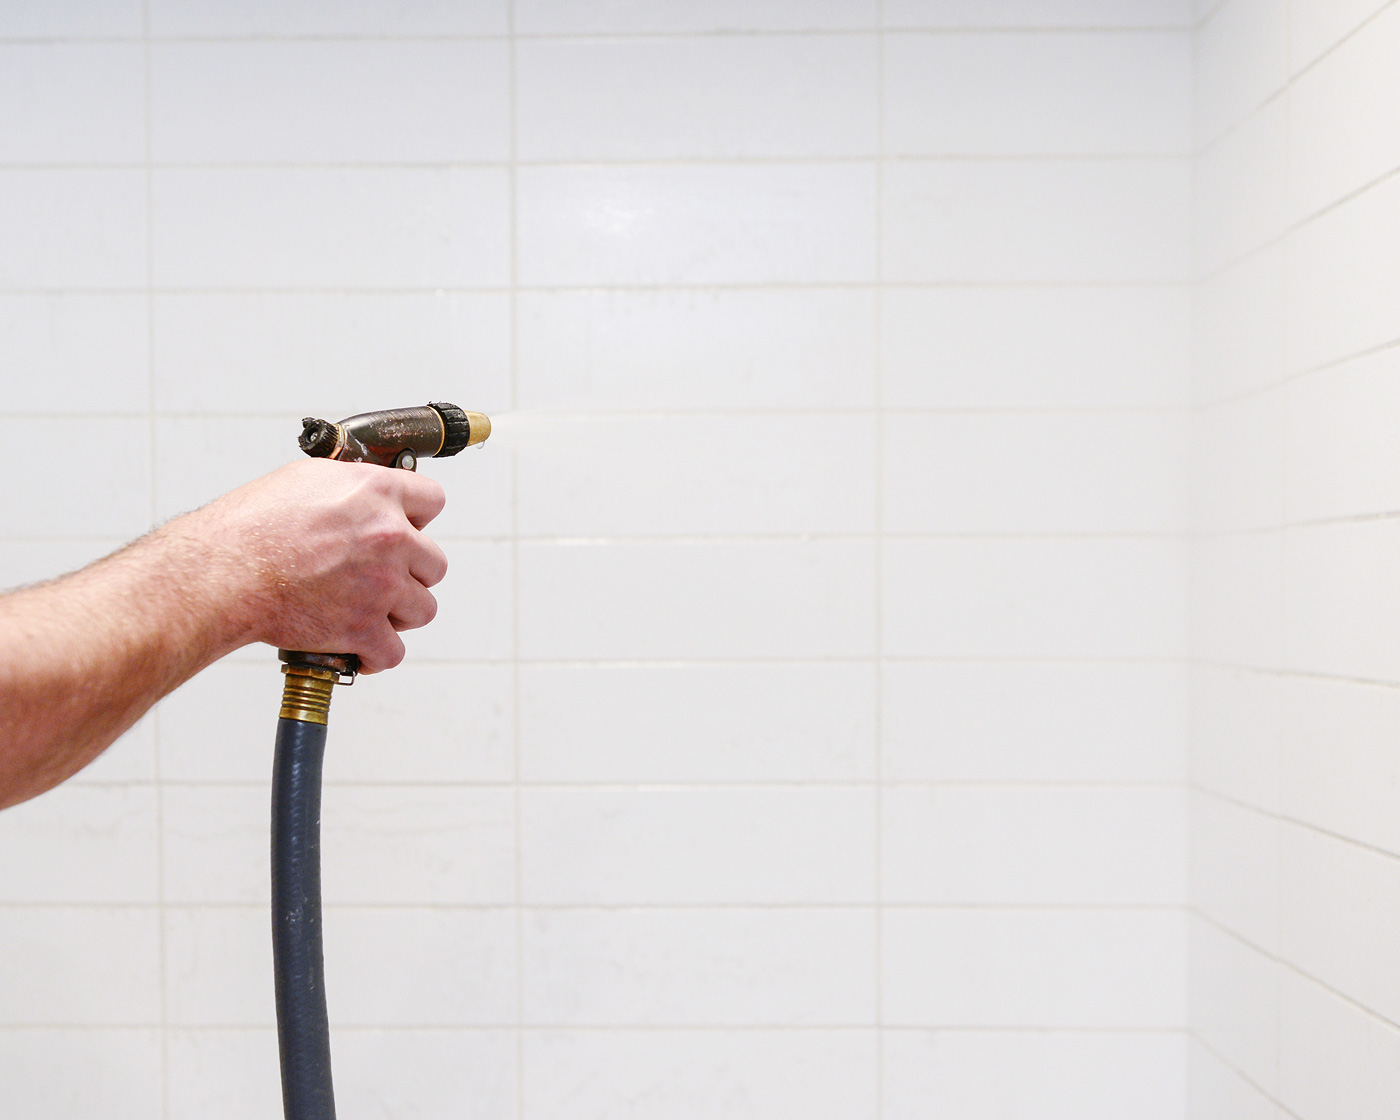
With the plumbing in its new place, our tile installer leveled the bathroom floor and laid the wood-look tile throughout. We added new baseboards, and finally, it was time for us to roll up our sleeves and clean! Clean like we’ve never cleaned before! We picked up this Magic Grout Cleaner, and we found that it really lived up to it’s name. A good scrubbing and hose down had the tiles looking new – ish. I say “ish,” because although they were technically clean, we had a few other areas in the tile department to tidy up.
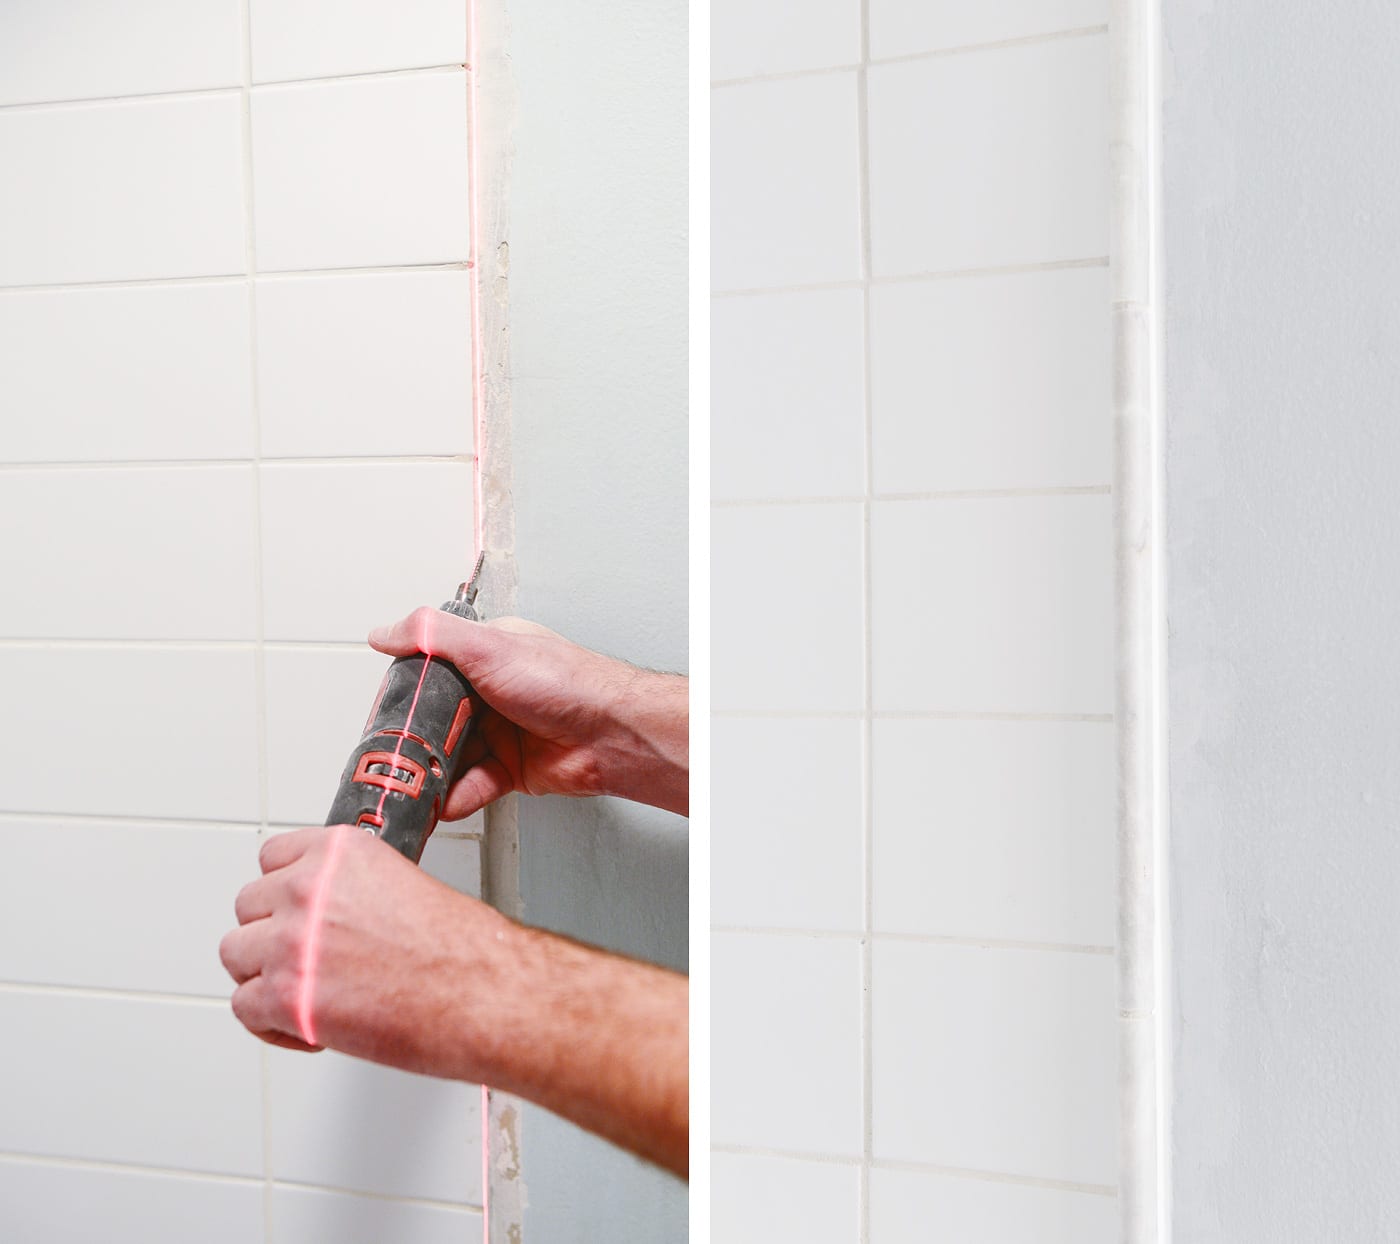
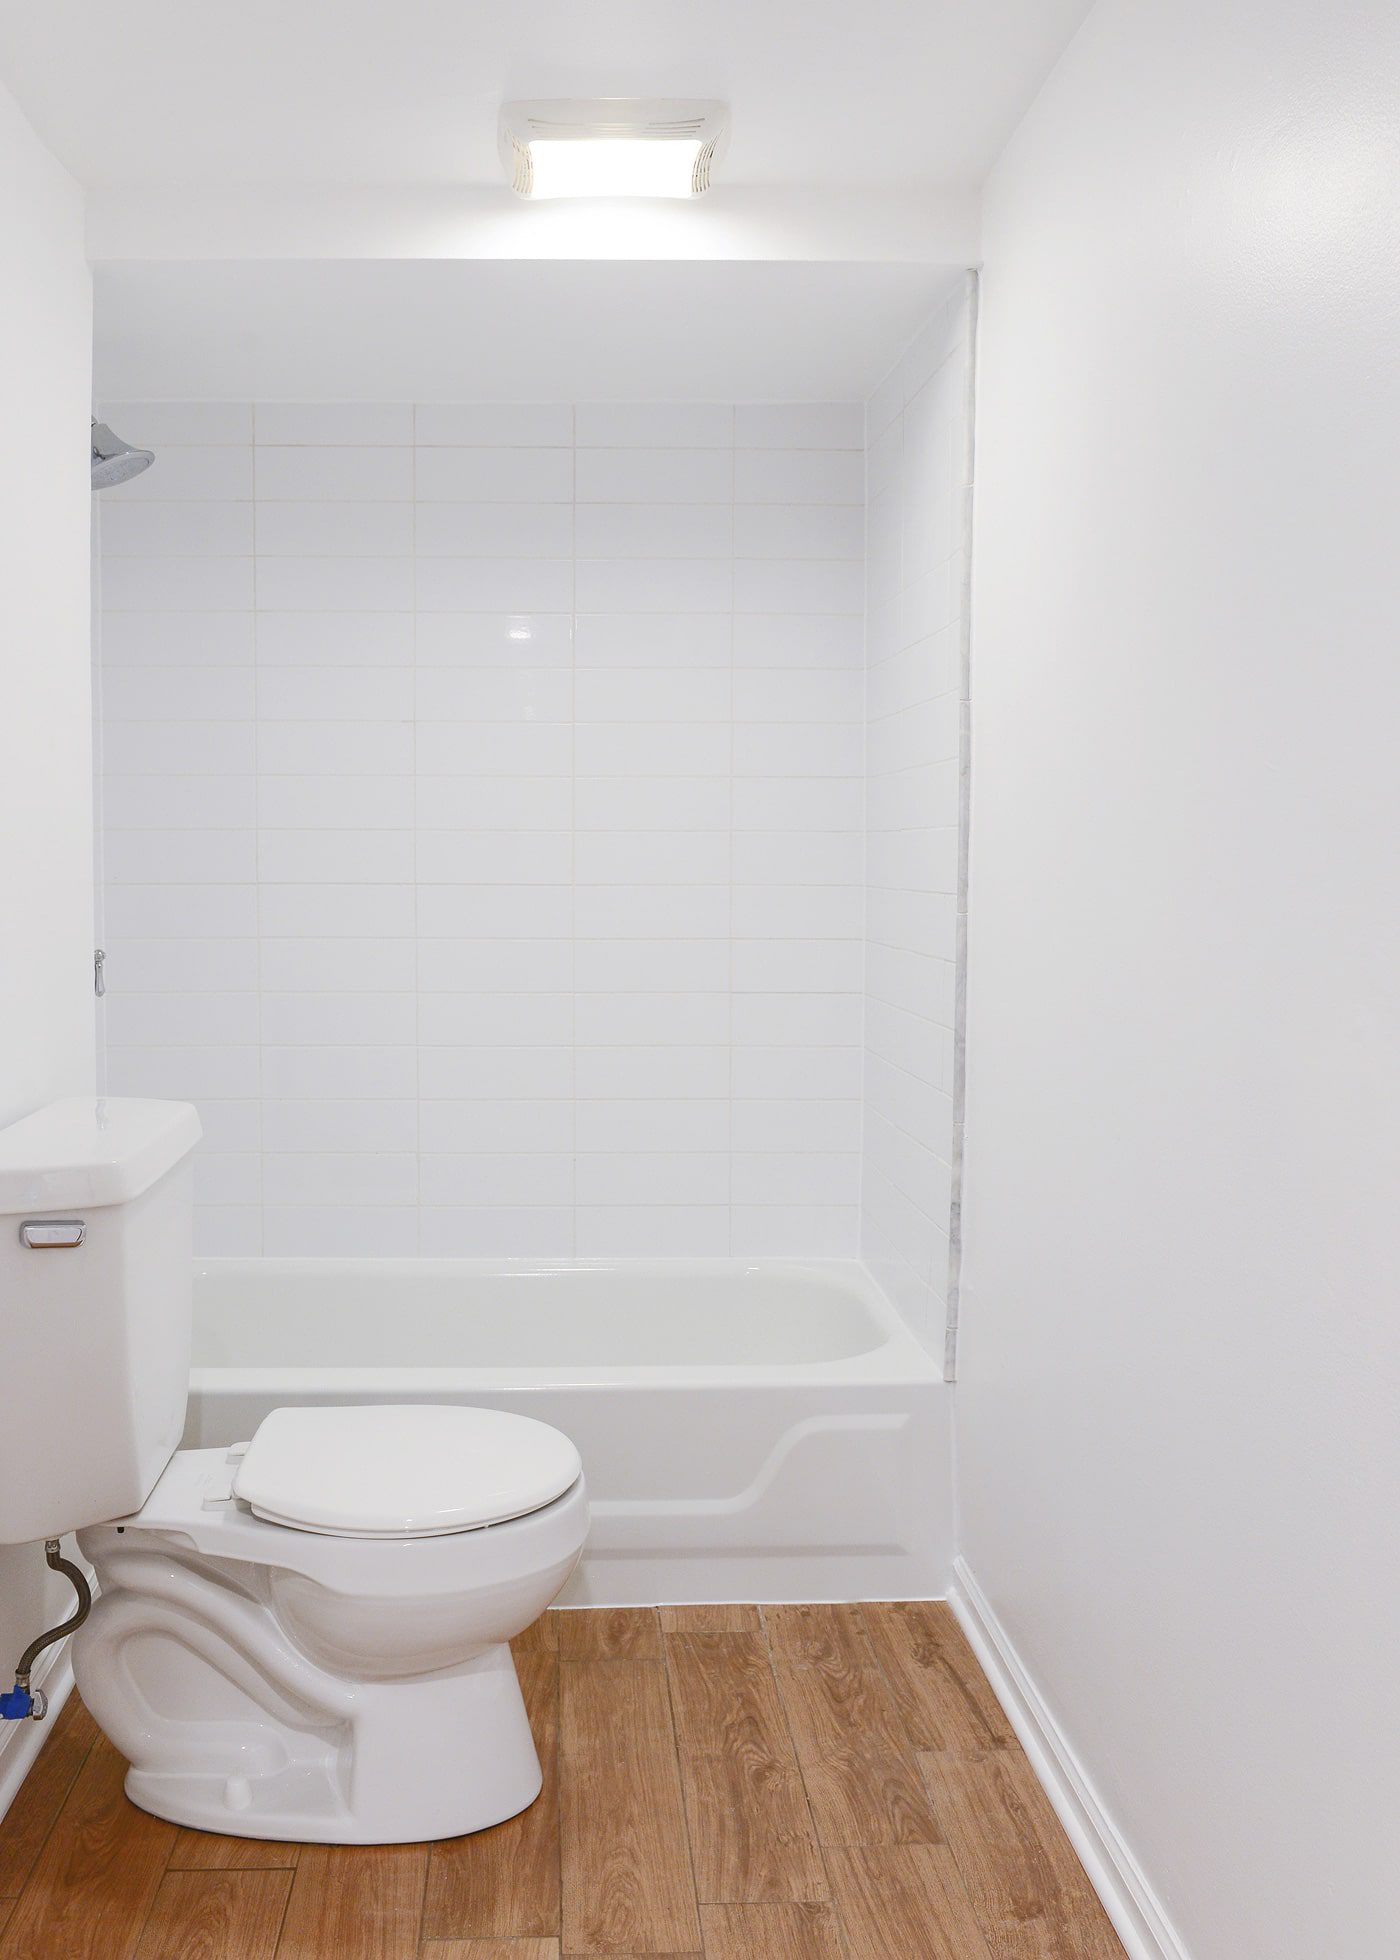
Glass pencil tile lined the termination point where the tile met drywall, but there was a glaring issue: There was no way that the stacked subway tile was ever cut on a wet saw. The subway tile had gaps that even grout couldn’t rescue, and the glass pencil was chipped, cracked and cloudy.
After removing the glass tile, Scott used his laser level to follow a straight line down the length of the subway tile, and he used a rotary tool paired with a tile drilling bit to shave it clean. The glass was replaced with pretty marble pencil, and the outside was caulked for a seamless finish. (The caulk would ultimately be painted the same color as the walls.)
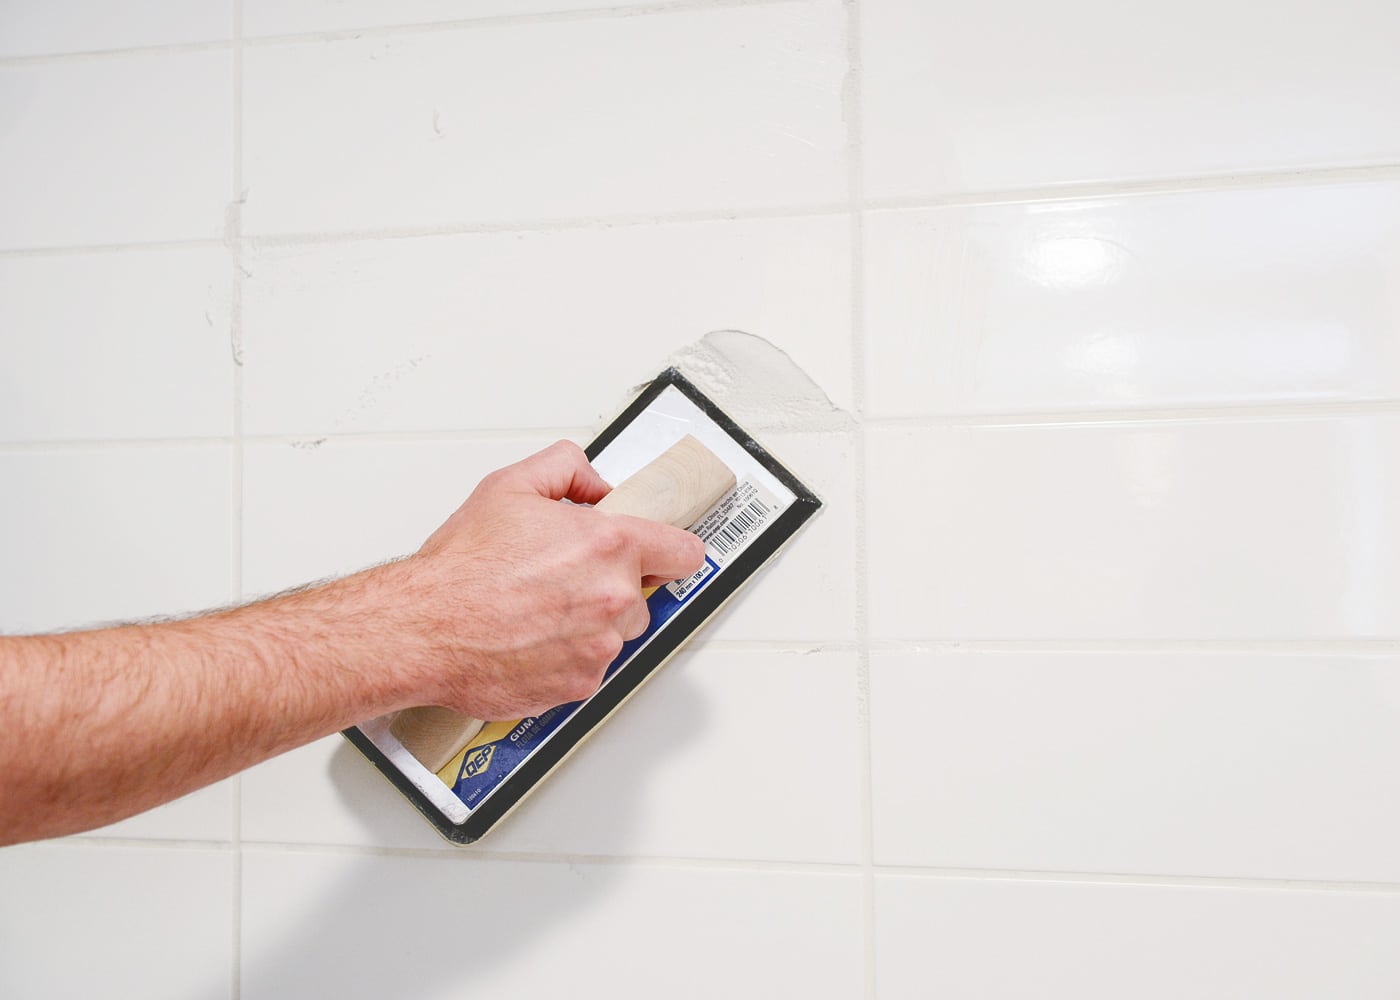
Not only did we need to grout the new marble pencil tile and where it met up with the stacked subway tile, but we also hit extra-low spots throughout the shower. We used this pre-mixed bright white grout, and we waited a day before sealing it:
After correcting the tile issues, we ultimately decided to get the tub reglazed. Although the tub itself is not the prettiest design, it was the most cost effective solution and ended up delivering stunning results. Note: We’ll share that experience in a later post!
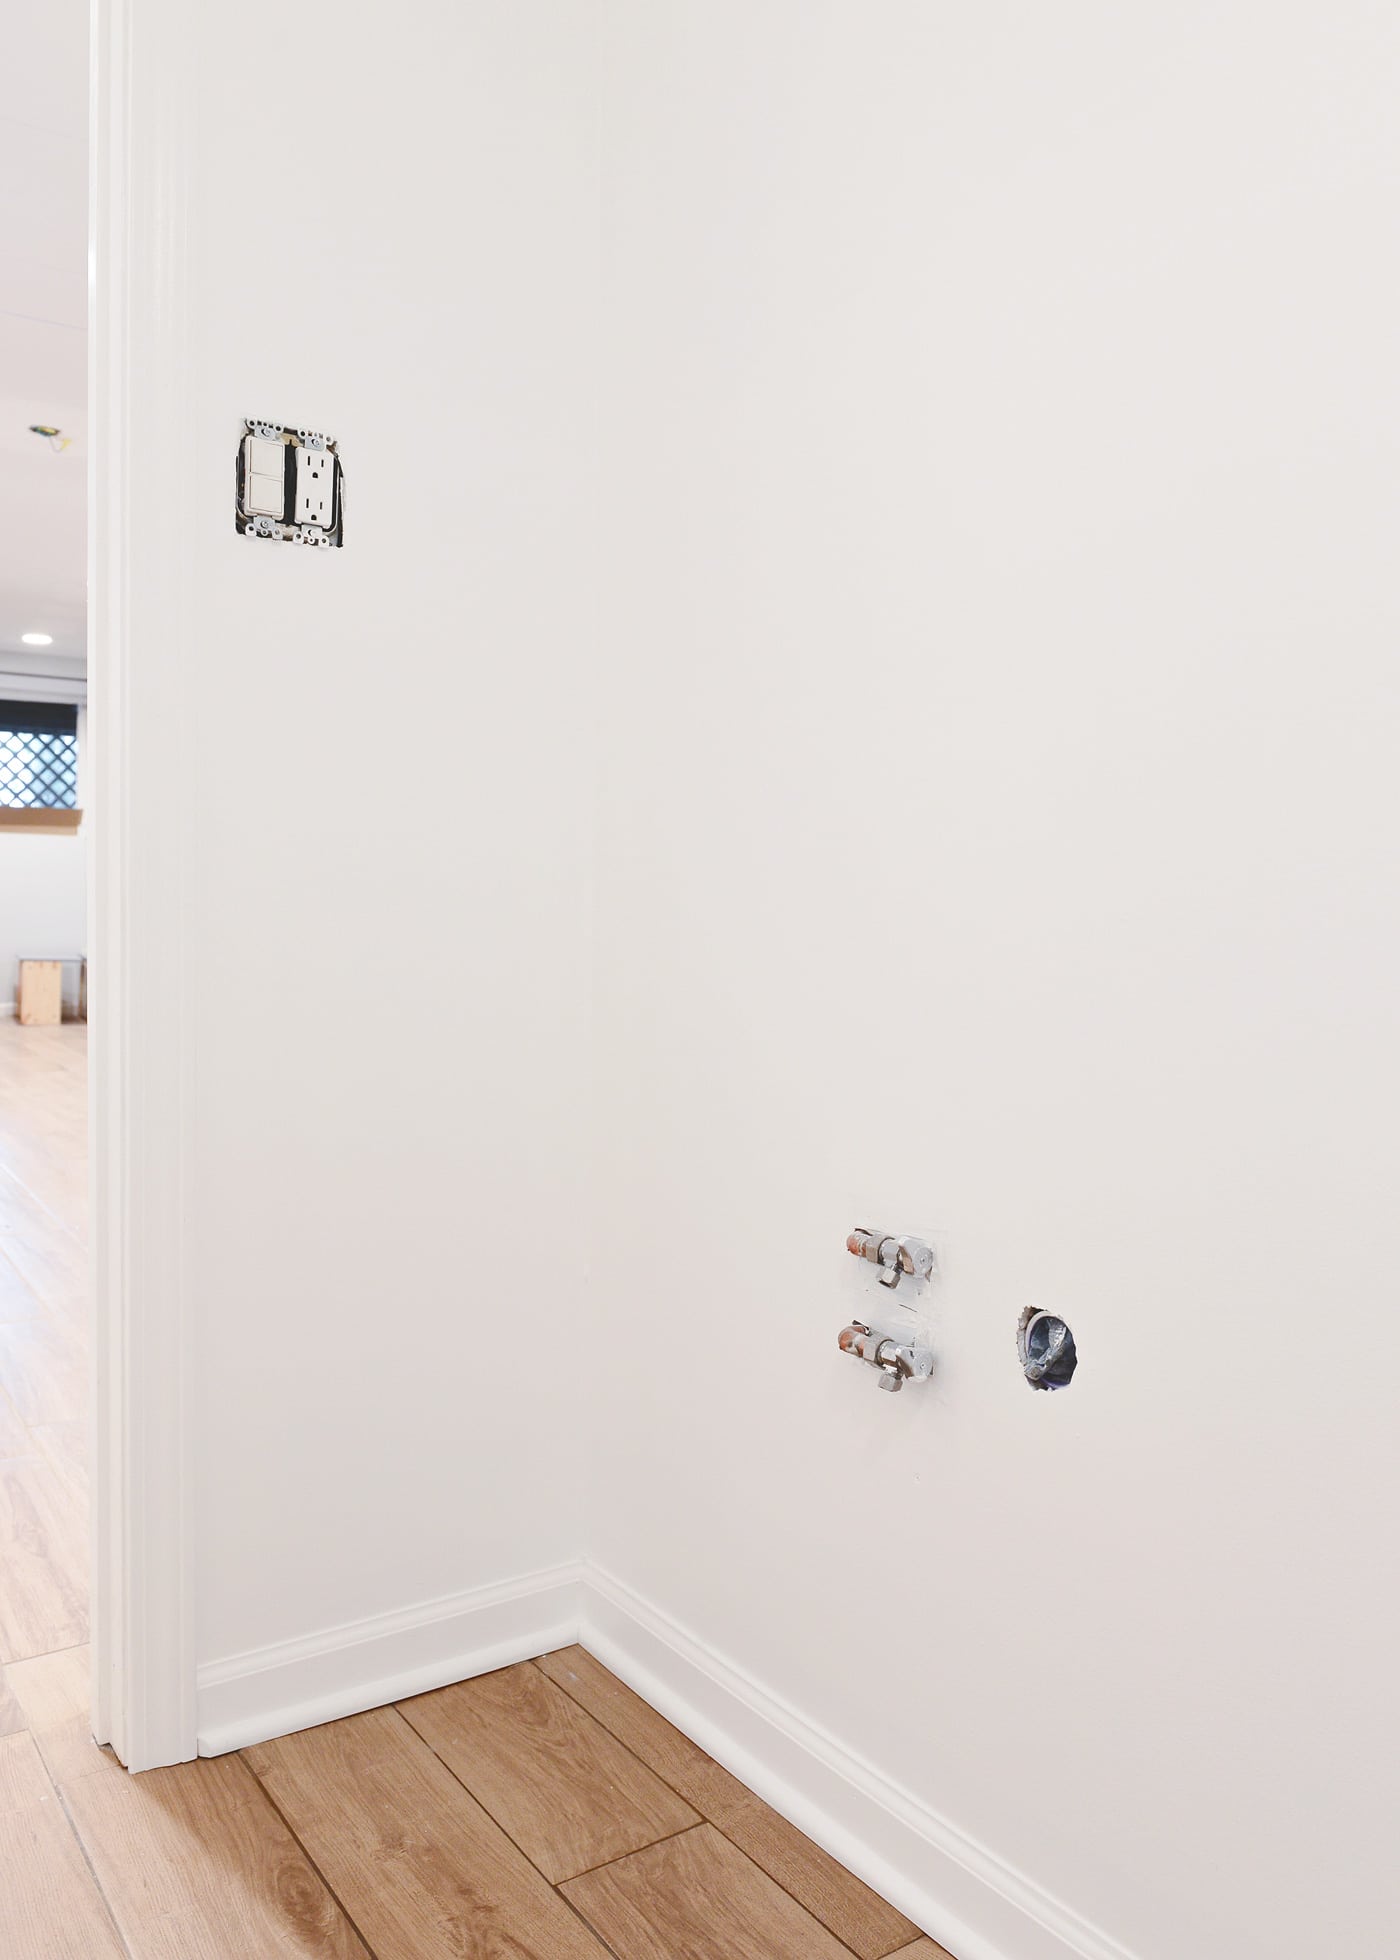
All of that brought us to here:
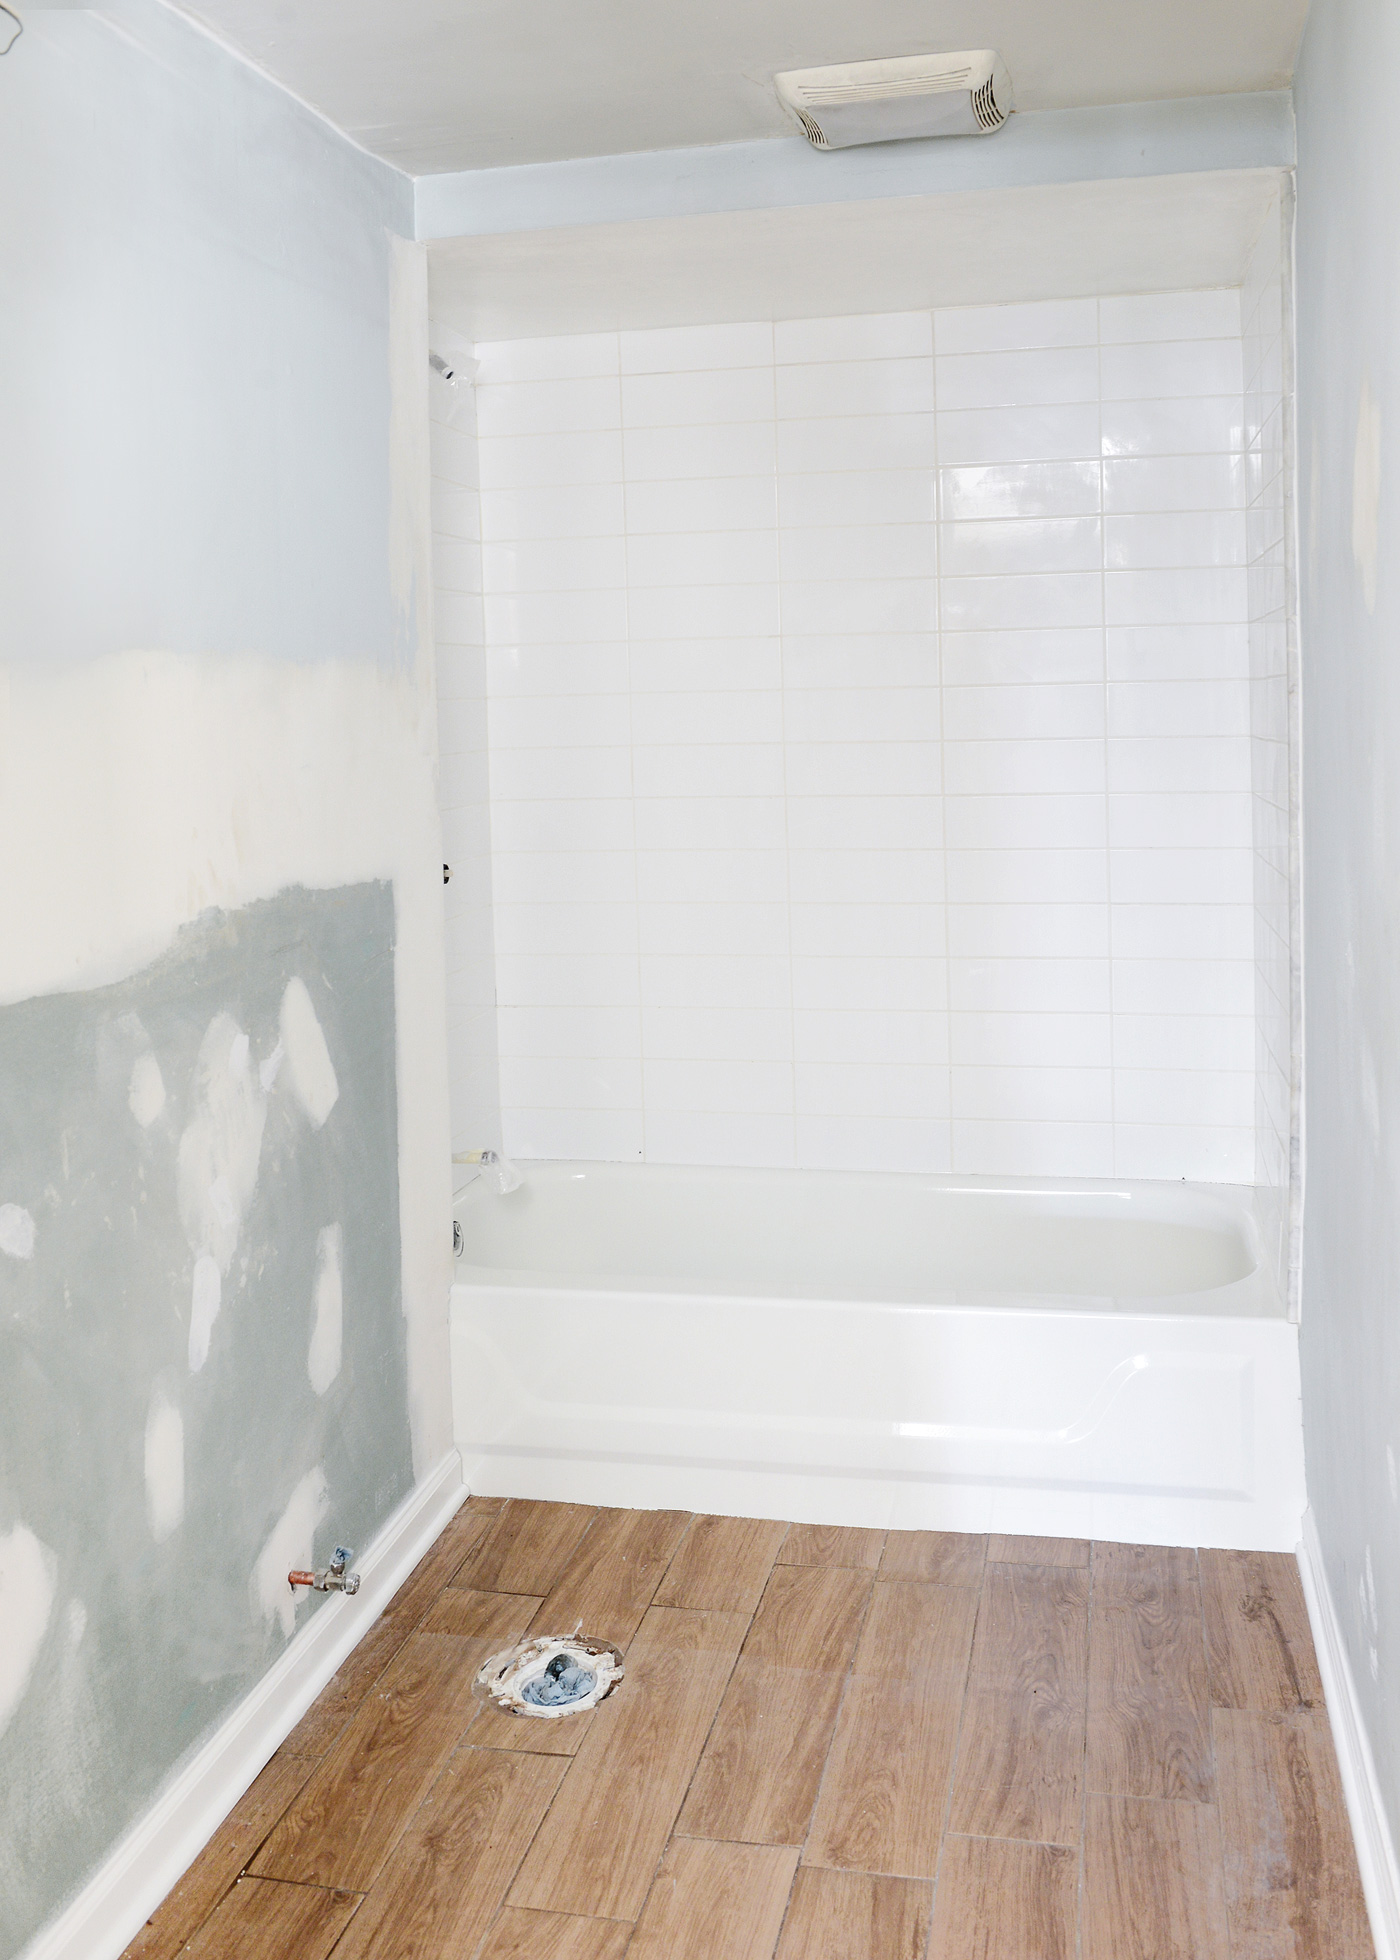
We spent the entirety of last weekend painting the whole room – ceiling, too! – Valspar’s Ultra White in an eggshell finish, the same color that we’ve been using on the doors and will use to freshen up the trim throughout. To this day, it never ceases to amaze us what a difference paint makes! Yow! The line of the ceiling isn’t perfect, and we knew this was a sure bet to open the space and distract from those slight imperfections. The toilet got the scrub of a lifetime (as in, we hauled it outside and pressure washed it, ha!), and we gave it a new soft-close seat and lid. The new shower fixtures were installed, and we washed the plastic cover for the vent fan. In its new life, the fan hopefully won’t get as grimy, as all the thick air from the bathroom will finally have a place to go (rather than build up and up and up).
When we replaced the door to the bathroom, we chose one that would swing out, which would give us maximum space to create a more desirable layout. While we were at it, we chose a solid core door, since it is located right off of the living room, after all. #privacyplease

I’ll put a wrap on the bathroom for now, but we’ve already been busy bees installing the vanity and fine tuning the details! It’s coming together much better than we could have imagined, and a few times we even said aloud, Is this bathroom cuter than ours? I think it is.
It’s small, but it’s turning out to be pretty damn mighty, too.


We have a bathroom with this same layout. The door opens into the bathroom and it’s a cramped nightmare. I can’t believe it never occurred to me to just have the door swing the other way! Can’t wait to see the vanity you chose. Getting so many great ideas!
Glad to hear! Something to keep in mind, we did have to buy a new door/jamb with the proper swing, remove the trim, install the new door and jamb, and then put the trim back on. So while it’s not as straightforward as, say, reversing the hinges, it is DEFINITELY worth it for the space!
Man, the previous owners made decisions only with their wallets, it seems. Y’all are pretty amazing for tackling issues and doing it RIGHT!
No truer words. Not just in the garden, in our home, too! Luckily we’ve just about tackled all the bad decisions in our space. Time to do the garden right!
I can’t say that I’ve ever seen chrome/brass shower fixtures before, and I’d be very happy if I never saw them again. The renovation looks great so far!
Haha, same here!
We’ve got chrome and brass combined fixtures in our master bath and they are awful! We are in the idea stages of a master bath overhaul (ditching the never-used garden tub for a two-person shower!) and it all started because we wanted to get rid of the fixtures.
Thanks for all your hard work. It’s encouraging to see you power cleaning and repairing some pieces, instead of straight up replacing everything. Gives me hope for some of our stuff! :)
I like reading about the dirty details. Not sure the age of the john, but I’m surprised that for $100 you didn’t just get a new toilet.
We almost did! But upon closer inspection, the toilet is a clean-lined and well-functioning Kohler, and all it needed was a good scrubbing. In this case, it felt wasteful to buy new. We swapped out the toilet seat/lid just because it seemed to be a good sanitary solution. :)
How do you like the elongated stacked subway tiles? I’m about to install them ion my own bathroom and would love to know how you find ’em! It was a toss up between those and penny rounds.
Scott and I are torn on this one! I personally like them, and I even like the stacked look. Scott isn’t a big fan. Because we inherited these tiles, we’re happy with how they cleaned up, but if we were to do it from scratch, I think we would have chosen the more traditional style, only because it feels like a better fit to our home’s (130-year-old!) age.
Such an amazing improvement already! Can’t wait to see the rest! And we have mistmatched flooring too all throughout our house. Drives me crazy!
Can’t wait to hear about the tub reglazing! It’s on our to do list.
I love the tiles you used! They’re gorgeous!
Paige
http://thehappyflammily.com
I’m excited to hear about the tub reglazing too! Our bathroom is on my list, but I’m dreading it because we only have one bathroom and being without a toilet and shower doesn’t sound fun. What a difference already in your space!
Looks great so far, can’t wait to see it when it’s done. I am very skeptical about the grout cleaner though… Will have to give it a try.
This bathroom was set up so wrong initially for functionality but you guys are doing a great job! I already love the bare bones in the room, I can’t wait to see the rest! :)
Soooo wrong!
You guys are so impressive! I know it’s those little spaces that can be the hardest to makeover. But you have such attention to detail! I think if I got to the point where I realized something wasn’t perfectly level I would just call it a day and leave it like that forever!
I look forward to seeing the result. The setup of this bathroom is so… weird. Why they place the toilet at the door :(
http://www.imgoog.com/
Who did you guys use to reglaze the tub?
Hi Kim! We have the same issue in our bathroom. Toilet and vanity need to be swapped. We are on slab with no crawl space:( What did your contractor charge for that? We live in Portland, OR, so I”m sure the cost may. Love reading your blog. It’s helping me get through the quarantine. TY!!
Hi Amanda! Not sure of the exact price as it that portion of the work was lumped in with everything else our GC did at the time. If the slab is in good shape with no tile or finish, our guess would be that the slab sawing and plumbing work would cost between $1,000 – $2,000. For unique situations like this, we find that it’s always best to get multiple quotes. Hope this helps!