

This post is sponsored by Lowe’s. Our Tree House is one step closer to completion! Today we’re walking through the steps to properly stain a weathered deck with lots of tips and tricks included along the way.
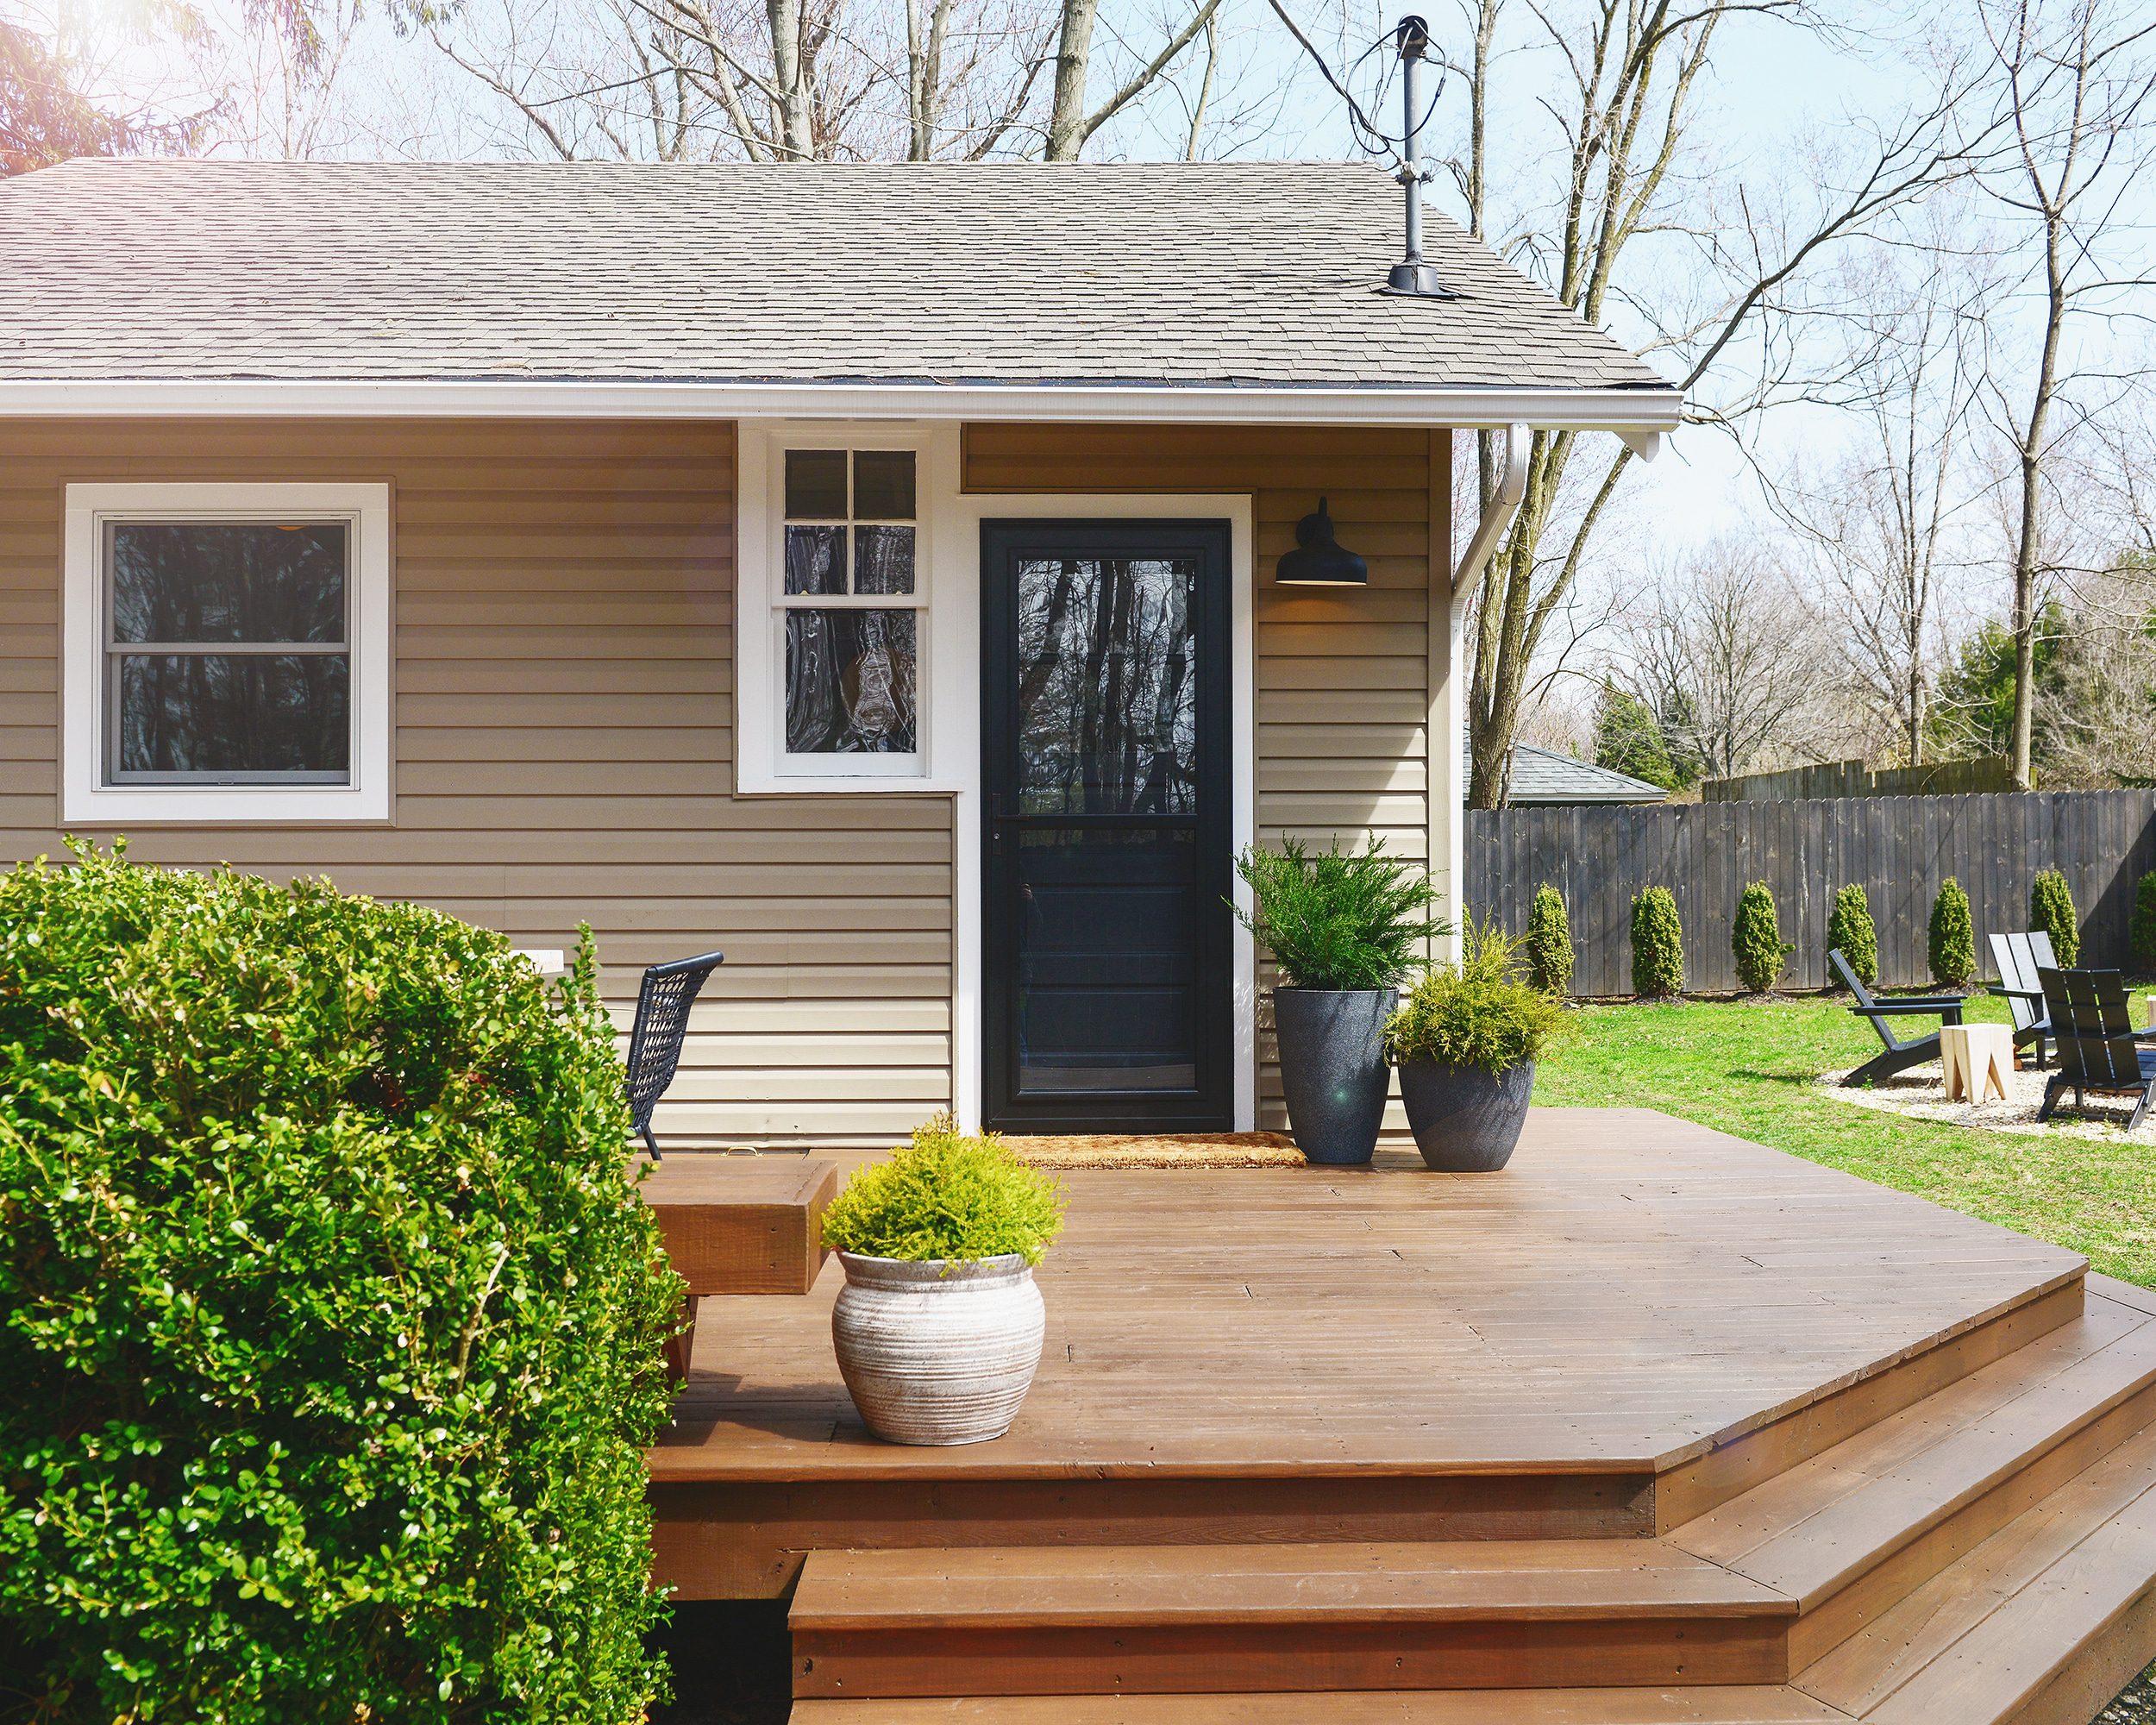
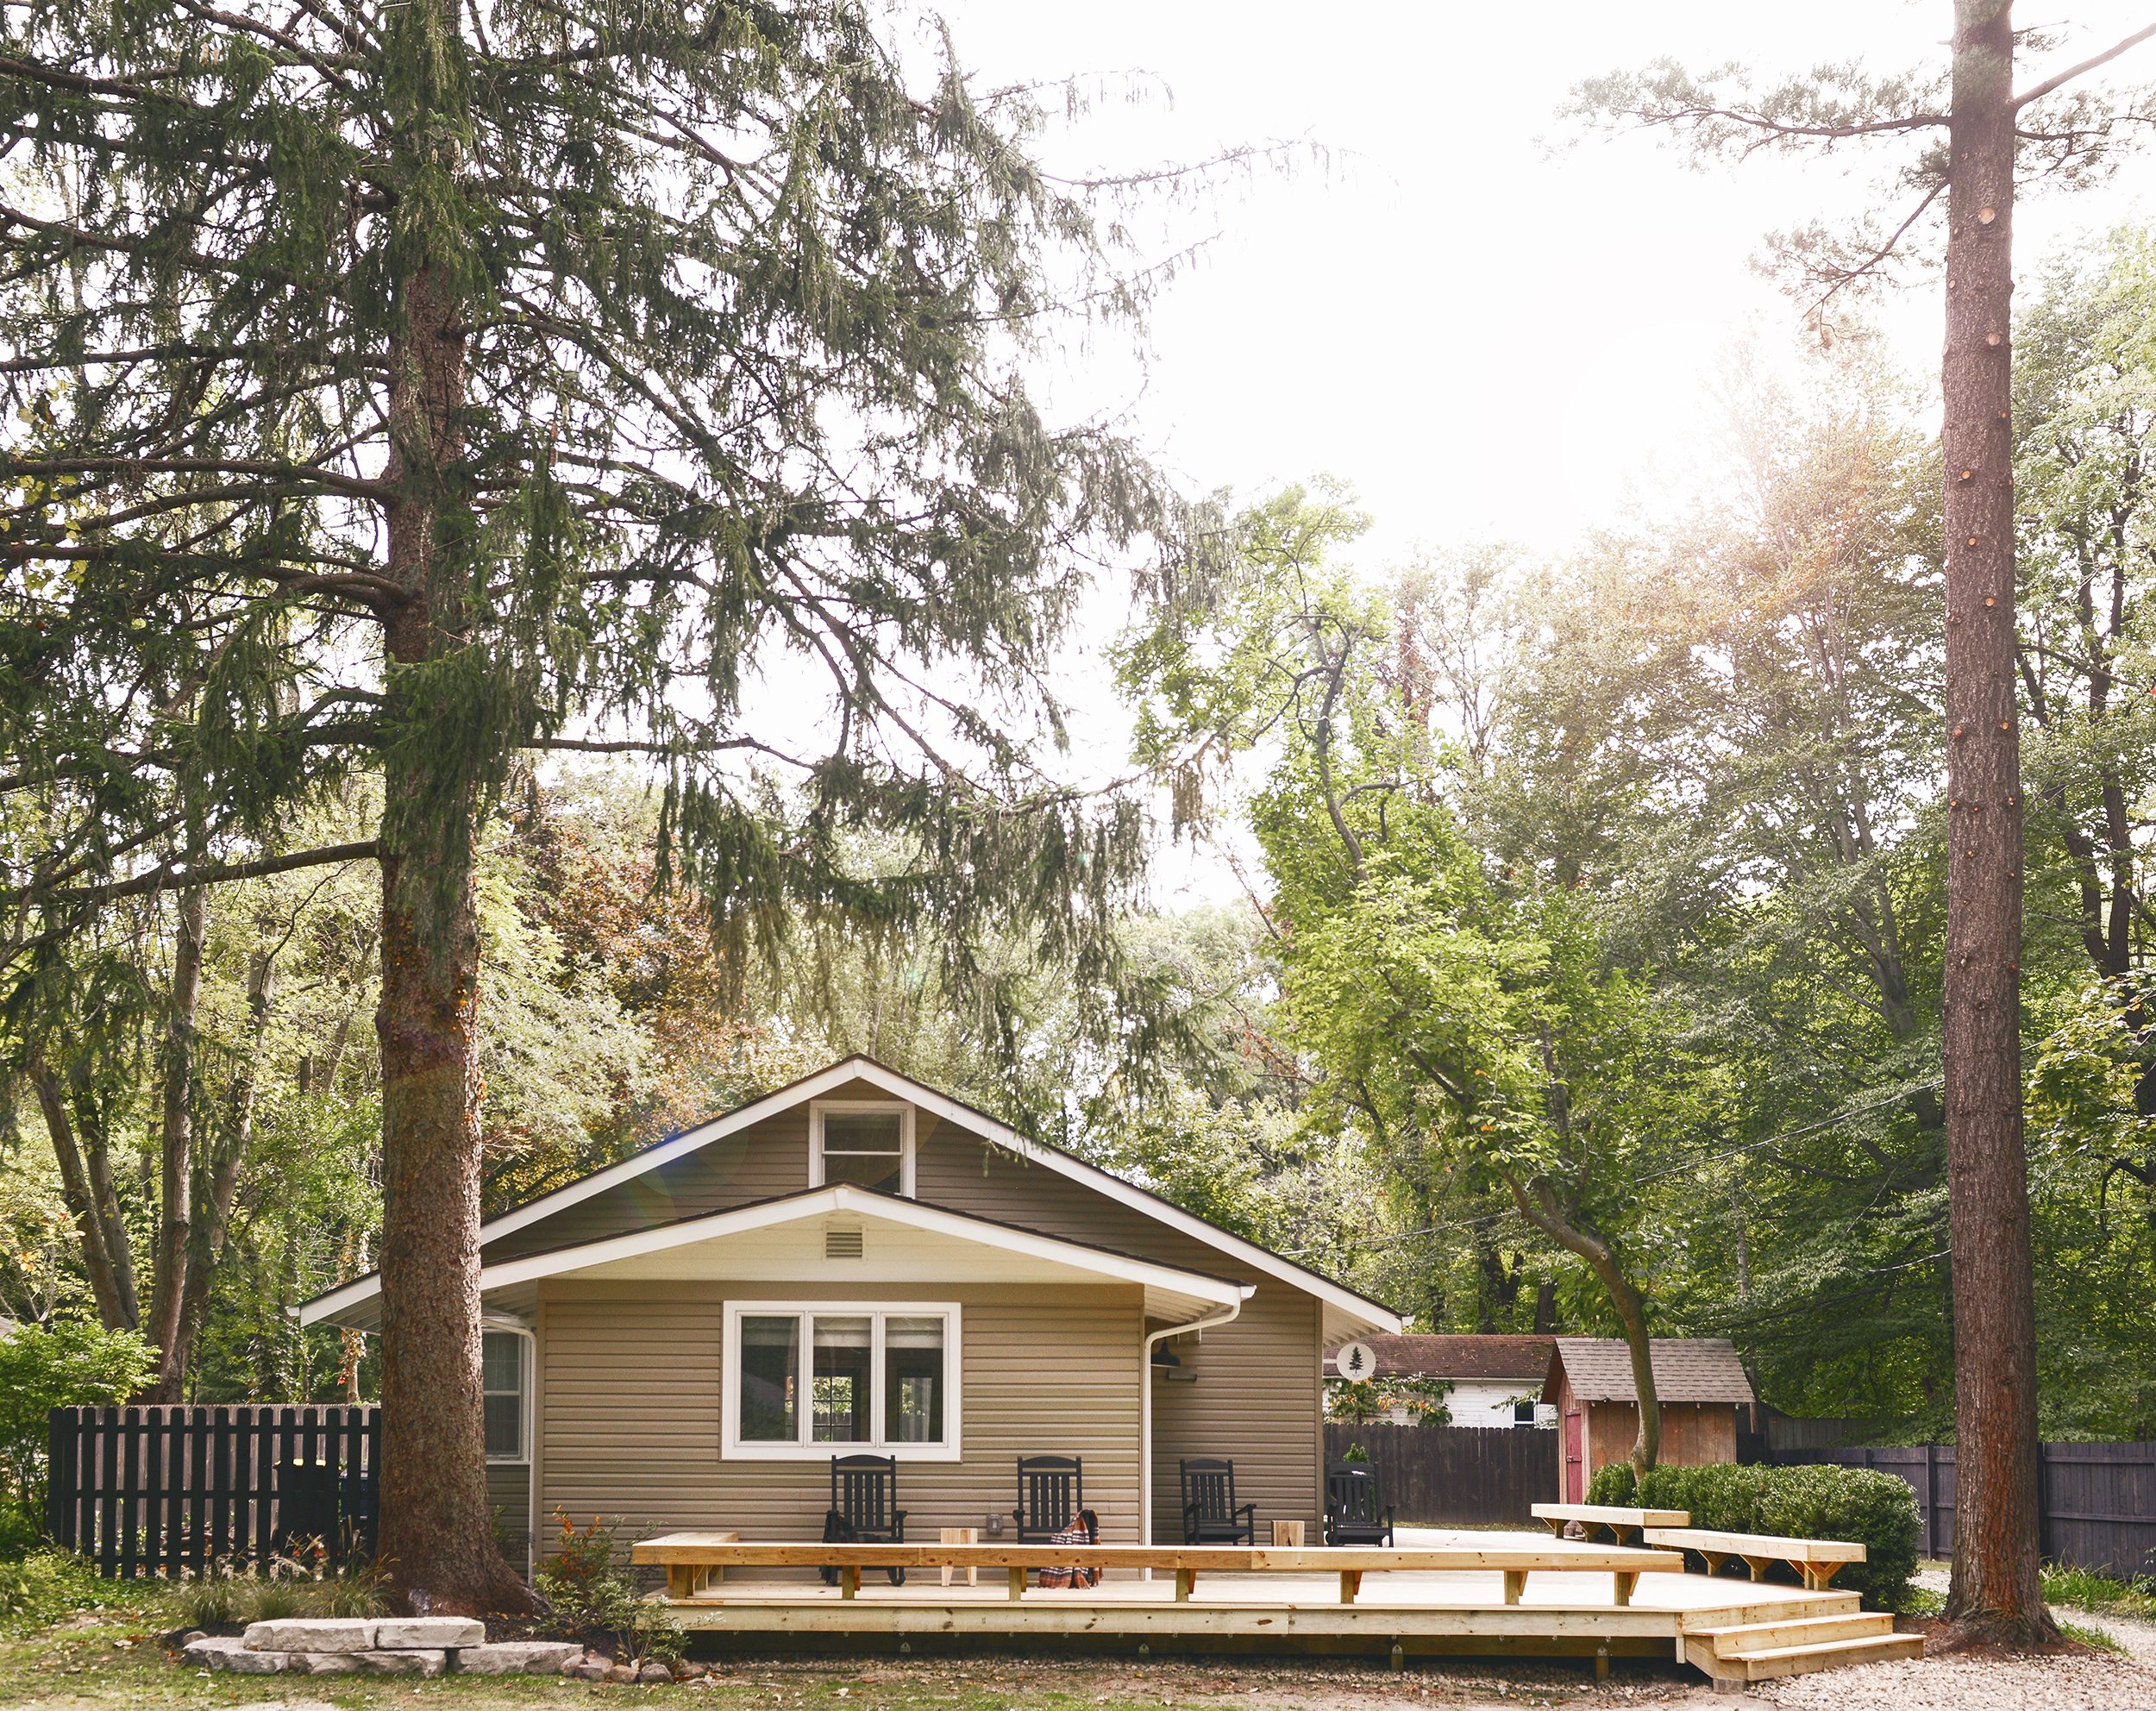
The exterior at Tree House has never looked better, and it’s everything we’ve always envisioned for this home! You may remember that Tree House underwent a work-with-what-you’ve-got transformation last fall, everything from painting the trim white to updated lighting and – the biggest undertaking – extending the deck and adding bench seating.
Next up? Stain! We wanted her to feel warm and inviting. This house is nestled among the trees, and we wanted her to be a part of her surroundings. We are constantly inspired by the nature that surrounds our Tree House, and we wanted to enhance that through color and feeling.
In This Post
Color Selection
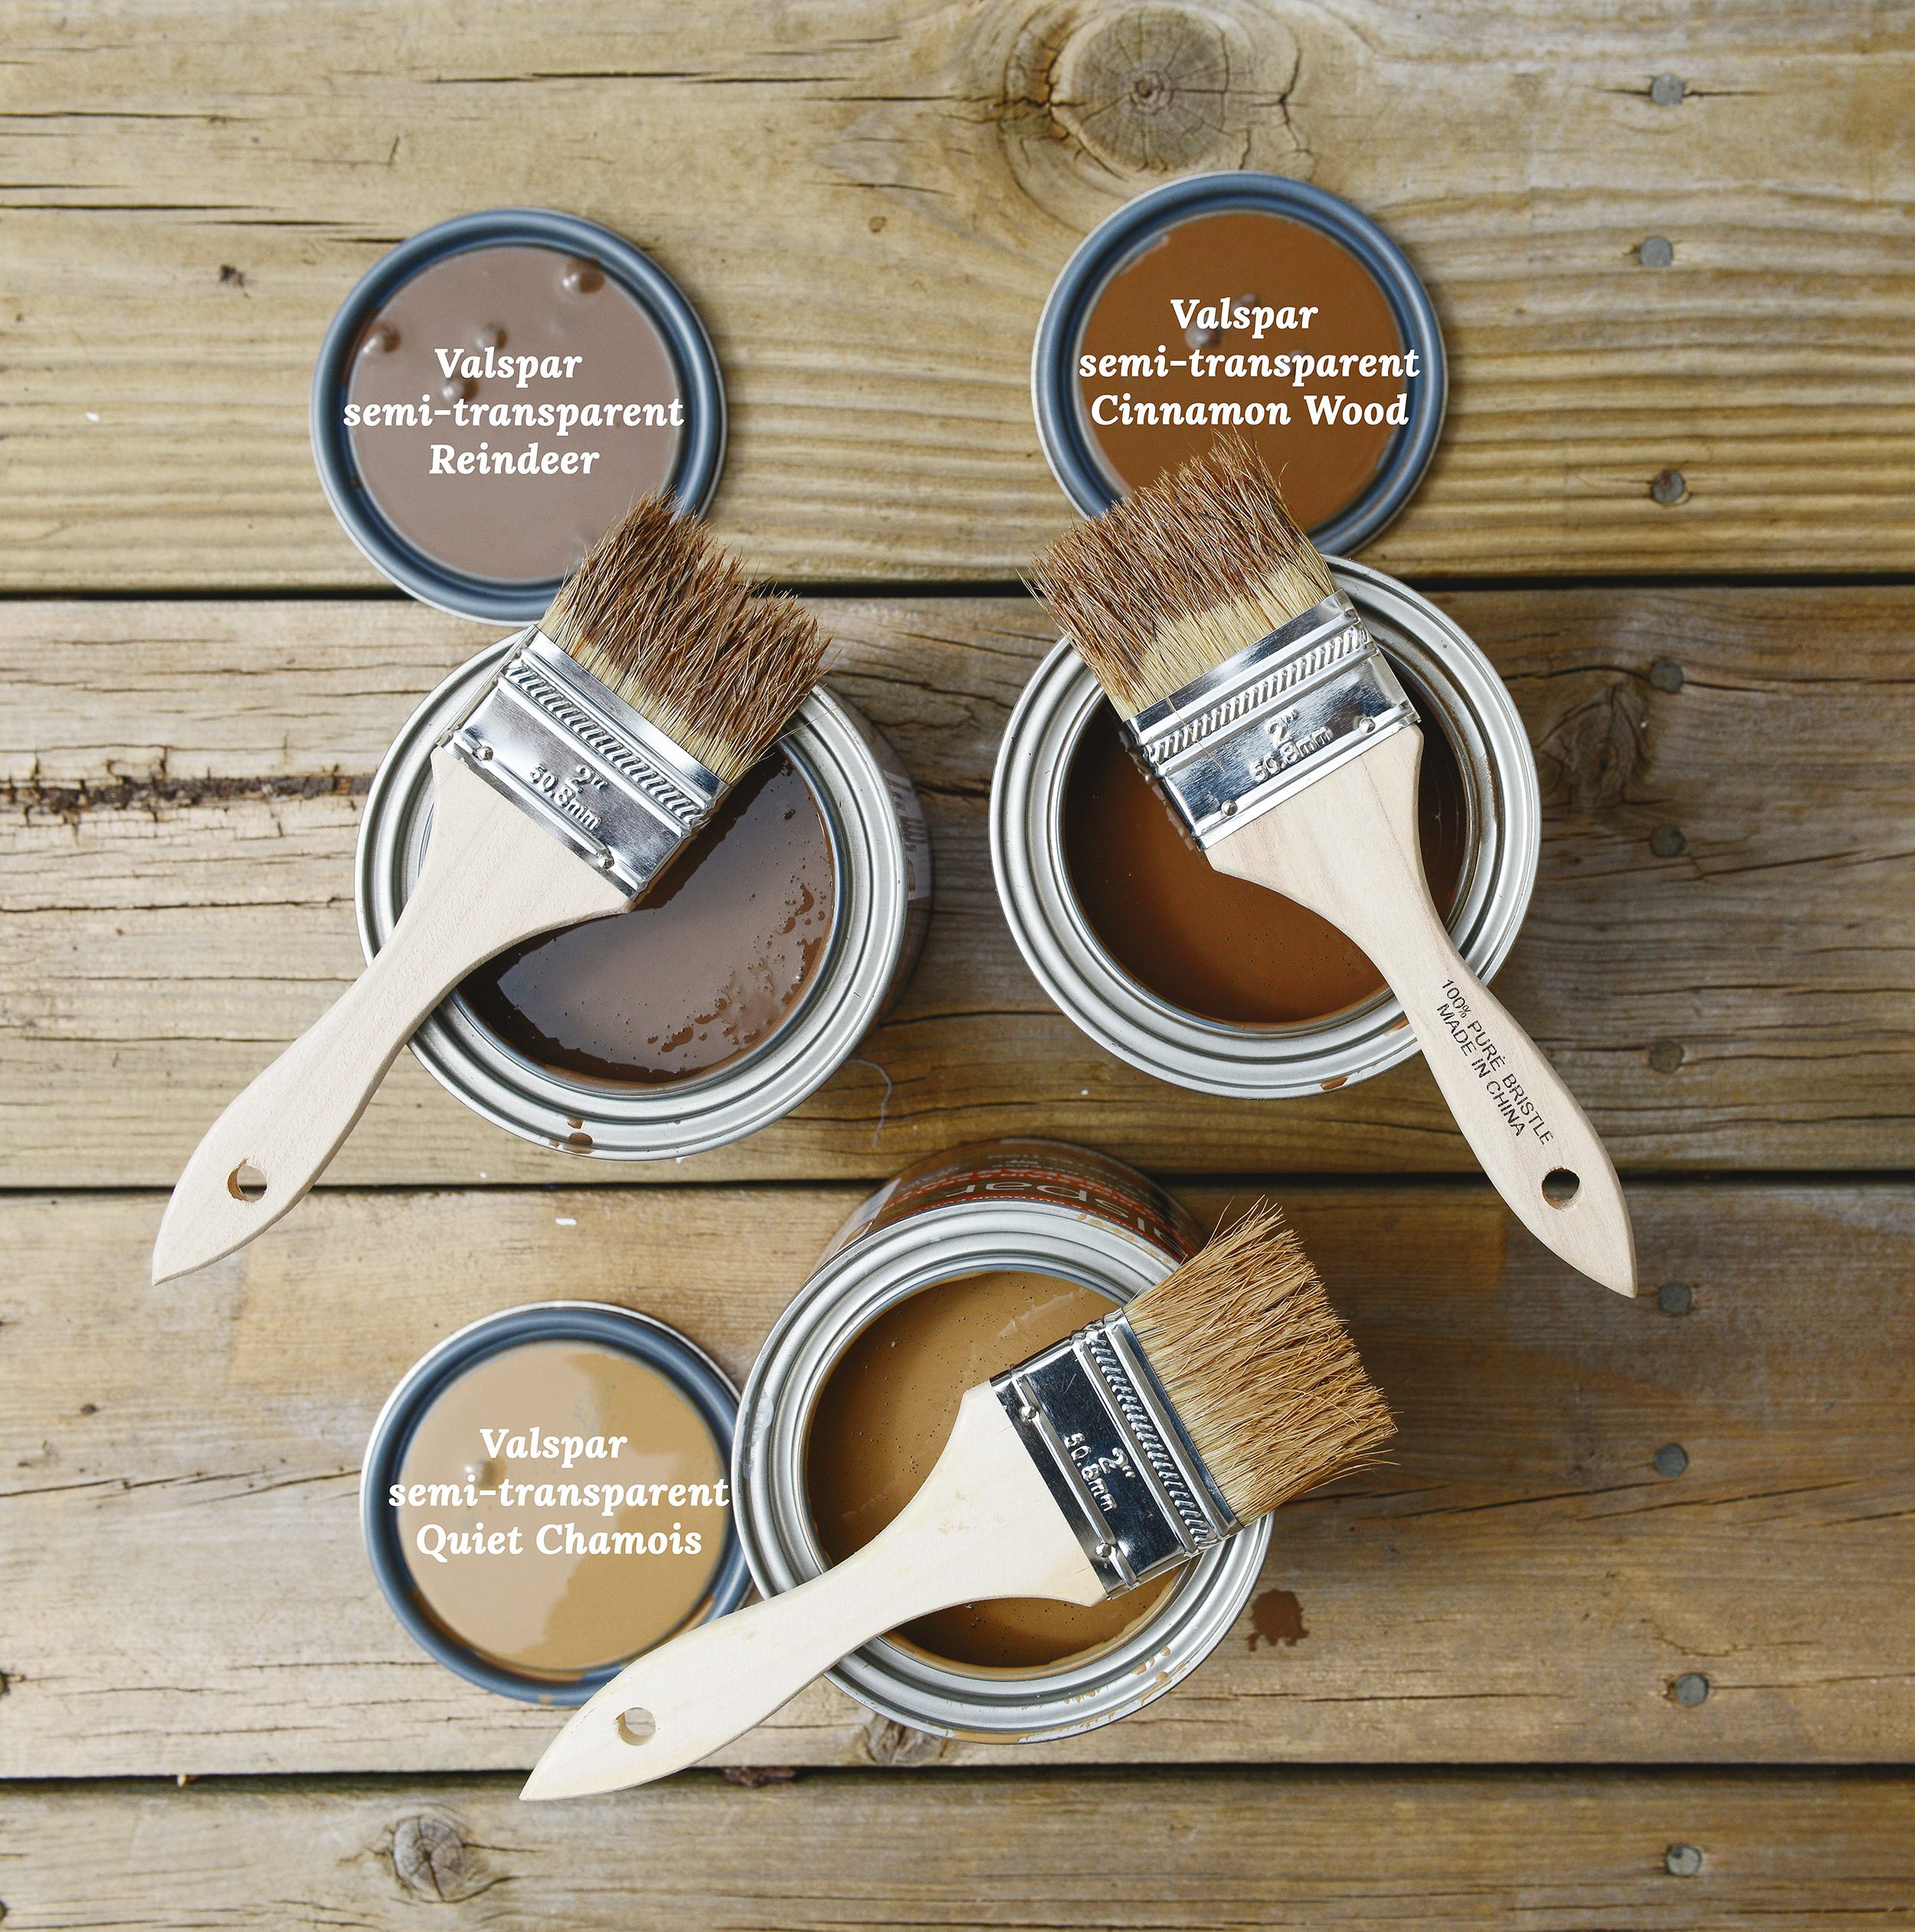
Picking a stain color is both exciting and stressful, because the deck is one of the most visible features at the front of the home. To make sure we got it right, we brought a sample book home and narrowed our choices down to three options. We then purchased a quart of Valspar semi-transparent stain mixed to out to three: Reindeer, Cinnamon Wood and Quiet Chamois.
A semi-transparent stain allows some of the natural color and texture of the deck to show through, as opposed to an opaque stain, which covers similar to paint. Our goal for the final color was to find a warm, medium brown tone that played off of the surrounding trees.
When applying our samples, we were sure to test them on both new and old wood, keeping in mind that the tone would likely vary a bit in the final application. Quiet Chamois was a bit more yellow than we were looking for, and Reindeer was a little too dark for our tastes, but Cinnamon Wood was just right! It’s the perfect warm medium brown and complimented our home’s siding nicely. It was exactly what we had in mind!

Cleaning
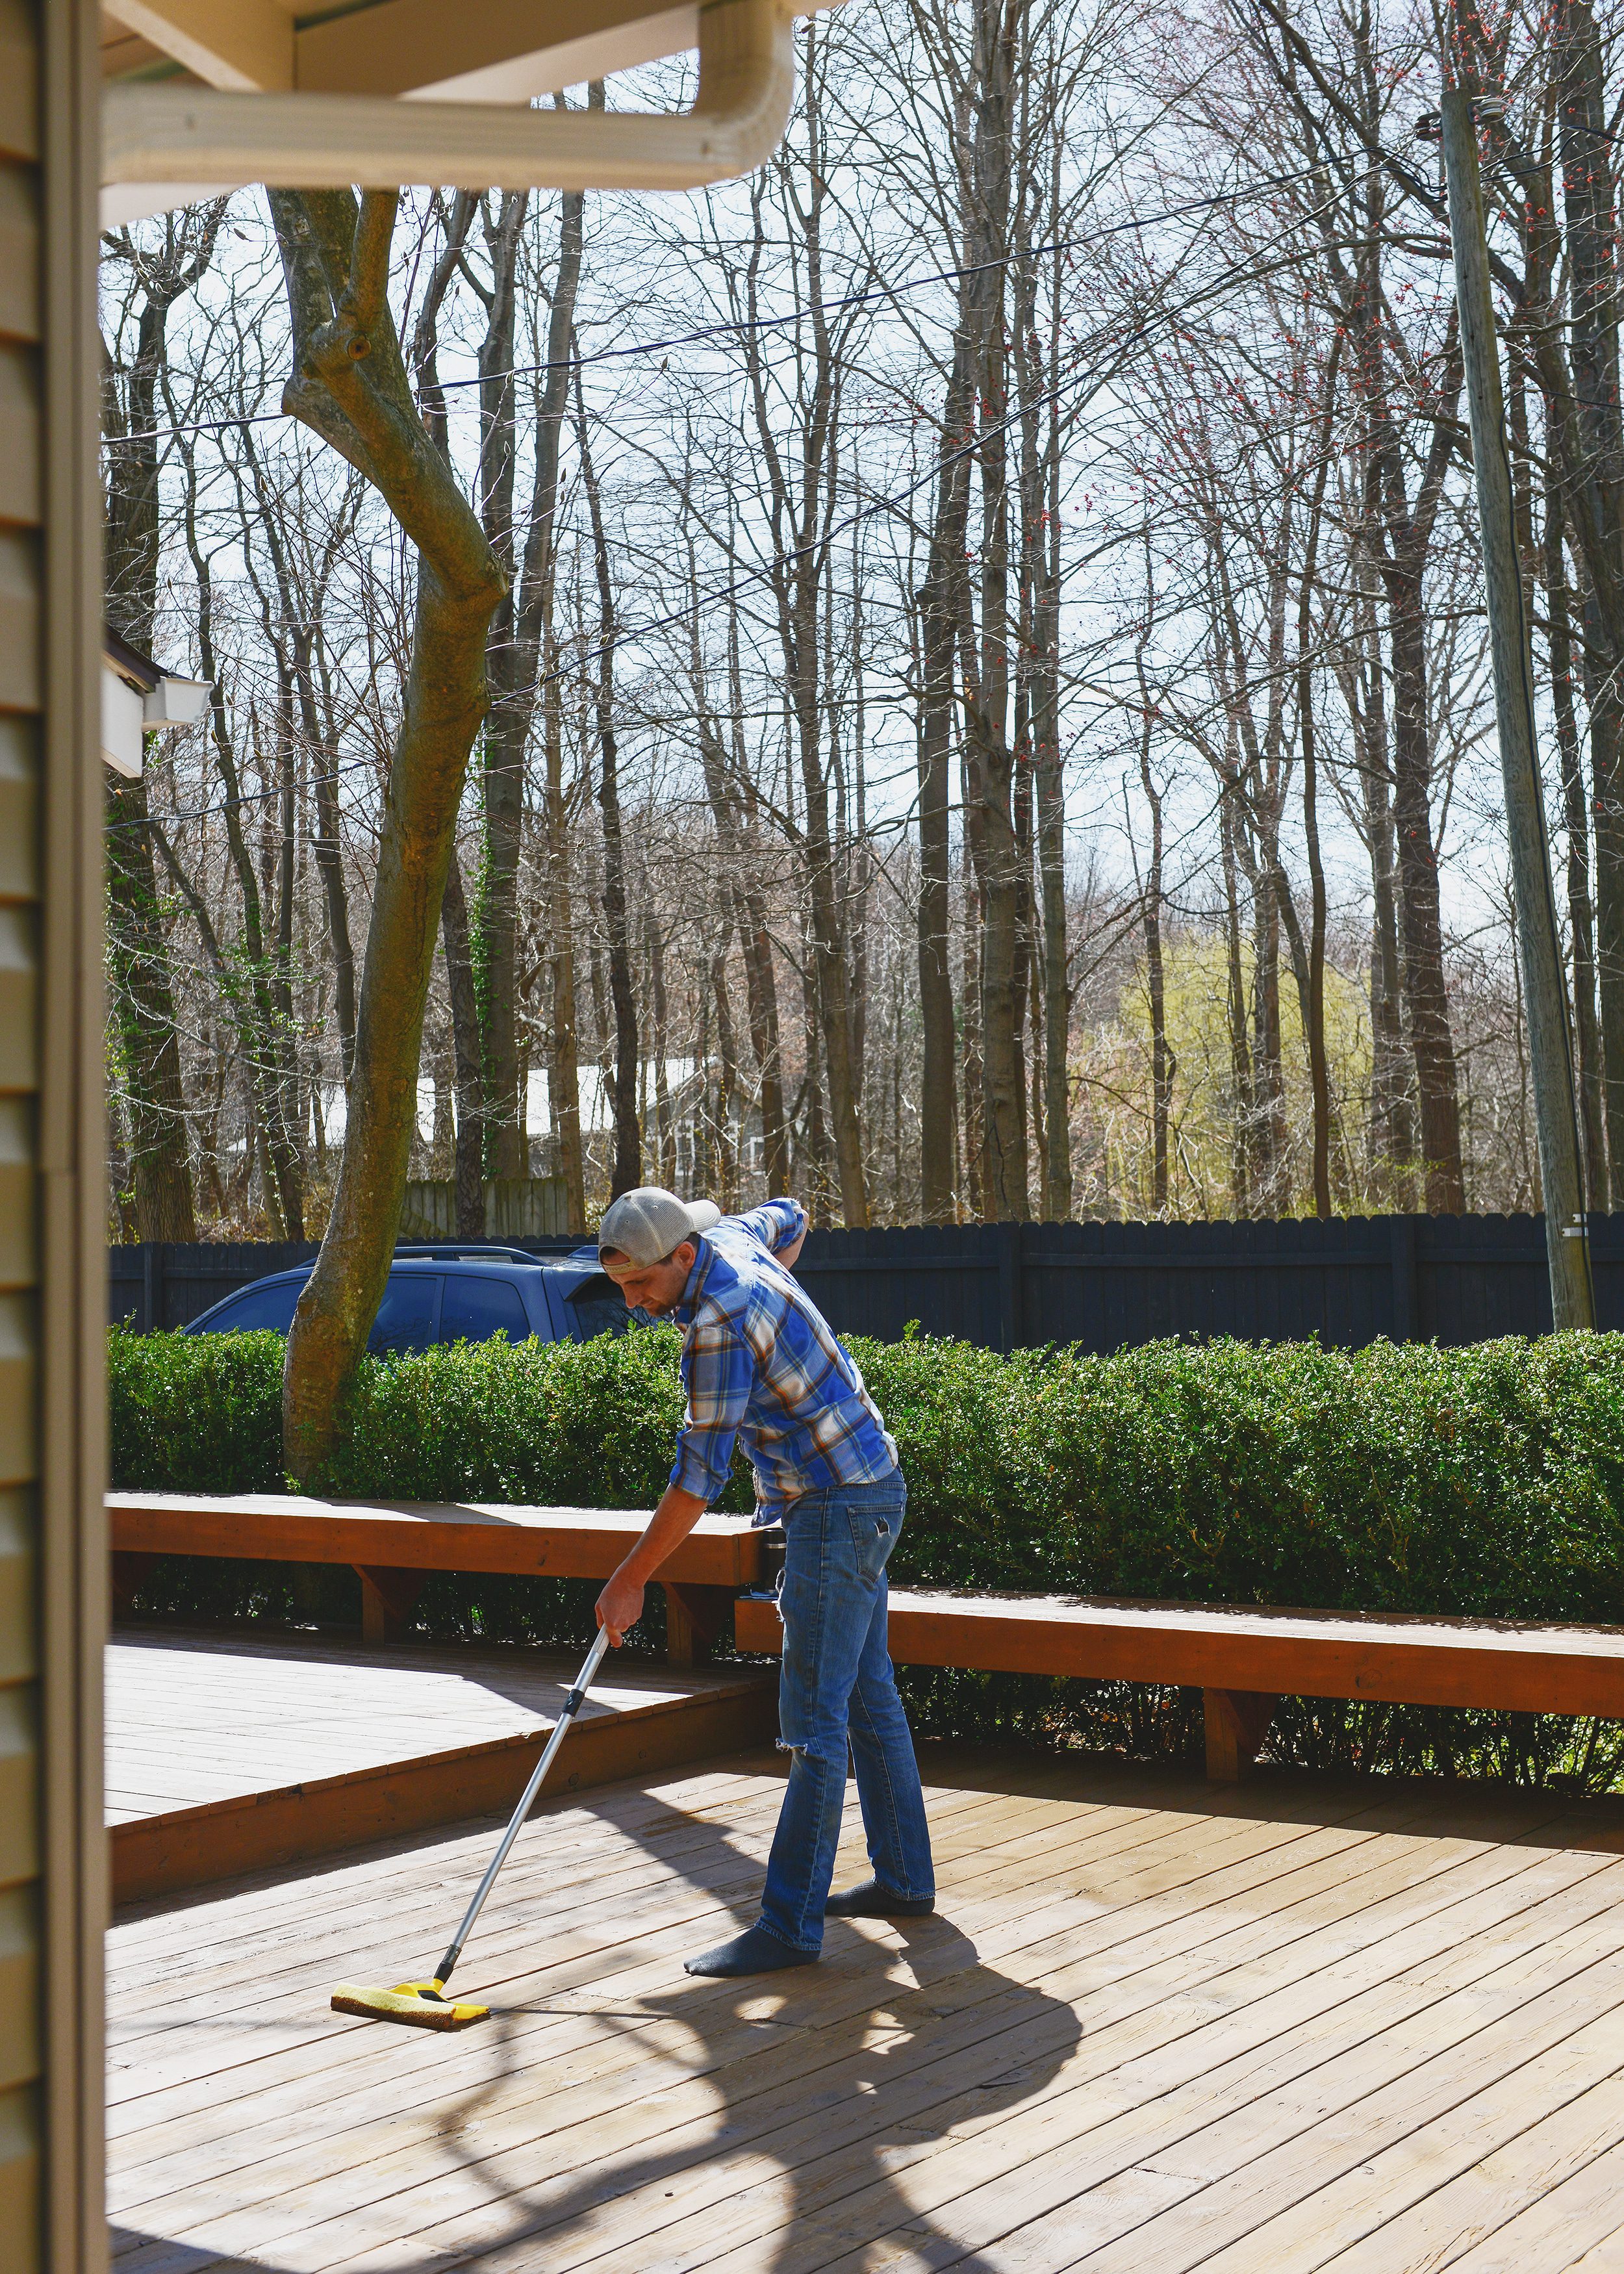
Once the stain color is selected, the real work begins! The first step toward a properly stained deck is to clean the deck surface to completely remove dirt, soil and algae. We’re big fans of pressure washers around here and truly believe them to be the best tool for a job like deck cleaning. Just remember to use appropriate pressure to avoid harming the wood! This was our first time using a rotating surface cleaner and now we can’t imagine cleaning a large horizontal surface without one! Our conservative estimate is that this attachment cut our cleaning time by more than half! Next time we use it, we’ll be sure to pick up an extension wand like this one for better leverage and more upright posture.
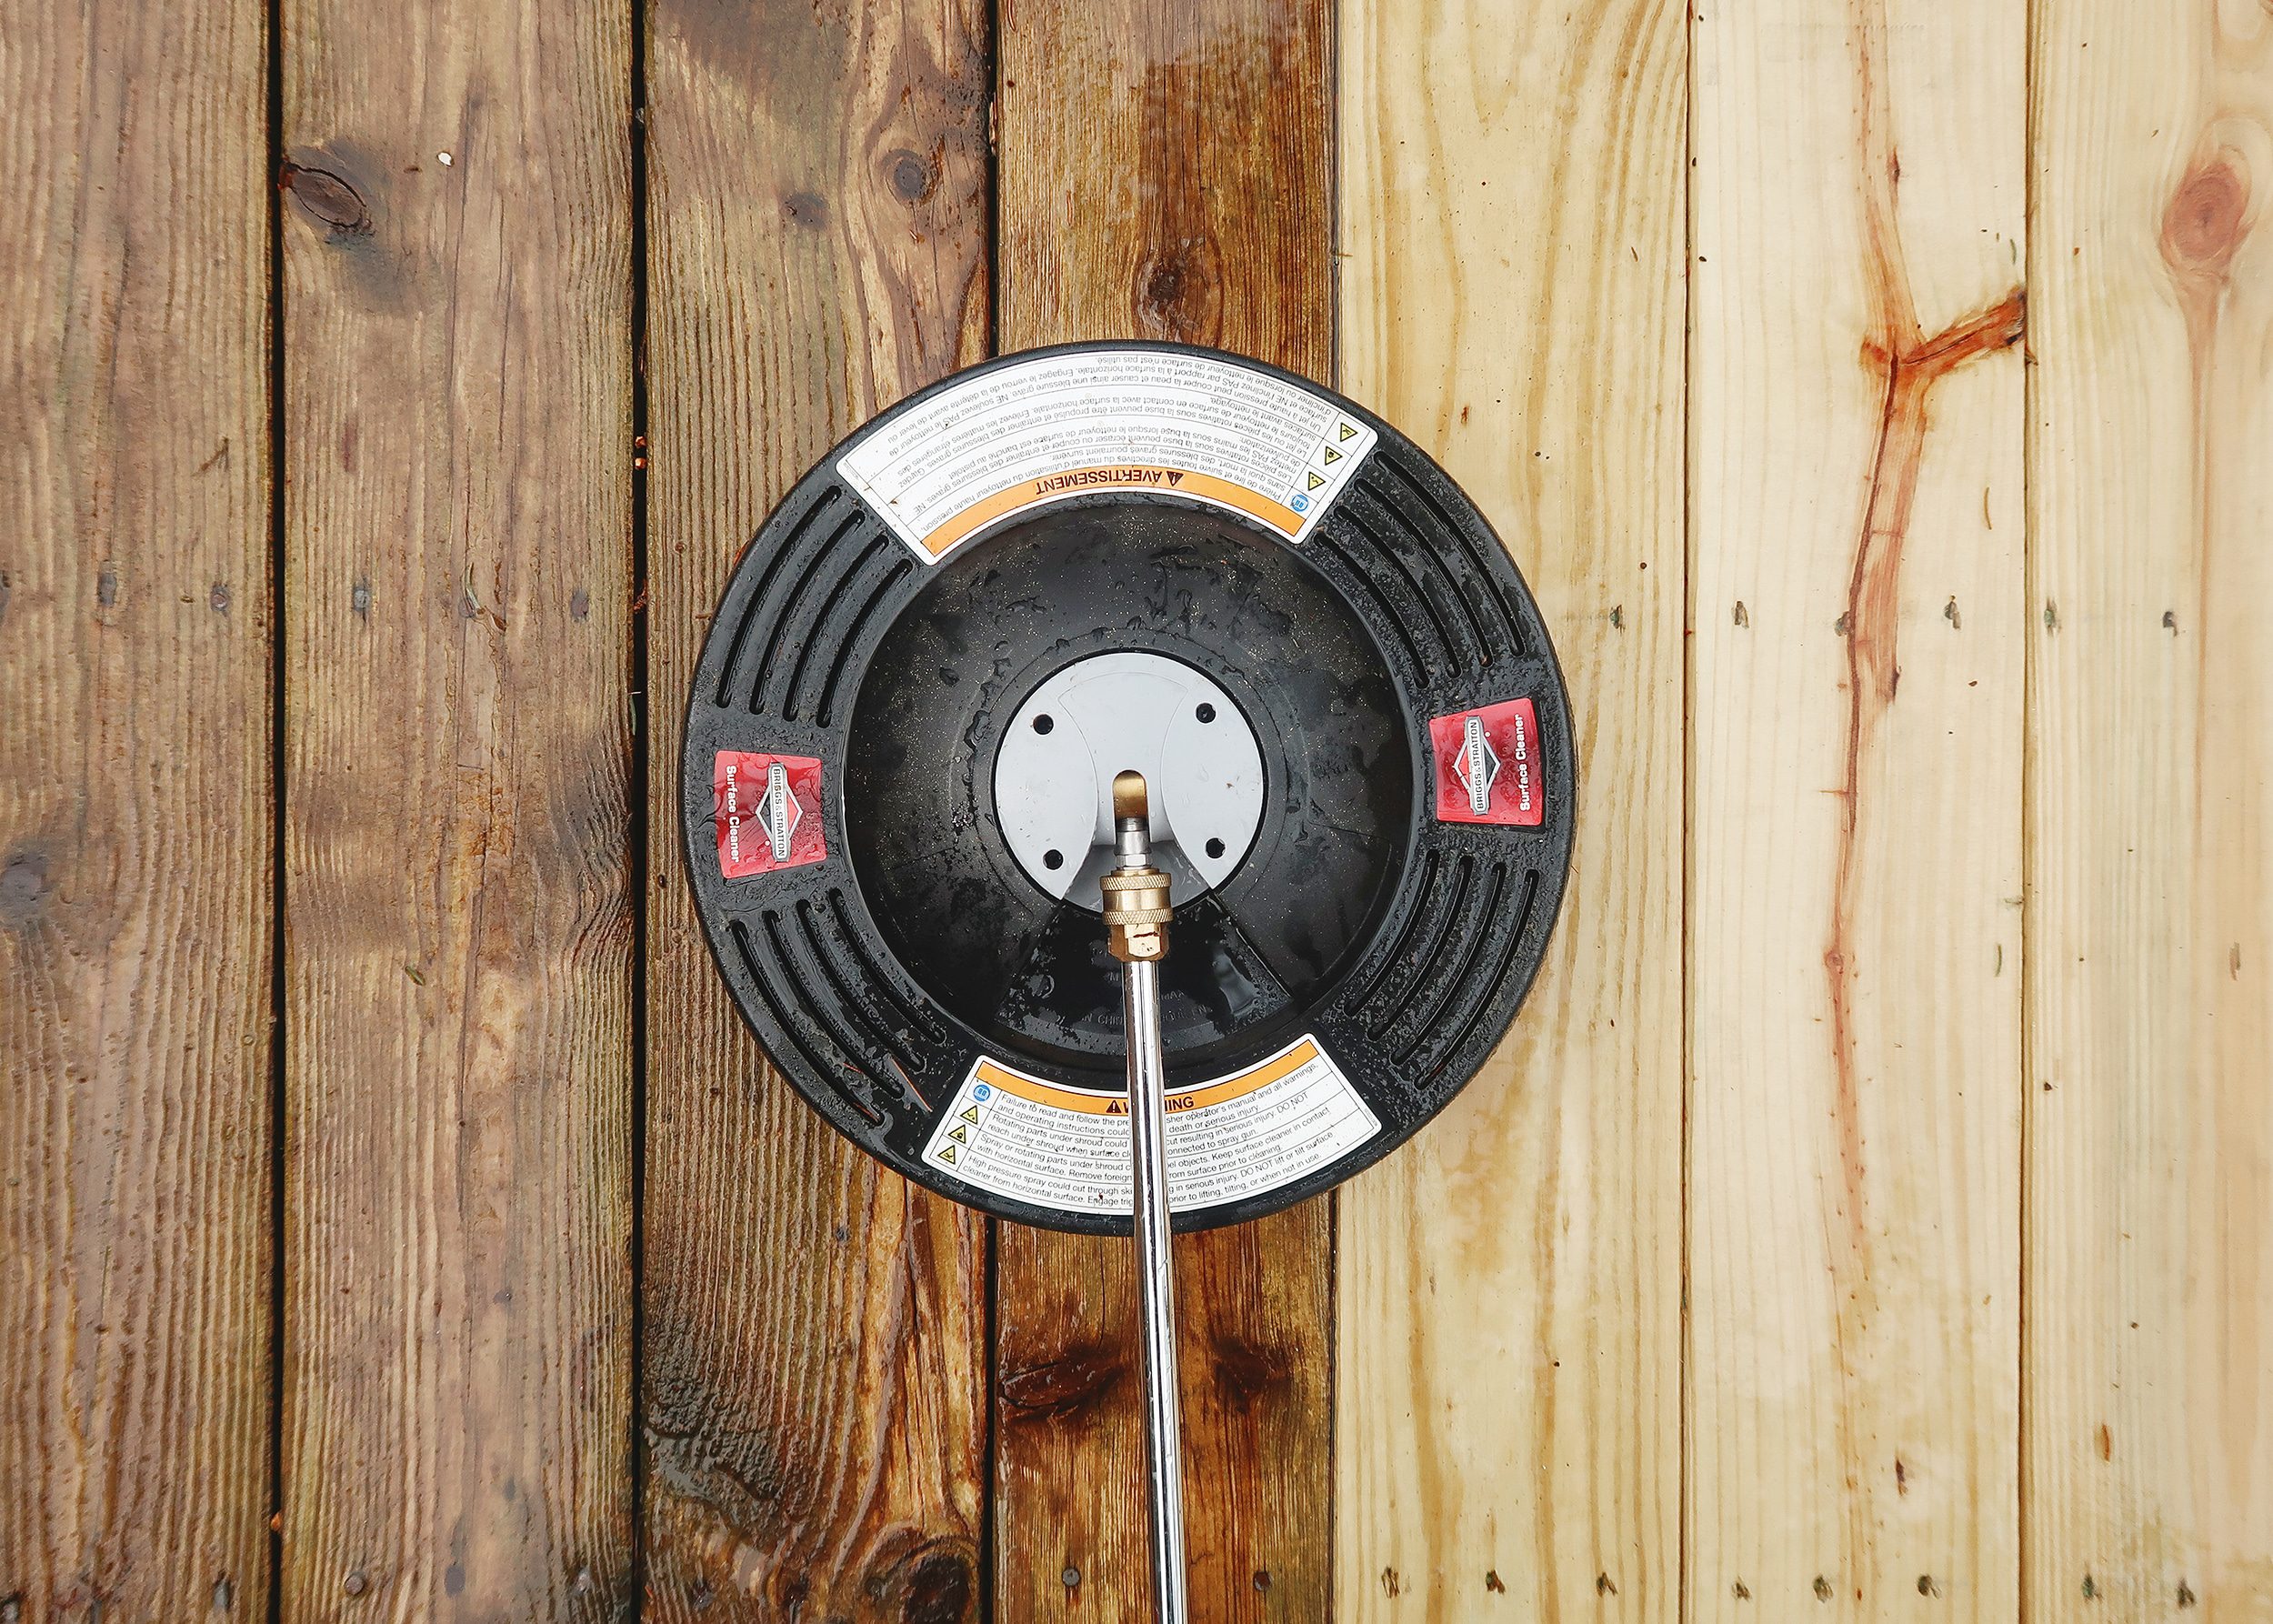
As an added bonus, the surface cleaner attachment keeps overspray to a minimum and allows for use under plants and shrubs without damaging leaves. We’re seriously not sure how we lived without this thing up until now!
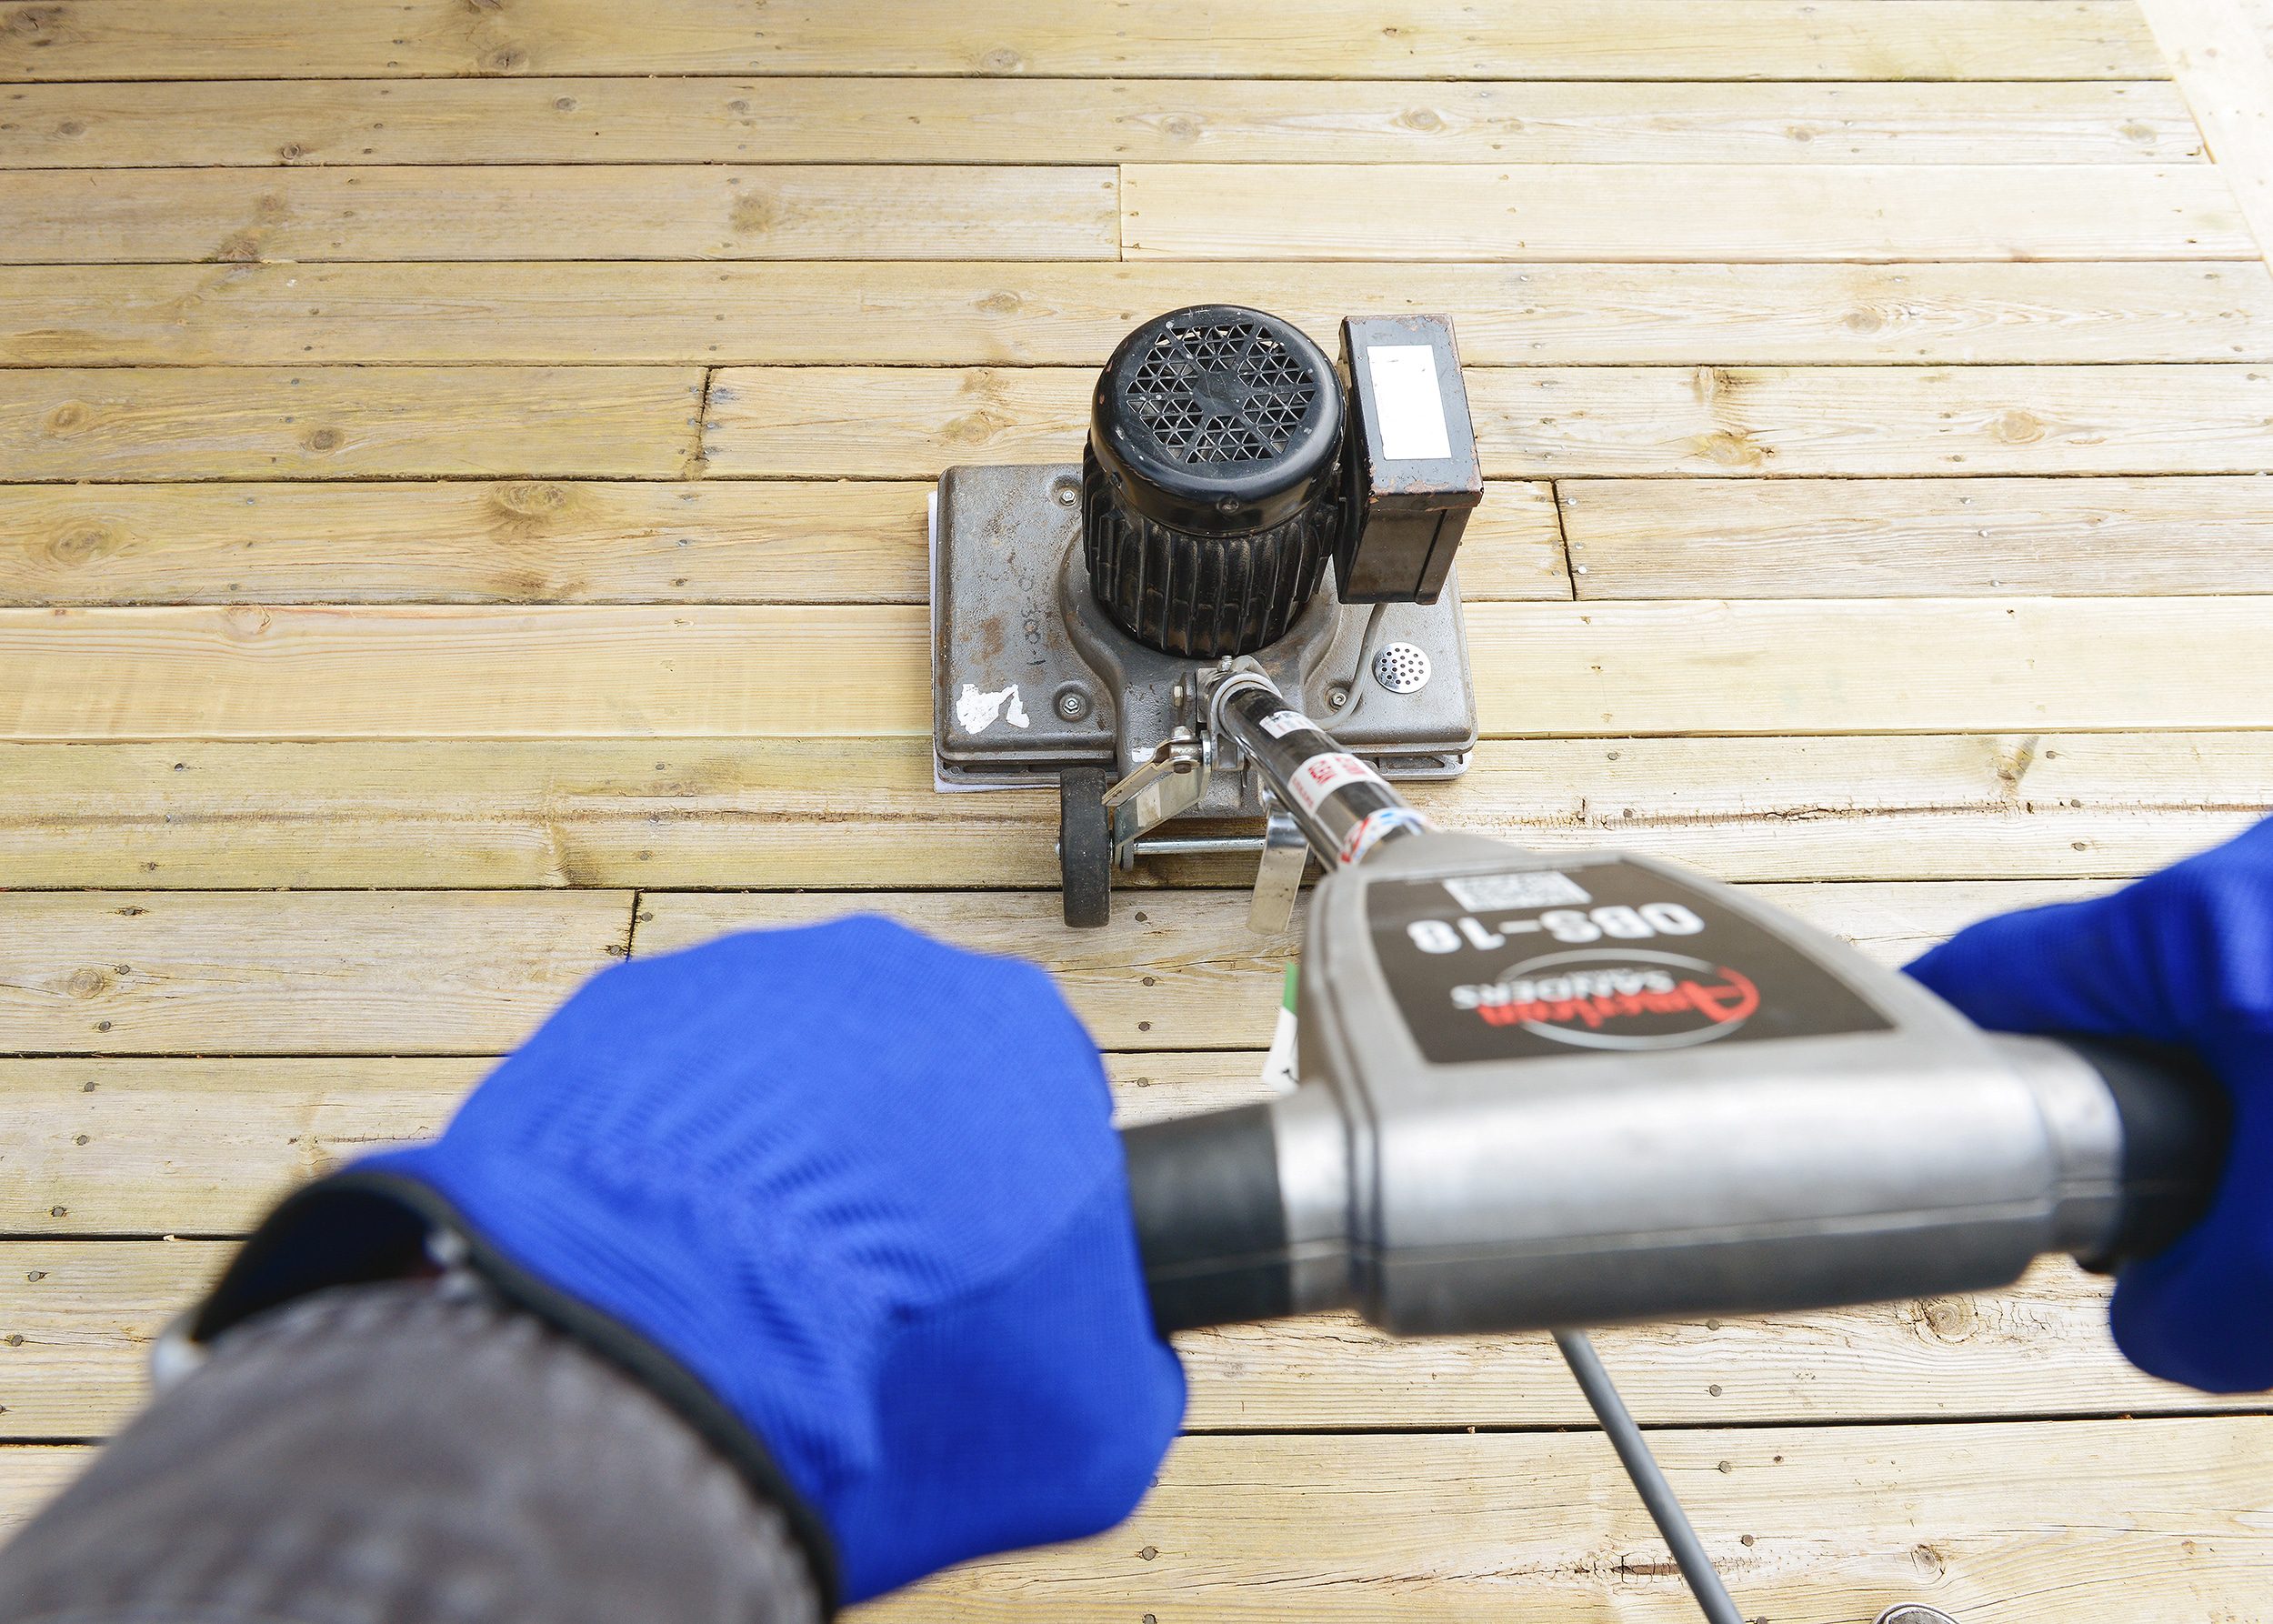
Sanding
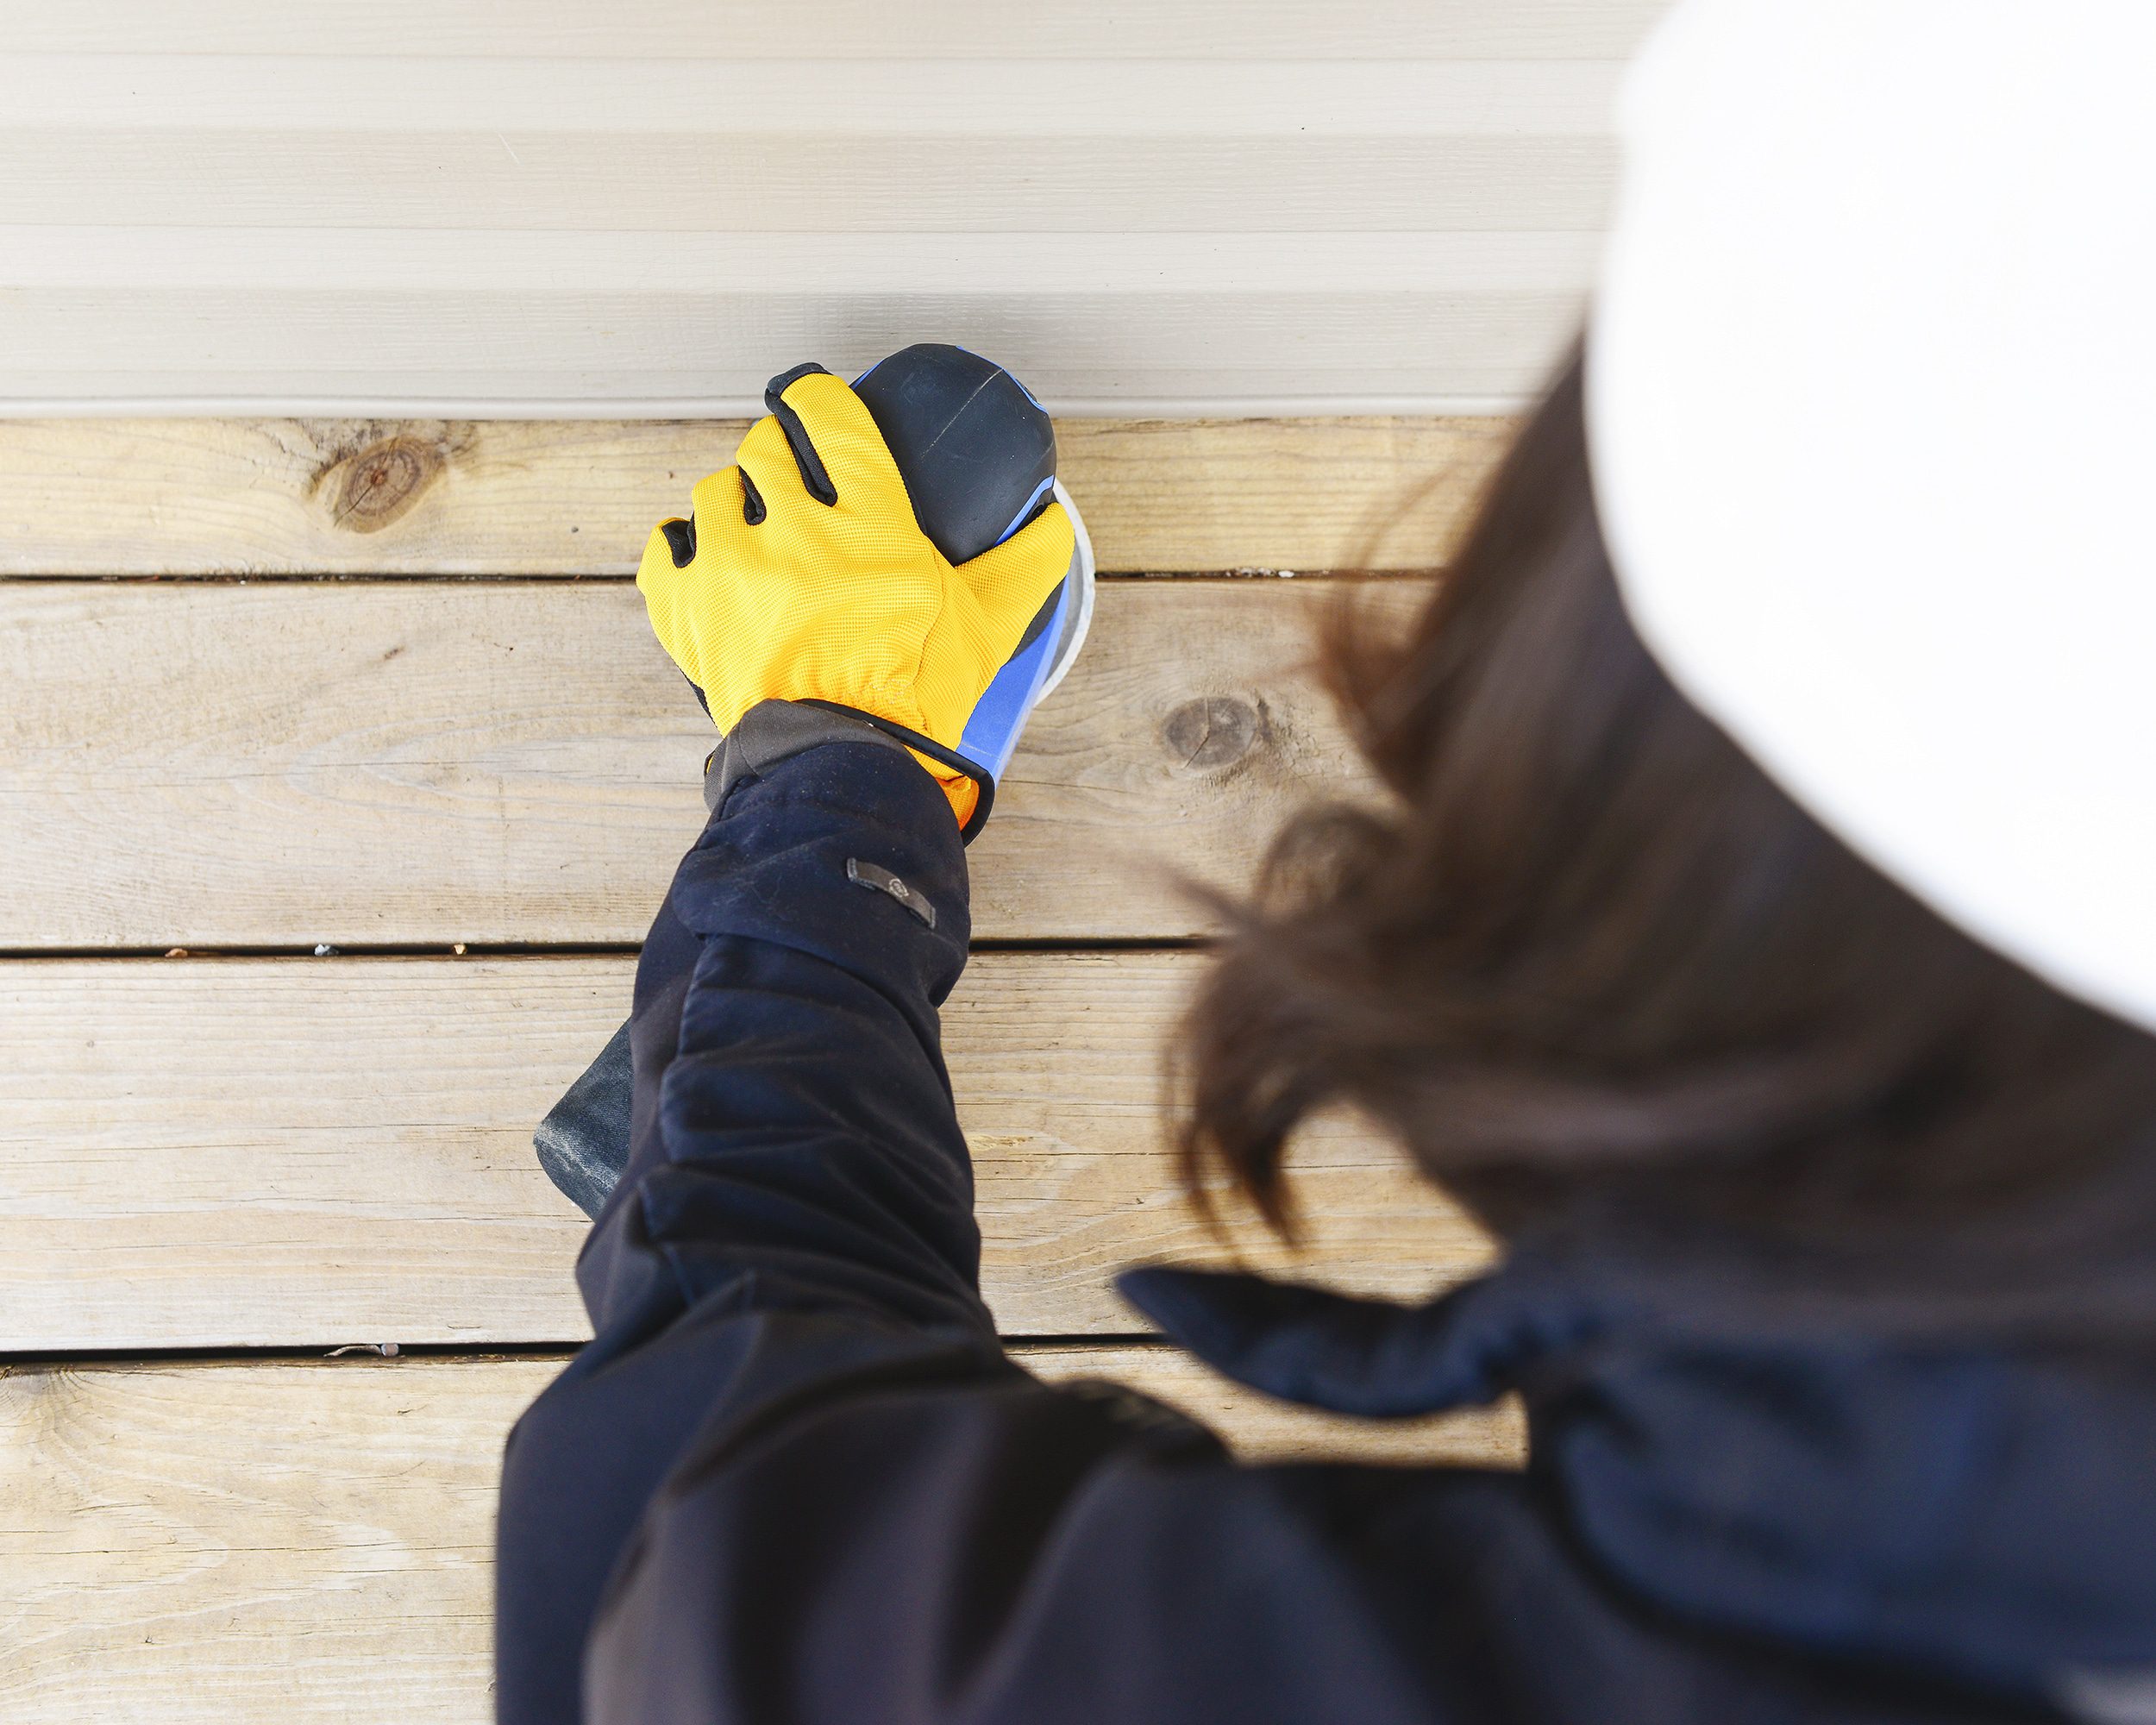
After the deck is cleaned and allowed to dry thoroughly, it’s necessary to assess the condition of the tread surface. Our deck presented a pair of challenges; First, the original deck had been poorly maintained over the years. A lack of stain or sealer on the surface had allowed harsh Michigan weather to warp and splinter it. Second, the newer portion of the deck was only installed last fall, so the wood still had a shiny glaze from the pressure treating process. If left unsanded, this could have led to premature stain failure. To remove the glaze (and any remaining pencil marks!), the entire thing would need to be sanded for proper stain adhesion. Kim got to work with 60 grit paper on our favorite cordless palm sander for the edges and tighter areas while I broke out the heavy artillery…
To sand the main portion of the deck efficiently, we rented a vibrating floor sander from our tool local rental shop. We spent around $120 for a whole day with the tool and all of the necessary sanding pads and it was worth every penny. Once we got the hang of the sander, the process was efficient and incredibly satisfying! The old portion of the deck is around 350 square feet and we sanded it first with 36 grit sandpaper. The entire deck (including the bench and stair surfaces) was then sanded with 60 grit sandpaper. The whole process took about 4 hours, but brought new life to the well worn deck treads! Once complete, we used our favorite blower to clear remaining dust from the surface and we were ready to start staining!
Edging and Trimming
Remember what we said about the prep work taking more time than the actual staining? It’s all been worth it to get to this point! Whenever we stain or paint, Kim and I like to divide the workload to be as efficient as possible. We started by trimming all of the small and hard to reach areas with high quality 3″ brushes for maximum coverage.
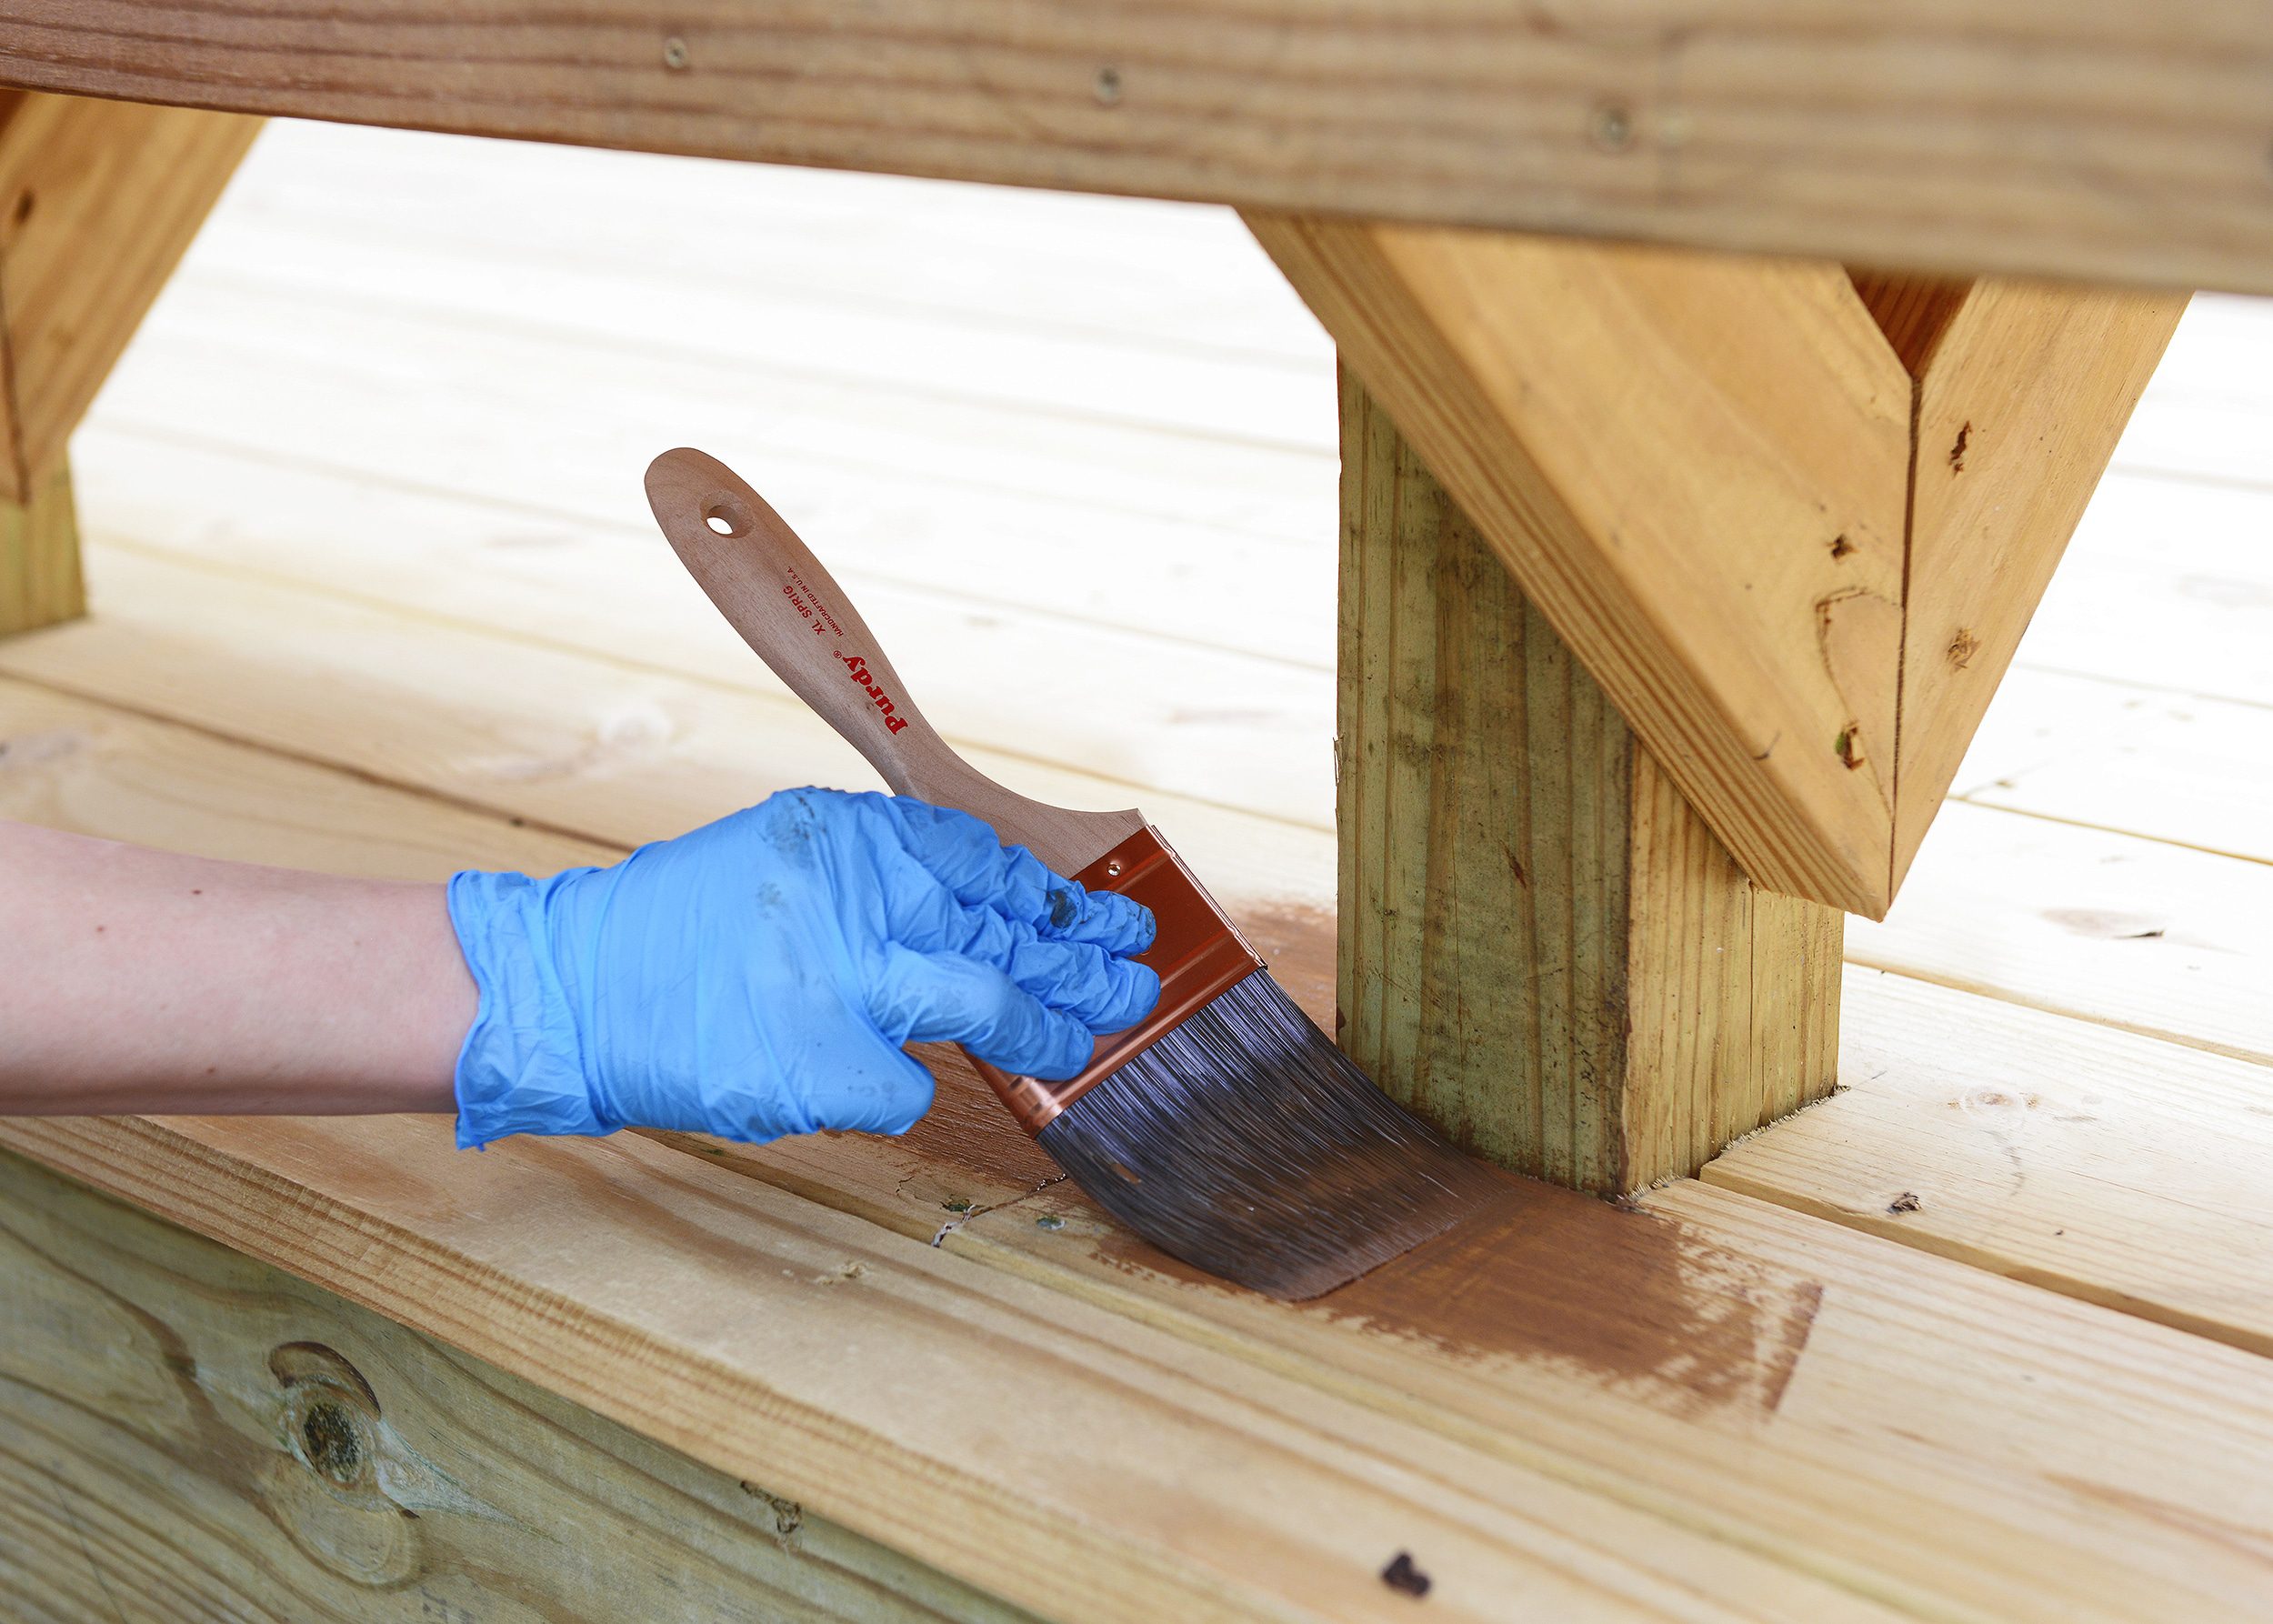
This portion of the job was fairly time consuming since we had about 60 linear feet of built-in benches to trim. Luckily, though, most of the areas that needed trimming were new wood, so we were able to get away with one nice coat. Then it was time for the fun part!
Rolling
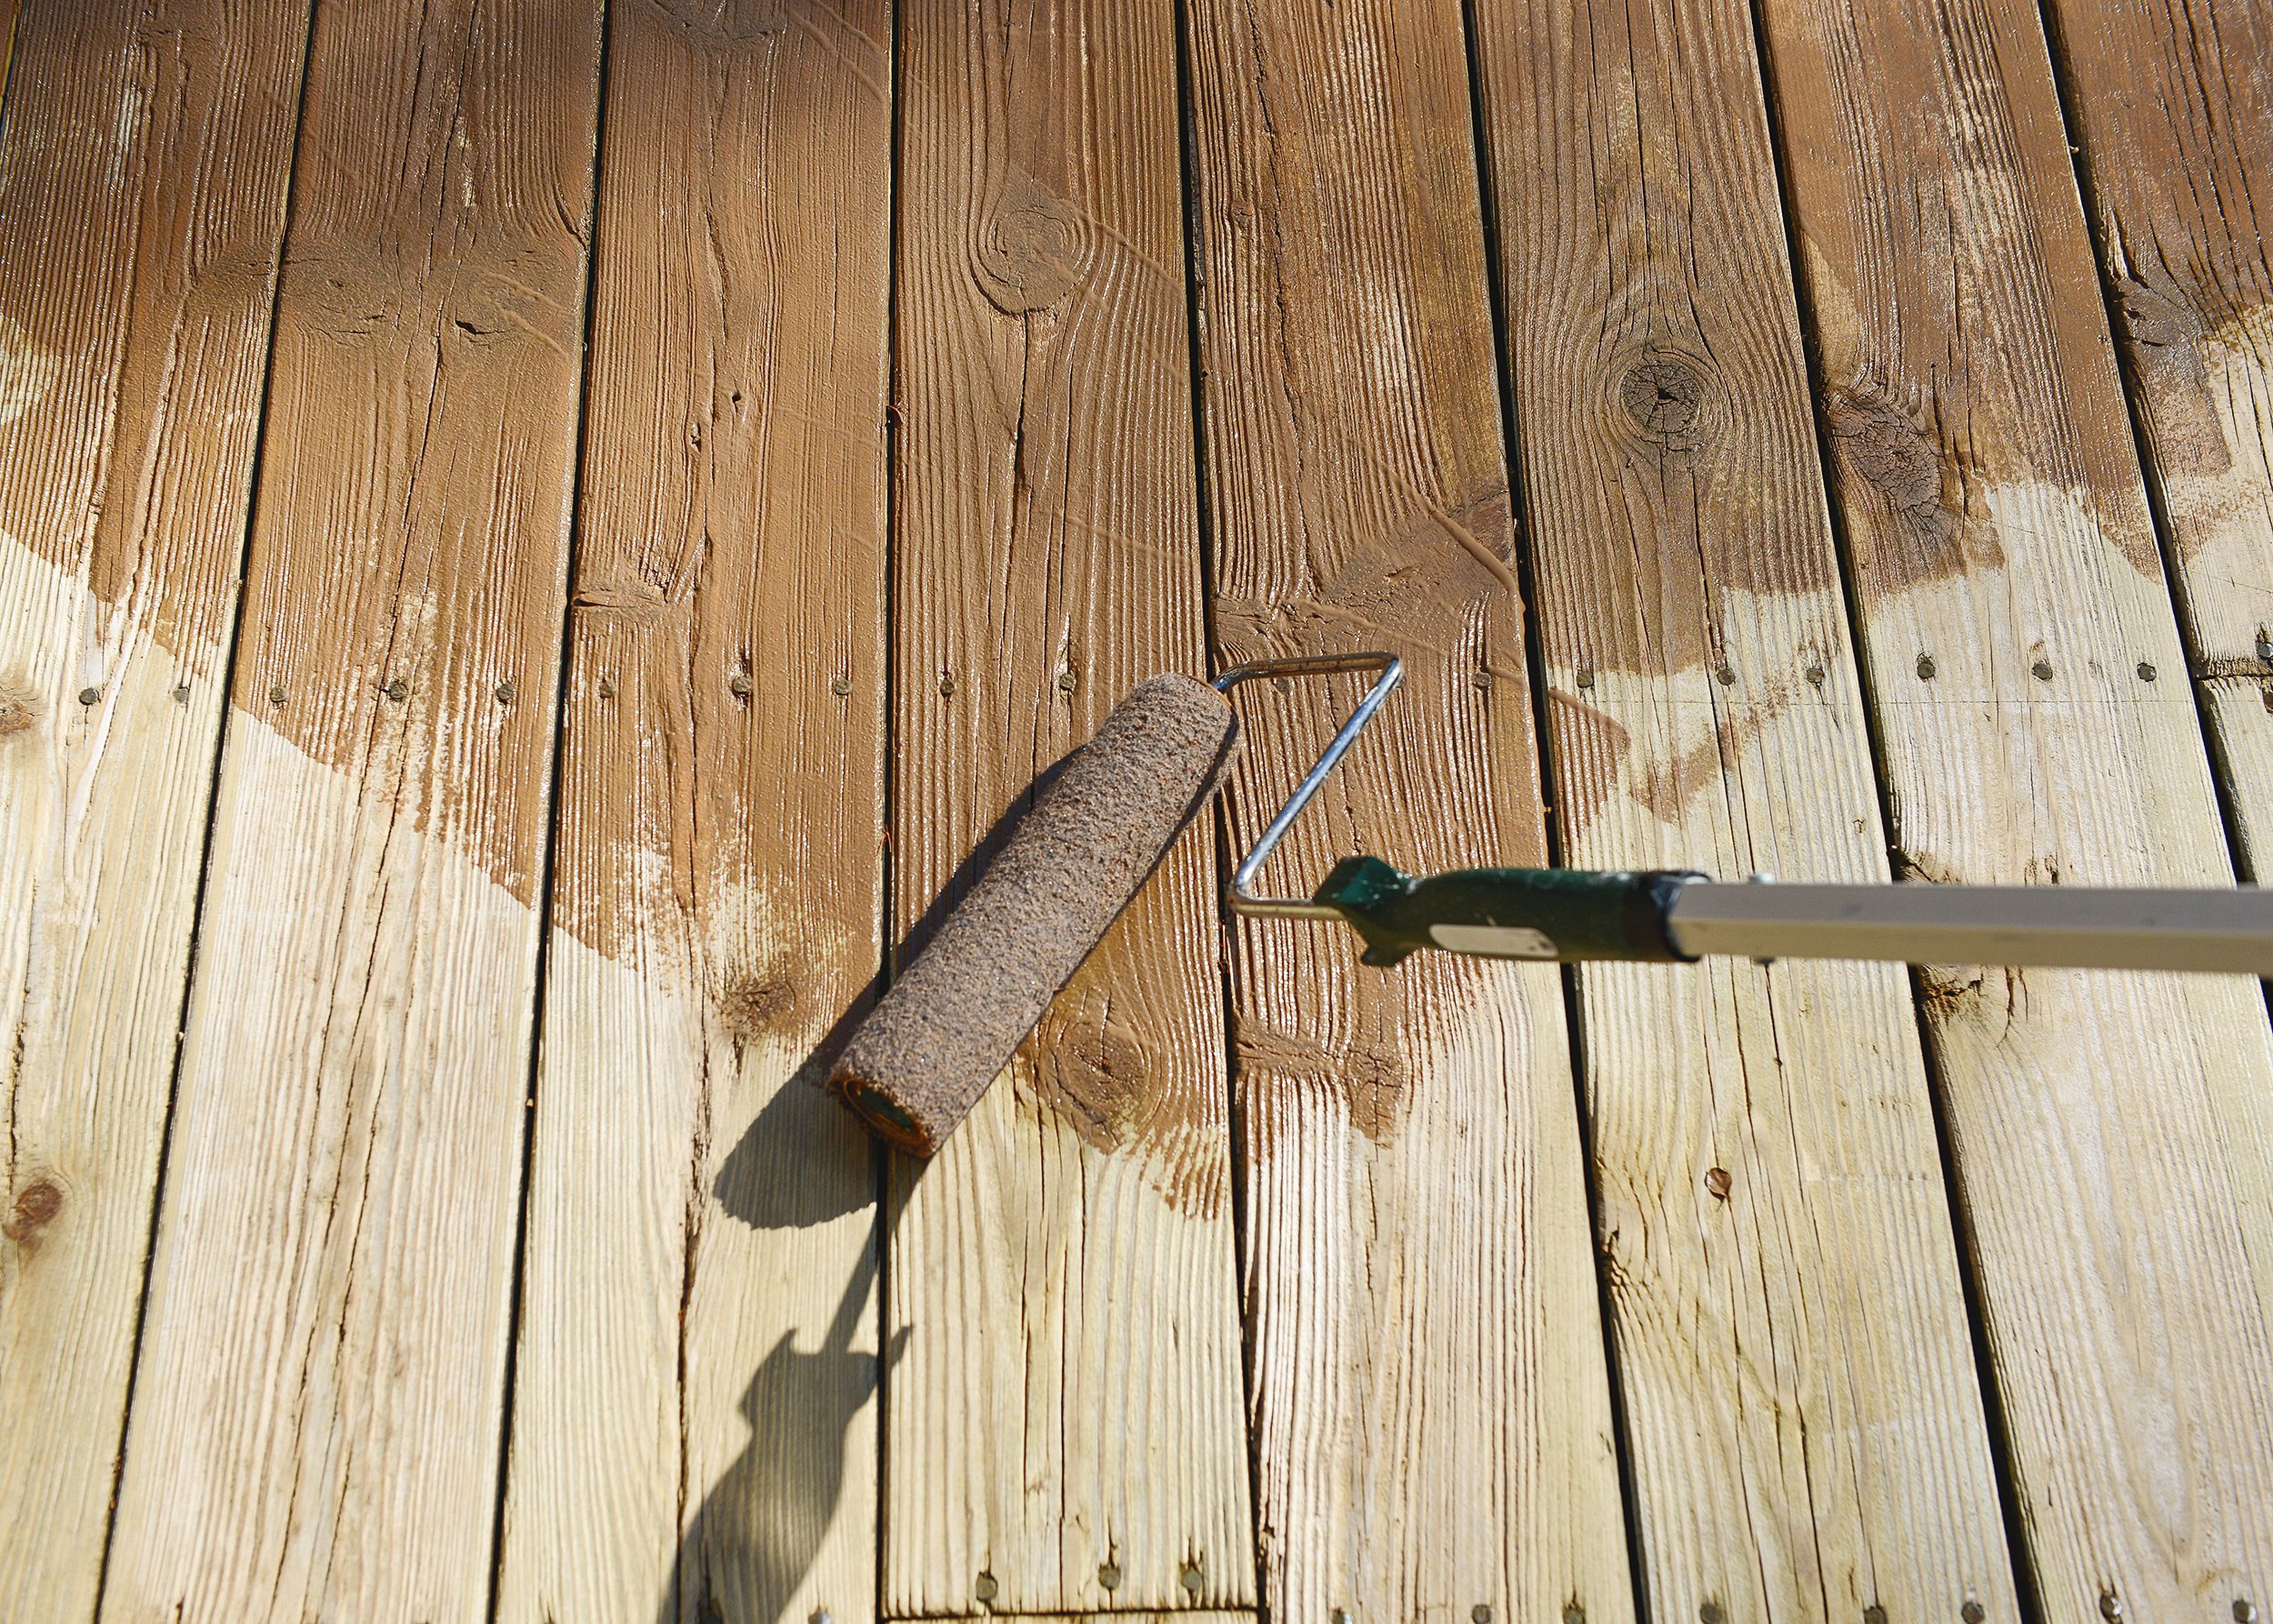
Once all of the trimming and edging was complete, we were able to begin rolling. We used a 1/2″ nap roller cover specifically designed for decks. It was able to fill in all of the imperfections in the wood nicely. We find an extension pole to be absolutely indespensible for a project like this – unless you prefer to be on hands and knees with a roller for a whole day!
Applying a Second Coat (as Needed)
The instructions on the semi-transparent stain suggest only one coat, but allow for two if necessary. In our case, it was immediately apparent that we’d need to apply two coats to even out the tone between the new and old wood. For the second coat, we used this stain pad on an even longer extension pole for better leverage. We loved working with the pad and if we had to do it over again, we probably would have used it in place of the roller all together. It’s specifically sized to stain two deck boards at once and covers very evenly. Just be sure to pick up a larger-than-average paint tray, since the head of the pad is an inch too large to fit into a standard tray.
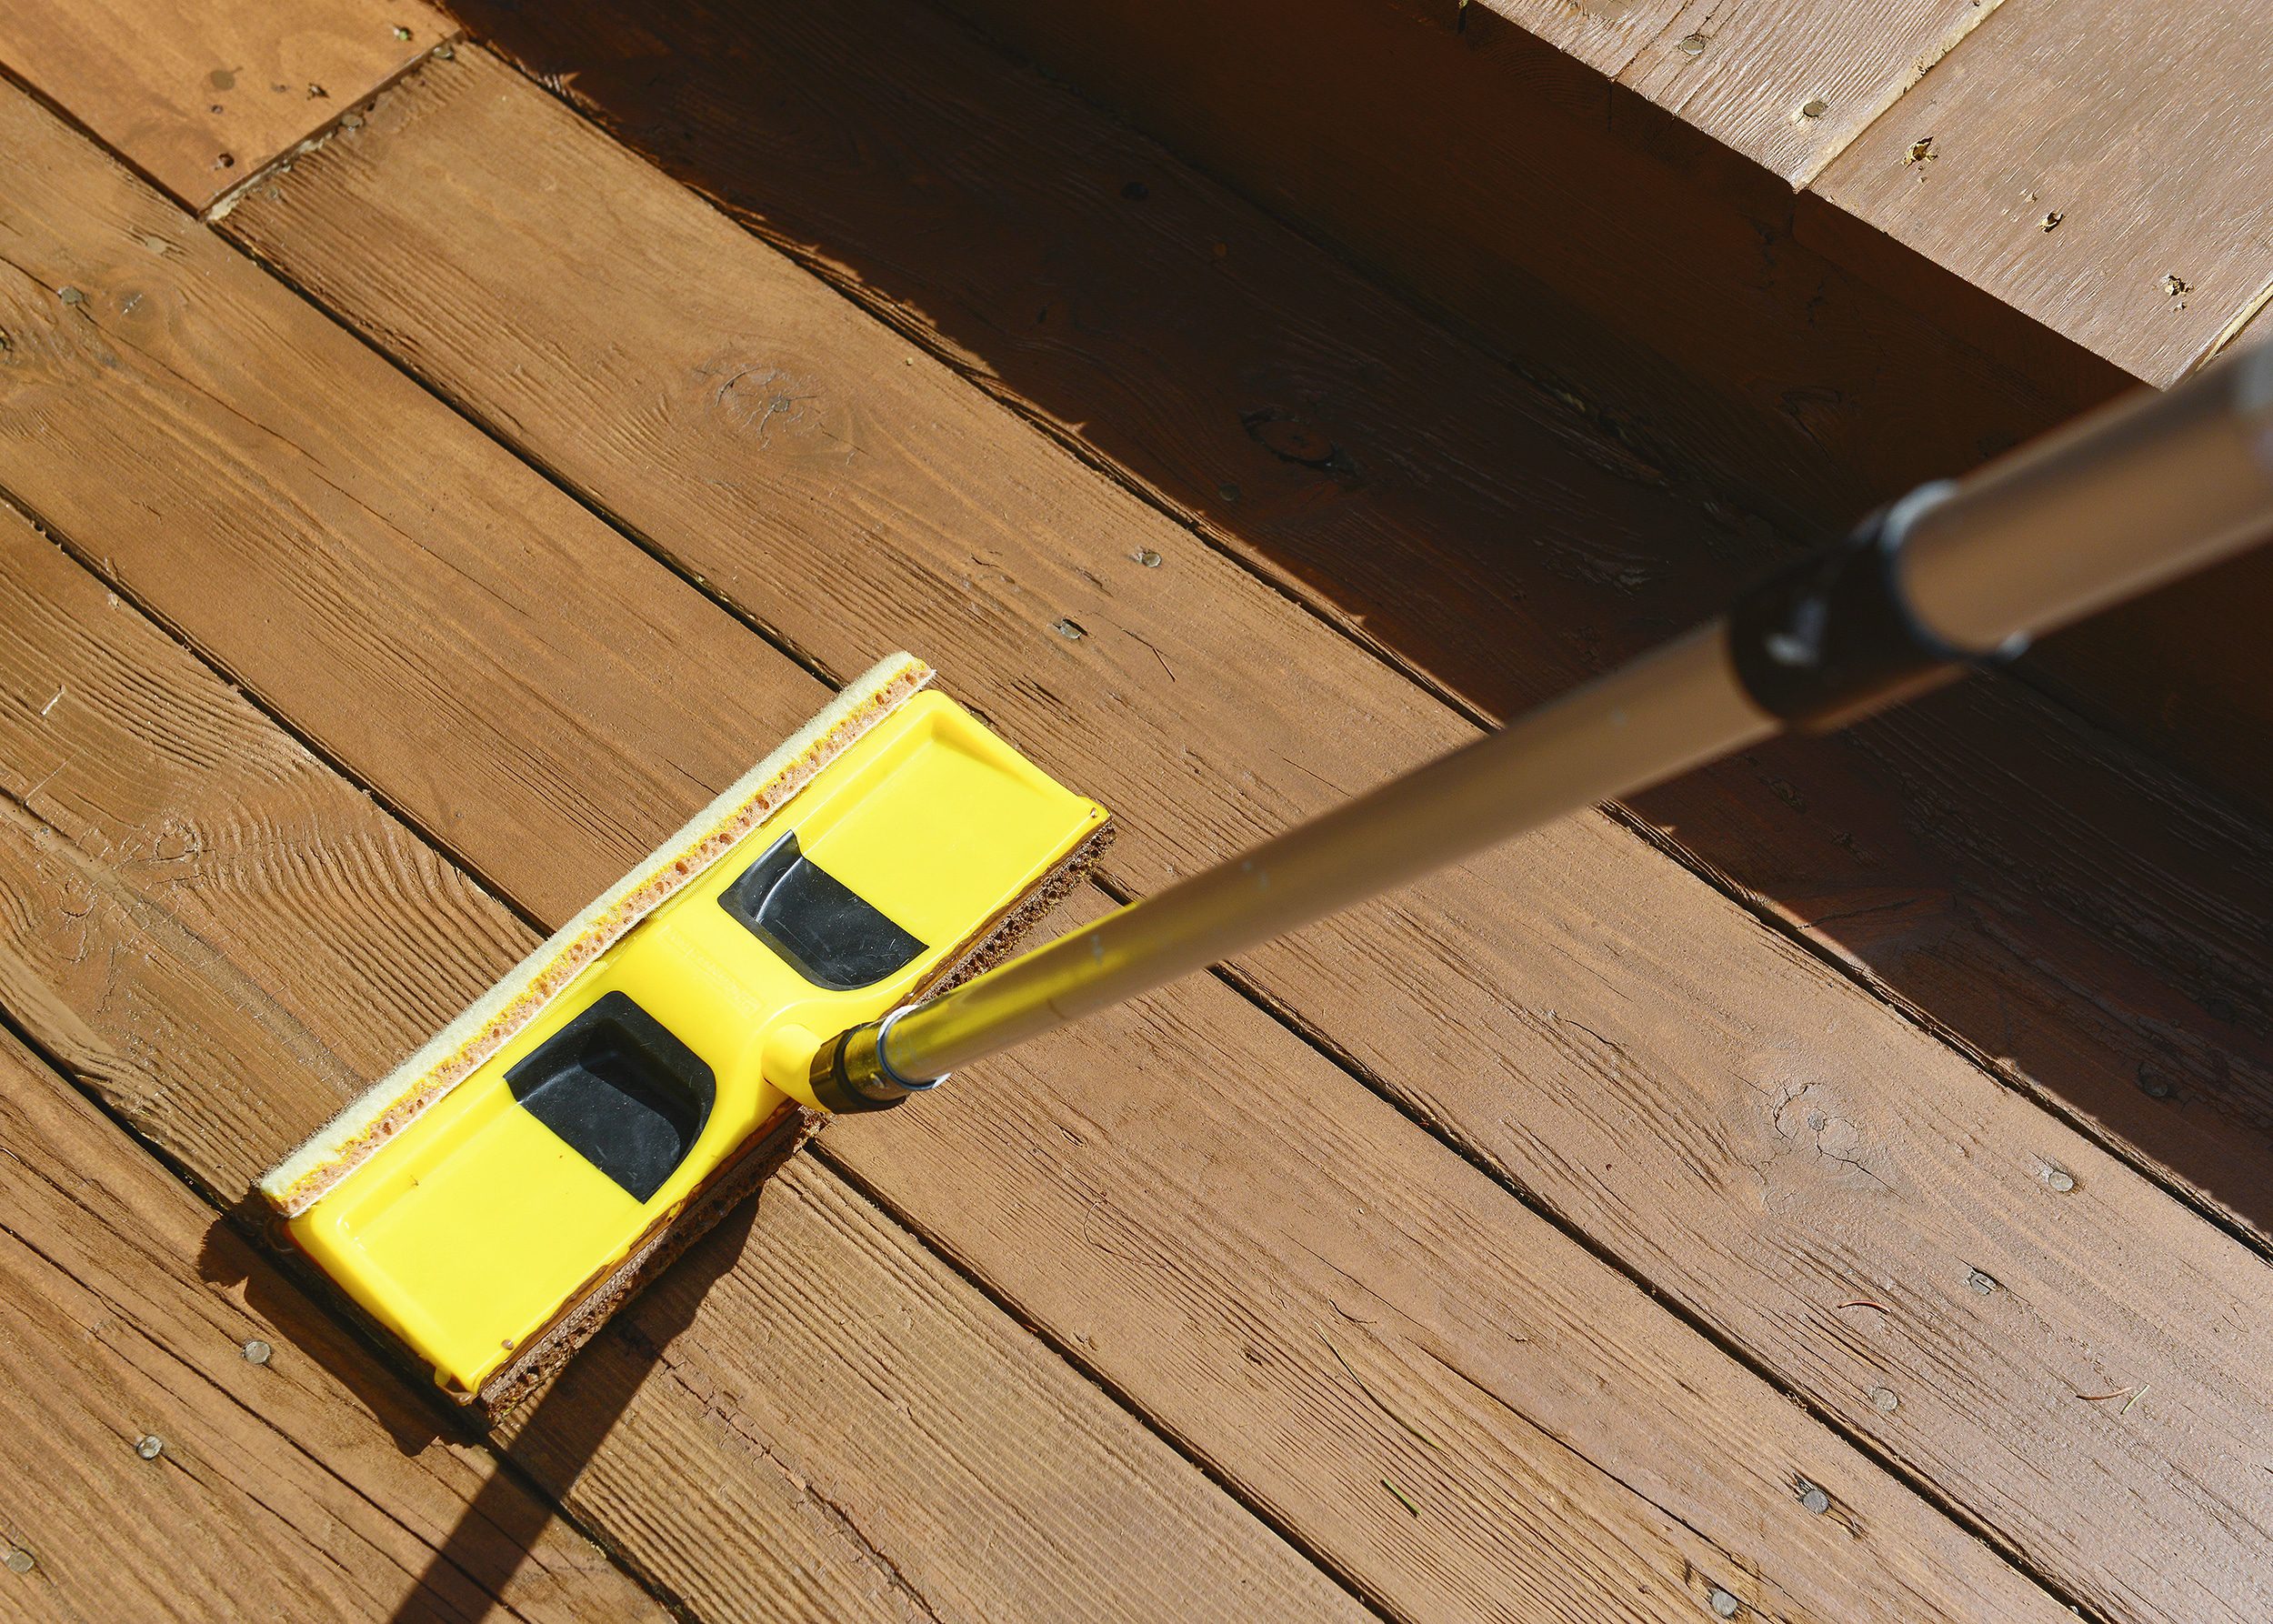
Applying the second coat with the stain pad worked wonders to even out the tone of the old and new deck boards! We were happy to call the staining portion of the project done!
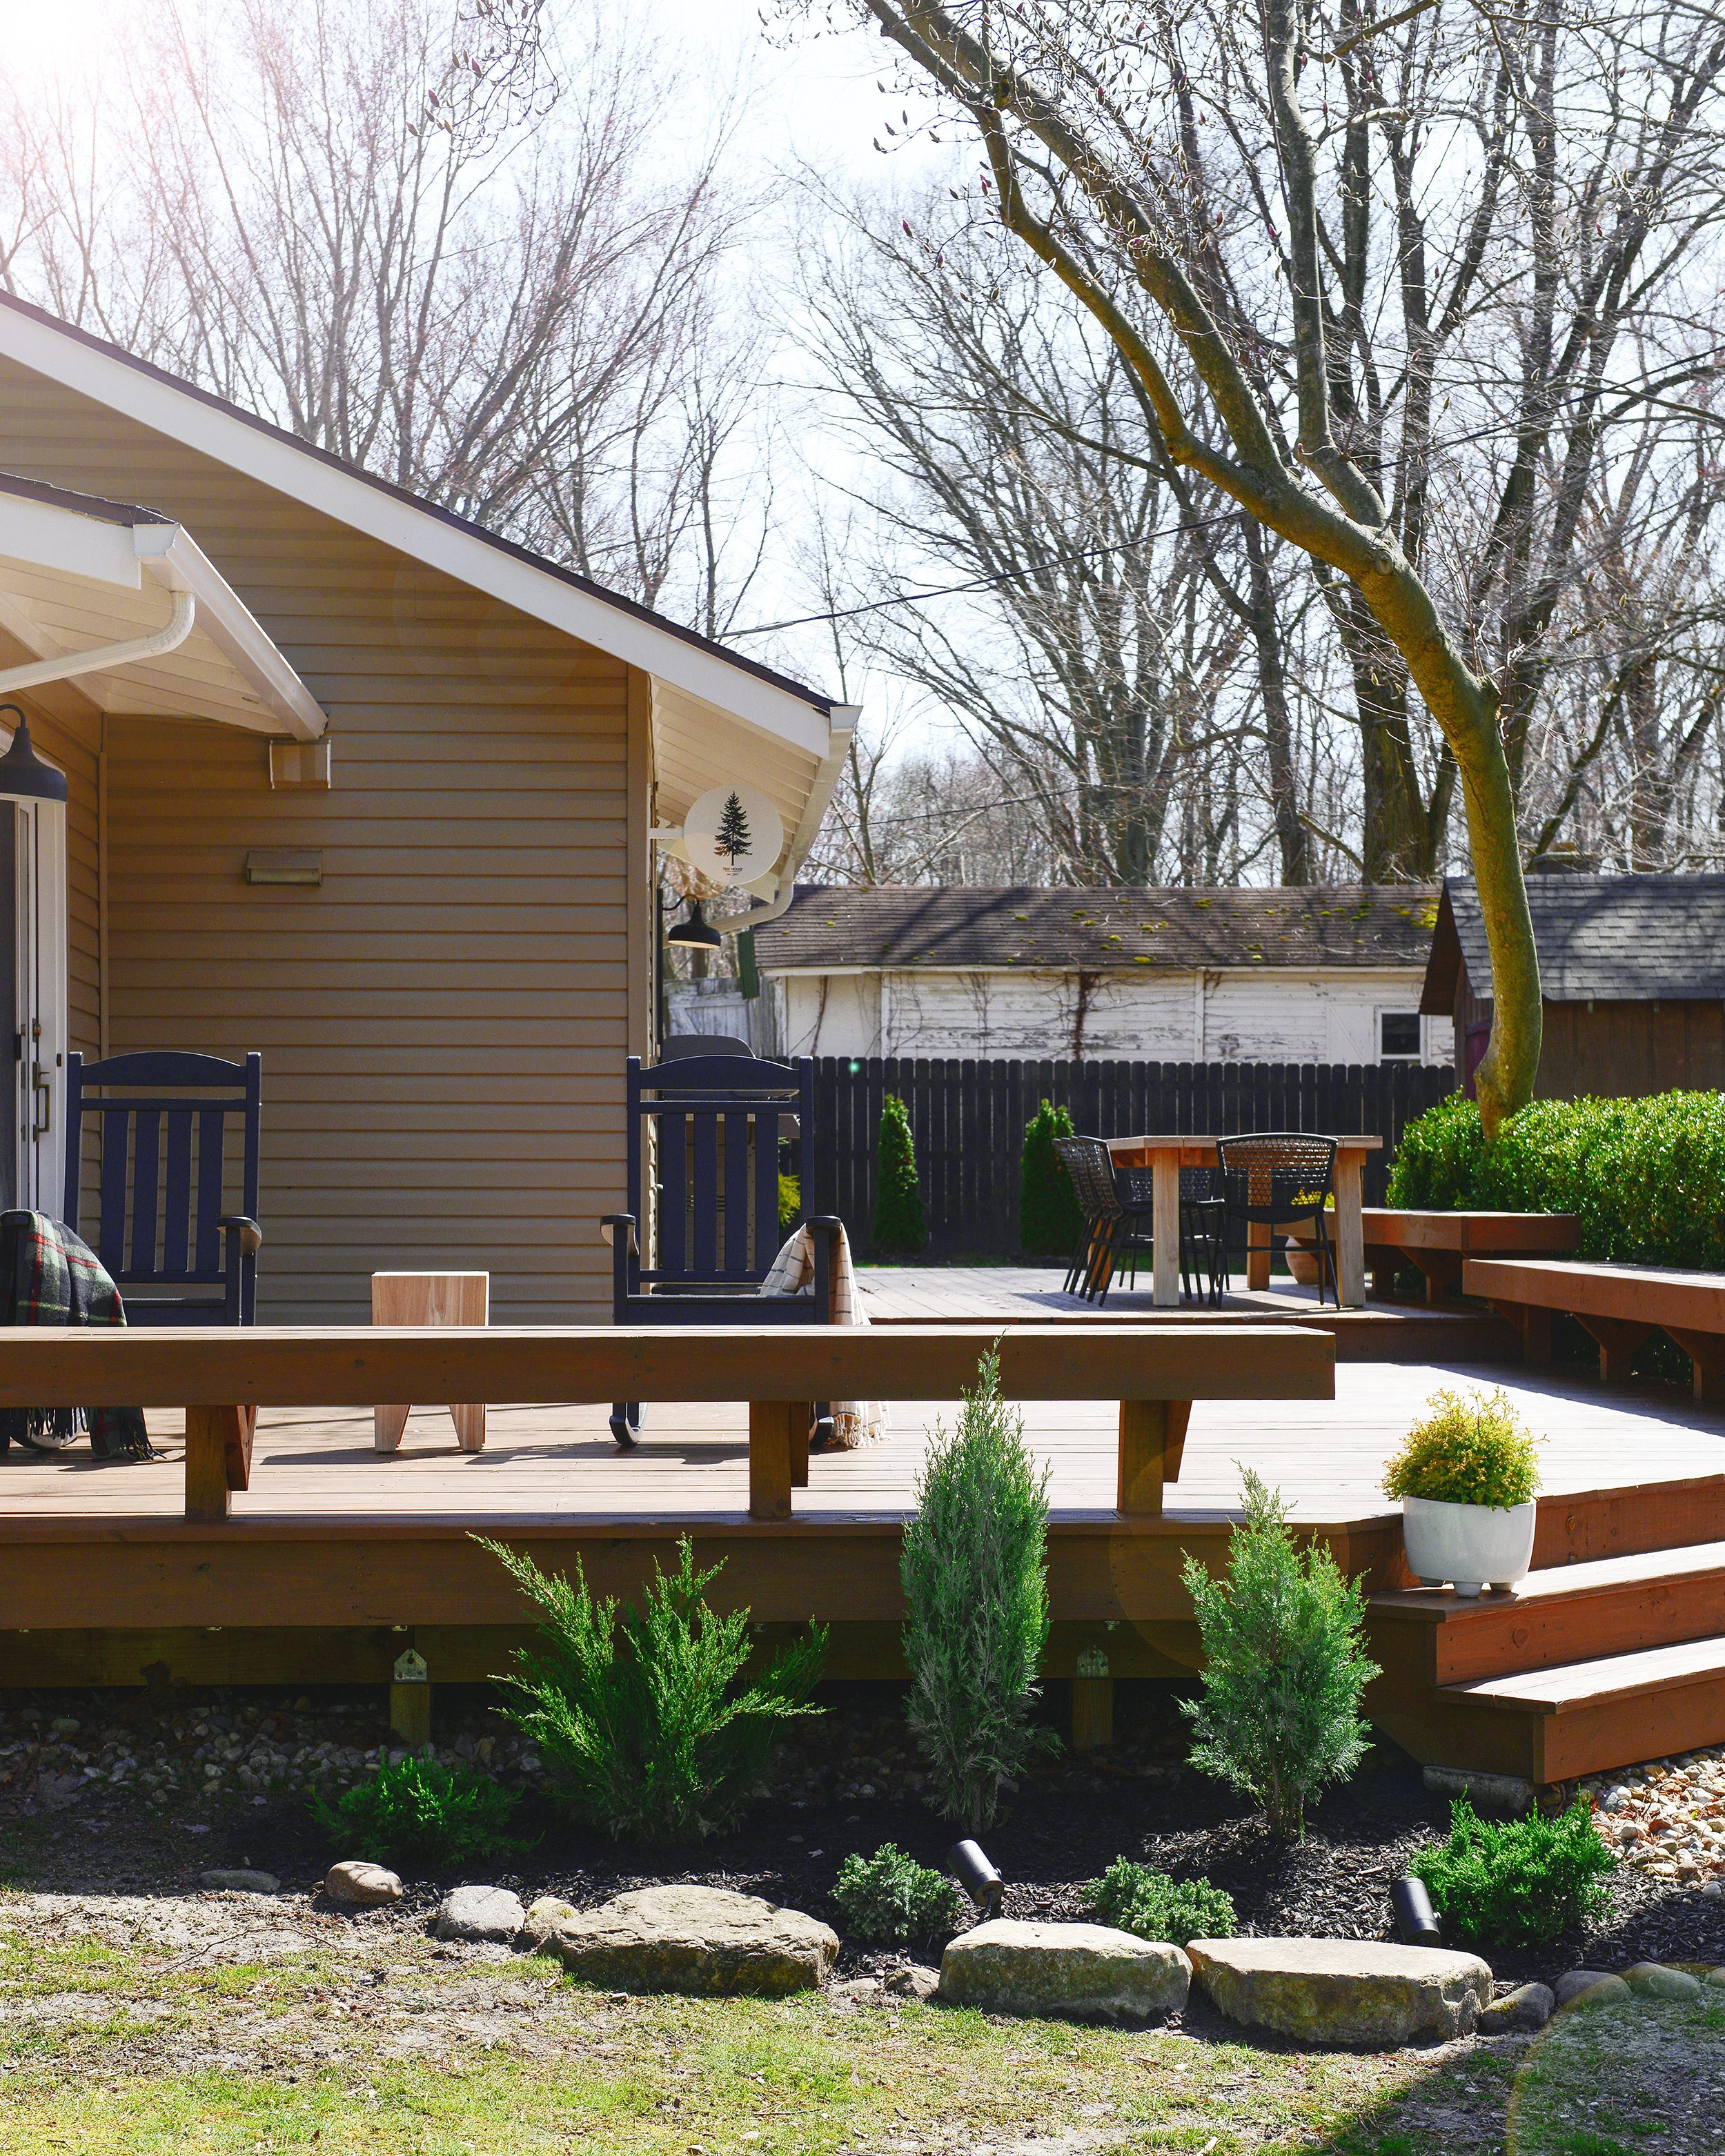
Landscaping to Soften the Edges
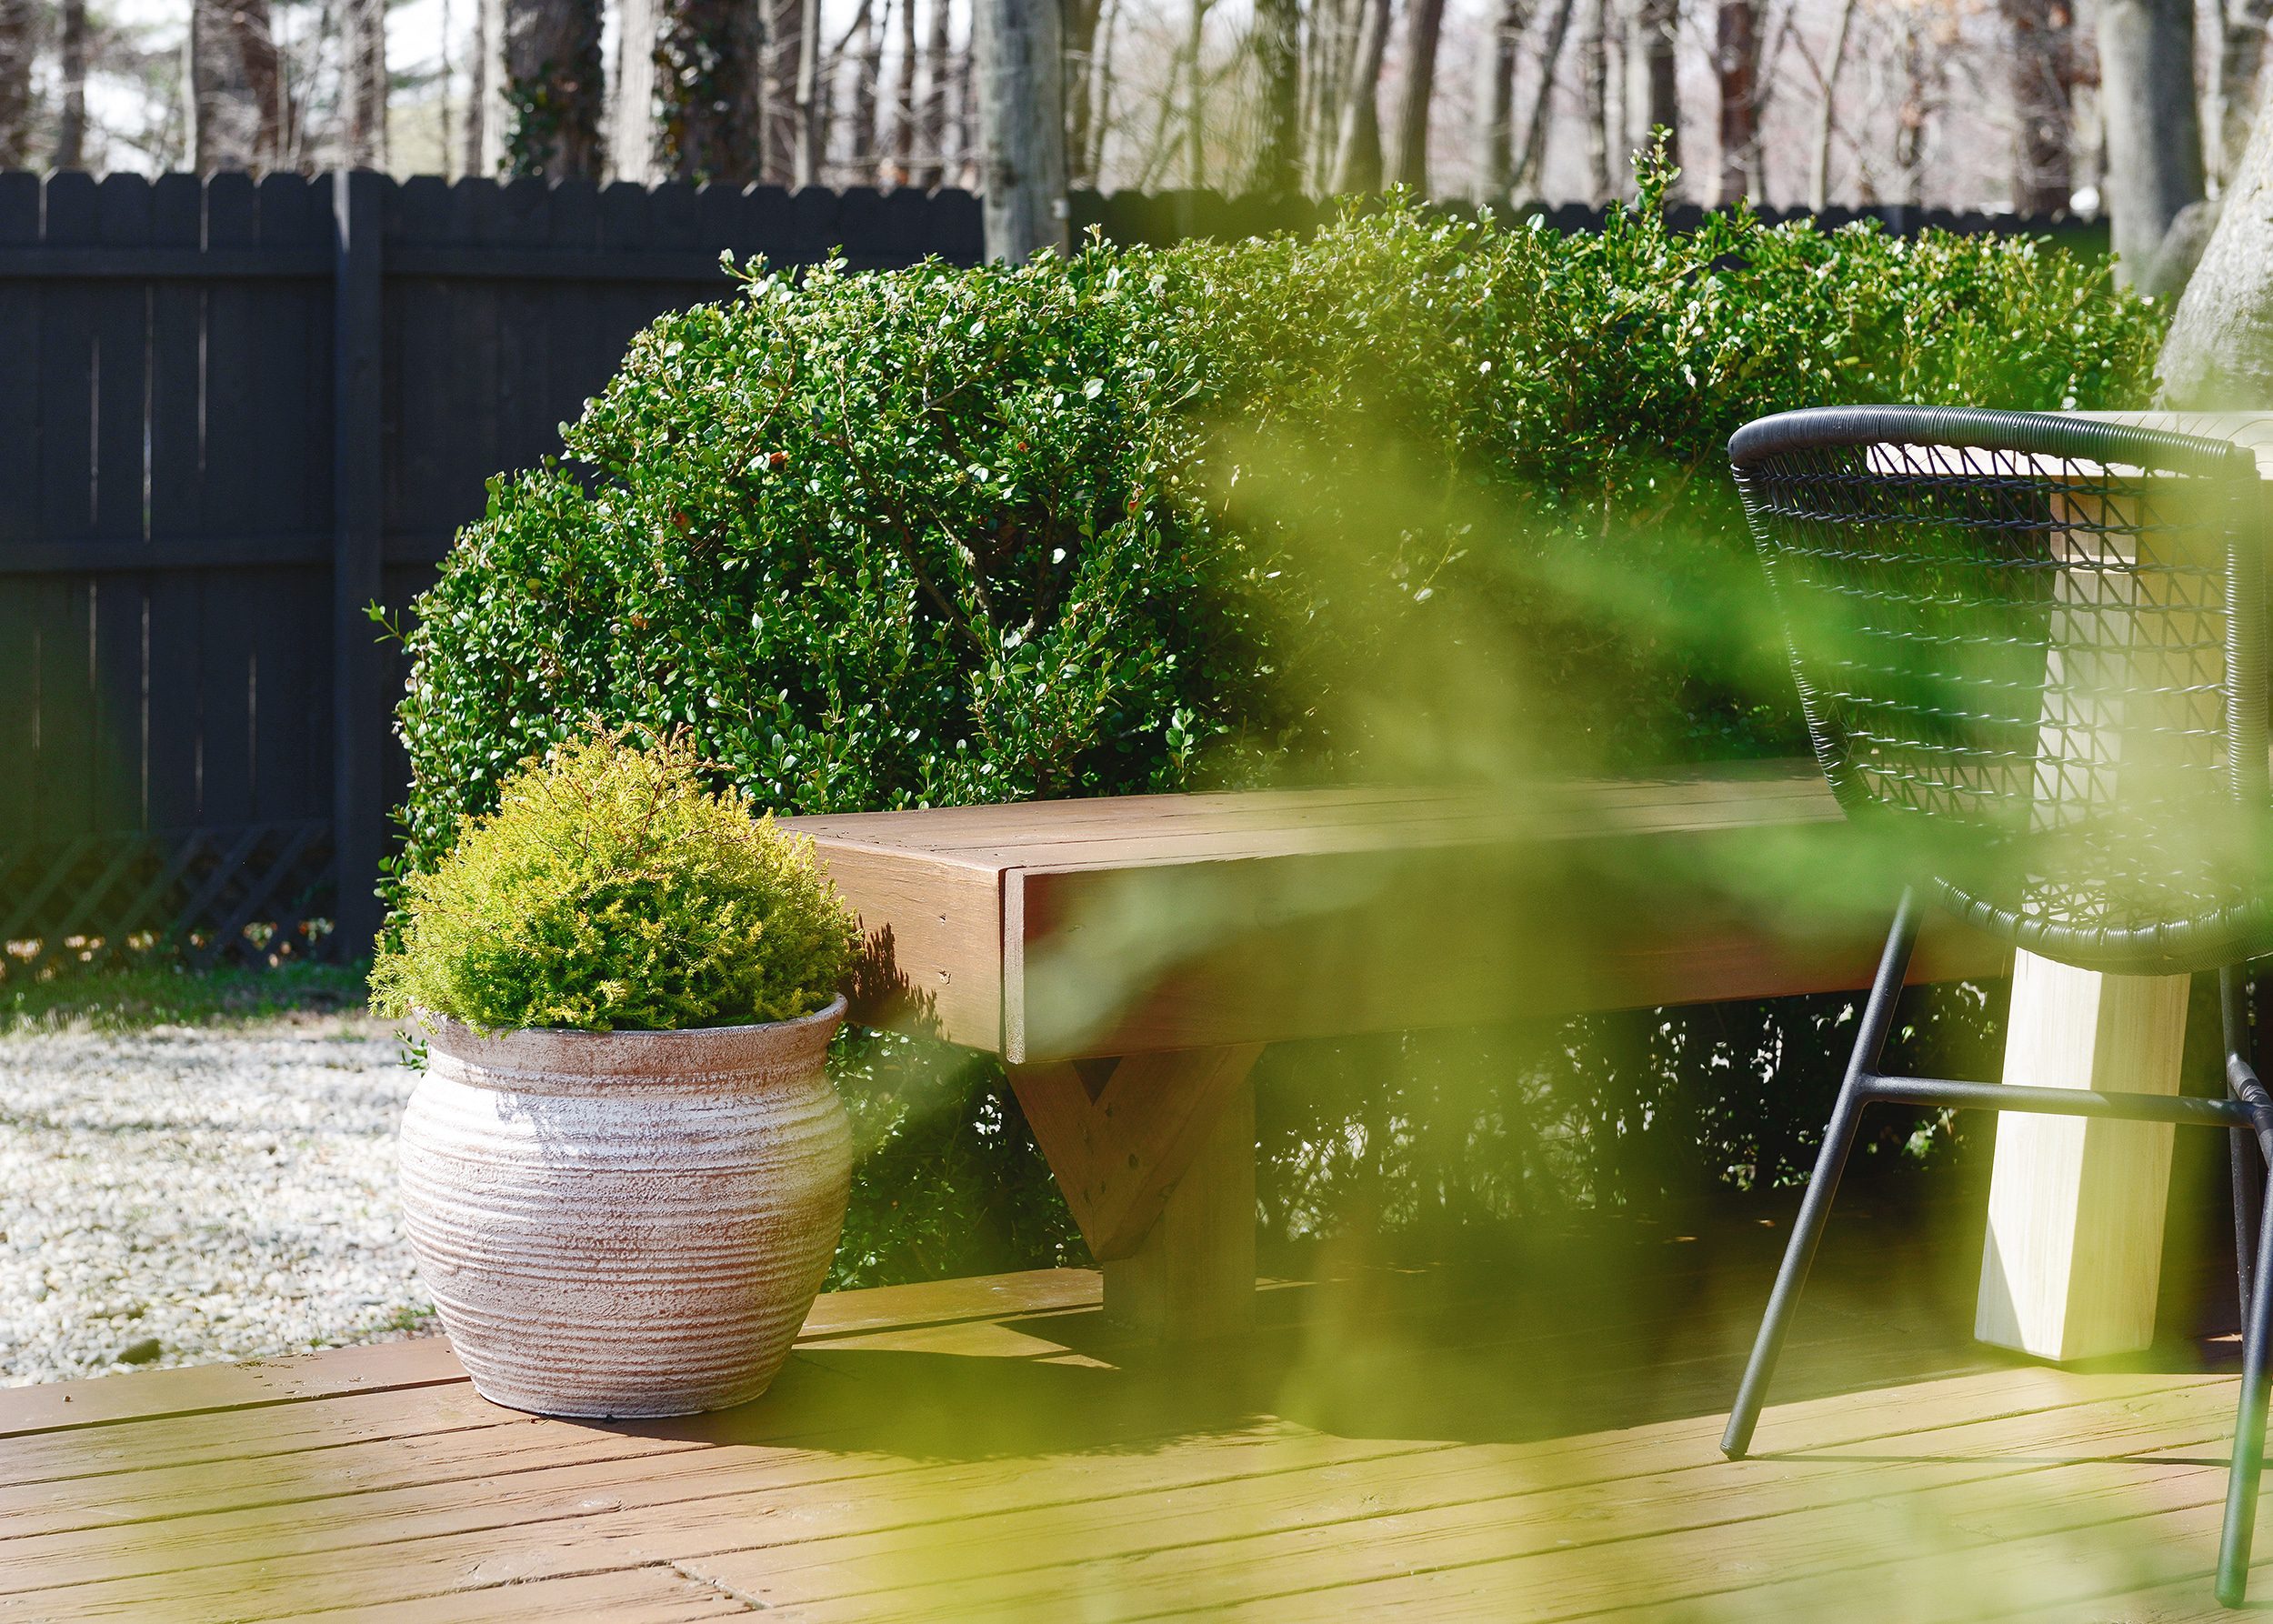
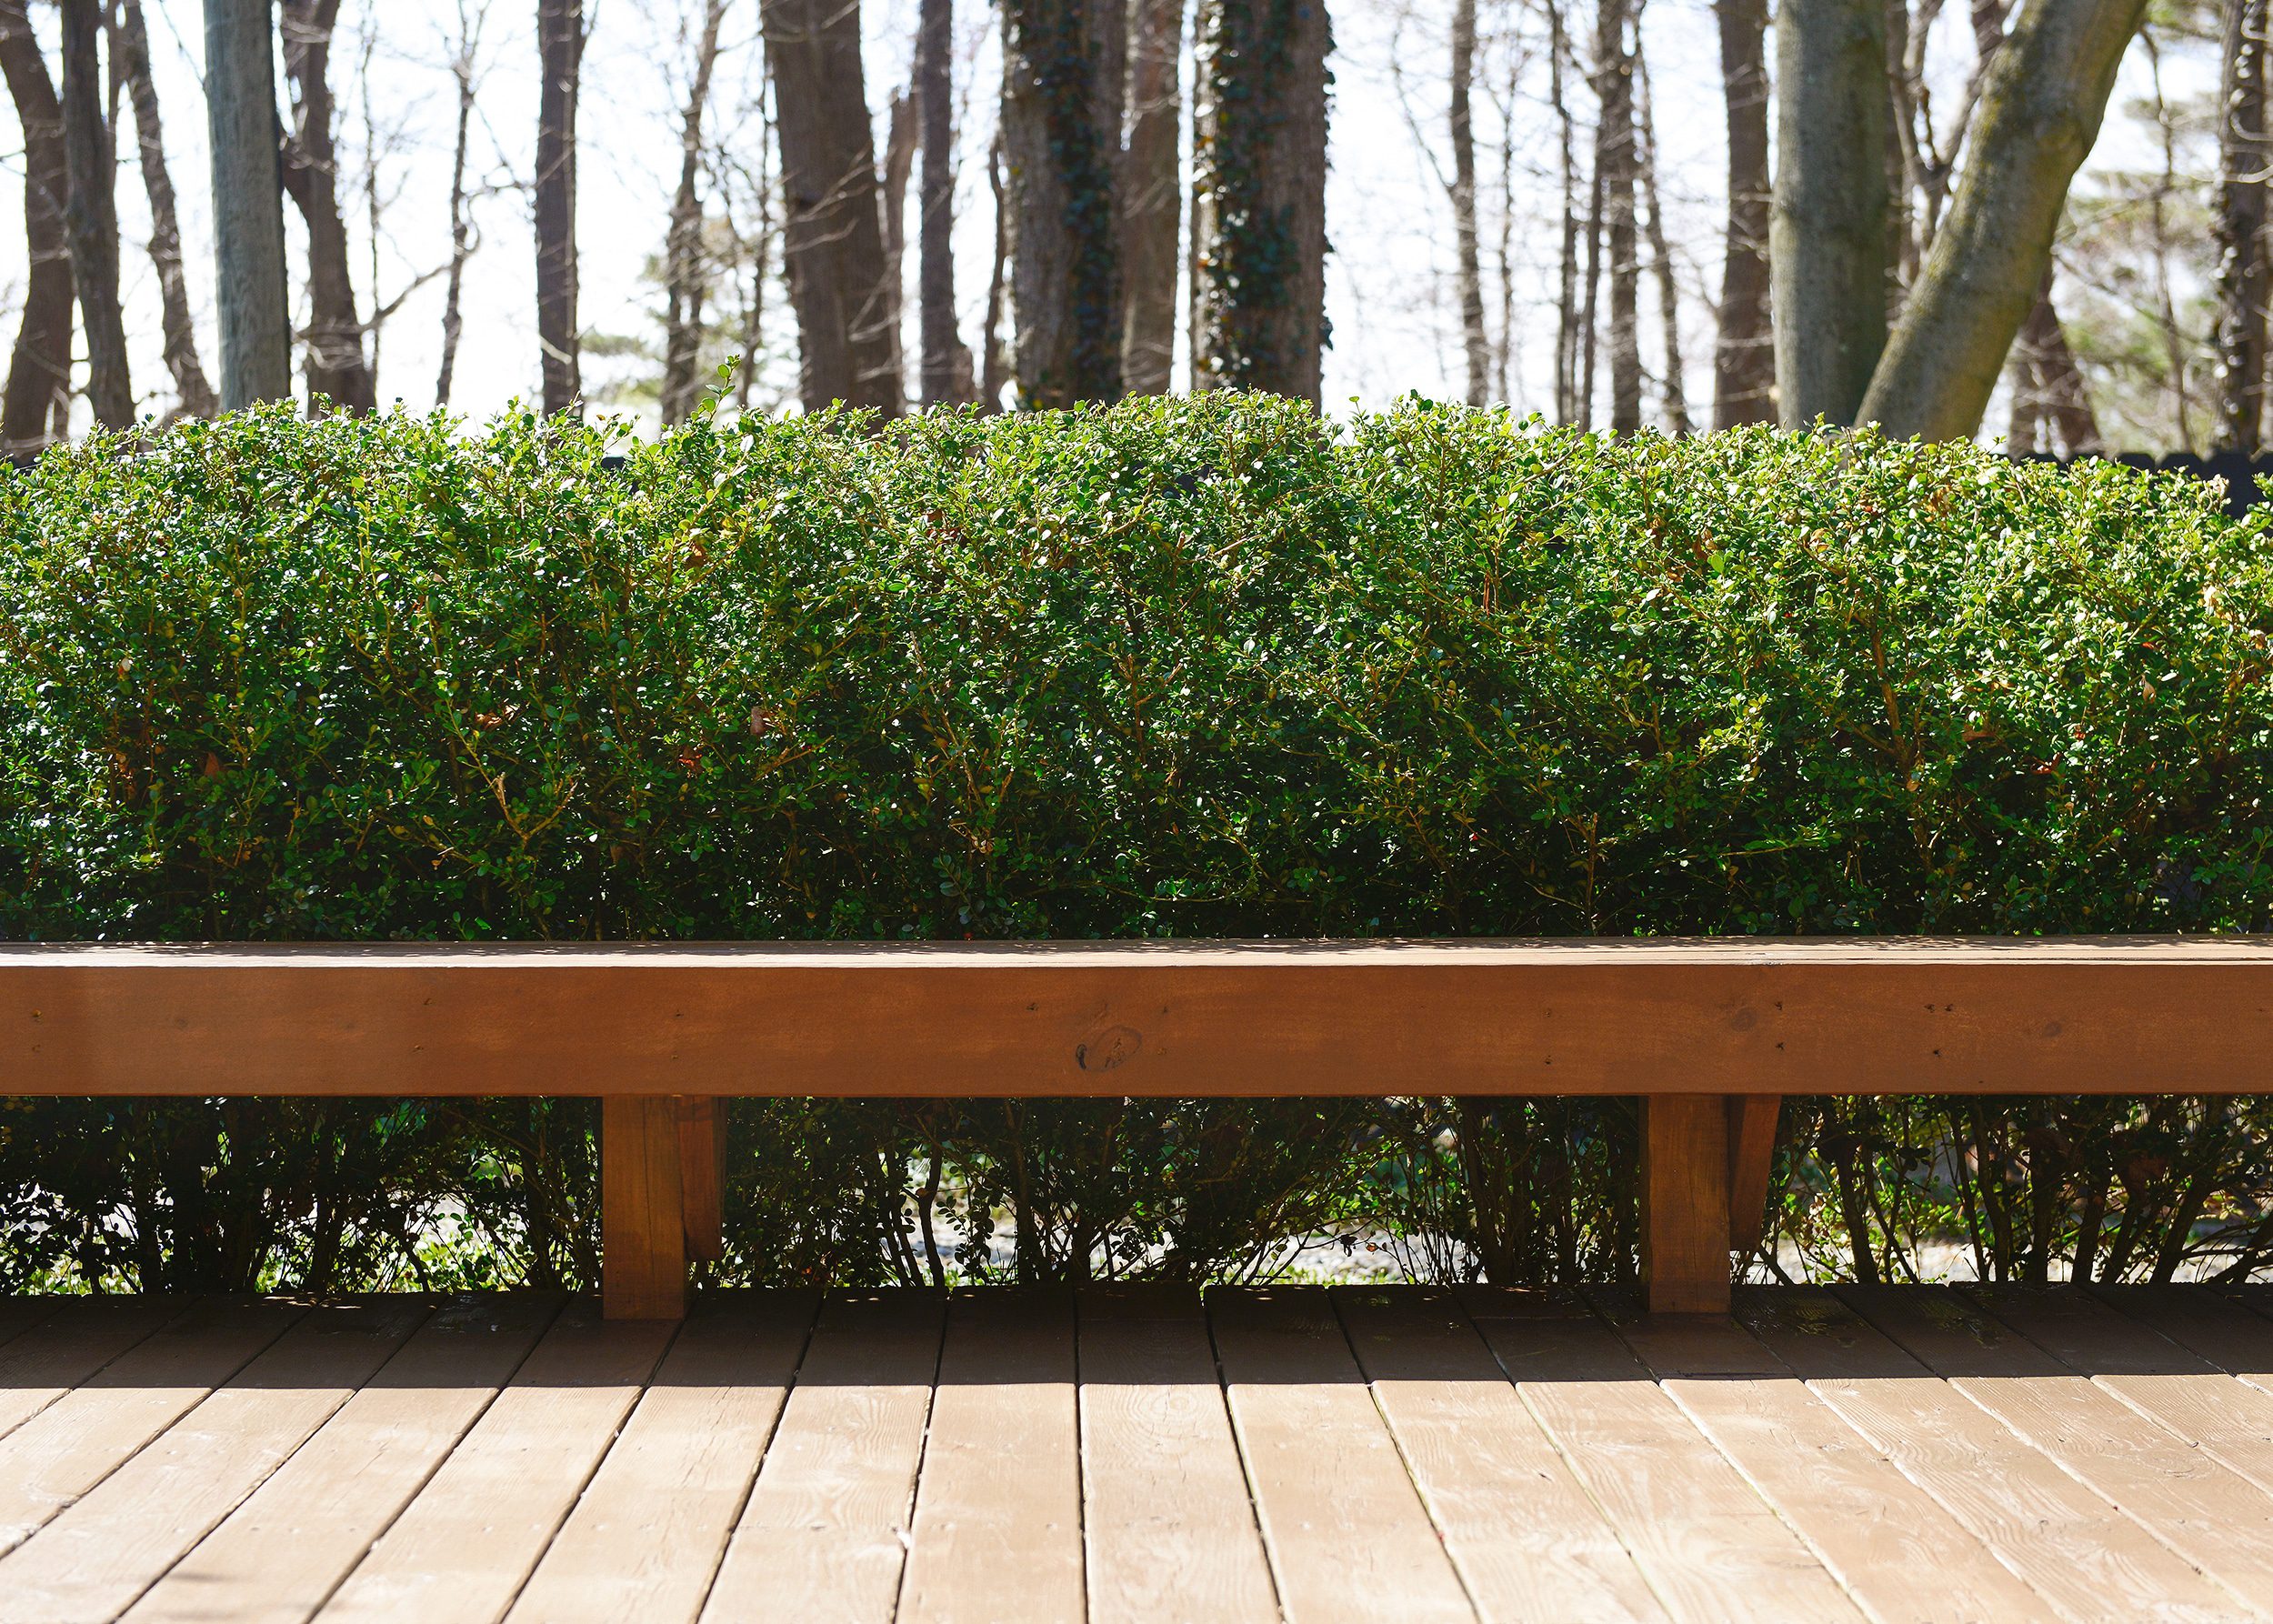
After the staining was complete, we were ready to add a some greenery to soften the hard edges of the deck and add a bit of privacy. We chose a mix of evergreen trees, bushes and ground cover that will provide color contrast all year round. The warm tone of the Cinnamon Wood stain plays very nicely with the cooler tones of the evergreens!
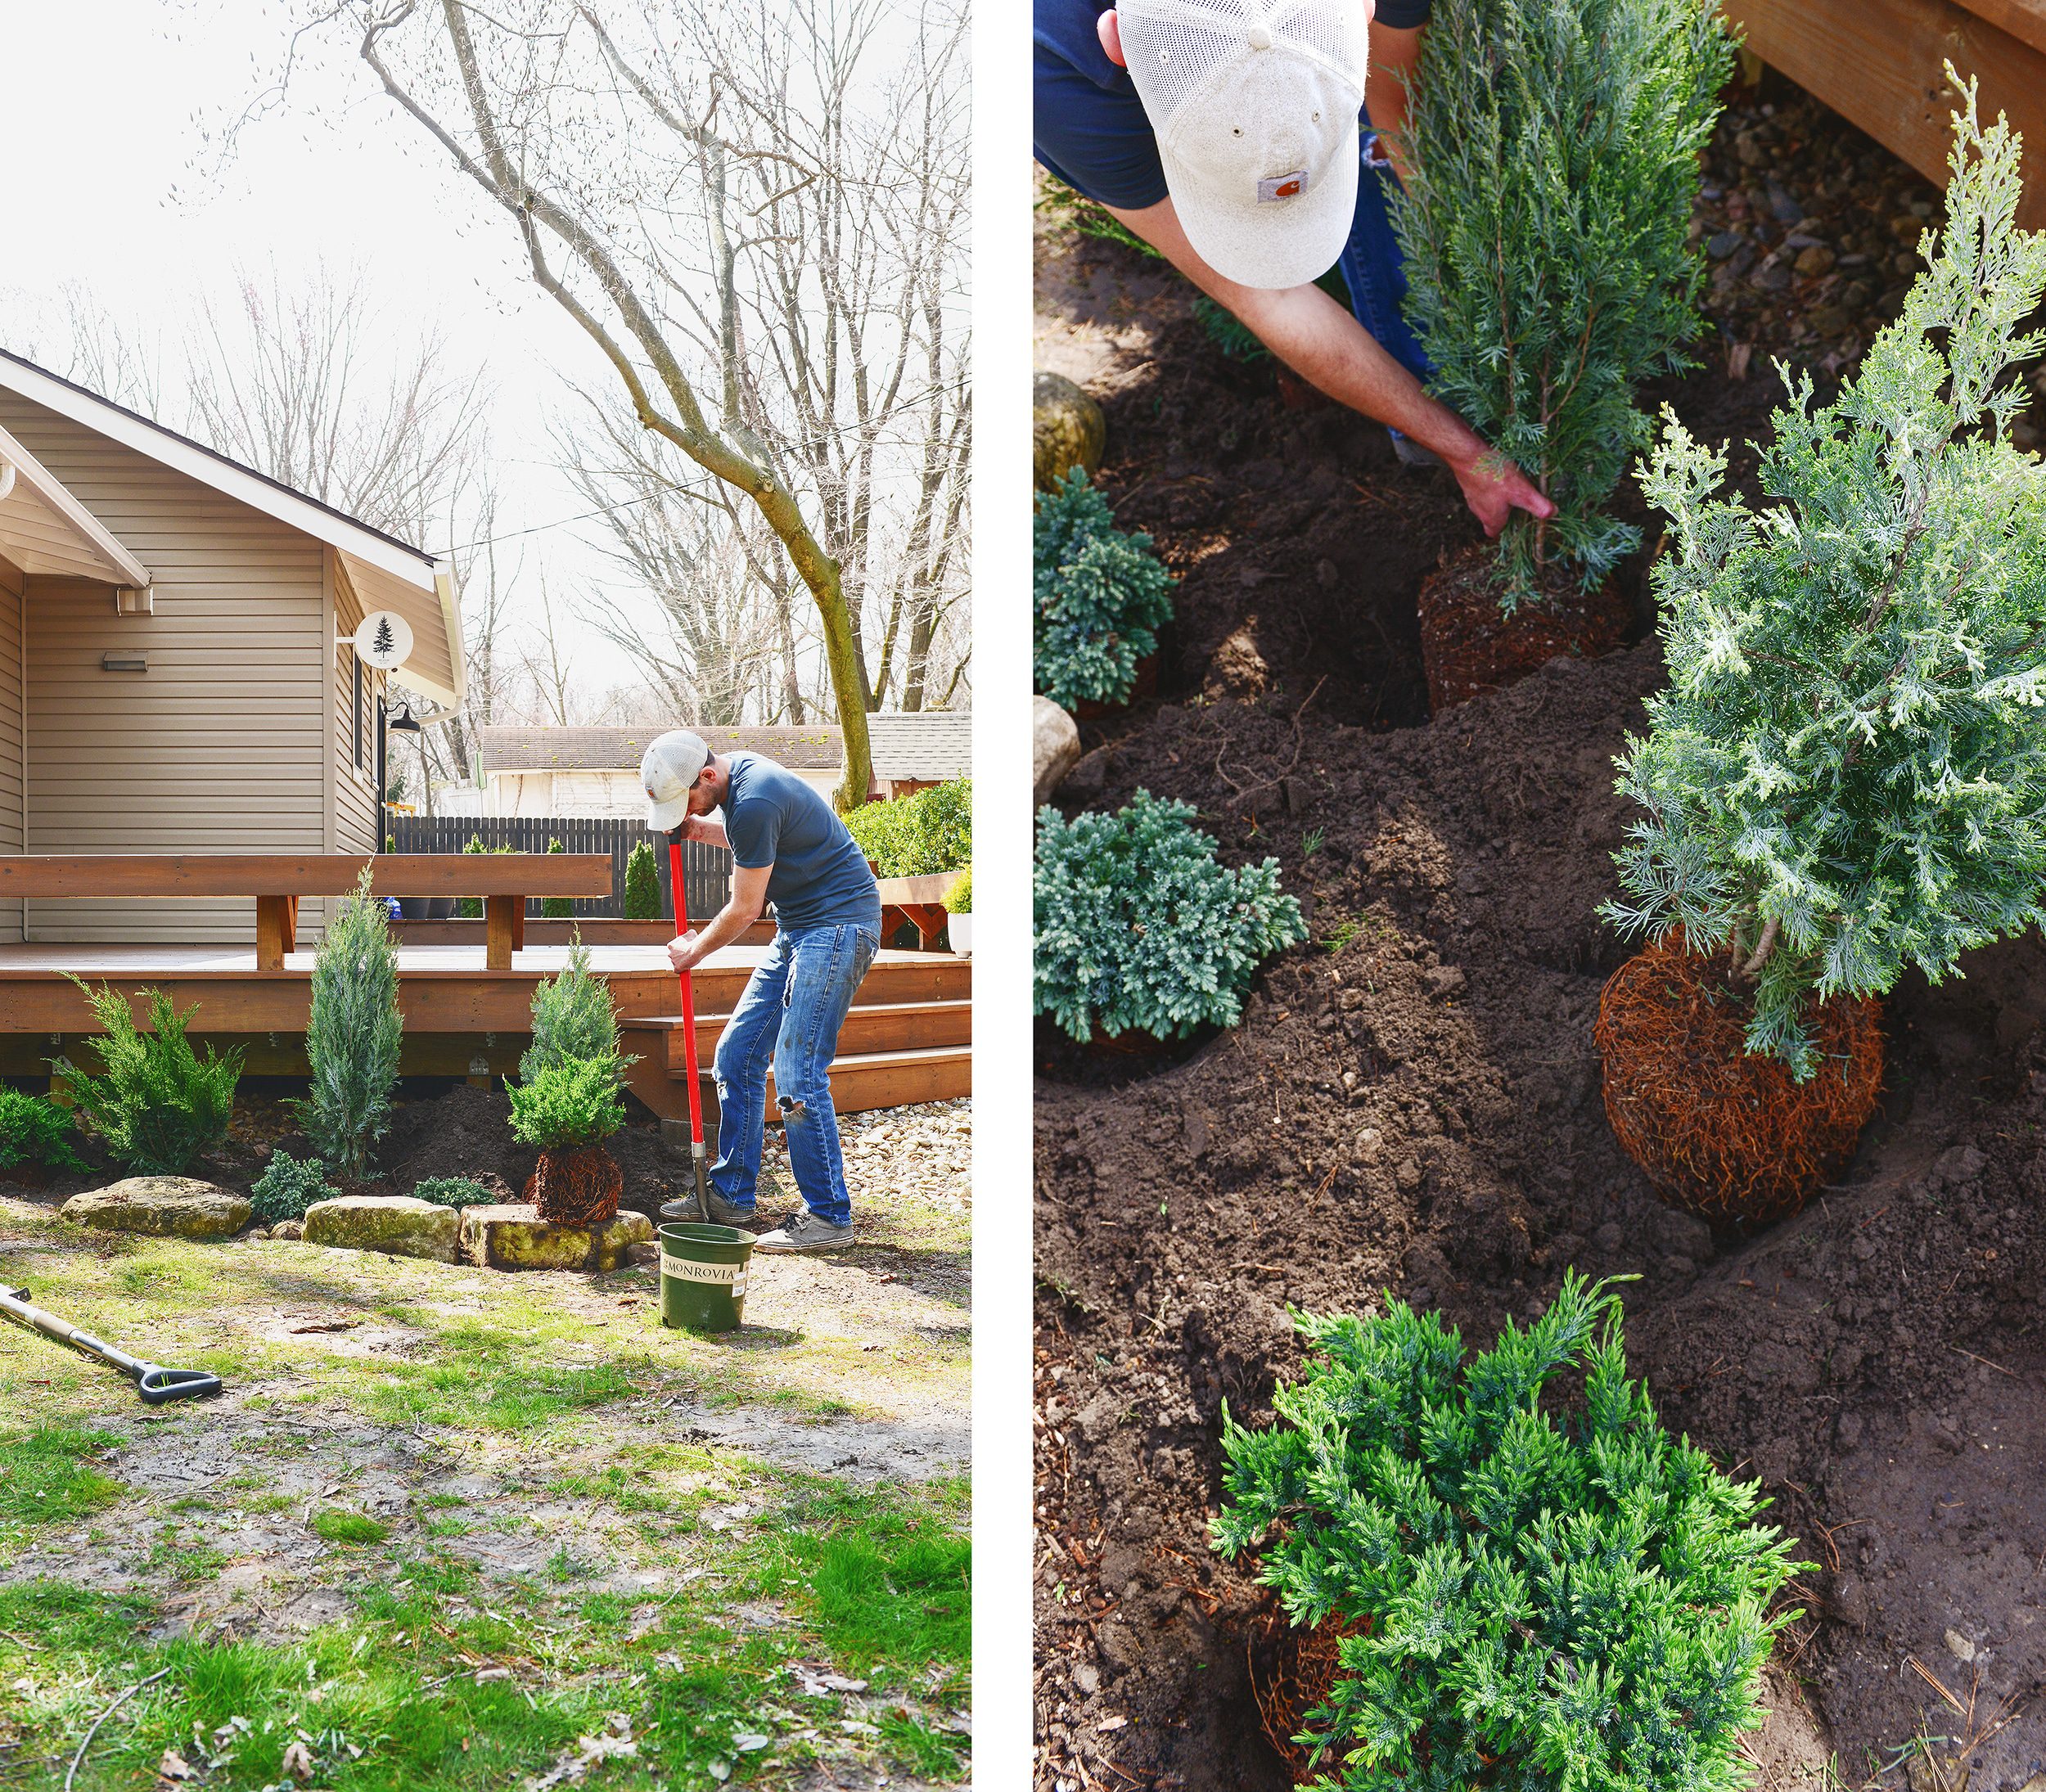
These low evergreen shrubs will eventually creep around and over the rocks that border the new bed. Fun fact: we were able to source all of the stone for this project from our yard! To give a bit more of a natural ‘always been there’ look, we also harvested some fresh moss from elsewhere in the yard and placed it carefully between the rocks. Last but not least, we over-seeded the thin spots in the lawn with sun and shade mix grass seed. All of this spring rain should help things grow in nicely!

Potted Plants for Additional Greenery
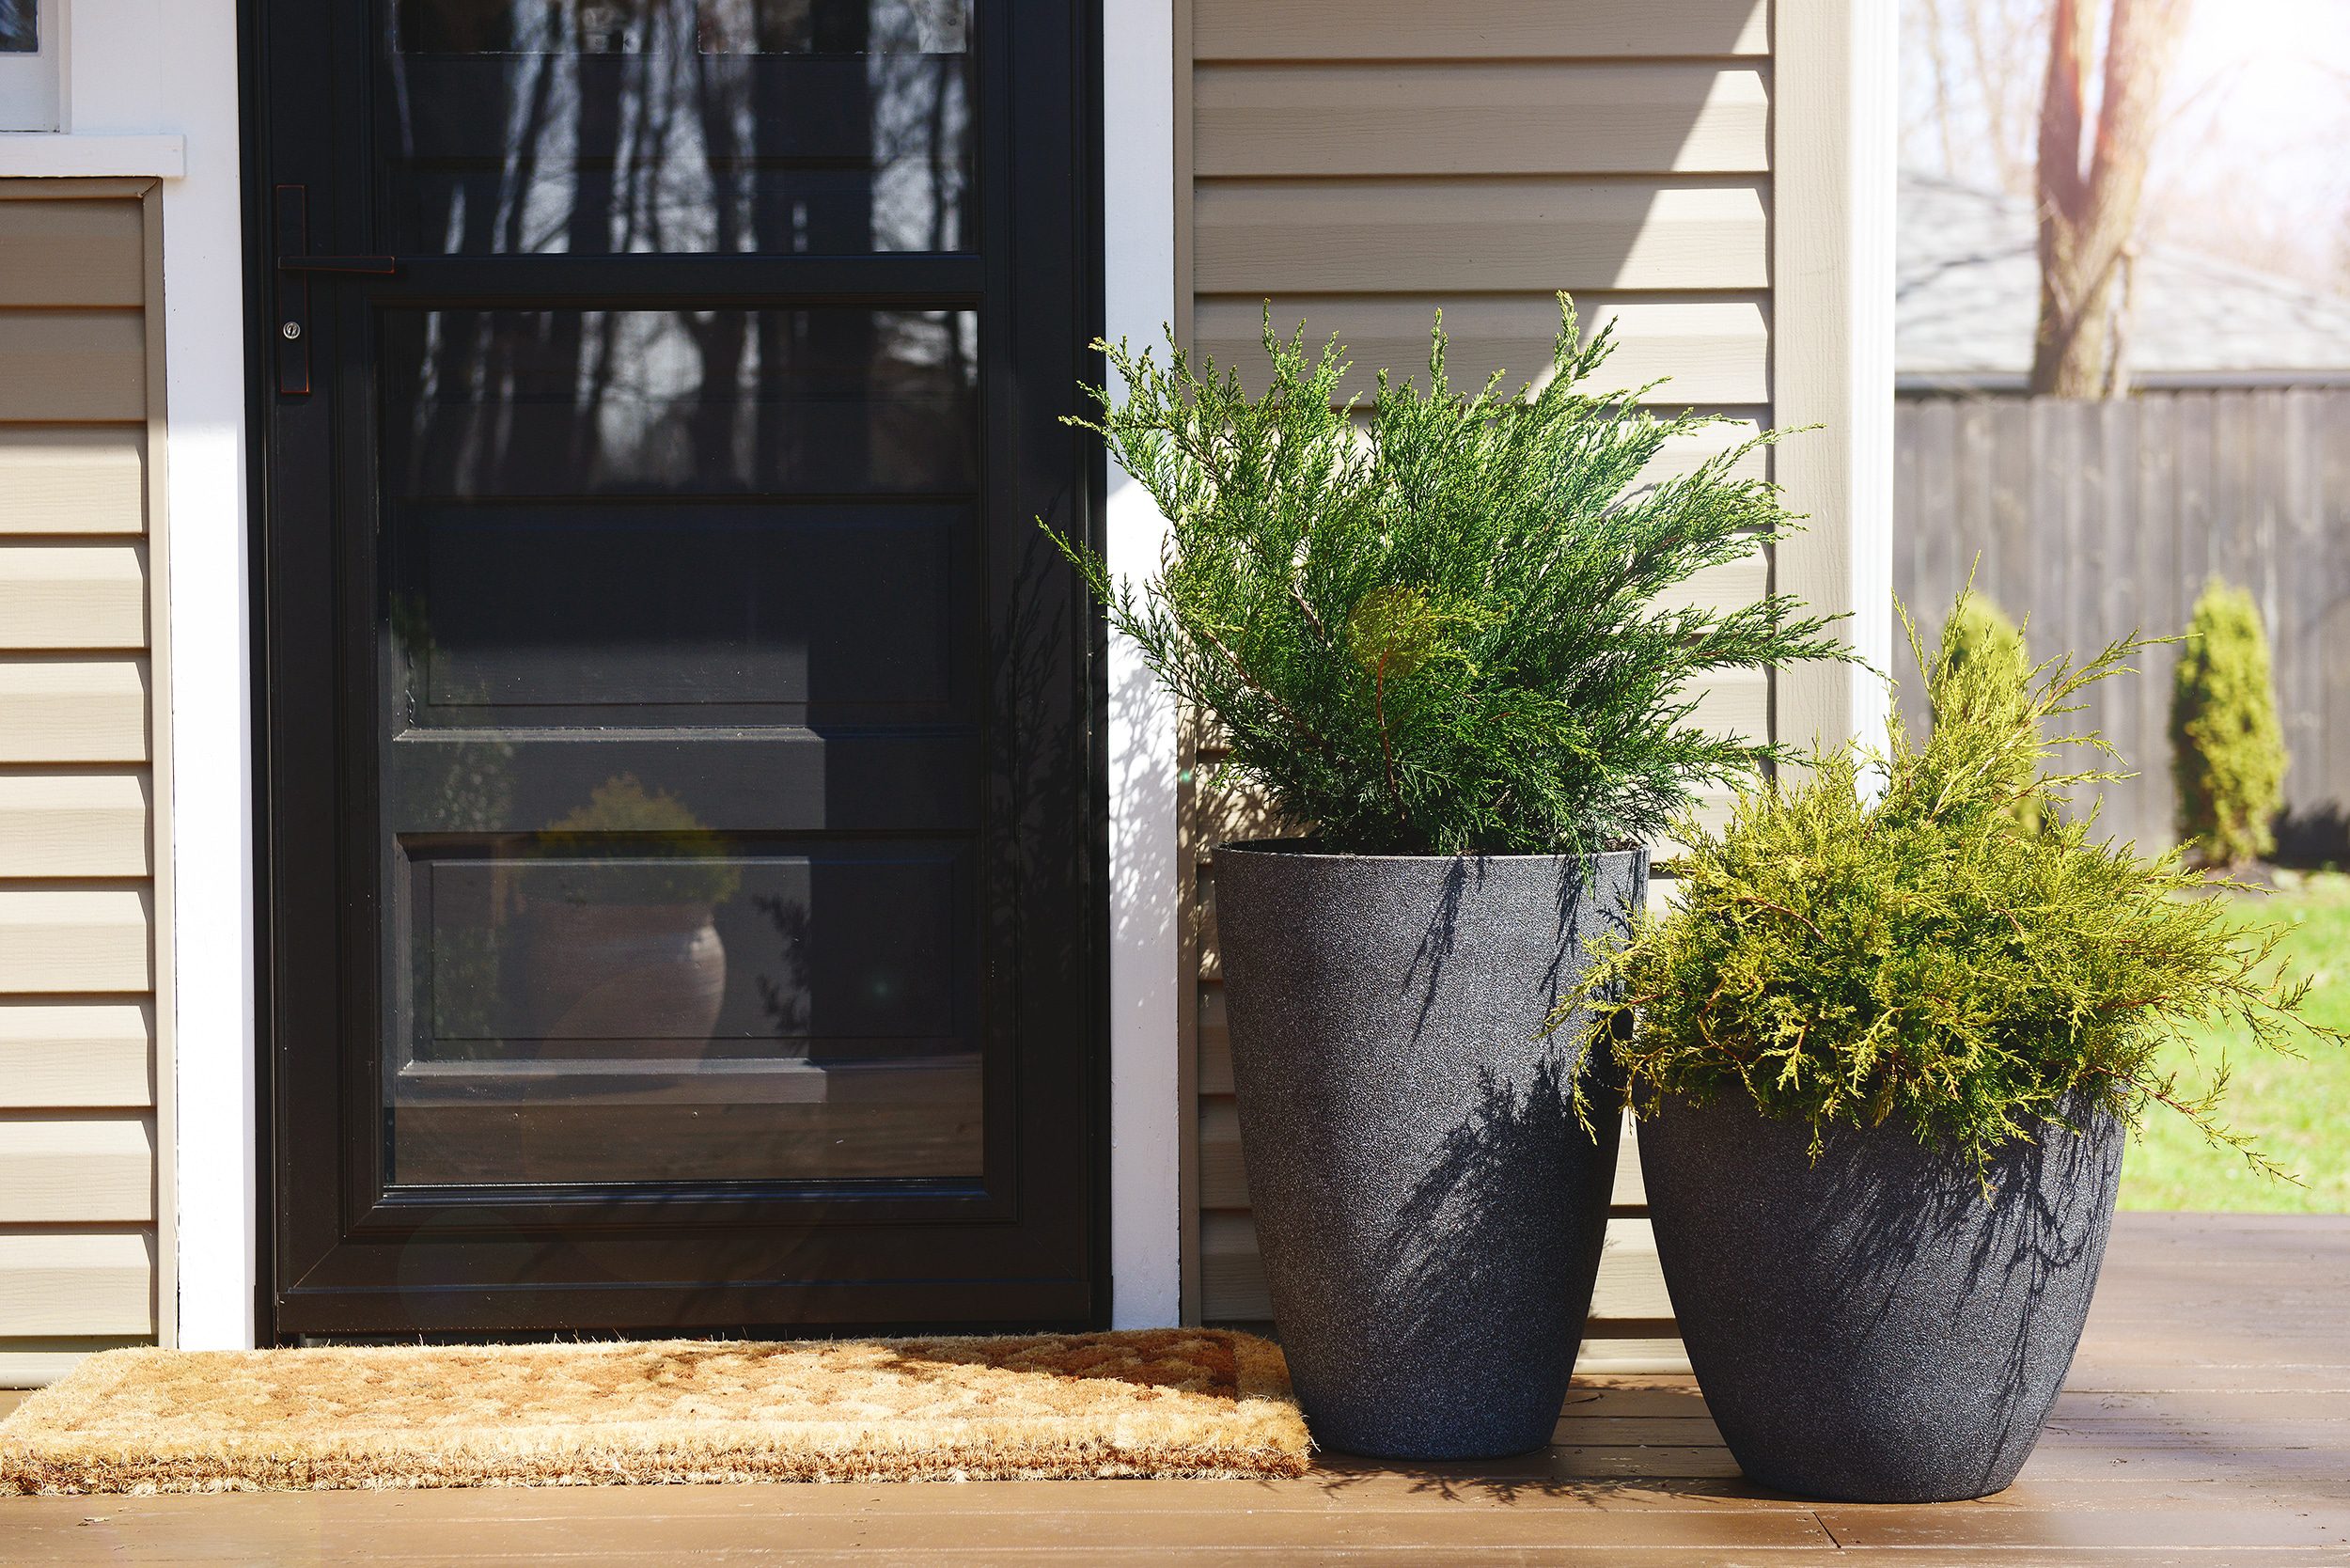
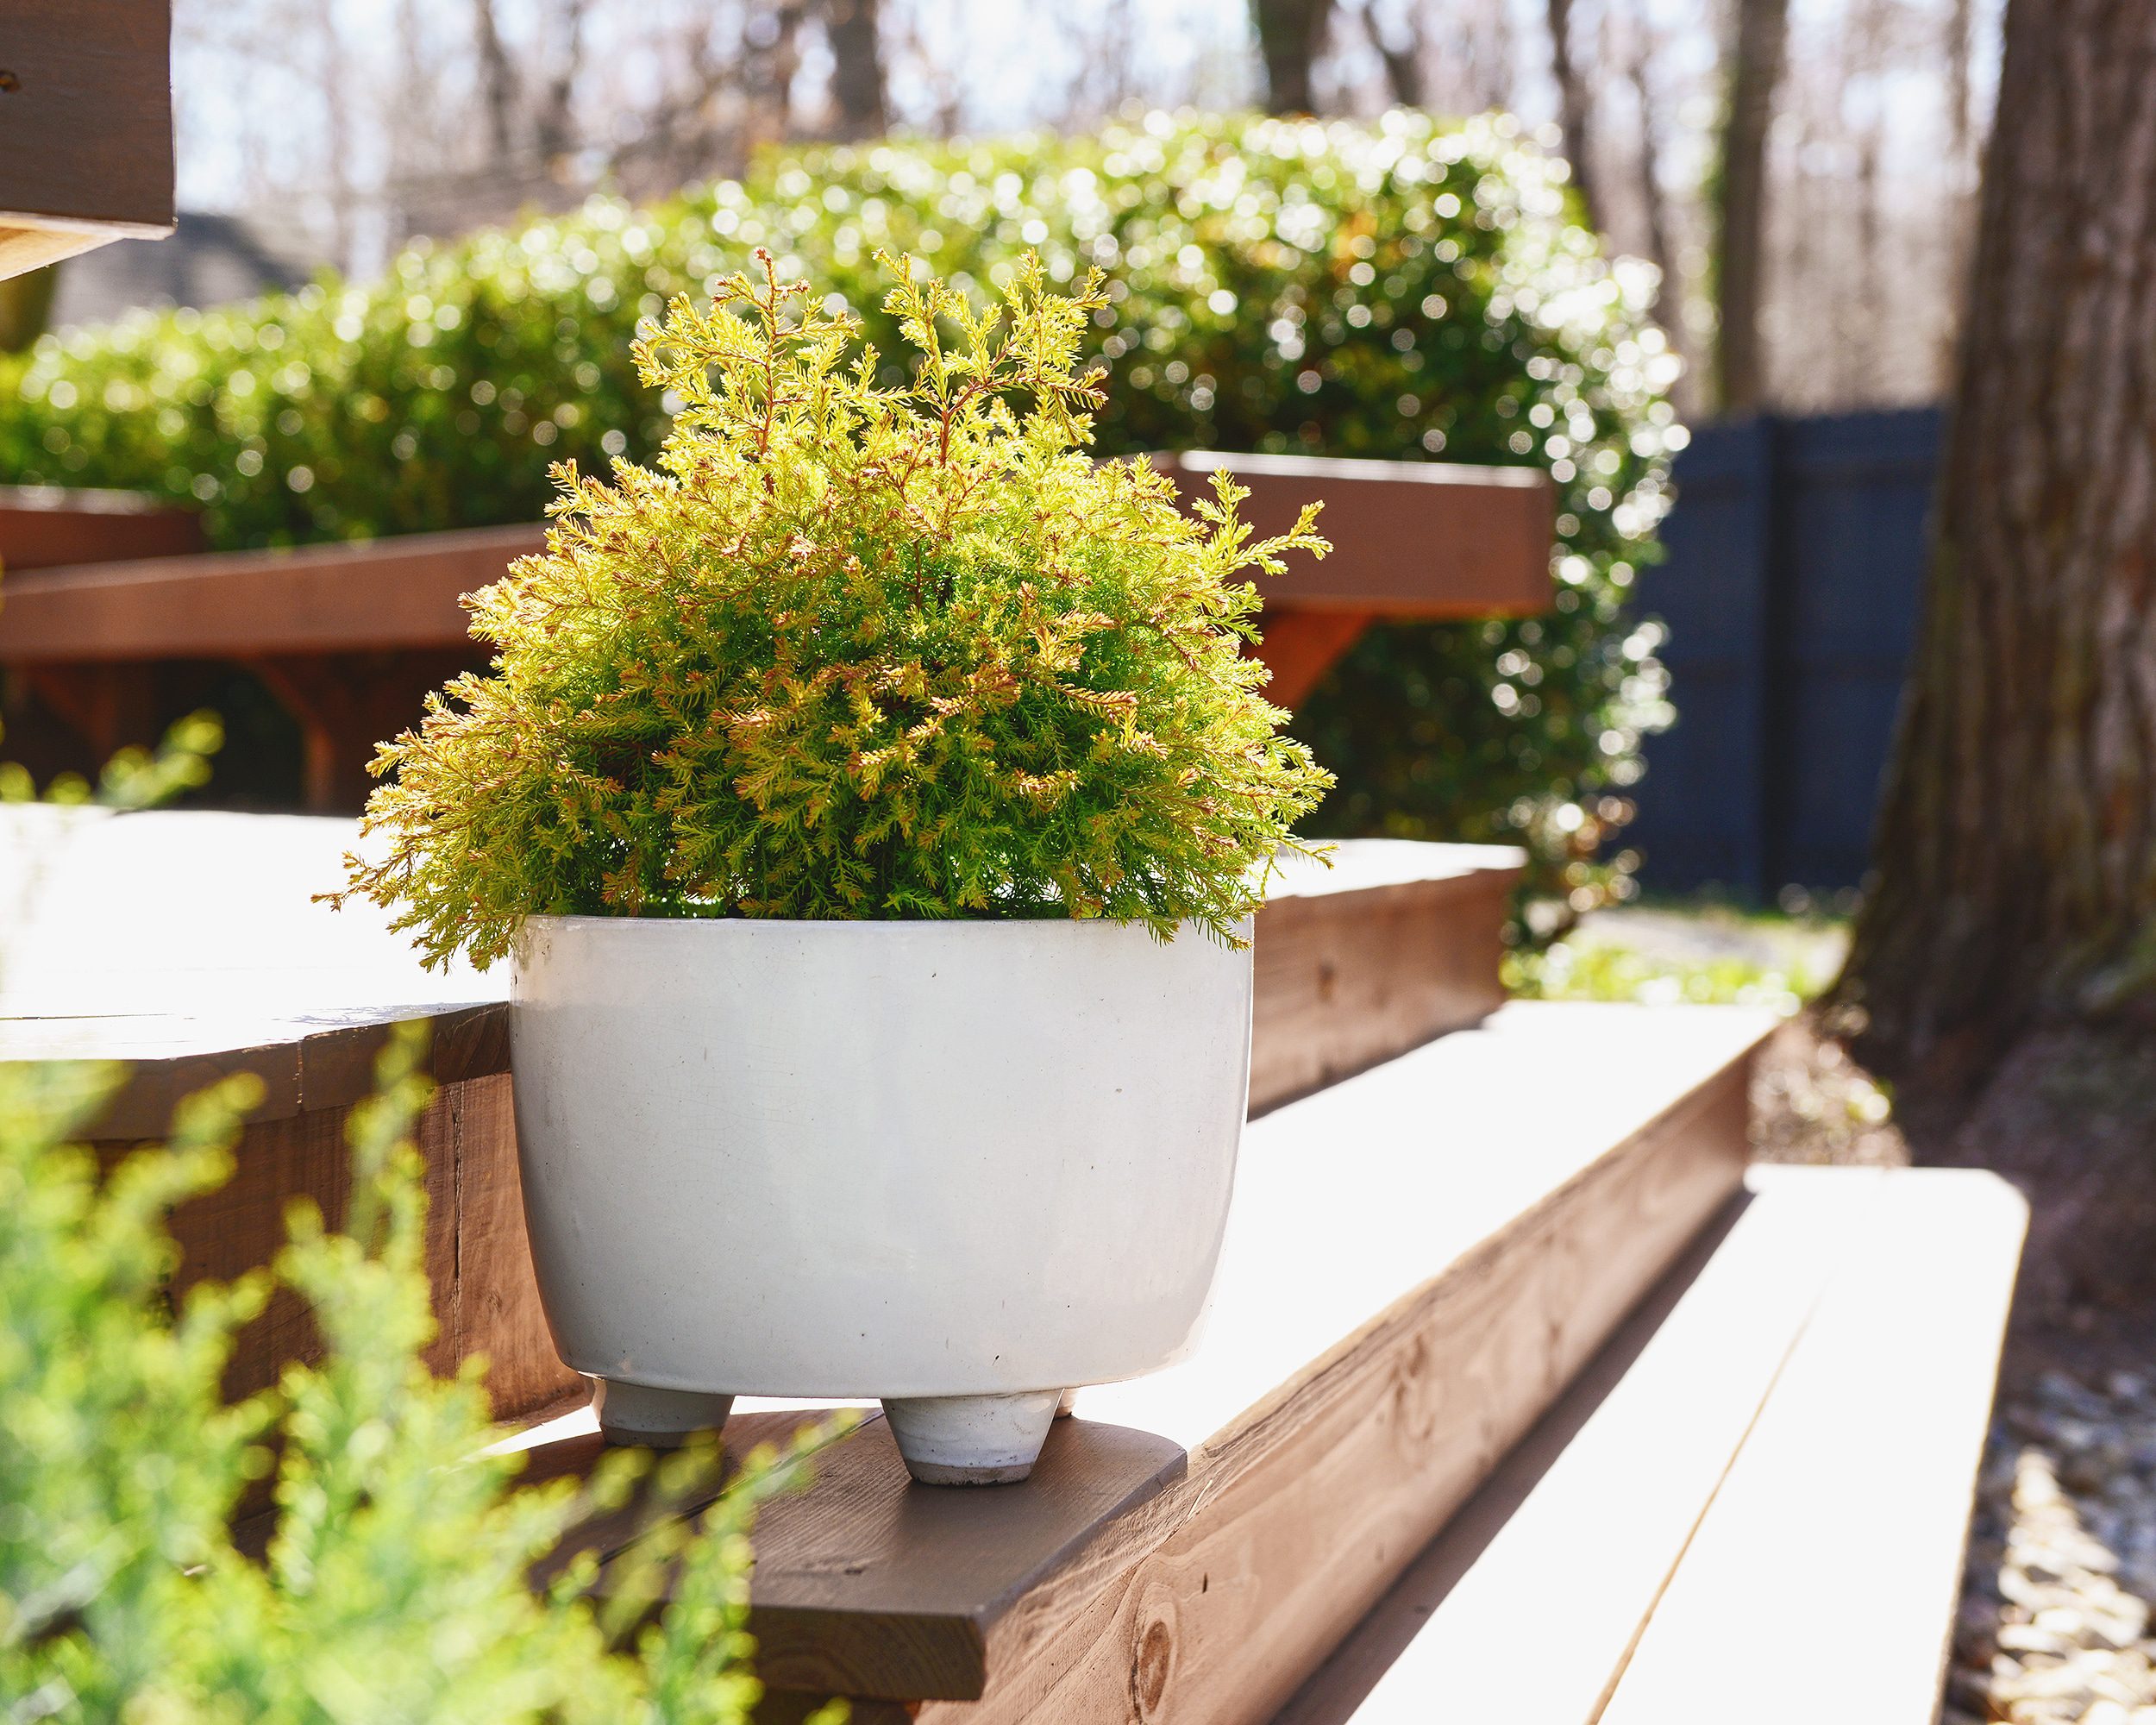
Elsewhere on the deck, we spread more greenery throughout with the addition of potted evergreens. In our upper midwest climate, we’re always sure to look for planters and pots that are weather resistant and/or frost proof to make sure they don’t crack and chip through our harsh winters. As we browsed the options online at Lowe’s, we were on the lookout for planters that were made for outdoor use.
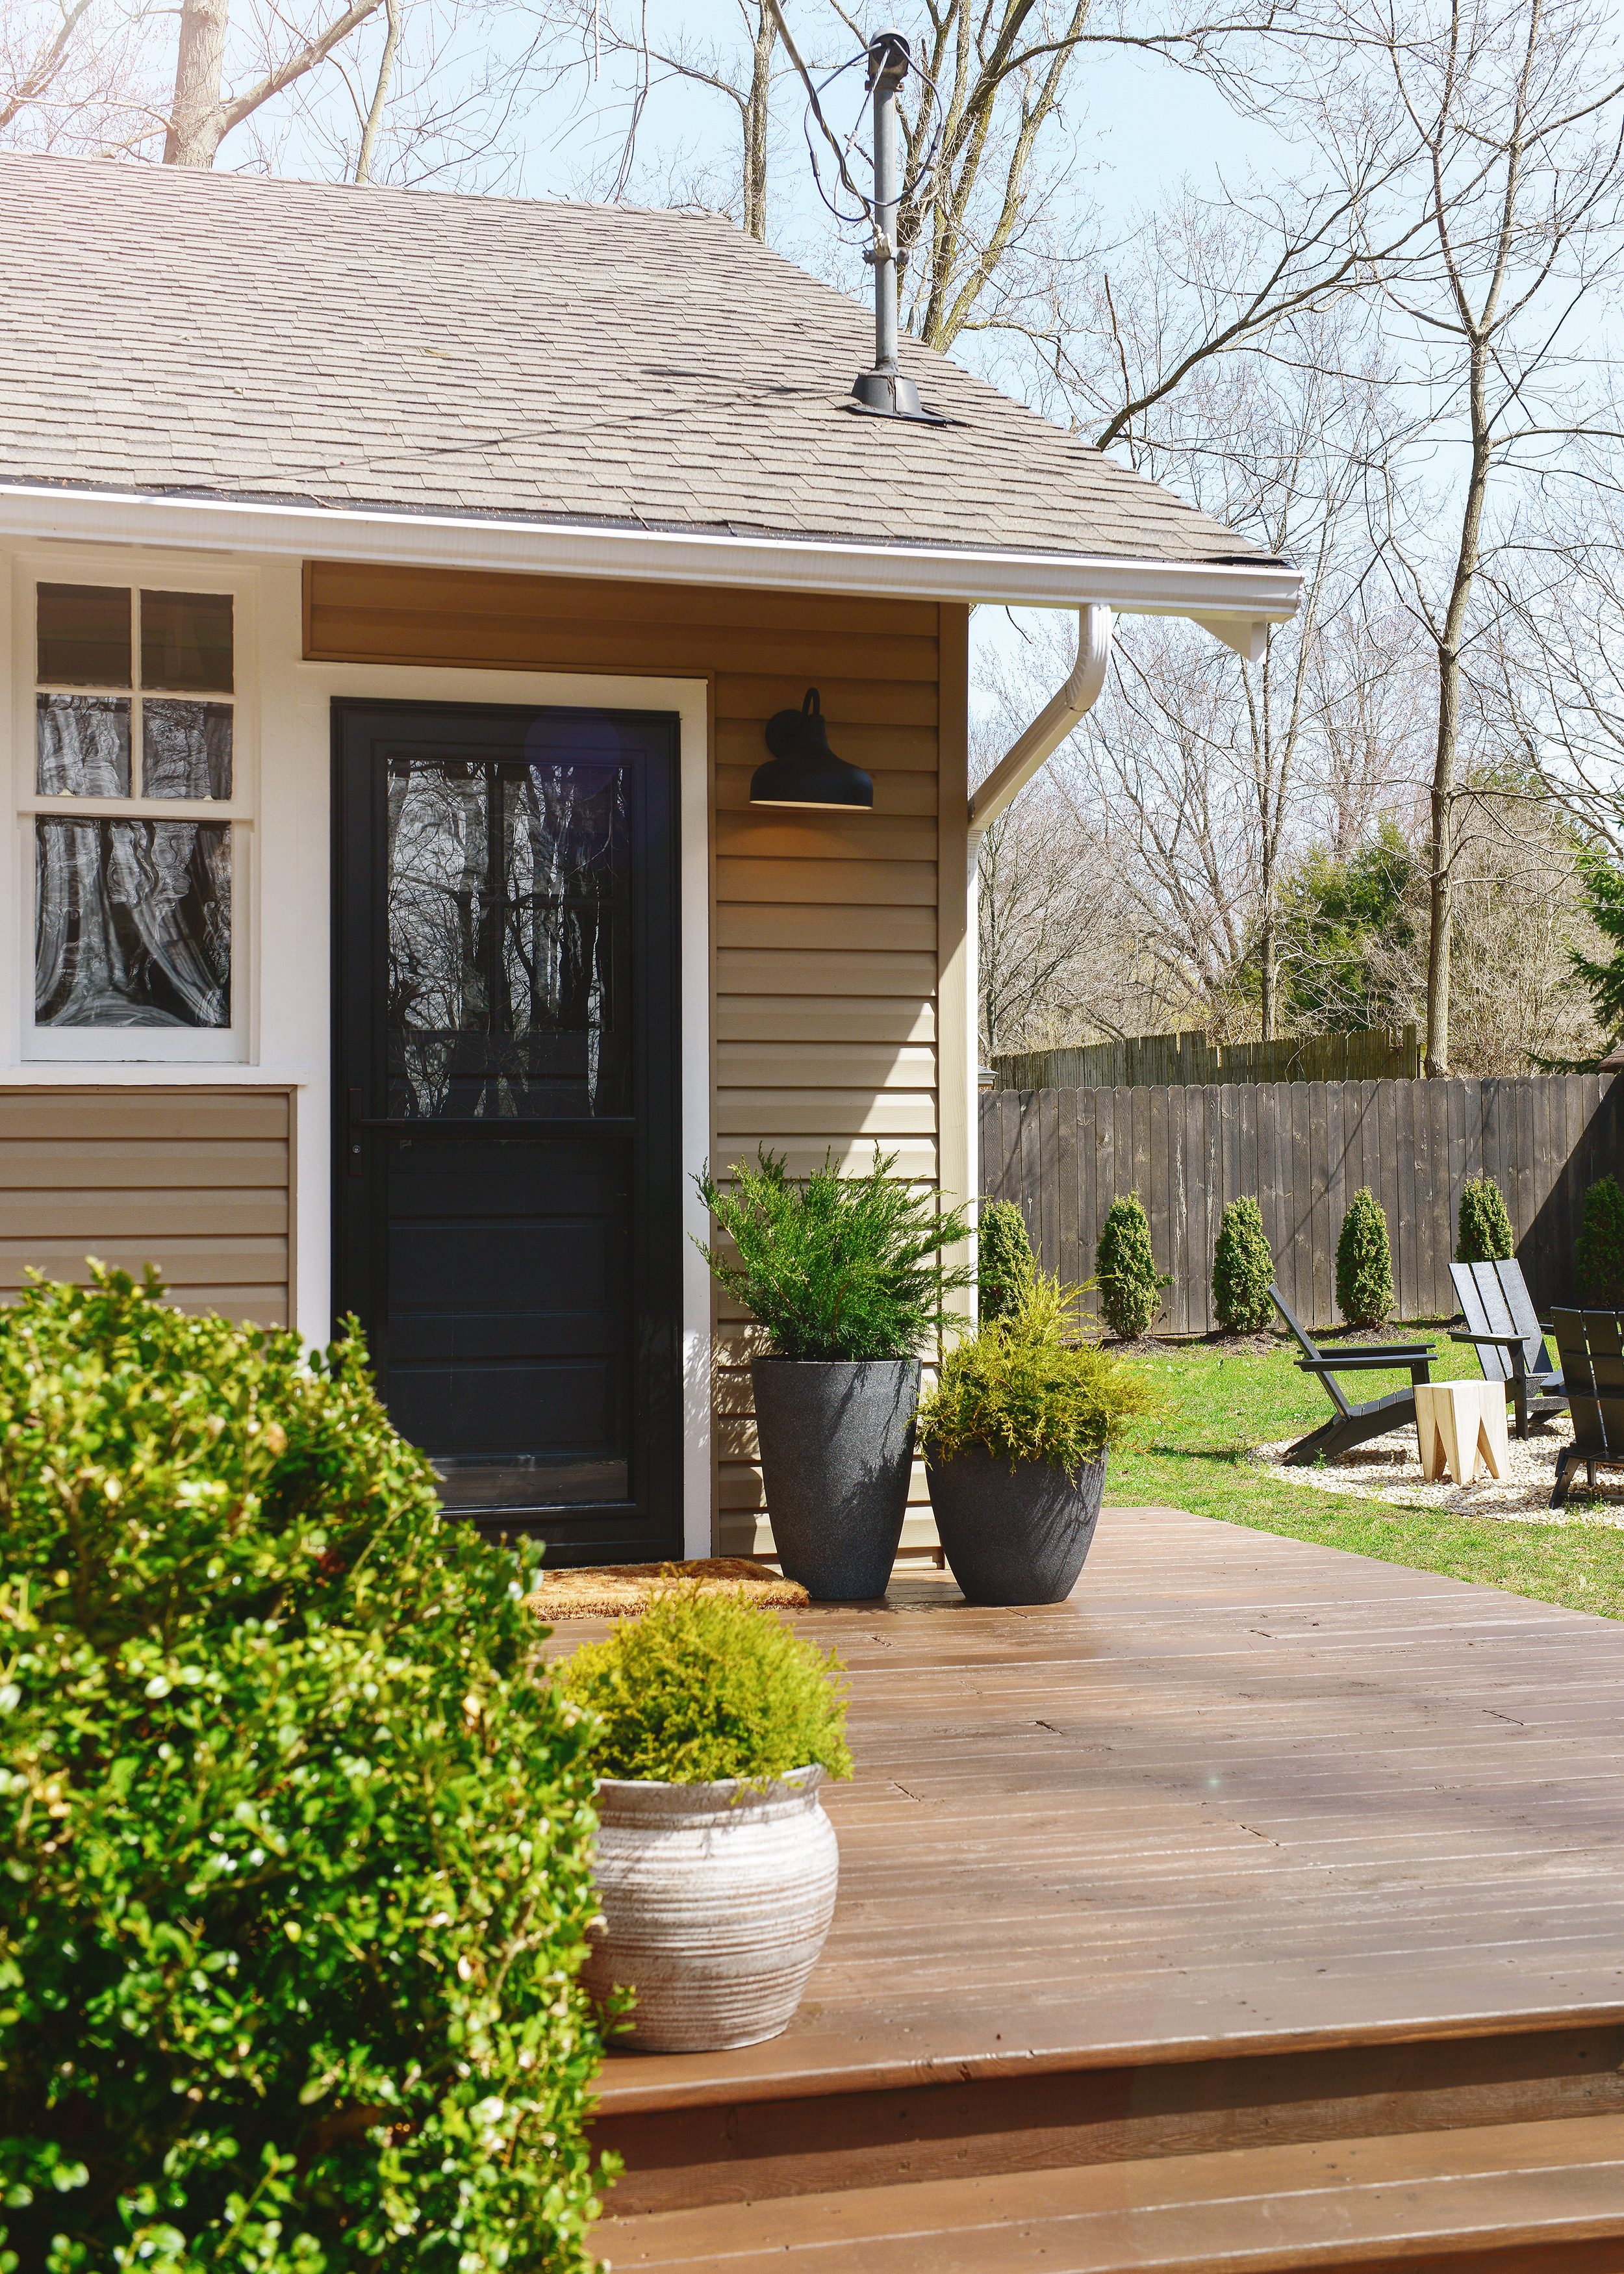
We love the contrast between the whitewashed terracotta pot and the two grey resin planters. From the beginning, we’ve attempted to mix clean, modern lines with natural, earthy textures at Tree House. We think this trio sums up the aesthetic perfectly!
Back up front on the wide staircase, we chose this chunky little guy. The proportions and the little stubby feet remind us of CC somehow. Is it weird to compare a planter to your dog?
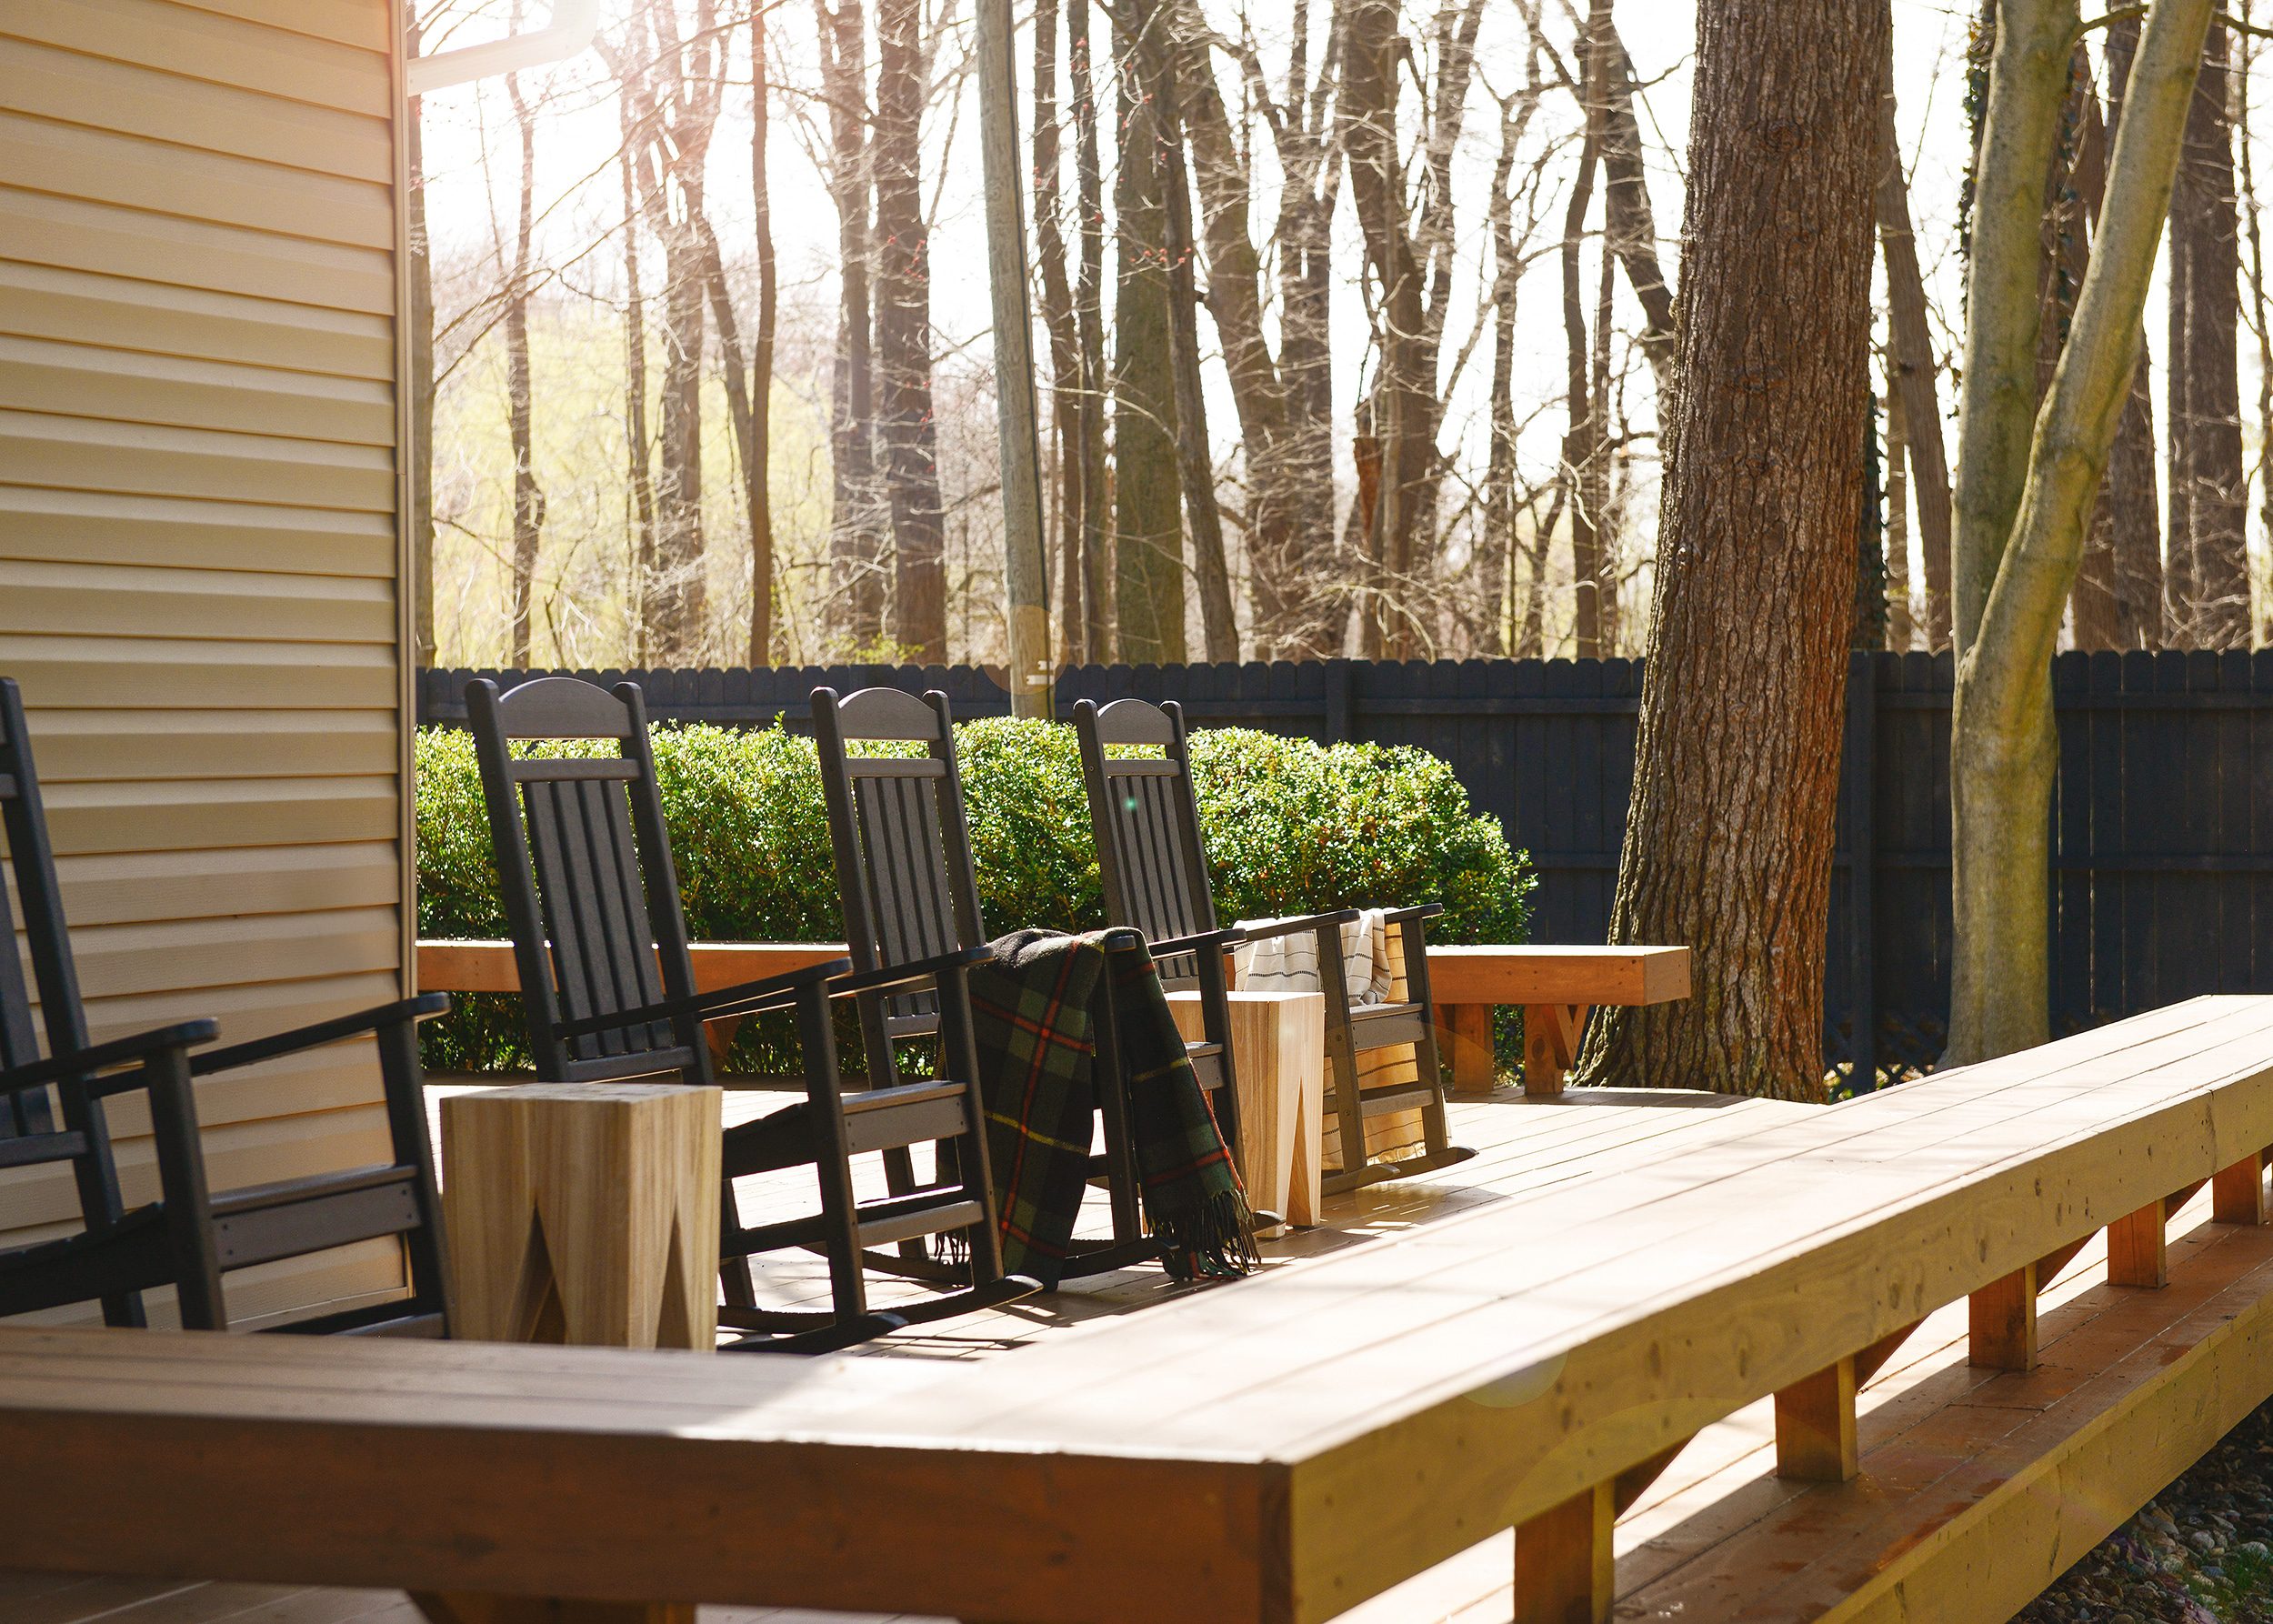
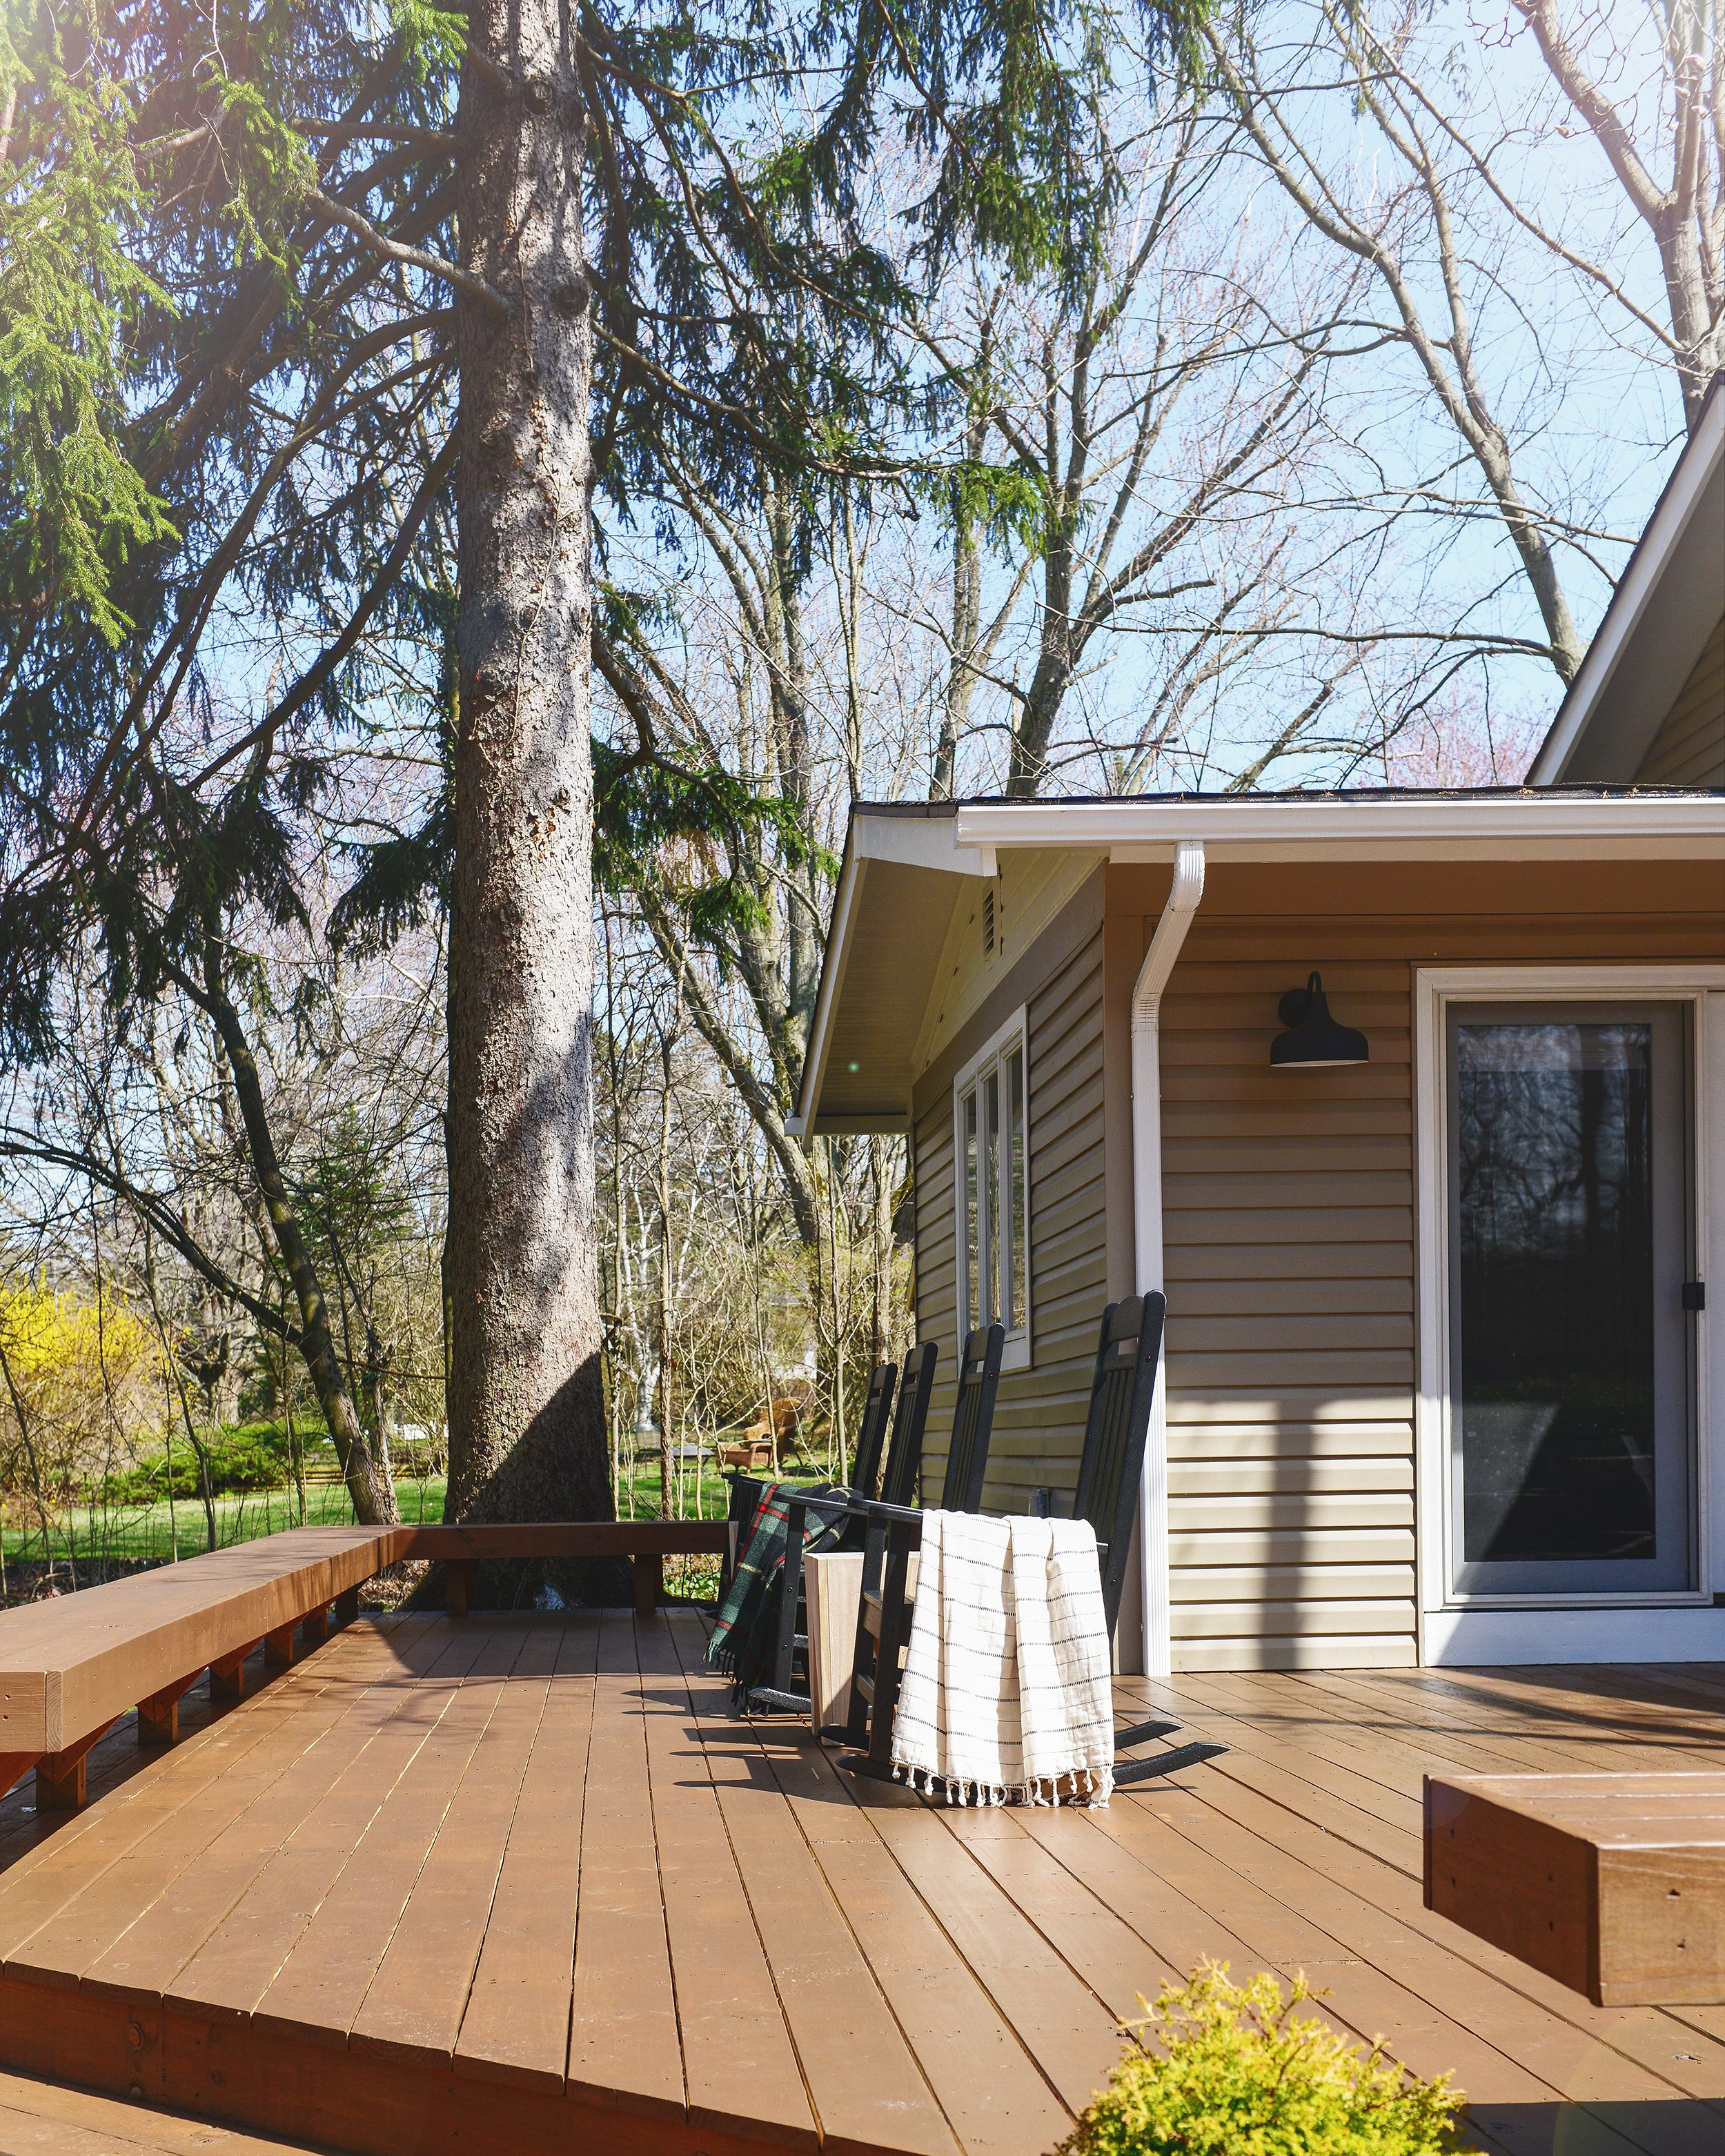
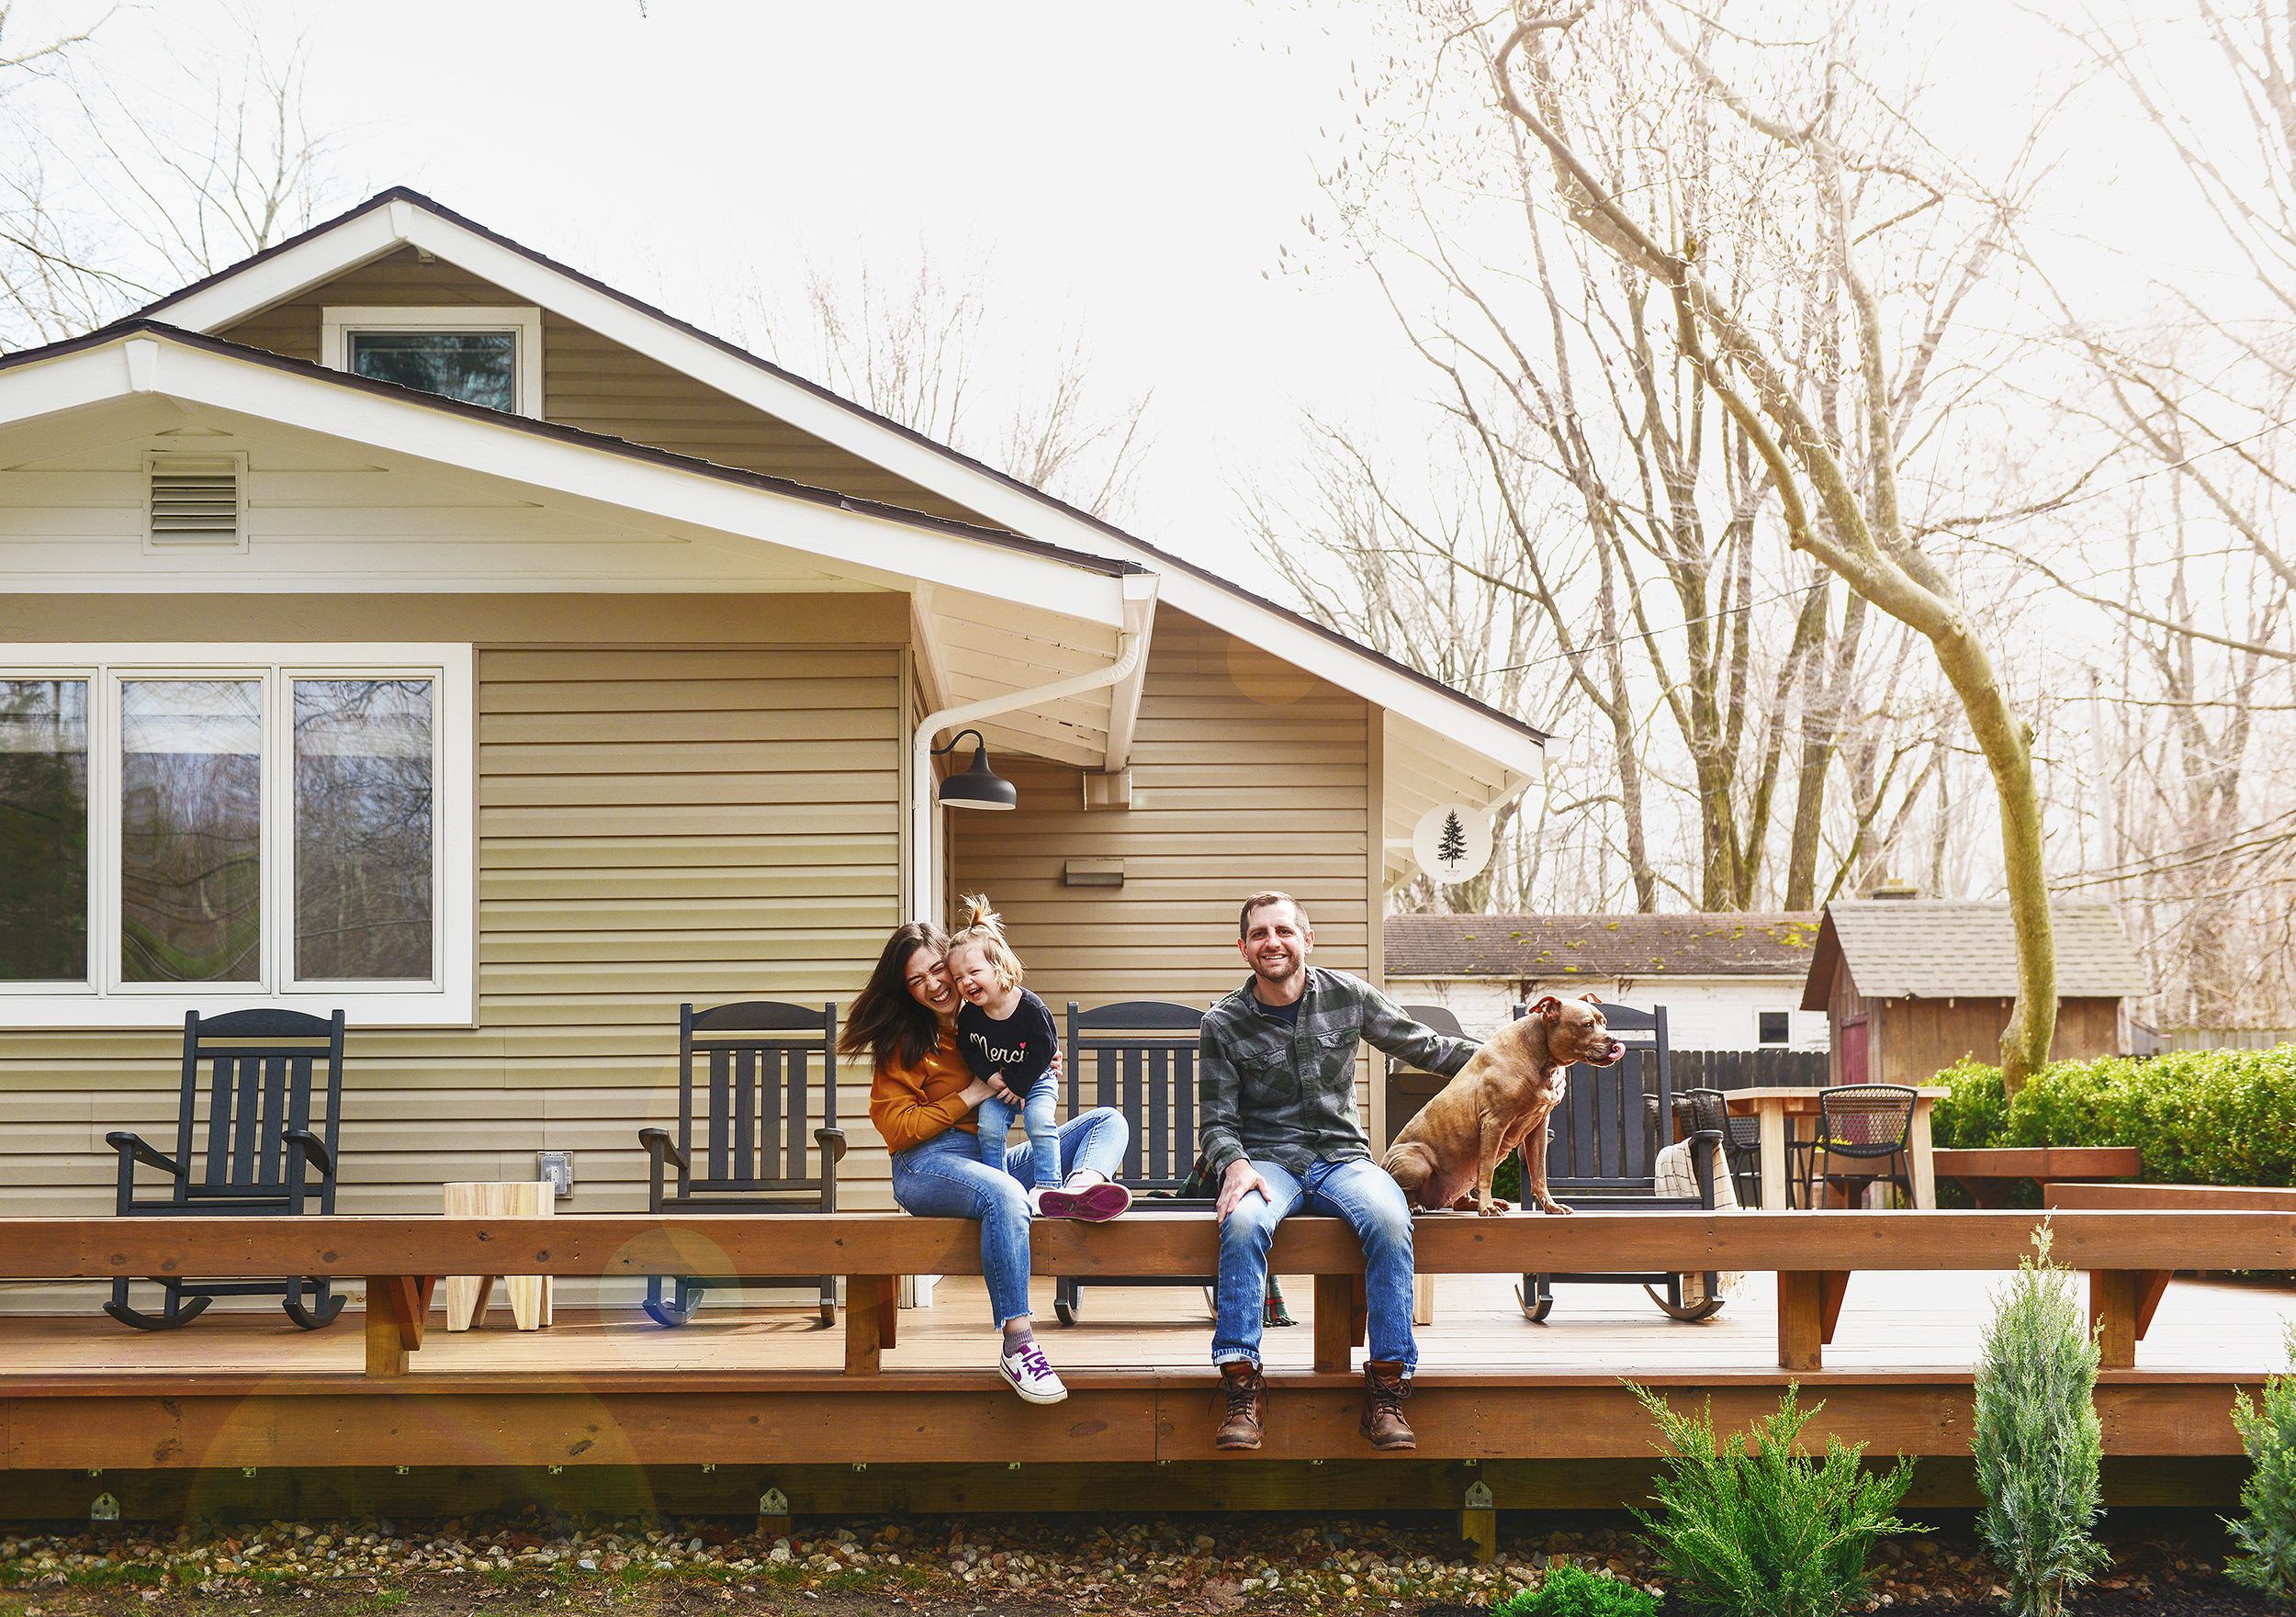
These built-in benches were one of the best additions we made to the deck extension. They’re incredibly sturdy and Lucy absolutely loves climbing all over them!
Lots and Lots of Seating!
One thing that was seriously lacking in the layout of the old deck was a place to sit. Like, at all. There was no seating. We remedied this challenge with built-in benches that line nearly the entire front and side portion of the deck!
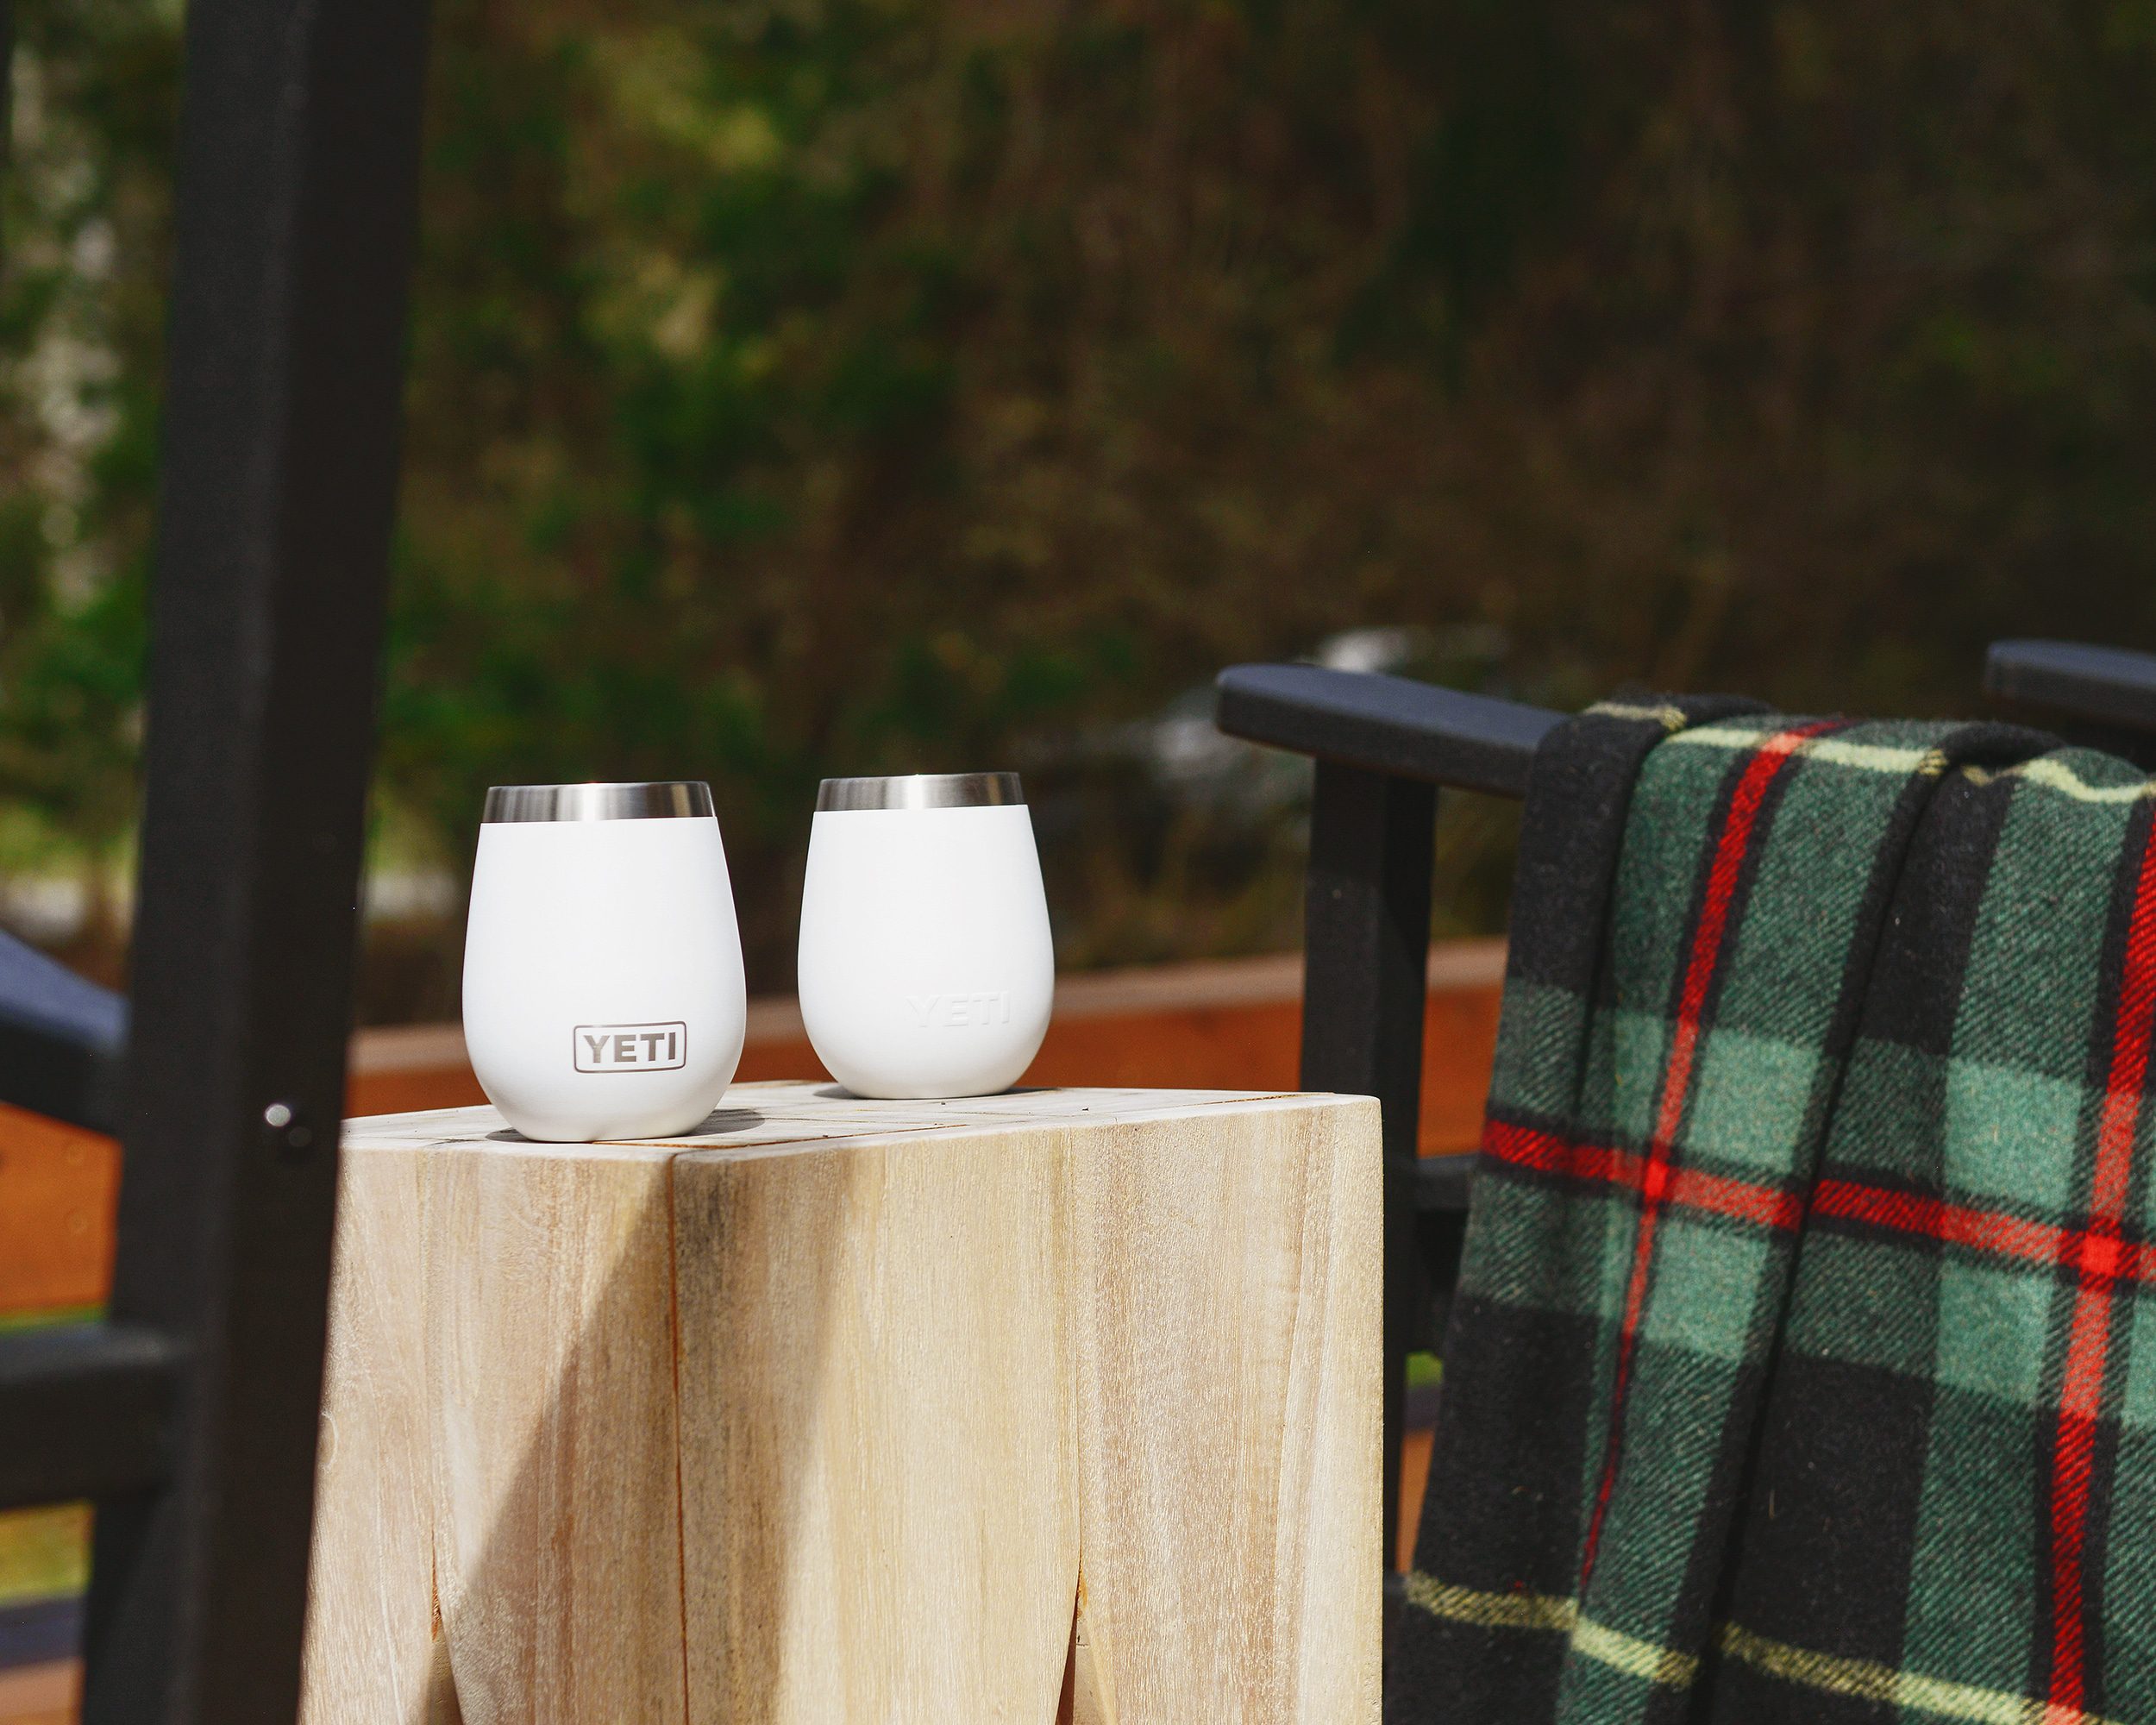
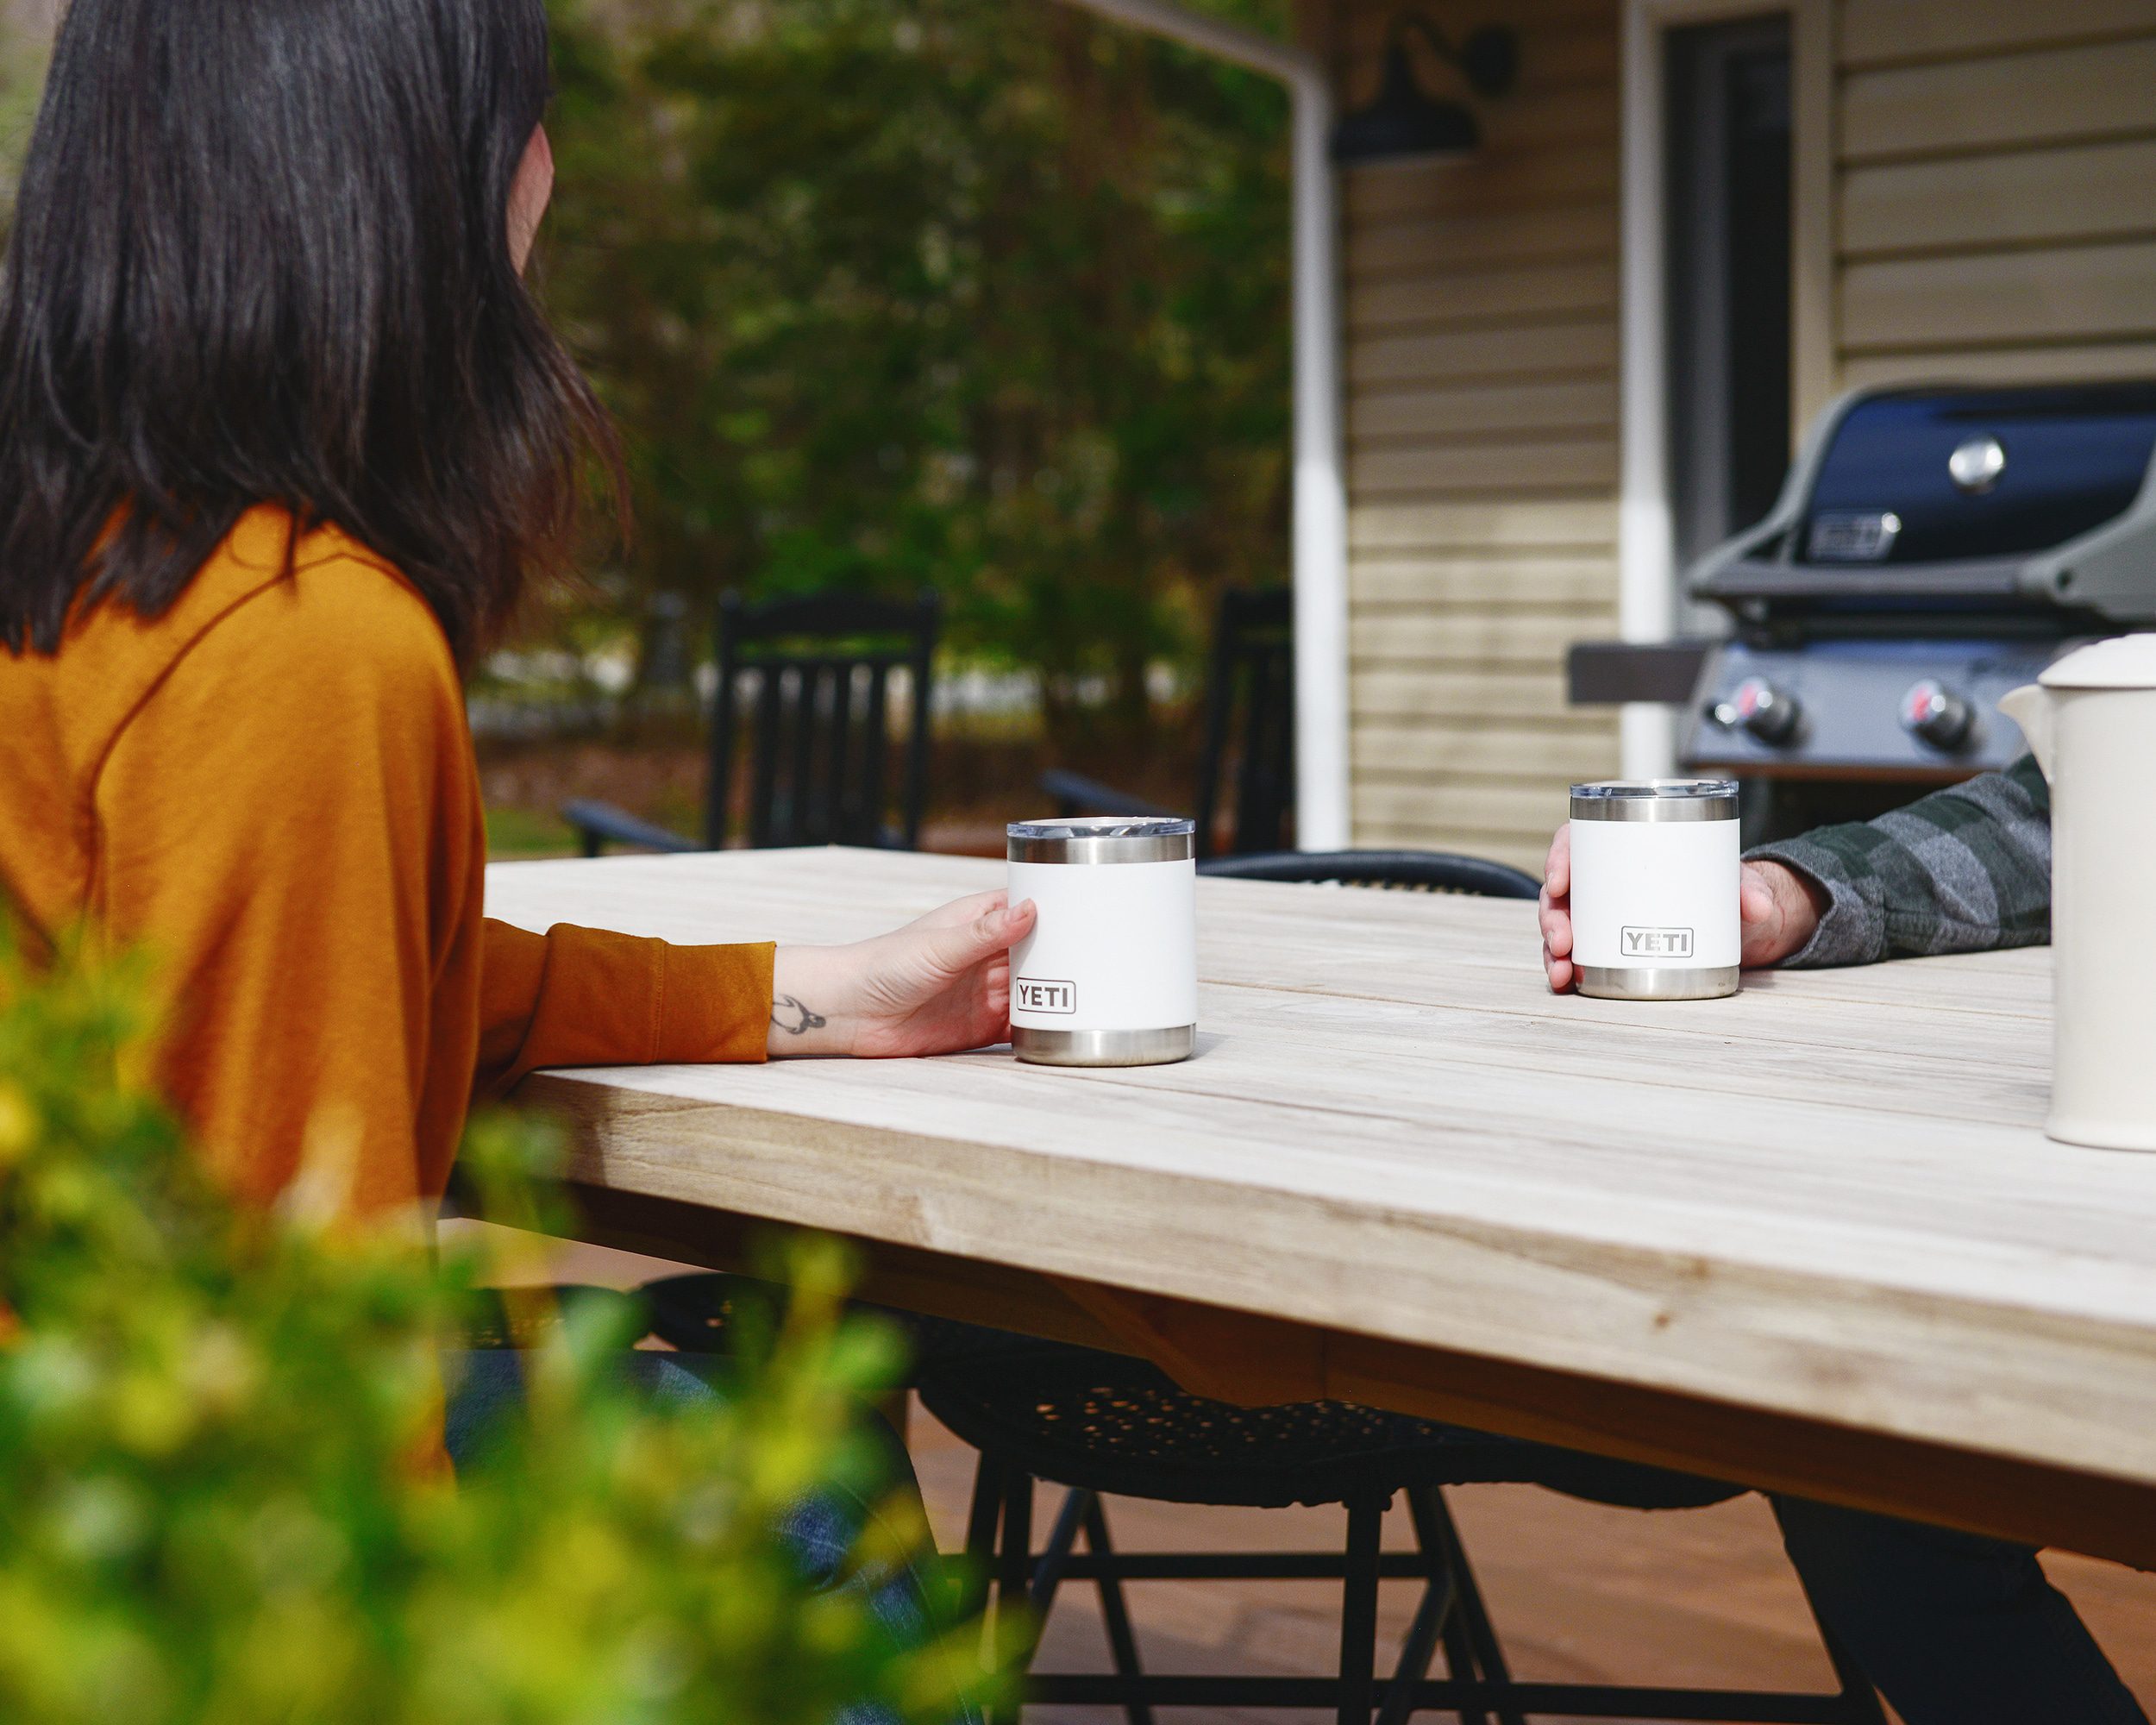
We also added four of these Polywood rocking chairs that are the absolute perfect perch to enjoy a glass of wine from our new stainless YETI tumblers!
Yes, Lowe’s sells YETI! If you’ve been following for awhile, you might be aware of our love for the YETI Rambler line of mugs and tumblers. (I use this one every. single. day!) Although we chose white to keep within our Tree House color scheme, they’re available in several colors – from black to navy, even seafoam, coral and citron (for those fuzzy spring feelings)! To say we were excited to learn that YETI products are now available at Lowe’s was the understatement of the year, haha.
Dining Al Fresco
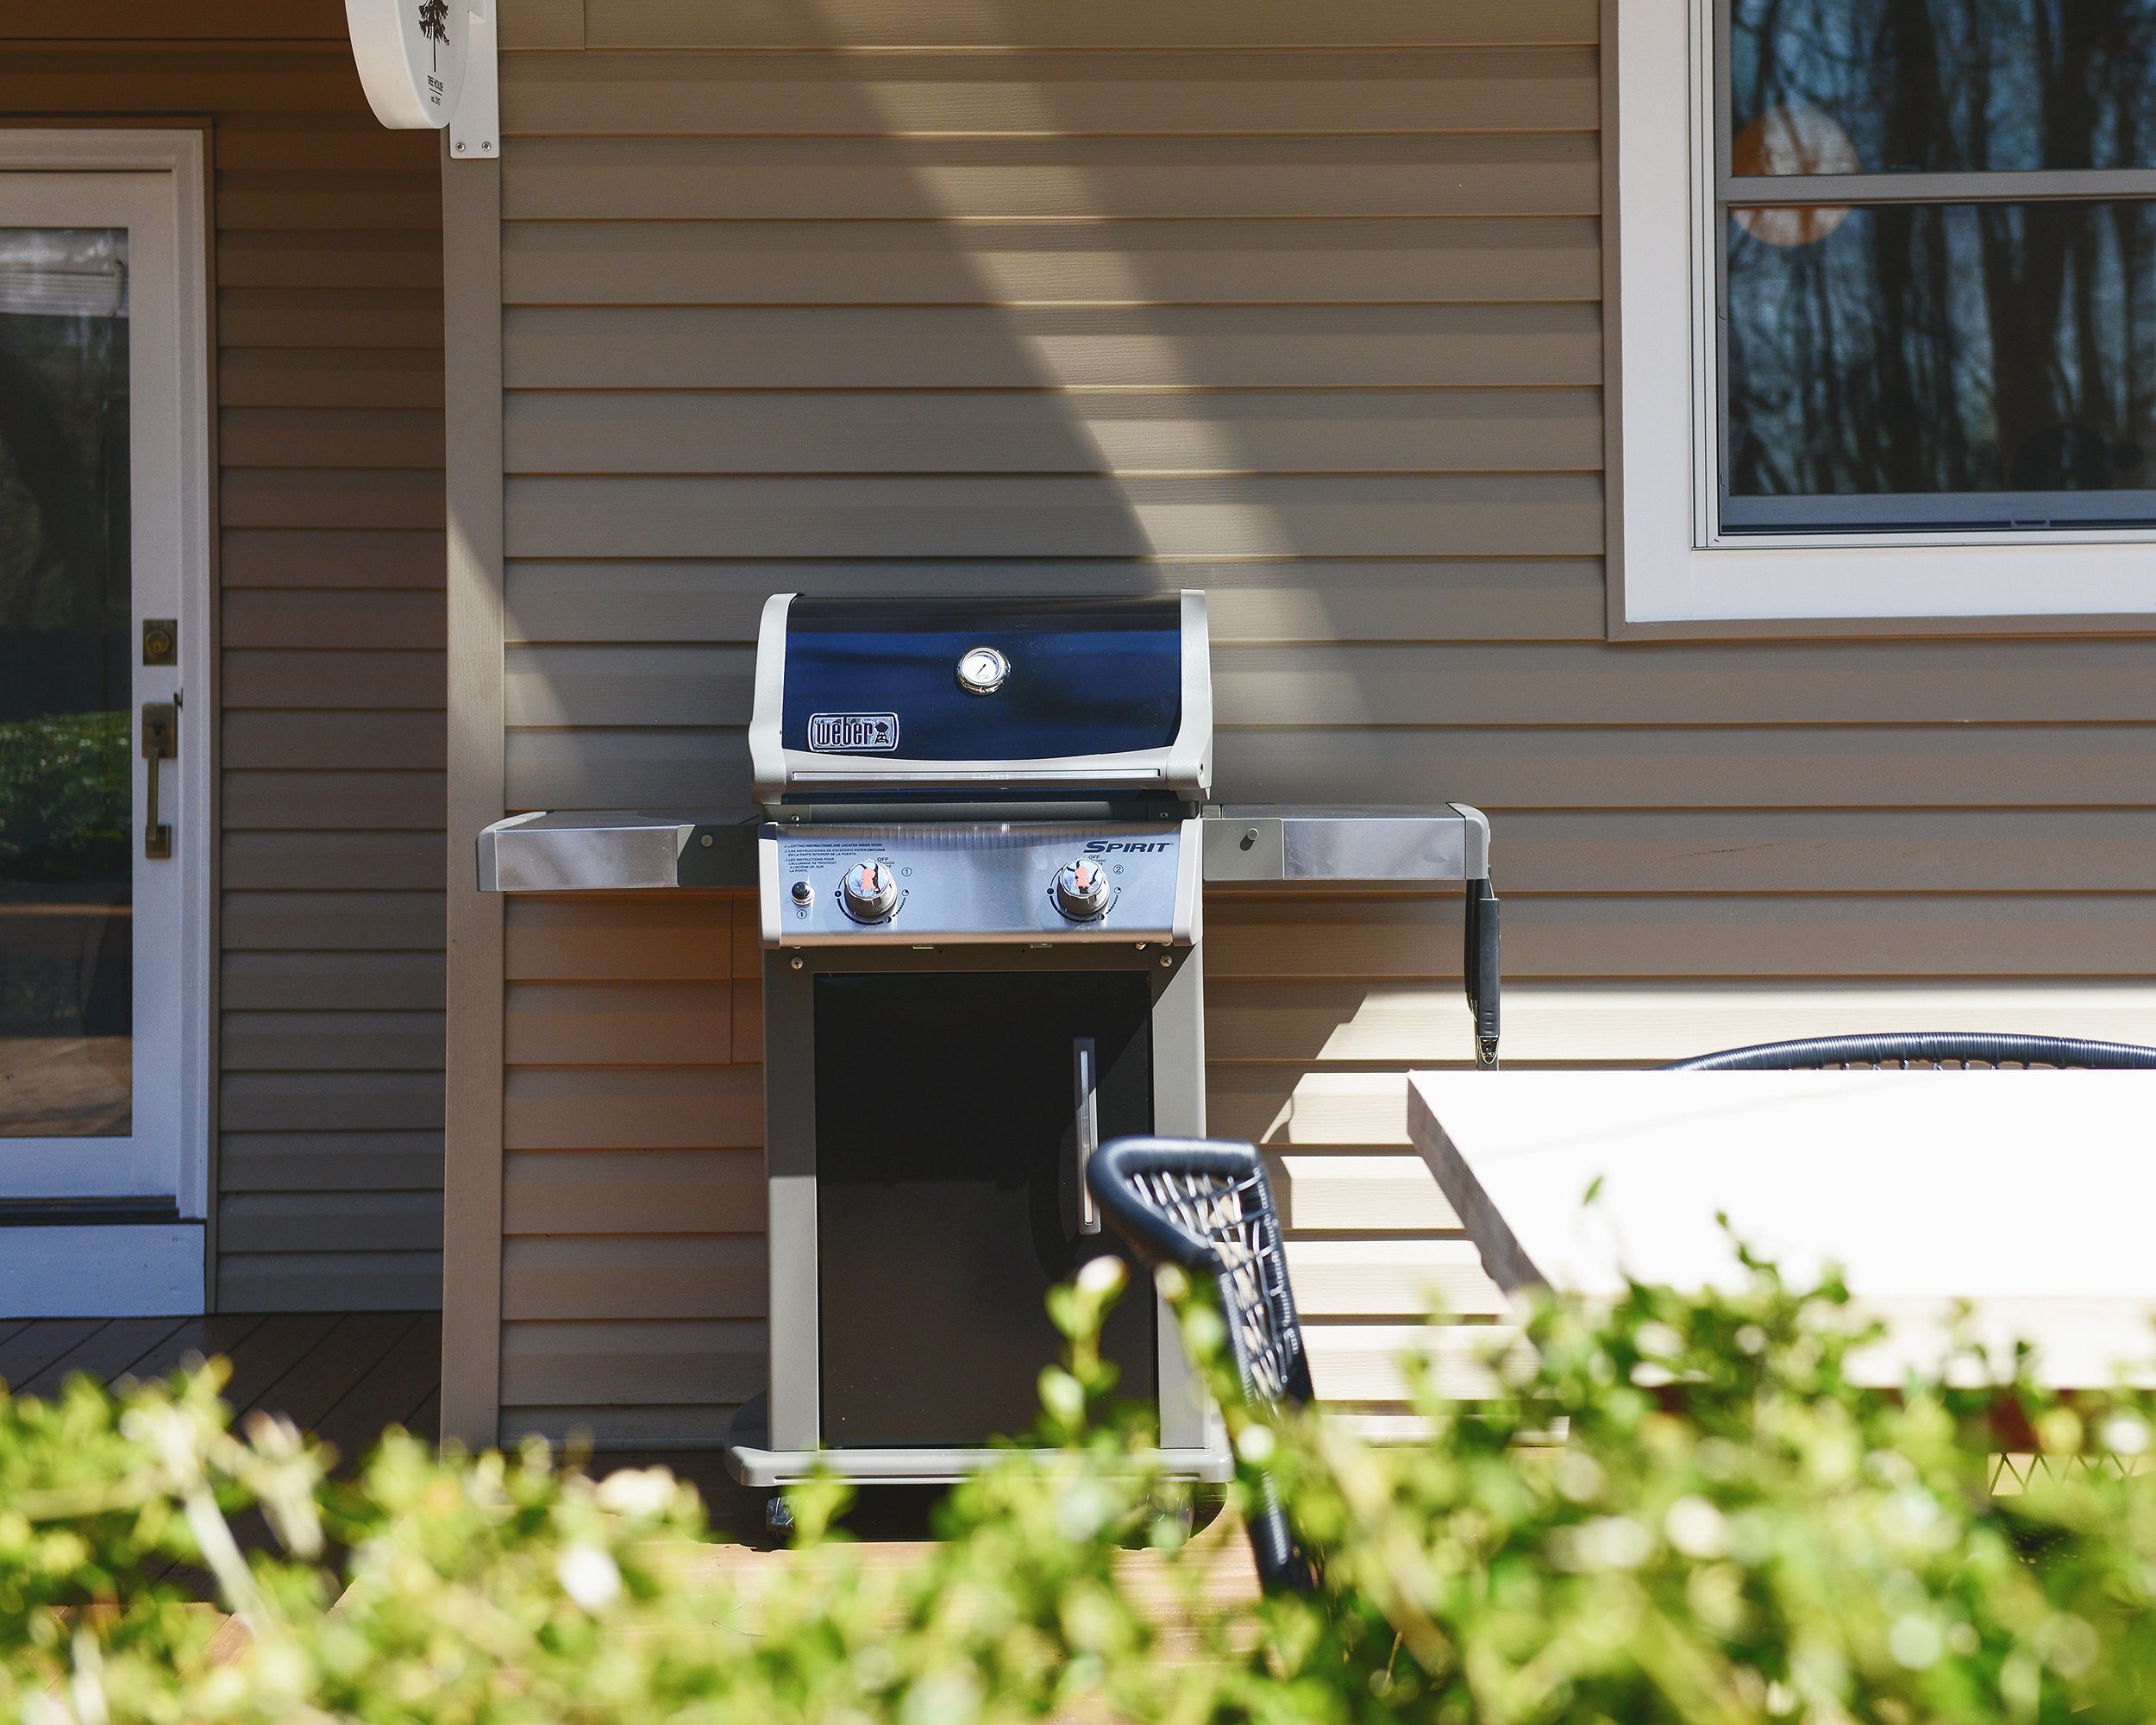
From the beginning of this project last fall, the main motivator behind expanding the deck was to allow us to spend more time outside… and what better way to spend time outside than by cooking and eating al fresco?! We own this exact same Weber Spirit grill at our home in Chicago and we love it so much that we decided to get another one for our home in Michigan!
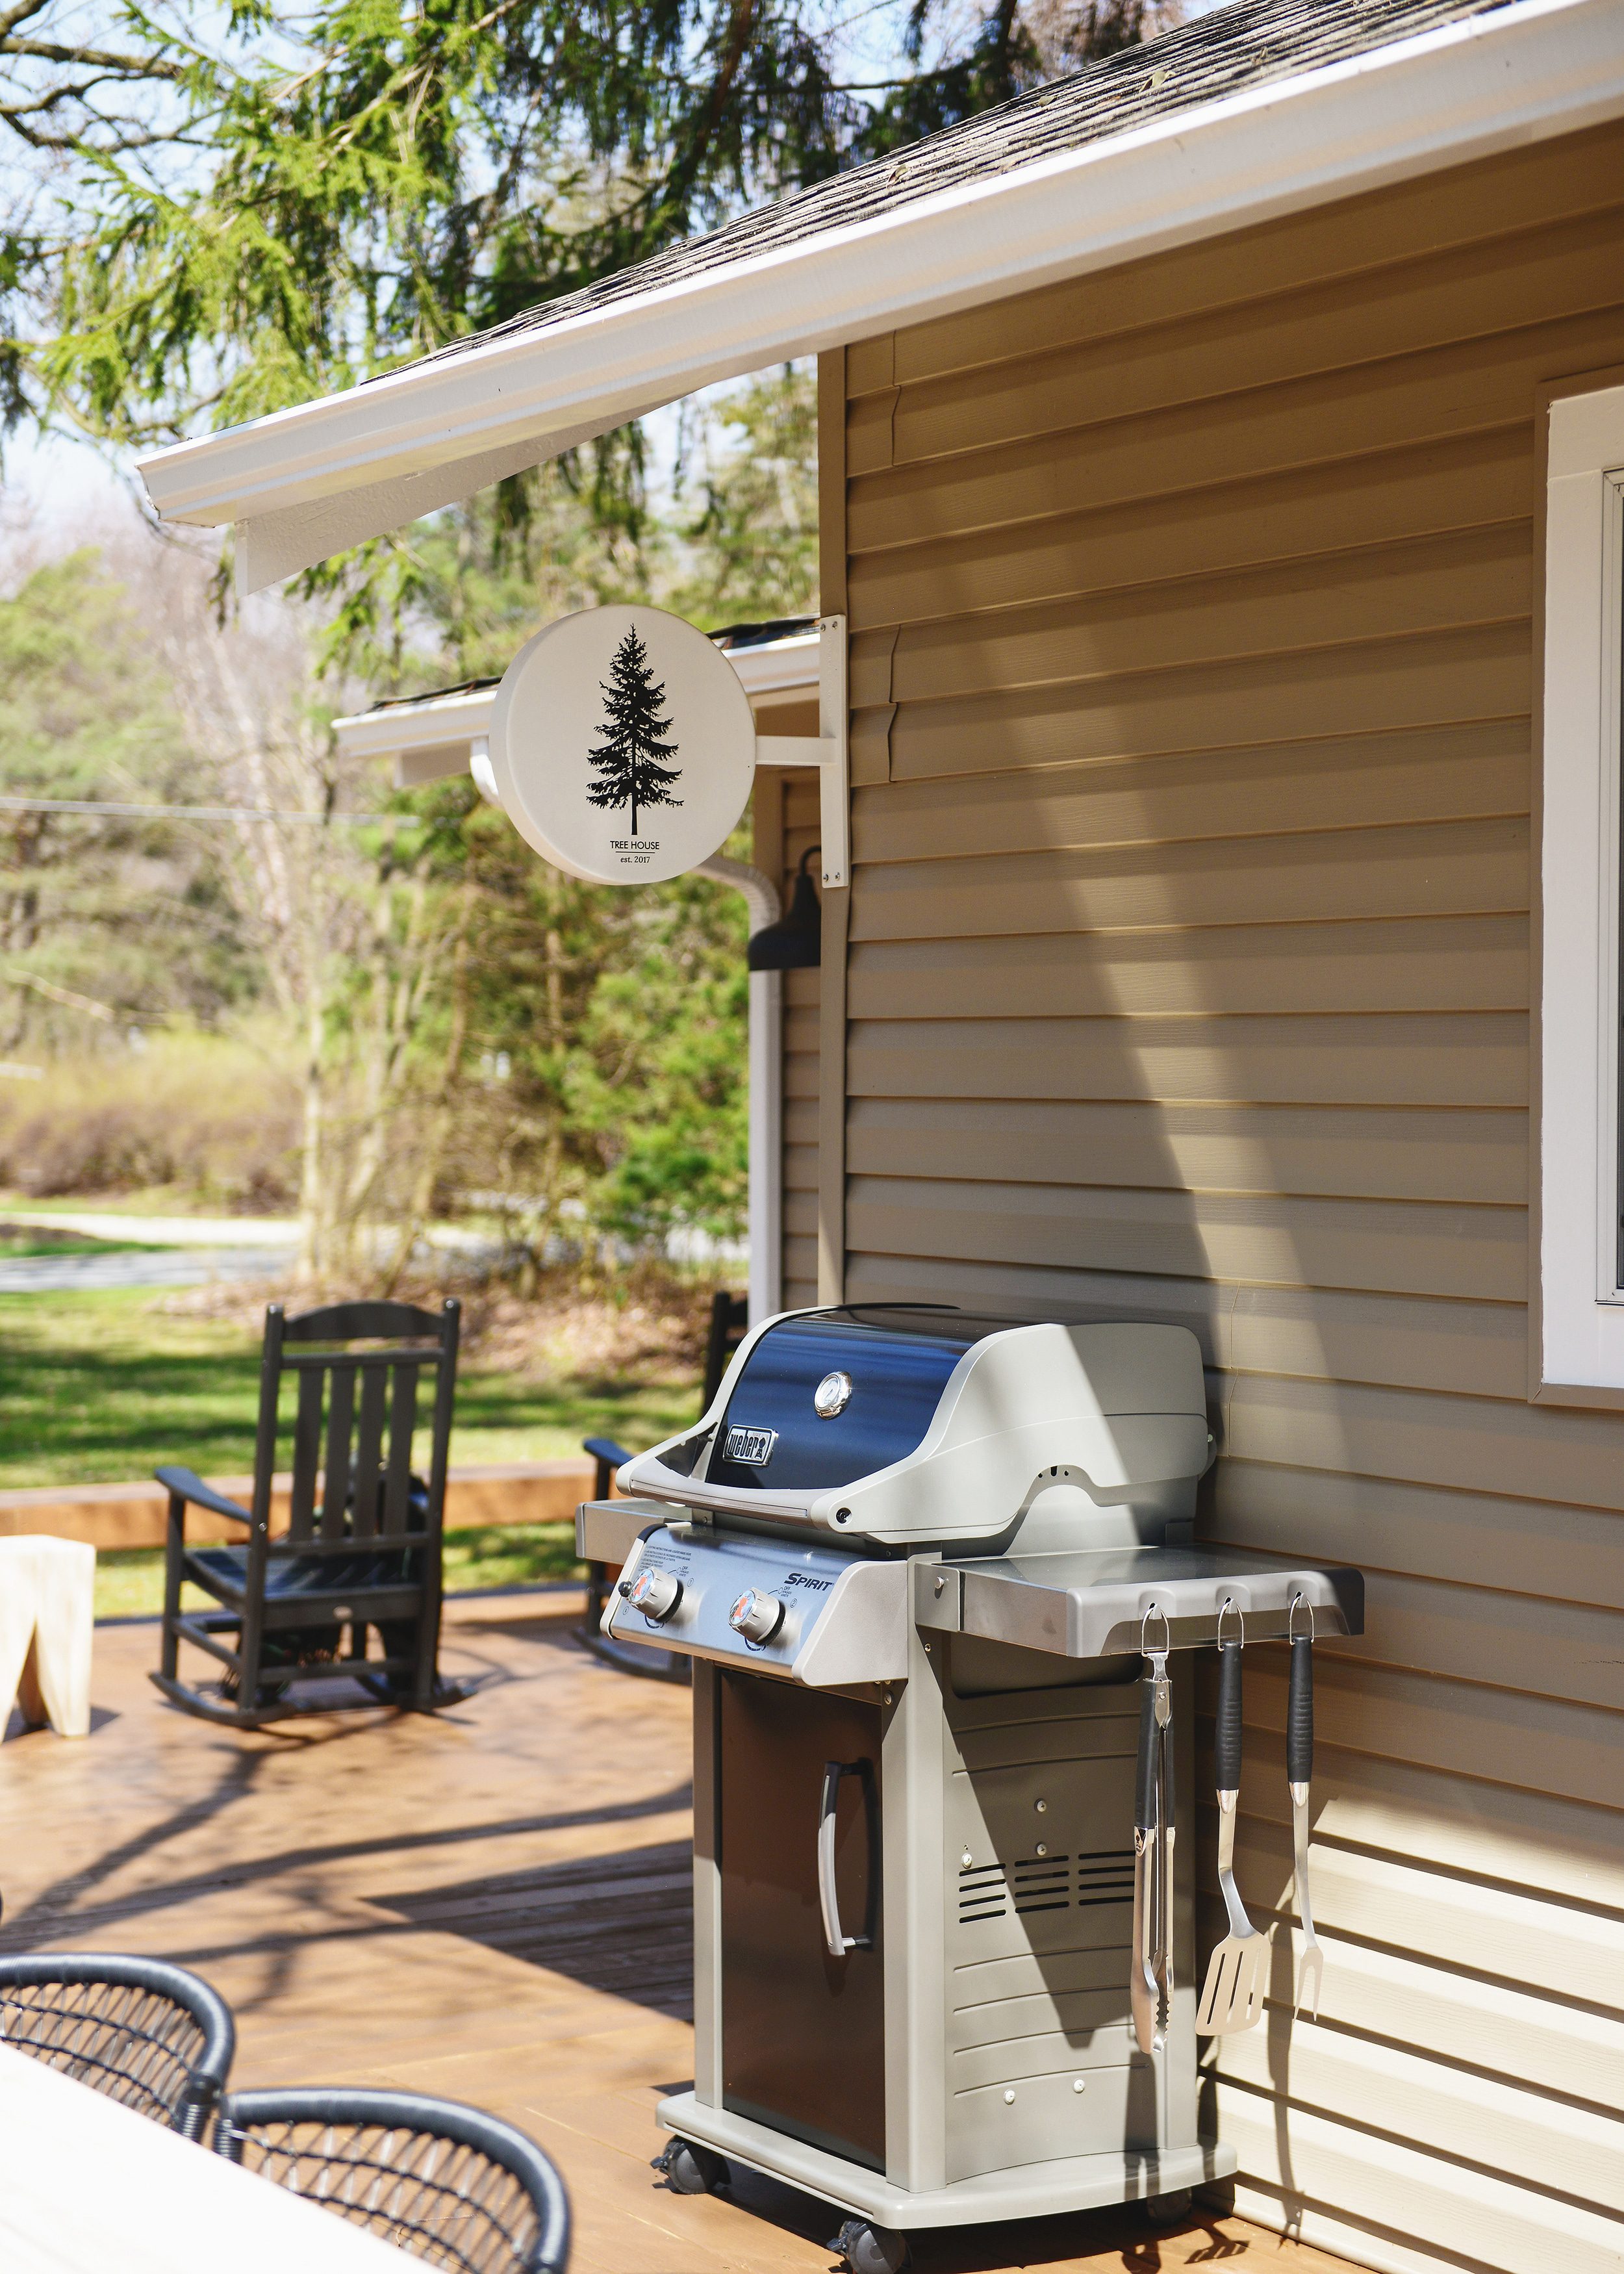
We’ve been very impressed by the compact size that still allows for enough grilling surface to feed a small army. There are also multiple hooks on the folding stainless steel tables that allow for convenient hanging storage of all essential grill tools!
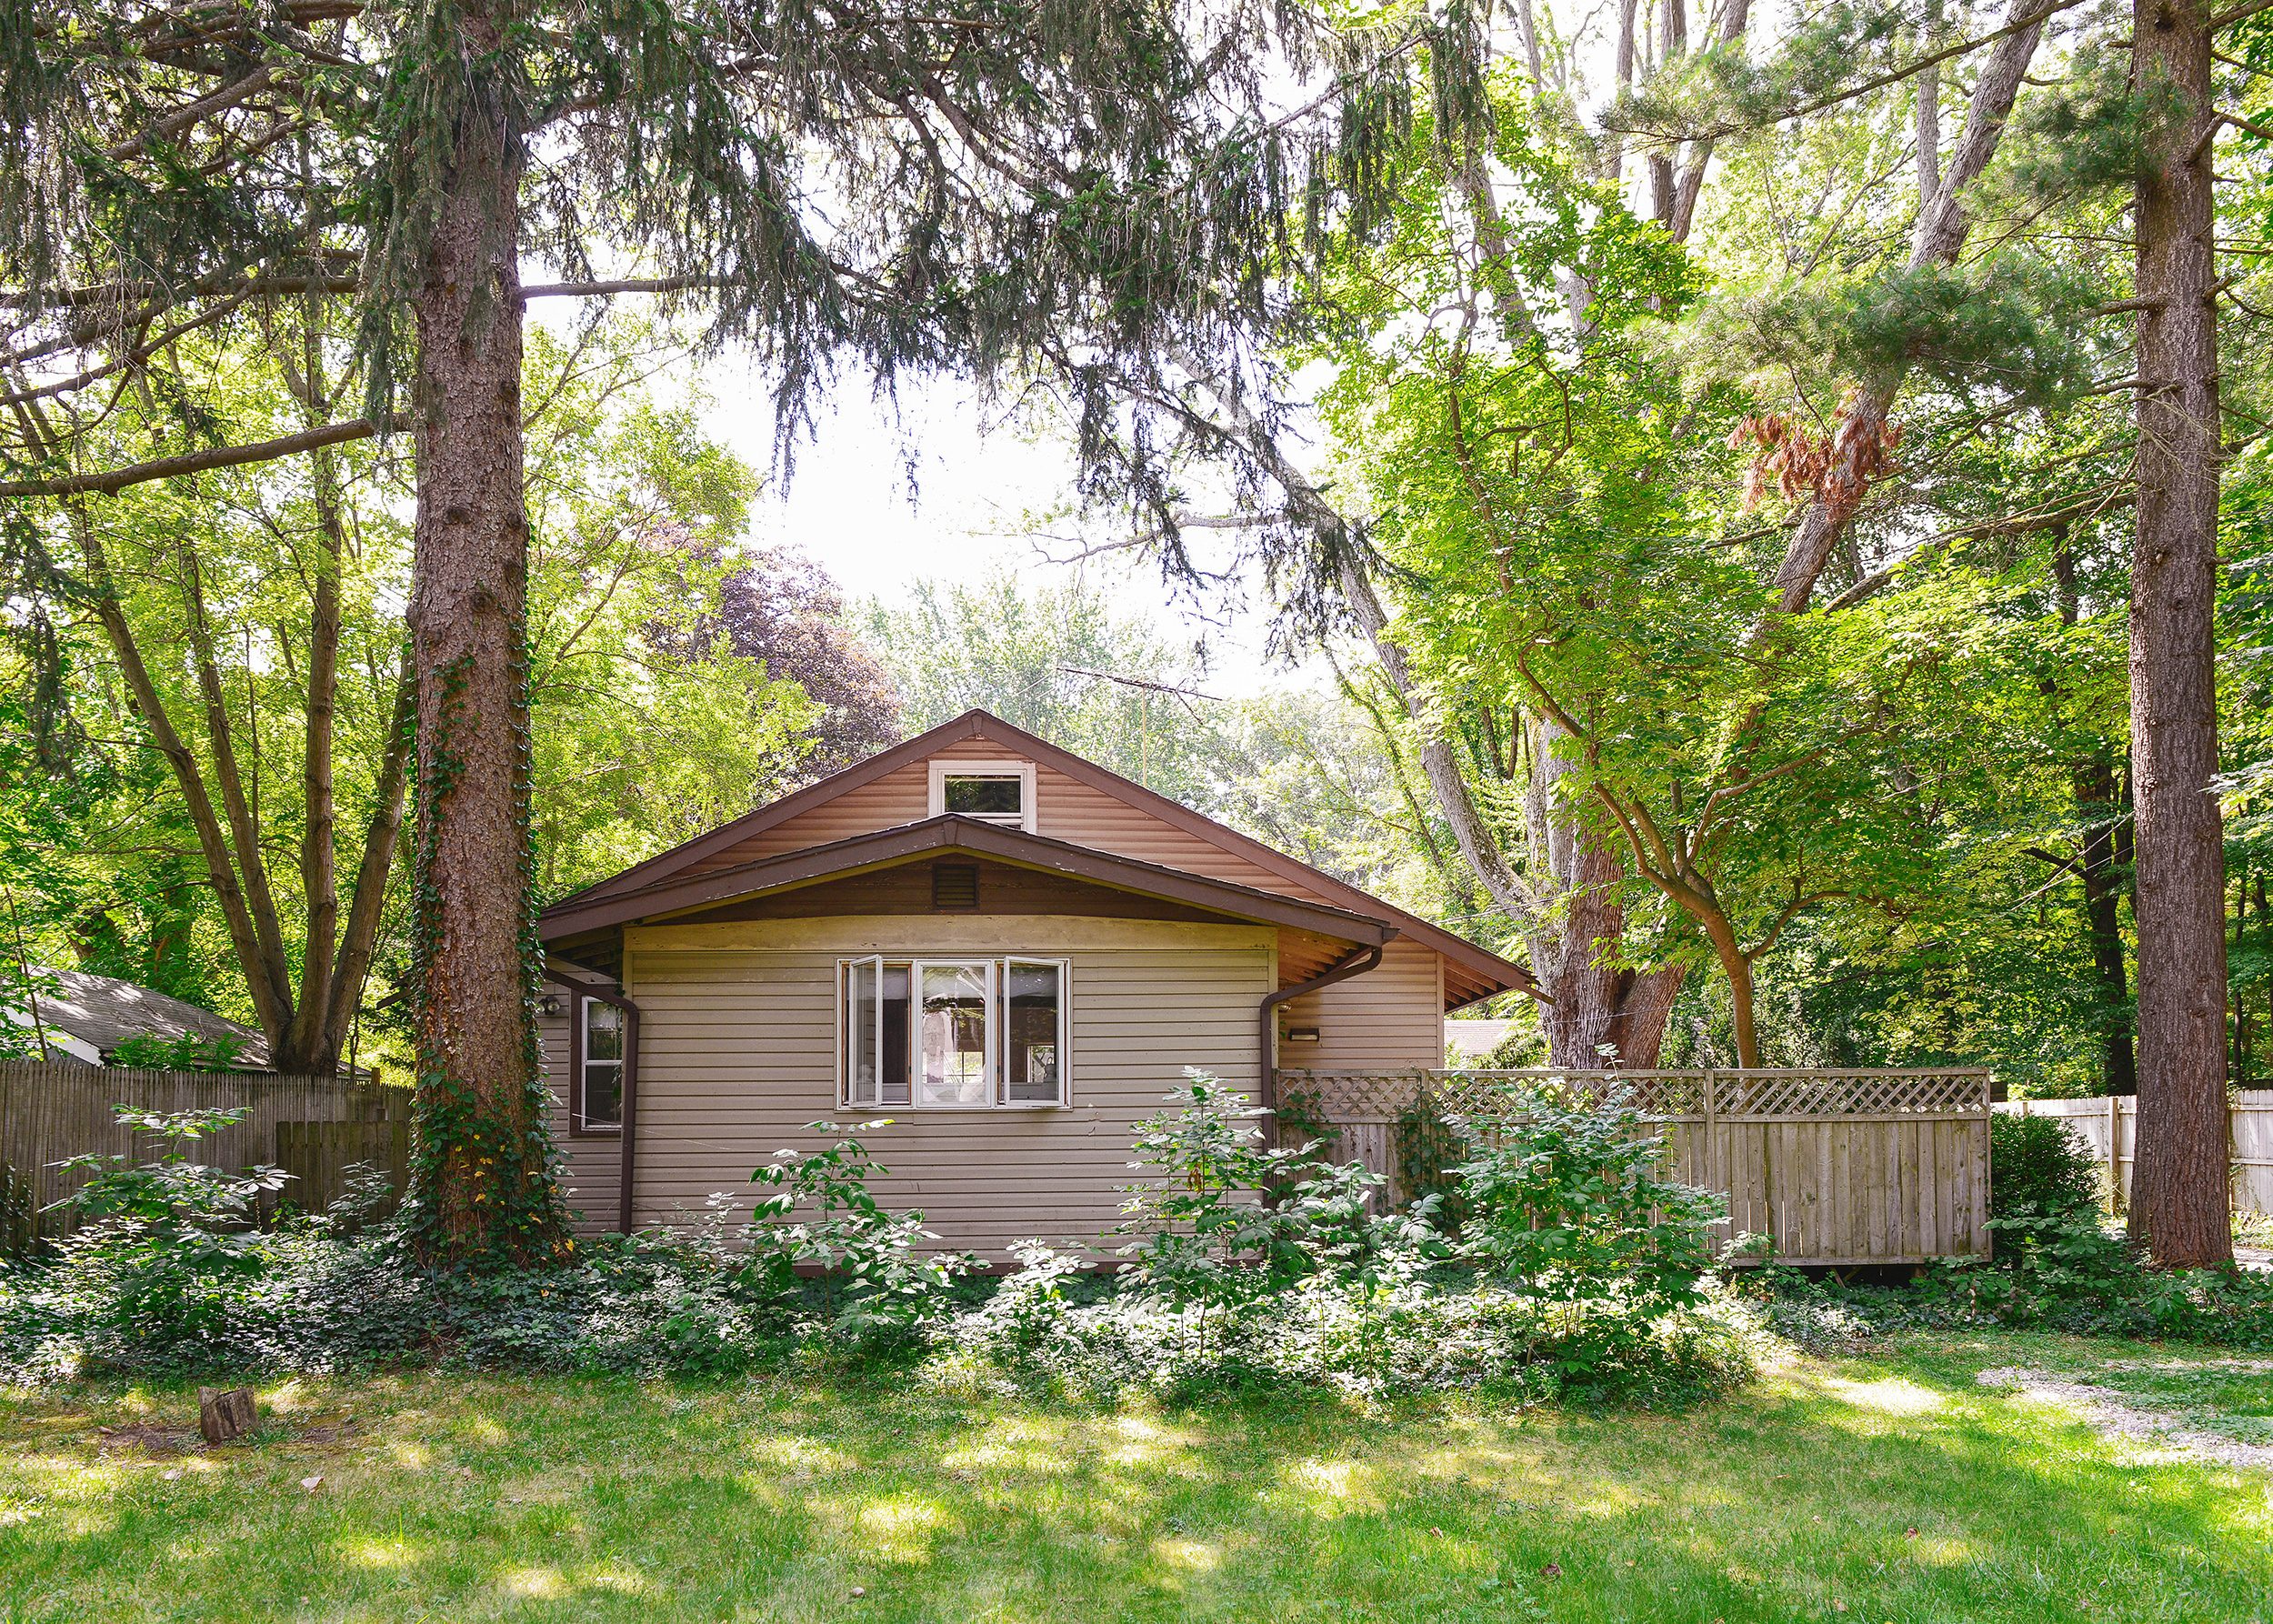
Exterior Before | 2017
This project has been a long time coming. As a quick refresher, this is what the front of the home looked like when we purchased it in the summer of 2017:
Exterior Progress | 2019
In 2019, we extended the deck, added bench seating, painted the trim and added landscaping around the big pine tree in the yard:
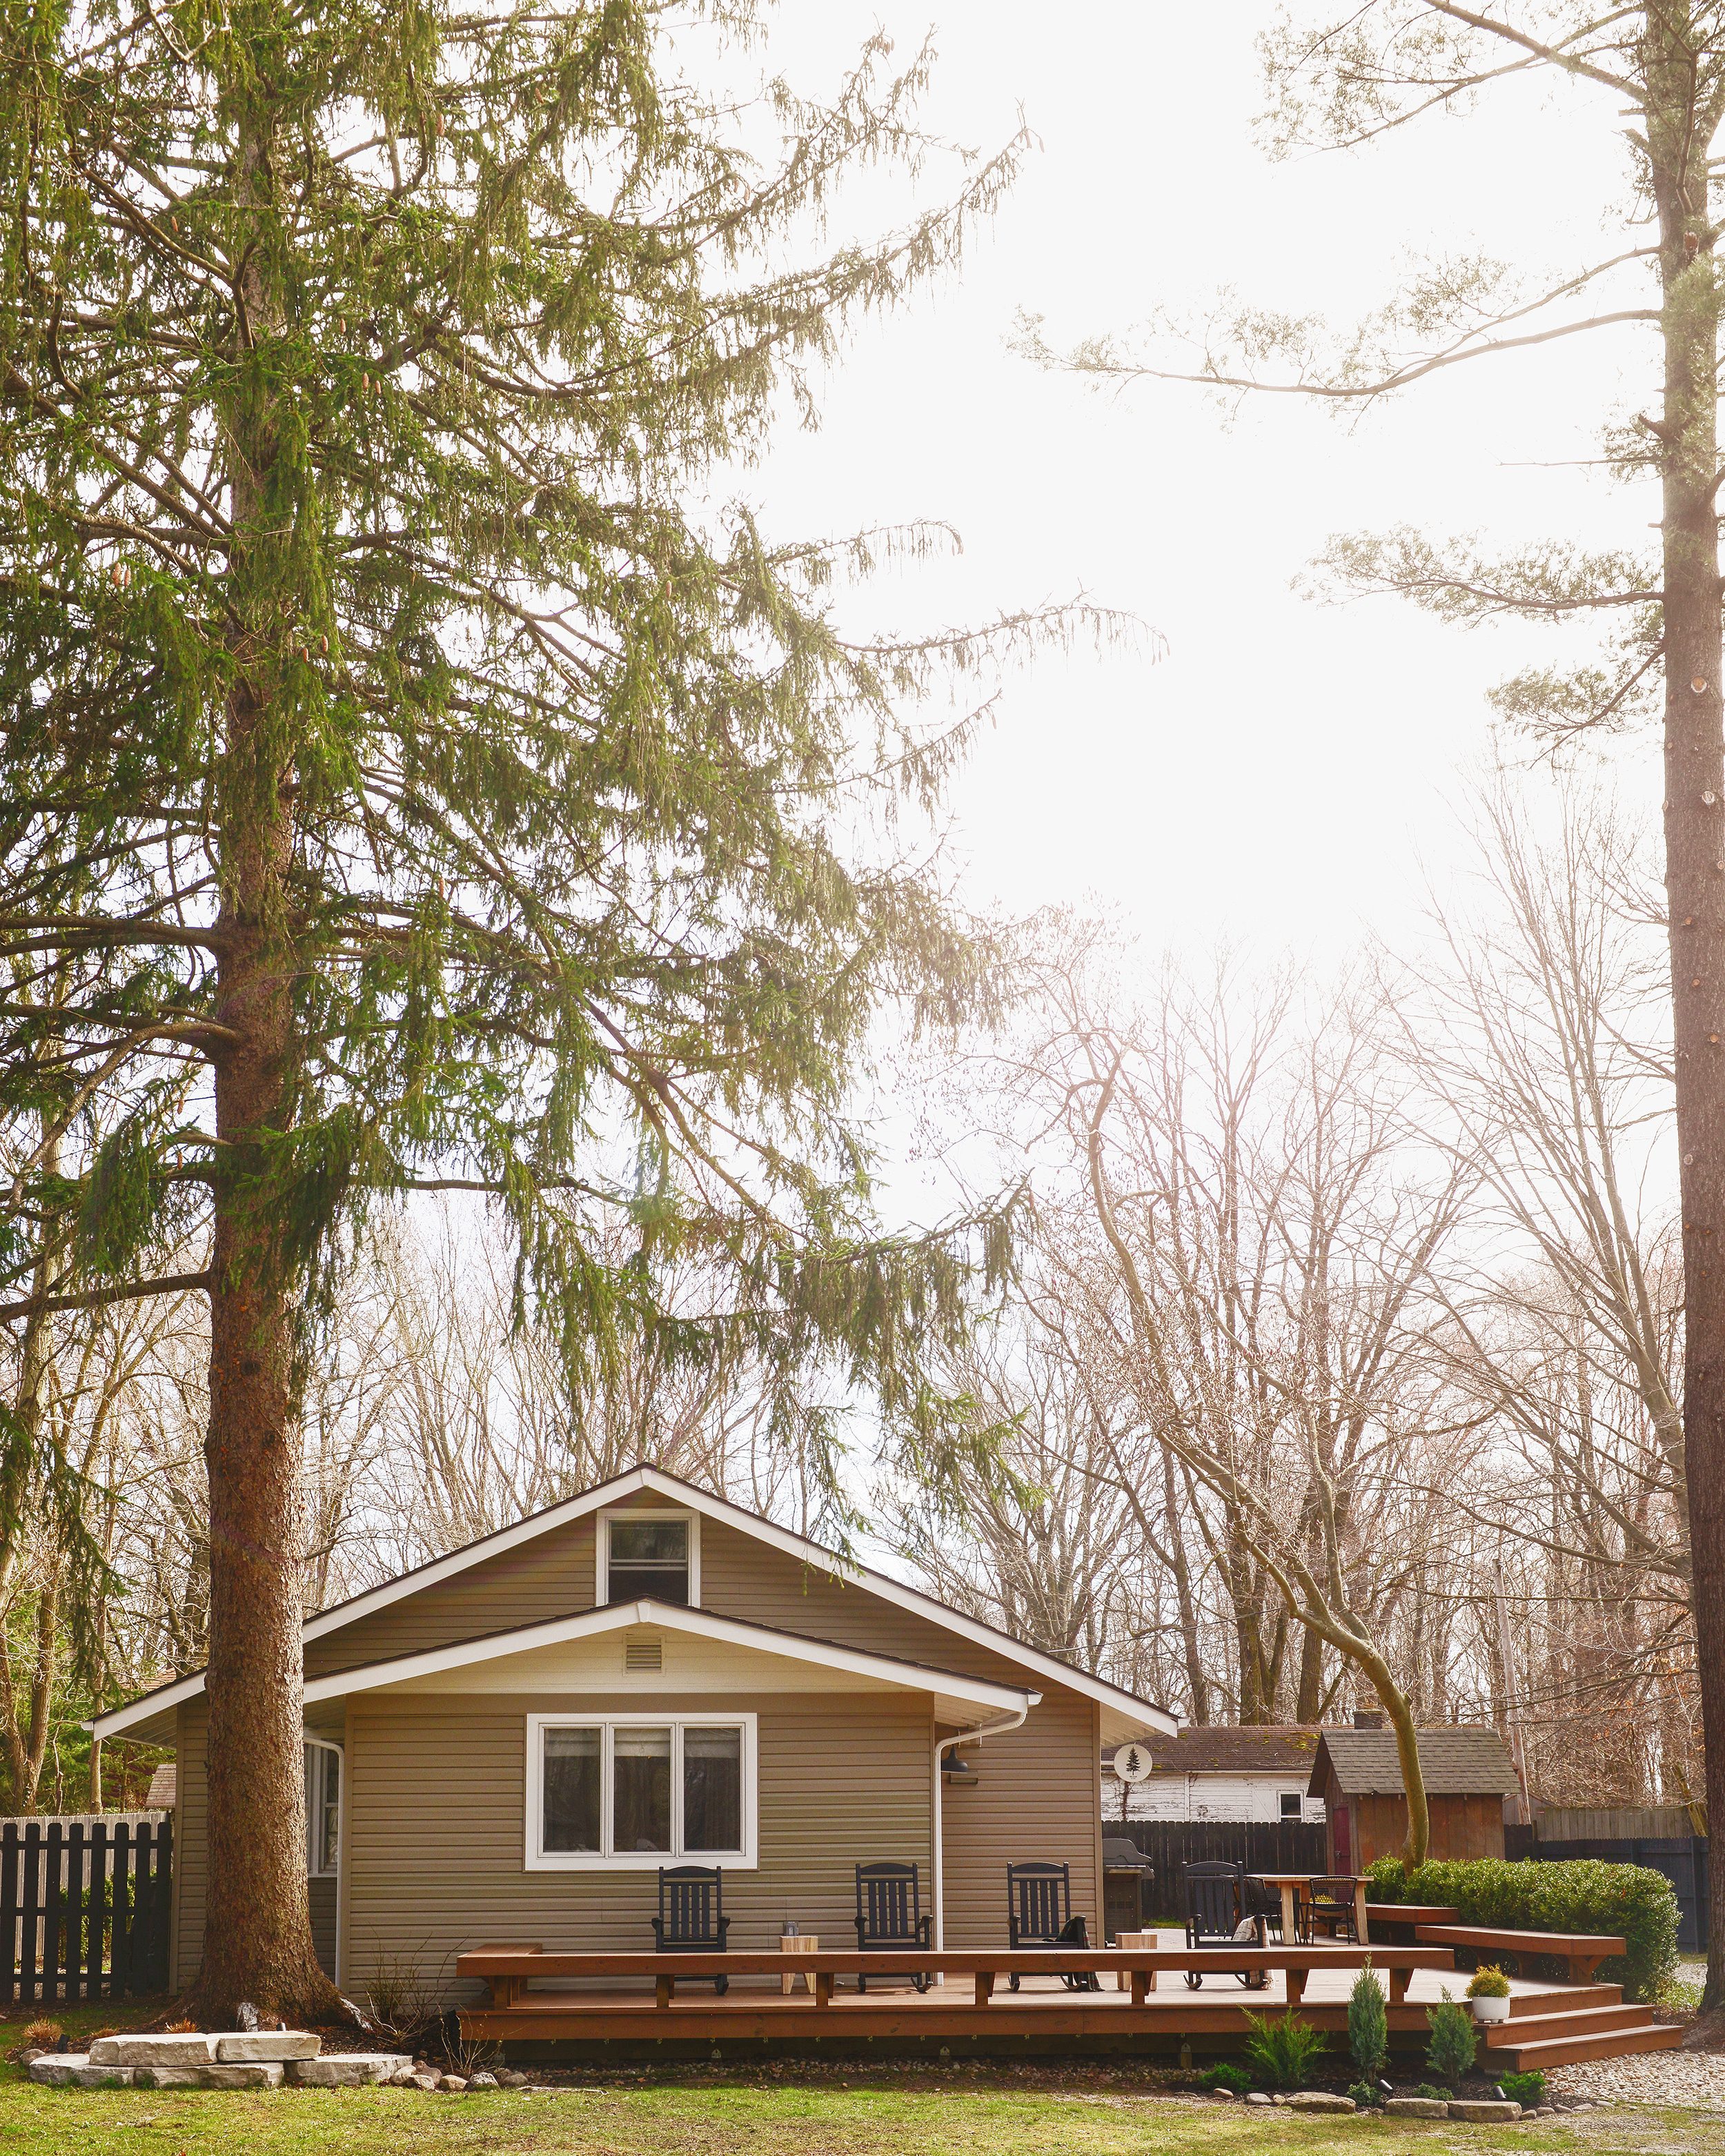
Exterior Today | 2020
…And here we are today! The increased deck space and the way that the new staircase opens into the front yard have completely changed the way we can enjoy the outdoors. The stain color enhances the nature setting of our home. The front yard has become a favorite spot for Lucy to run around and burn off the day’s energy while we supervise from the rocking chairs!
We couldn’t have accomplished all of this without help from our friends at Lowe’s, and we can’t thank them enough for their continued sponsorship! We’re proud to partner with them and hope that you continue to support those that support us. We shop Lowe’s exclusively online given the current environment, and their delivery options make it super convenient for you to stay home and safe while knocking out your to-do list. (Did you know that most orders of $45 or more ship for free?!)
The completion of this deck was among the final steps in preparing Tree House for its big debut as an Airbnb and we hope that the near future will allow us to share this very special space with some of you. As always, thanks for coming along on this adventure with us!
Lowe’s Items In This Makeover
Valspar Semi-Transparent Cinnamon Wood Stain | doormat | tall grey planter | short grey planter | white terracotta planter | weber grill | grill utensils | tripod planter | YETI wine tumblers + lowballs | Polywood rocking chairs


The link to see your Airbnb listing isn’t working!
Ah, sorry! We ended up needing to snooze the actual listing for a few weeks due to restrictions right now. So in the meantime, I’ll link to our landing page we’ve been working on behind the scenes. We hope you’ll bookmark it and stay with us soon!
The right tools make allll the difference in a project like this. It turned out so beautifully!
Thank you, Ashley!
You two can do no wrong. That before and after is SO GOOD!
Thank you, Kaitlin! You’ve made our day!
I don’t remember if/when it was ever mentioned – but the appearance of the little “tree house” sign attached to the house … I LOVE IT. It’s such a fantastic touch.
Thank you!
Hi! Where did you get your outdoor table and chairs?
Hi Nicole! The table and chairs are all from Article.
It just keeps getting better and better!
I’m curious about the staining — I know absolutely nothing about staining, let’s get that clear right off the bat! — how different is this from the stain you might use on flooring inside the house, for instance? If you had been into the color of the wood, could you have applied some kind of a clear coat instead of stain? Or does the pressure treated wood look kind of funky unless it’s stained? Also, how are you expecting your stain to age? Do they typically fade over time, or do they behave more like paint? In any case, yours turned out beautiful! Hahaha, and feel free to ignore my 80 questions above; I can always pester the Lowe’s employees.
Hi Elizabeth! Answering in bullet points below:
– The most notable difference between interior and exterior stains is that the vast majority of exterior stains are all-in-one products that don’t require a separate poly/varnish to protect the finished surface.
– If we liked the color of the wood and simply wanted to seal and protect it, a product like Thompson’s Water Seal would have been a perfect option.
– The color of the wood is a matter of simple preference. We were looking for a warmer tone to blend in better with the wooded surroundings of the home, so chose to change the color.
– The Valspar stain that we used has a 6 year warranty when used on decks and incorporates UV defense to protect from fading, so we don’t expect the color to change too much over the years.
Hope this all helps!
Thanks so much!
It’s looking so good, you guys! If you had started from scratch rather than extending what was there, would you guys have considered composite decking? Our deck is rotting and we’re going to have to start from scratch…
Thanks, Lindsay! We absolutely would have considered composite decking if we were starting from scratch. From our limited research, it seems like the added initial cost of composite decking could be completely offset by the time and cost of future maintenance over the life of the deck. Best of luck with your project!
Since this is more of a weekend home/soon-to-be rental home, do you store the rocking chairs and grill away when you aren’t there? If so, could you share some ideas of outdoor storage?
We just leave them out! The rocking chairs are Polywood and will hold up to ALL weather! (Our Polywood chairs around the bonfire look as good as the day we got them, and they’ve seen sun, snow and rain.) For the grill, we throw a grill cover over it. :)
Absolutely beautiful! What type of plants are in the planters? Have you had success with potted evergreens?
Thanks Jen! Our best description is ‘various’ types of plants. :) Unfortunately, we failed to note the plant names, but we’ve had great luck with small evergreens in pots both in Chicago and Michigan.
[…] and Scott shared the exterior reveal of their tree house and I am completely smitten. It’s in Michigan, near the lake, surrounded by a lot of trees. […]
Ha! The stubby planter immediately reminded ME of Olaf!
Hahaha
I am so happy for your blog. I was looking for which stain color I wanted to use for my deck which I have tragically ignored. But I have been taking care of the husband who has had 3 hip replacement surgeries. He had infection in the last one. Anyway I was washing a rug on the deck with my son’s electric pressure washer and started spraying the deck. Now I need to finish cleaning.Anyway, I got off track……Thank you for showing your work. I really like the color of your deck and how it compliments your home and landscaping. My house is currently white but I am thinking about changing it. It’s been white forever. I live in my childhood home and I’m 63 now. Kathy
This stain was exactly what I needed!! Thank you for posting this!