

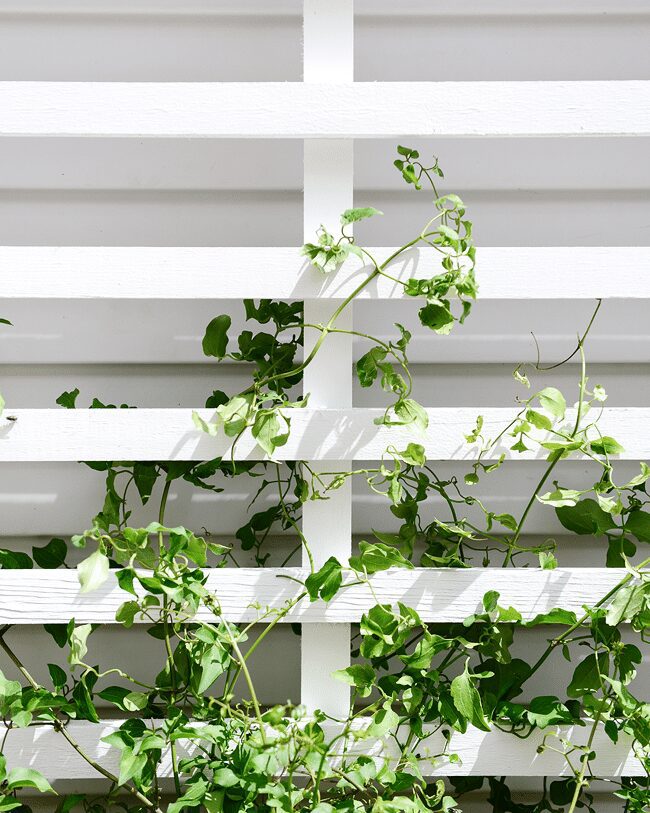
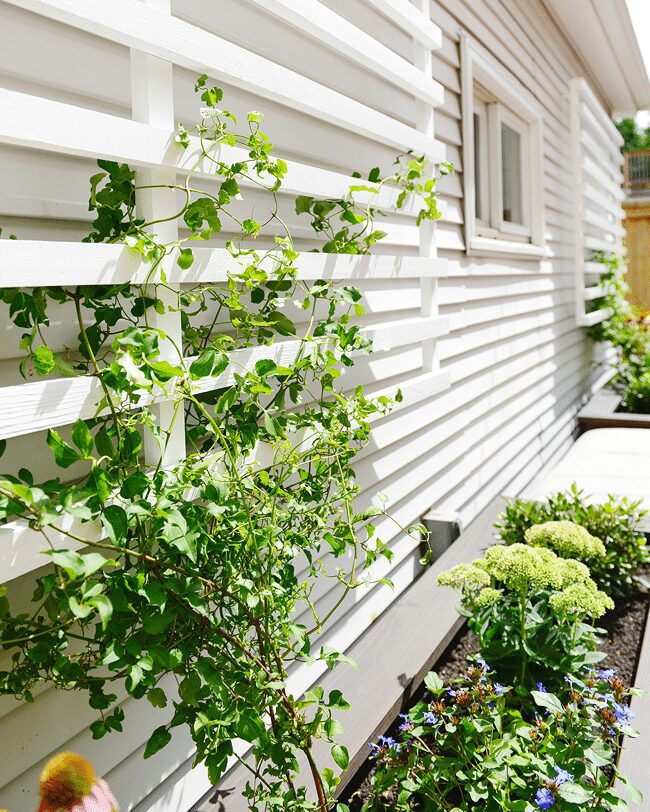
When we chose plants for our raised planter boxes, we knew we wanted the overall feel to be very free, if not slightly chaotic. In a sense, we wanted a big, beautiful tangle of plants. Earlier this week, I asked Scott if he thought the plants were happy, because I was worried that our supposedly-bushy-ground cover (the ceratostigma) was looking a little yellow. And then, not even two days later, I noticed that the same plant was growing wider, and just yesterday, our clematis started to get teeny, tiny buds of white flowers!
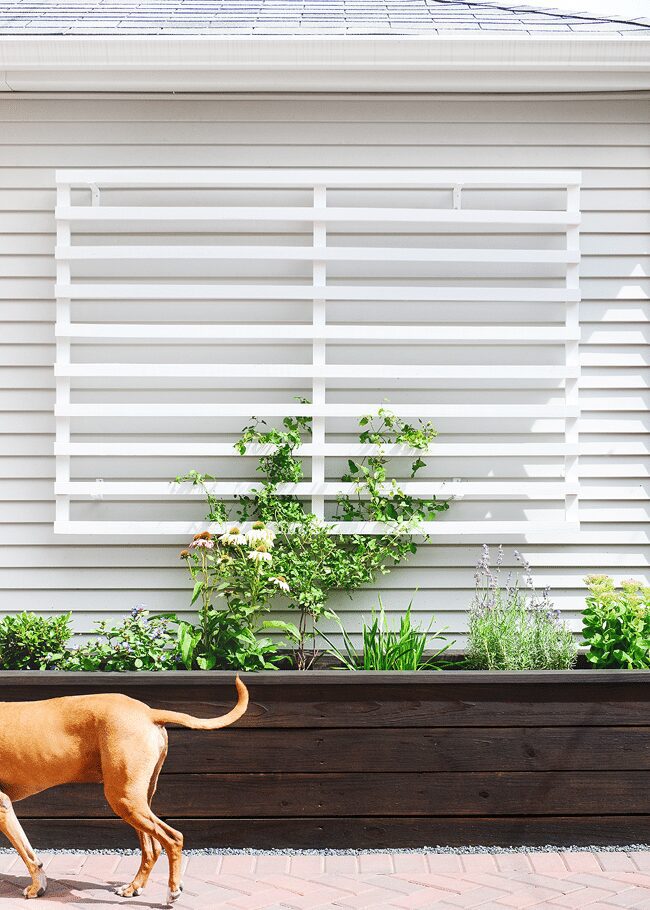
Speaking of the clematis, I mentioned previously that I wasn’t completely sold on the look, but I’ll admit that it’s already growing on me (ha). From the beginning, we imagined greenery climbing up the side of our garage on a trellis, but when it was game time, we were completely stumped on how we wanted the trellis to look. Most of the garden trellises we saw in store or online were much more ornate than we had in mind, and anything sleek and slim was far out of our price range. We were hopeful for a clean, modern look, something that would juxtapose just enough with our traditional boxes while still looking like they belonged there, too. We considered cables or dowel rods or rope, but nothing really struck us as The One – that is, until we came across this trellis for inspiration. We can make that!, we said. So we did!
In This Post
MATERIALS:
Pressure treated deck boards or 2 x 2s
1 5/8″ coated deck screws
Exterior semi-gloss paint
5″ galvanized steel angle brackets
Spray paint (optional)
Clear silicone caulk
TOOLS:
Table saw (optional, see step one below)
Miter saw
Sandpaper
Drill
Square
Angle grinder
Paint sprayer or foam roller / paint brush
Tape measure
WHAT WE DID:
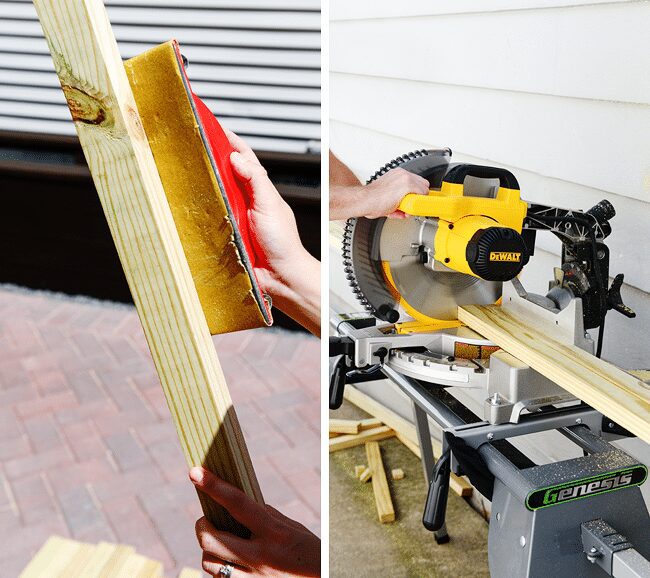
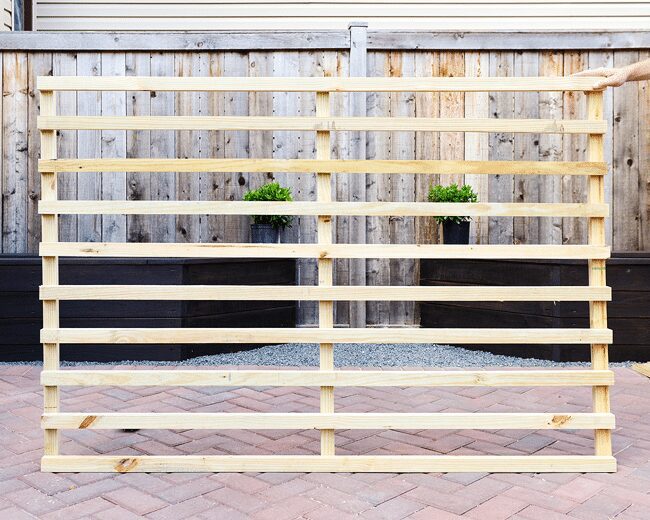
We had leftover pressure treated deck boards from our planter box DIY, and we used our table saw to rip them down to about 1 5/8″ wide. The table saw gives the slightly rounded edges a cleaner look, and I quickly sanded down any visible burrs. Scott cut all of our finished strips to the right lengths and widths on the miter saw. (Side note: We just upgraded to this miter saw, and we couldn’t be happier!) In our case, the horizontals were 69″ wide, and the vertical supports were 48″. Tip: If you don’t have a table saw, you could simply substitute with 2″ x 2″ pressure treated lumber.
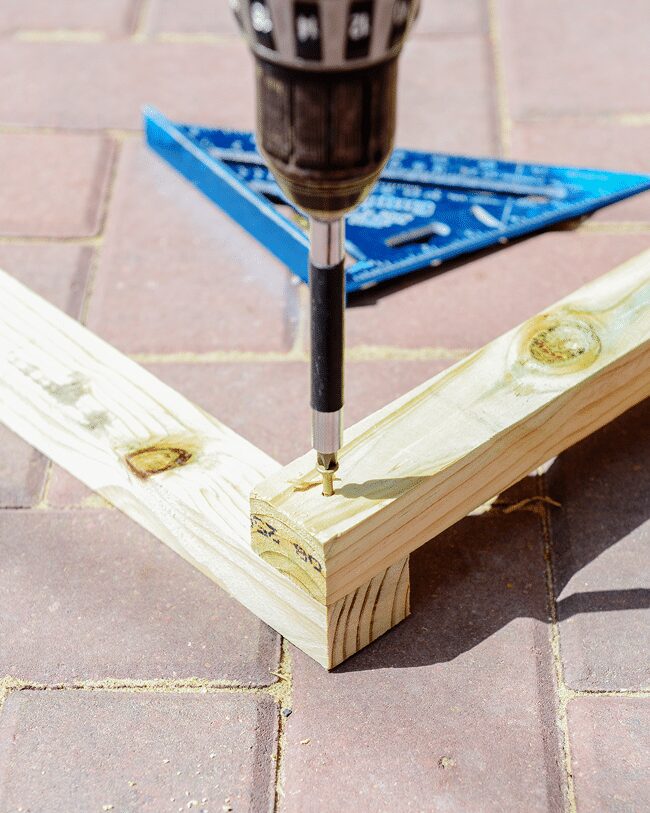
Next, we used coated deck screws to attach the three verticals to the top and bottom horizontal strips, creating our box. We used our square before securing every corner, and we drilled pilot holes first to prevent the wood from splitting:

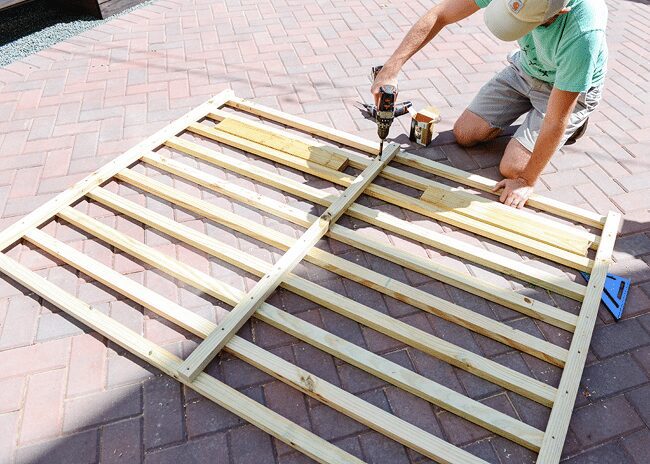
Below, you’ll notice that the horizontal pieces are underneath the verticals. The verticals are the back of the trellis, but we built the entire thing upside down so that all the screws could be completely hidden! The spacing is personal preference, but we liked the look that 3 1/2″ provided, so we used scrap 2″ x 4″ lumber as a spacer between every horizontal strip. (By the way, this math was all figured out beforehand, which is what allowed us to cut the verticals to the proper height!) We continued to drill pilot holes and secure the unit together with deck screws. To keep the trellis strong, we doubled up the screws on every corner and down the middle.
Pressure treated lumber is heavy, and even though the additional screws made all the difference, our trellis had the slight ability to pivot on the screws. This isn’t a big deal; once installed on the wall, the brackets will hold them securely in place.
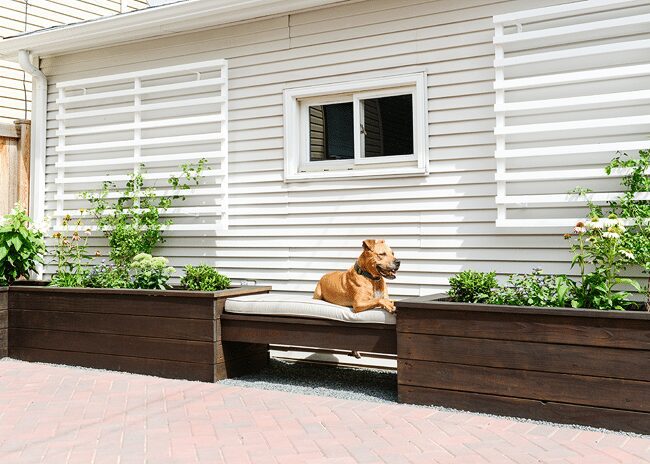
We made two trellises, one for each side of our built-in bench, and we used our paint sprayer to give the fronts and backs two coats of exterior semi-gloss white paint (Behr’s Ultra Pure White, straight off the shelf). Tip: If you don’t have a paint sprayer, a foam roller would do the trick, too! In that case, it would be easier to paint the strips before making the trellis.

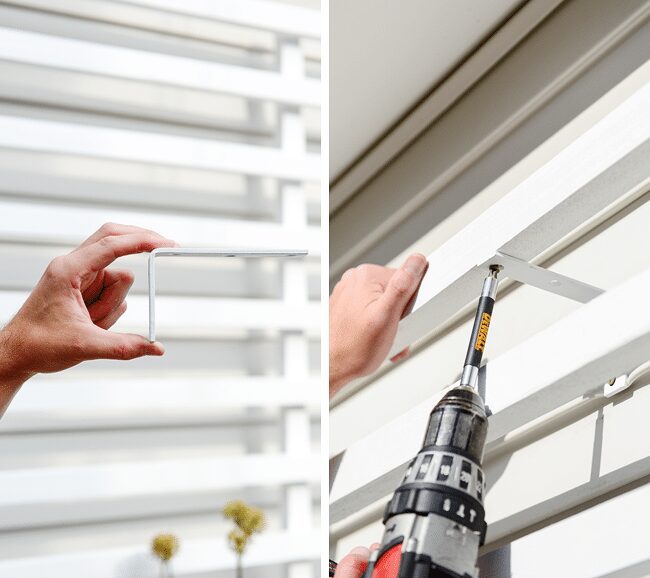
To attach them to our siding, we used 5″ galvanized steel angle brackets for a few reasons:
- Galvanized steel is necessary for outdoor use, and…
- … Unlike stainless steel, galvanized steel can be painted easily.
- Also, the 5″ brackets allowed for 2 attachment points to our garage, and….
- … angle brackets of this size have a gusseted corner, making them strong.
That said, Scott used an angle grinder to cut down one side of each bracket to match the height of our vinyl siding, and I followed that up with a coat of white spray paint. Each trellis got four angle brackets – two on top, two on bottom – and they went directly into studs. We squeezed a dollop of clear caulk into the pilot holes on the garage before screwing them in (again, using coated deck screws), ensuring a water tight seal. Finally, the brackets could be secured into the trellis!
It was impossible to get the angle brackets spaced evenly on the trellis, as we were at the mercy of the studs. Although off-centered, our hope is that by next summer, we won’t see them at all! Come on, clematis, grow your little heart out.
There are a lot of things that work against in our backyard – the city’s unsightly electrical lines, our neighbor’s satellite dishes, our own cable line, the less-than-stellar greige vinyl siding and the list goes on – but we always remind ourselves of this one pretty amazing thing: we have a backyard. In the city! That alone was one of our biggest selling points (flashback to this post!), and so we’re focusing on all the things we can control.
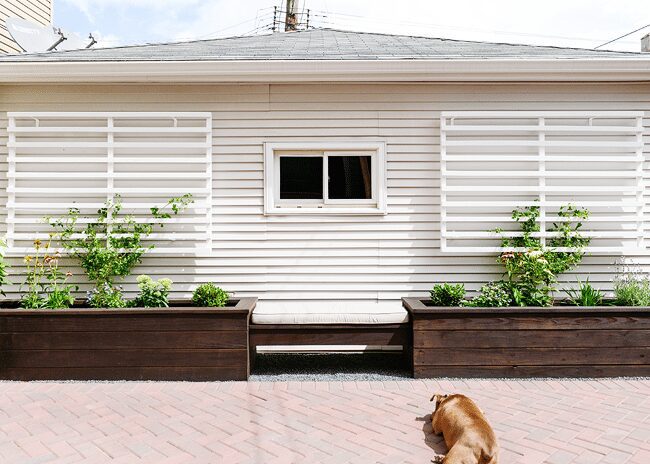
We’ll be adding a light above the garage window to balance the height we’ve added with the trellises, and we’re finalizing table plans so that our friends and neighbors no longer need to balance their plates of barbecue on their knees! Fingers crossed that the warm, sunny days can continue, because we’re hustling to knock a few more things off the outdoor list. We’re not quite done with you yet, yard.


Oh it just looks so clean and good ! I can only image how pretty it’ll be next year with all the leaves tangled around !
This looks great, and I love the blissed-out puppers in the sun :)
They could bake ALL. DAY. LONG. They don’t budge! We just keep bringing them water like their faithful servants.
I’ve had no luck finding 2×2 pressure treated wood. I’m here in Chicago and have tried a few Home Depots and Menards! May need to rip 2x4s but was trying to save some hassle!
Hmm. It looks like it should be in stock at some of the Chicago area Home Depots! http://www.homedepot.com/p/WeatherShield-2-in-x-2-in-x-8-ft-1-Pressure-Treated-Lumber-302477/100023713
Another option would maybe be to use pressure treated railing posts. They came in smaller lengths (typically less 42″ or less), but depending on how large you wanted to make the trellis, it might still work for you!
Those trellises look amazing. Are you growing “Sweet Autumn” clematis? Your backyard looks like an incredible oasis. What a great place to enjoy the last vestiges of summer!
Thank you, and yes we are!
It’s coming together so nicely. Love the trellises and
We added a Sweet Autumn Clematis to our front yard this summer and it is growing like crazy! We’ve got a bunch of small white flowers now and I’m so excited to see it really bloom! The lattice we purchased is almost too small so I may need to create one like this for ours! Your space looks amazing! I wish we had something like this but our backyard is pretty much an ugly jungle right now.
Thanks, Christin! We liked that this design had a little more space for a more substantial climber. I’m not sure how big the clematis will get this year, but hopefully next year, it’ll pop!
After reading your post I got very curious about clematis, as it would fit right into our little backyard. So I googled it and found this information in gardeners.com:”clematis vine does not climb by twining around something, as a pole bean or a morning glory does. It climbs by wrapping its leaf stems around something. Because these leaf stems are not very long, anything that’s more than about 1/2 inch in diameter is too wide for the leaf stem to twist around. The easiest things for a clematis to grab onto, are twine, fishing line, wire, thin branches, wooden dowels or steel rods. The more grabbing opportunities you offer, the better, so even if you have a nice trellis, consider adding some twine “helper” lines, or covering your trellis with a grid of trellis netting.”
So you have a different variety, that’s able to climb your trellis? Because I very much like the clean look you achieved.
I have noticed that our clematis is wrapping its little stems around other parts of itself, and it continuing to grow! That said, We’ve been helping it by weaving it through the trellis. Smaller trellis or wire would probably be ideal, but we told the nursery how thick our lattice was, and they said that as long as we can help to weave the clematis through, it will get to the point that as it winds around other parts of the plant, it will continue to weave through the trellis. It MIGHT just need more help than a wire trellis. :D
It will climb just fine on your trellis. I have a clematis climbing up a trellis with spacing much larger than yours and it goes crazy every year. Once in awhile I’ll help it by weaving it up the trellis, but mostly just let it do it’s thing.
The outdoor space is really coming together. Great work! Next year, we will tackle the landscaping at BHH. We are so ready. It’s a jungle out here. :)
What an amazing DIY! I’m totally having this done at my house. It looks great! Thank you for the post =D
[…] modern trellis will definitely be on our outdoor to-do list next […]
[…] & Scott from ‘Yellow Brick Home’ show you their modern garden trellis DIY with a complete tutorial. They made this from leftover deck boards! They even tell you the best […]
I just stumbled upon your update on your back patio today and saw this trellis project – THANK YOU! We’ve been trying to figure out a way to camouflage our electric meter by our side entrance and this is perfect! I’ll be building this very soon!
[…] art deco (source unknown) / cedar trellis / modern white trellis […]
[…] Via Yellowbrickhome […]