

We’re walking through the nearly completed drywall at our ongoing Two Flat project with photos and a video tour!
Two flat progress is in the home stretch before we take the reins! It’s only a matter of weeks (or days!?) until our GC finishes his portion of the project, at which point, we’ll take over for trim, finish and buildout work. We stopped by recently for a dusty walkthrough as the drywall team sanded and touched up the last bits before the space is primed. Below, we’re taking you through the whole house, which will give you a good feel of the largely finished layout of the two units!
You can also view this video directly on YouTube.
In This Post
Unit 1 | First Floor
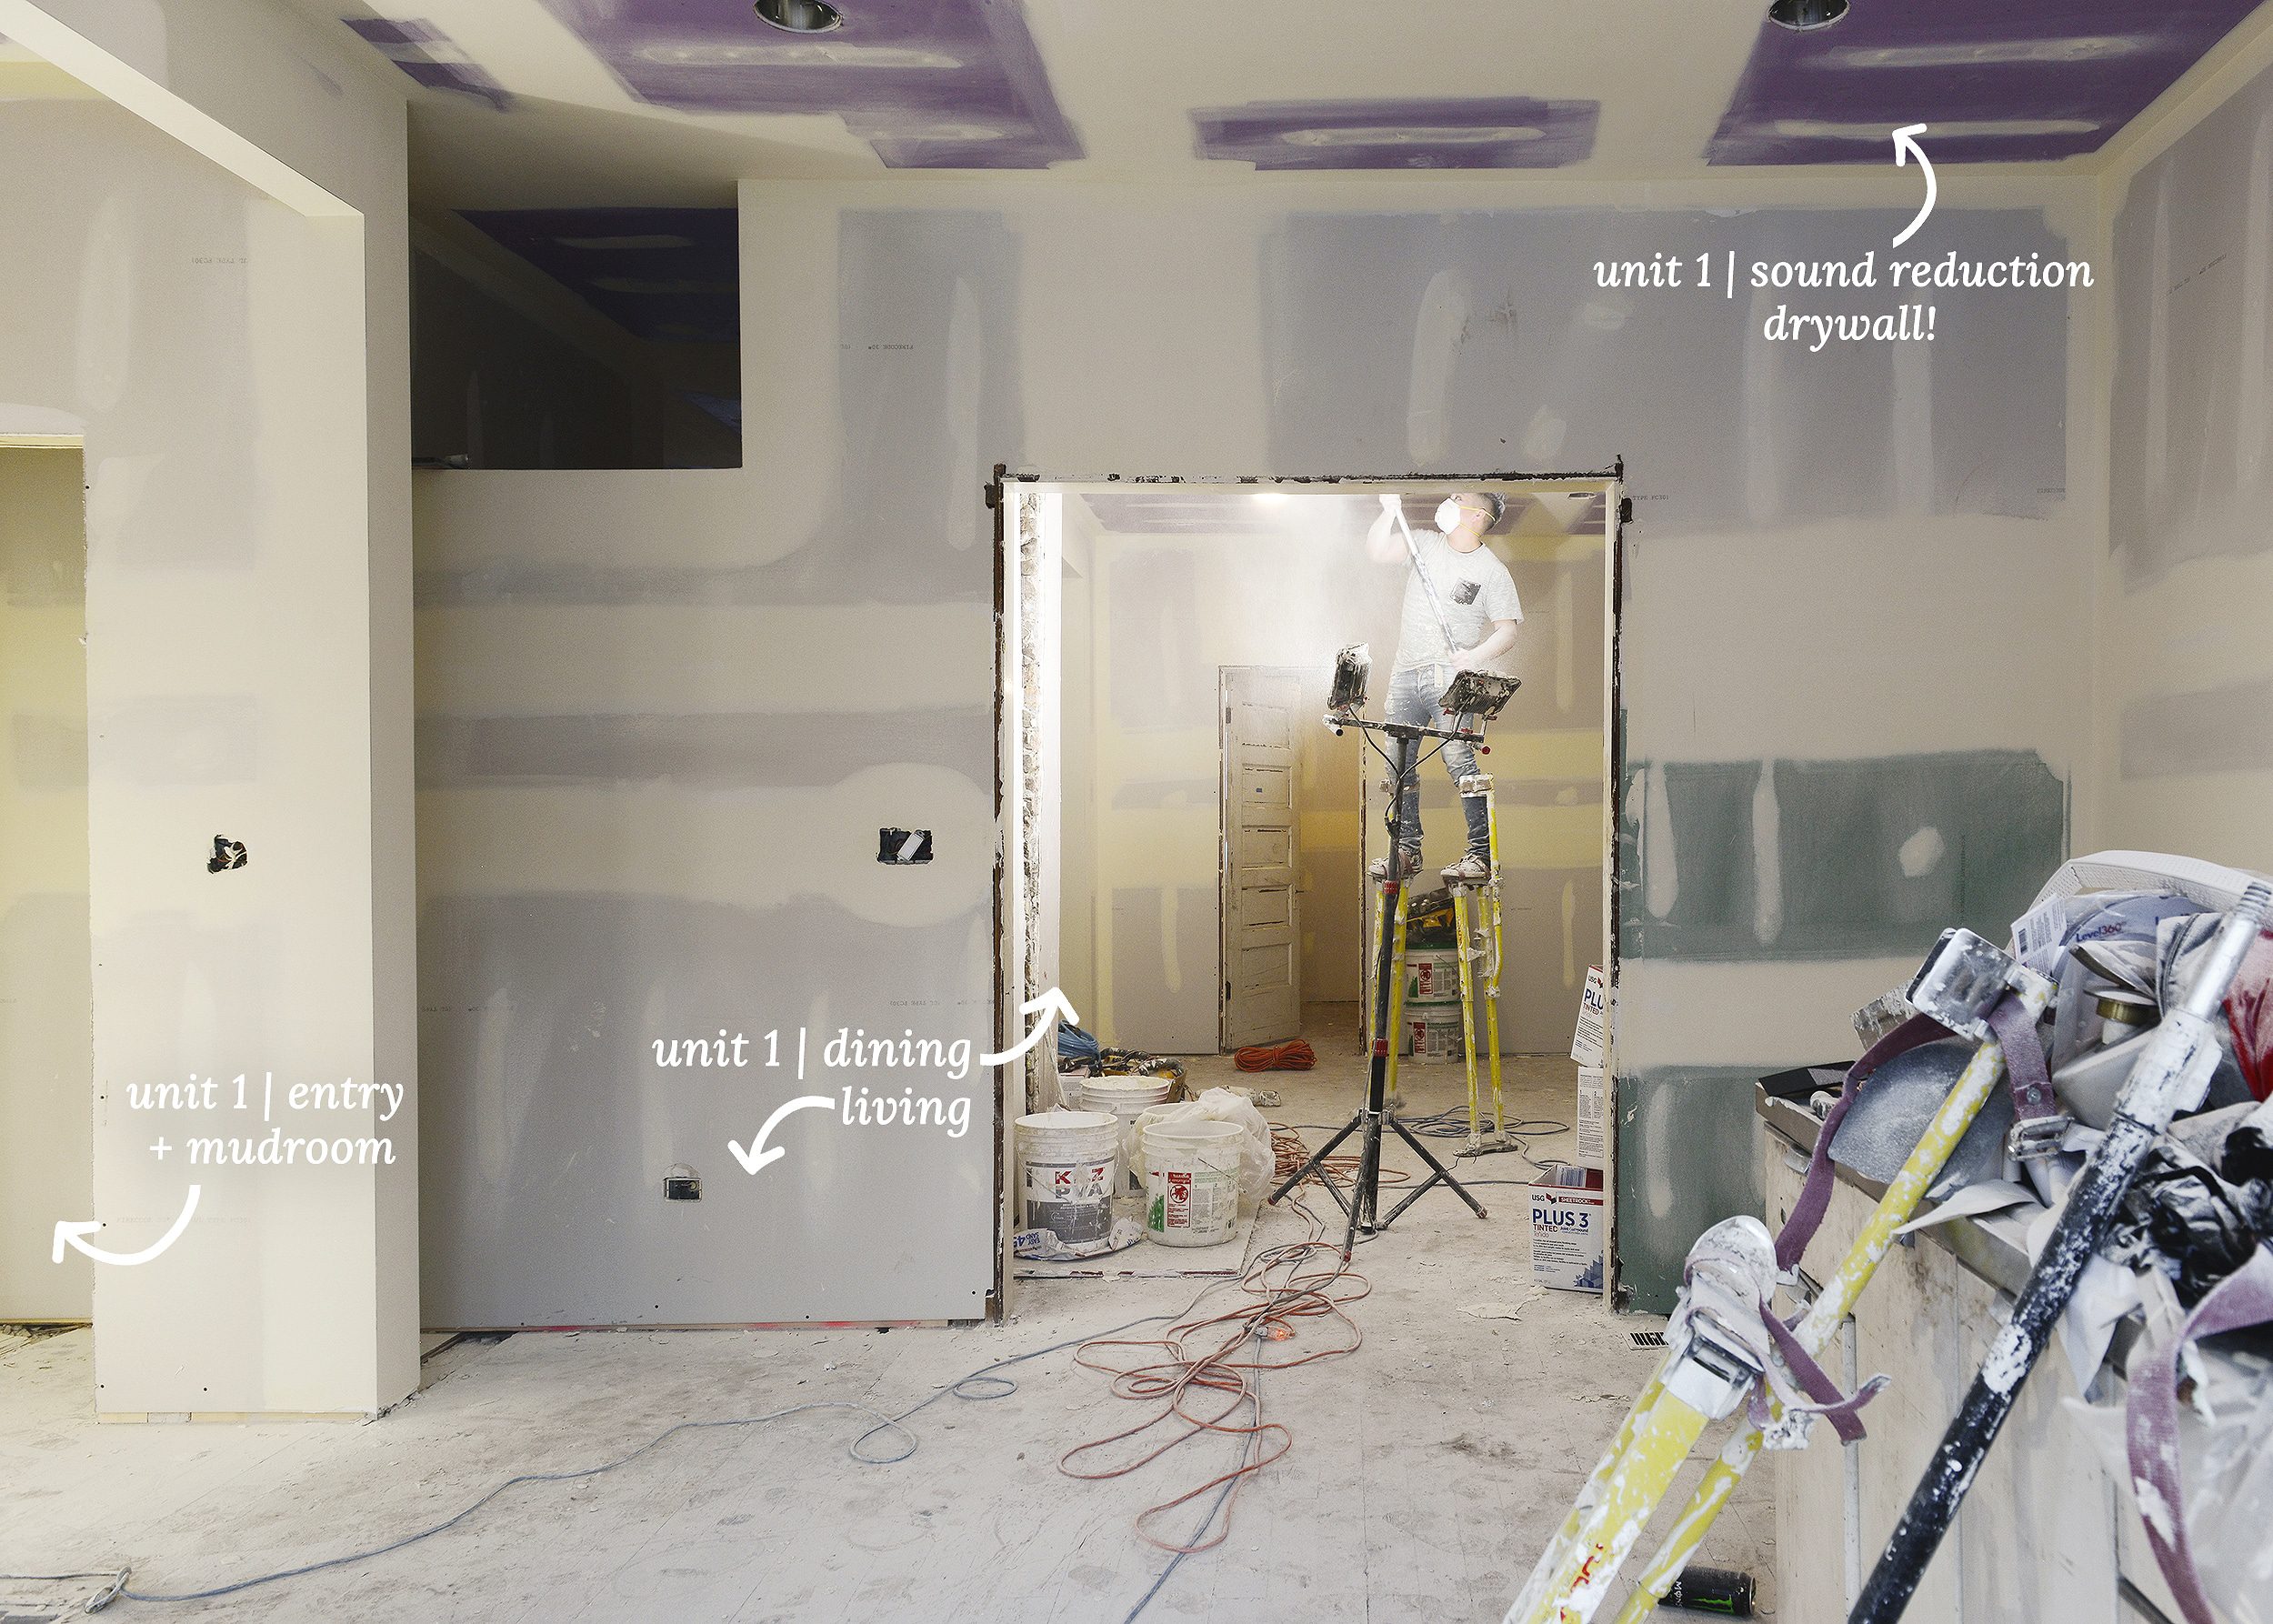
The main floor of Unit 1 saw a reconfiguring of the kitchen and entryway to optimize the layout of the common spaces. We also needed to make room for the staircase leading down to the ground floor, which freed up space for an expanded bathroom and pantry. Bonus! The vast majority of the plaster in this unit was well beyond repair, so we opted for a clean slate with all new drywall. Also pictured here is a set of brand new windows from our friends at Andersen! More on those energy efficient beauties at a later date.
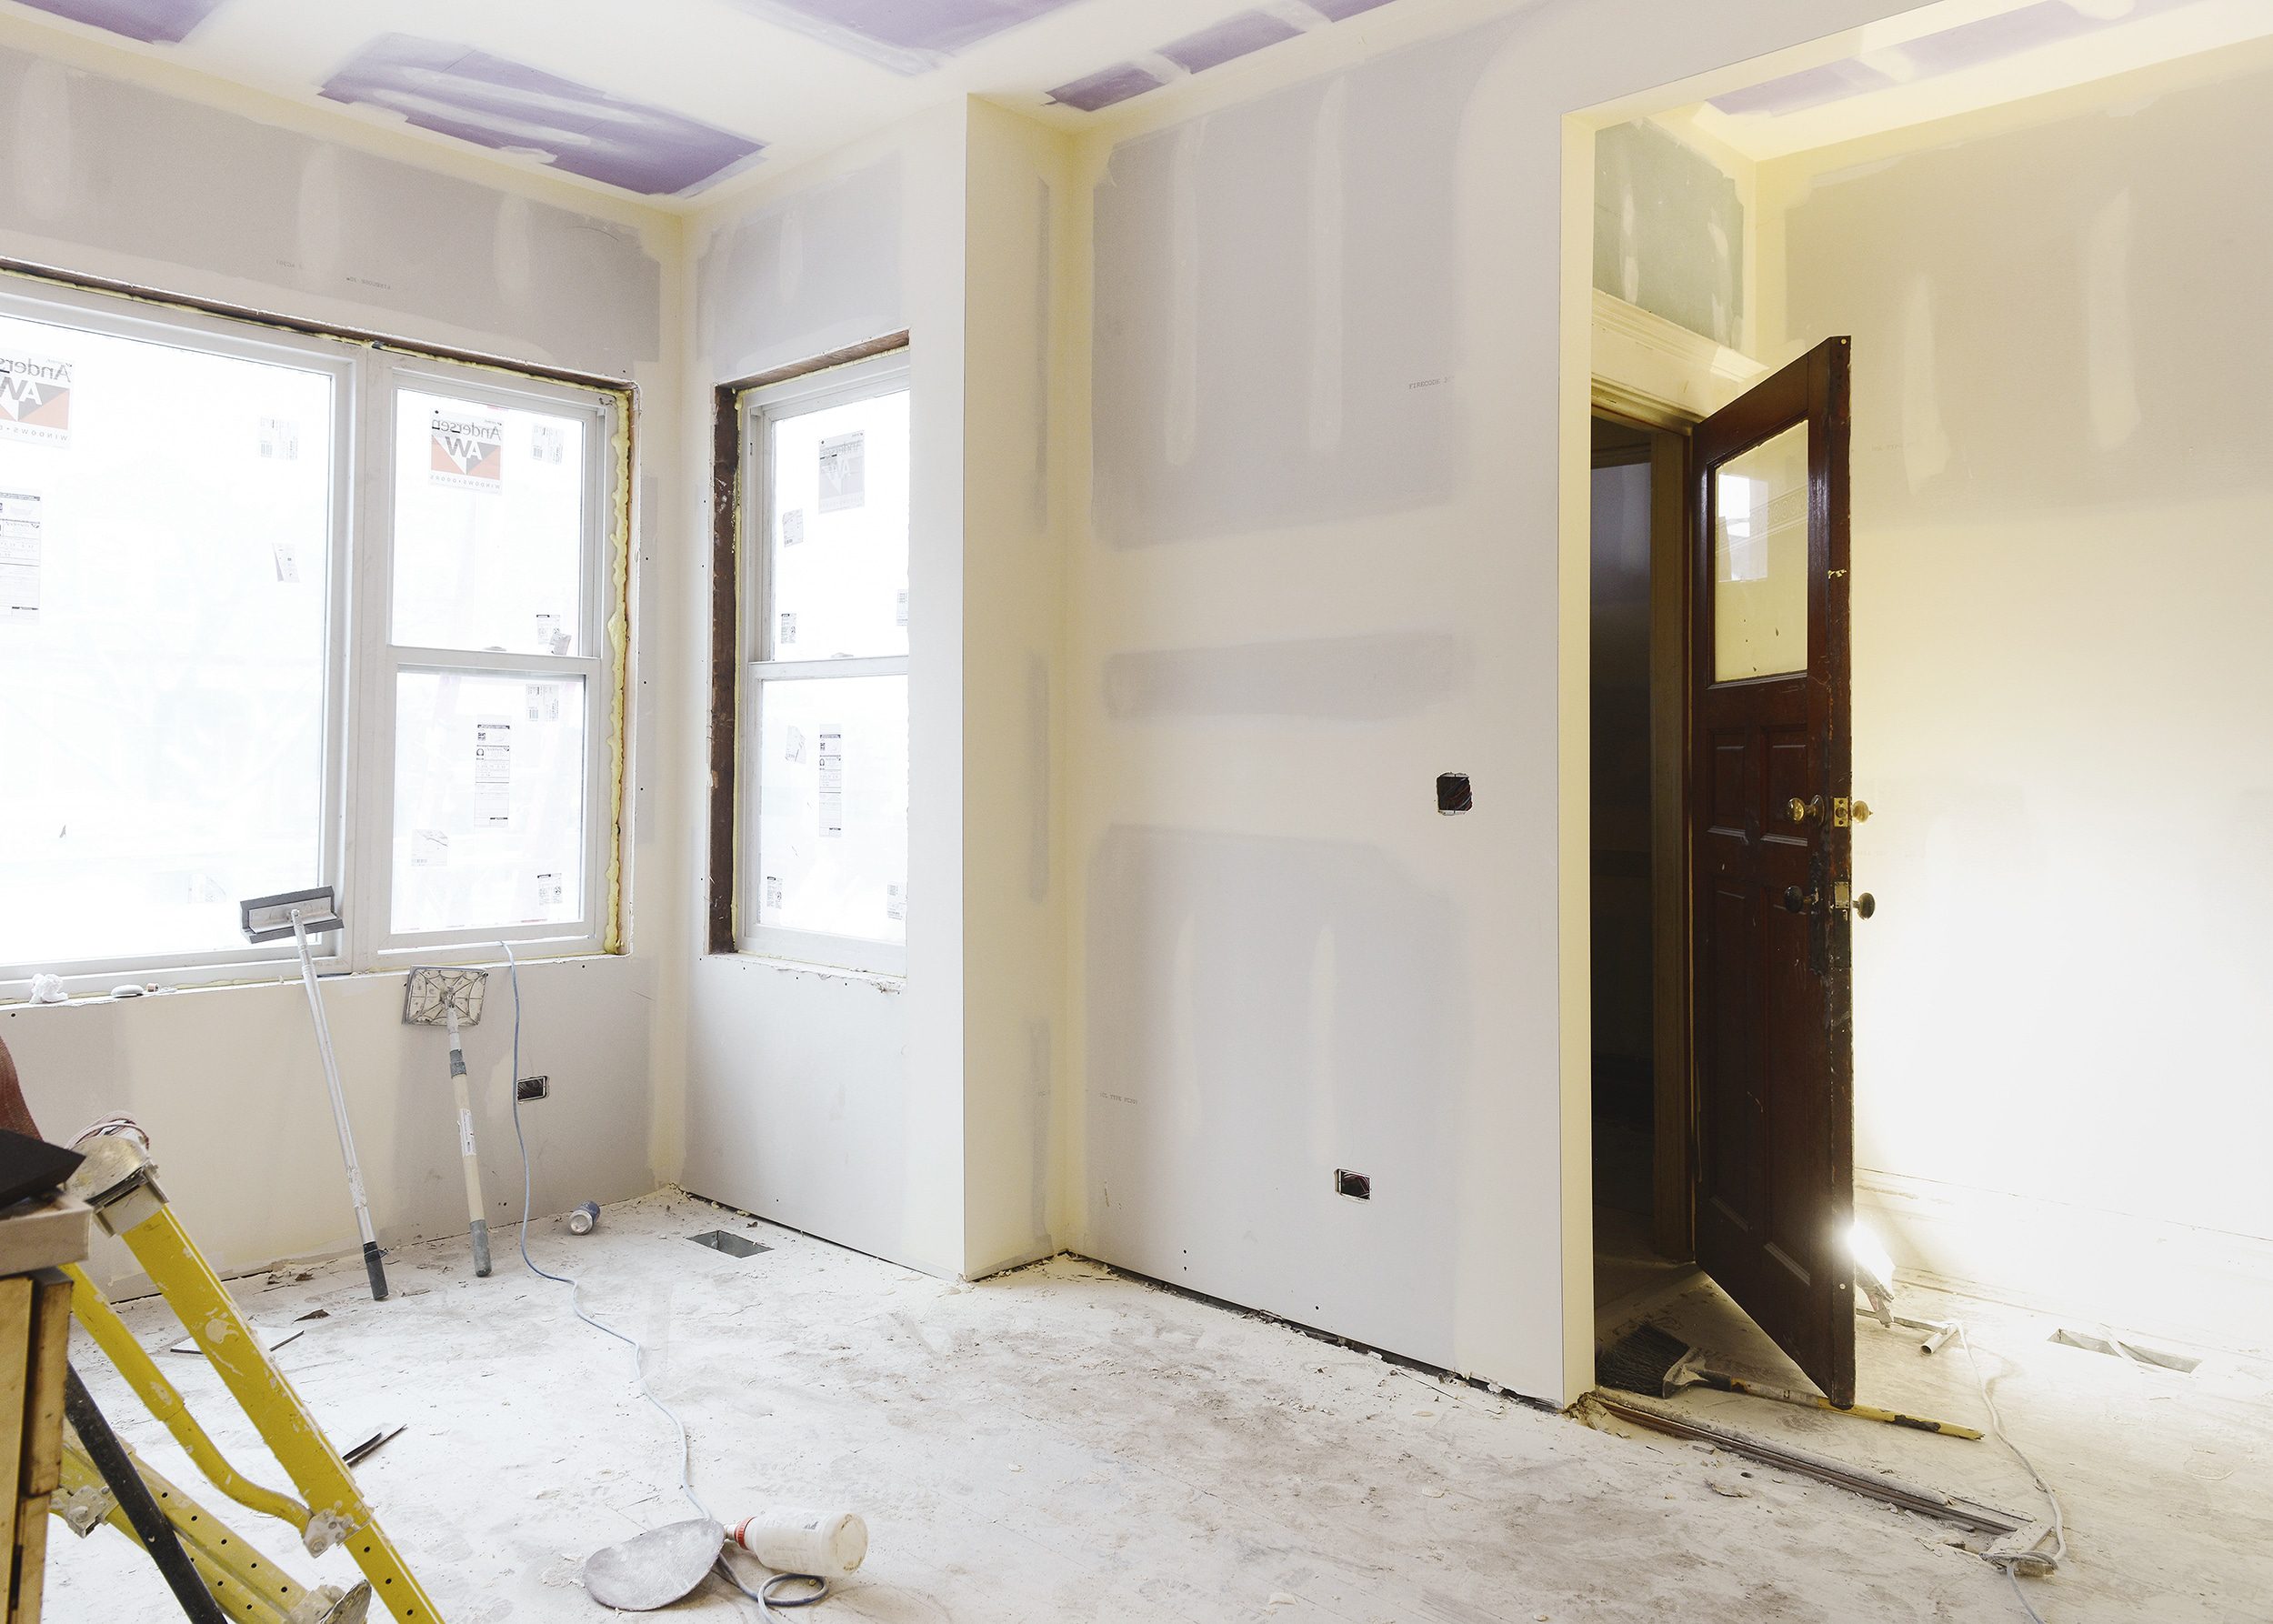
In order to eliminate the transmission of as much sound as possible between the two units, we installed PURPLE drywall on the ceilings of Unit 1 – and you know we love our PURPLE! The drywall we chose is designed to reduce and dissipate sound, which is a high priority in any multi-unit dwelling. We take our role as landlords seriously and want to create the most comfortable spaces possible for our future tenants!
Unit 1 | Den (Lower Level)
Down the staircase into the lower level of Unit 1, we’ve created a den, a laundry room, two bedrooms and a generous bathroom. (Hard to believe it ever looked like this!) This space, which we refer to as the ‘den’, also includes a triple-sized hallway closet that will serve as extra linen storage for our future short-term rental space. The ceilings are on the lower side, and we had some challenges with soffits to accommodate HVAC, but a few additional windows keep the rooms light and bright. We can’t wait to paint and style these spaces – they’ll be a challenge, but a fun one, we hope!
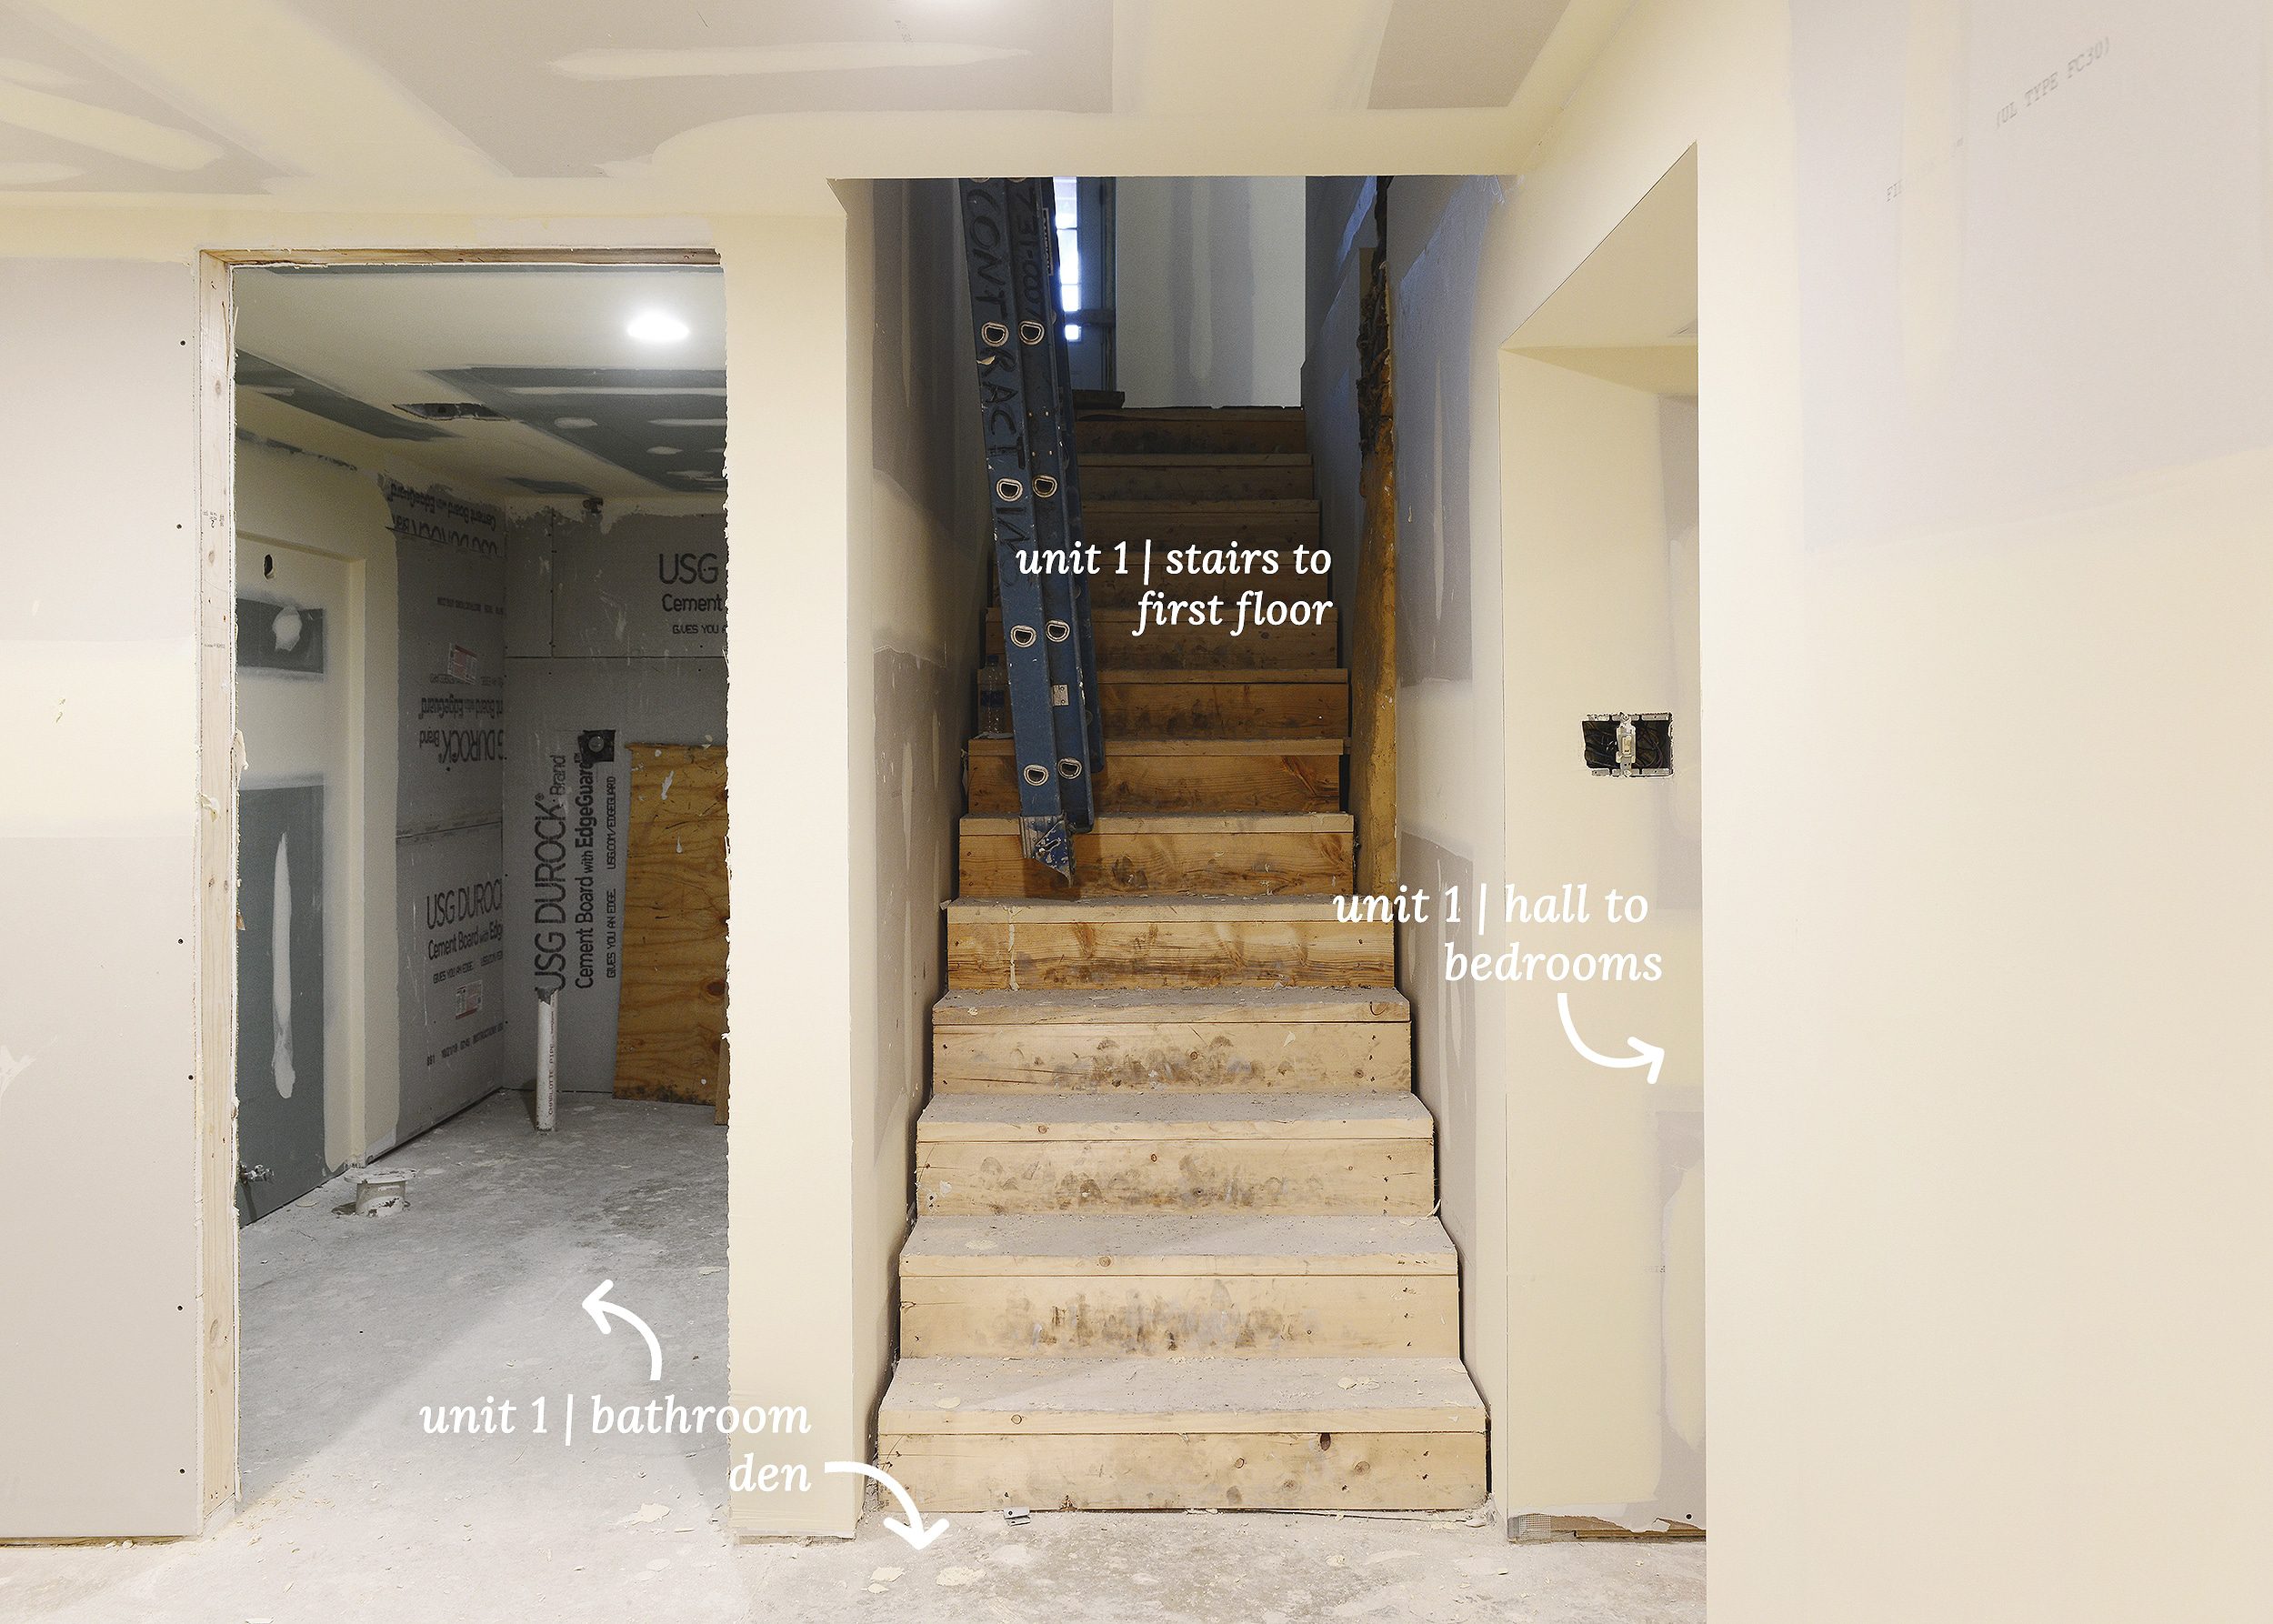
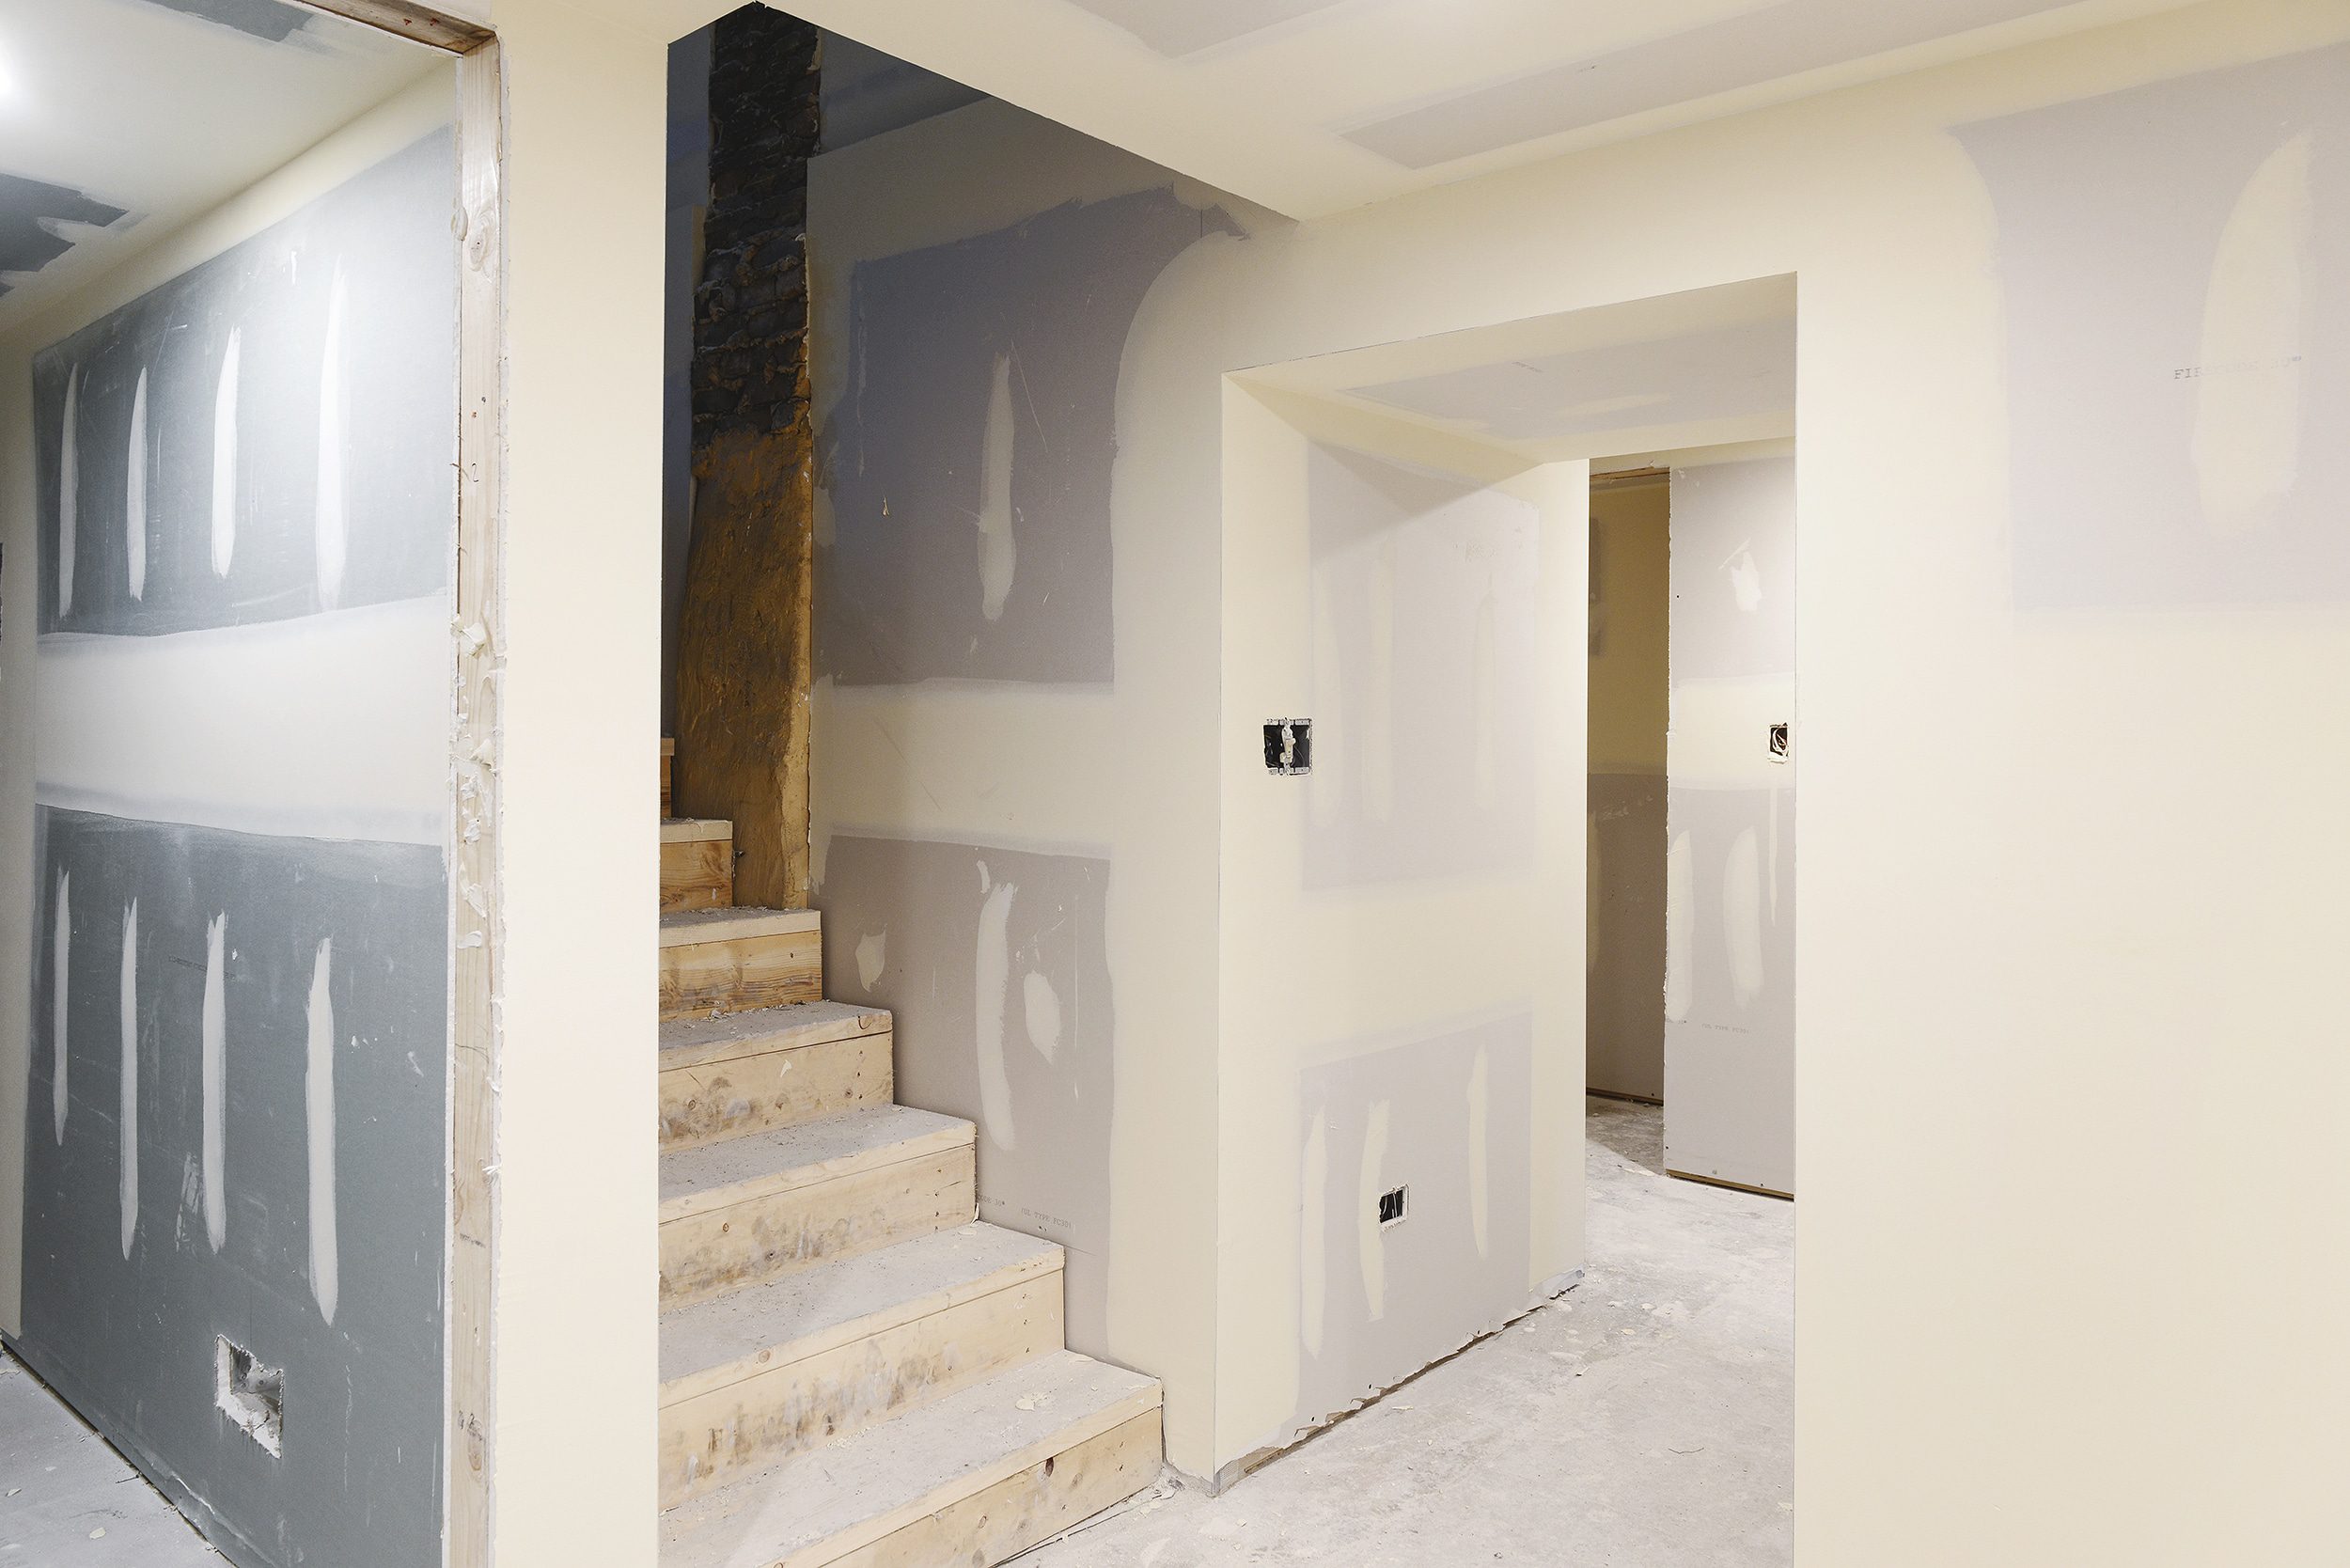
A slightly different angle shows the exposed chimney as you come down the staircase. We’ve still got some plaster to remove, but this old beauty will get a full makeover to show off some of those perfectly imperfect bricks from the late 1880’s.
Unit 2
Up the common space staircase to Unit 2, the plaster was also in pretty rough shape. With the entire house being re-wired, re-plumbed and re-insulated, it once again made sense to replace all of the crumbling plaster, which we were initially bummed up. However, seeing how well our contractors were able to mimic the arched openings and soft curves of the ceiling made us feel so much better! The only main layout change to Unit 2 came in the form of a slightly extended bathroom, which borrowed a bit of square footage from the kitchen.
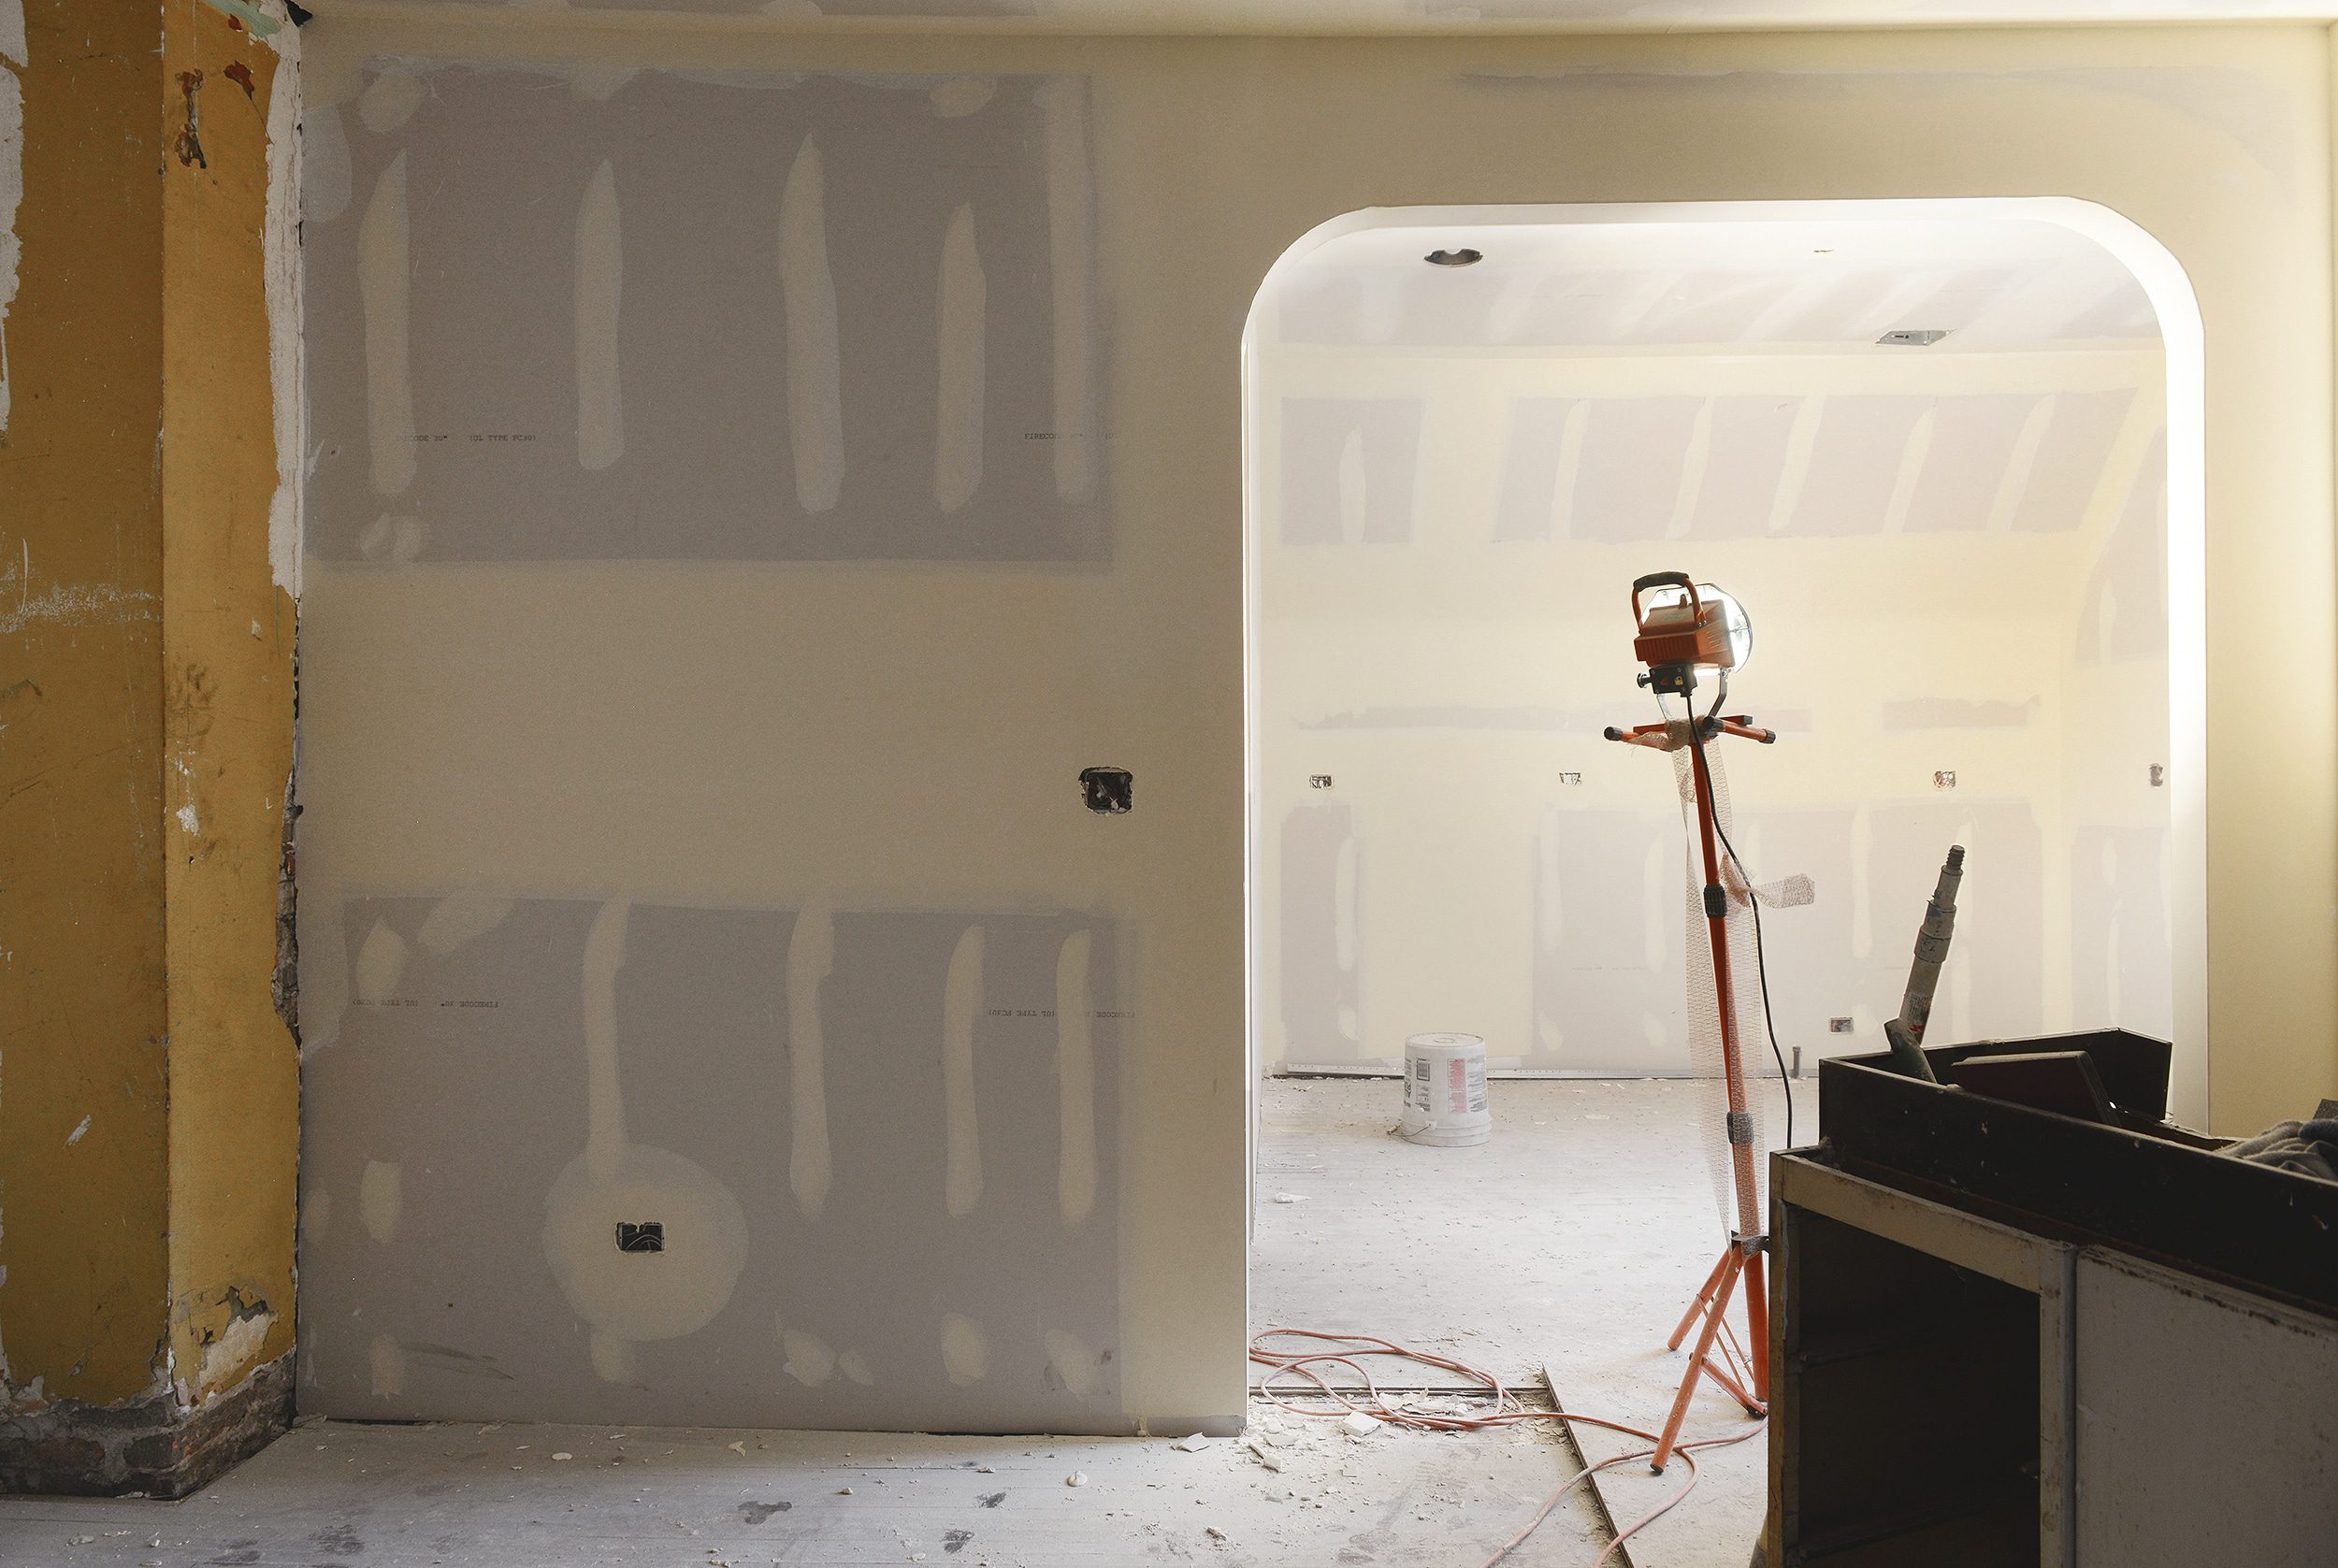
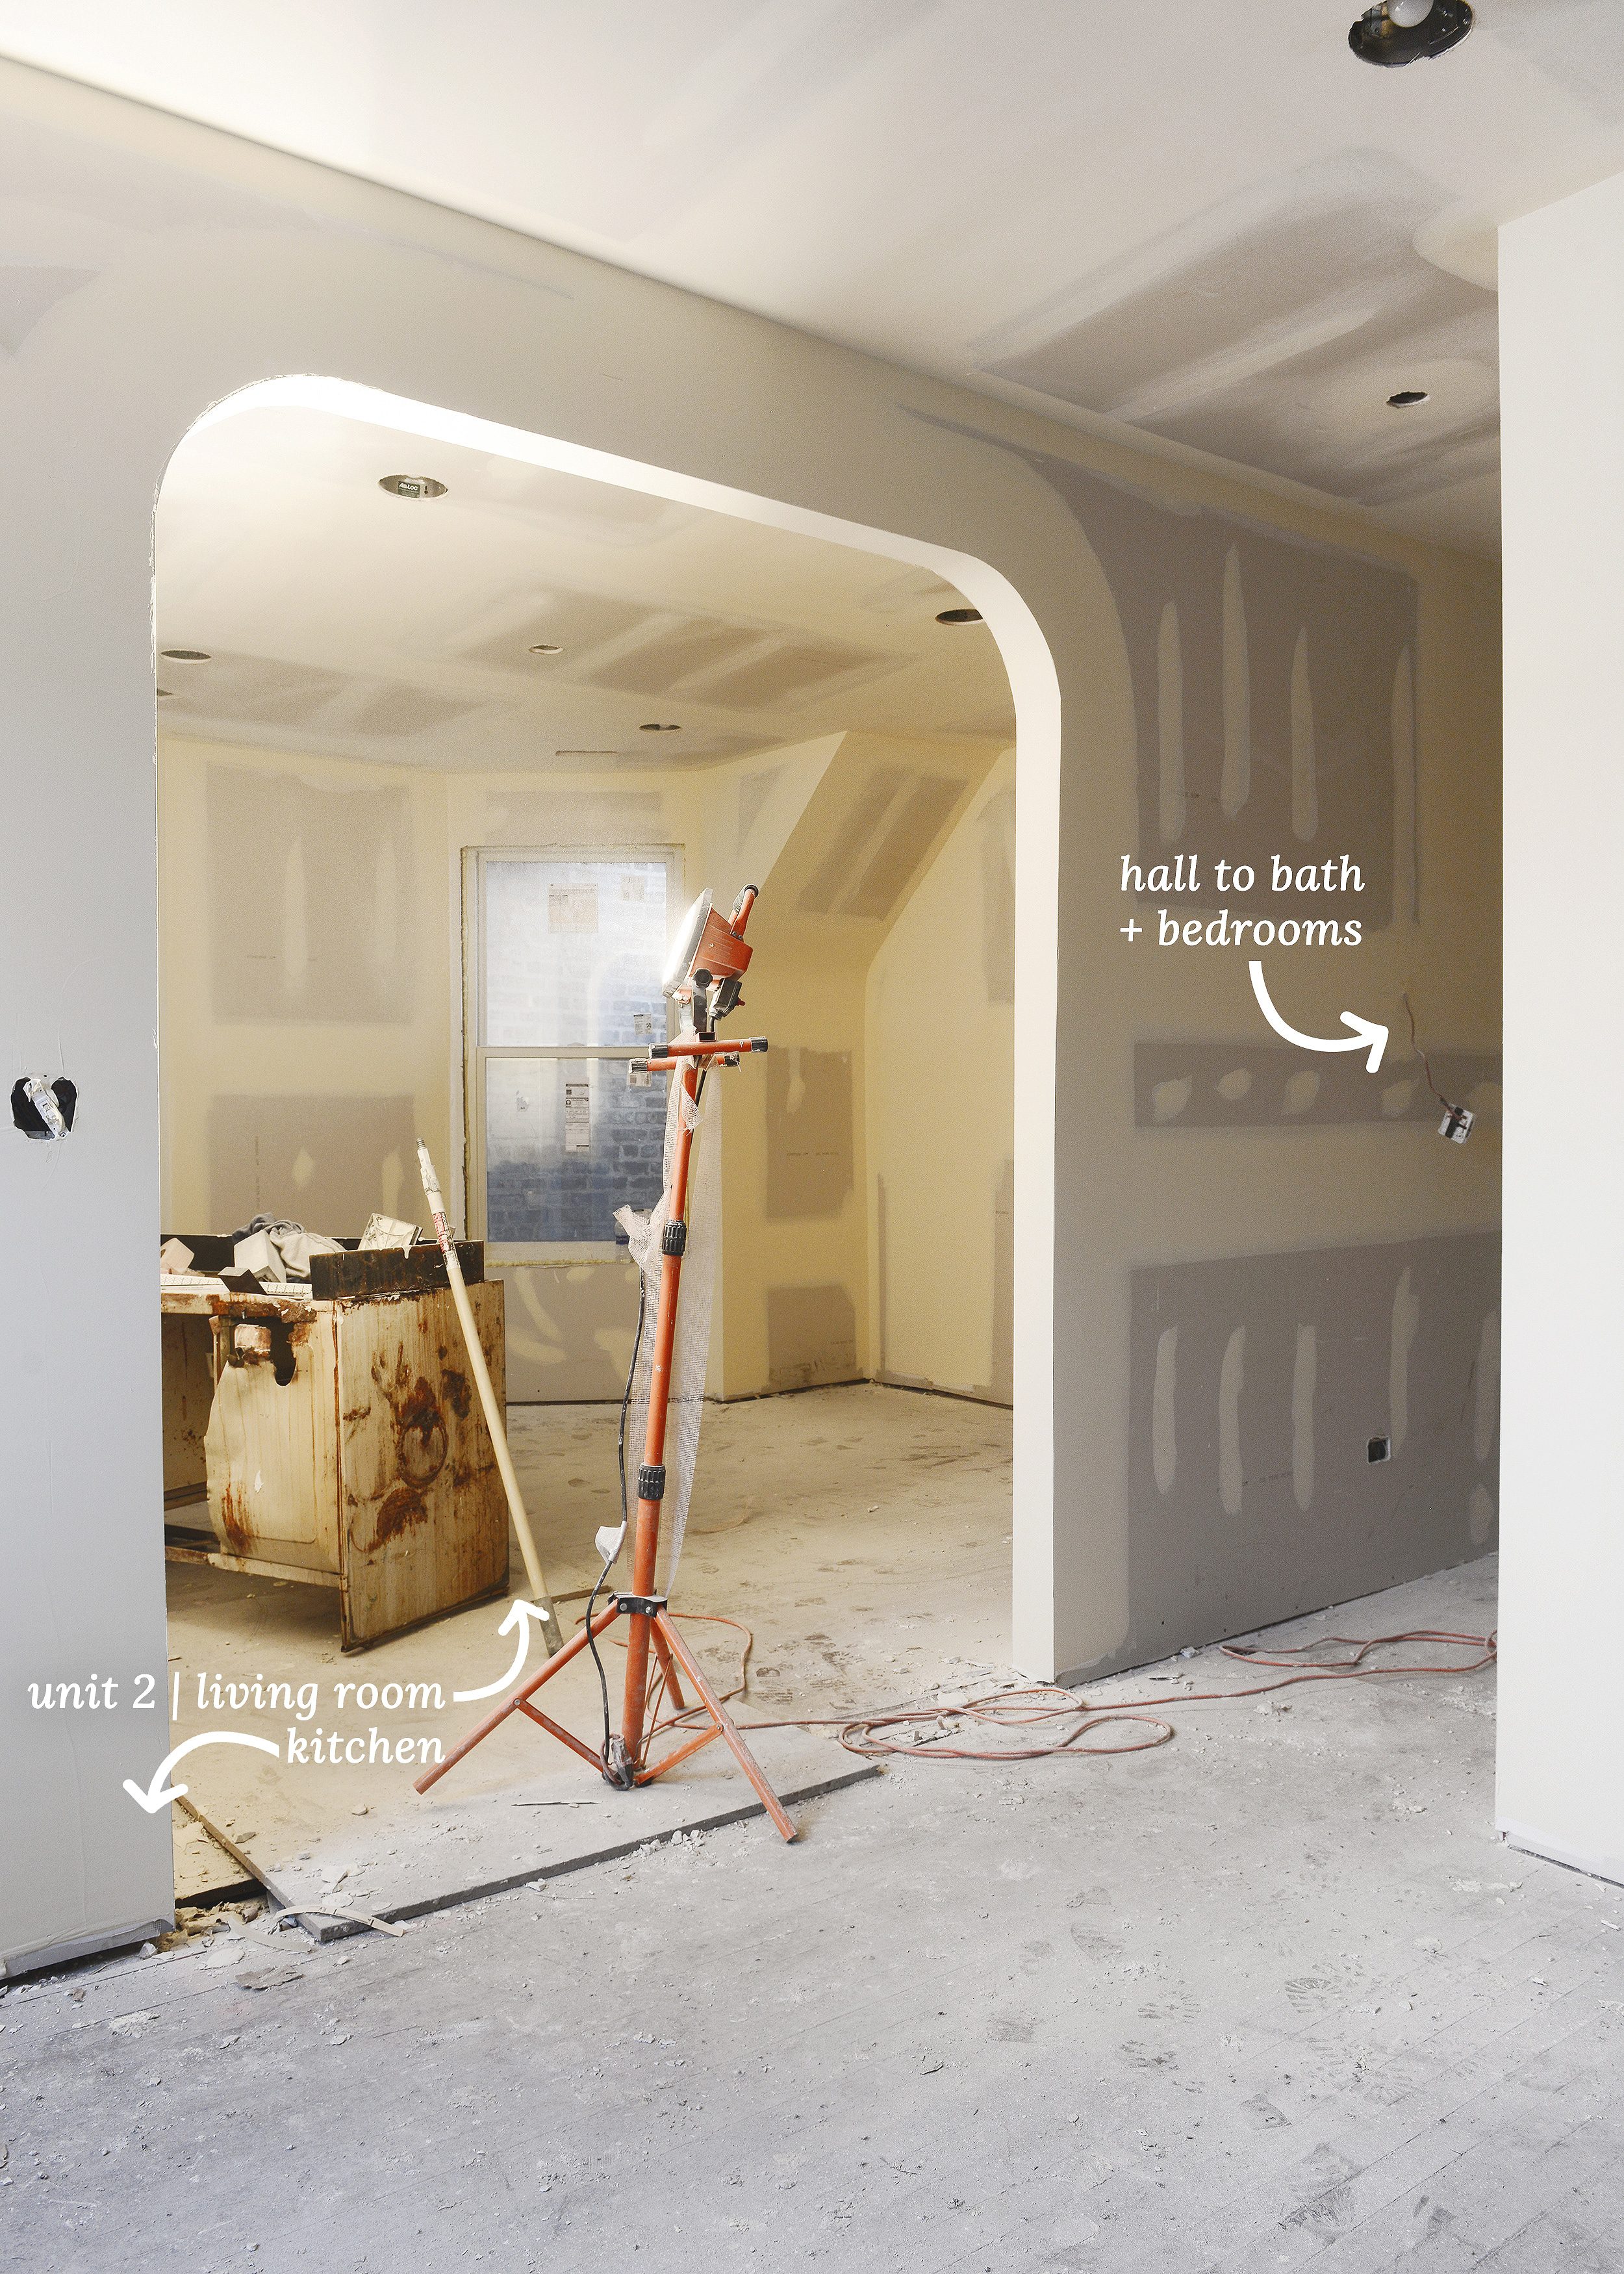
And about that archway: We also elected to relocate and widen the archway between the kitchen and living room as seen below. This change provided much better flow and created a short ‘hallway’ to the bedrooms at the front of the unit for added privacy. It will also allow for more furniture placement options in the living room and create space for a small dining table, if desired. Since we were starting from scratch, we really tried to think of everything!
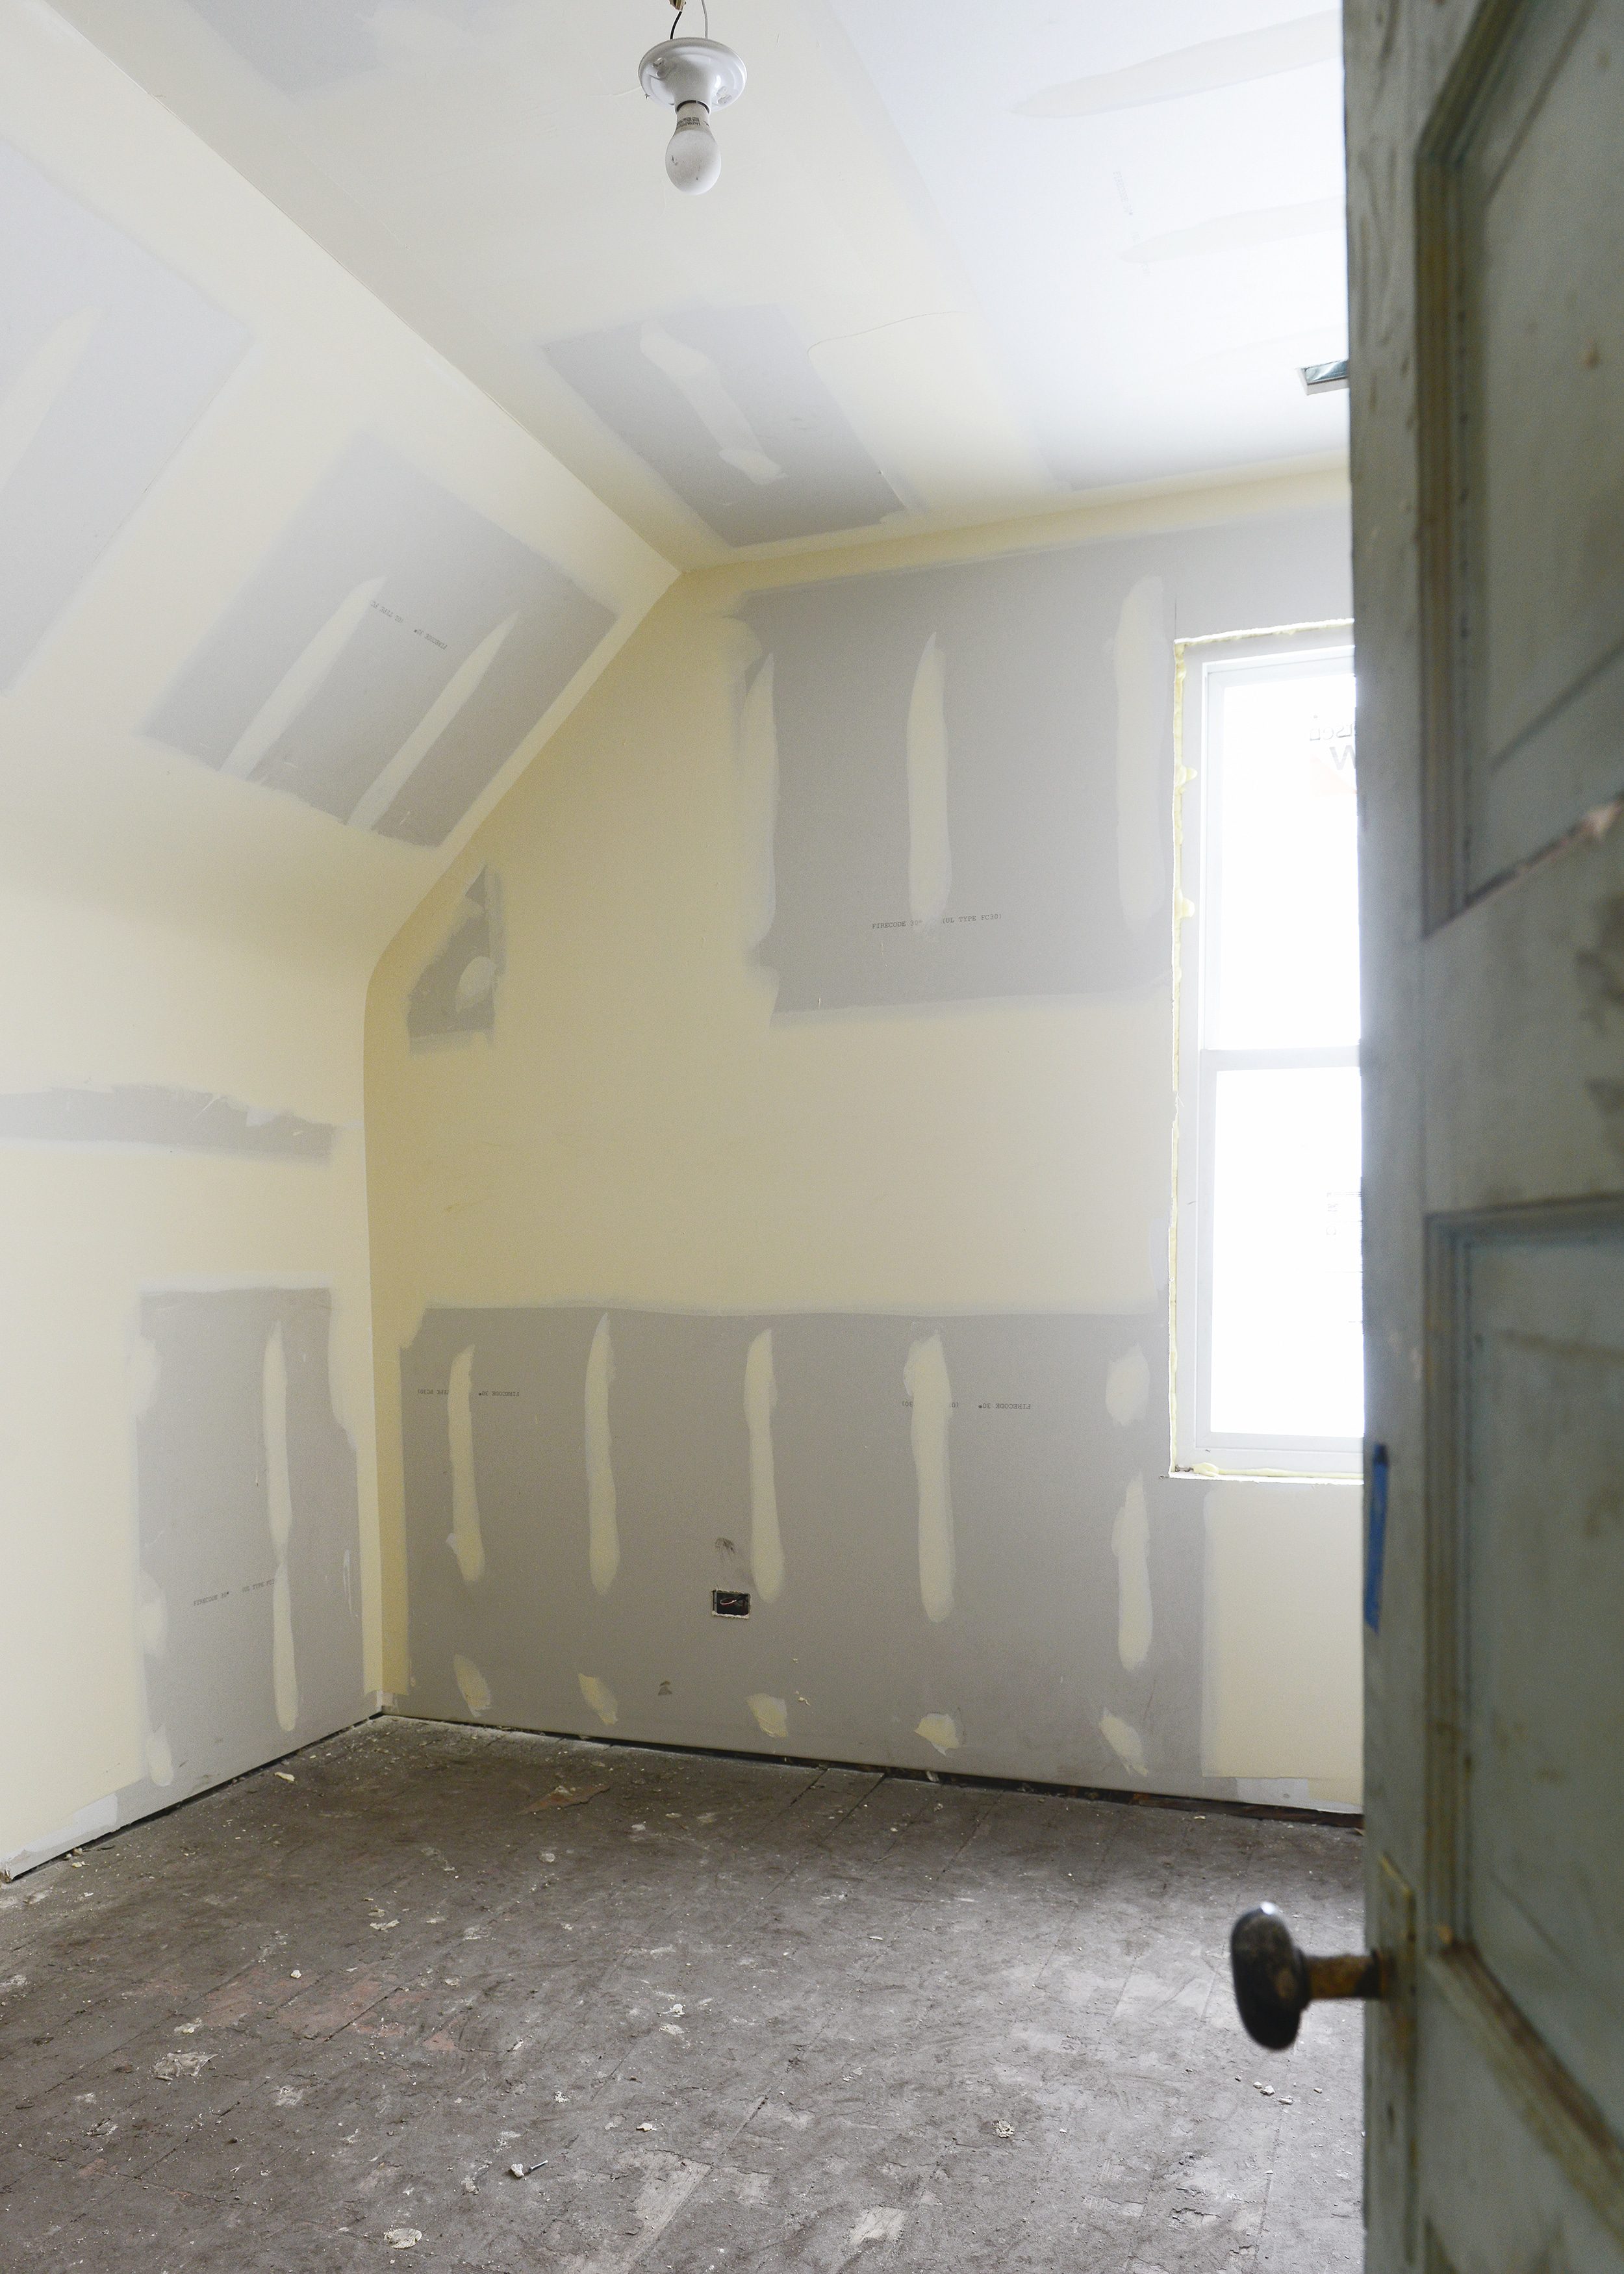
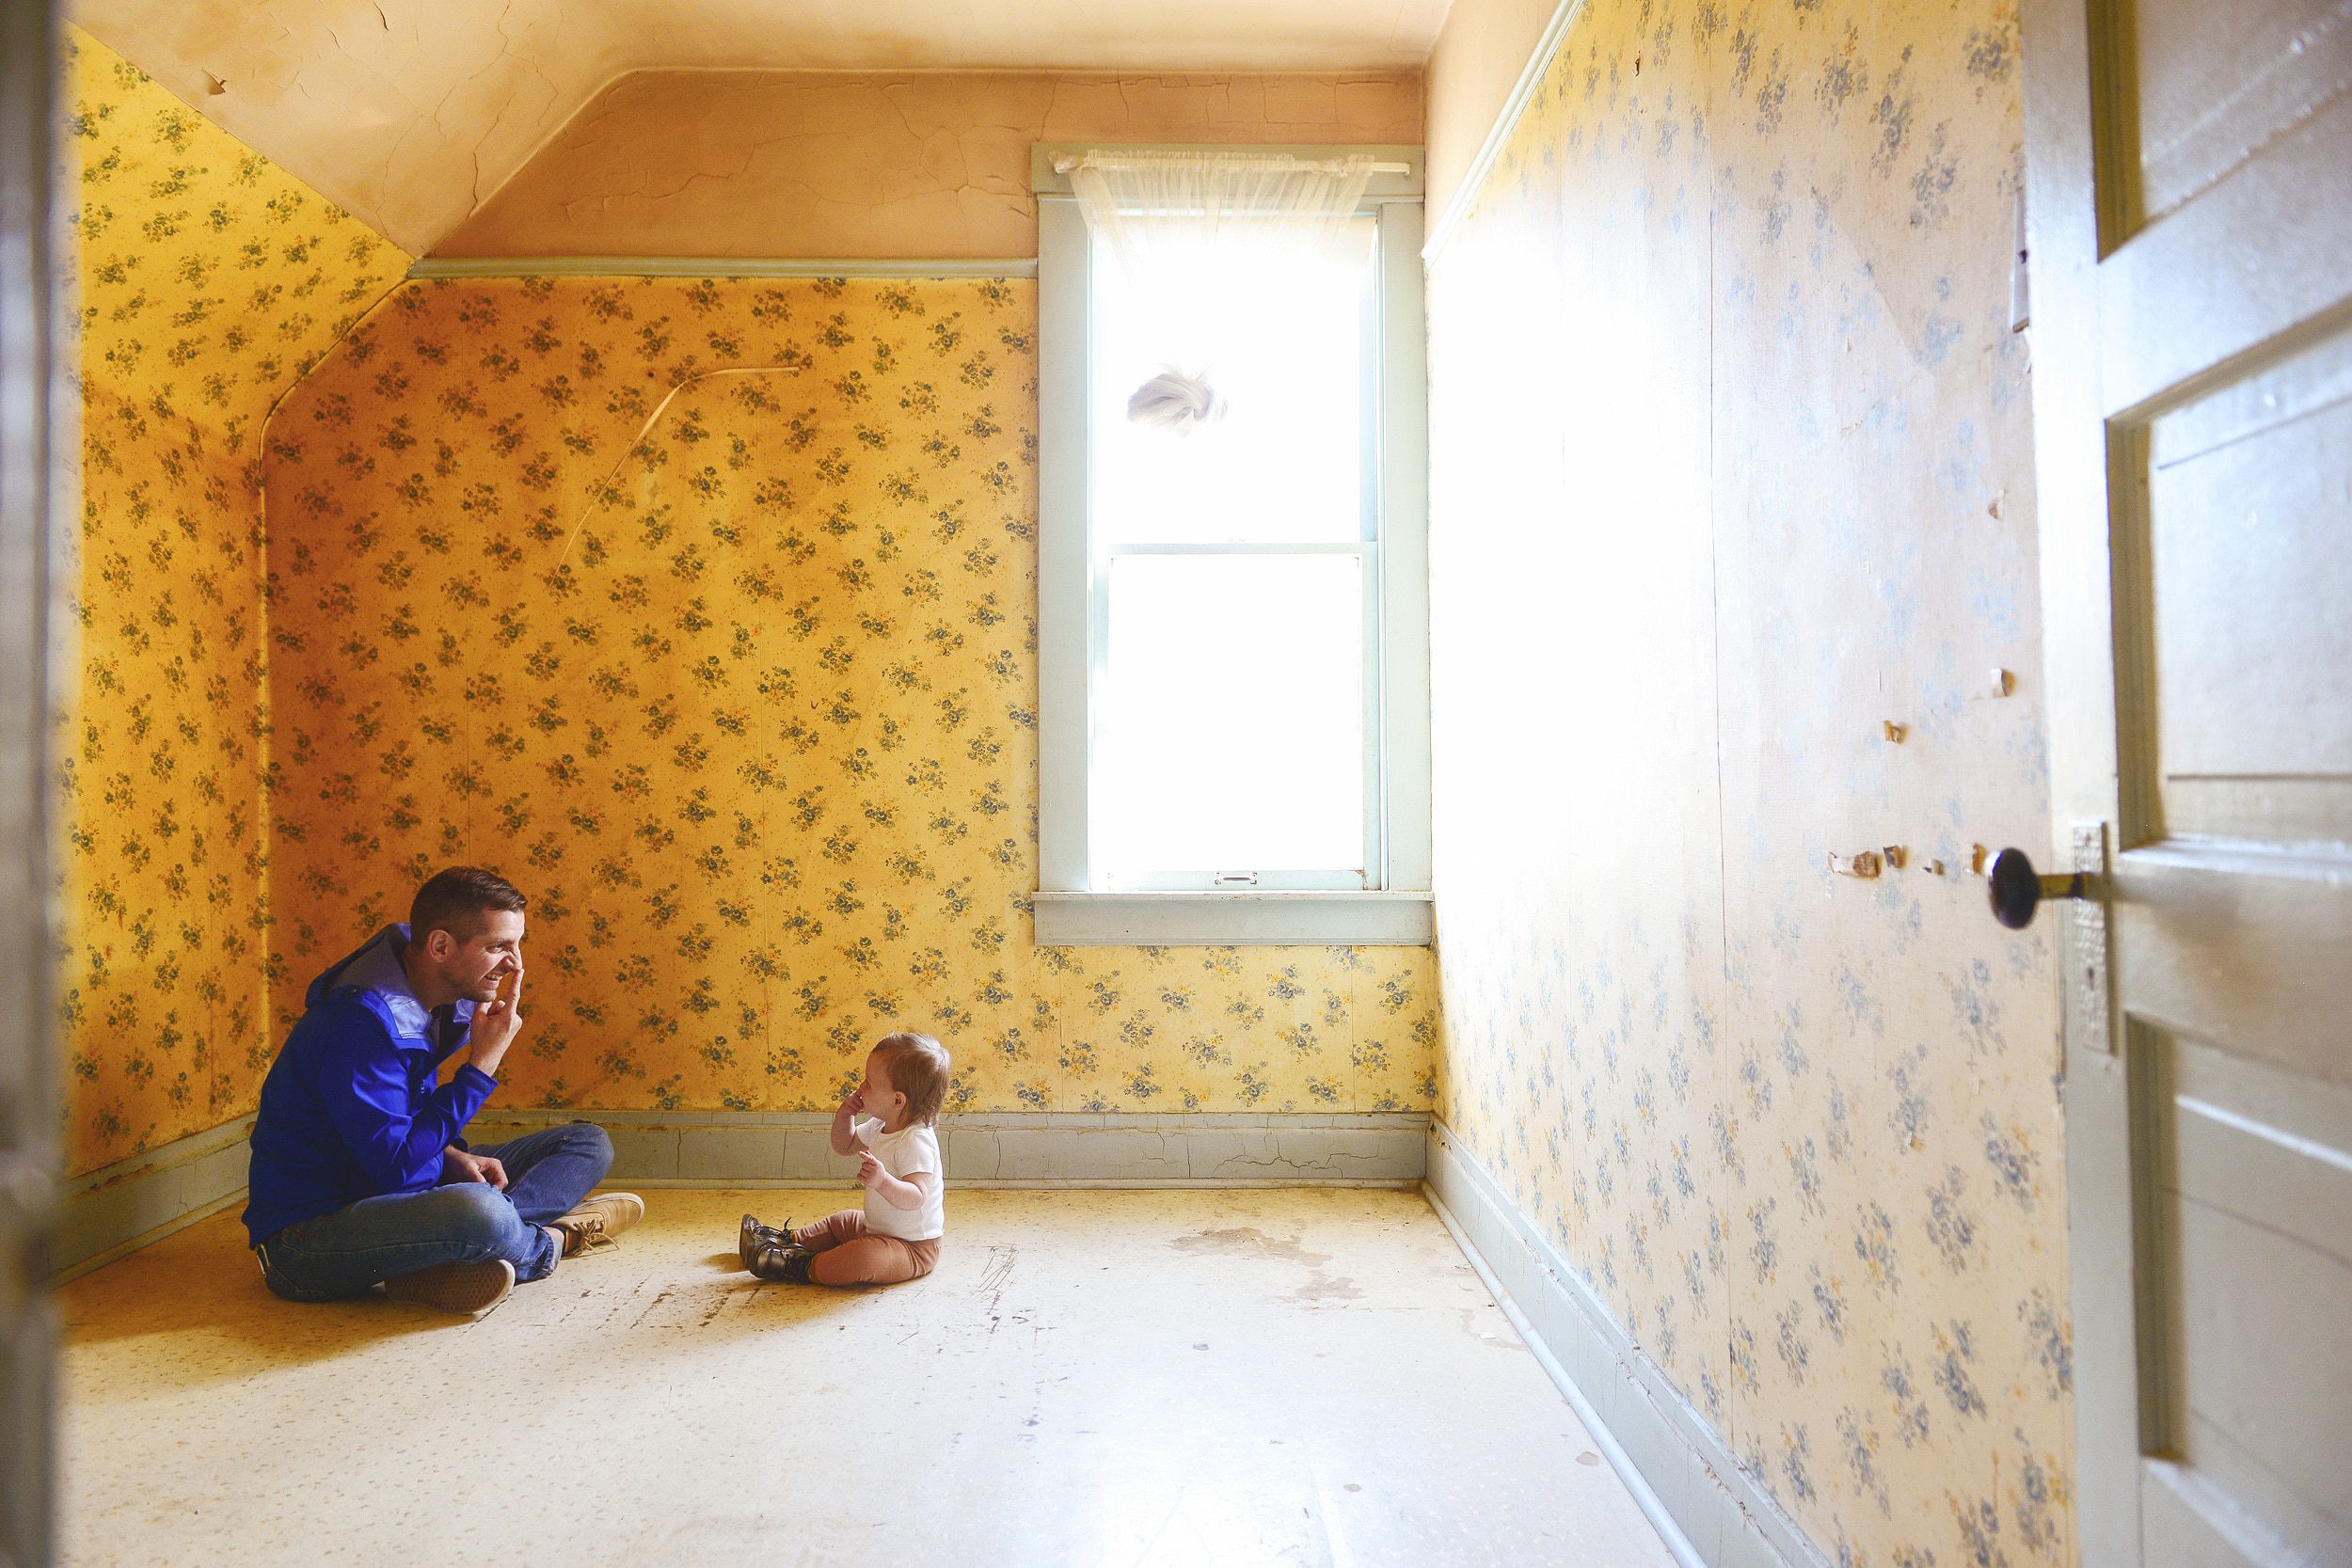
In the two bedrooms at the front of the unit, the floorplans were already awesome, so no changes were needed. Aah, look at those curves! The gently curved plaster walls were some of our favorite architectural details in the home, so it was very important to us that they be retained and the drywallers took extra care to replicate the curves perfectly.
Just for fun, here’s how the room above started:
The drywall work is nearly complete, and the whole space will be primed and ready in the next few days. Once complete, we’ll do the final walkthrough with our GC to establish any final punch list items, and then it’ll be our turn to take over and start kicking butt! It’s been a long road, but we’re only a week or two behind our initial projected schedule. Guys. Things are about to get real!
PS: You can see our first walkthrough right here, and these are the plans for Unit 1 and Unit 2.


Looking great! So are both units for short term rental or is Unit 2 long term?
We’re thinking that Unit 2 will be a yearly lease.
Love seeing the progress in the photos below the video. Usually your videos are awesome but this one didn’t have the pulled back angles to properly see the space. It seems like ChrislovesJulia has the same problem this week. Love you both!
I agree. The video was very hard to watch without getting dizzy too. I had to stop watching. I’m loving the progress!
It has come so far so fast!
It’s so cool how much lighter and brighter it looks now that the light has something to bounce off of!
Looking good! And I am excited to follow along with the whole process! I hope this phrase doesn’t put you off – but I am curious why you went with a long narrow horizontal window for the basement? I really like the width of it but was curious if it couldn’t be deeper or did it just look funny on the outside? I am not good at visualization or planning so I like to hear about the process for others. :)
Thanks, Beth
Hi, Beth! We knew that was the only wall it would work to put the bed, so we needed it high enough off the ground to not conflict with a bed frame. We were also constricted by a new beam we had to install in the basement! Lots of tricky angles down there!
Thanks so much for your reply! And now the choice makes perfect sense. :)
Love the progress! It’s looking amazing!
Paige
http://thehappyflammily.com
I can only imagine how excited you must be! Those drywall installers look like they did an awesome job! Our house is small, so anytime we do renovations, I finish the drywall myself, and I have a strong appreciation for people who do it for a living. I think I’d lose my mind trying to get that many spaces smooth all at once. LOL
Will you be sharing the units to find renters on here once done? Very excited to see it!
Of course!!
This is huge progress! Every little bit counts. Can’t wait to see what’s next.
Wow, the progress looks amazing so far. Can’t wait to see the finished reveal. Would you be comfortable sharing a cost breakdown of the complete renovation once finished?
Thanks for sharing a fun article about drywall. It can be quite ‘dry’ but lots of great nuggets in here. I love learning about this stuff. Good luck on your next project!
Looks fantastic. Thanks for sharing your journey on here. The photo with the little one at the end is precious. We have a small drywall biz in NJ and I always love reading stories like this. Drywall is typically not fun to talk about but these stories make it come alive and give us purpose to keep doing what we do. Thanks again for sharing!