

With the paver patio complete, we were excited to dive into phase two of our backyard project – planter boxes! We’ve been talking about these boxes for months – over dinner, in the car, while walking the pups (you name it!) – and it felt so good to start knocking them out. In our minds, we were planning on completing them in a day, but as most things go with DIY (and my runaway imagination), that didn’t happen. Even still, we made a ton of progress, so we’re calling this step one of phase two. Let’s go!
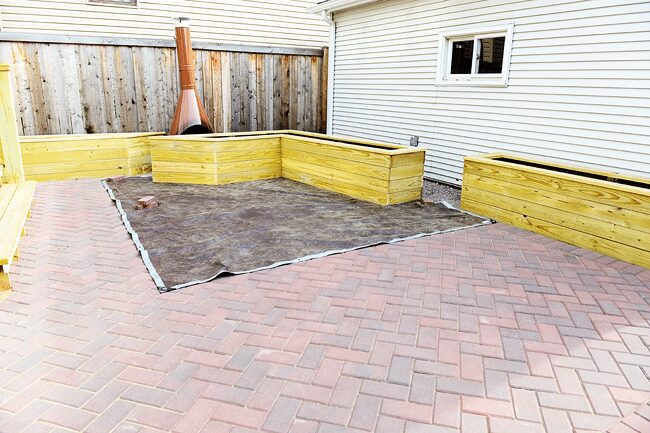
When we had our backyard graded and prepped for pavers, we allowed for a 30″ border around the perimeter for our above-ground planter boxes. We pinned inspirational boxes, sifted through pretty online garden photos, and in the end, we made the last minute decision to incorporate a built-in bench, too. Before we hurried off to the store, we sketched out plans and debated the merits of a 20-inch height versus 22 or 24. We threw around talk of a deep walnut stain or a weathered grey stain, and we even wondered if we should spring for cedar and skip the stain altogether. Nothing was off the table just yet, but we did nail down all the lengths so we would have a basis for shopping.
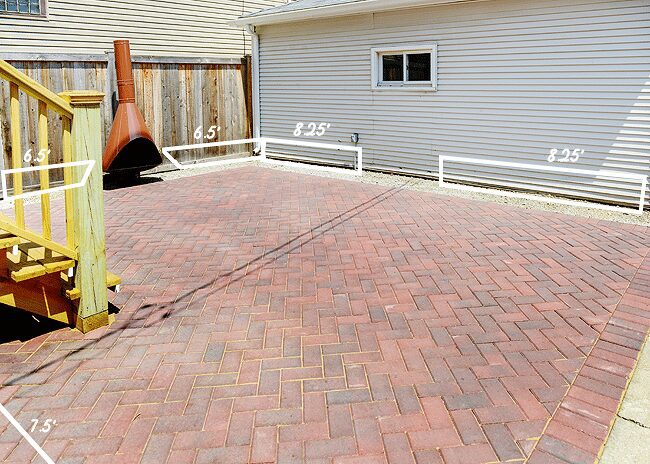
We love the way Sarah’s bench seating (our inspiration) plays off the curves of the wide, circular base of the fireplace, so we also threw in a couple of 45-degree angles to keep things interesting. Below, you can see where we landed on length, including the box alongside our staircase (see it there in the lower left corner?). And that gap between the two 8′ boxes? That’s where a sweet little 4′ bench will go:
Although we originally thought we might buy 2″ x 8″ pressure treated boards (allowing for a 3-board height), we quickly realized that the thickness of a 2-x would be overkill! Instead, we opted for these 5/4″ x 6″ x 10′ boards that were a true thickness of 1″. The 10′ lengths would allow us to cut each length needed for the planters with enough leftover to create the depth. But! By going down to a 6″ board versus an 8″ board, we had to adjust our plans for a 3-board height and step up to 4 to get them as tall as we’d like.
In total, we tallied up a total of 55 pressure treated boards, but with each 10′ board weighing 10+ pounds, we nixed the idea of hauling them home in our car. Instead, we scheduled a delivery for the following day, just as we did with our brick pavers! Side note: Lowe’s charges a $59 flat delivery fee, and it’s 100% worth it. Every last board was brought in on a pallet and set inside our garage.
OUR SHOPPING LIST
5/4″ x 6″ x 10′ pressure treated deck boards
Pressure treated 4″ x 4″ (corner supports)
3″ Polymer-coated deck screws
Cabot semi-solid deck stain
Foam board insulation sheets
2″ x 4″ x 8′ pressure treated boards (for our bench seat support frame)
Exterior grade wood putty
Tarps for protection
If shopping for yourself, the quantities above would depend on how many boxes and what sizes you’re making, but you can see that the supply list is pretty simple! For the stain, we have paint rollers, brushes and trays already, so keep those add-ons in mind, too.
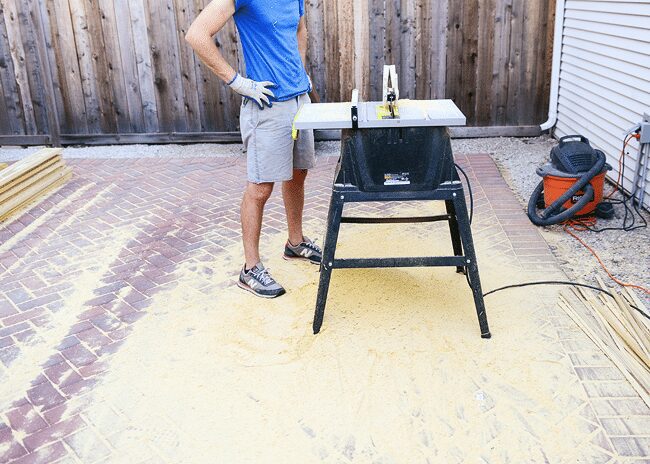
The same day the boards were delivered, we spent the evening ripping 1/8″ off both sides of each and every board using our table saw. Common boards have a slightly rounded edge, so although this is complete personal preference, we always take the time to do this step so that the edges are nice and square. In the end, we love that it gives off a more polished look:
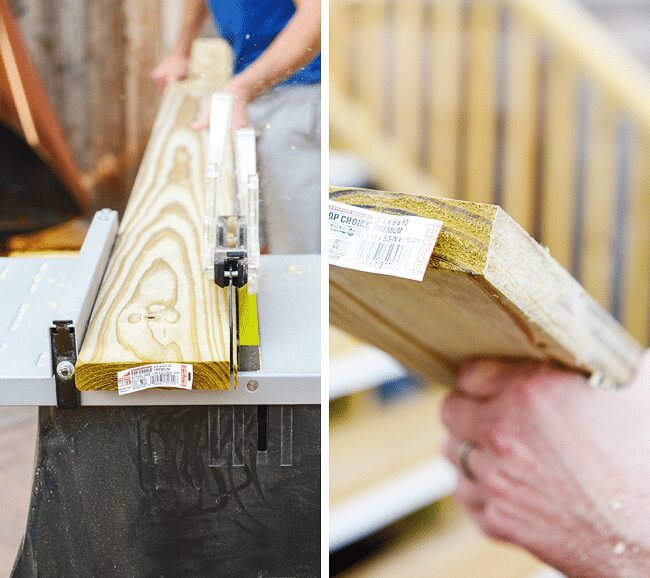
Just be prepared to clean up the massive amount of sawdust!
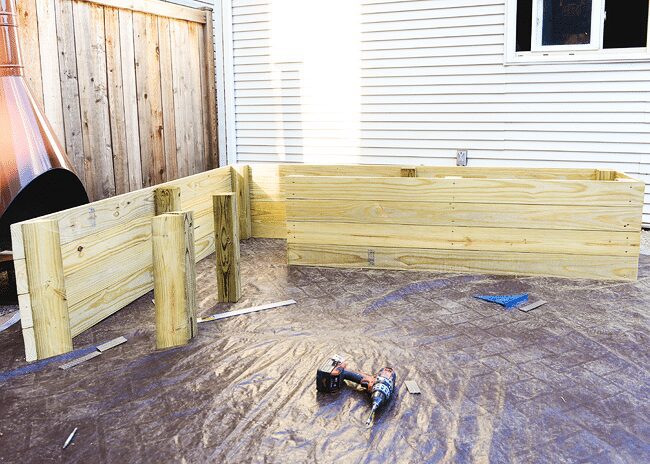
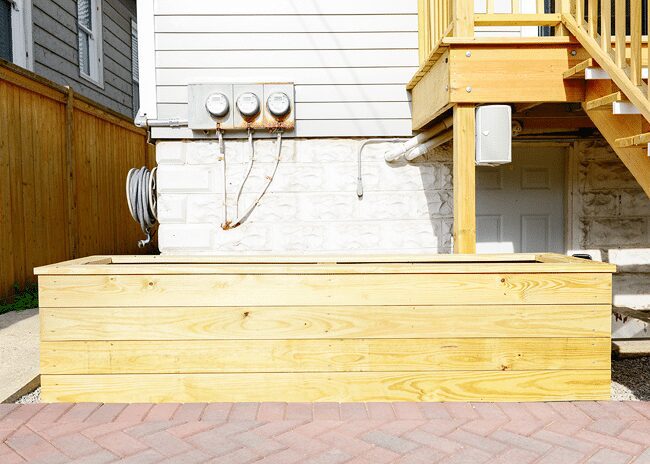
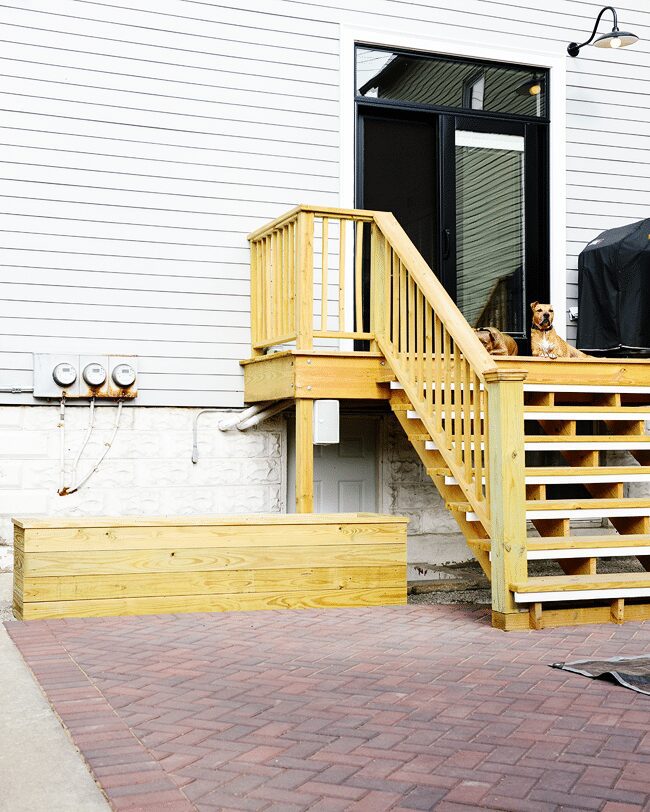
With our boards prepped and ready, we spent last Saturday building! We started with the 7.5′ planter next to our staircase first, the most straight-forward box of the bunch. We started by cutting the 4x4s to 21″, which would be our finished height. We decided on an overall depth of 24″, so after cutting the long lengths to 7.5′, we used the remainder of those boards and cut them to 22″; this accounts for the 1″ depth of the front and back boards:
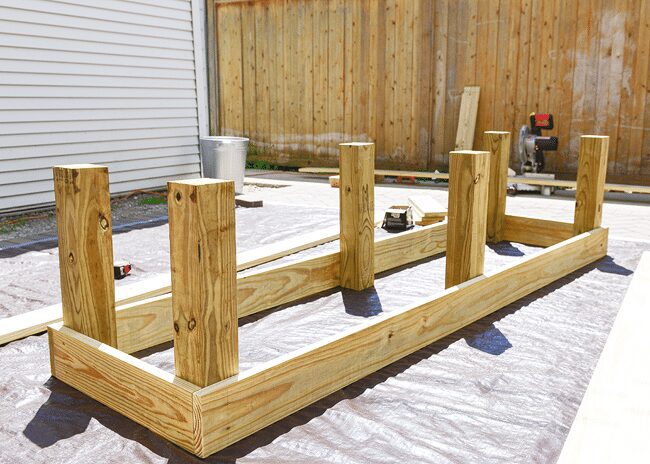
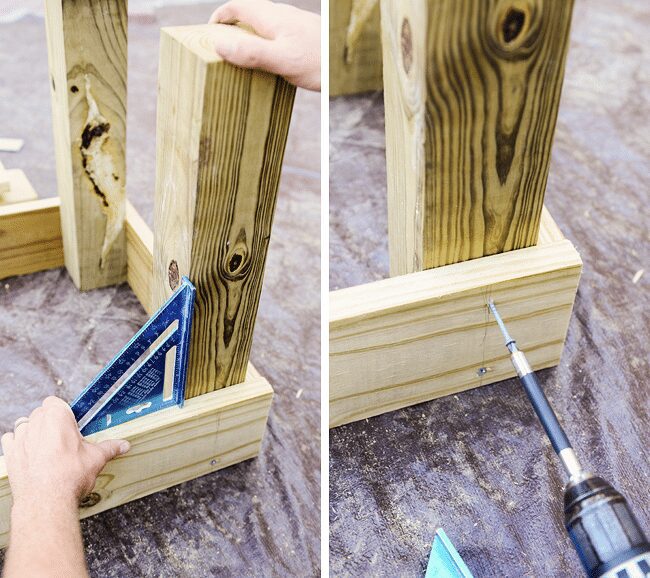
It was easiest for us if we worked our way around box, layer by layer, squaring the 4x4s as we went. Scott used two screws into each of our corner braces on every board. Additional 4x4s were added to the middle of all our boxes, which helped to align the boards and give them more support.
For a bit of interest, we used shims to space each board apart. Not only did this help give the illusion of straighter boards across the longer runs (we had more freedom to push and pull the boards into place along the 4x4s), but the 1/8″ gap added a tiny design detail that we liked. Our planter boxes will ultimately be lined with insulation – a tip given to us by a local nursery to protect perennials – so there won’t be any spillover from dirt, precipitation or watering.
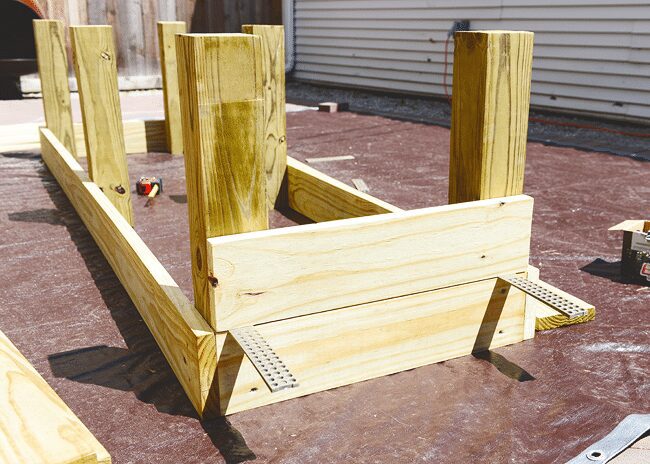
For being one of our smaller boxes, this guy still weighed a ton. Like, I was barely any help to Scott, but we were able to get it into place. At this point, we still needed to add a finishing lip around the top (more on that in a minute), but things were looking up!
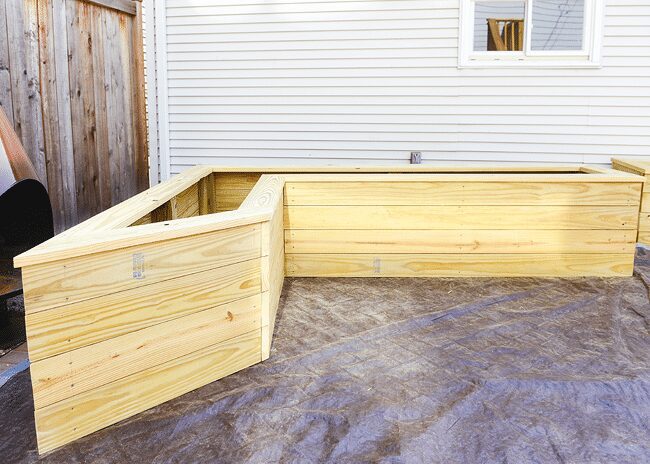
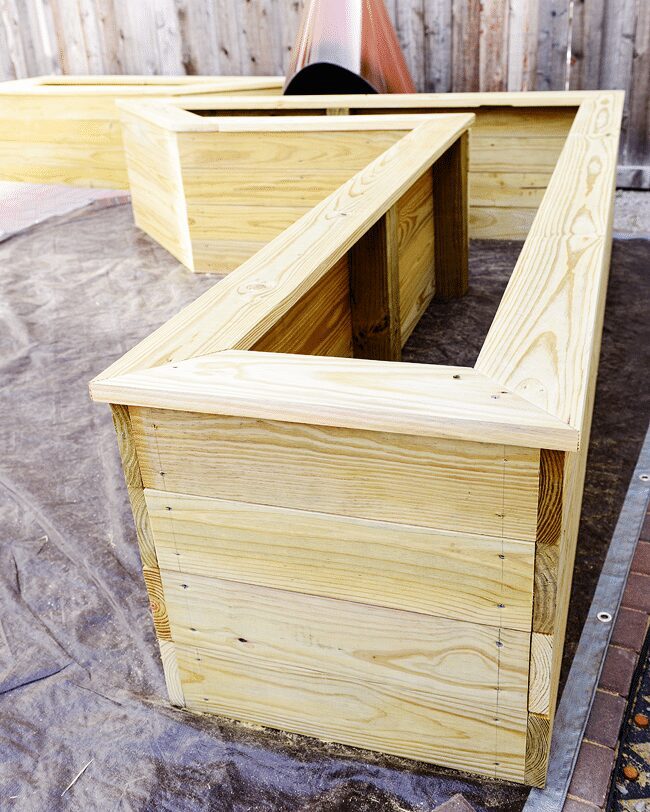
Next, we worked on the angled box that would sit to the left of the fireplace. It was built in the same way, but we needed to use three 4×4 halves to support the corners, and we cut the ends of the vertical boards on a 45-degree angle as well:

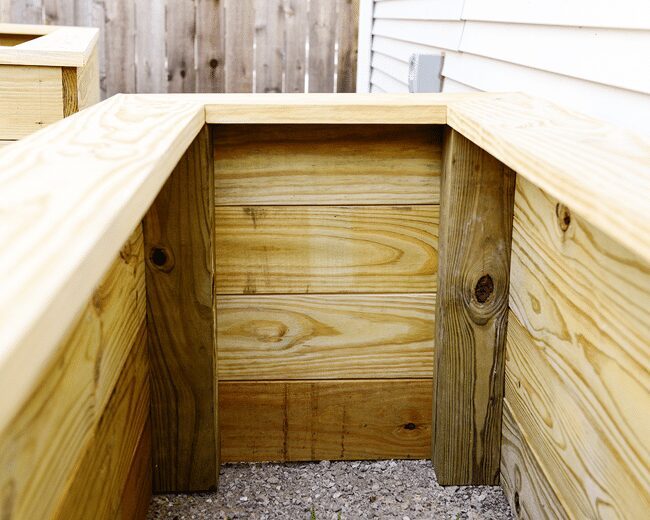
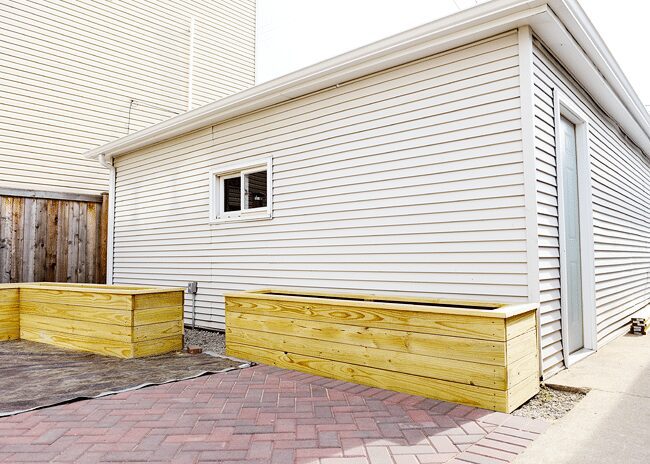
The box to the right of the fireplace was our most challenging, because we wanted it to seamlessly wrap around the corner along the garage as well.
But look! Cute!
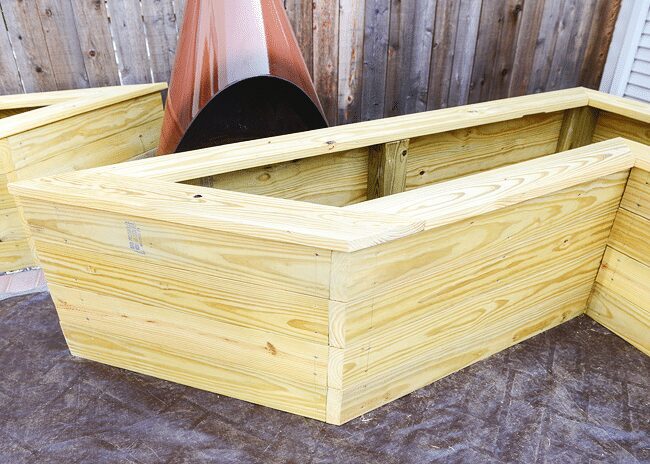
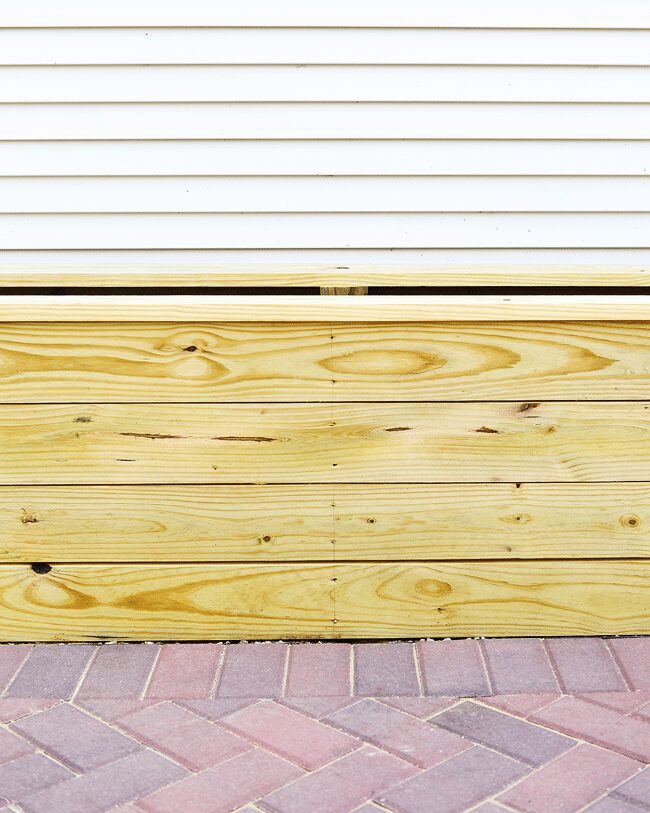
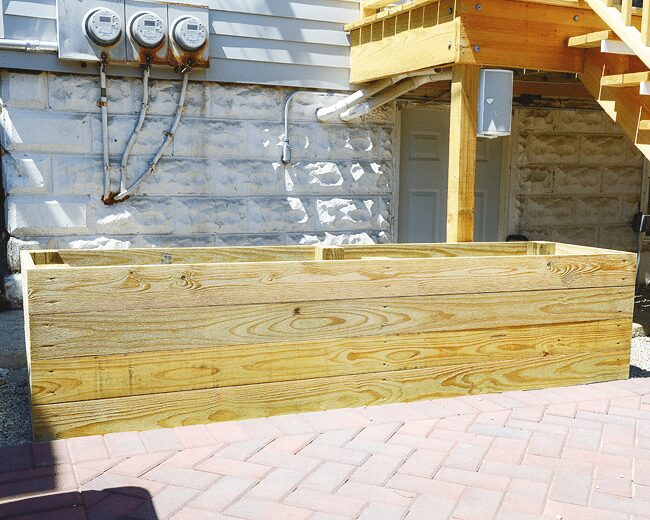
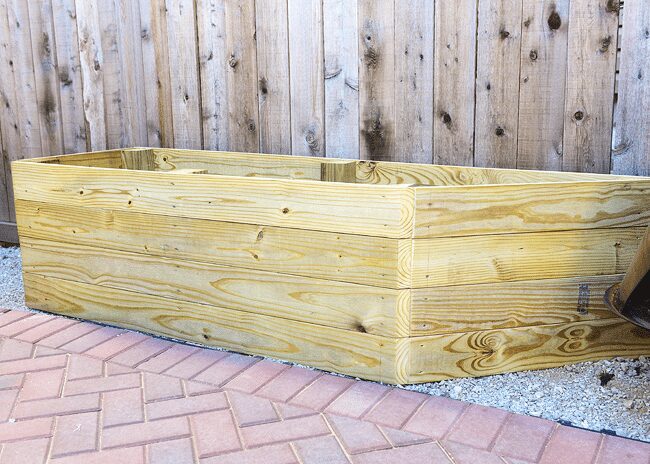
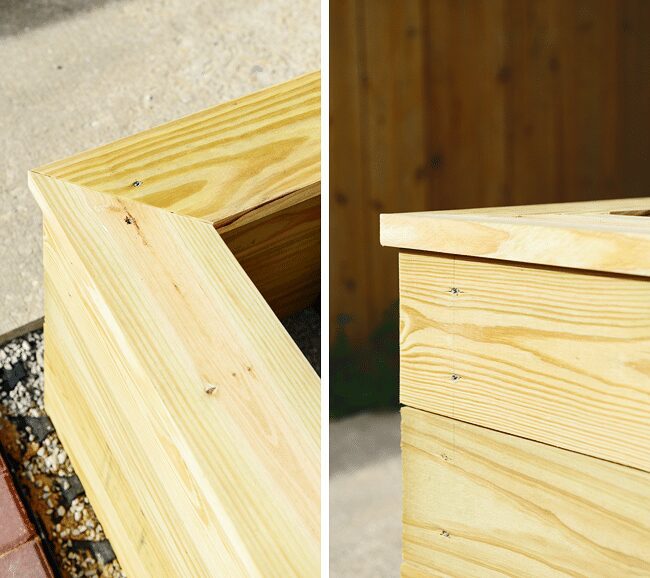
You can see we added a finished edge along the tops at this point, which really sets them off. We are so happy with how they took our pretty planters and made them look complete:
We made the edges deep enough to cover the 4×4 supports with just enough for a 1/2″ overhang. The math worked out that each lip is the same width as the vertical boards – about 5″.
Although straight cuts would have looked fine, we decided to use mitered corner cuts. One deck screw from the top into each 4×4 is keeping them secure!
The largest corner planter is very, very (very!) heavy, so it’s still floating in the yard for now. At least this will help us get all the way around when we go to stain the boxes, but we’ll likely need to call in the help of a few friends to shimmy it into place:
This weekend, we’ll be building the 4′ bench that will span the distance between these two planters (again, the corner planter isn’t in place, so that gap will be large enough for a 2-seater):
In addition to building the bench, we’ll be puttying over all the exposed screw heads and lining them with foam board insulation. We’ve decided on a deep, dark stain that we’ll apply before finally moving them all into place, and then it will be time to fill them up with dirt and plants and choose a nice layer of gravel to finish off the look between and around them!


Forgive me for asking but today this post came truncated into my RSS reader. I don’t believe your posts were before. Is this something you plan to do into the future?
Hi Katie, we’re working on a few formatting changes for the blog to keep it loading faster since our posts tend to get very long. Nothing is set in stone just yet. Can you tell me what reader you use? I’m not seeing it truncated on my end, and I use Bloglovin’. Thanks!
I use feedly and it came through truncated. Not a big deal for me to click through but thought it might be helpful to let you know.
I use Feedly and it happened for me too. Not that it matters, but I REALLY prefer the blogs that aren’t truncated. :)
Thanks, guys! The reason I wasn’t seeing it is because I use Bloglovin’ to read up on favorites, and they always require a click over… something I actually prefer, since I like to read posts directly on the site. I appreciate the feedback!
Please don’t truncate! Pleeeeeaaaaseeee!
I use theoldreader.com and it was truncated for me, too. I usually unsubscribe from blogs that truncate. Even if I love the blog, I just can’t. ha.
I use bloglovin and it showed up truncated for me as well! Please don’t truncate! I’m super not a fan!
I am also using Feedly
I’m also using Feedly and it is truncated. Please change it back!!
I use Feedly and it is truncated. I unsubscribe from blogs who truncate even though I typically click over to the site and read the post there if I find it interesting – truncation keeps me from figuring out whether I want to read the post or not.
I am really interested to read about the insulation process. This wouldn’t have occured to me until too late. We’ll be tackling our back yard renovation next spring and will be using many of your posts for guidance. Any chance you’ll be installing a rain barrel or two as well;) We have some drainage issues to tackle as well.
It’s not something we thought to do either, but we met with a design consultant from a local nursery (which was surprisingly crazy affordable, by the way!), and she suggested it to keep perennials happy! We’ll share the details once we tackle that part!
Hi- I am disappointed that this post came through truncated. I have been a long time reader and huge fan (of your style and as a rescue dog mom) and I save and pin a large number of your posts after reading them in my RSS feed. I have also purchased a number of items through links in your posts. Please don’t make the decision to optimize towards getting more clicks on your content at the risk of alienating people who already are part of your fan base.
Hi Kelly, thanks for your feedback. We’re working on a few formatting changes for the blog to keep it loading faster since our posts tend to get very long. Can you tell me what RSS reader you use?
Update: I’m seeing it in Feedly, is that right?
I use Feedly and they’re coming through truncated for me on there.
I use Digg Reader and it’s showing up truncated as well. Like Kelly, I’m a longtime reader, and often purchase items using links in yours posts. I would prefer that you not truncate posts in RSS readers as it does effect my decision to continue reading your blog.
I’m seeing it truncated in The Old Reader as well. I know I’m so much more likely to read posts when I don’t have to click away, or even if it’s truncated, but with a photo. I need that visual to remind me what I’m following a blog for!
oh my gosh, guys, now you are making me rethink keeping the boring little flowerbed in front of our newly re-sided garage — the idea of two giant planters + a cute bench is blowing my little chicago brain! plus my raised beds are cedar and i loooove the weathered color they’ve taken on after this rainy sunny summer — thinking a version of these planters with that would look amazing :-o
Oooh, that WOULD look amazing! Perhaps you could give it a go in another area and see how you like it? They had cedar at Lowe’s in the same dimensions as the pressure treated we used, and it was stunning.
I use feedspot and had to click over which I hate! Please change it back! I love you guys but I just don’t have time to click over to every single blog I read!
Also- planter boxes and fireplace are awesome. Can’t wait to see them filled with plants. It’s gonna be rad.
We can’t wait either!
I have that same fireplace, can’t wait to see how you fit it in your plan.
Did you guys talk about why you went for planters rather than just planting in the ground? Planters looks great – but I’m always nervous about the cost of so much soil, keeping them watered and keeping them warm in the winter. All things that are eliminated if you plant directly in the soil. Just curious!
Emily
Good question! We wanted them to be up and away from dogs/children, and we personally just love the look that warm wood planters bring to a space. We’ll be staining these a dark walnut color (which should add a lot of contrast back here), and our hope is that the more structured boxes will look really nice against wild, overflowing plants!
Oh my goodness, you guys! These are so great! We just finished building a new staircase ourselves, so we can relate to measuring, doing math, cutting precisely, and all those fun wood things. :) You must be so, so happy with this project!
So. Much. MATH! But worth it. Can’t wait to finish them up soon!
How will this work around the bottom of the planters? Will the dirt and stuff ooze out?
Nope! These guys are heavy, and they sit nice and firm on the ground. We’ll also be filling the surrounding area with prettier gravel (we still need to choose it though!).
Ooo!!! We wanted to do a few raised planters, but this! This is so amazing! I can’t wait to see them finished. What a powerful statement they will make.
OMG!! This makes me want to get off my butt and finally, FINALLY start building those planter boxes my husband and I keep talking about for our yard! I’m thinking I’m going to use the same plans that you used (but with the sizes customized for my yard of course) and will go with a black stain. I’m super into black stain recently for some reason. What do you think? Too much?! The back of our fence is white vinyl lattice while the rest of the fence around the yard is cedar and scalloped.
Black stain is classic. Go for it! Did you see Daniel’s makeover for Lowe’s? He used black stain on the planters, and they’re pretttttyyy:
http://manhattan-nest.com/2016/06/22/my-lowes-spring-makeover-alex-and-apryls-backyard/
I loooove the planters! Are you going to fill with something light or inexpensive before putting the dirt in?
I’m a loyal reader and loyal feedly user and I really wish I could have read this in the reader!
No, I think it’s going to be all dirt so that our perennials can grow down and into the ground if their roots feel the need! We’ll share the details on the dirt once that happens, hopefully in the next week or two. :D
I agree with others on the truncated posts. I may love a blog but will stop reading if truncated!
These look great. How wet were the pressure treated boards? I don’t think they will take the stain well until they dry out some. Also, last year I had an issue with stain spontaneously combusting on a rag I used to wipe off the excess so be careful.
Yikes!! What brand of stain did you use? Our boards are a little wet, and I know we should wait a little longer, but the heat has been helping them dry out much faster! I think we’re going to cross our fingers and hope for the best…
So pretty! Can’t wait to see the next step! I wish we waited to build our planter box last month~! Haha
Nice! Did you guys DIY them!?
We did! :) But ours look a little sad compared to yours. Haha! I can’t wait to see what you plant too! My thumbs are turning greener. :D
That’s so awesome!! Go, you!
This looks amazing! Awesome work, and super inspiring – I just stepped onto our back porch so I could scan the yard and think where I might be able to do something similar. Looking forward to hearing details about plants and stain!
Thanks, Marti!
They look awesome. I’m excited to see what you plant!
So are we, haha! We still don’t know.
Doing a mini version of these would look dynamite on my condo patio. Maybe even staining them black like one of the other commenters suggested?
You can’t go wrong with black stain!
[…] A Chicago DIY’ing duo with some serious skills. I mean can you even believe these amazing planters?! […]
[…] it has to be four-sided, but this comes with limitations. If you need a bigger and more flexible DIY wooden planter box, then you should go with this […]
[…] but better raised beds, my pals Kim and Scott (sometimes we live parallel lives, I think) tackled pretty much the same project but with a few adjustments, including using 5/4″ decking boards (which are actually 1″ thick) instead of 1-by […]
[…] but better raised beds, my pals Kim and Scott (sometimes we live parallel lives, I think) tackled pretty much the same project but with a few adjustments, including using 5/4″ decking boards (which are actually 1″ thick) instead of 1-by […]
You didn’t show how you really lined boxe with insulation or the type you used . Which is what I wanted to really see :(
We detailed that in this post! https://yellowbrickhome.com/an-easy-built-in-bench-diy/
Amazing Project!
What size board did you use for the top lip?
I didn’t see it mentioned in the post.
Thanks
I believe it’s a 2×4!
[…] Boxes: Speaking of water gardens please check out how many of these you could establish outside your home. The most popular combination that comes to mind is of an old foggy pond with grated rocks. In case […]