

Extra, extra! A huge thank you to everyone for the overwhelming congratulatory words on Monday! Between our virtual home and the (too many) social sites, we (still) feel very happy, lucky and so grateful for all your encouragement. You all are the best.
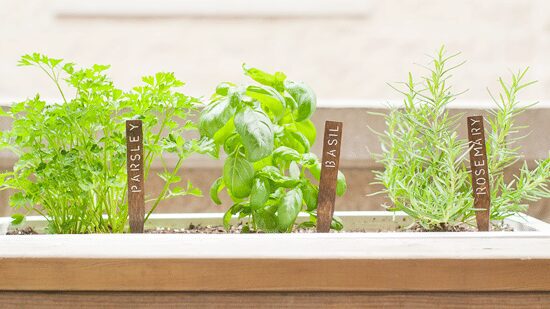
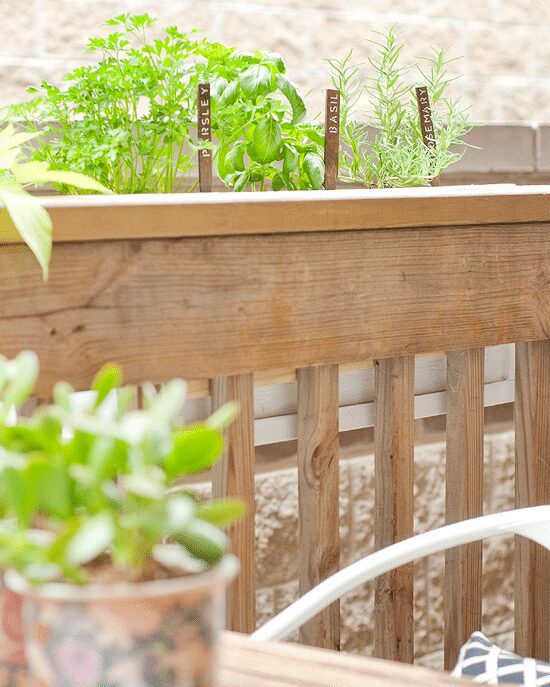
With our patio appropriately perked (and our whole home in the beginning stages of being tucked away in boxes), I took a time out over the weekend for a tiny outdoor detail – DIY herb signs! We’d meant to do so last year, but we’d also been so quick to jump on a living room tweakfest that it went out the window as fast as it flew in. So! This year, here we go:

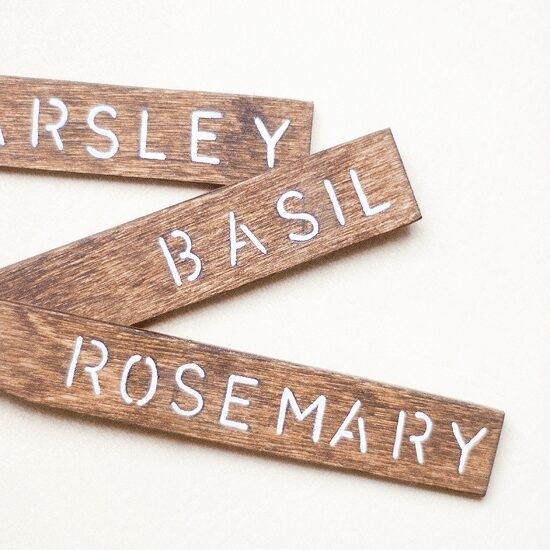
We knew they needed to be mostly waterproof, but a quick search online left us empty-handed; they were all too kitschy (nothing wrong with that, by the way!), non-permanent or more money than we would have liked to spend. I scoured the studio cabinets for bits we could piece together, and we agreed on the simple design above. Here’s how we did it:
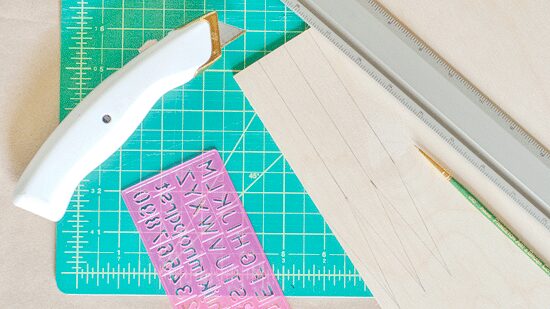
Supplies needed
1/8″ thick plywood (can be found at any art store)
lettered stencil
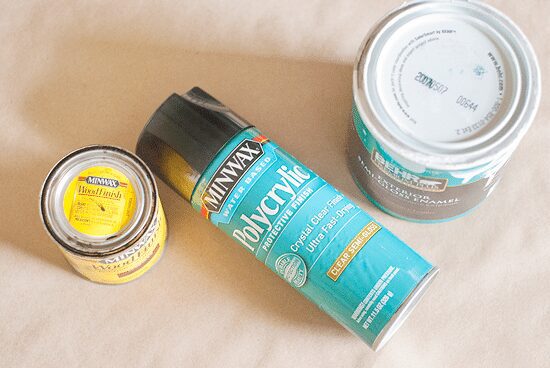
wood stain
exterior paint
spray Polycrylic (for good measure)
ruler or any straight edge
sharp utility knife (I changed the blade 2x in the process)
pencil
small paintbrush
What to do
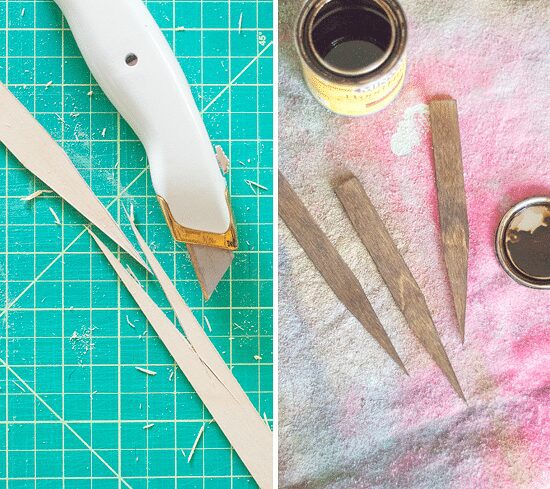
draw your desired sign shape on the plywood
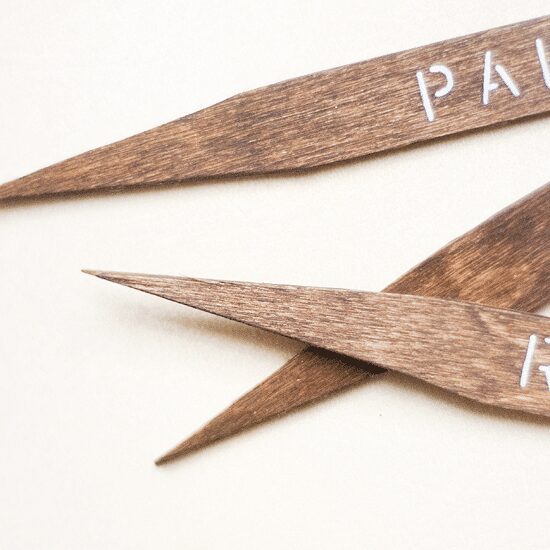
using your straight edge and a sharp utility knife, cut out your shapes
stain (or paint!) your signs
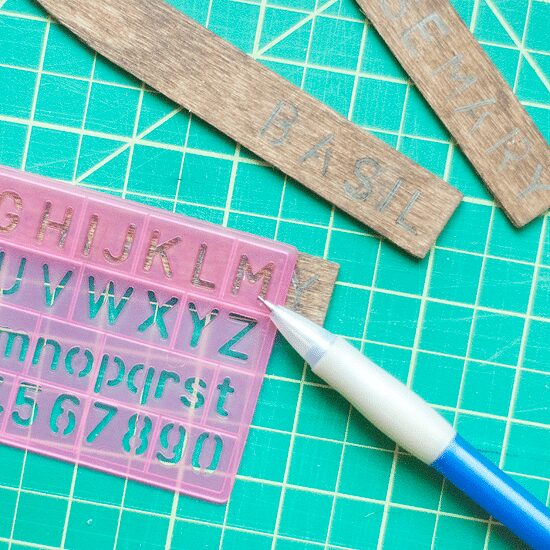
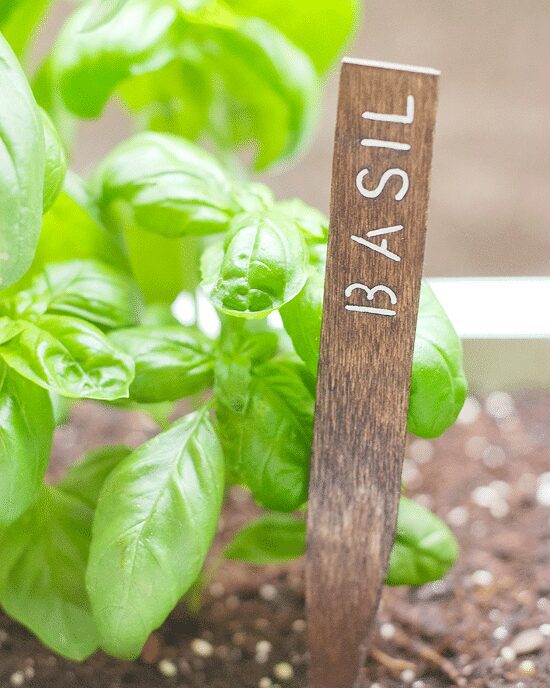
with the stencil, use a pencil to write your herbs
paint your letters using a teeny paintbrush and exterior paint
spray Polycrylic on your signs to seal out water damage
stick your cute signs in that herb garden!

I’ll fully admit that it’s a bit more effort than just hand painting the letters on, but I’m a through and through type A, OCD girl (as many of you should know by now), and I truly can’t stand the site of my own handwriting. (For real, Scott writes all the notes on our chalkboard entry wall; remember how panicked I was when I wrote that list on photo shoot day?)
You could make this project even easier by using, say, tongue depressors (Scott, of course, suggested this later!), and you can certainly customize it any way you’d like using any paint you may have on hand. The exterior paint for the lettering is key – as I’m sure you know – to prevent your hard work from being washed away in rain and daily waterings. That goes without saying though, yes?
Aah, we’re going to miss this patio.


So cute and what a great gift idea! Congratulations on the new place – can’t wait to follow along with the move and a whole new set of house updates :)
I really like the look of these! The simplicity is so cute!
These are super cute, and I like that they are re-usable from year to year as well.
They look great. Now, I am eyeballing our popsicle sticks. I diy’s these (http://www.adasinteriordesign.com/mondays-make-it-my-diy-garden-markers) but they tend to get all flop-sided when our landscapers pass by with their leaf blowers. Thanks for the inspiration!
Ada, those are SO cute!!
[…] Pinterest | four: Make Your Own Herb Garden via Tuinieren.nl | five: DIY Herb Garden Signs via Yellow Brick Home | six: Herb Garden via […]
These look great. I am just finishing up some new planter boxes for my wifes herbs to go in and I think these would look great with them.
These are so adorable!