

A step-by-step guide to building a fully customizable reptile enclosure from a thrifted dresser.
In This Post
We’re a Lizard Family Now
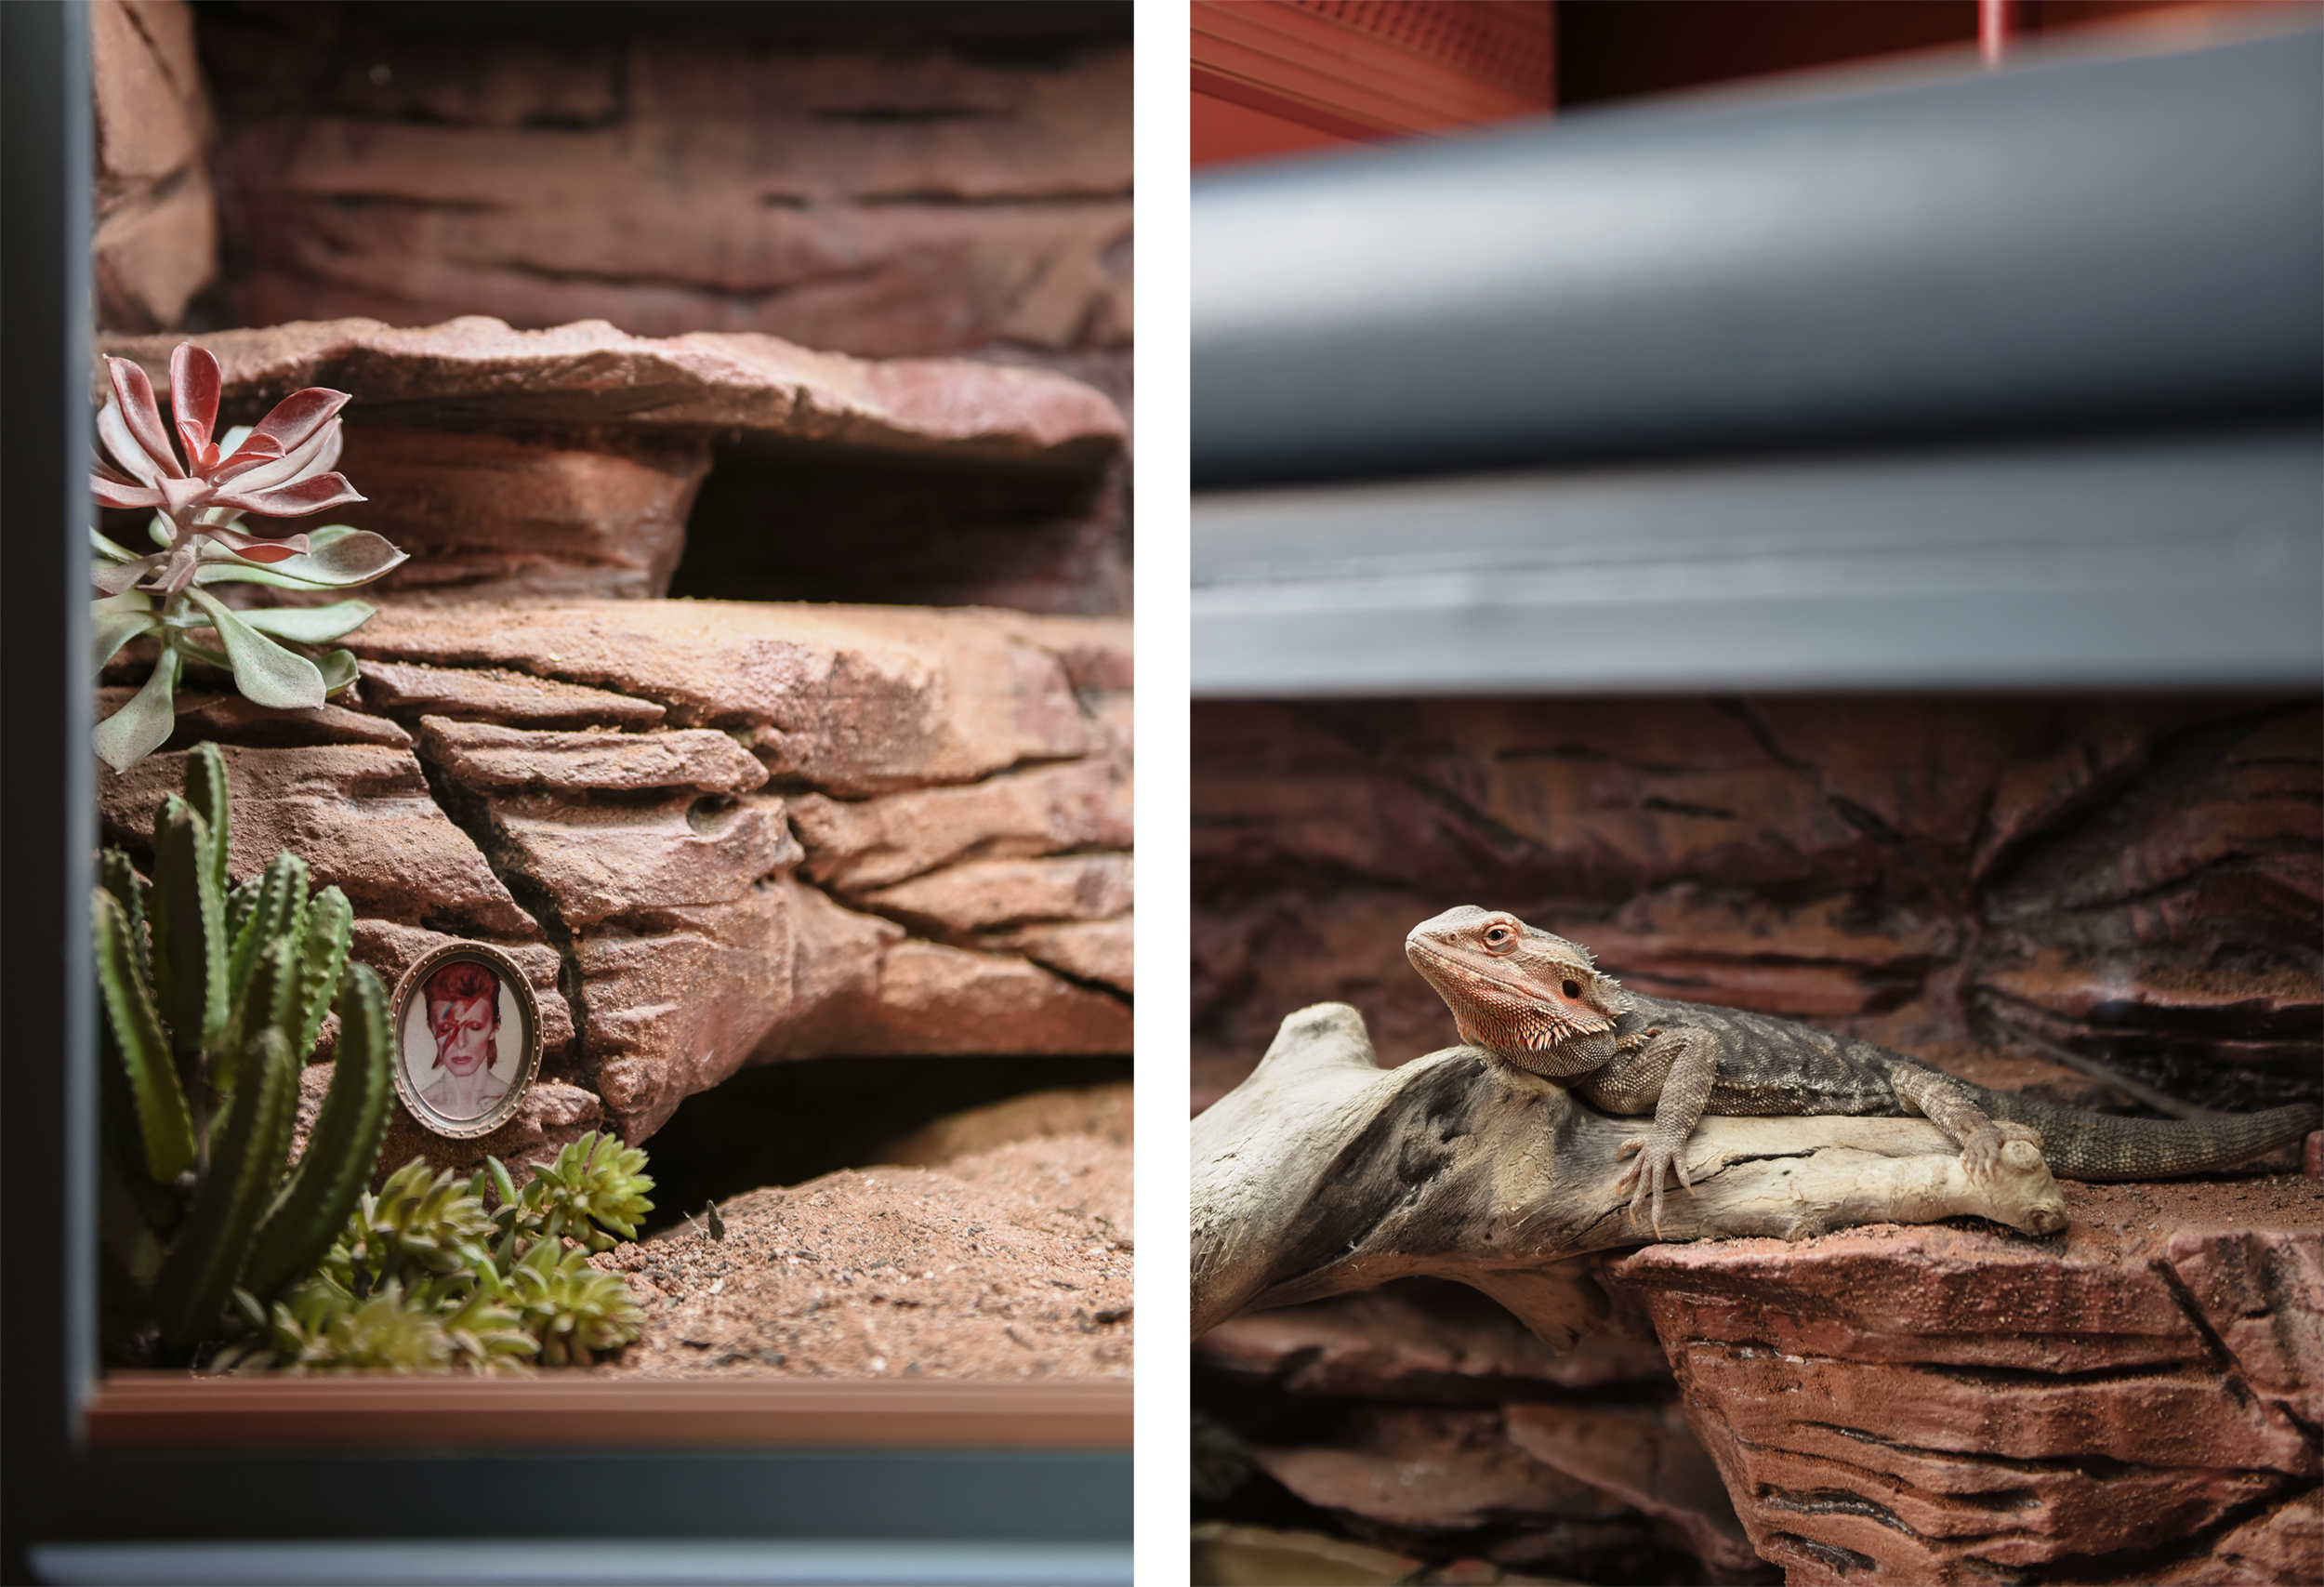
Just over a year ago, we became a bearded dragon family when we brought David Bowie home. He was three months old, just over 6 inches long and easily fit in the palm of our hands. Now, he’s nearly full grown at almost 18 inches long! We started him off in a simple 40 gallon starter tank with a plan to move him into a permanent custom home within a year. If you followed along on Instagram last fall, this will all look very familiar to you. If not, you can catch up with part 1, part 2, part 3 and the big reveal here!
Before We Begin, a Few Things to Note
This process will vary based on the care needs of your individual pet and the size of the dresser you’re converting, so we’ll avoid specific measurements and focus on the process itself. The recommended minimum habitat for an adult bearded dragon (and many other ‘beginner-friendly’ reptiles) is 4′ x 2′ x 2′ and we wanted to mimic that interior volume, although with slightly different proportions.
We also wanted to make sure that the bottom row of drawers could be retained, because these little pals require stuff. You know, deli cups full of bugs, feeding tongs, harnesses for outdoor play time. That sort of thing. So, just keep all of this in mind if you see yourself taking on the totally normal task of sourcing a vintage dresser and spending a few hundred dollars and dozens of (wo)man-hours converting it into a naturalistic reptile habitat. Cool? Cool.
We did hours and hours of research and took the most inspiration for the interior buildout from this build by SerpaDesign. This process is far from an exact science and there’s a lot of conflicting information out there. We’re not experts, but we want the best for our little man, so we leaned on advice from expert reptile keepers and put our DIY skills to work. Here’s how David’s dresser habitat came to be.
Gather Your Supplies
- Dresser (the sturdier the better)
- Wood glue
- Scrap wood or 1 x 2s
- Various saws and cutting tools (will vary)
- Brad nailer or drill
- Caulk + Caulk gun
- Faux succulents
- Driftwood
- Drylok
- XPS foam board
- Hot knife kit
- Latex paint (multiple shades)
- Substrate
- Heat + light source
- Expanding foam
- Polycrylic
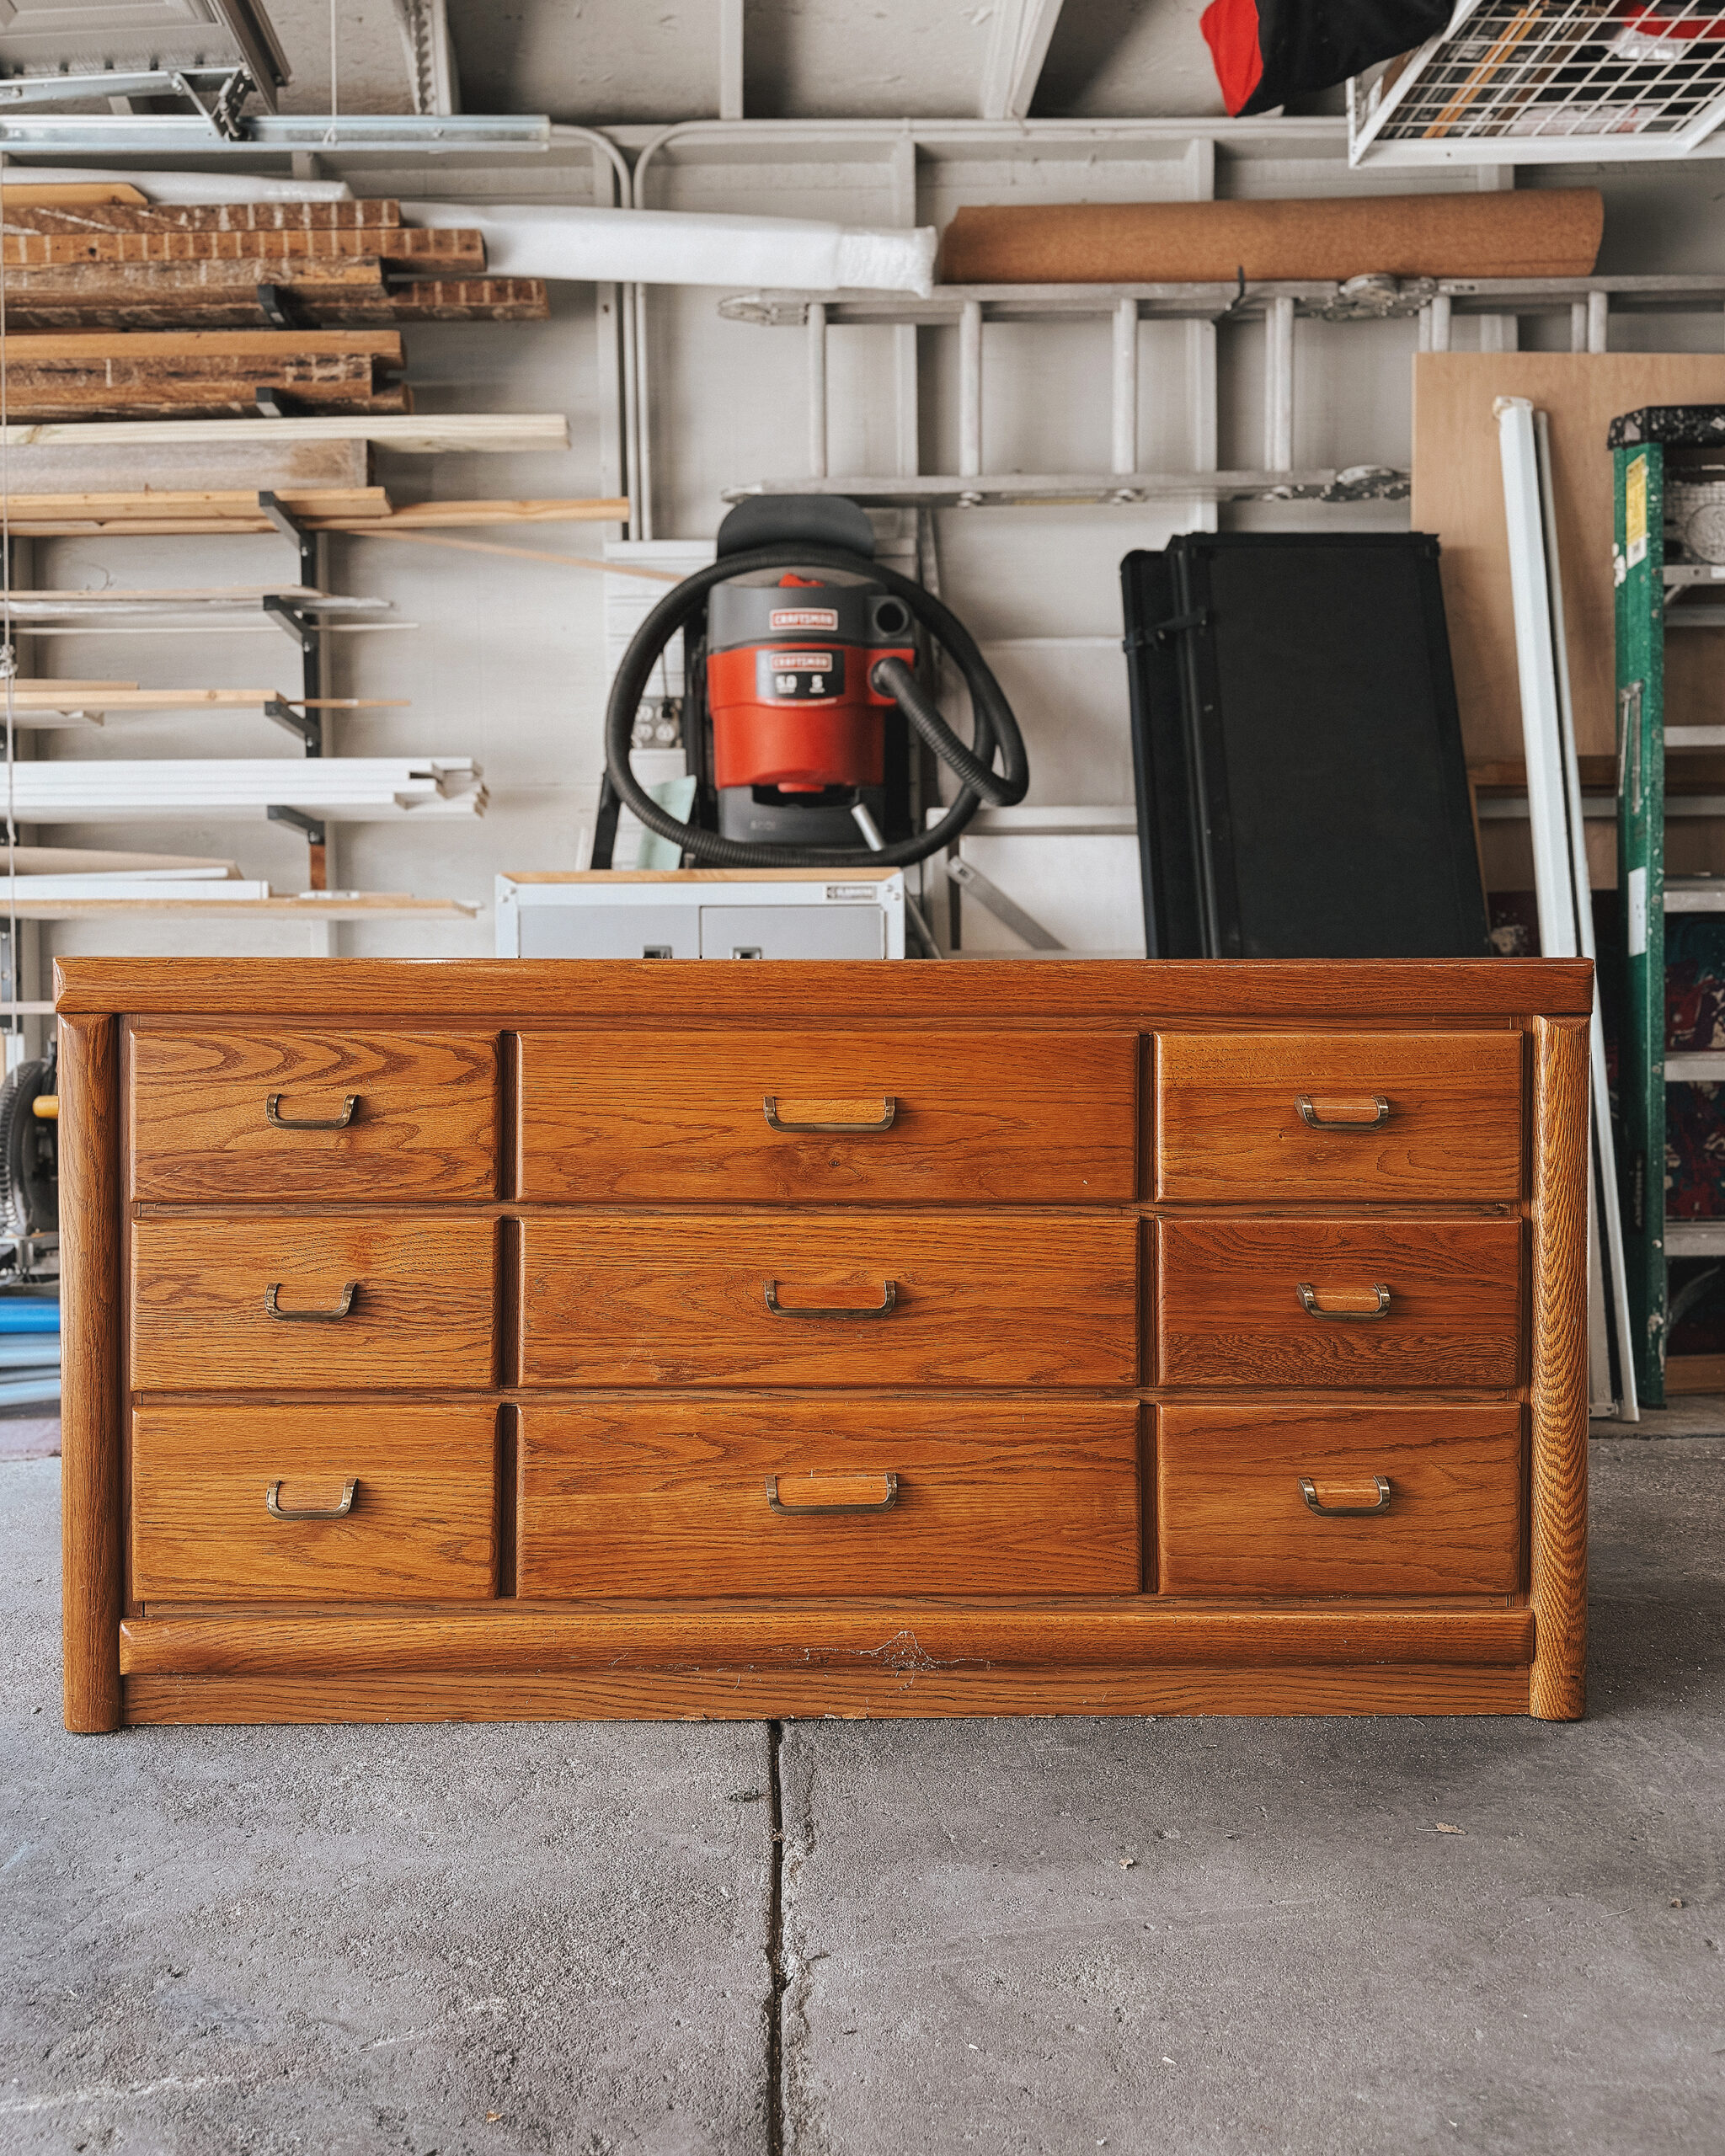
1| Gut the Dresser
We started by removing the top six drawers and the supporting framework. The oscillating multitool to be the best suited for the job. We were extra careful to maintain the vertical supports and horizontal top rail of the bottom row of drawers since we’d be maintaining them as we mentioned.
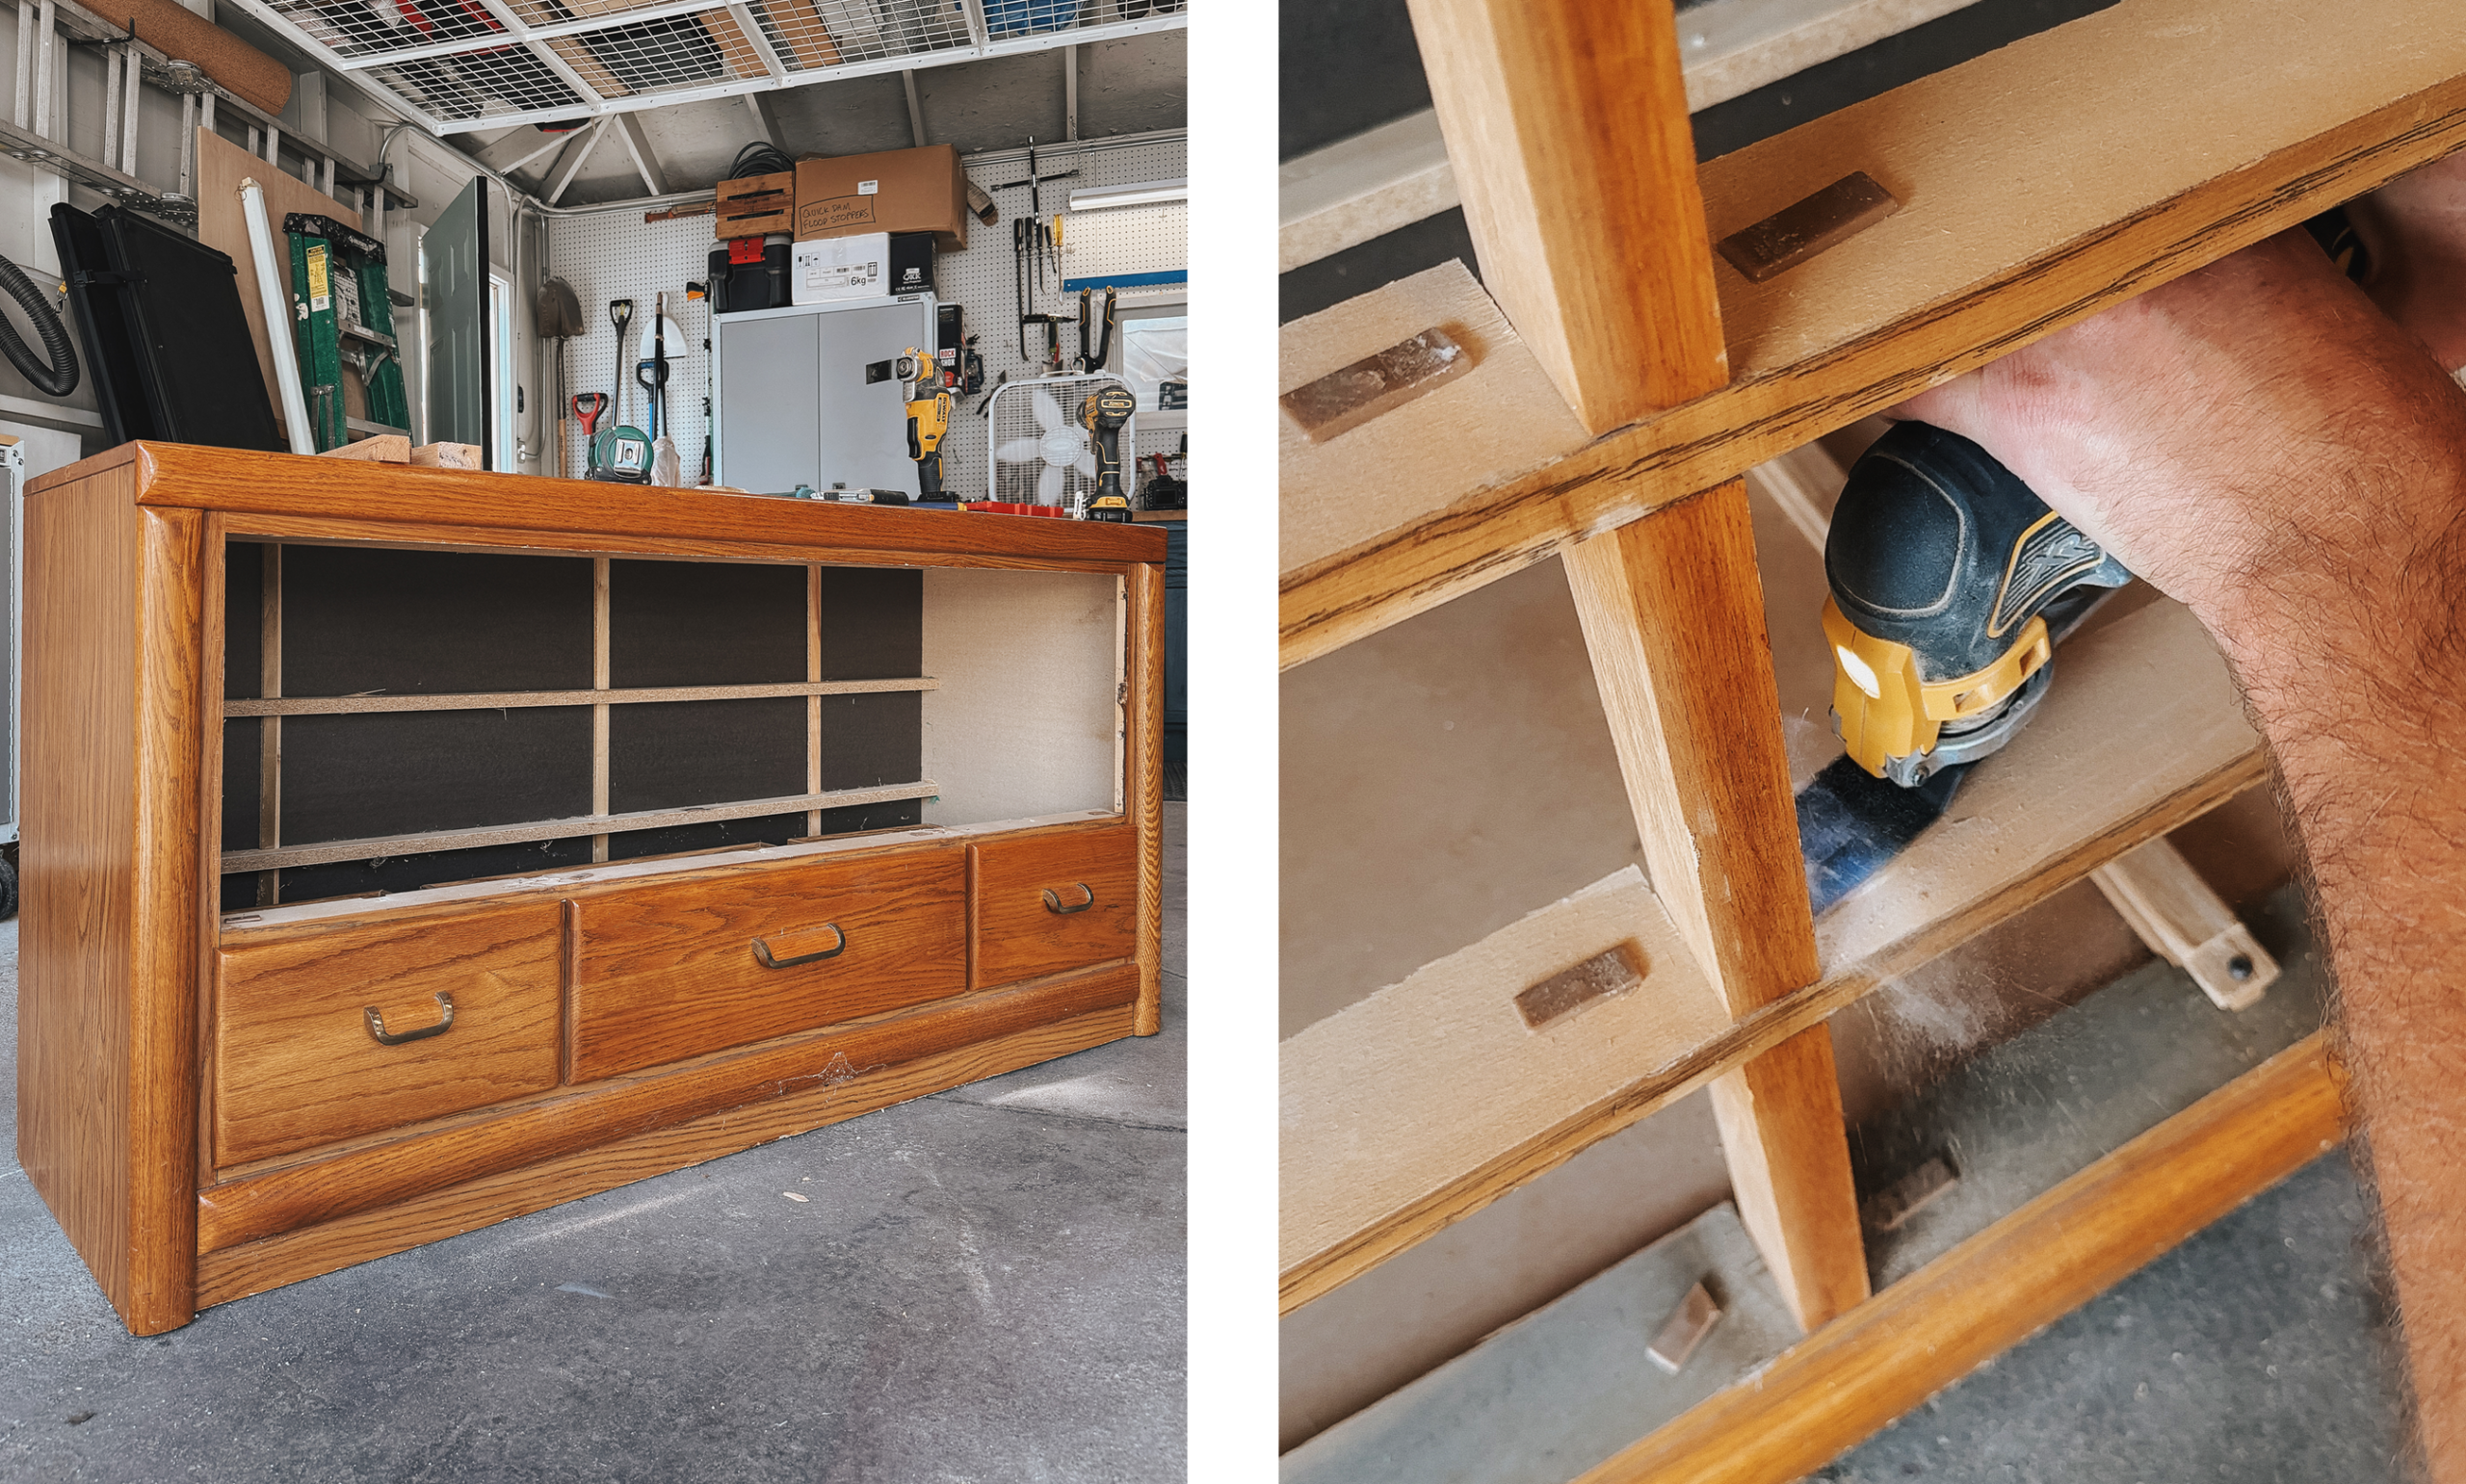
We also went ahead and pulled the flimsy back while we were at it, since we needed it to become a structurally secure part of the interior build. These first few steps left us with a mostly empty carcass.
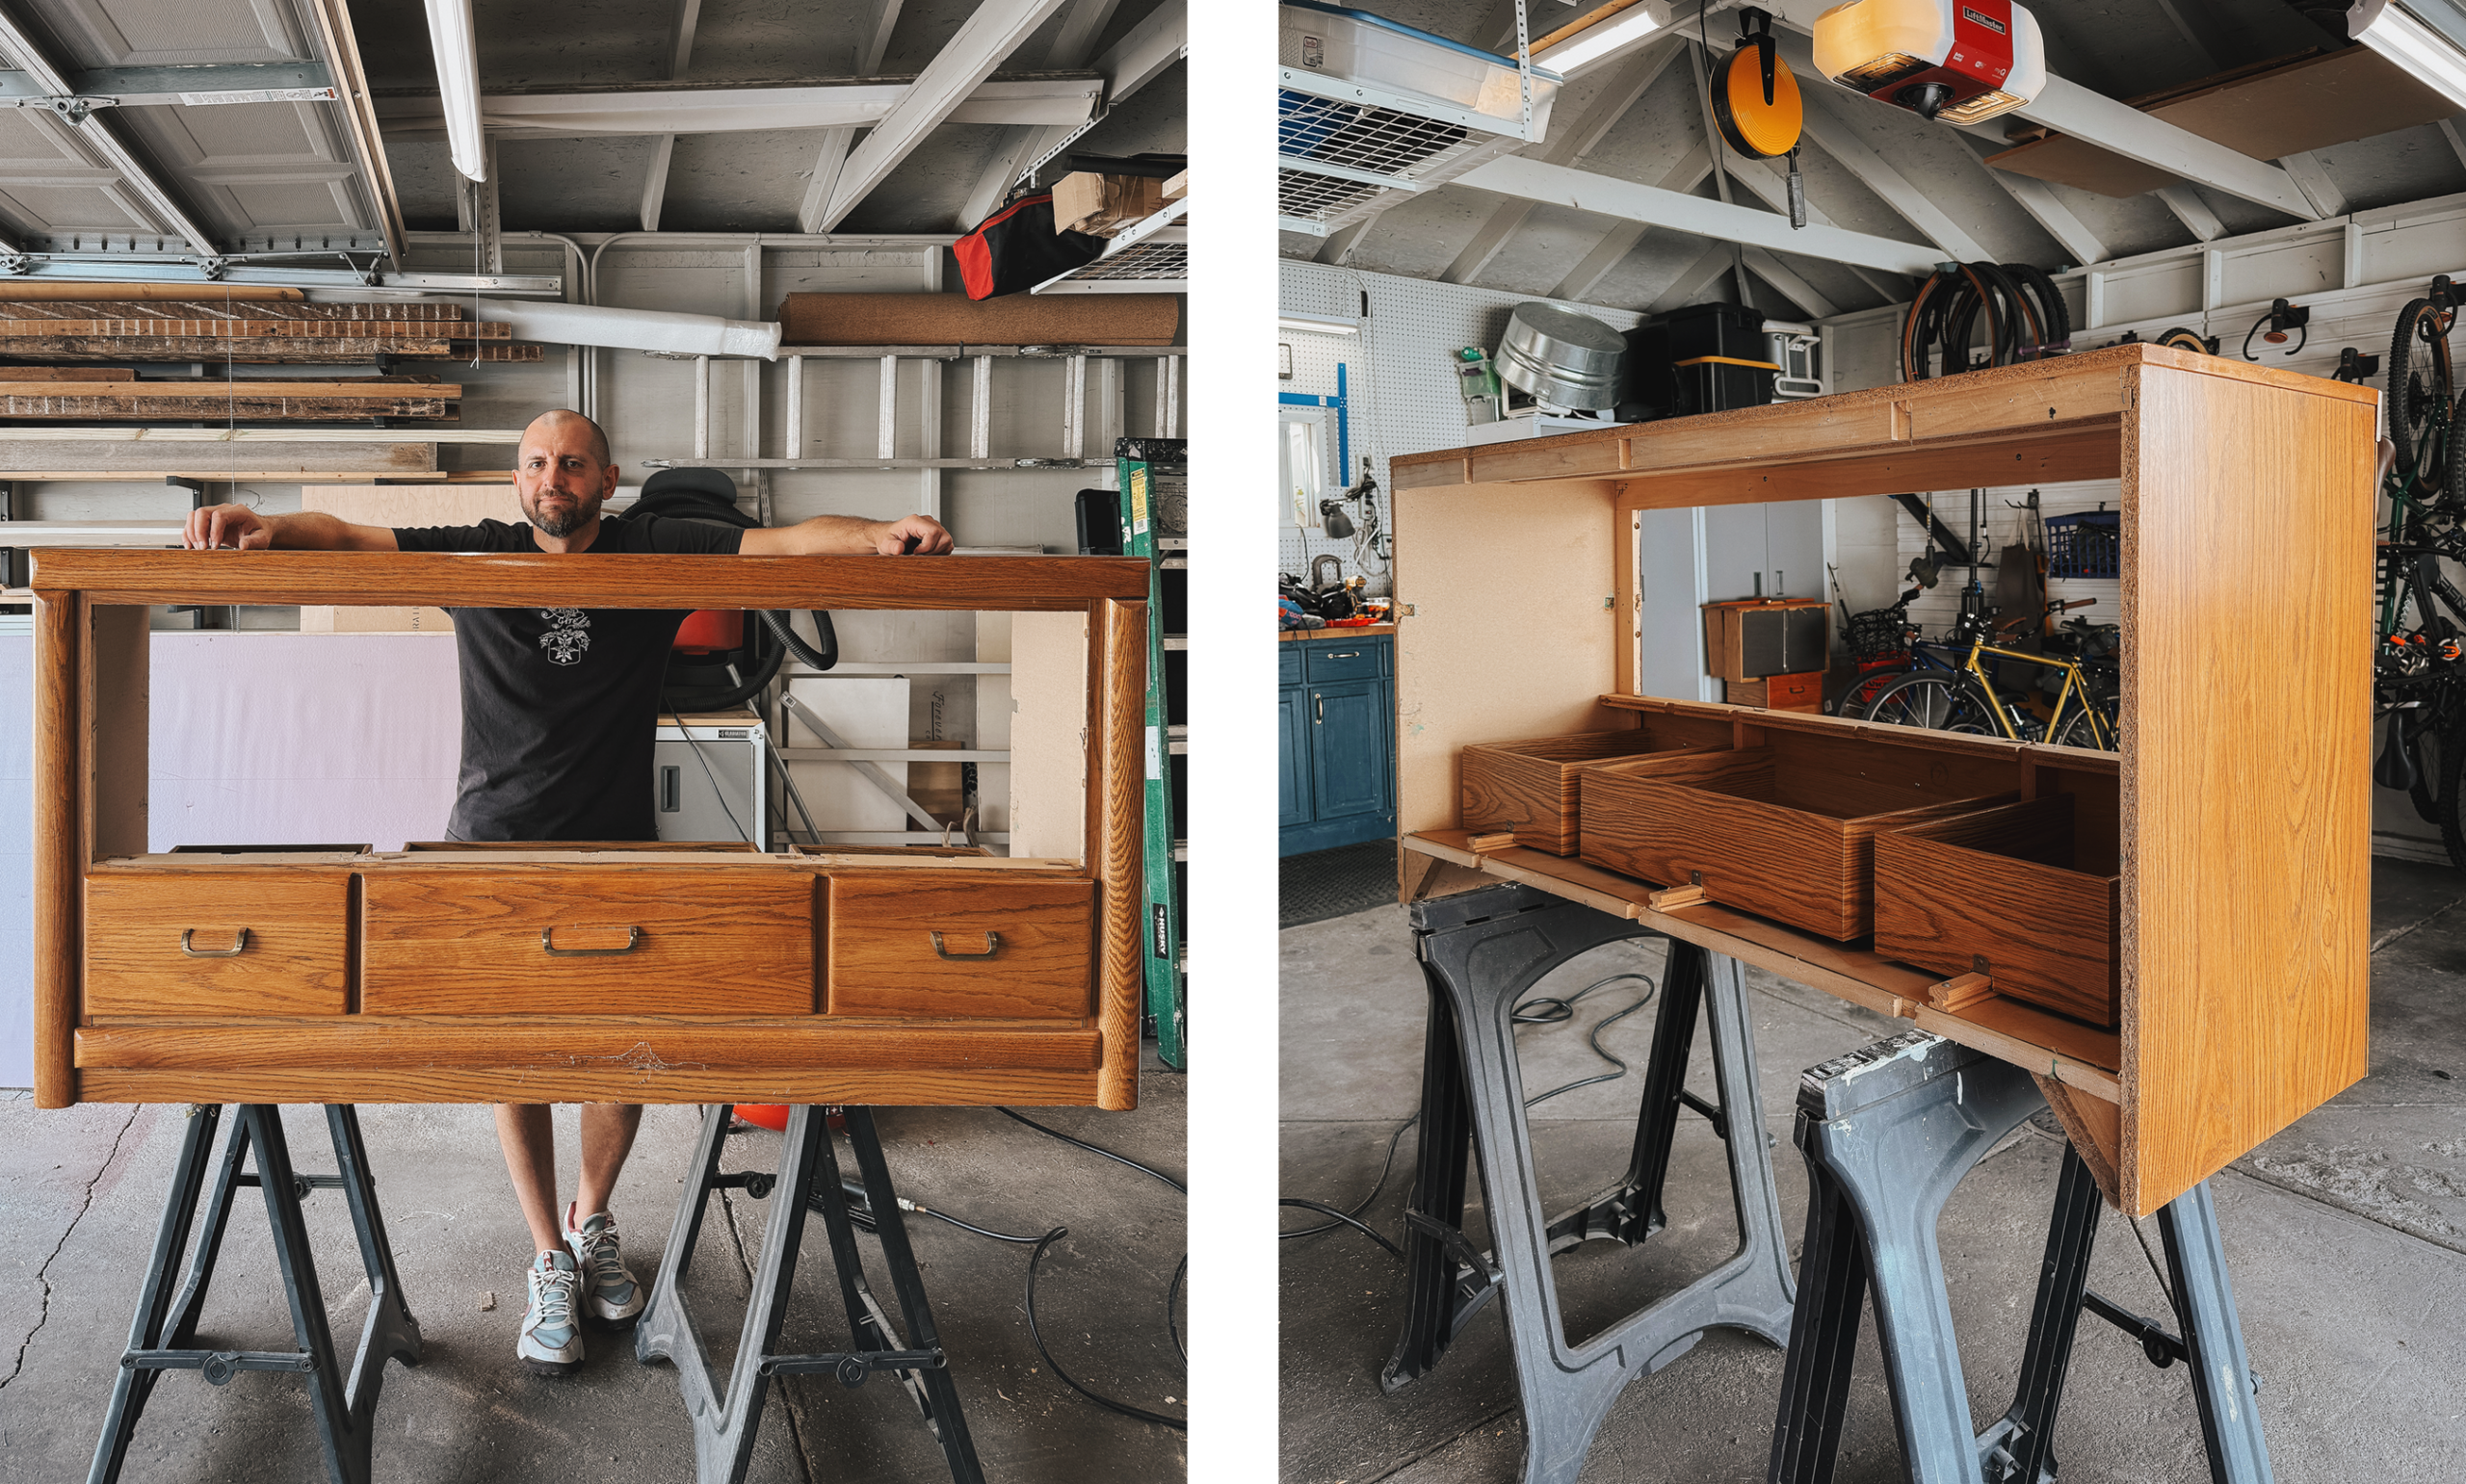
2| Rebuild the Carcass
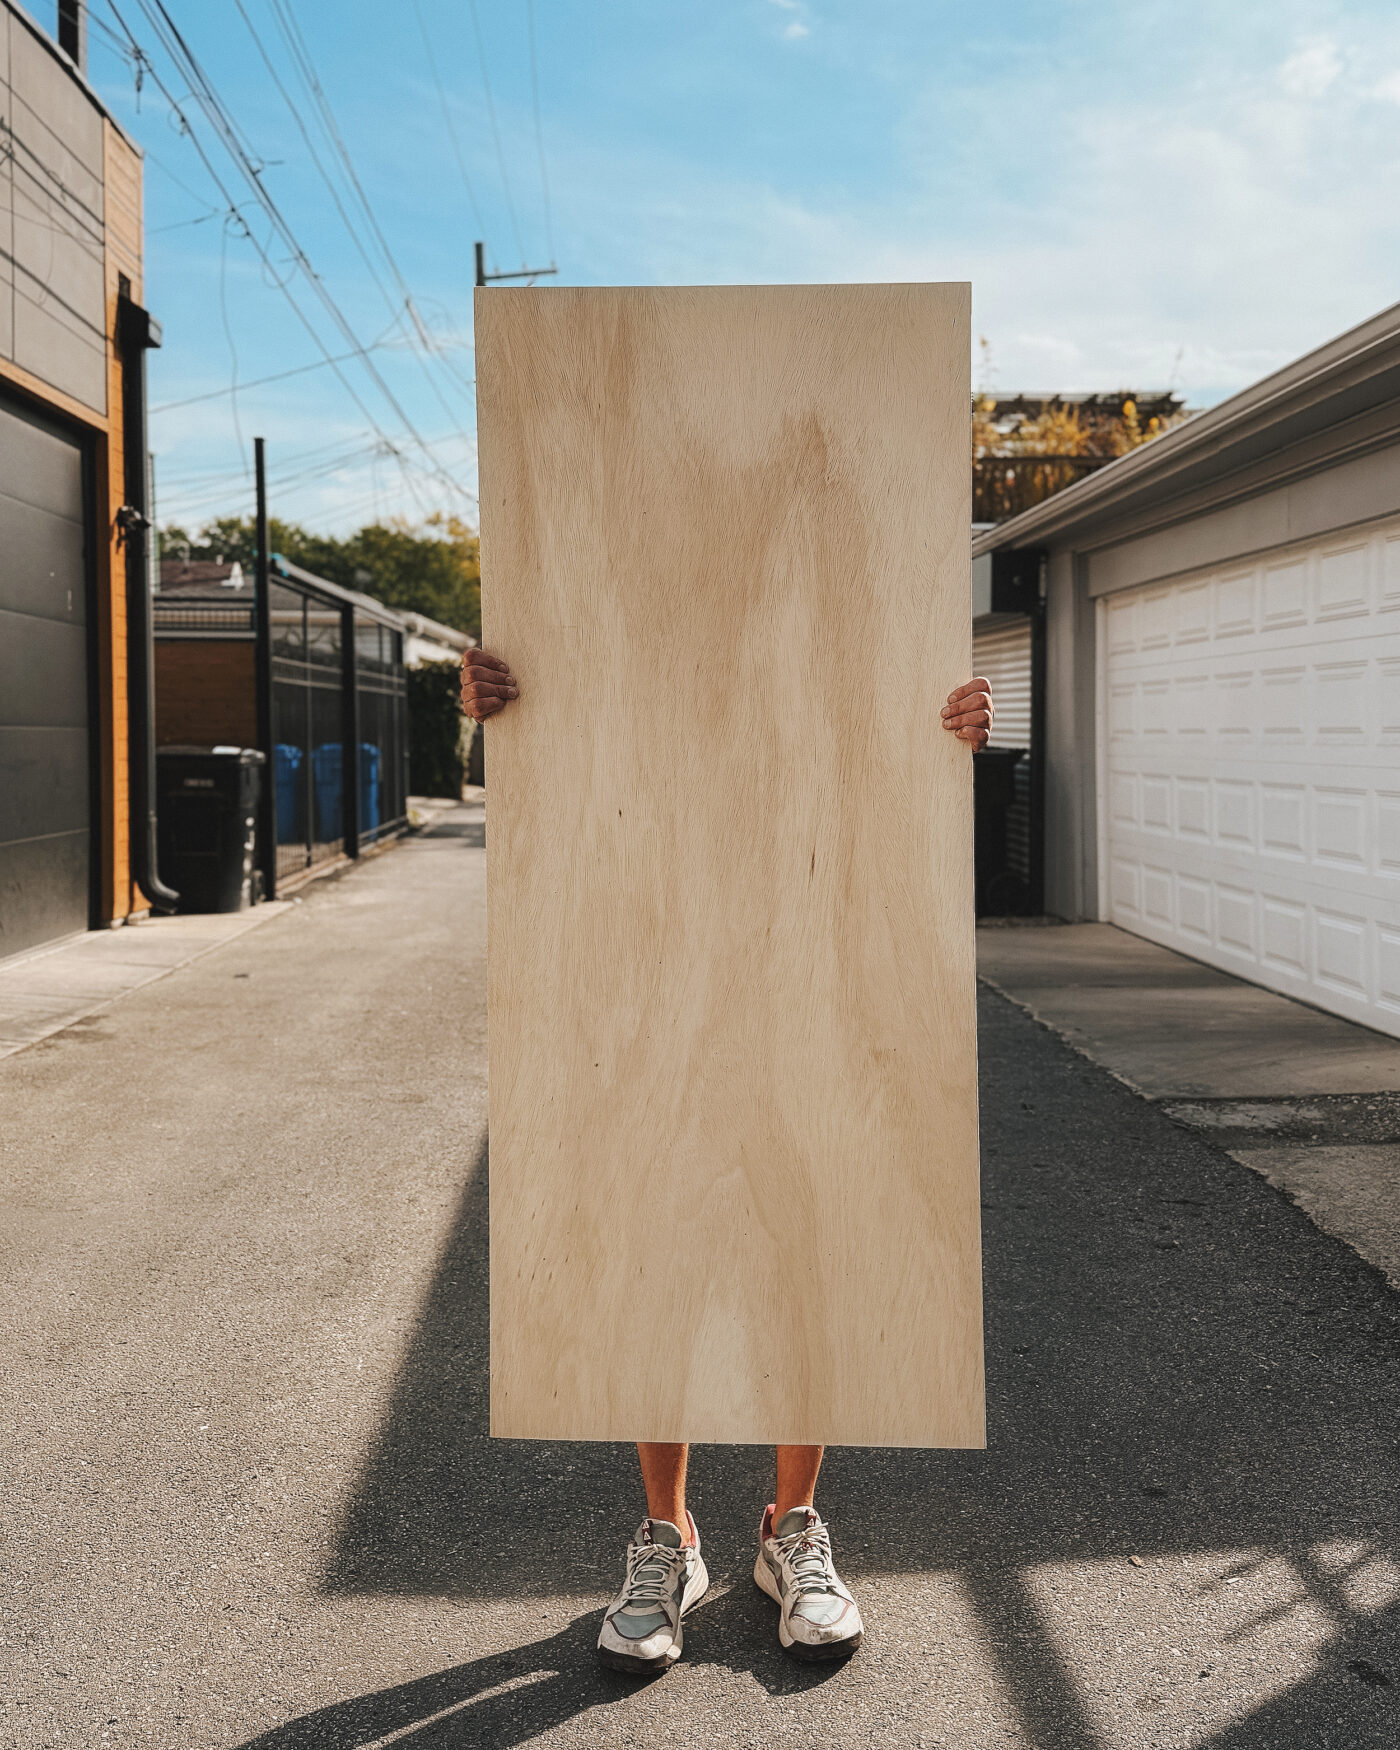
Next, we rebuilt the dresser box to create an empty upper zone and a lower drawer zone. Luckily, our garage does double duty as a wood shop on occasion, and we tend to hoard leftovers. We scoured the wood racks and found an almost-perfect piece of 1/4″ thick plywood scrap for the back.
We measured the back and cut it to fit with our track saw. This new back is much sturdier than the thick fiber board material that it replaced and gave us a great base to build on.
We fastened the back with glue and our brad nailer. A drill and appropriate screws could definitely be used here if you don’t have a brad nailer.
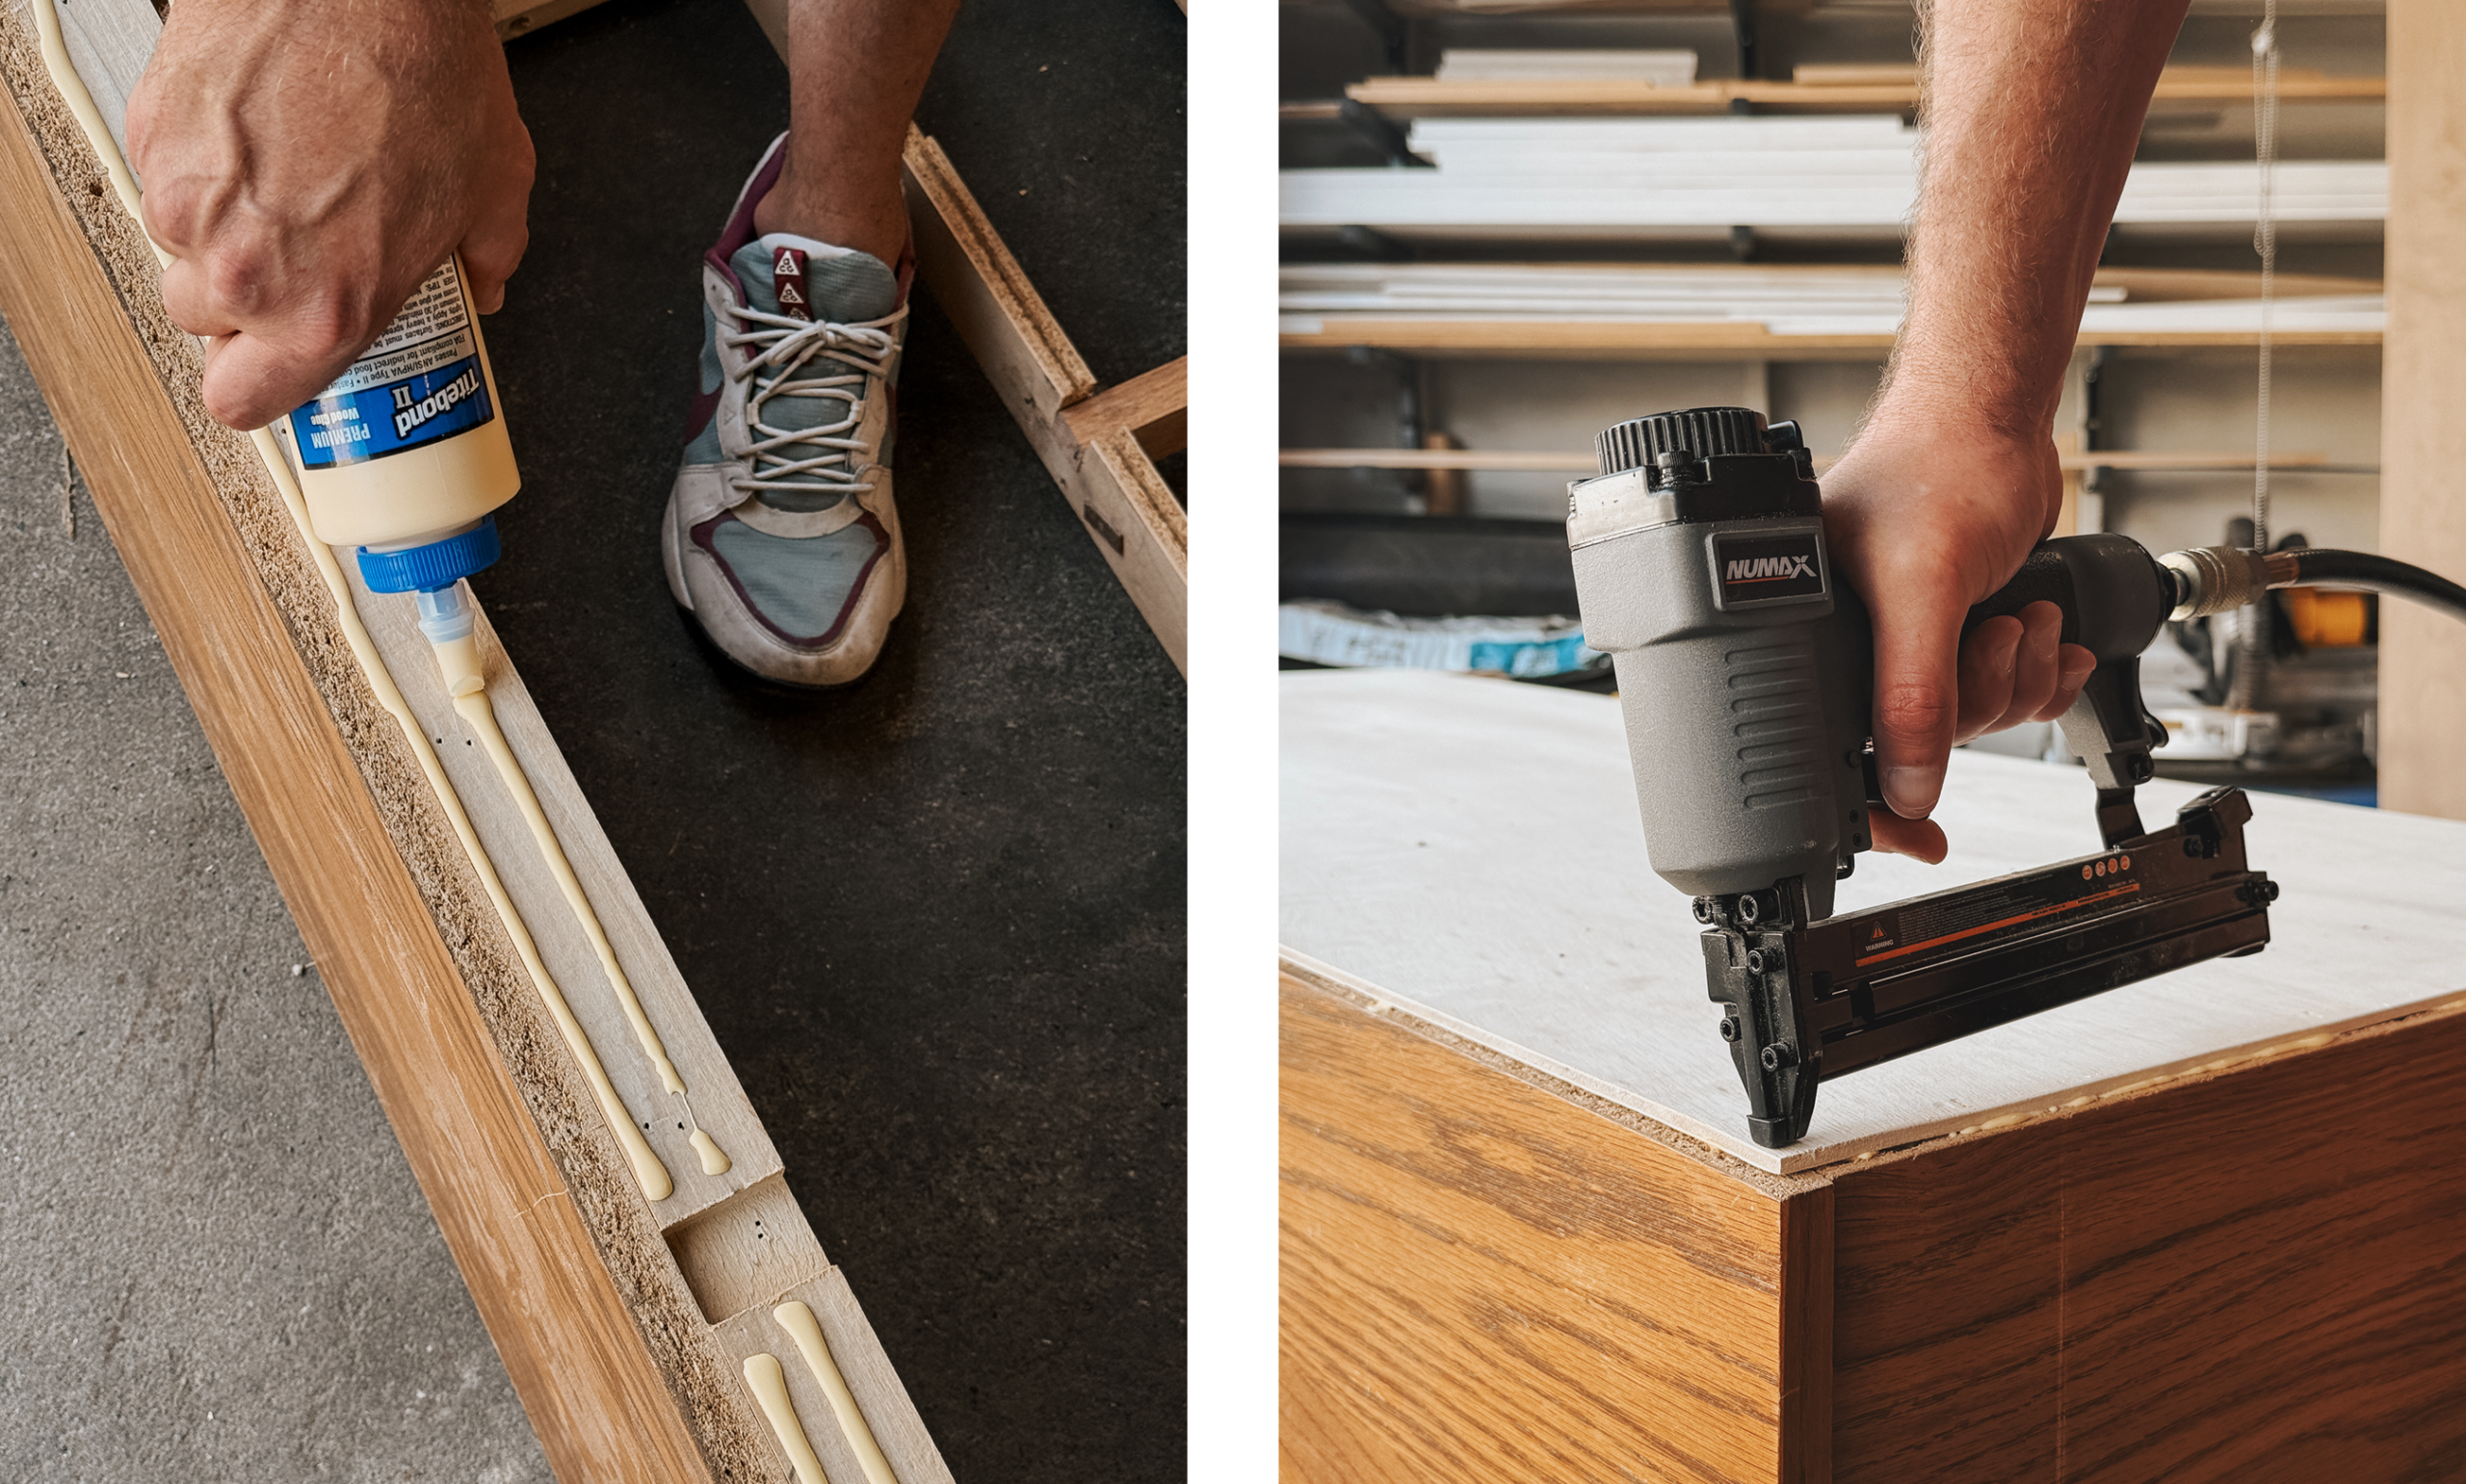
With the back securely in place, we were ready to build the floor assembly. At this point, we were starting to visualize the scale of the interior and things were getting exciting!
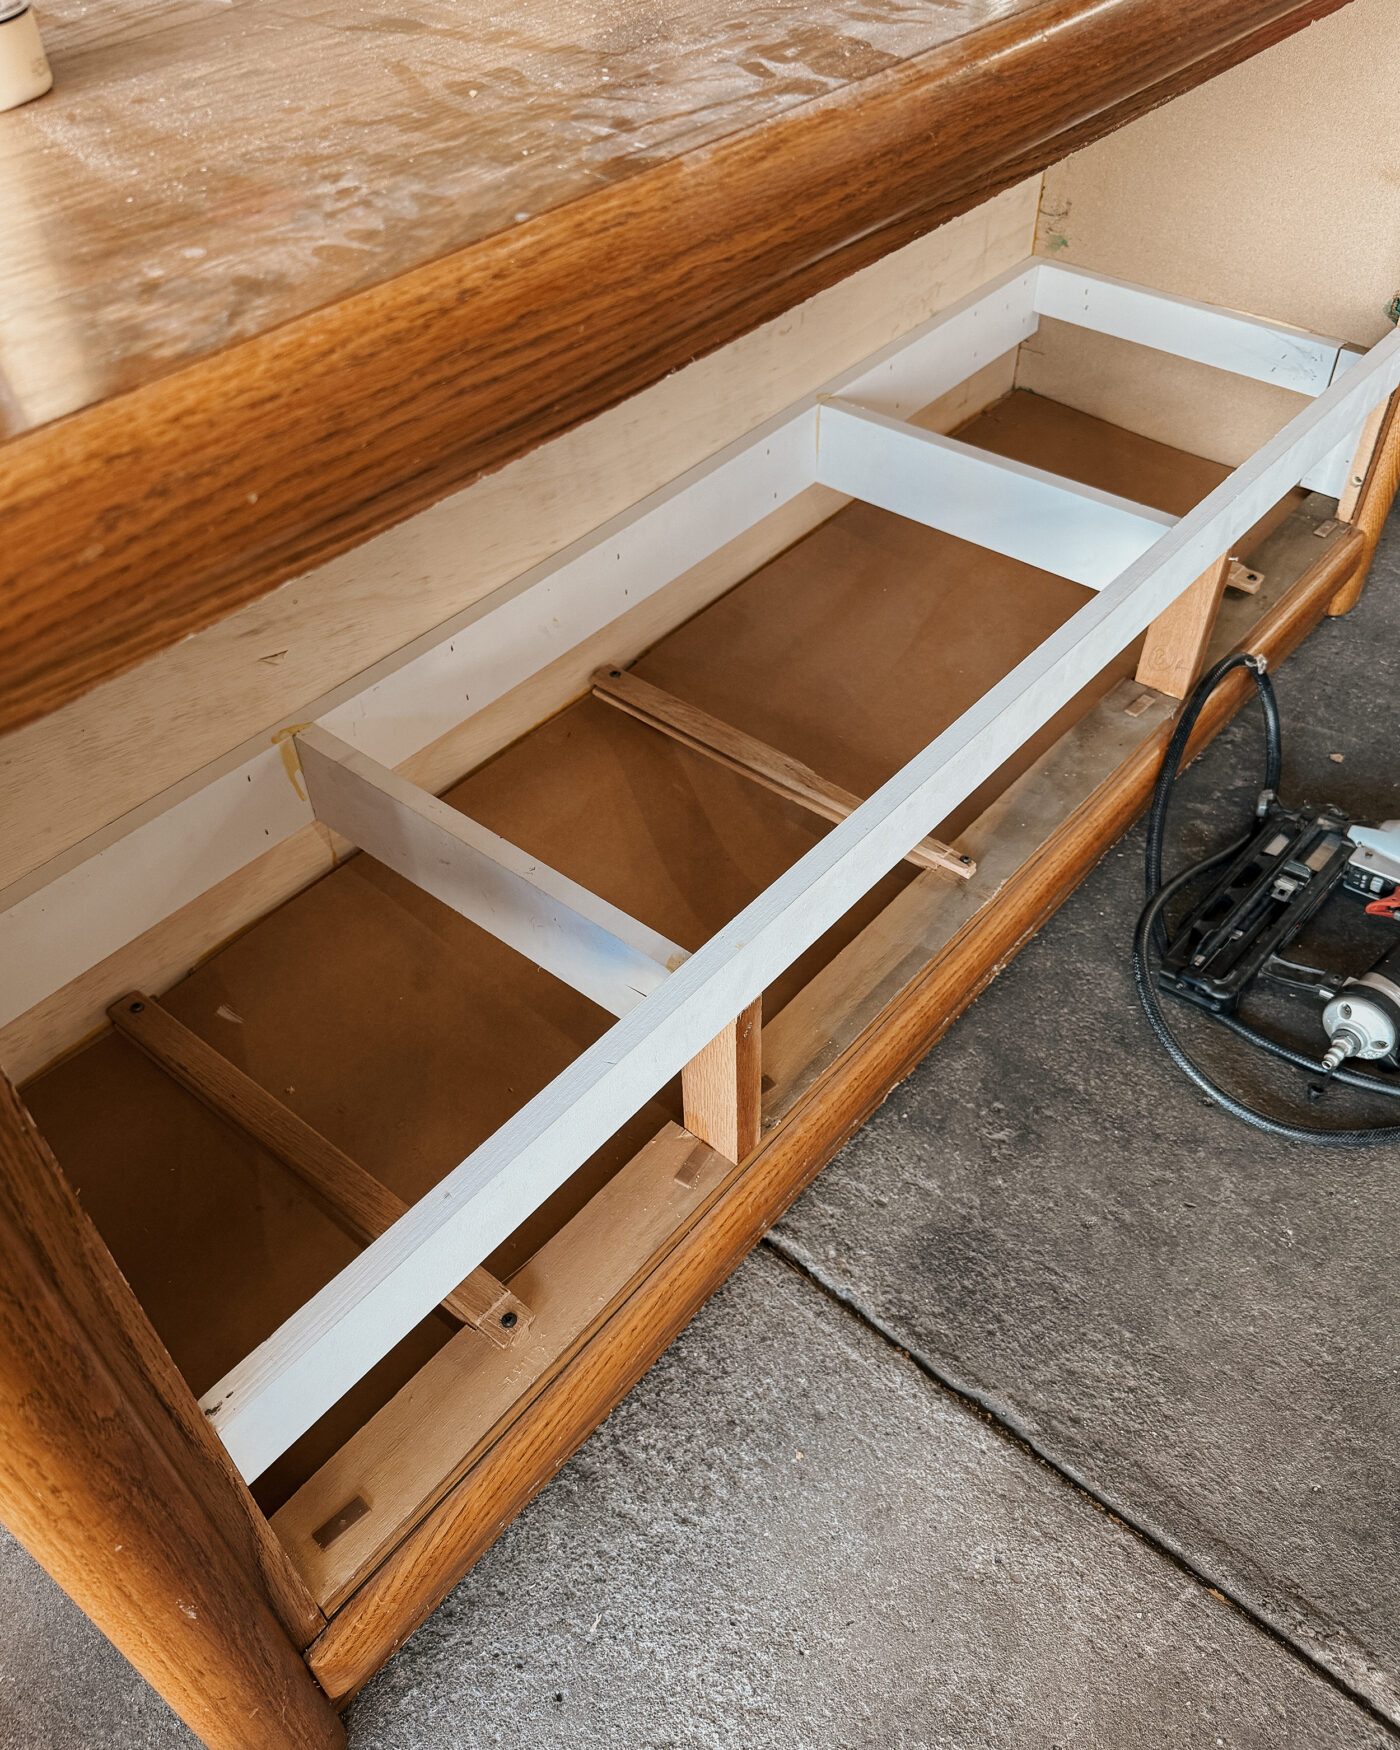
We built a secure ladder frame inside the enclosure that would support the weight of the faux rocks and the sand substrate. We maximized the interior depth here so the bottom had juuuust enough clearance for the drawer boxes. Coupled with the taller front face lip, we created a 3″ deep tray to contain the sand and give our little buddy a place to dig.
Next, we cut a new 1/2″ plywood floor to fit and fastened it to the ladder frame (not pictured) keeping our tolerances as tight as possible. The interior box was complete and we were ready to seal it up!
3| Seal Interior Walls
With the box completed, we were reader to seal the wood to prevent moisture absorption. We used original Drylok tinted in beige on all the interior surfaces including the walls, ceiling floor and the interior of the substrate lip. This stuff goes on thick and gloopy, so it does a fantastic job of filling cracks and self leveling with a sandy texture.
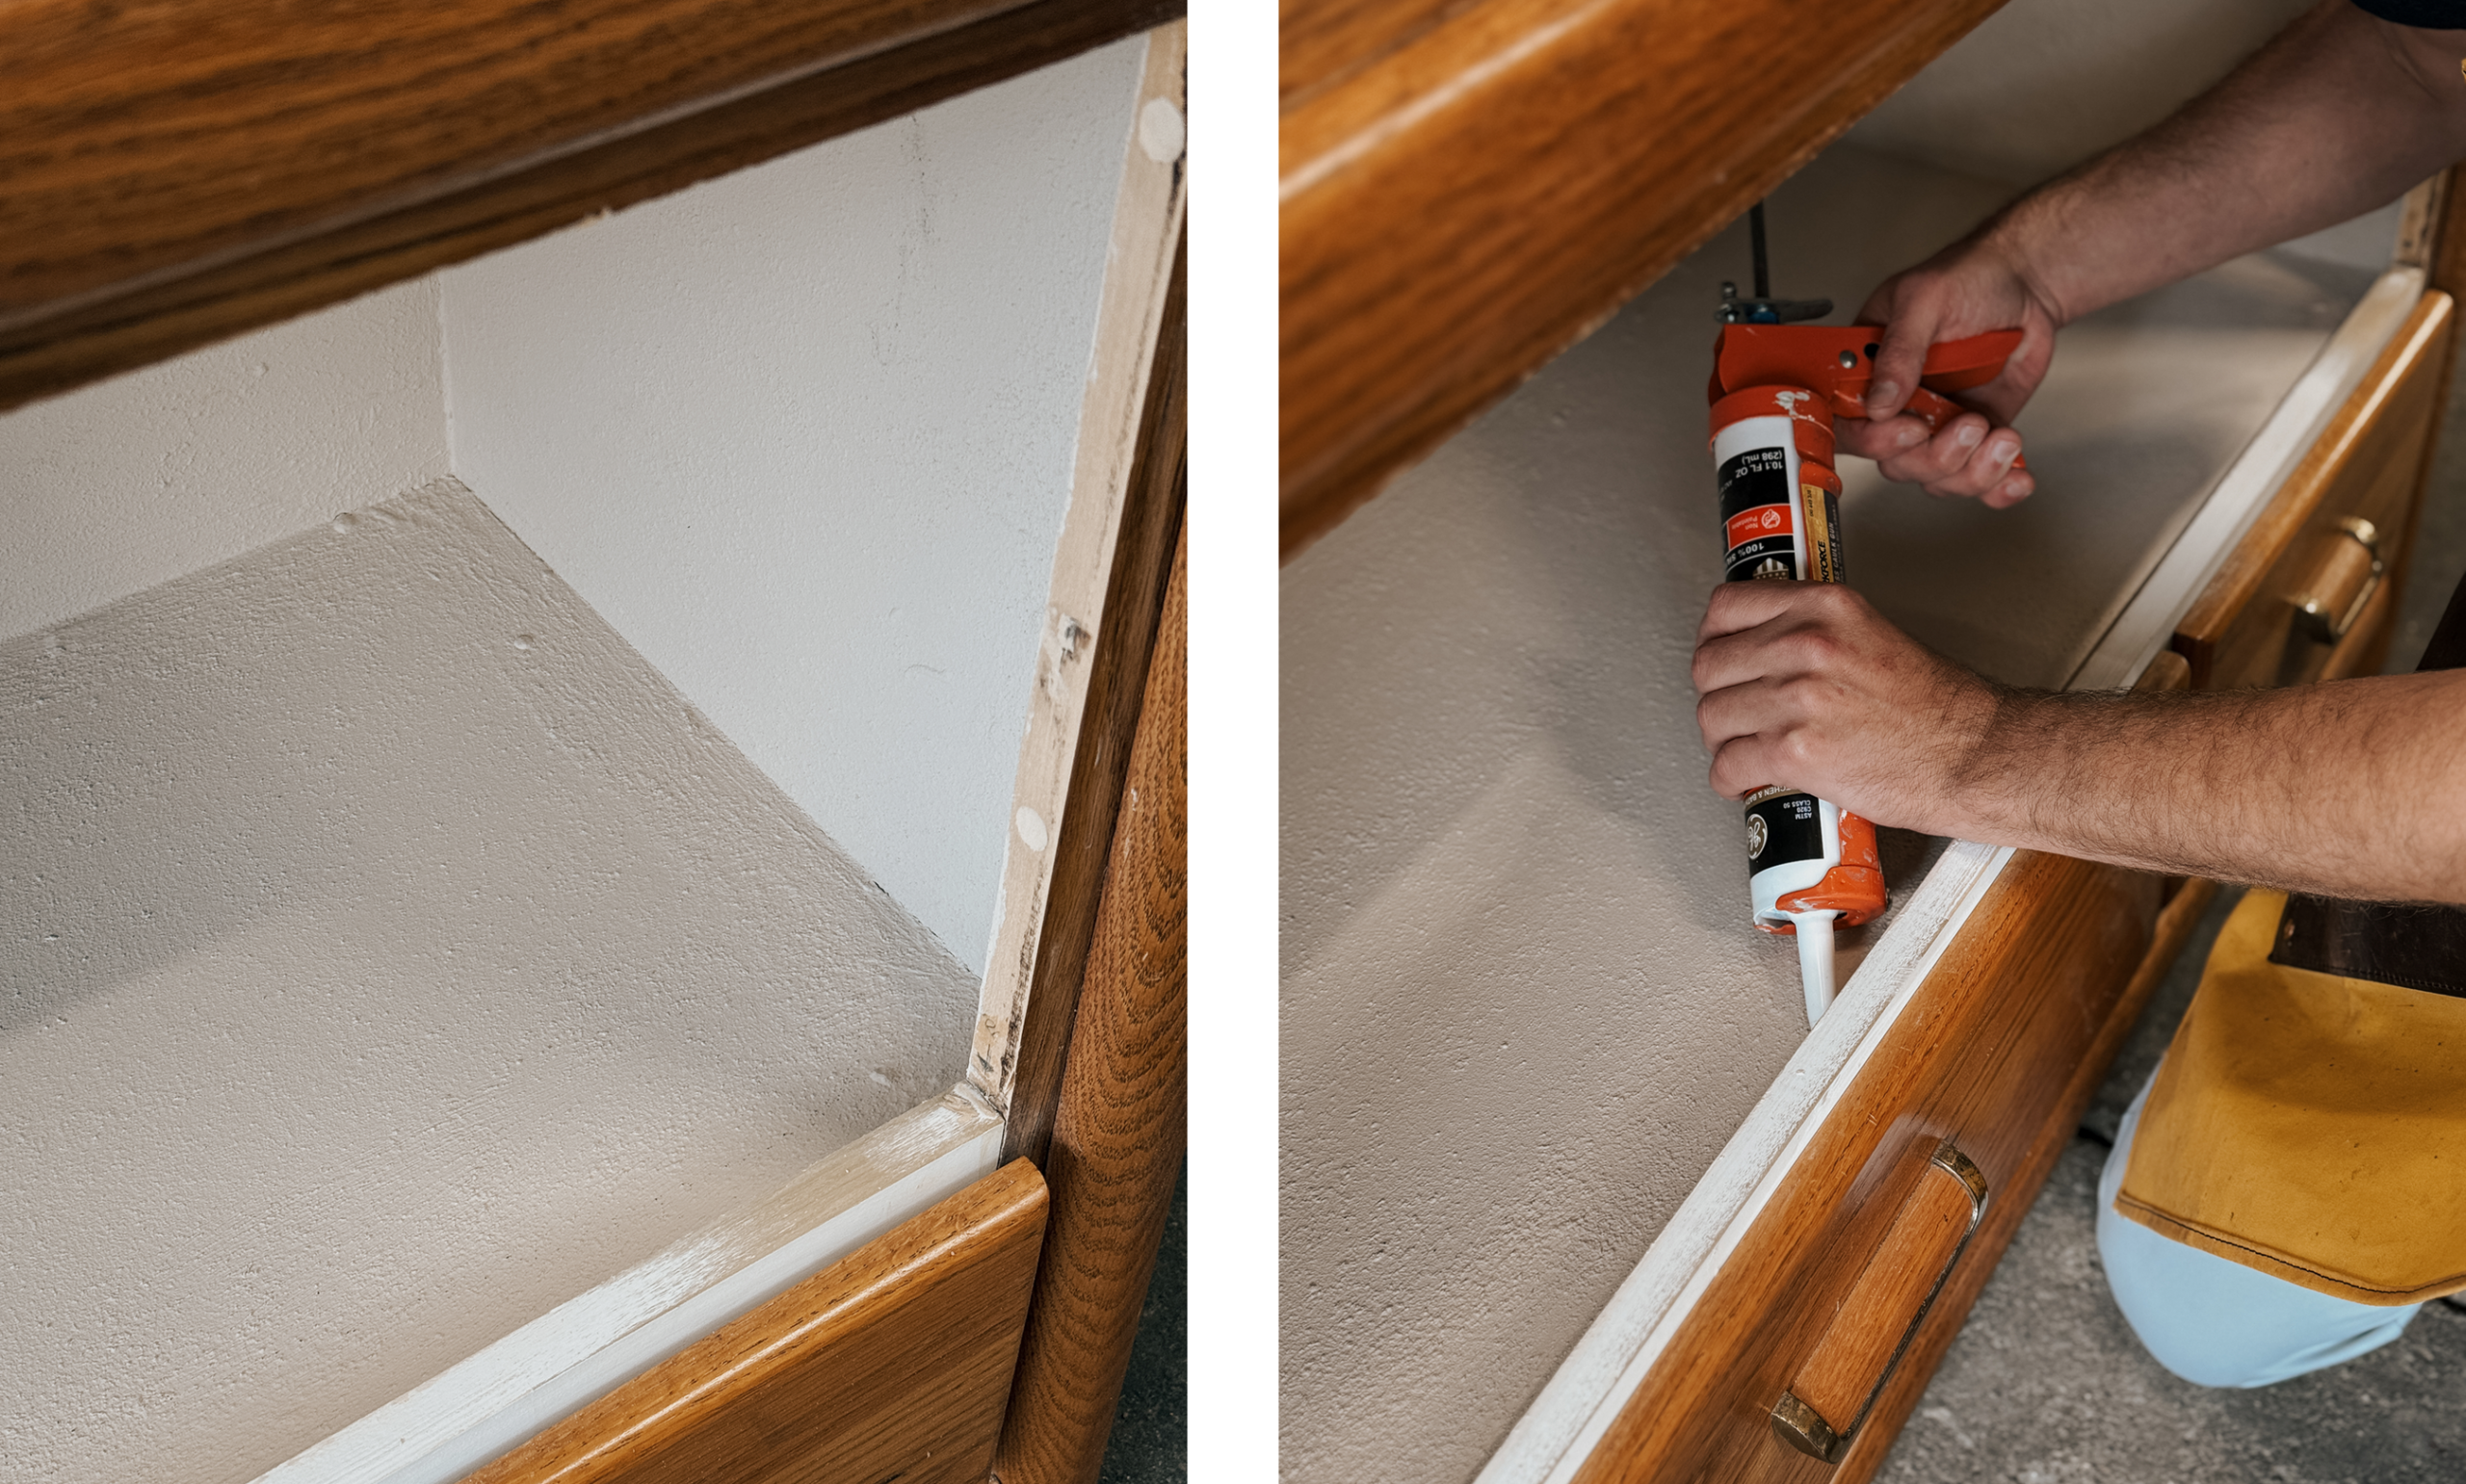
We did a couple of coats, then caulked all of the corner seams with latex caulk before doing another coat or two. Beardies live in the Australian desert, so humidity stays low, but sealing up the enclosure is fully necessary to keep sand and water in place.
4| Interior Mock-up and Build-out
With the construction out of the way, we were ready for the fun part! Mocking up the interior! We used leftover cardboard shipping boxes to make up templates and play with interior shapes. This part was insanely fun and we really let our imaginations take over. We wanted David to have multiple levels to explore and multiple caves to hid in. Reptile enclosures generally have a ‘hot’ side and a ‘cool’ side so animals can self-regulate temperature, so adding height and interest all over was really important.
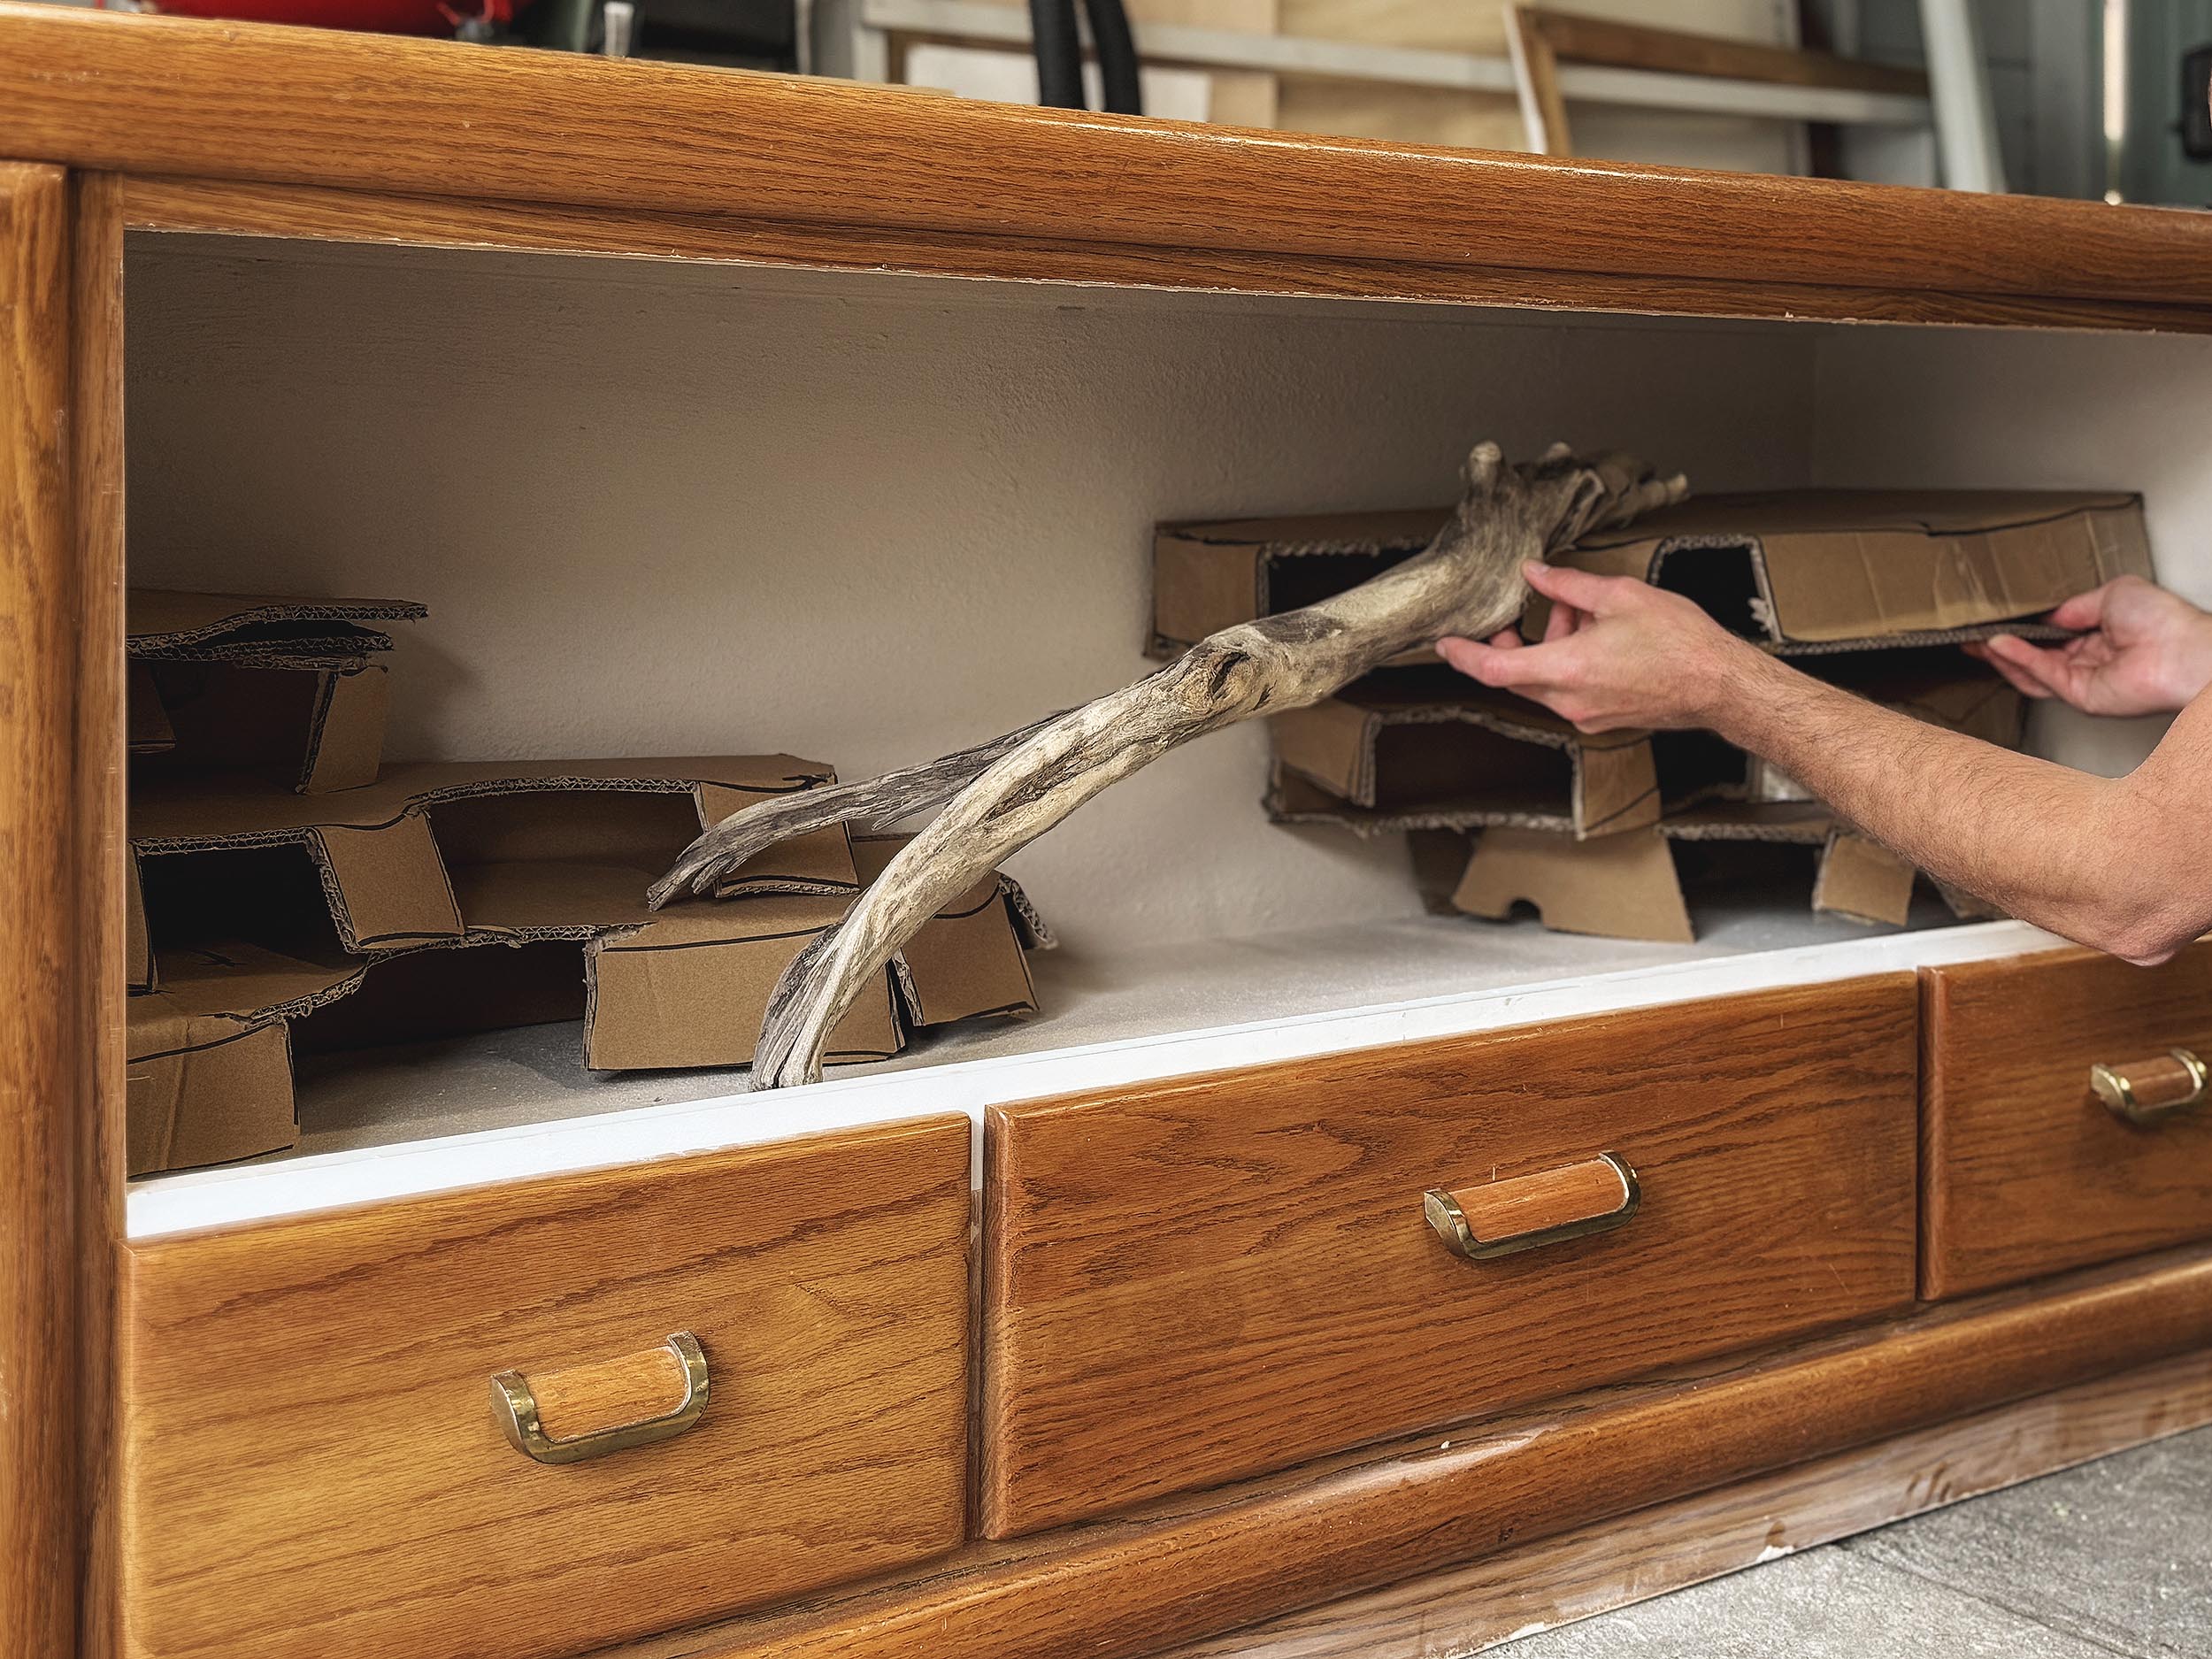
At this step, we also made space for the piece of driftwood that we harvested on the beach in Michigan. Similar pieces can also be purchased in pet stores. We wanted it to be supported securely at three points, so we made sure to plan for that. Once we were happy with the rough shape, we traced the cardboard template pieces onto our purple foam board and we were ready to cut!
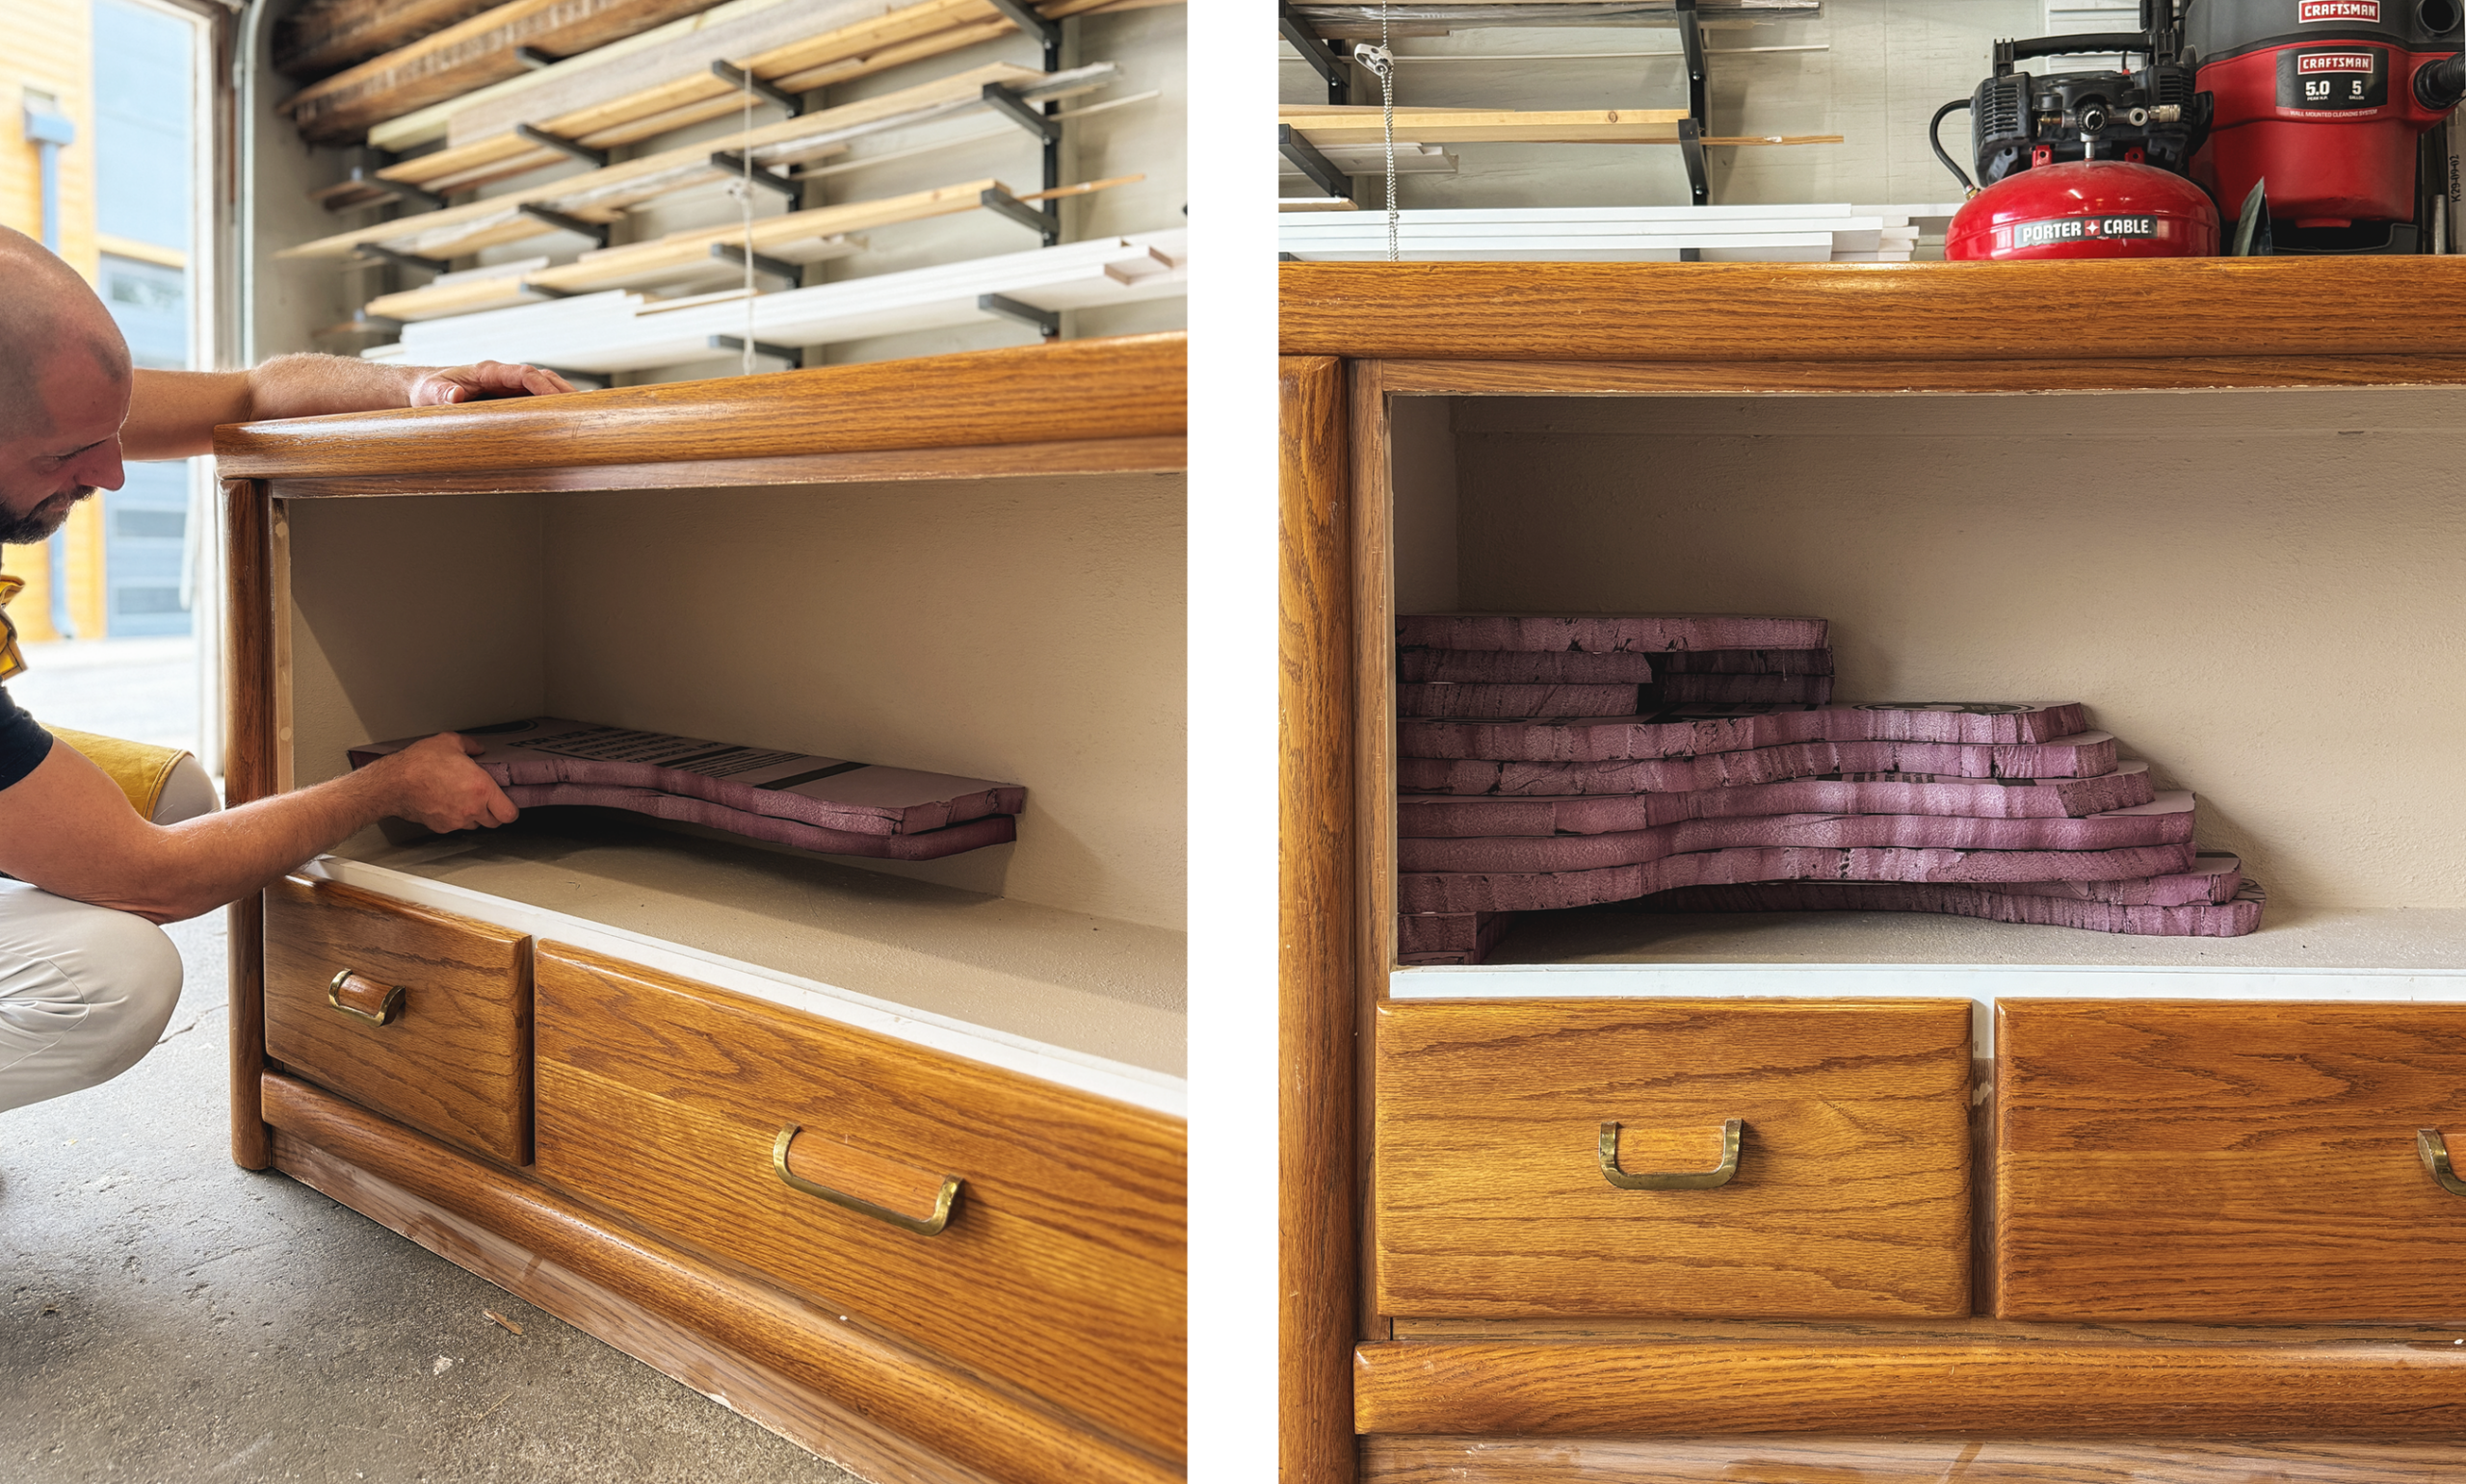
We found a nice rhythm where I’d trace the cardboard template pieces onto the foam board, Kim would roughly cut them out with the hot knife, then hand them back to me to be stacked and caulked together. We created the cave/rock sculptures in three main sections; Left, right and bridge. This allowed for easier access and clamping overnight when securing layers together with caulk.
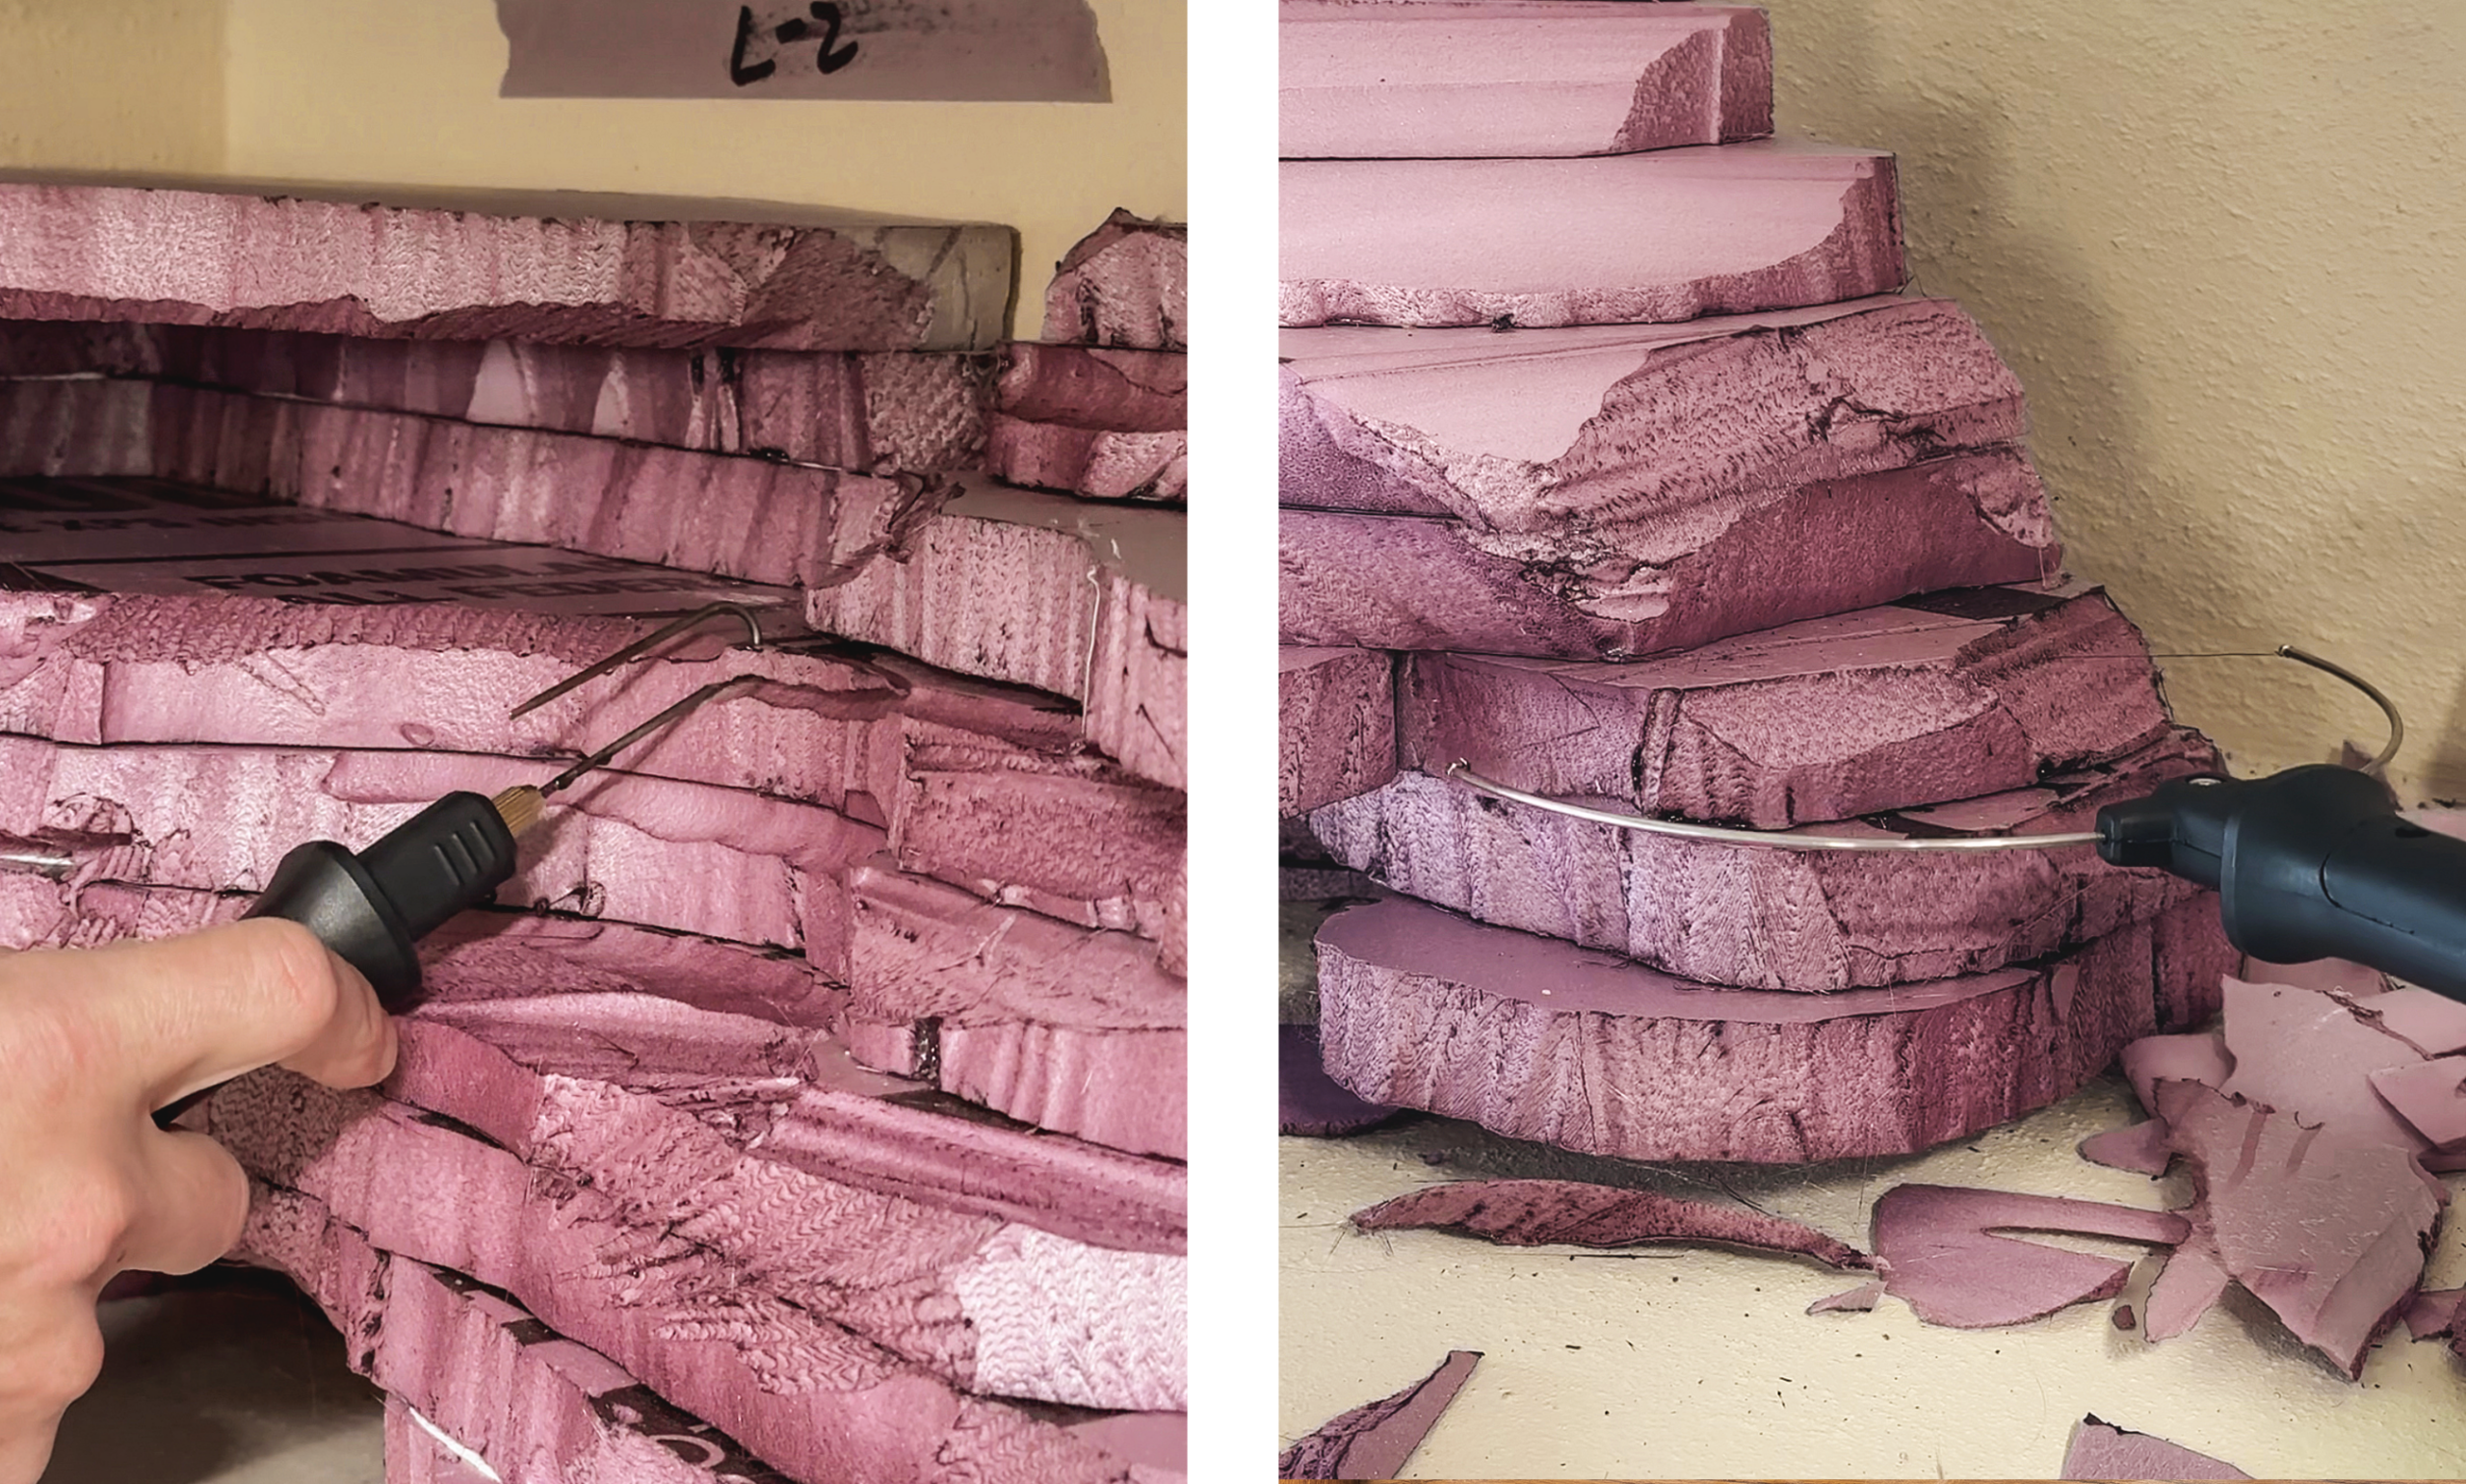
Building in three interlocking pieces also allowed us to shape the backs and sides to be as realistic as possible. We were careful to avoid anything looking too flat or unnatural. When in doubt, carve more!
Kim quickly mastered the looped end attachment of the hot knife and was carving hyper-realistic desert rock formations in no time! We were sure to vary the depths and angles of the cracks to mimic the rocky outcrops that Beardies naturally hide in.

With the carving complete, we put the three sections in place and secured them into the dresser with caulk and spray foam.
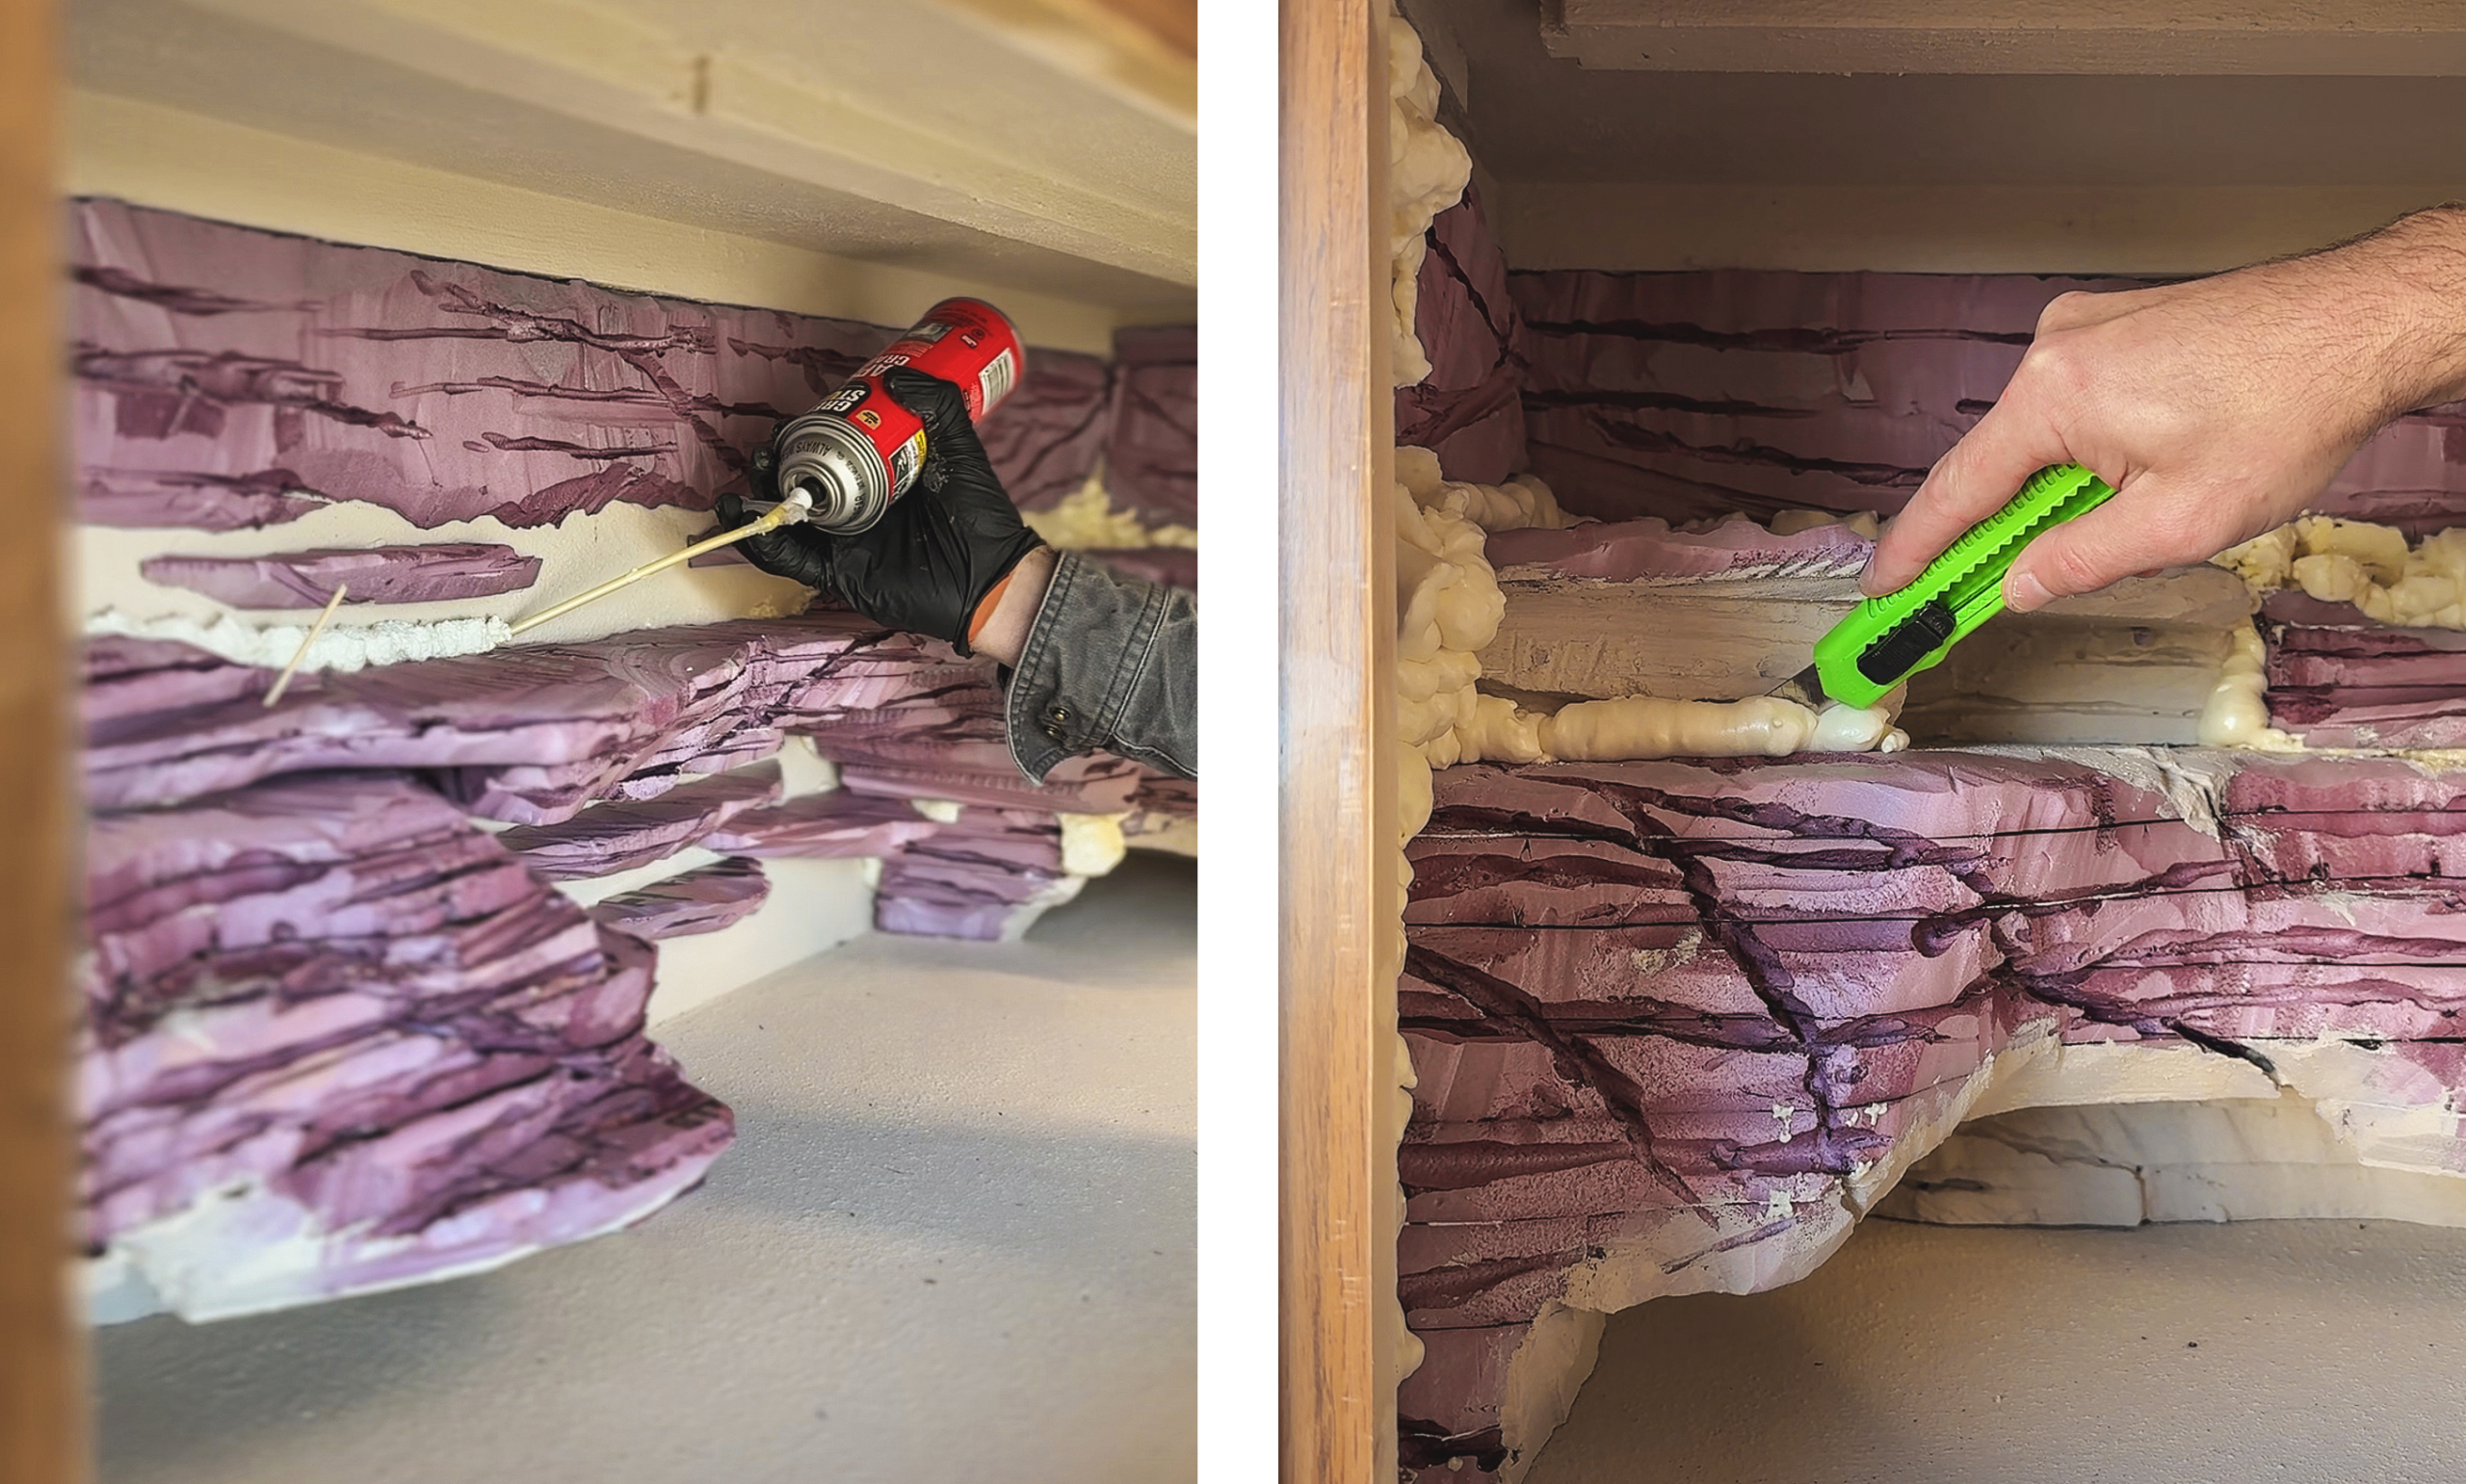
This secured the ‘rocks’ in place and fill the cracks to keep any escaped feeder bugs from escaping David’s clutches. Once the rock structures were in place, we carved out interlocking foam ‘wall’ pieces to make the whole interior feel natural instead of ‘a pile of rocks in a box’.
5| Paint, paint paint!
The carving made the foam look realistic but the paint took it to the next level! picked three different reddish browns and layered them. Kim started with the darkest color and really worked it into all of the cracks to add depth and dimension. She then moved on to the middle color, then the lightest color to give the rocks highlights and dark areas.
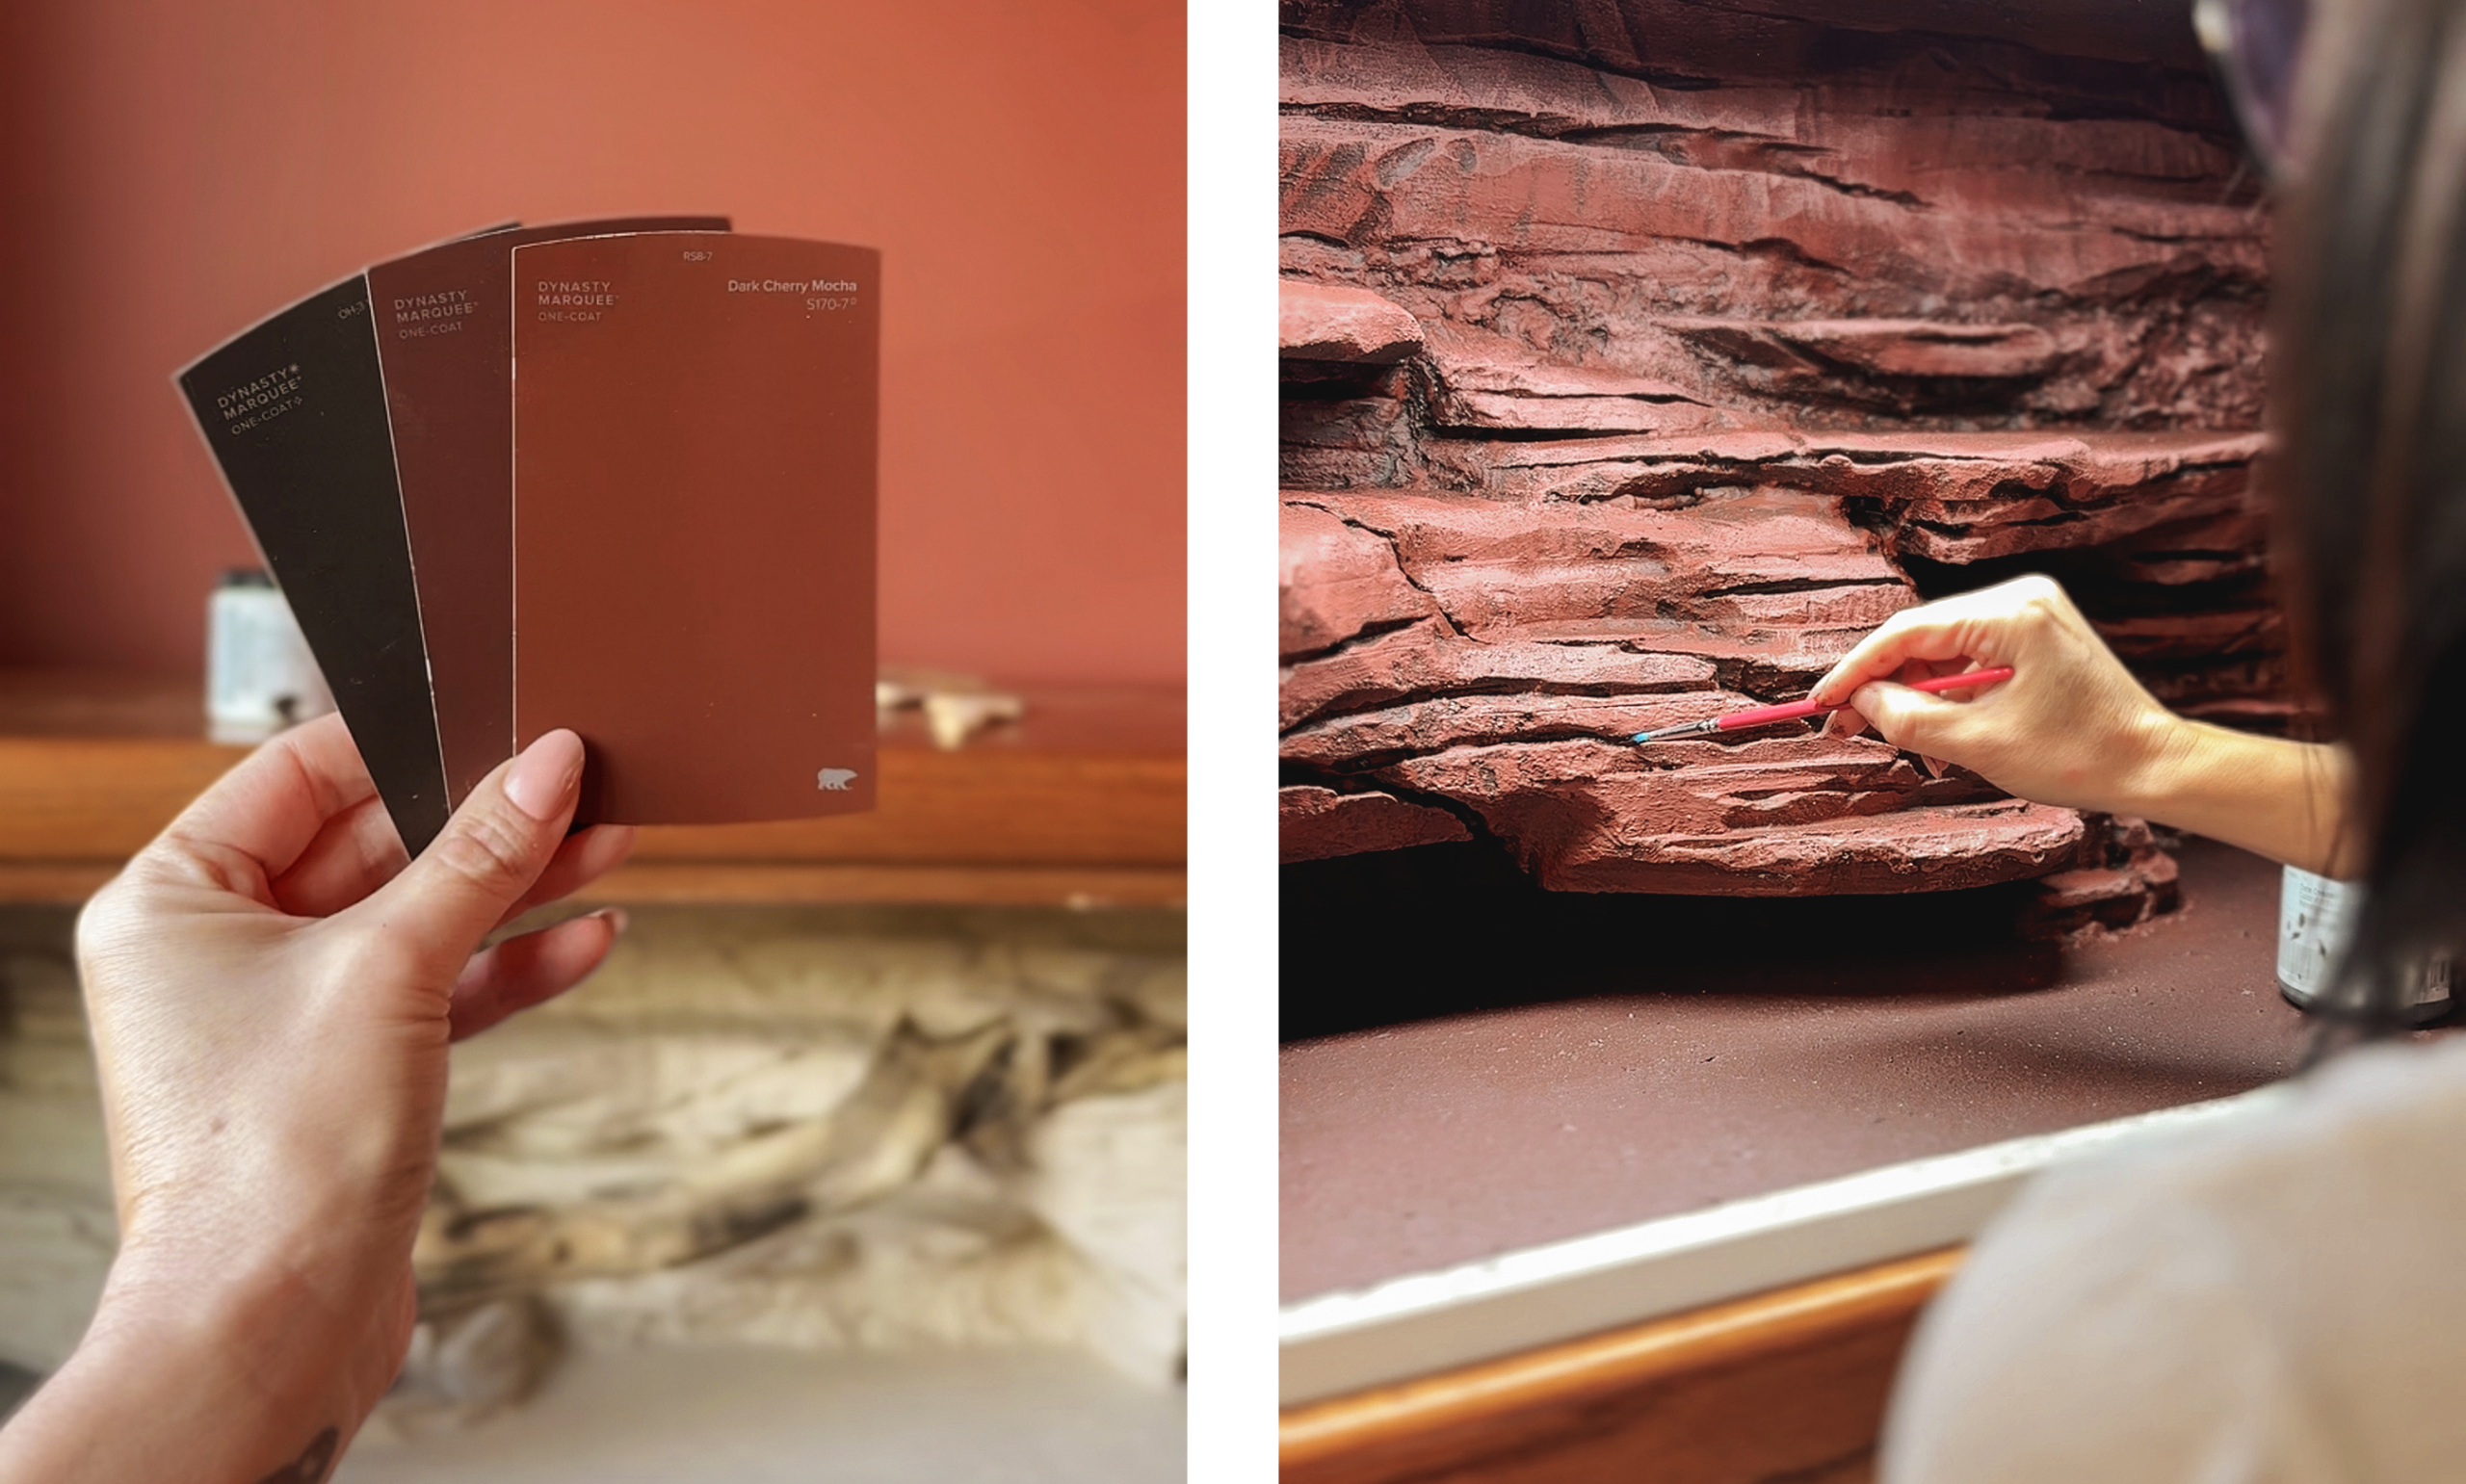
Deep cracks were hit one more time with the darkest color and everything got some more dry brushing and stippling to blend the colors together.
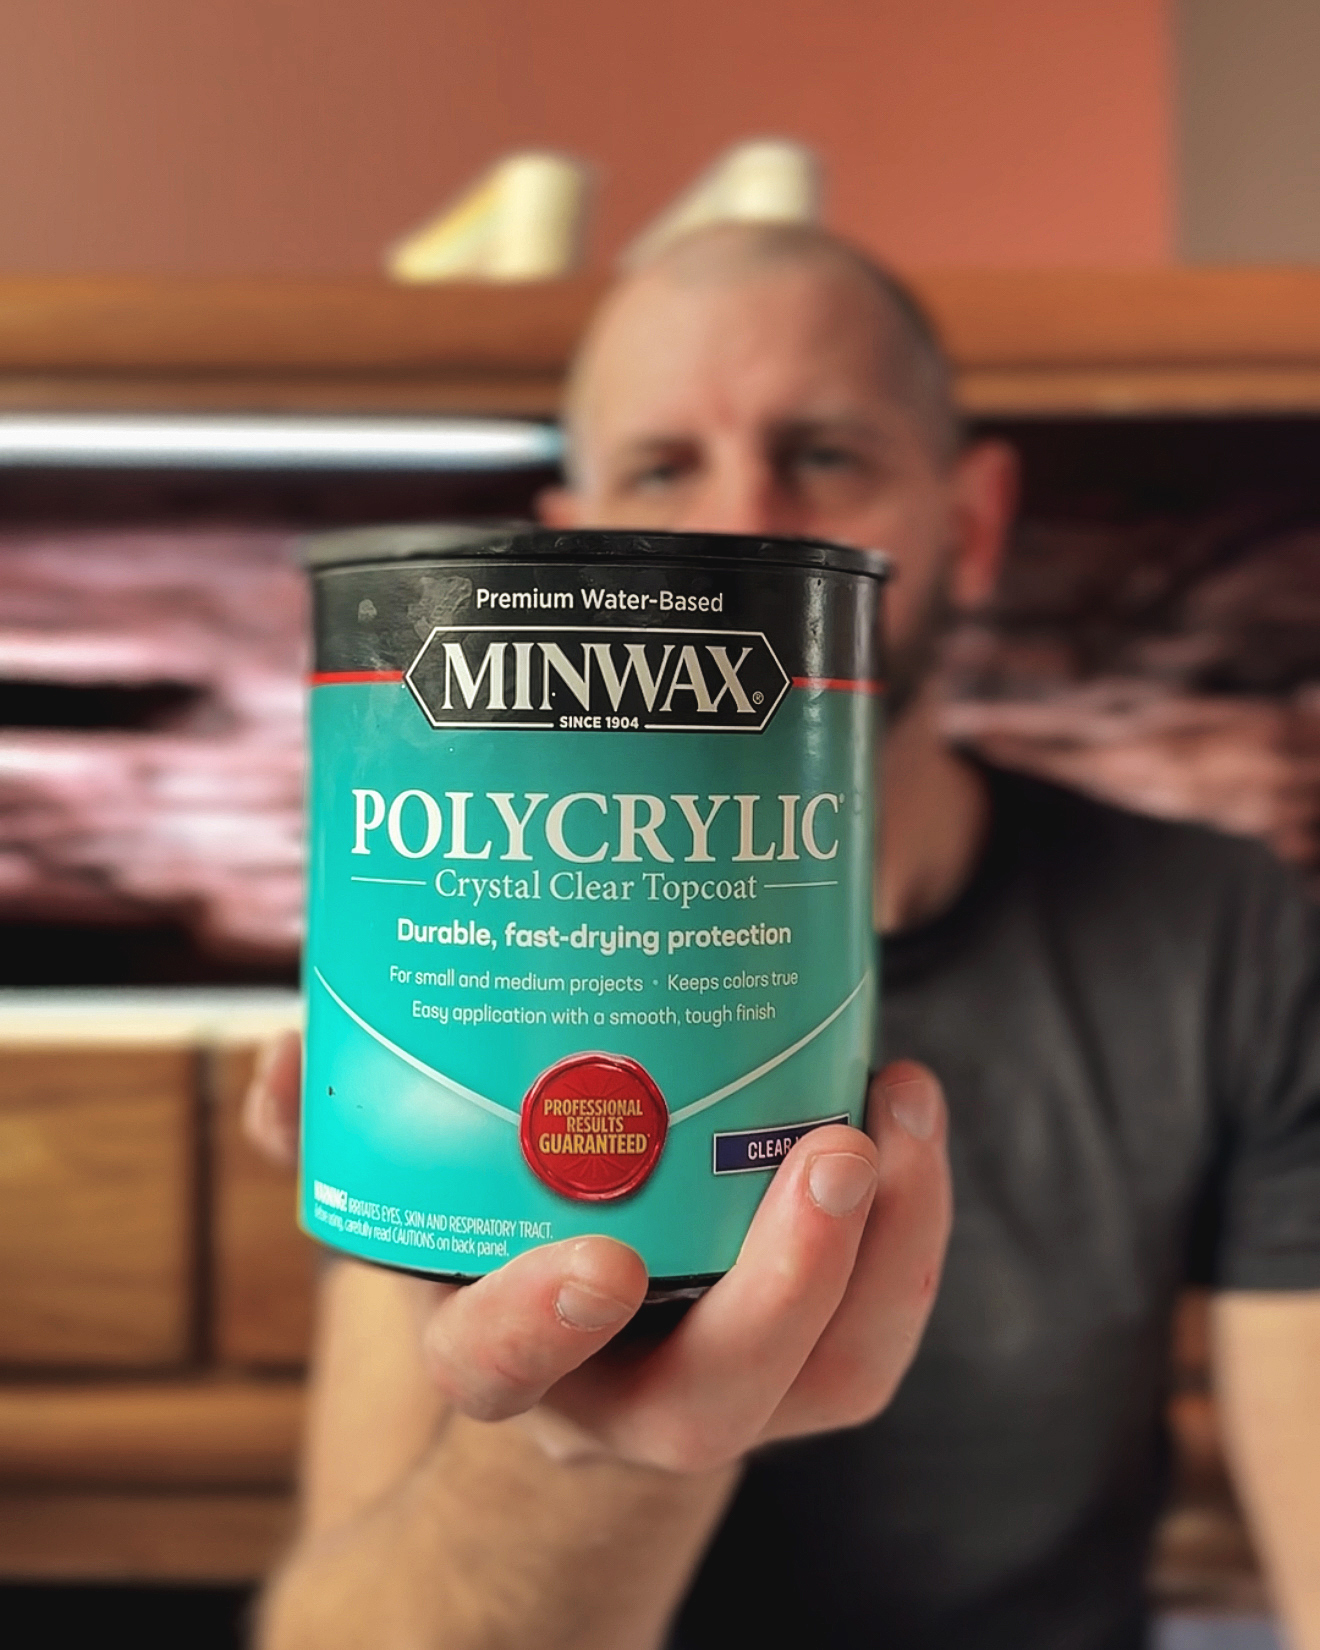
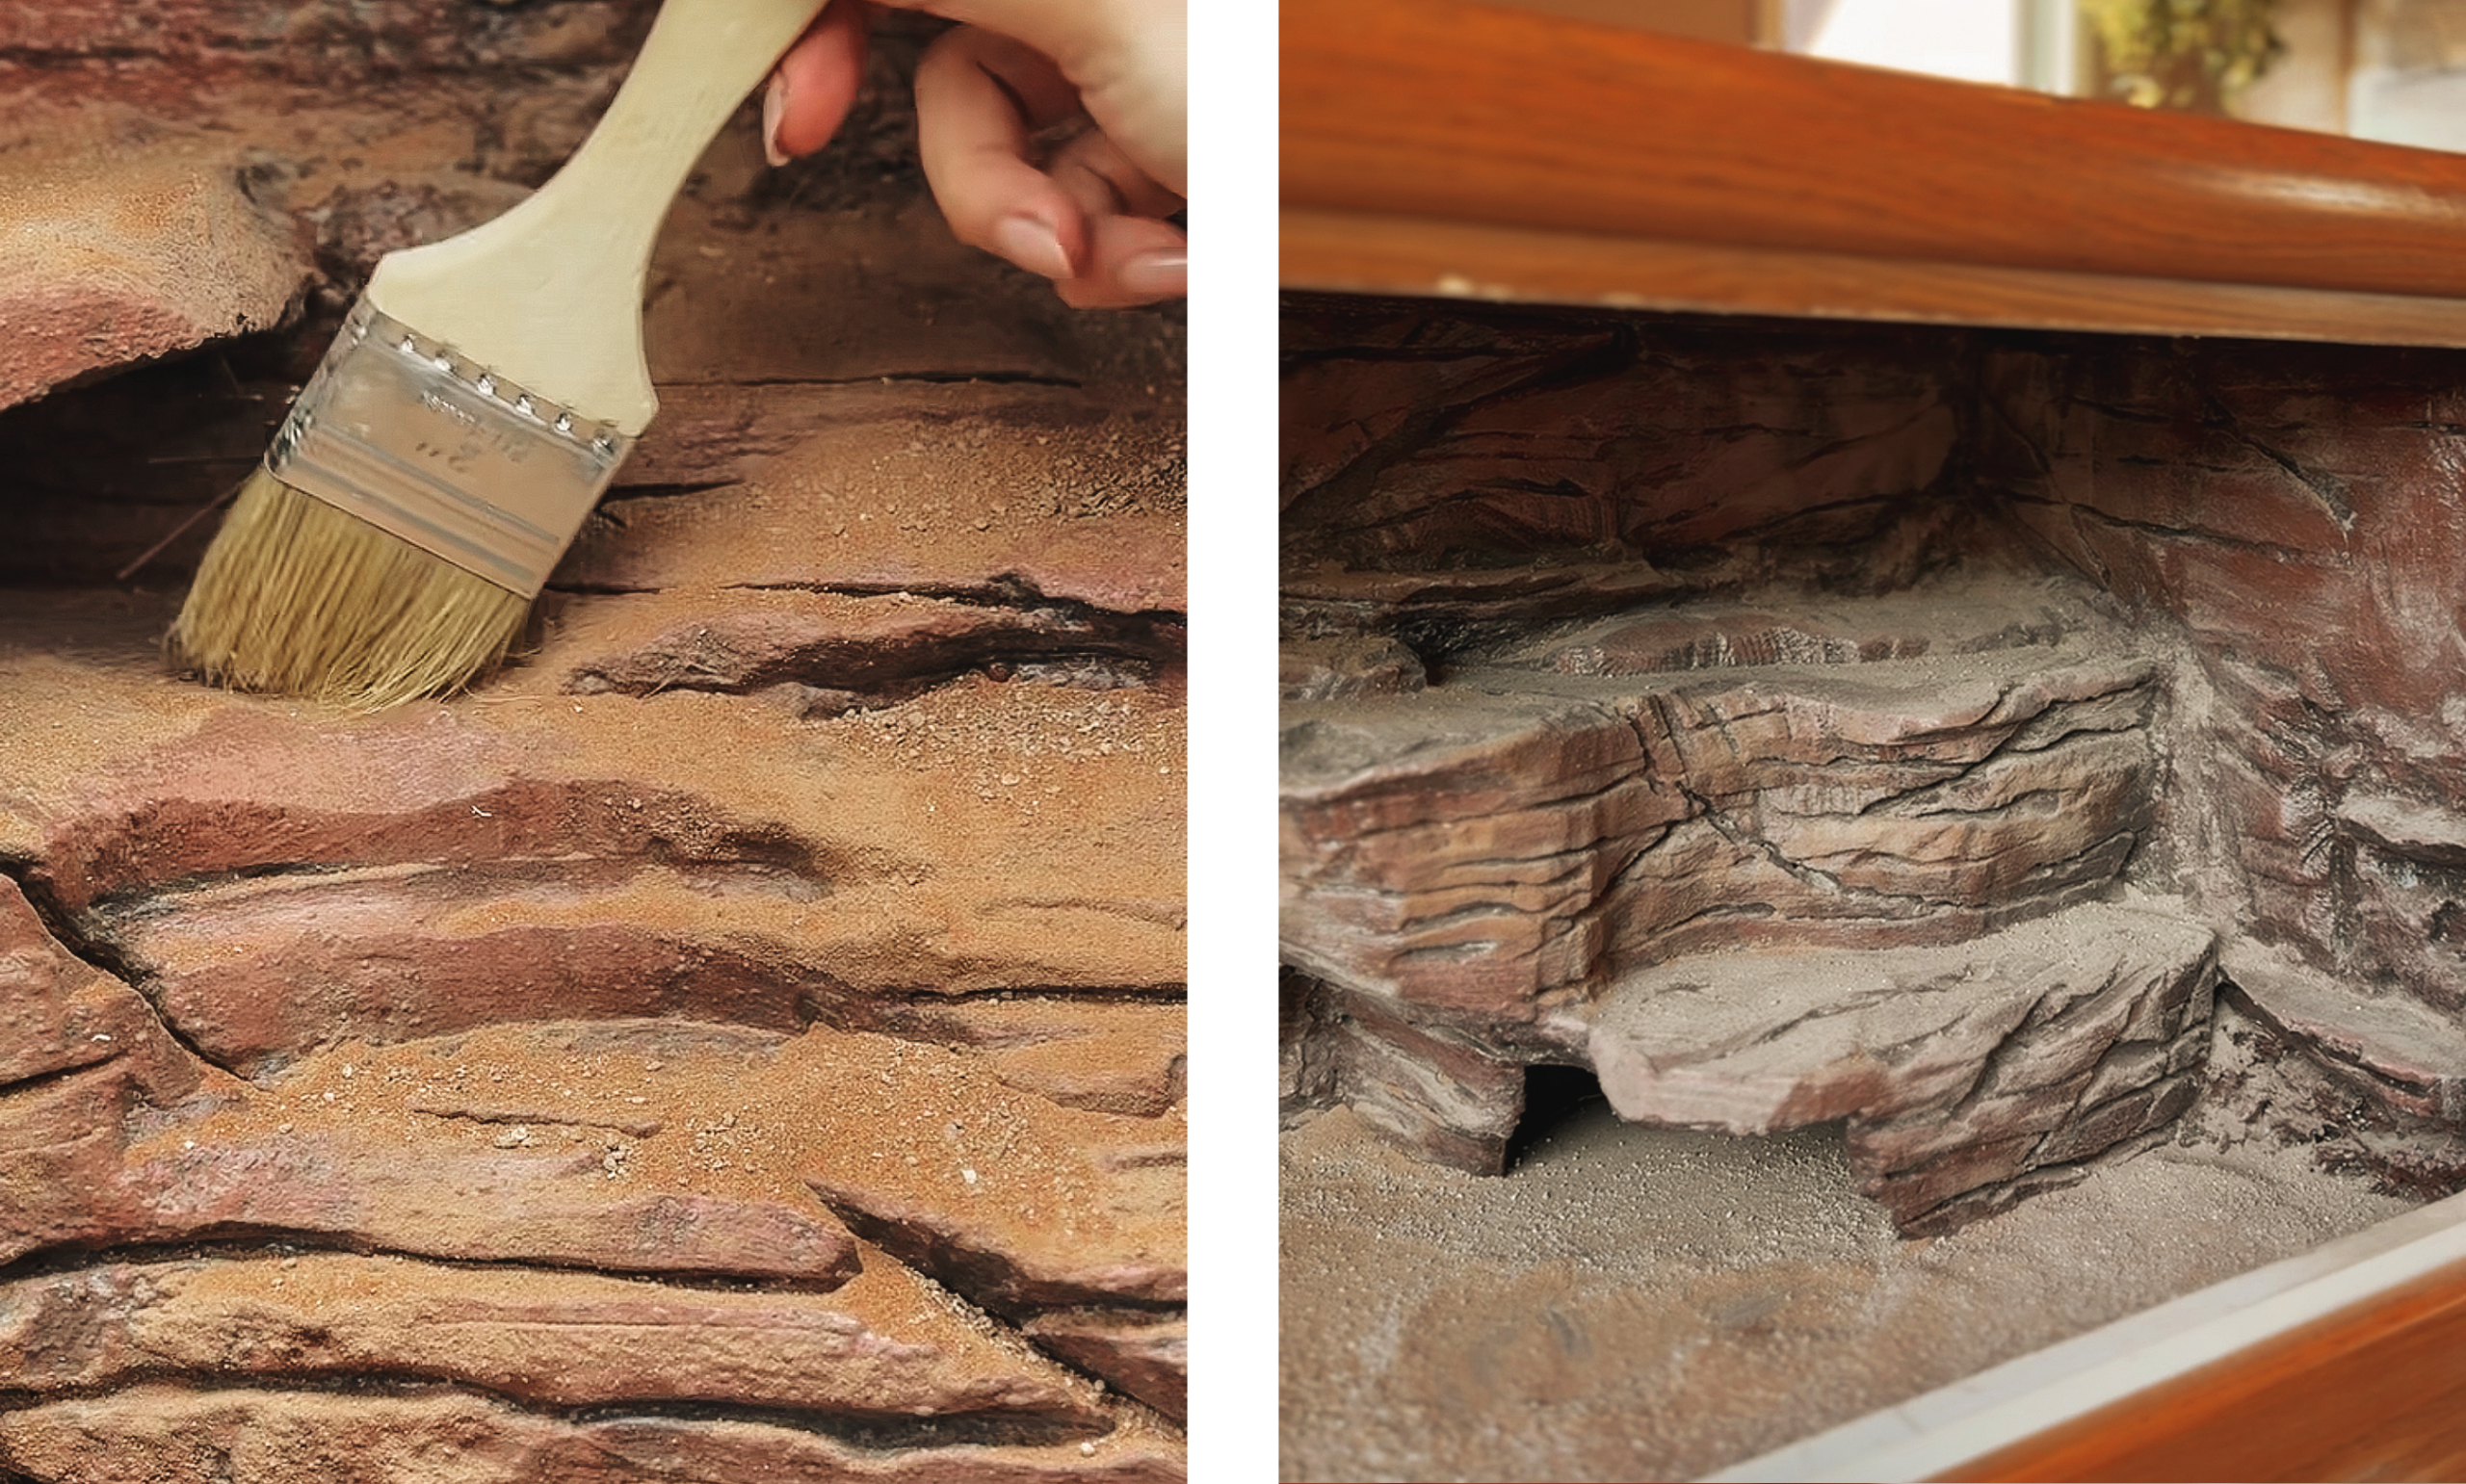
When we were happy with the final look of the rock formations and walls, we gave the whole interior multiple coats of clear matte Polycrylic to seal everything up.
On the final layer, Kim applied the polycrylic on thick and I followed behind her scattering red desert sand onto the wet top coat and into the cracks. This scattering of sand and dust really brought down the remaining gloss of the polycrylic and gave the rocks an unbelievably realistic texture.
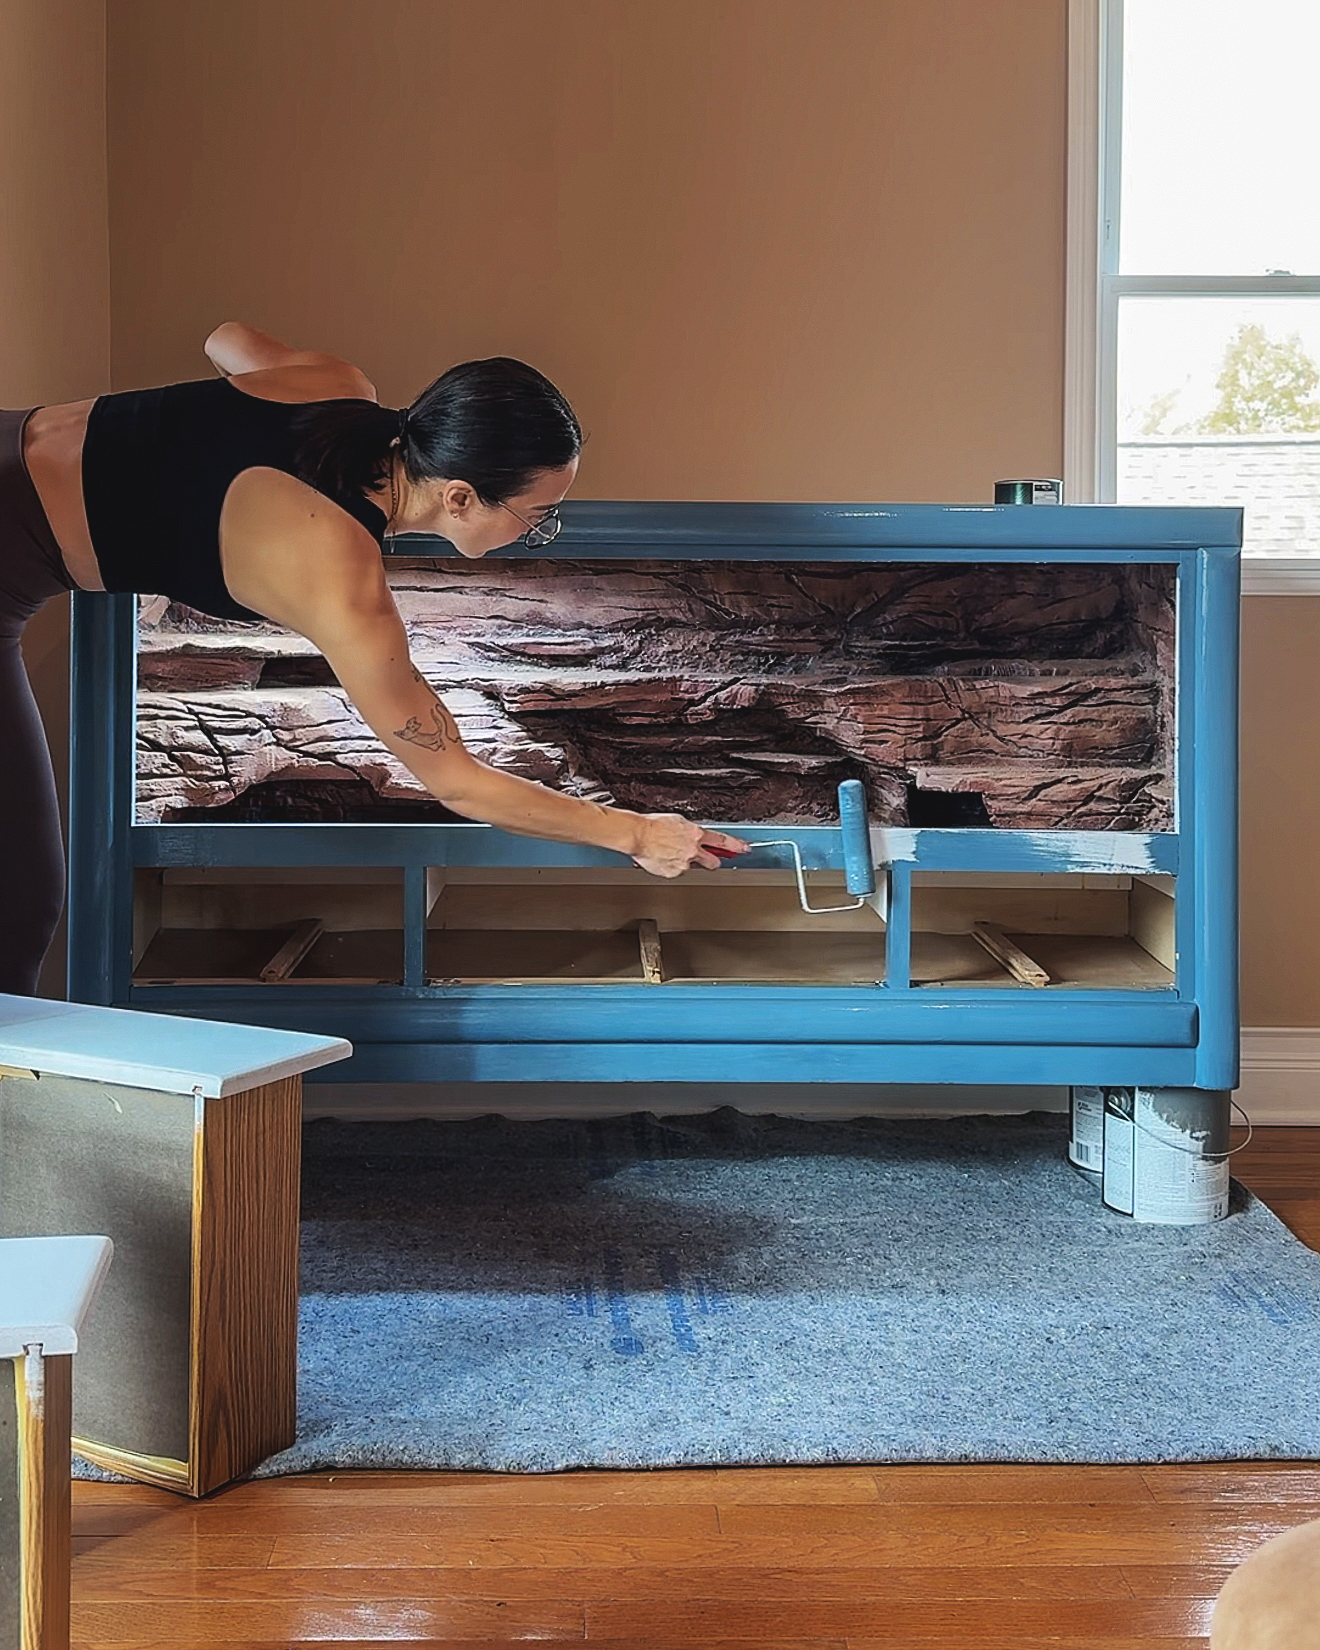
6| Exterior Paint and Interior Decor
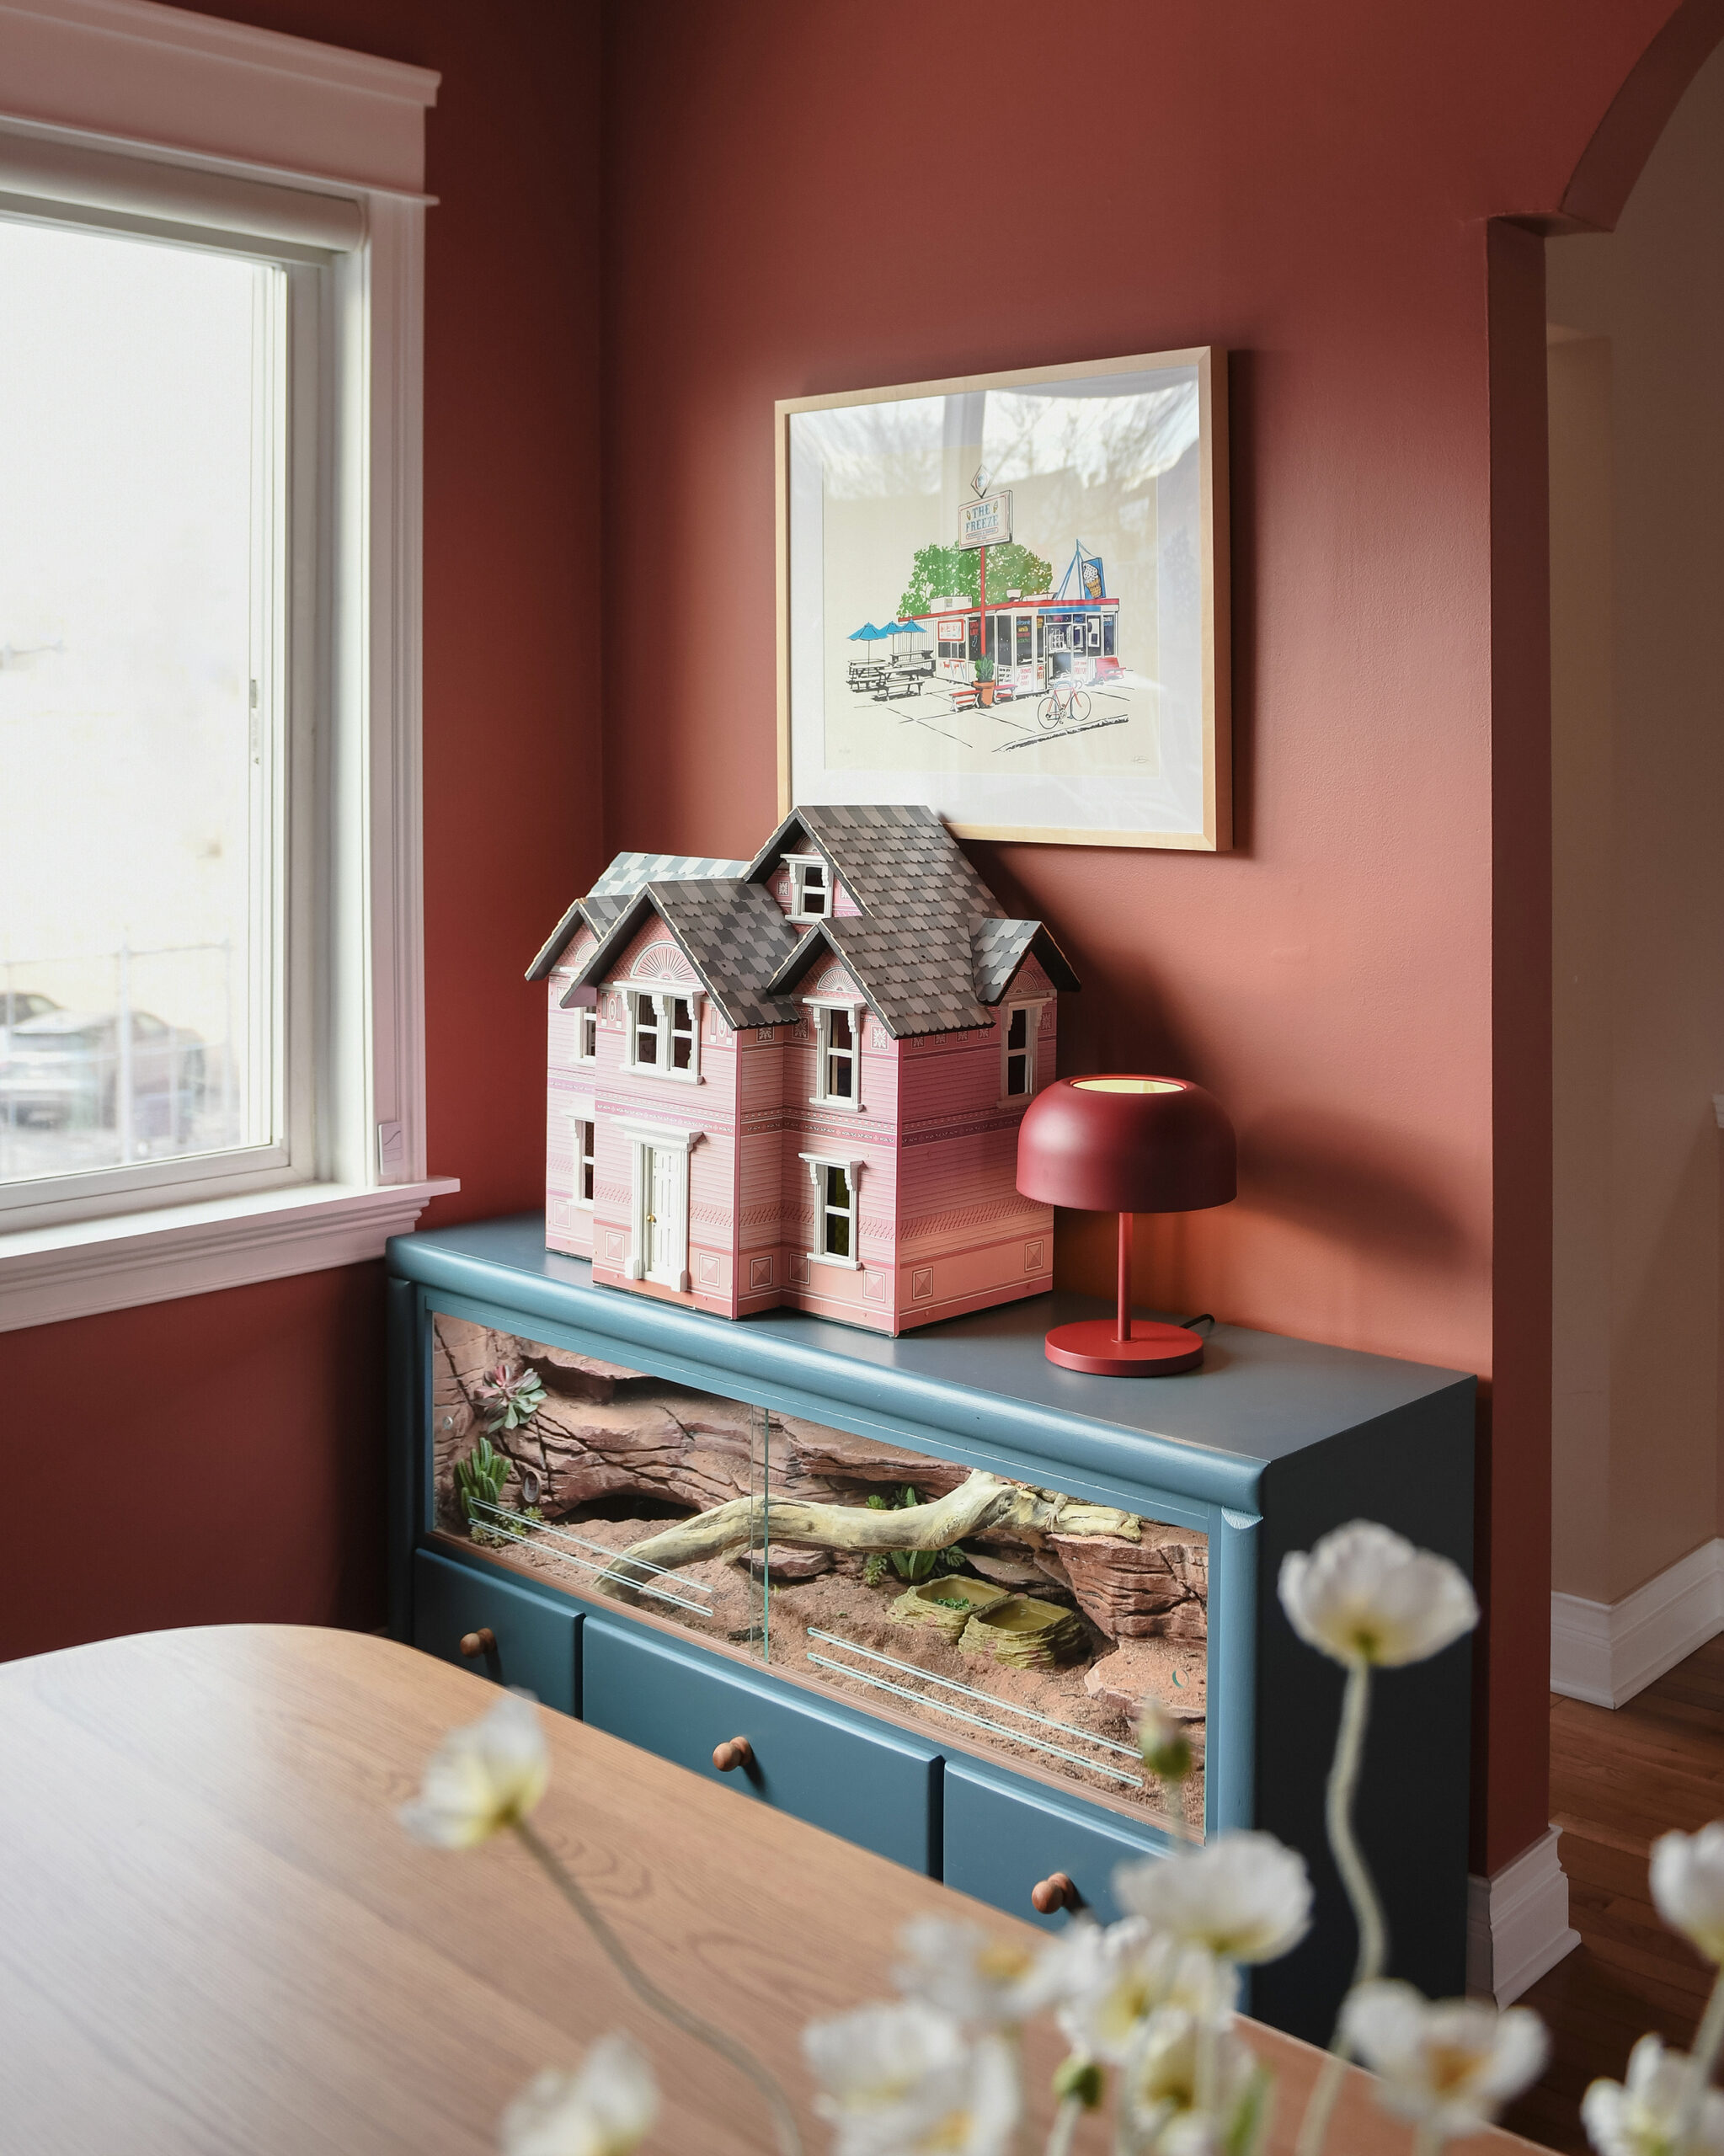
With the interior mostly complete, we needed to pick a color for the dresser itself. We intentionally left this decision for this exact moment because we wanted the exterior color to complement the interior colors.
We kept things playful with a bold blue that played well with the deep reds of the interior. We used a brush and roller for paint and water-based poly using this method.
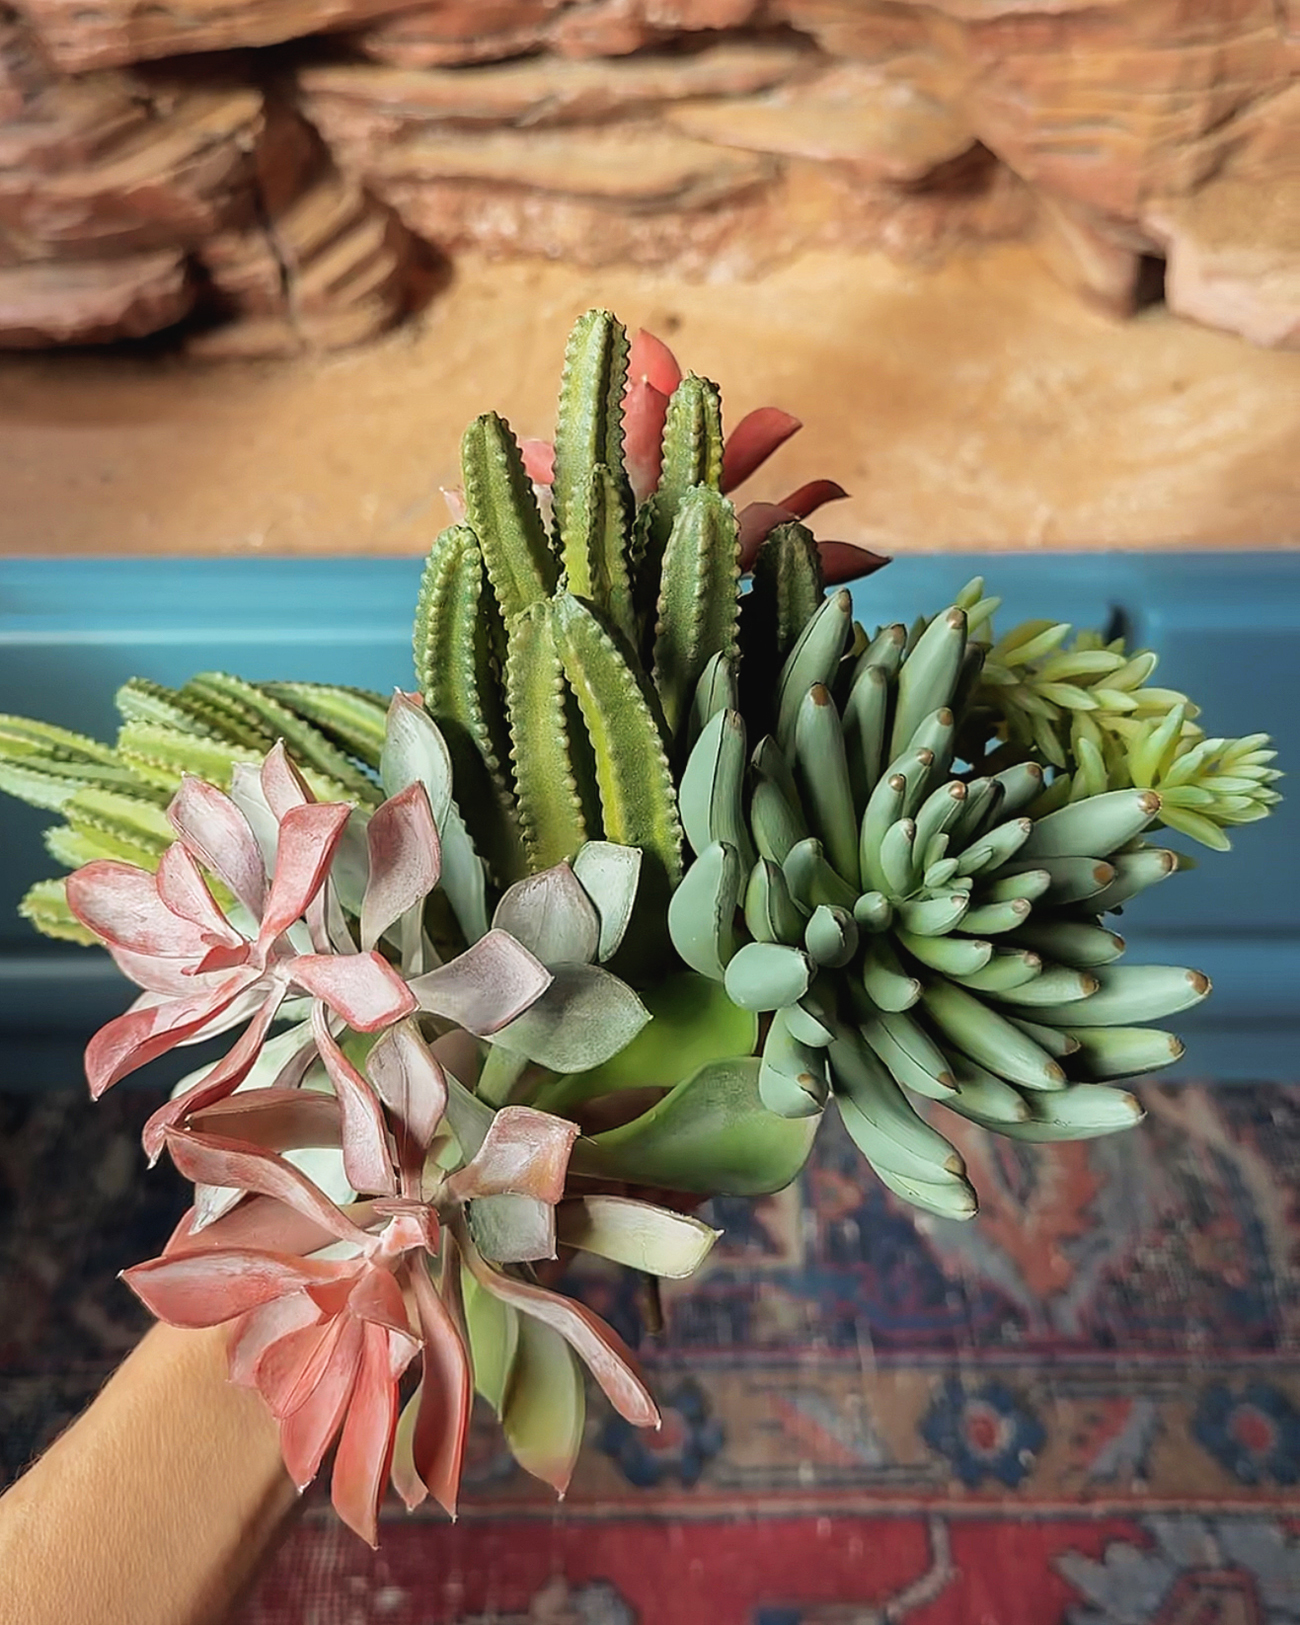
Things were looking great after the paint had a day to dry, so it was time to put the finishing touches on the interior. We gathered a handful of faux succulents that popped nicely against the red rocks.
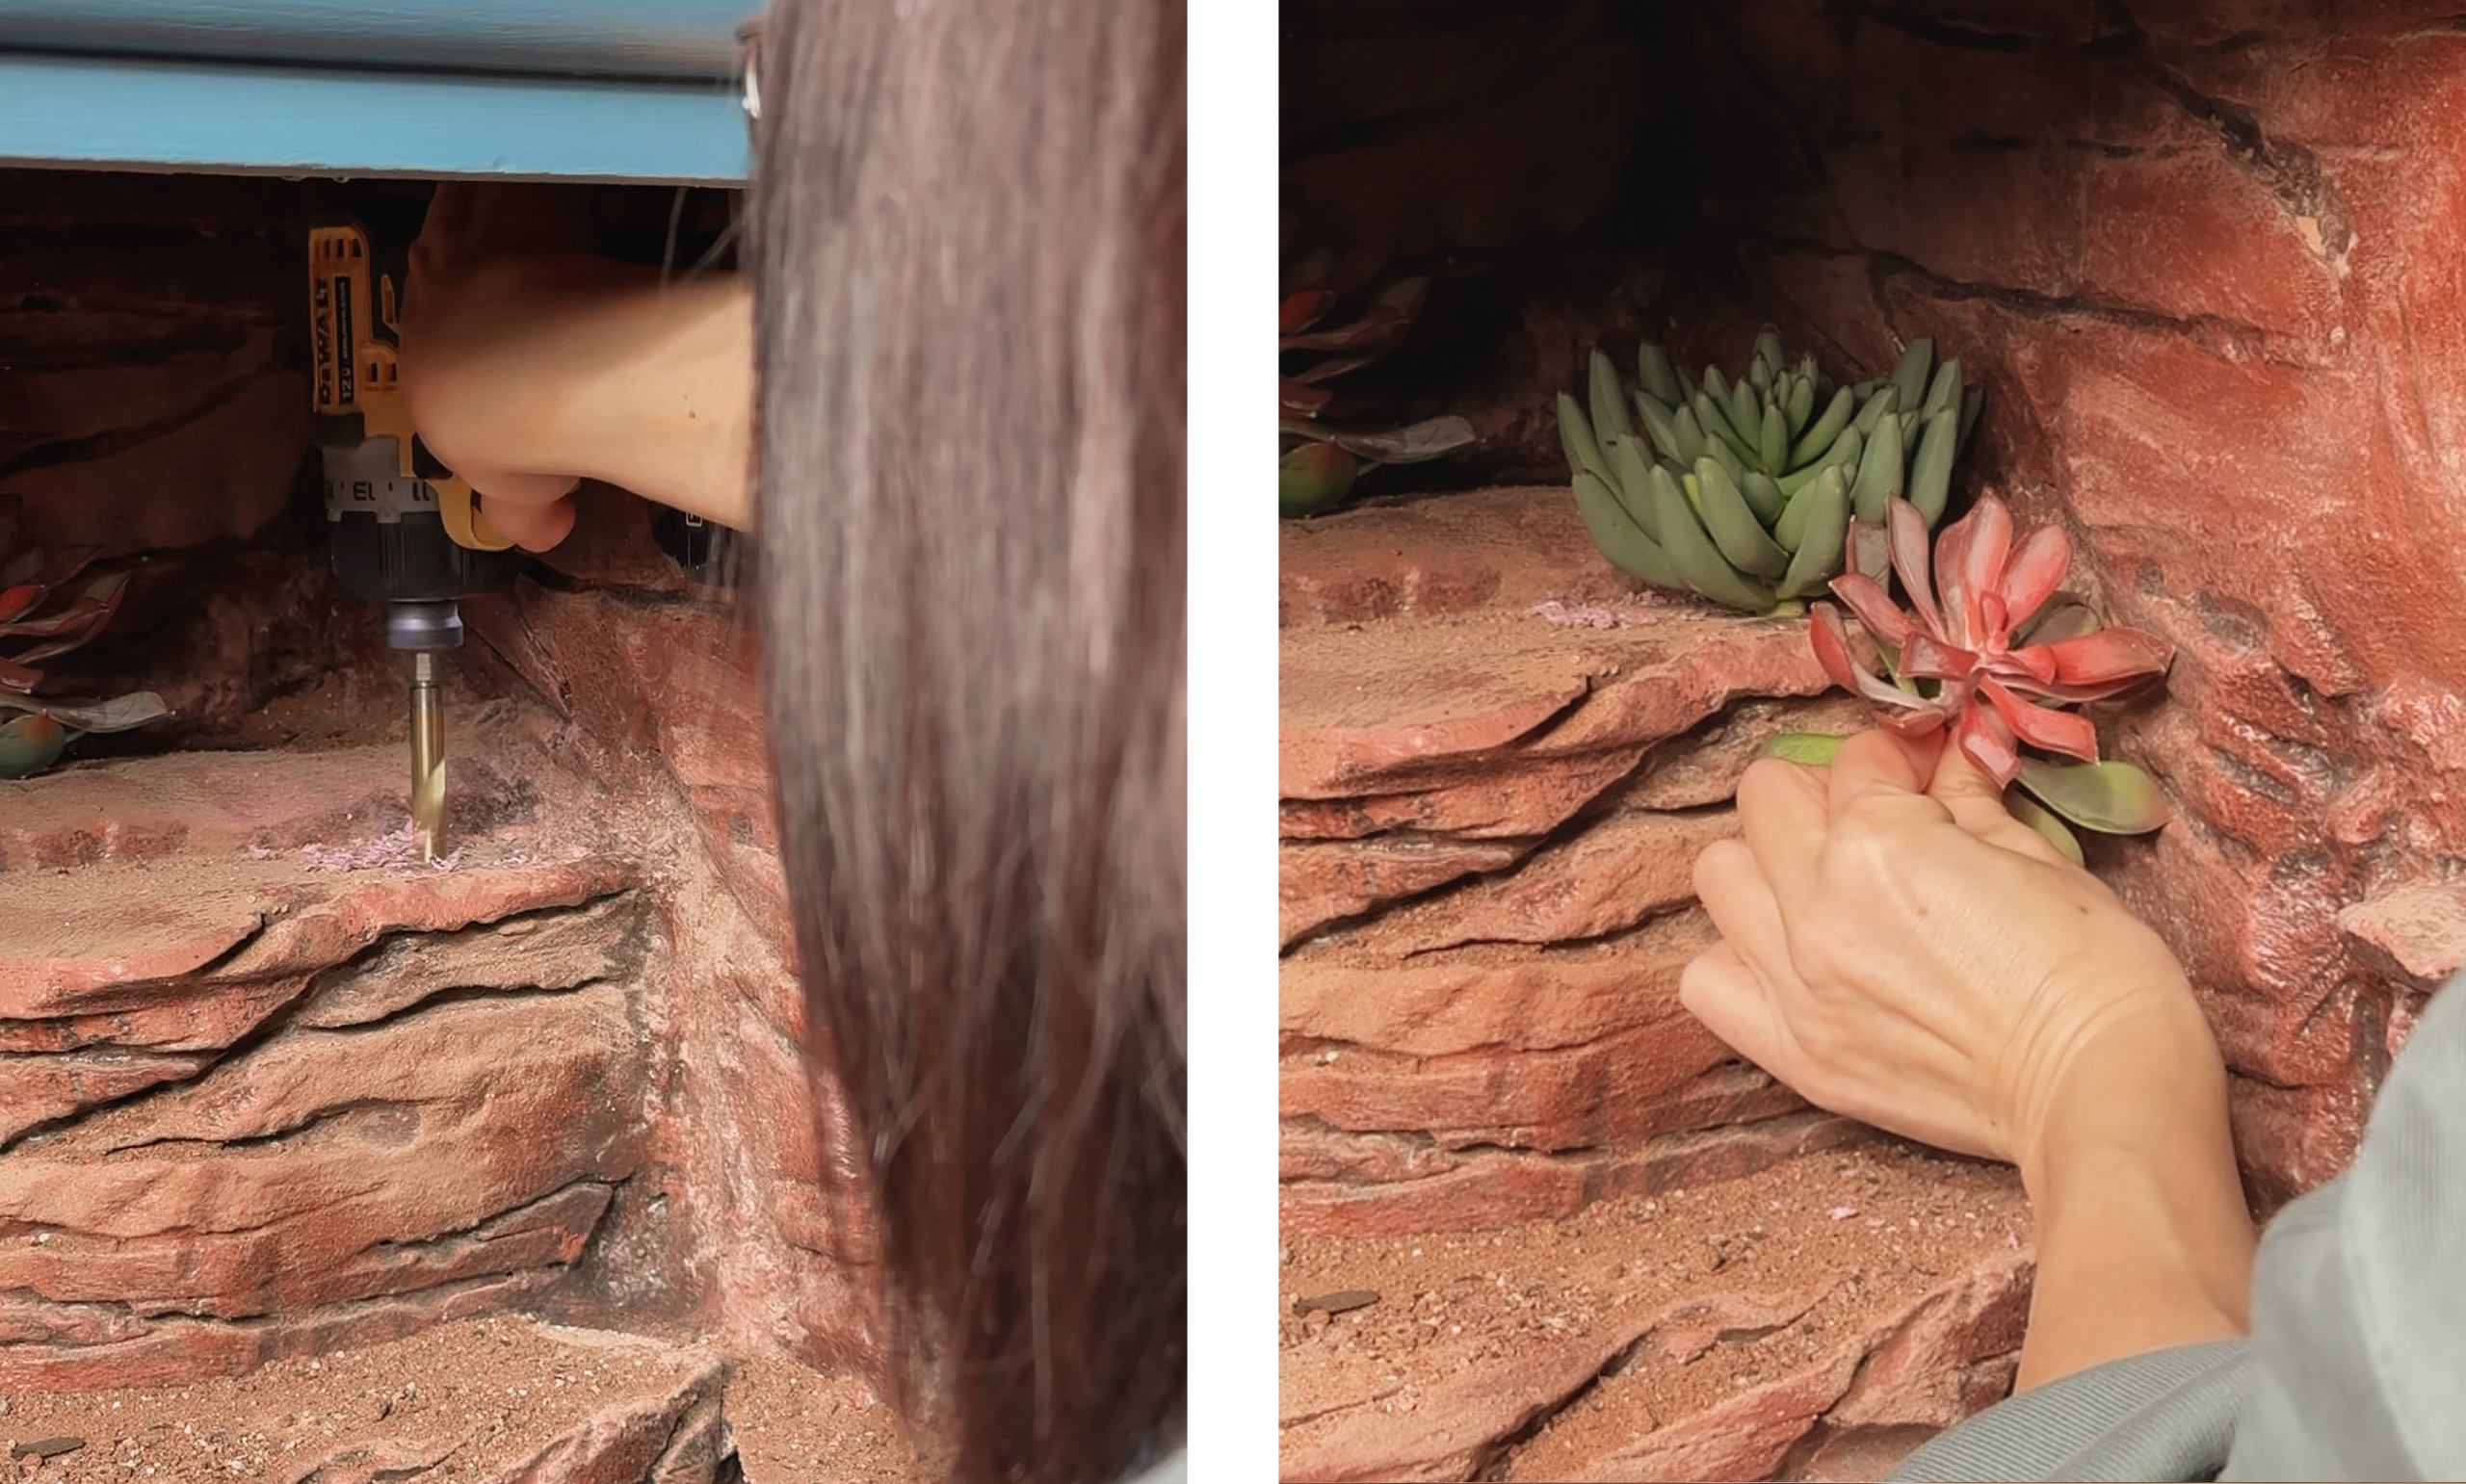
To install the succulents, we used a 1/4″ drill bit to poke holes in the rock structures. The succulent bases were then slid right into the voids. The plants really finish off the space and soften some of the hard edges. We’ve had a number of Australian followers message us to tell us that this looks exactly like the outback where they spent time camping as kids and that feels like the ultimate compliment.
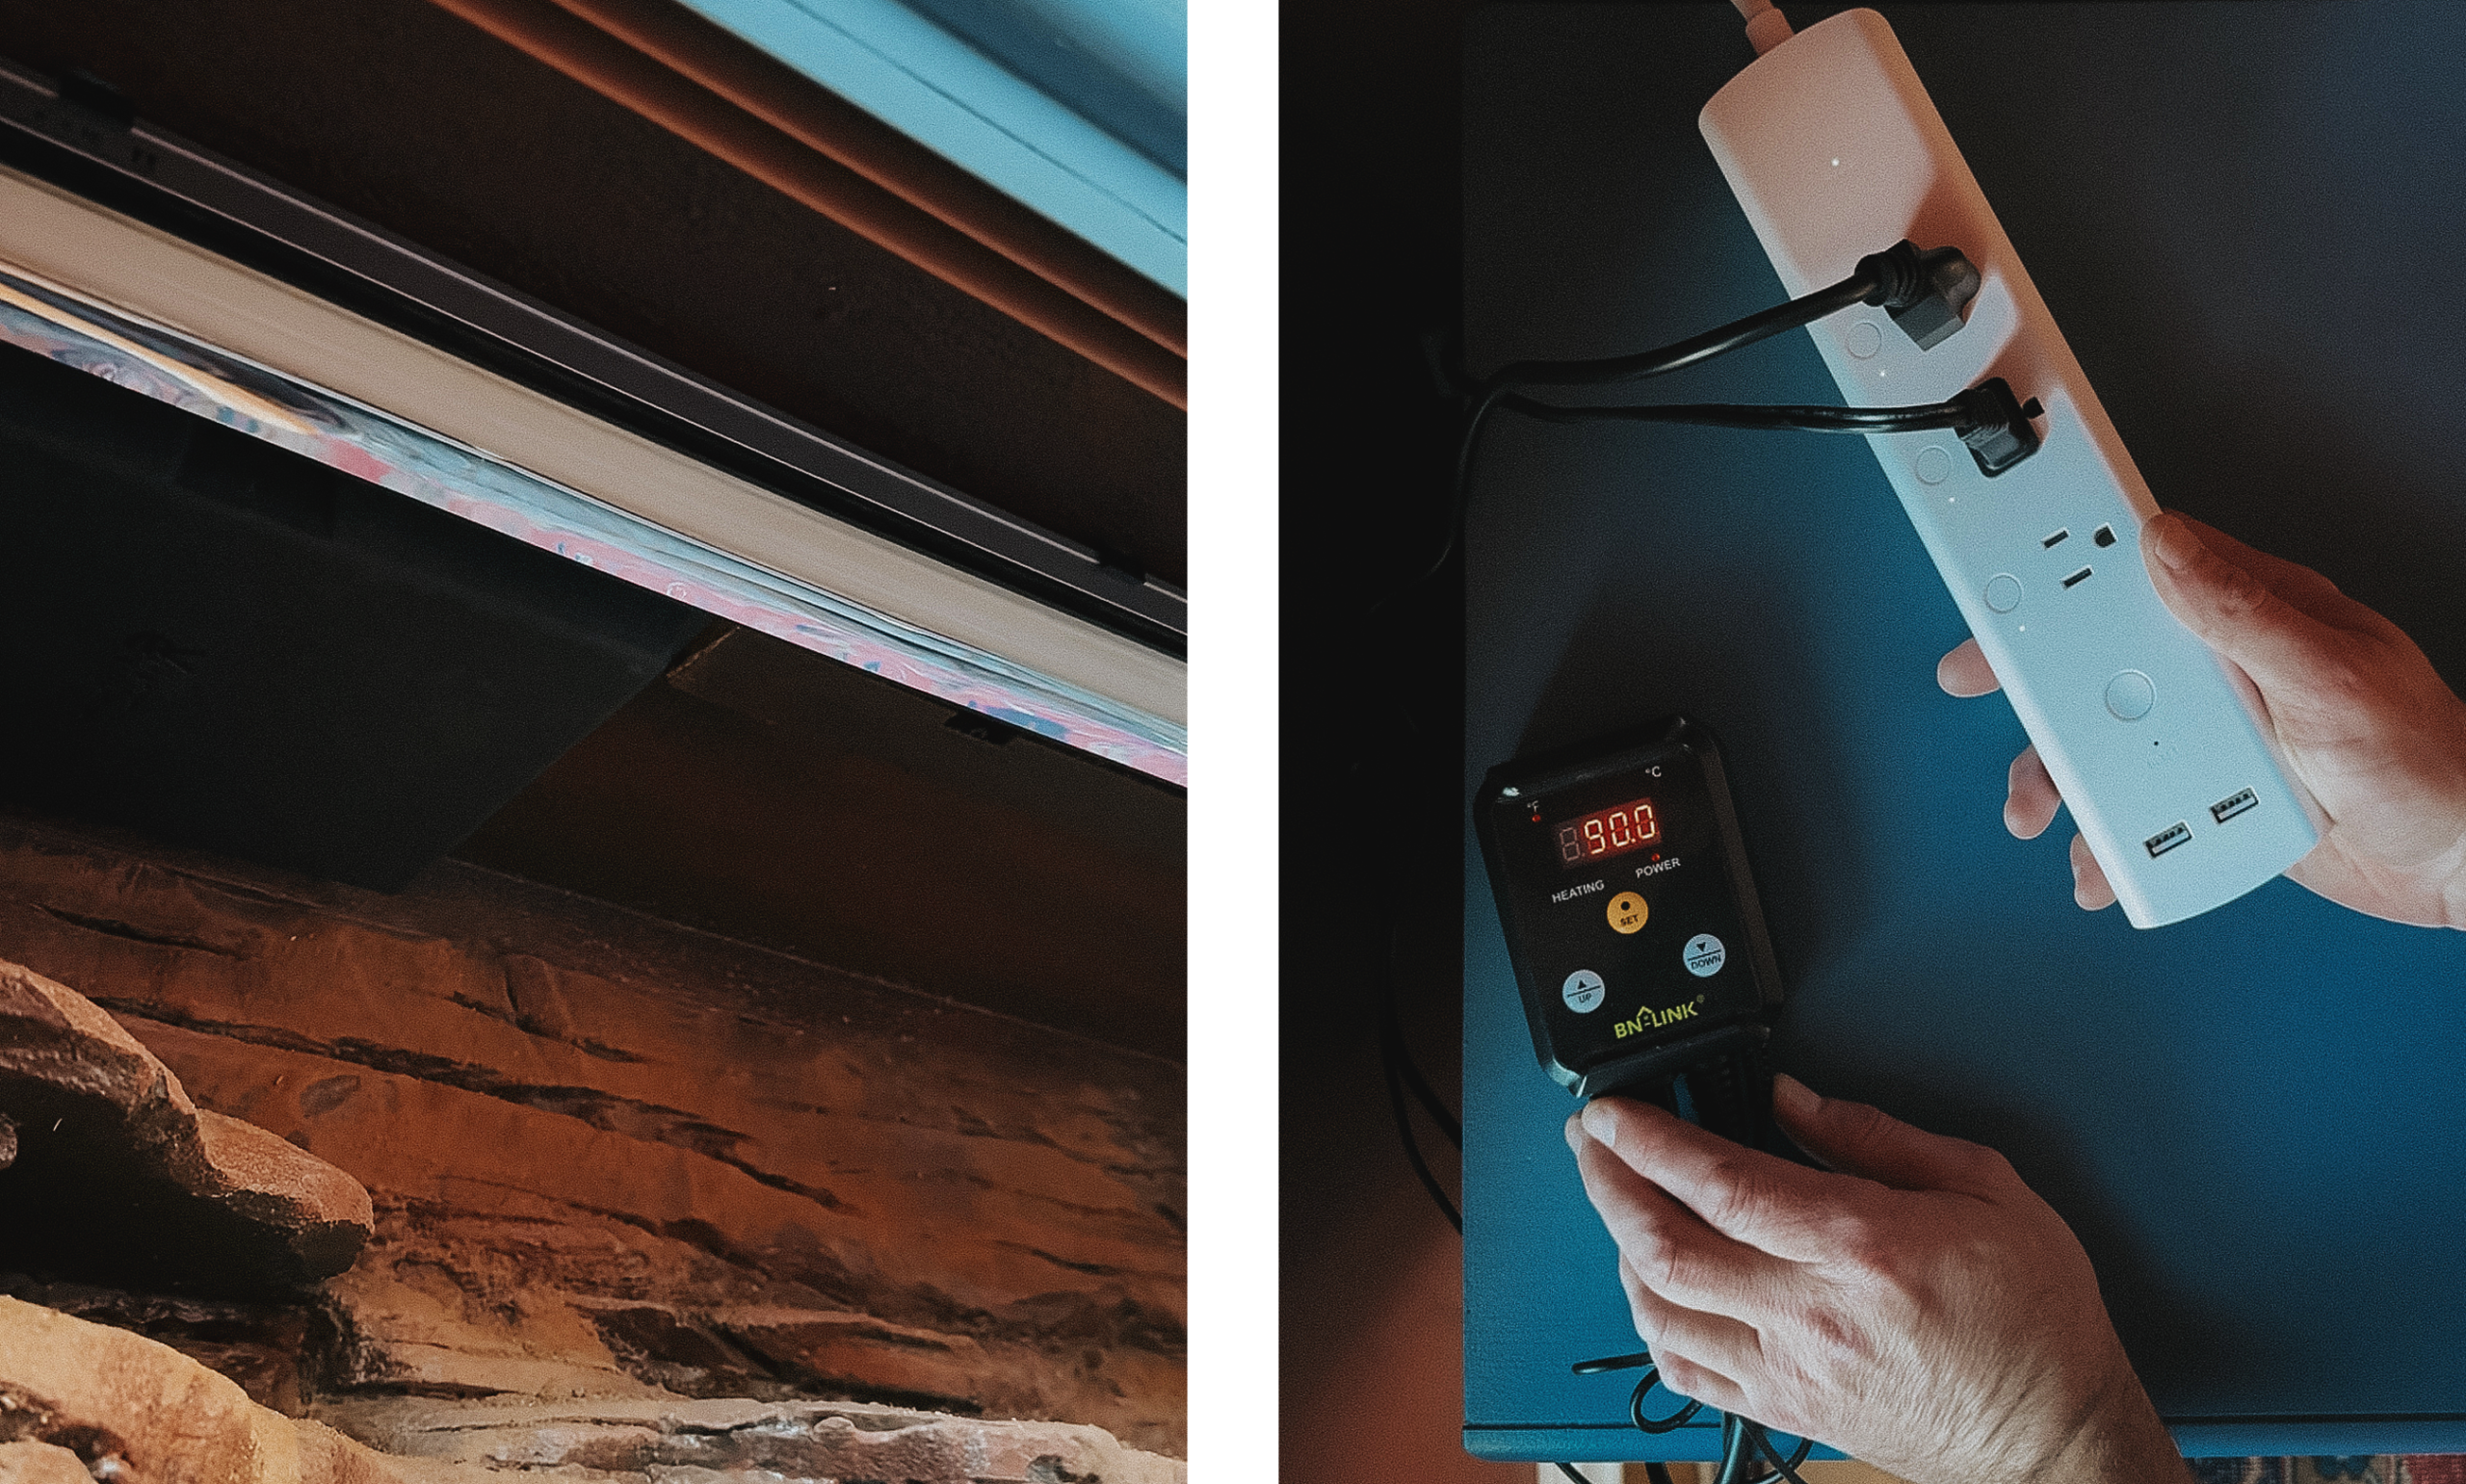
7| Electronics
Almost every reptile requires UVB light. This helps them with metabolic function, vitamin synthesis and overall health. Bearded dragons also require very high heat to simulate their natural habitats. We gave David the best of both with Arcadia Pro T5 lighting fixtures and 12% bulbs and a Vivarium Electronics radiant heat panel. These top of the lie fixtures are controlled by a smart power strip that can be turned on or off with voice controls or set on a timer. David’s lights and heat come on around 7am and turn off around 8pm to simulate natural patterns. We wanted to take all of the guesswork out of the equation and this setup has worked flawlessly for us.
We finished the build off with these sliding glass tracks and a pair custom cut glass panels from onedayglass.com (not pictured). For our substrate, we 1 part sifted reptisoil for every 2 parts of excavator clay and red sand for a perfect, natural mix that holds color and shape for digging duties.
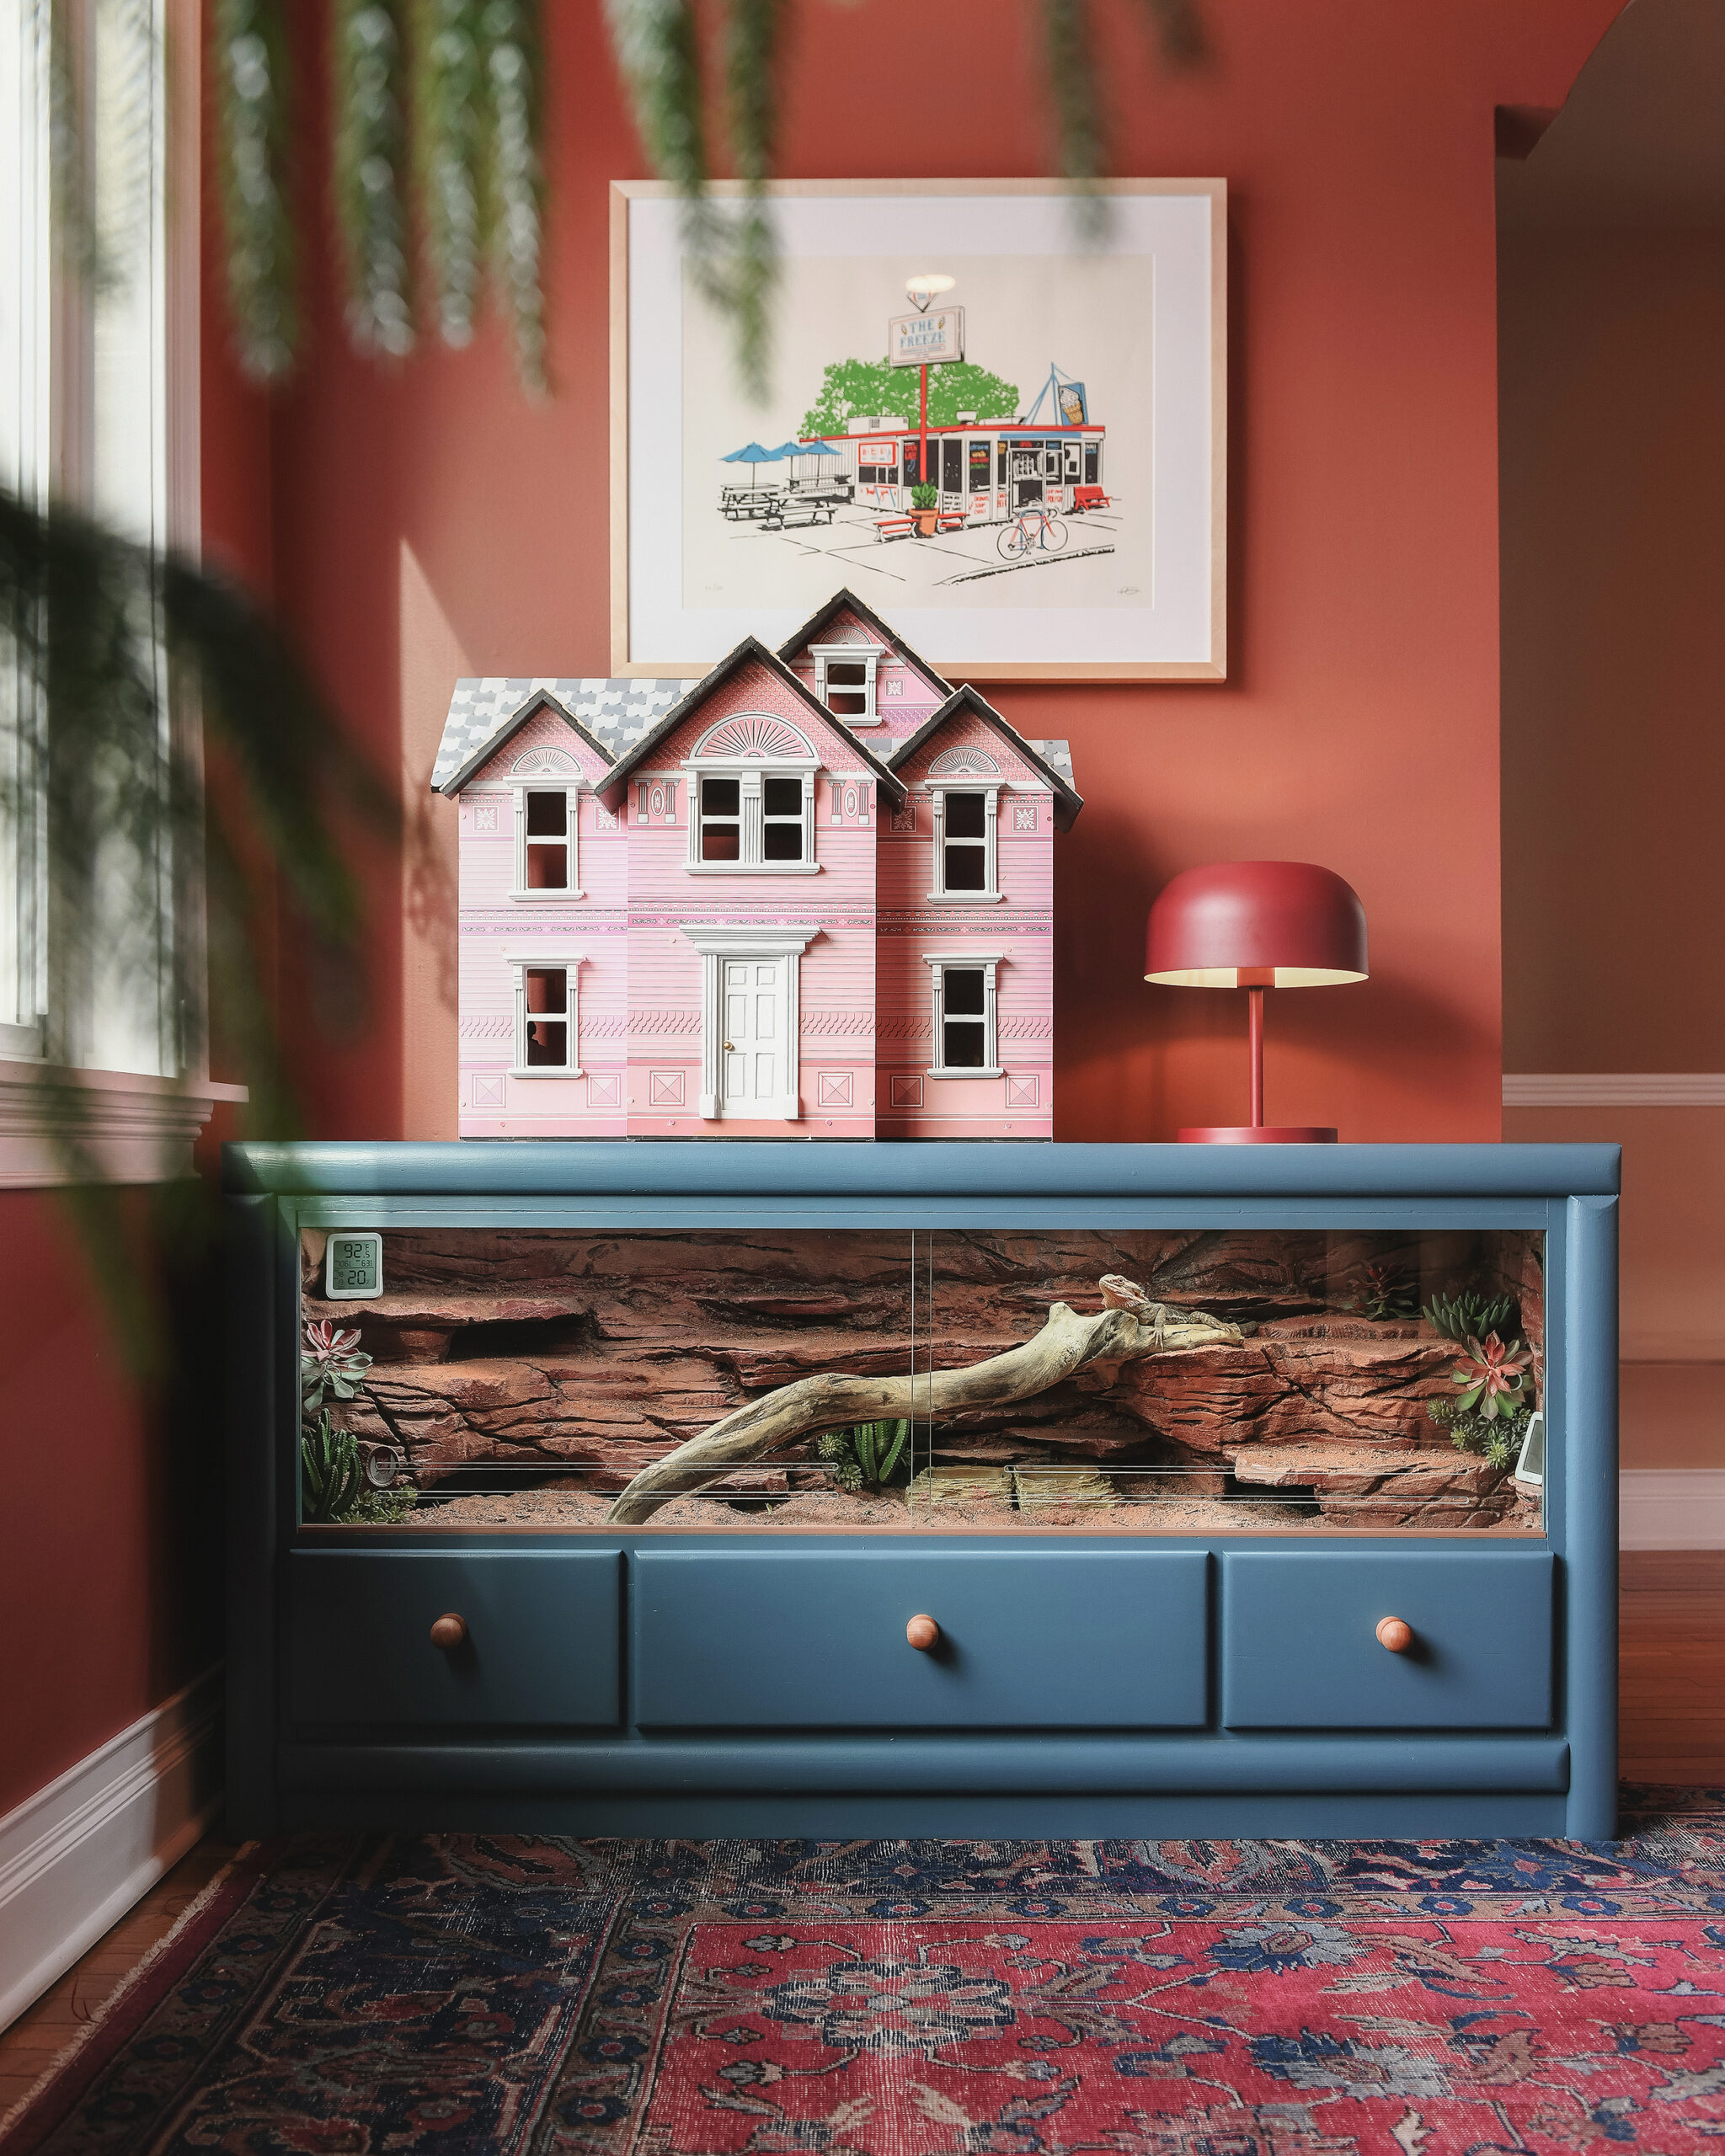
Home Sweet Home
David is absolutely thriving in his new enclosure. This was a fun, silly project that took us way longer than we expected, but the results have been so worth the effort. Seeing David use and explore every crack, cave and ledge in this enclosure has been a real treat. He climbs, burrows and basks his days away and is fed the highest quality diet of bugs and greens. He’s a truly spoiled little man and we love that for him.
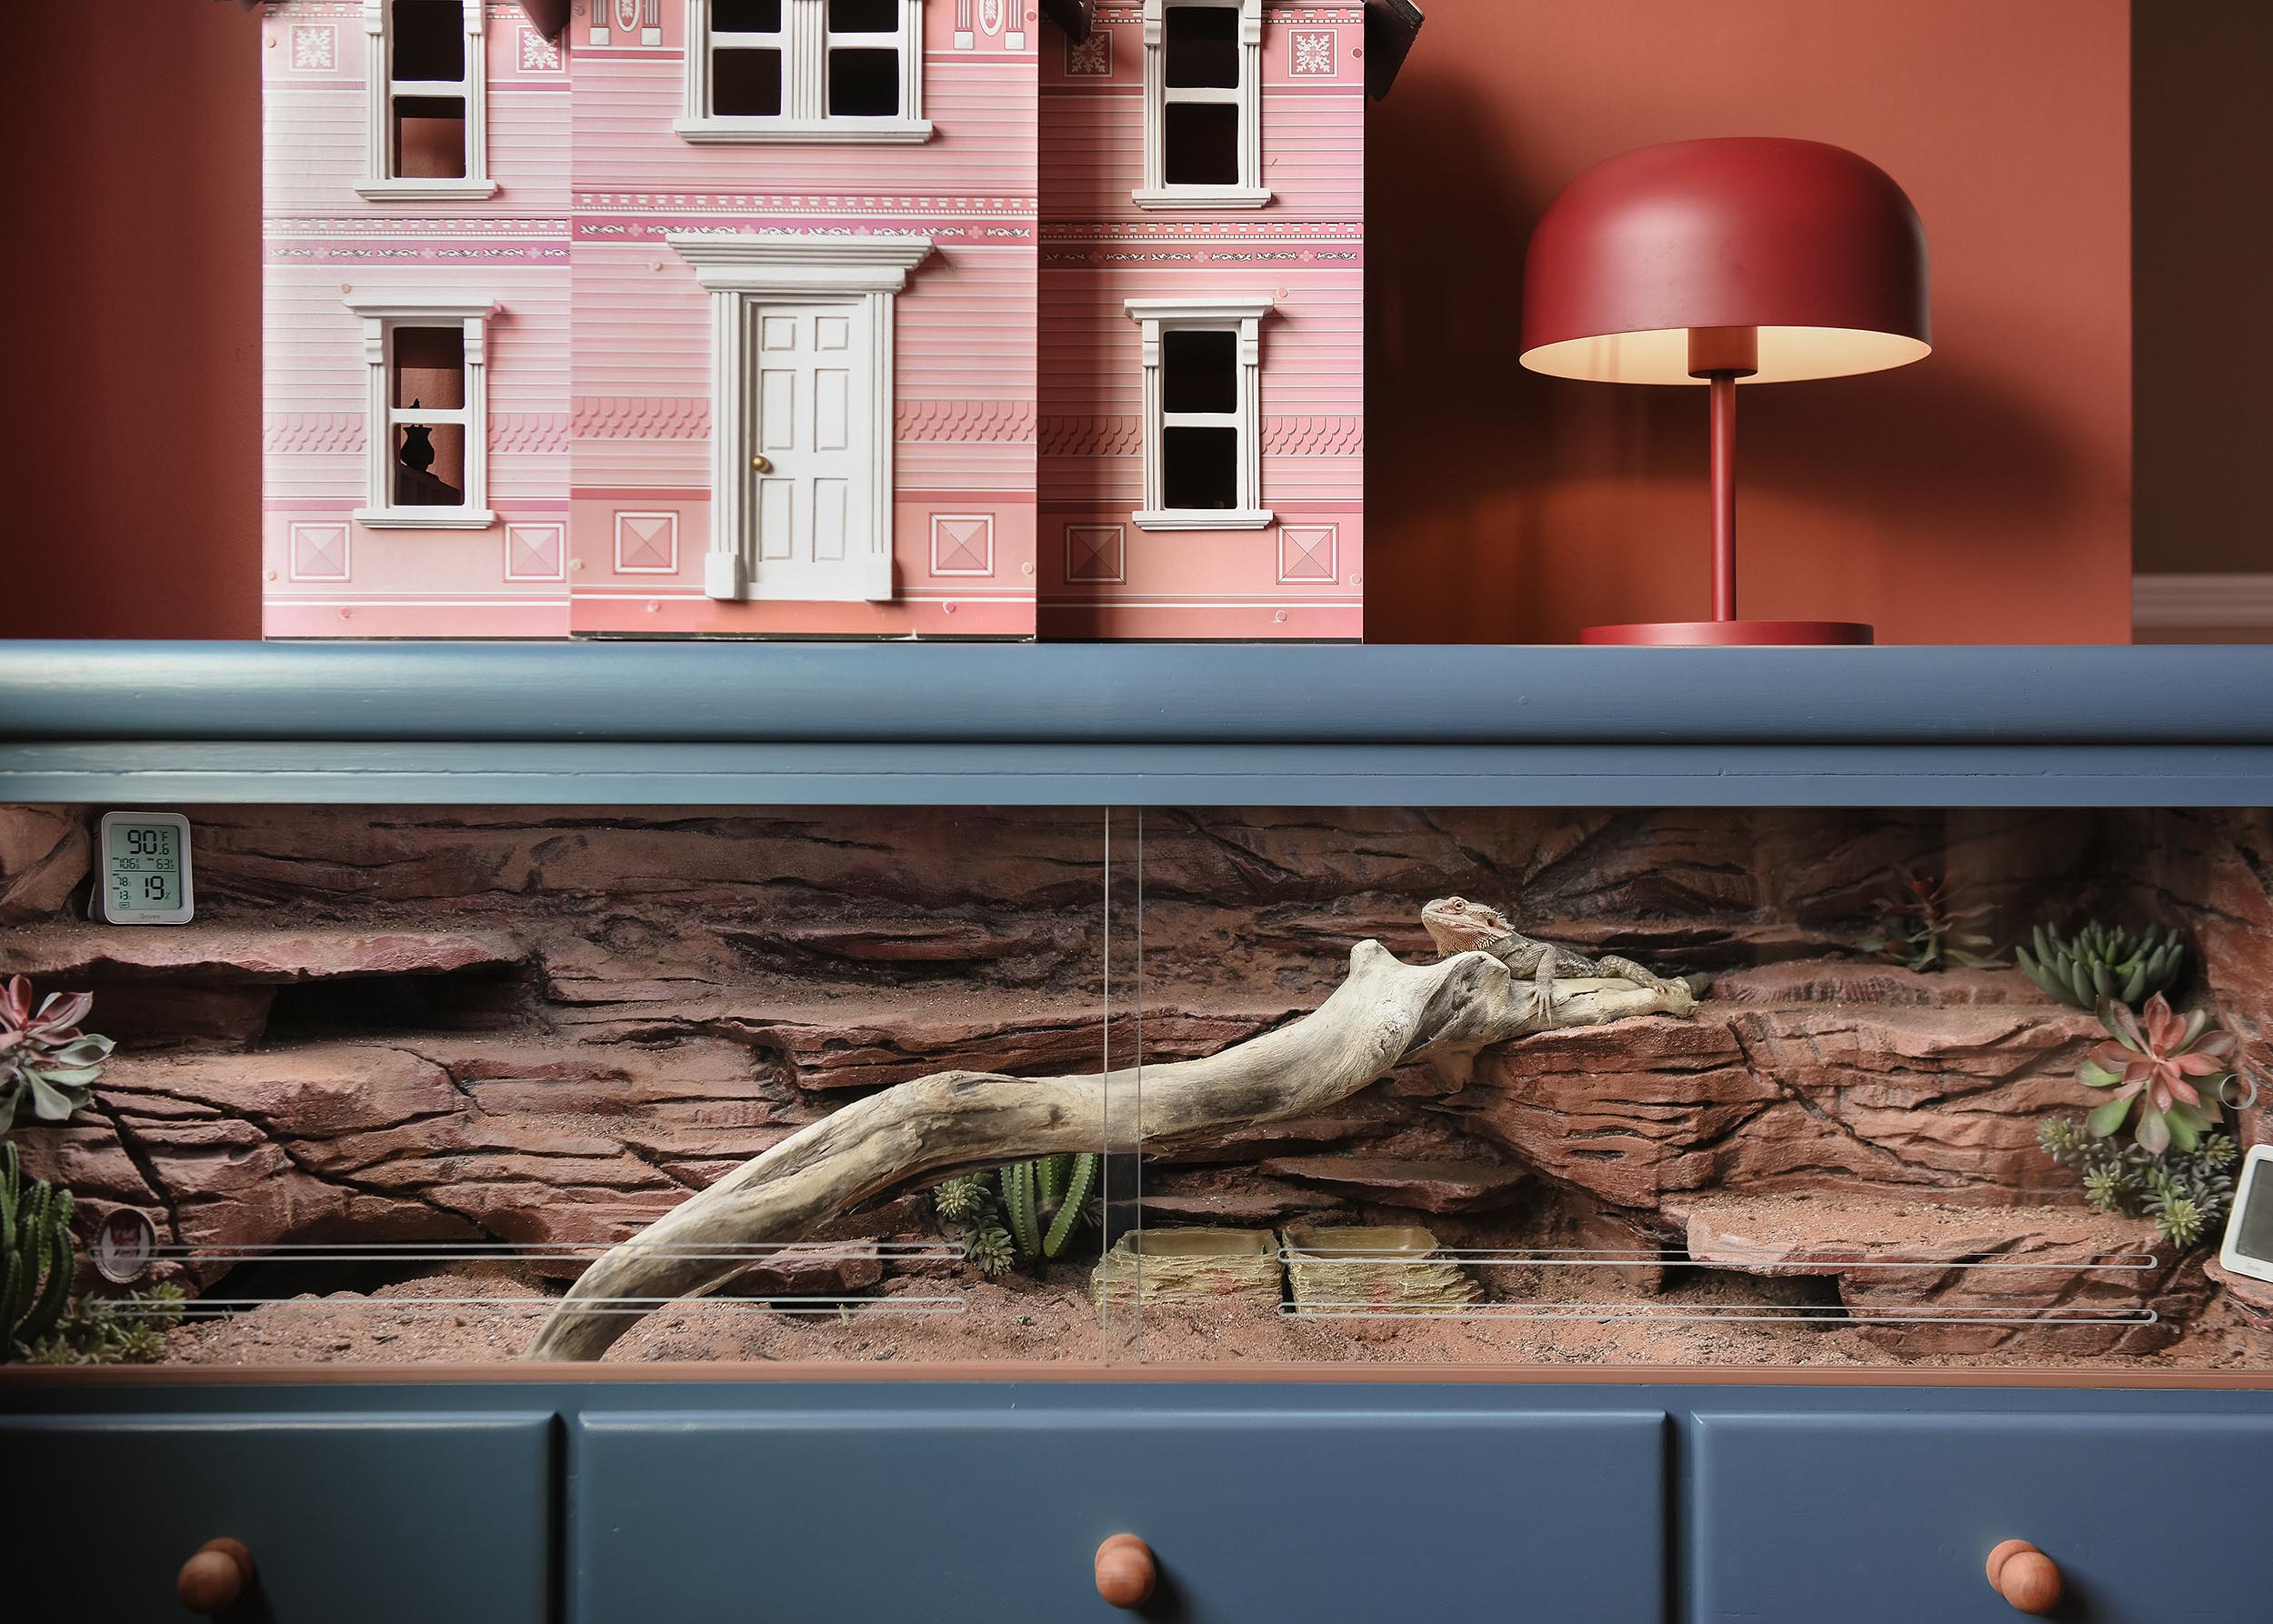
The tiny bowie portrait in the dollhouse picture frame was the icing on the cake. Just enough silliness to bring us all back to reality.
Now that David has been with us for a whole year, we almost can’t remember life without hime. Just yesterday, on the first truly perfect day of spring, Lucy and her best friend set up a ‘bearded dragon petting station’ on the sidewalk while Kim and I worked in the front garden. Unsuspecting neighbors walking to lunch were treated to a full-on dissertation about David’s history and strongly encourage to pet him in his favorite spot under his chin.
Cheers to you, David. The most deservedly spoiled lizard there ever was.
Make It Your Own
1. foam board | 2. foam cutting tools | 3. sliding door track | 4. reptile light | 5. heat panels | 6. polycrylic | 7. behr dark cherry mocha | 8. reptile wood | 9. faux succulents | 10. fb marketplace dresser (similar) | 11. smart power strip | 12. reptile sand | 13. excavator clay substrate | 14. reptisoil | 15. drylok | 16. gaps + cracks spray foam sealant | 17. acrylic latex caulk


You buried the lead with “bearded dragon petting station” story at the end. Love it.
It was quite adorable!
This whole post was delightful. No plans to get a bearded dragon or make one of these habitats, but I had to read the whole post anyway. :)
Love you for it!
This is unhinged in the best way. Making design fun again!
Bahaha so accurate.
Love this! We have a beardie and a few years ago while the neighbors were having a garage sale he set up a table and charged a quarter for petting the dragon. I’m sure everyone got an earful of beardie facts, and of course a reminder to use hand sanitizer after petting! :)
Love that! We certainly have more of these in our future!
This looks fantastic, the lizard definitely loves his new home, it goes very well with the dollhouse, it gives an interesting contrast