

This post is in partnership with TheRTAStore.com. If you’re about to embark on any organized-dream-space renovation, we’re offering a YBH promotion below!
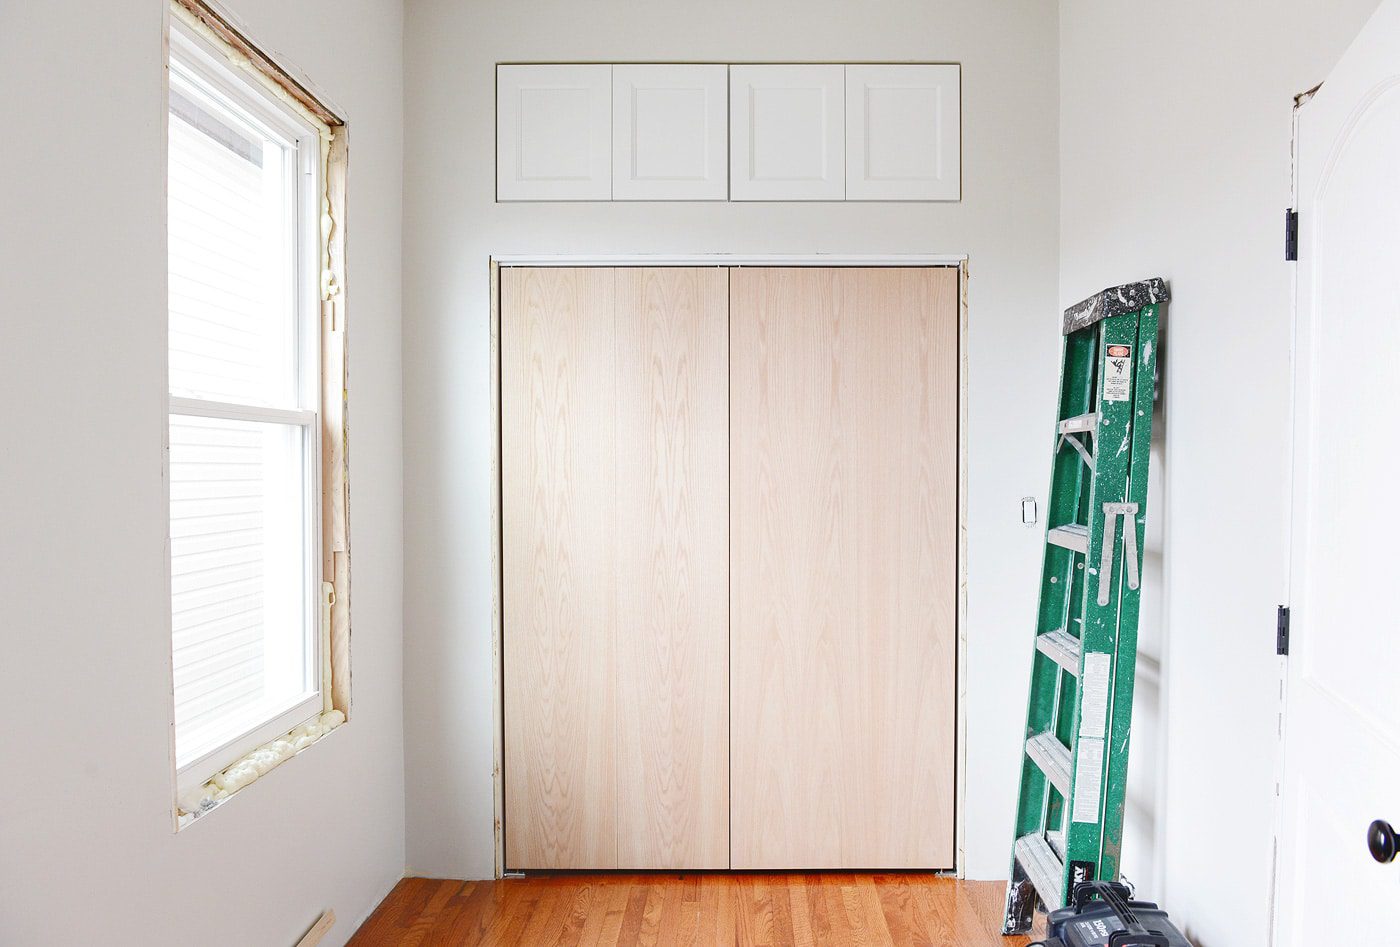
Over the course of the last few weekends, we’ve been devoting our time to realizing our Scary Room closet plans – and it’s getting there! The upper cabinets are in place, the bi-folds are trimmed, and after a full day with our table saw, our 3-piece trim is off the floor and on this one wall. Each of these tasks were a project in itself, but today we want to focus on our cabinets, because you guys, we created so much storage where there was once none. All that space that’s typically wasted above a closet? We’re using it! It’s the stuff storage dreams are made of.
As a refresher, we landed on a pair of 18″h x 30″w x 24″d Newport White cabinets from TheRTAStore.com. Typically, cabinets of this depth are used as extra storage above a refrigerator, but because they were so deep, they were perfect for this application, too! We’ve used The RTA Store previously for our laundry room renovation, and we’ve been so thrilled with their performance, it was an easy choice to use them again. As the name R-T-A implies, the cabinets arrive flat packed, ready-to-assemble.
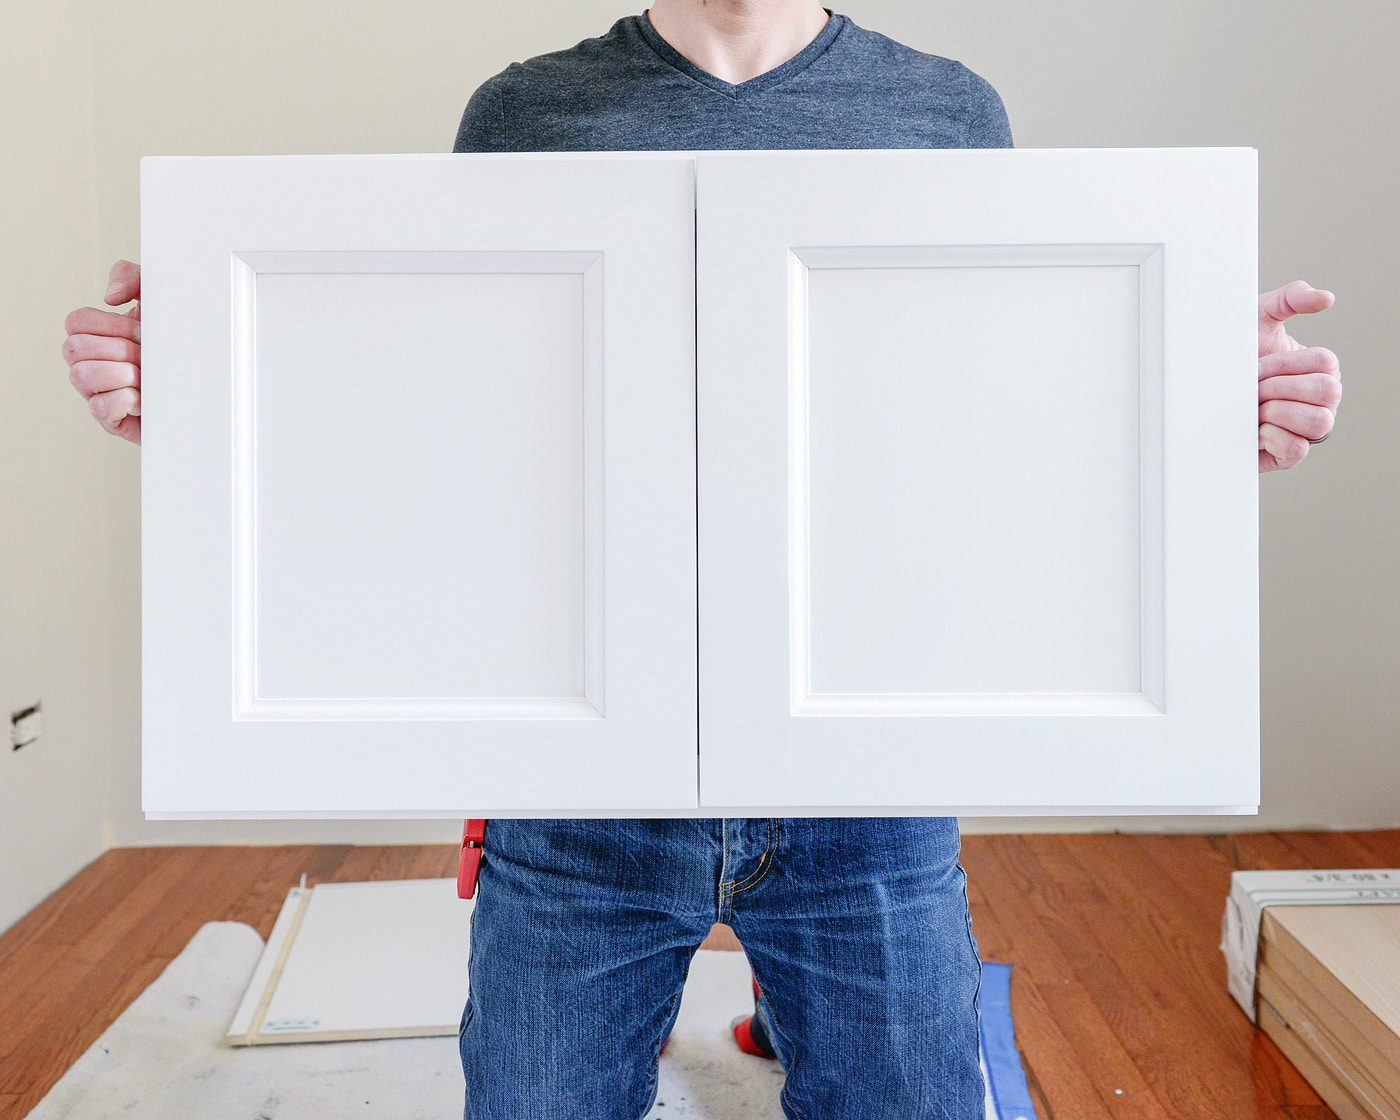
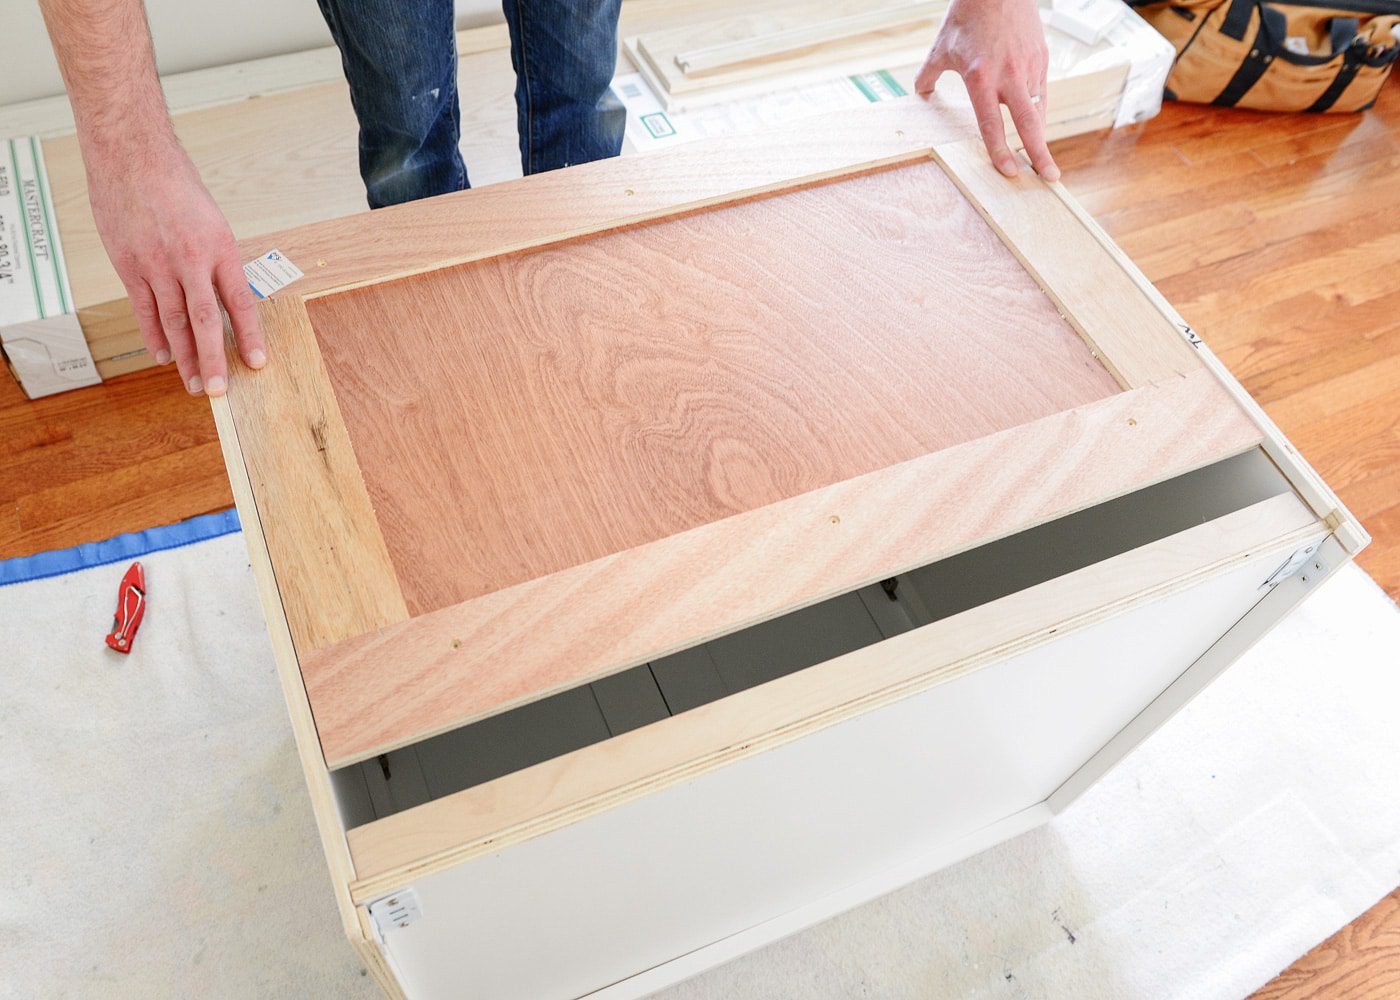
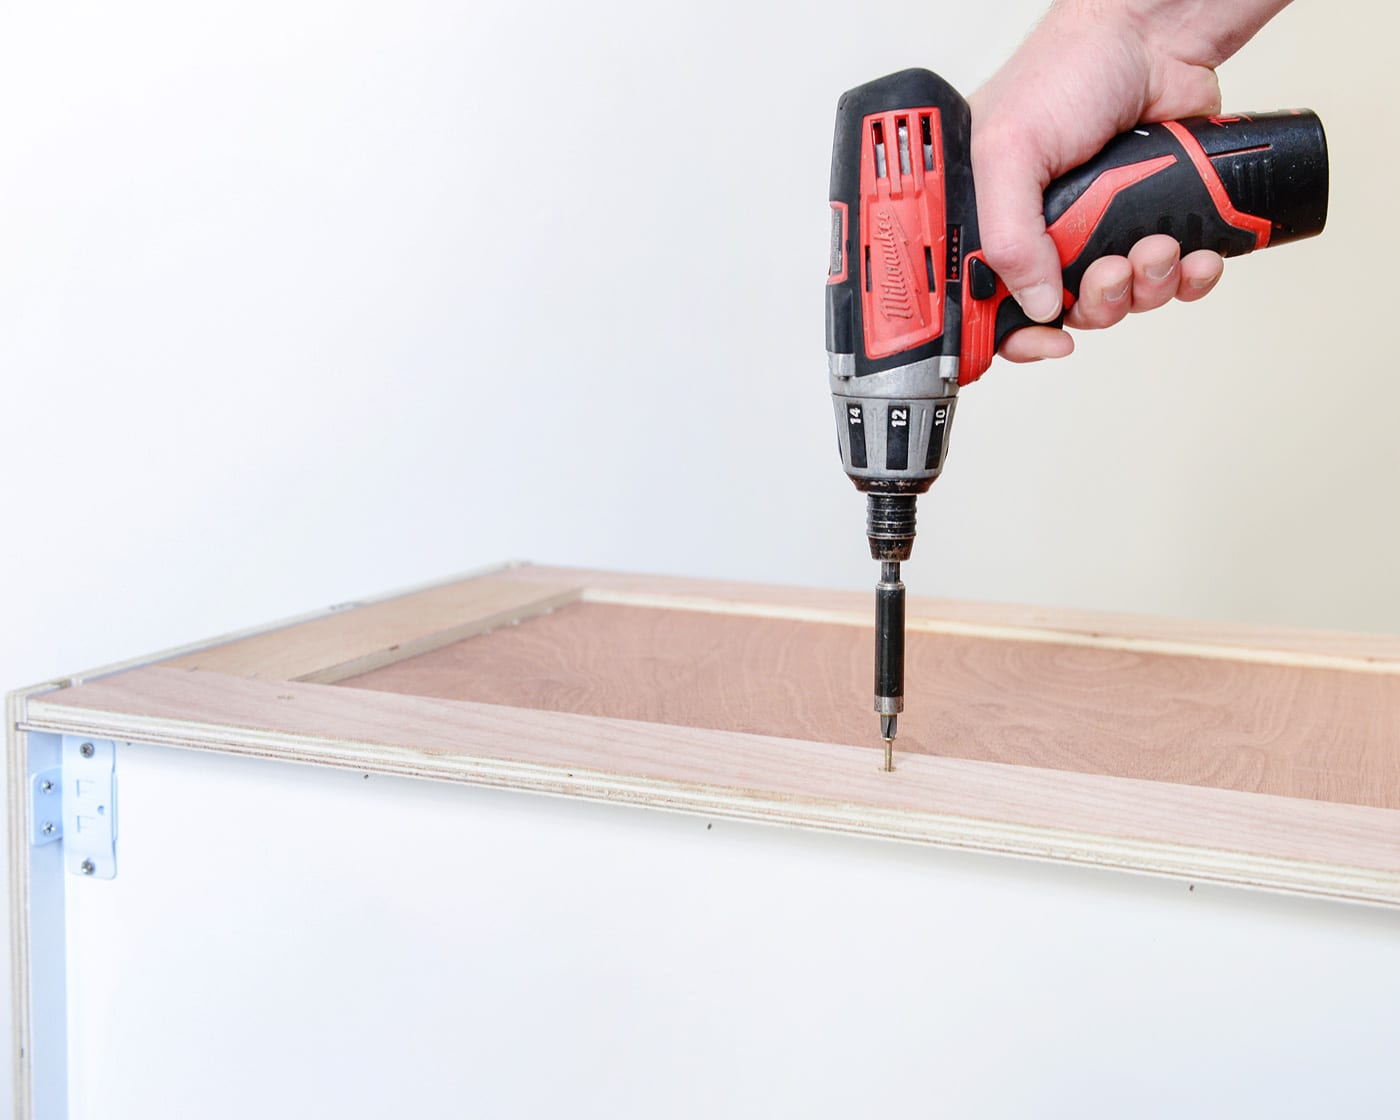
The front face of the cabinet arrives with the doors already on the hinges (and honestly, they were even pretty level from the get-go!), so we laid down a blanket as our working surface. With the front face down, we slipped in the sides first, attaching them loosely to the clips that are on each piece:
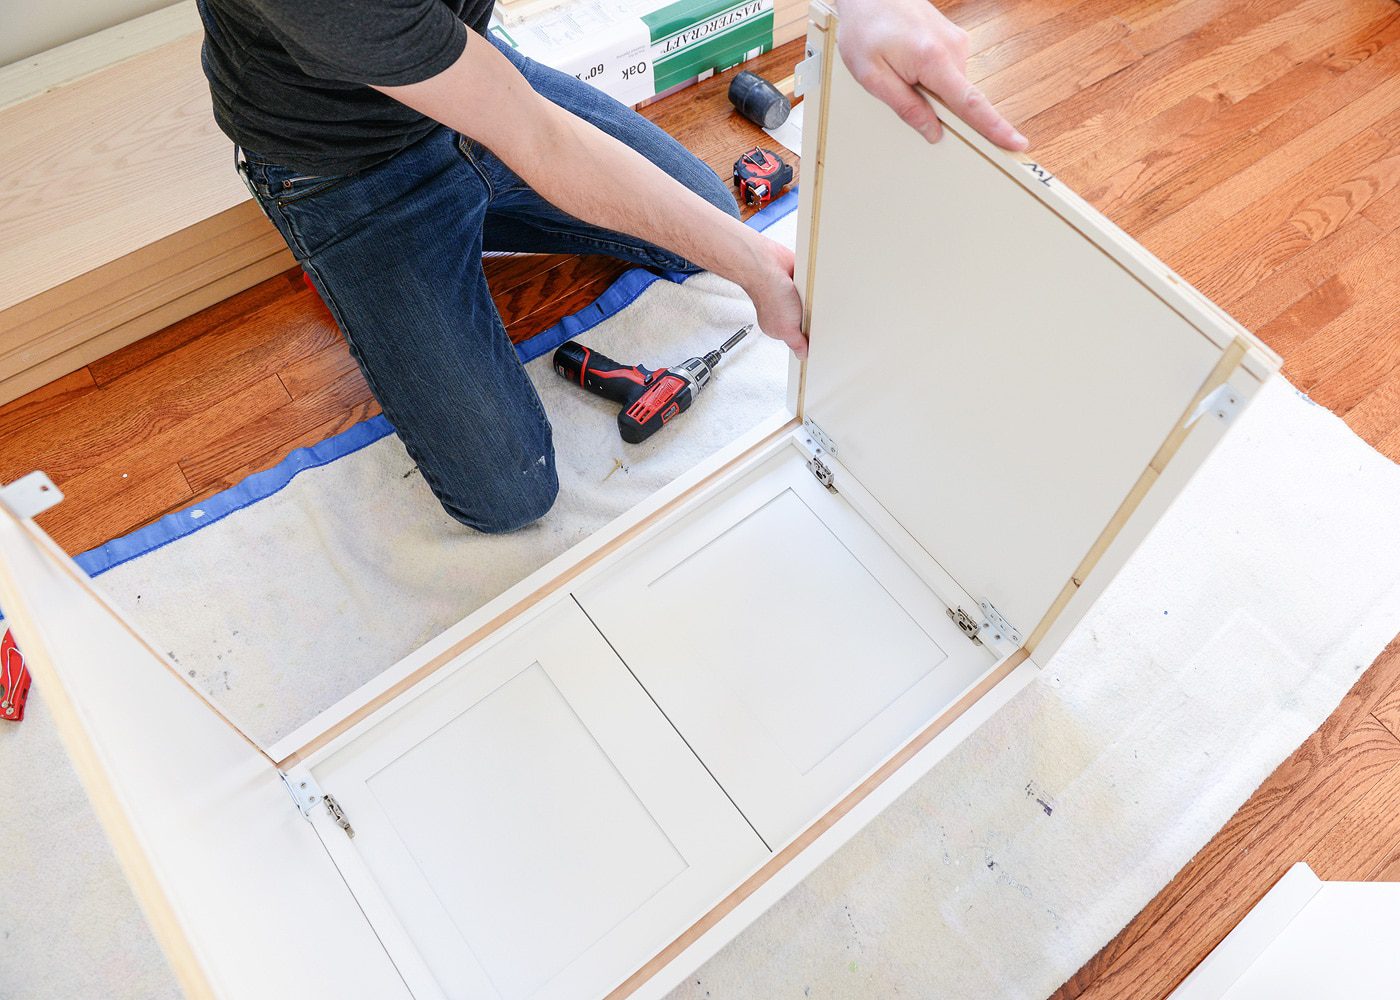
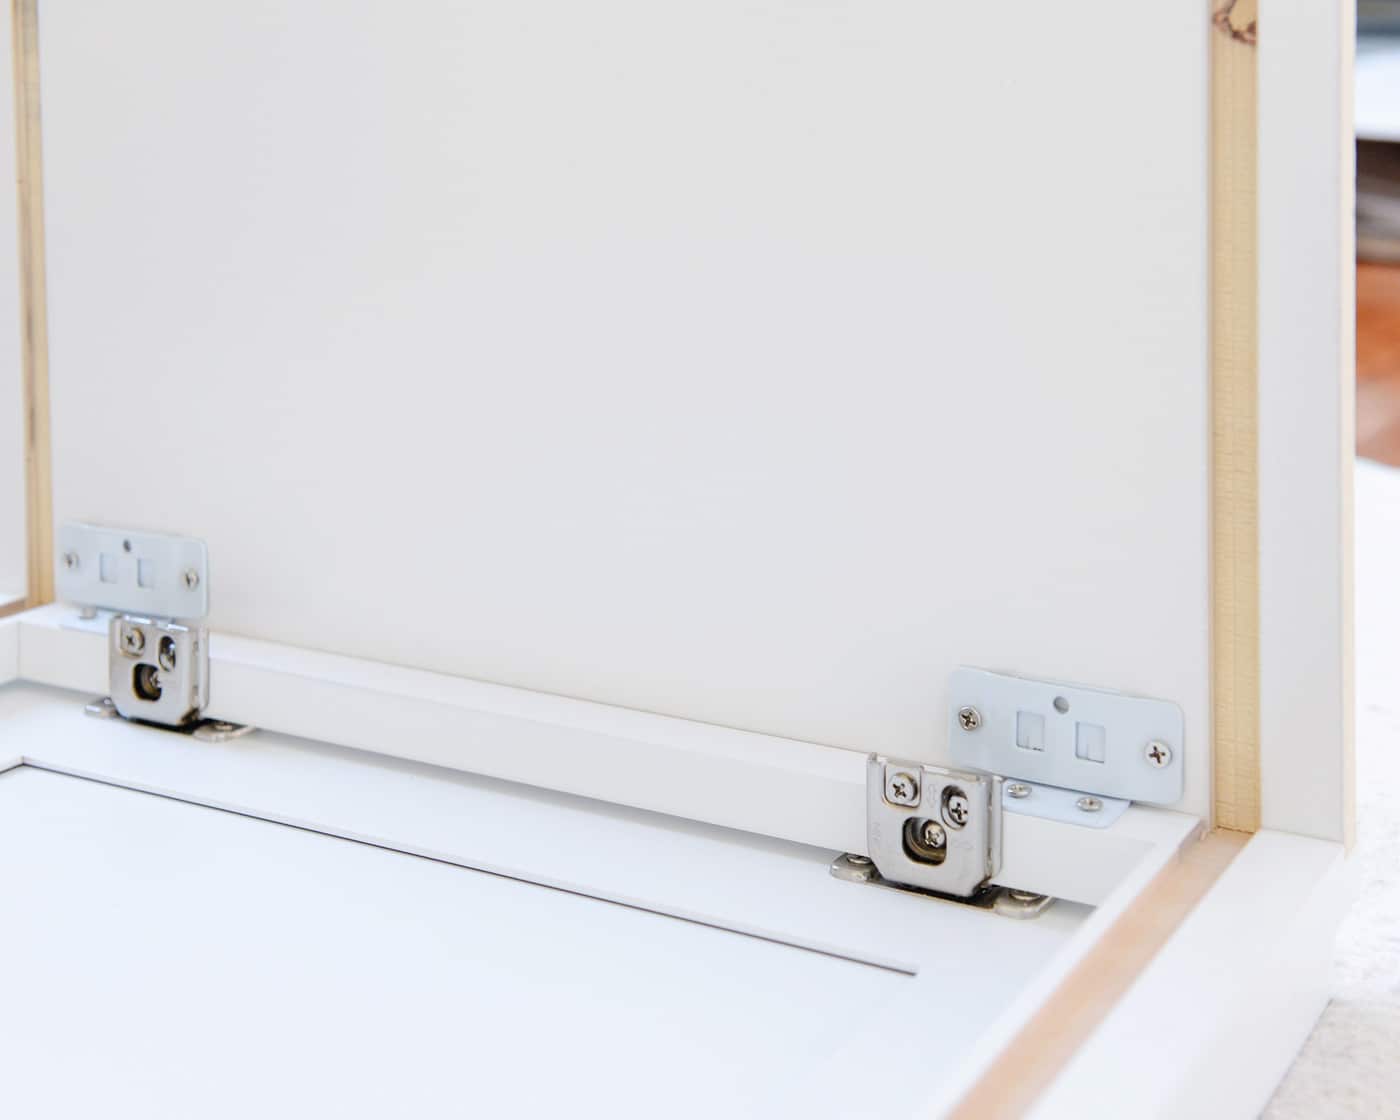
The top and bottom are identical, and they go in next. They clip into the sides, and we found that loosening the screws on all the clips made it much easier for everything to join together like a jigsaw puzzle. Once all four sides where in place, we used our screwdriver to gently tighten all the clips:
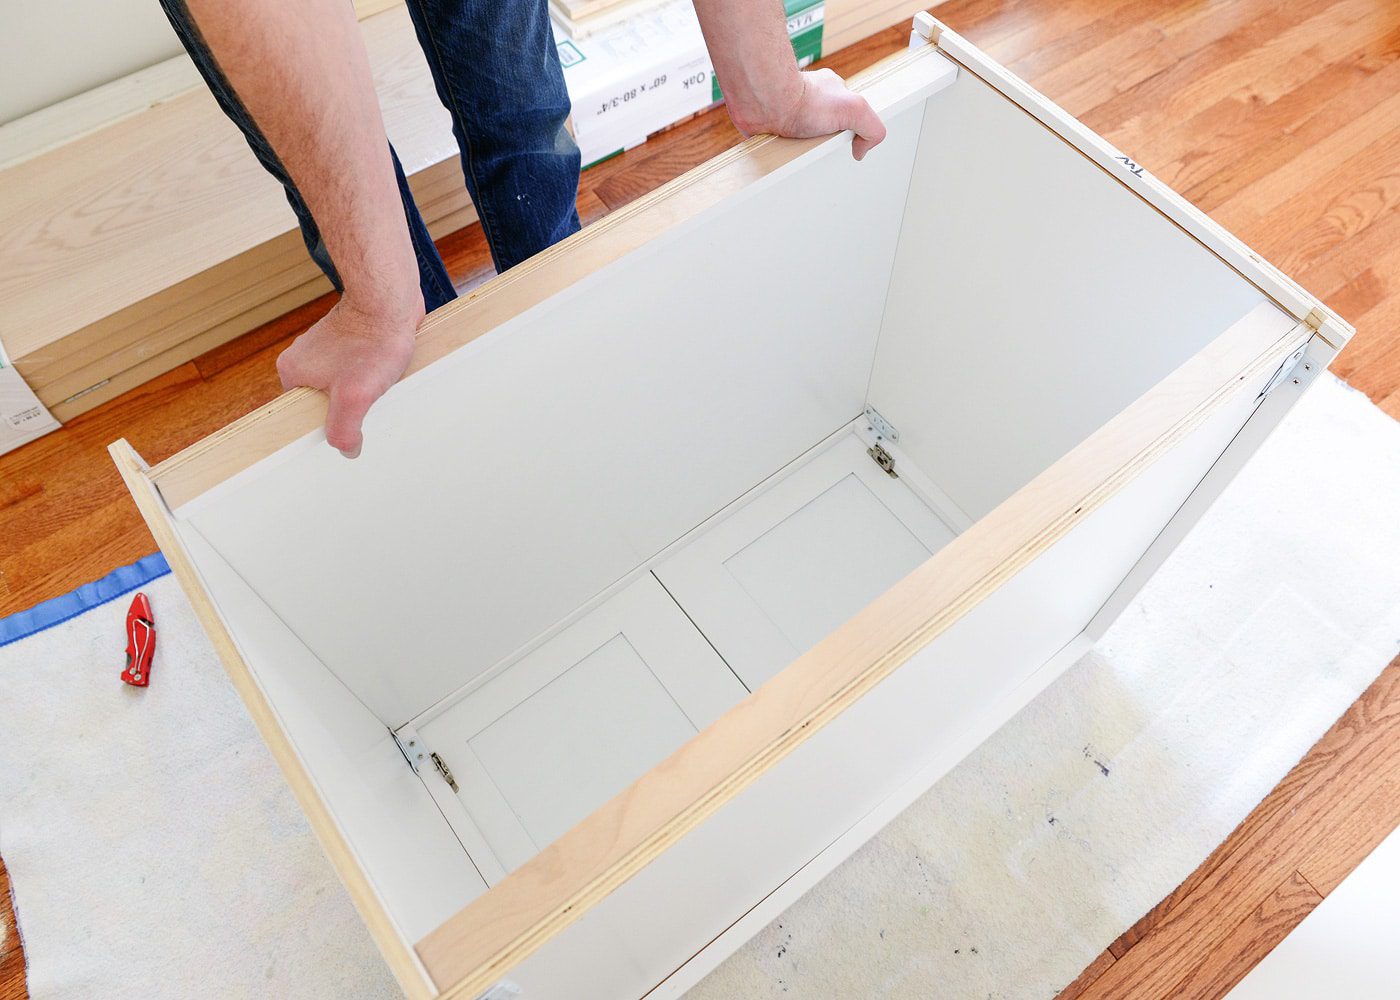
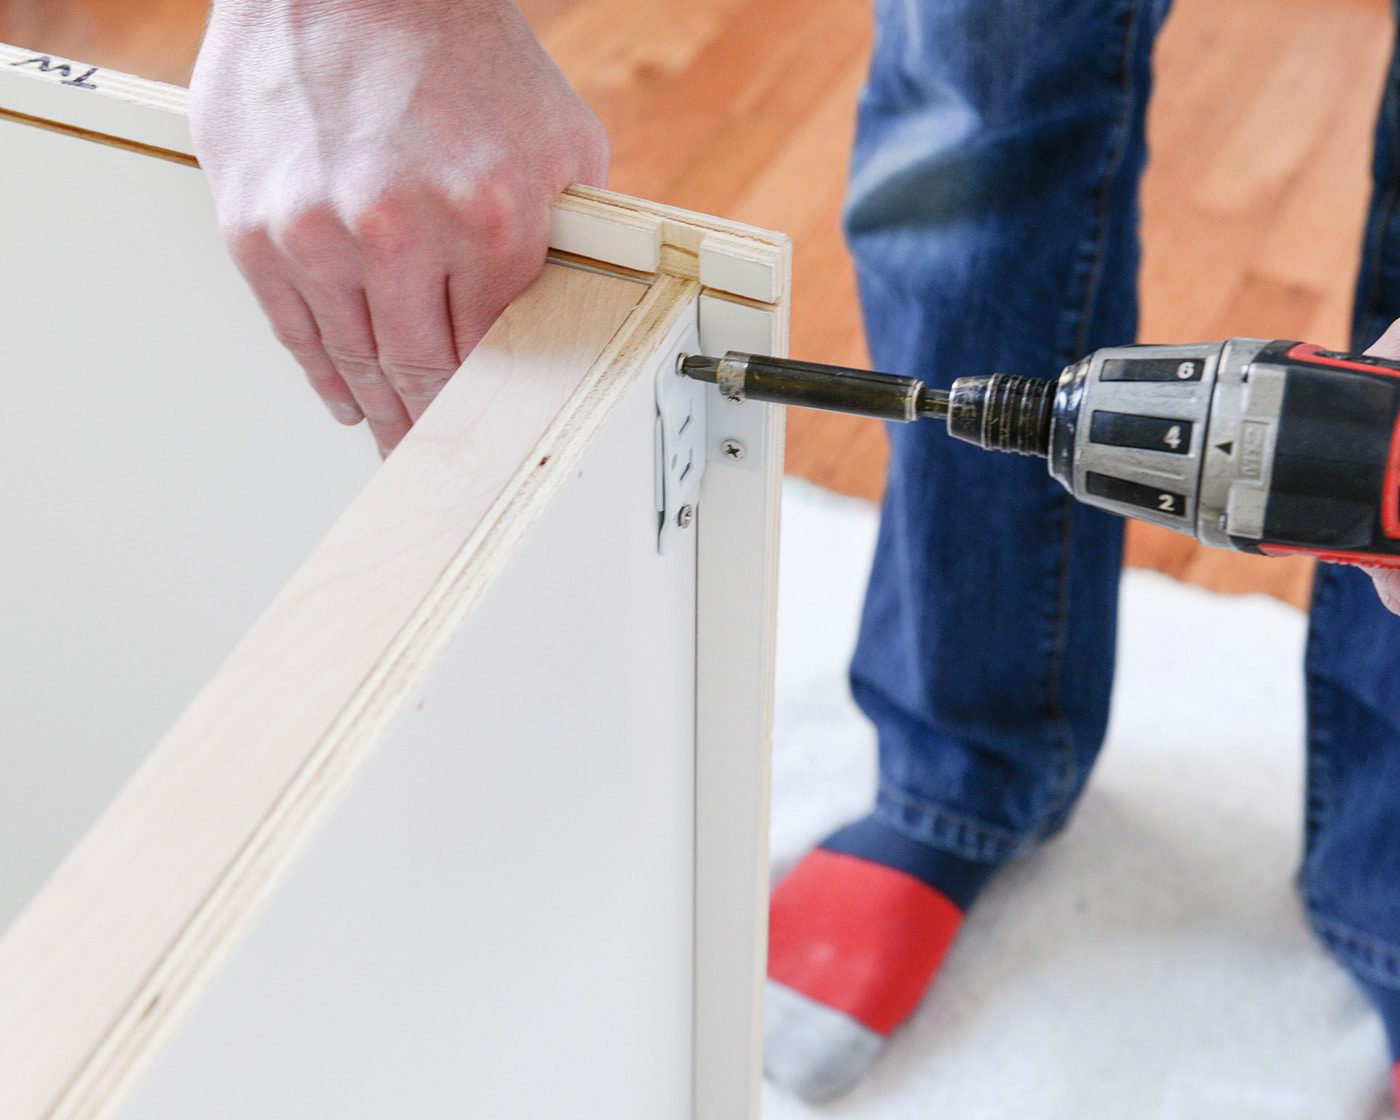
Finally, the back piece was pushed in, and we used the screws provided to firmly attach it using the pre-drilled holes. Because the doors and clips are already on all of the pieces, it took us no more than 5 minutes to build each one!
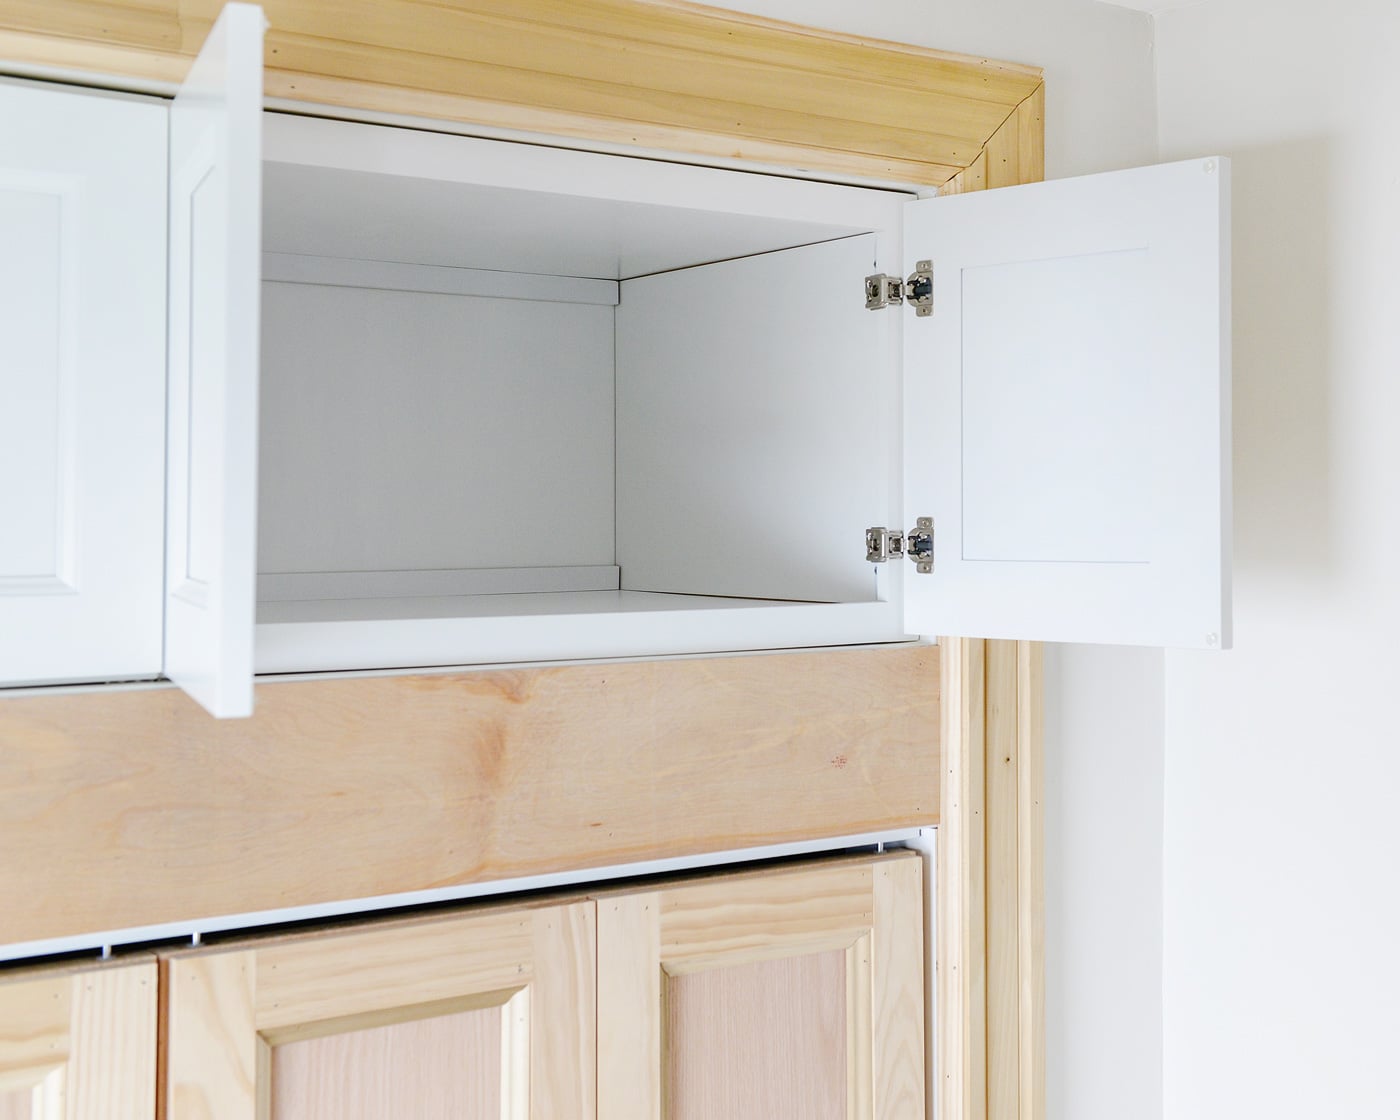
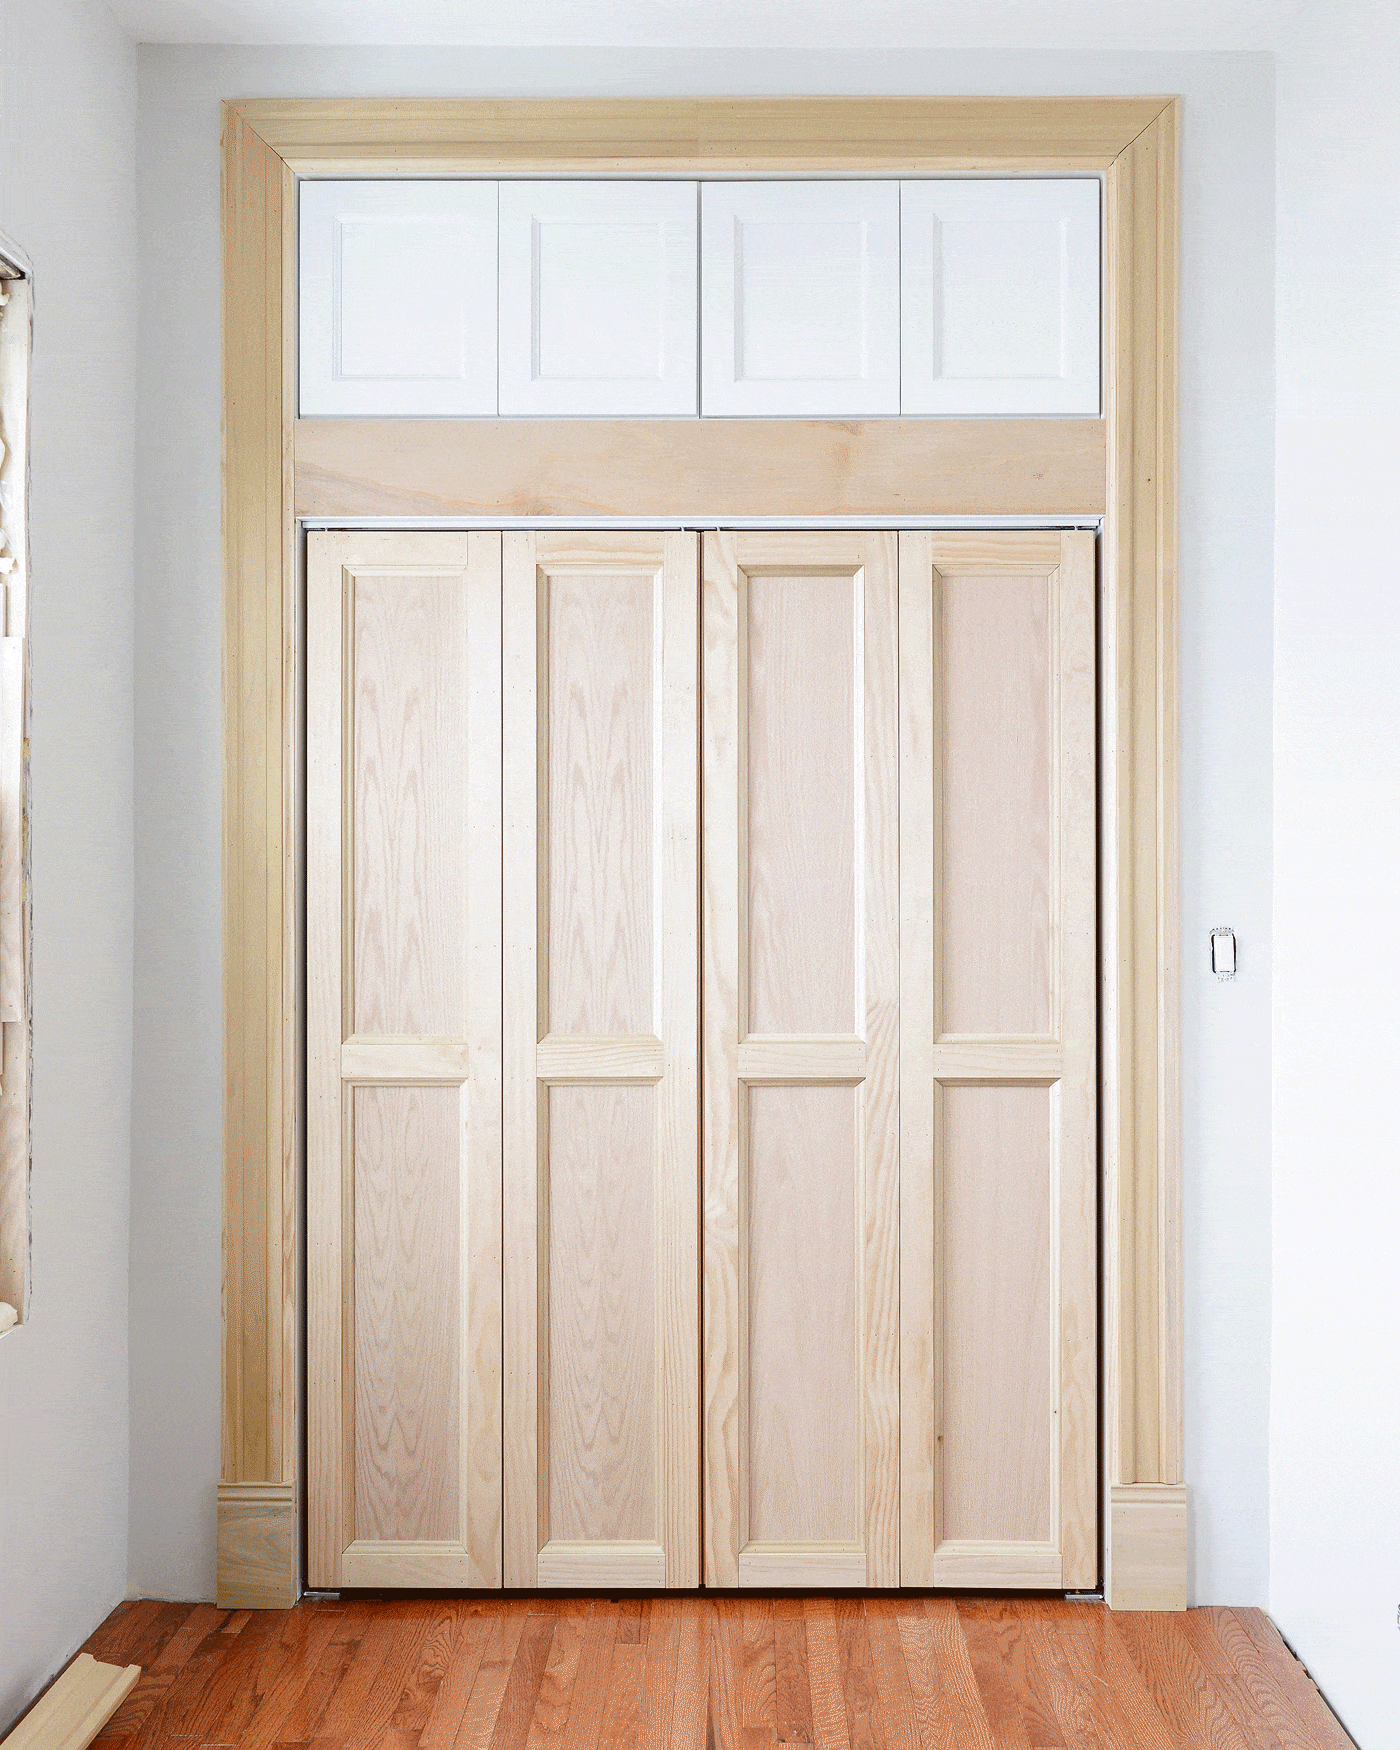
During the closet widening, our contractor also framed out the opening for our cabinets. We asked him to create an opening that was 60 1/8″w x 18 1/8″h, which we knew would create a super tight fit. With the cabinets built, we crossed all of our fingers, and we very carefully slid them into place – and it was just right. Yeah! So much storage! The cabinets span a width of 5′, and their 2′ depth will be a perfect home for my sad sewing machine – among other things.
The photo above was taken two weeks ago, but right now, it looks like this! (And hey, remember this?)
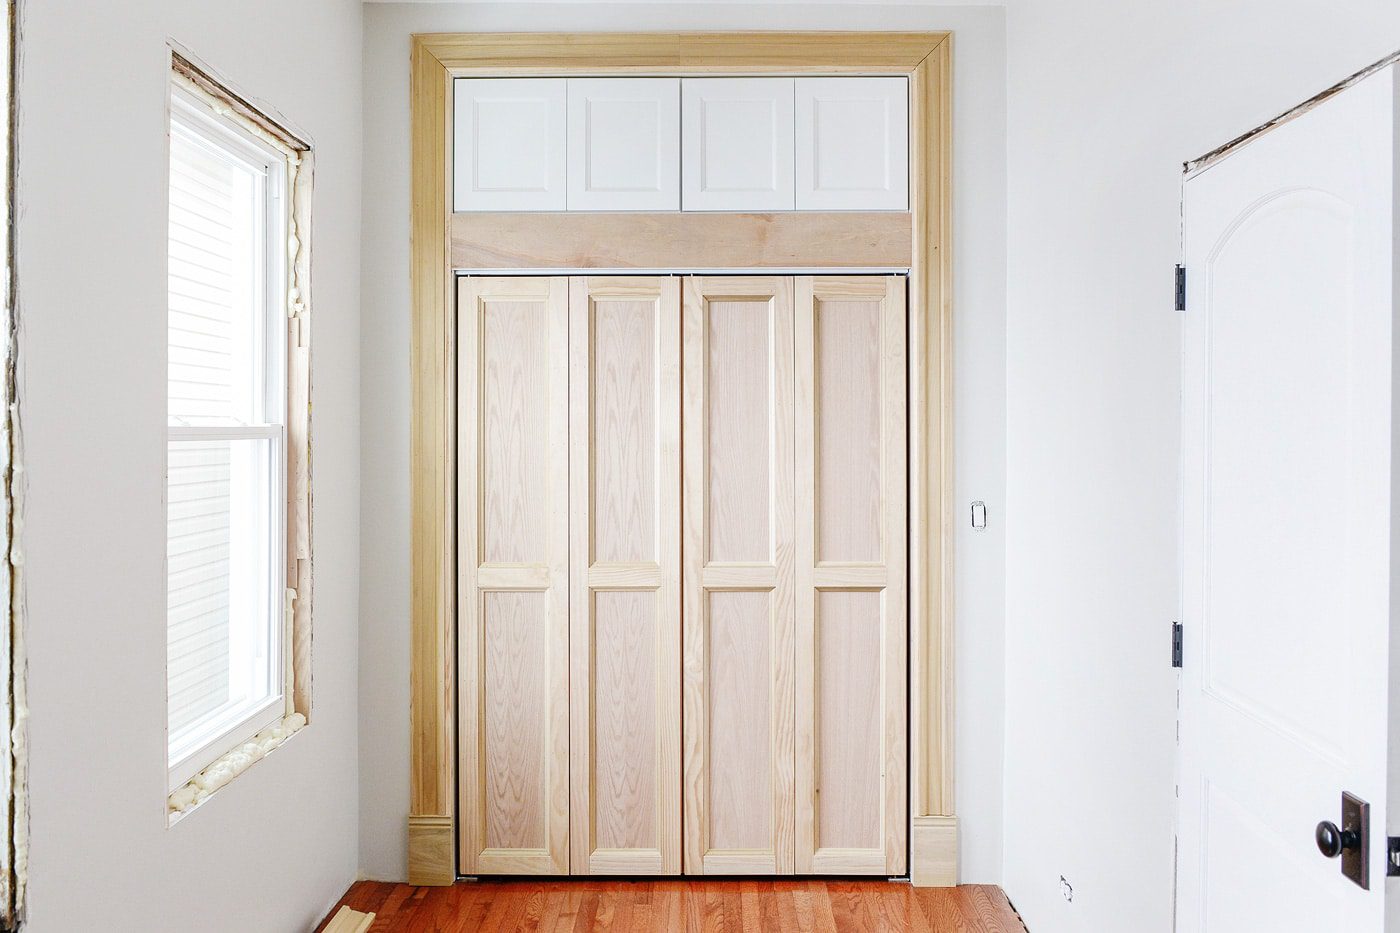
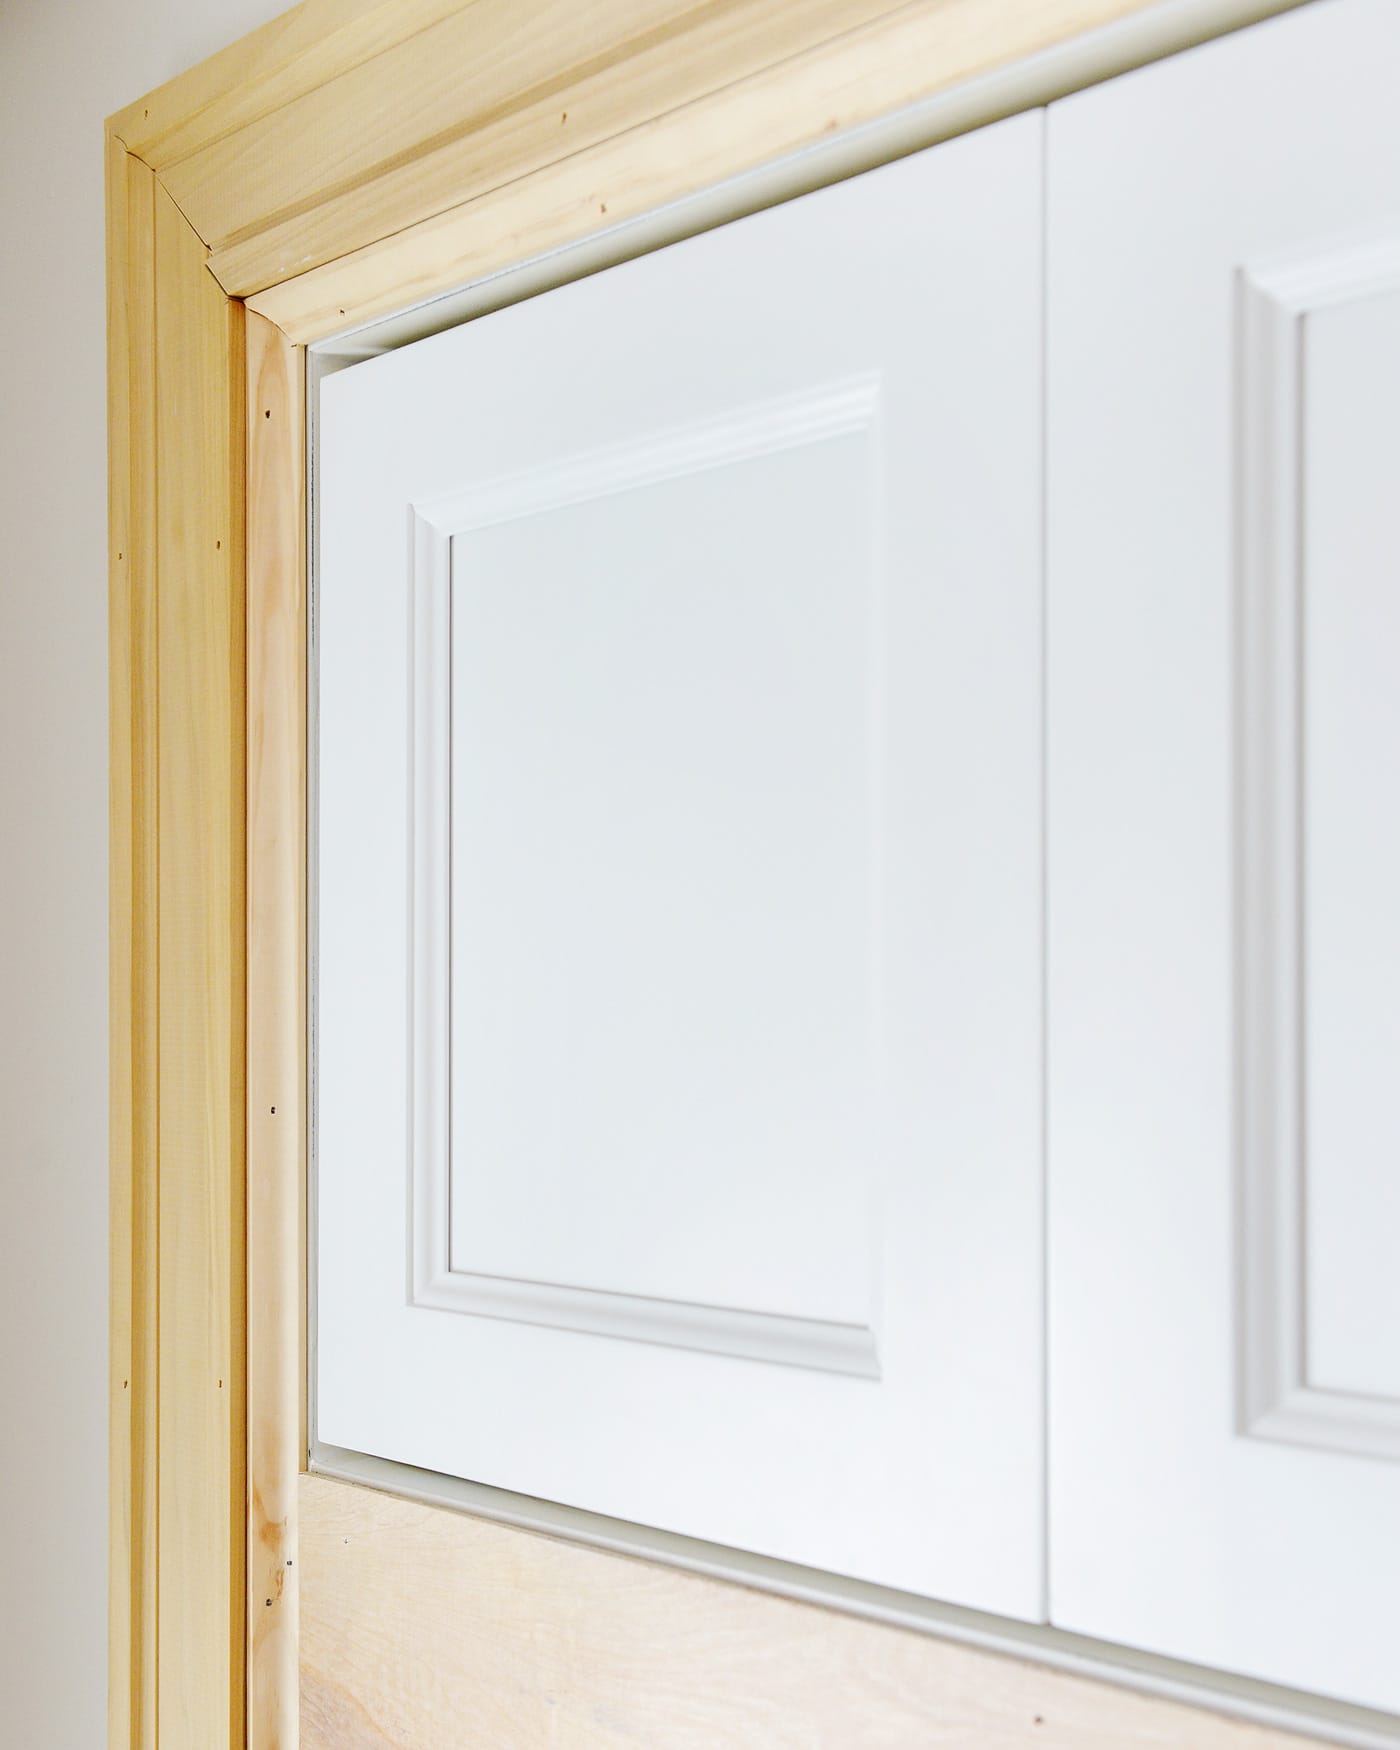
The bi-folds have been trimmed to mimic the style of our cabinets, and the moldings around the entire opening are in place. The dead space between the cabinets and closet doors still need some panel molding, and although you can see a seam in the trim across the top (the result of trying to save a few bucks on special order trim that only came in 8′ or 12′ lengths), it will be virtually invisible once everything gets spackled and painted in the same semi-gloss white:
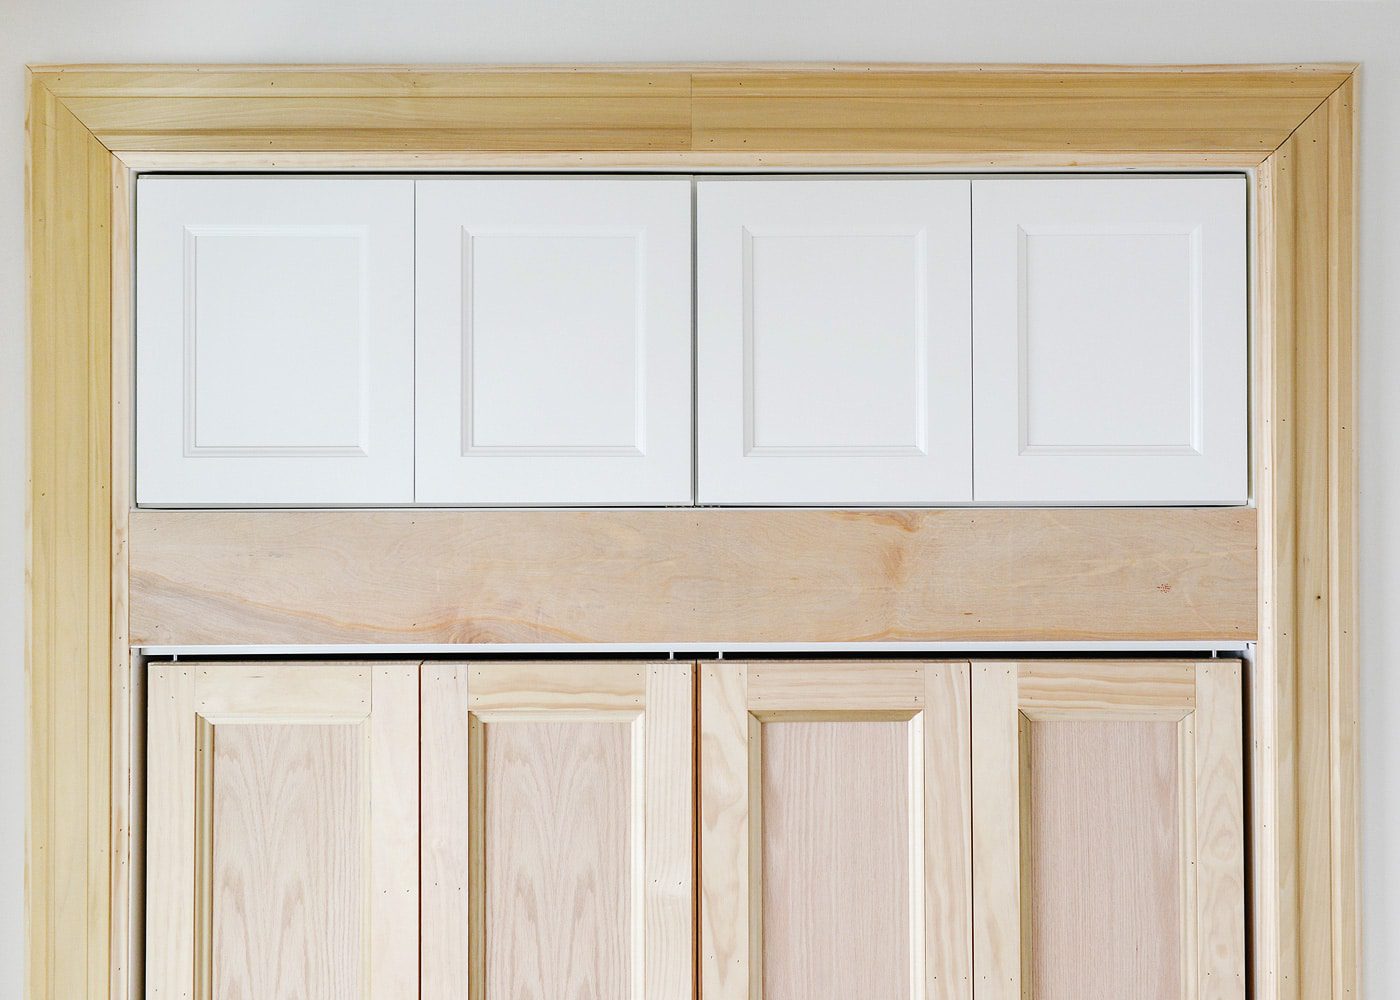
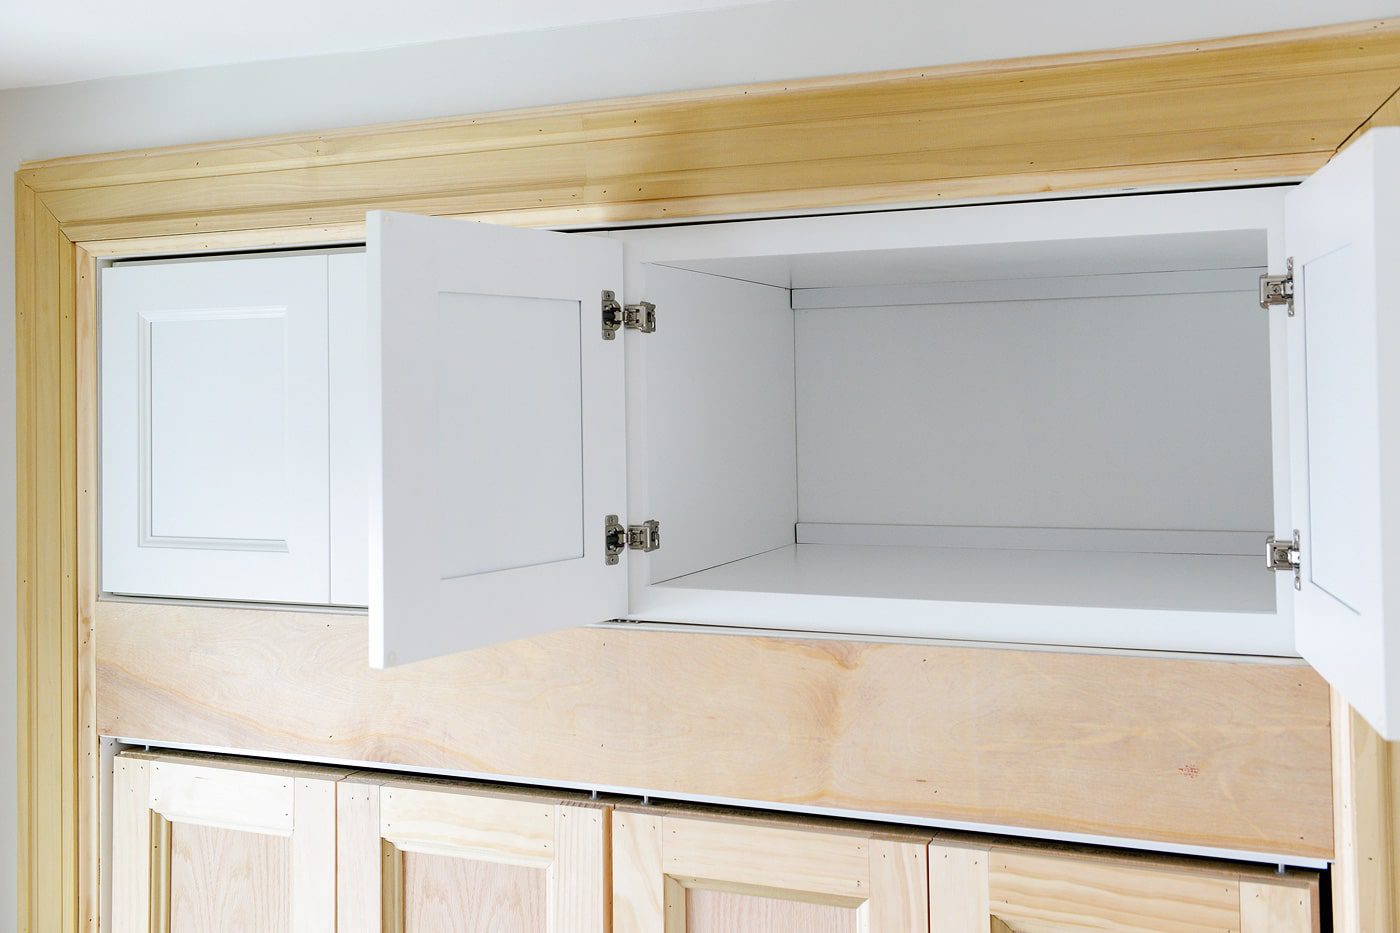
They aren’t screwed in place – yet! – but once they are, we’ll caulk all the way around to eliminate the barely-1/8″ gap. The Newport cabinets come standard with soft close hinges, and the doors are highly adjustable to ensure level.
With these cabinets and our laundry room cabinets, we also opted into their 5-year warranty plan with Guardian, which protects against accidents and is backed by AIG insurance. To be honest, I’m usually the first one to skip a warranty plan, but in this case, we went for it after discussing with an RTA designer everything it covers – from a scratched door to a spill that won’t budge, to a damaged hinge or drawer glide. The part would be repaired or replaced at no charge.
There are two levels of protection to choose from (more on that here), but the Platinum Plan is a full replacement warranty, meaning that if something happens and that style of cabinet is no longer available, then we have the option to have everything replaced with a comparable style/finish!
If you’re about to embark on any organized-dream-space renovation, we’ve had a great experience with TheRTAStore.com, and we’d recommend them in a heartbeat. We heard through the grapevine that starting next Friday, March 24th, they’re having a big tax-time sale, with savings of up to 40% (our cabinet style included)! To prepare, you can get started by ordering sample doors right here, and they’re offering Yellow Brick Home readers BOGO on all sample doors when you use the promo code YBHBOGO at checkout! For your reference, these are the Newport White, and our laundry room is outfitted in Aspen White.
We couldn’t be happier with the added storage, and I’m simultaneously looking forward to and dreading the rest of the trim in this room. Longtime readers know my true feelings about trim work, but thank goodness for Scott – he actually enjoys this job. More on that soon, but our progress so far has already made a world of difference!
This post is in partnership with TheRTAStore.com. We used two of these extra deep cabinets from the Newport White line. Thank you for supporting the brands that allow us to bring fresh content to Yellow Brick Home!


This project is SO inspiring! I’m learning my way around my table and miter saw right now… Hopefully one day I’ll be able to tackle these kinds of projects, but for now I’ll just sit here in awe of everything you guys are able to accomplish! The closet looks amazing!
You can do it, Brynne! I’ve seen everything else you can do! Once you get a handle on your table saw, you won’t believe you were ever able to live without it. :D
It looks absolutely awesome! Serious trim goals!
Very cool! So impressive! I hope I can get around to doing things like this in my home. Thanks for sharing!
We know, first hand, how much time all that trim took. But, oh so worth it! This looks gorgeous and grand!
are you planning a post on how you trimmed out the plain slab bifold doors? what a difference; they look great! i’m looking forward to seeing them all painted up.
thank you for the promocode as well…
We definitely will!
My friends Mo and Scott added similar storage above their cabinet in the kitchen, and in their older house it was a god-send!
We believe it!
That trim… I have never seen a closet I wanted to call “majestic” before… but this one certainly warrants it!
Haha, love that.
This looks awesome! Are you going to write about installing bi-fold doors? I’d love to know if you did anything to recess the top track. I have 4 old doors that I want to make into bi-fold doors and I make stumped on what to do with the 1″ tall track for these heavy doors.
I love reading your blog and I can’t wait to see this room all done!
Yup, we’ll be writing about those doors!
this looks so awesome!! I love the trim and new doors. I can’t wait to see the final product!
Looks great! Pull out bins might be nice to make the most of the deep cabinets. I’m sure you have something planned ?
WOW! Looks great! Love the new trim and the doors look fantastic :)
Not only are you going to have great storage with these, but it’s going to look awesome too! High five to you guys!!
I love this. I have been trying to figure out how to finish out a hole above our cost closet. This is perfect. I am wondering how the opening was finished out to create such a clean space between the drywall face and the cabinet. Was drywall wrapped around the opening for the upper cabinet or was the face of the drywall just cut super cleanly or was it framed out in some other magical way? I am clearly missing something in my process. Thank you!
Great question – we asked our contractor to cleanly drywall the opening for this very reason. This way, once we slipped in the cabinets, the edges were nice and neat and reading for caulking.
Thank you!
My father used to say I had an obsession with putting closets in our home. When you have an older home, closet space is at a premium! Seriously this is fantastic, and I’m so glad you used the room’s height for extra storage. Looks rad.
-Susie @ http://www.tinyhousegiantlife.com
These cupboards are going to provide such great storage. That would be a great place to stuff all of your off season clothing! I also love hearing about good companies with better warranty plans. I don’t know about you but I tend to live in my home so my home decor, including cabinets, are often beat up.
Did you re-paint the cabinets to match the doors and trim or did they provide a color-match? We’re (hopefully) getting ready to install a bunch of out of the box storage and this part worries me…
We ended up painting the doors the same Ultra Pure White BEHR that we use for all of our trim! We did at the same time we painted the bi-folds: https://yellowbrickhome.com/2017/04/13/add-molding-to-bi-fold-doors/
All the searches for “pax” and “closet” and “doors” on your blog today? Yeah, that’s me. Don’t mind me doing a deep dive and copying everything you do. :)
Hahaha, copy away!
Curious what you keep up there. I have a spot for deep cabinets and am so worried I’ll just lose things up there.
We use it as deep storage for things like pillow forms, camera bags etc. Stuff that we might not need to grab more than once or twice per year, but we know it’s there.