

Today we’re walking through the steps we took to utilize every square inch of our average-size entry closet!
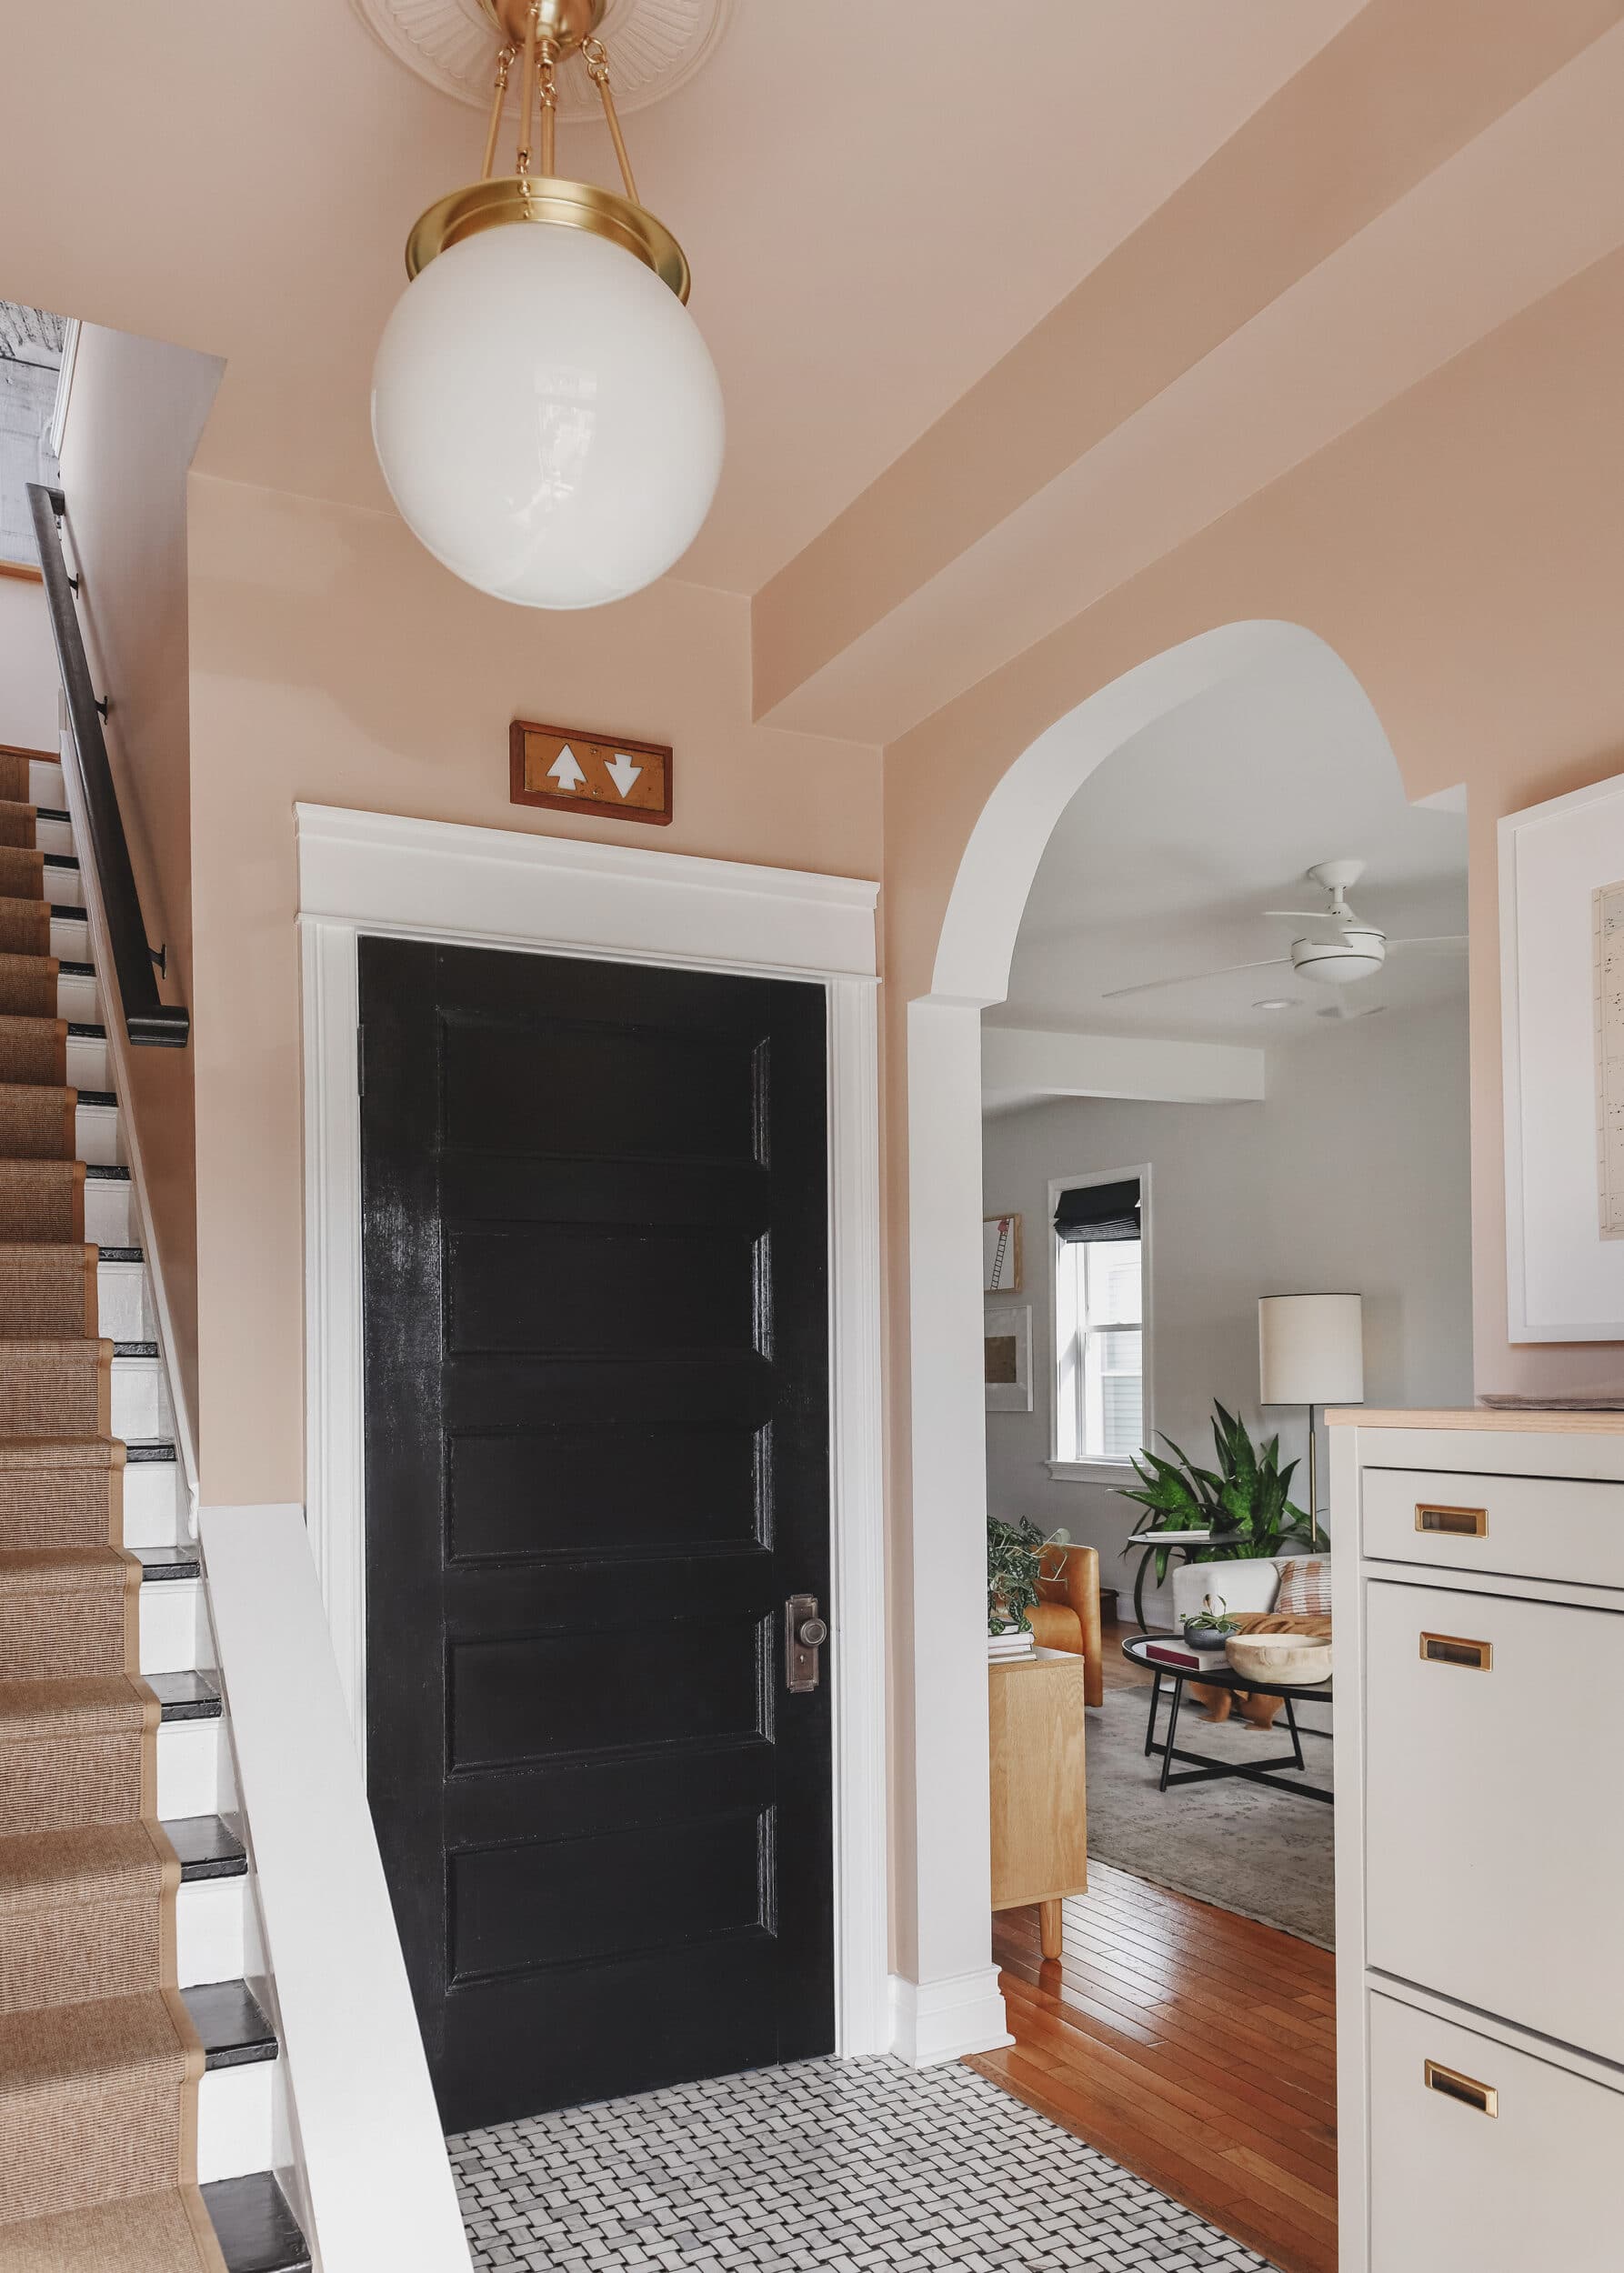
The entryway coat closet in our Chicago home has seen a couple of iterations since we’ve lived here. Do you remember when it was green? How about the cheery lavender phase? With each color iteration, we’ve also moved, repurposed and rearranged the storage systems inside it.
As our family has changed and grown, our needs have changed as well so it has made sense for our closet to adapt with us. Fast forward to today and we’re onto our third (fourth?) version of this closet and it’s working perfectly for our little family unit so far! We’ve done this enough times that we’ve honed in on our process and have a few tips to make sure everything goes smoothly. Here’s how we move through the process:
In This Post
1 | Purge!
We start by pulling every single item out of the closet. Coats, boots, umbrellas. Everything! Anything that we didn’t use in the last year is sold, gifted or donated. We consider what we’ll be putting back in – this dictates how things are organized. This also includes a purge of the existing closet systems! We consider moving and reusing things, but don’t be afraid to donate parts that no longer work for your needs.
2 | Prep + Consider a Fun Surprise
With the old closet system removed, we then take care of any necessary wall patching to prep for paint. We don’t think closets have to be boring or overly utilitarian, so consider a fun wallpaper or fun paint color to keep things fun. In the past, we’ve created a custom paint pattern and used punchy colors. Wallpapered closets are always fun as well!
Many closet organization kits are also available in multiple shades, so that’s another option all together. (More on that next!)
3 | Select + Install Your Organization System
Once our closet items are inventoried and the space is prepped for installation, we’re ready to purchase parts! For larger closets, we love column-based systems that allow for shelving and drawers. The closet in the primary bedroom at Tree House serves as a mini dresser of sorts. The drawers can be individually locked to keep our personal items out of the way of our guests. (Hi, Jack!)

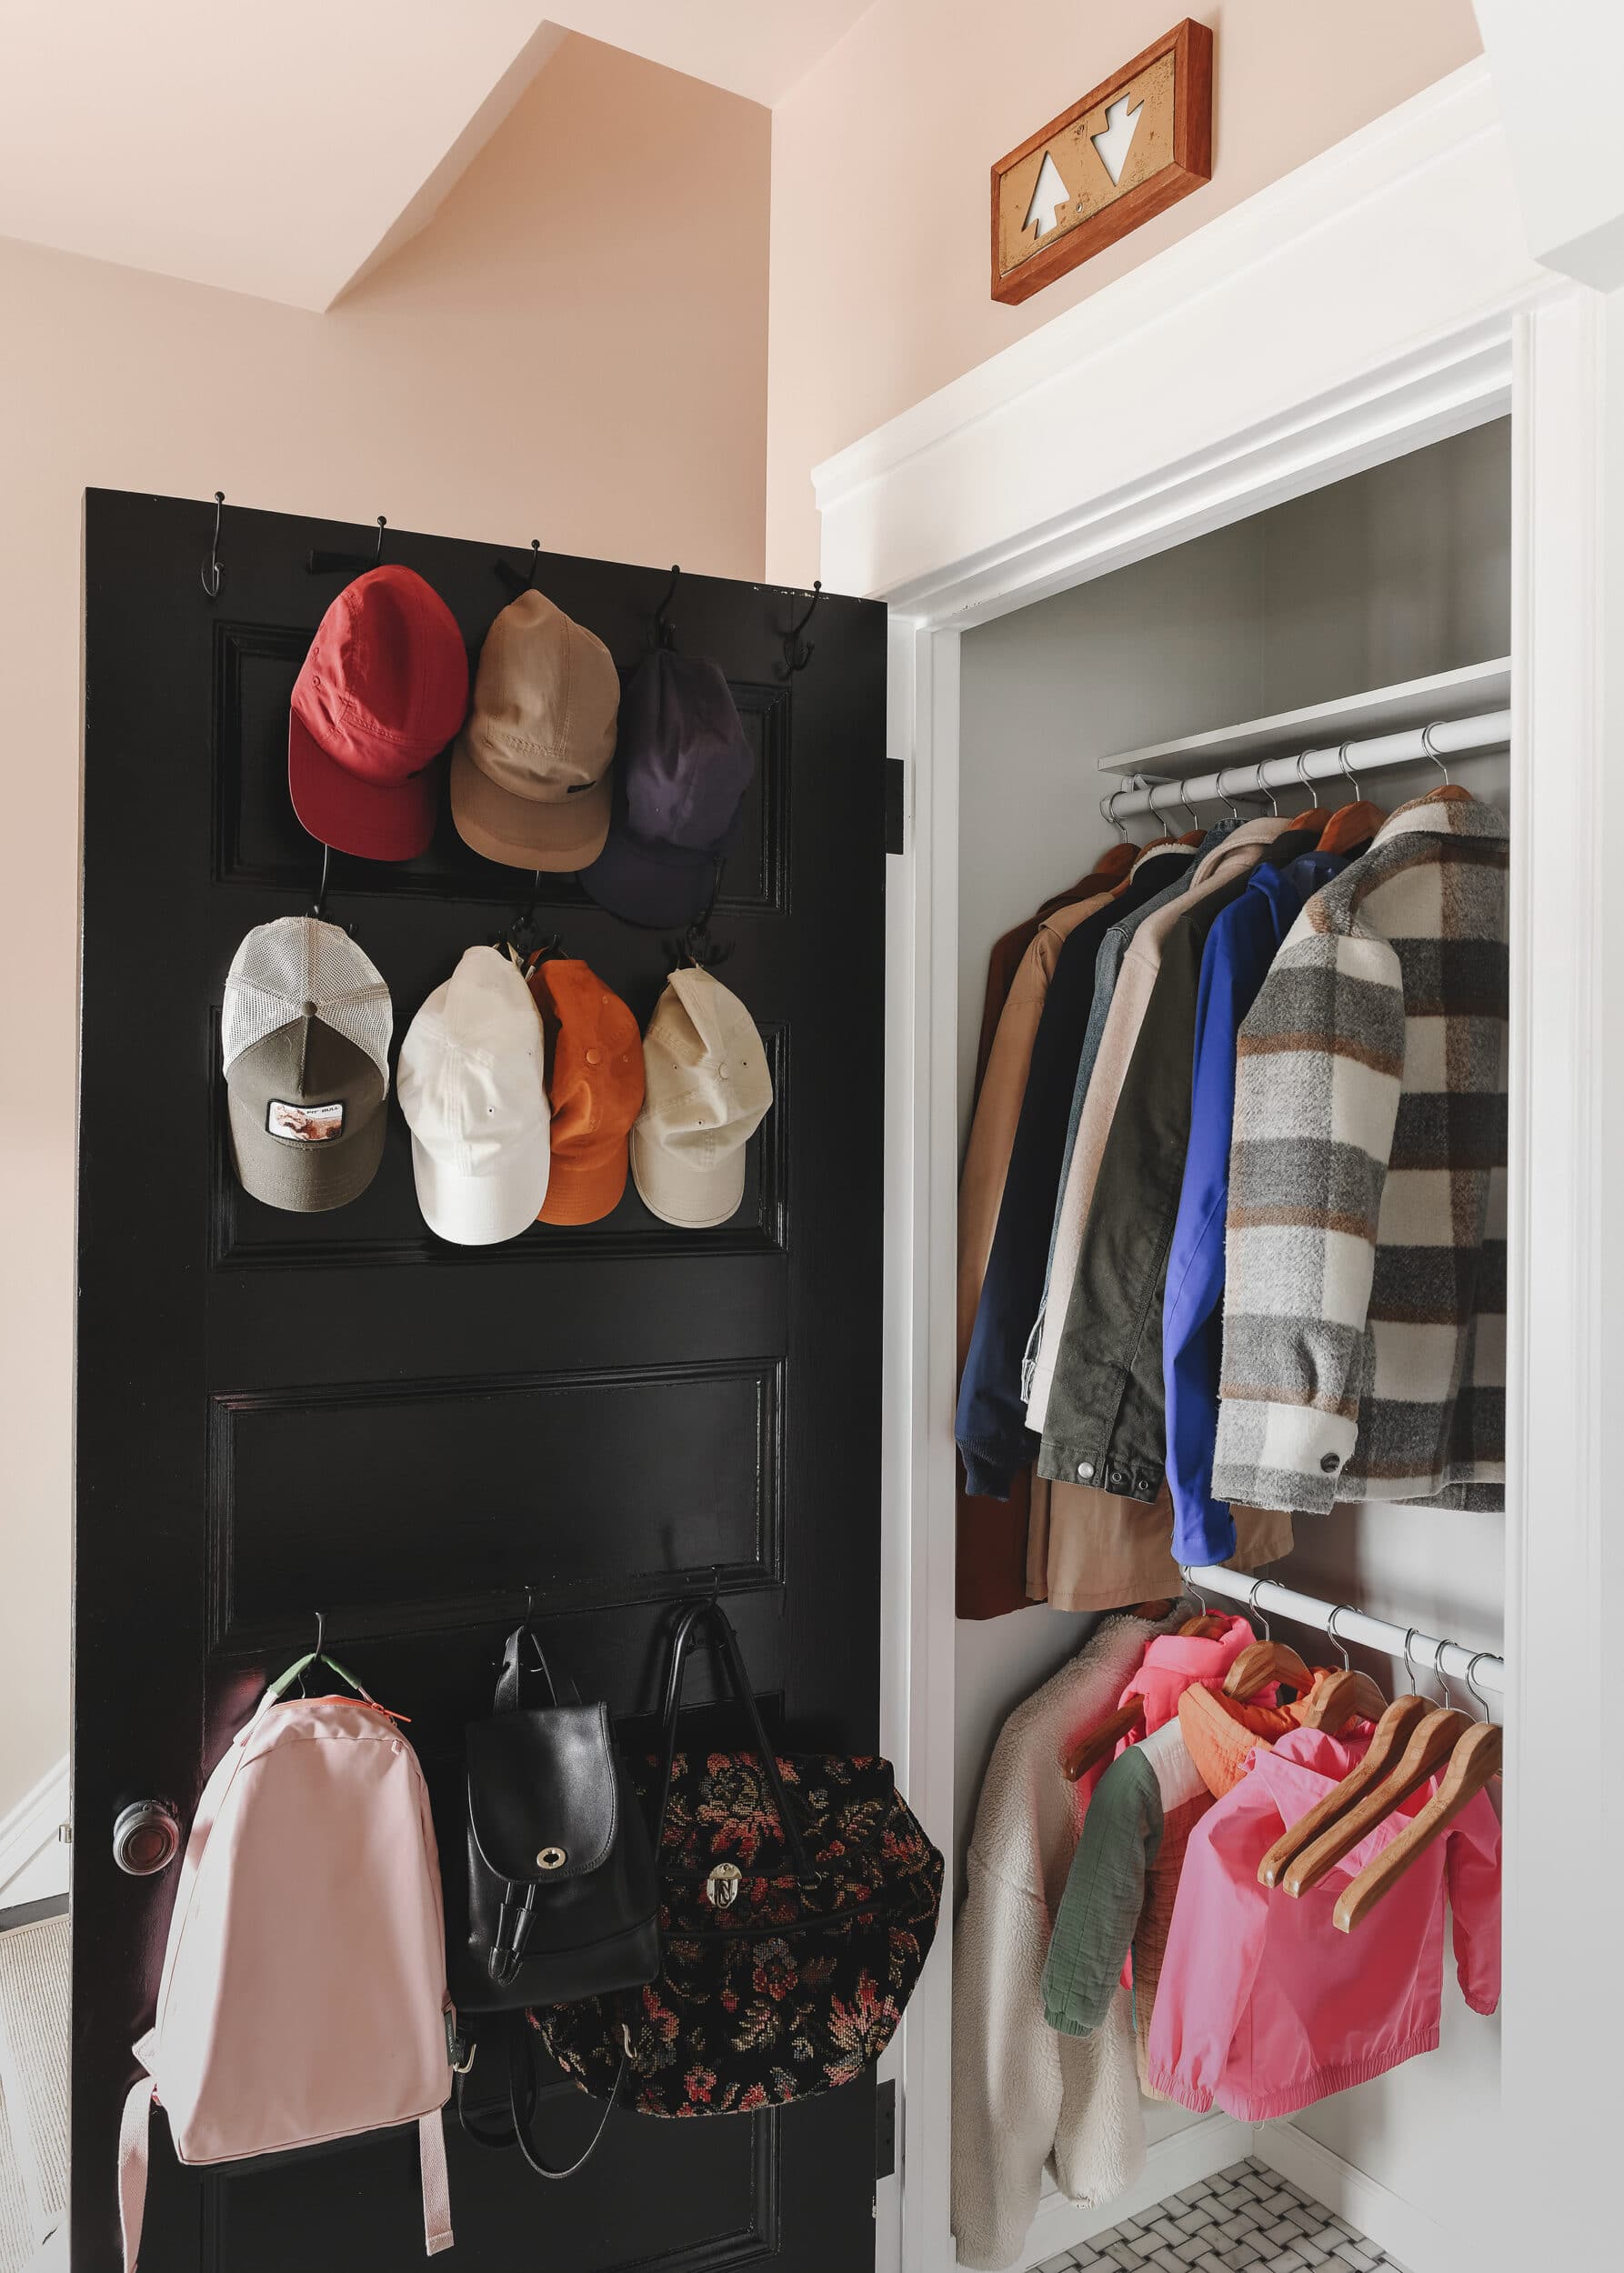
For smaller, budget-friendly closets, we love the Rubbermaid twin track system. It’s sturdy, adaptable and offers a handful of useful accessories. Below, we rearranged our entry closet with two rods that span more than half the width of the closet. This instantly gave us extra coat hanging space!
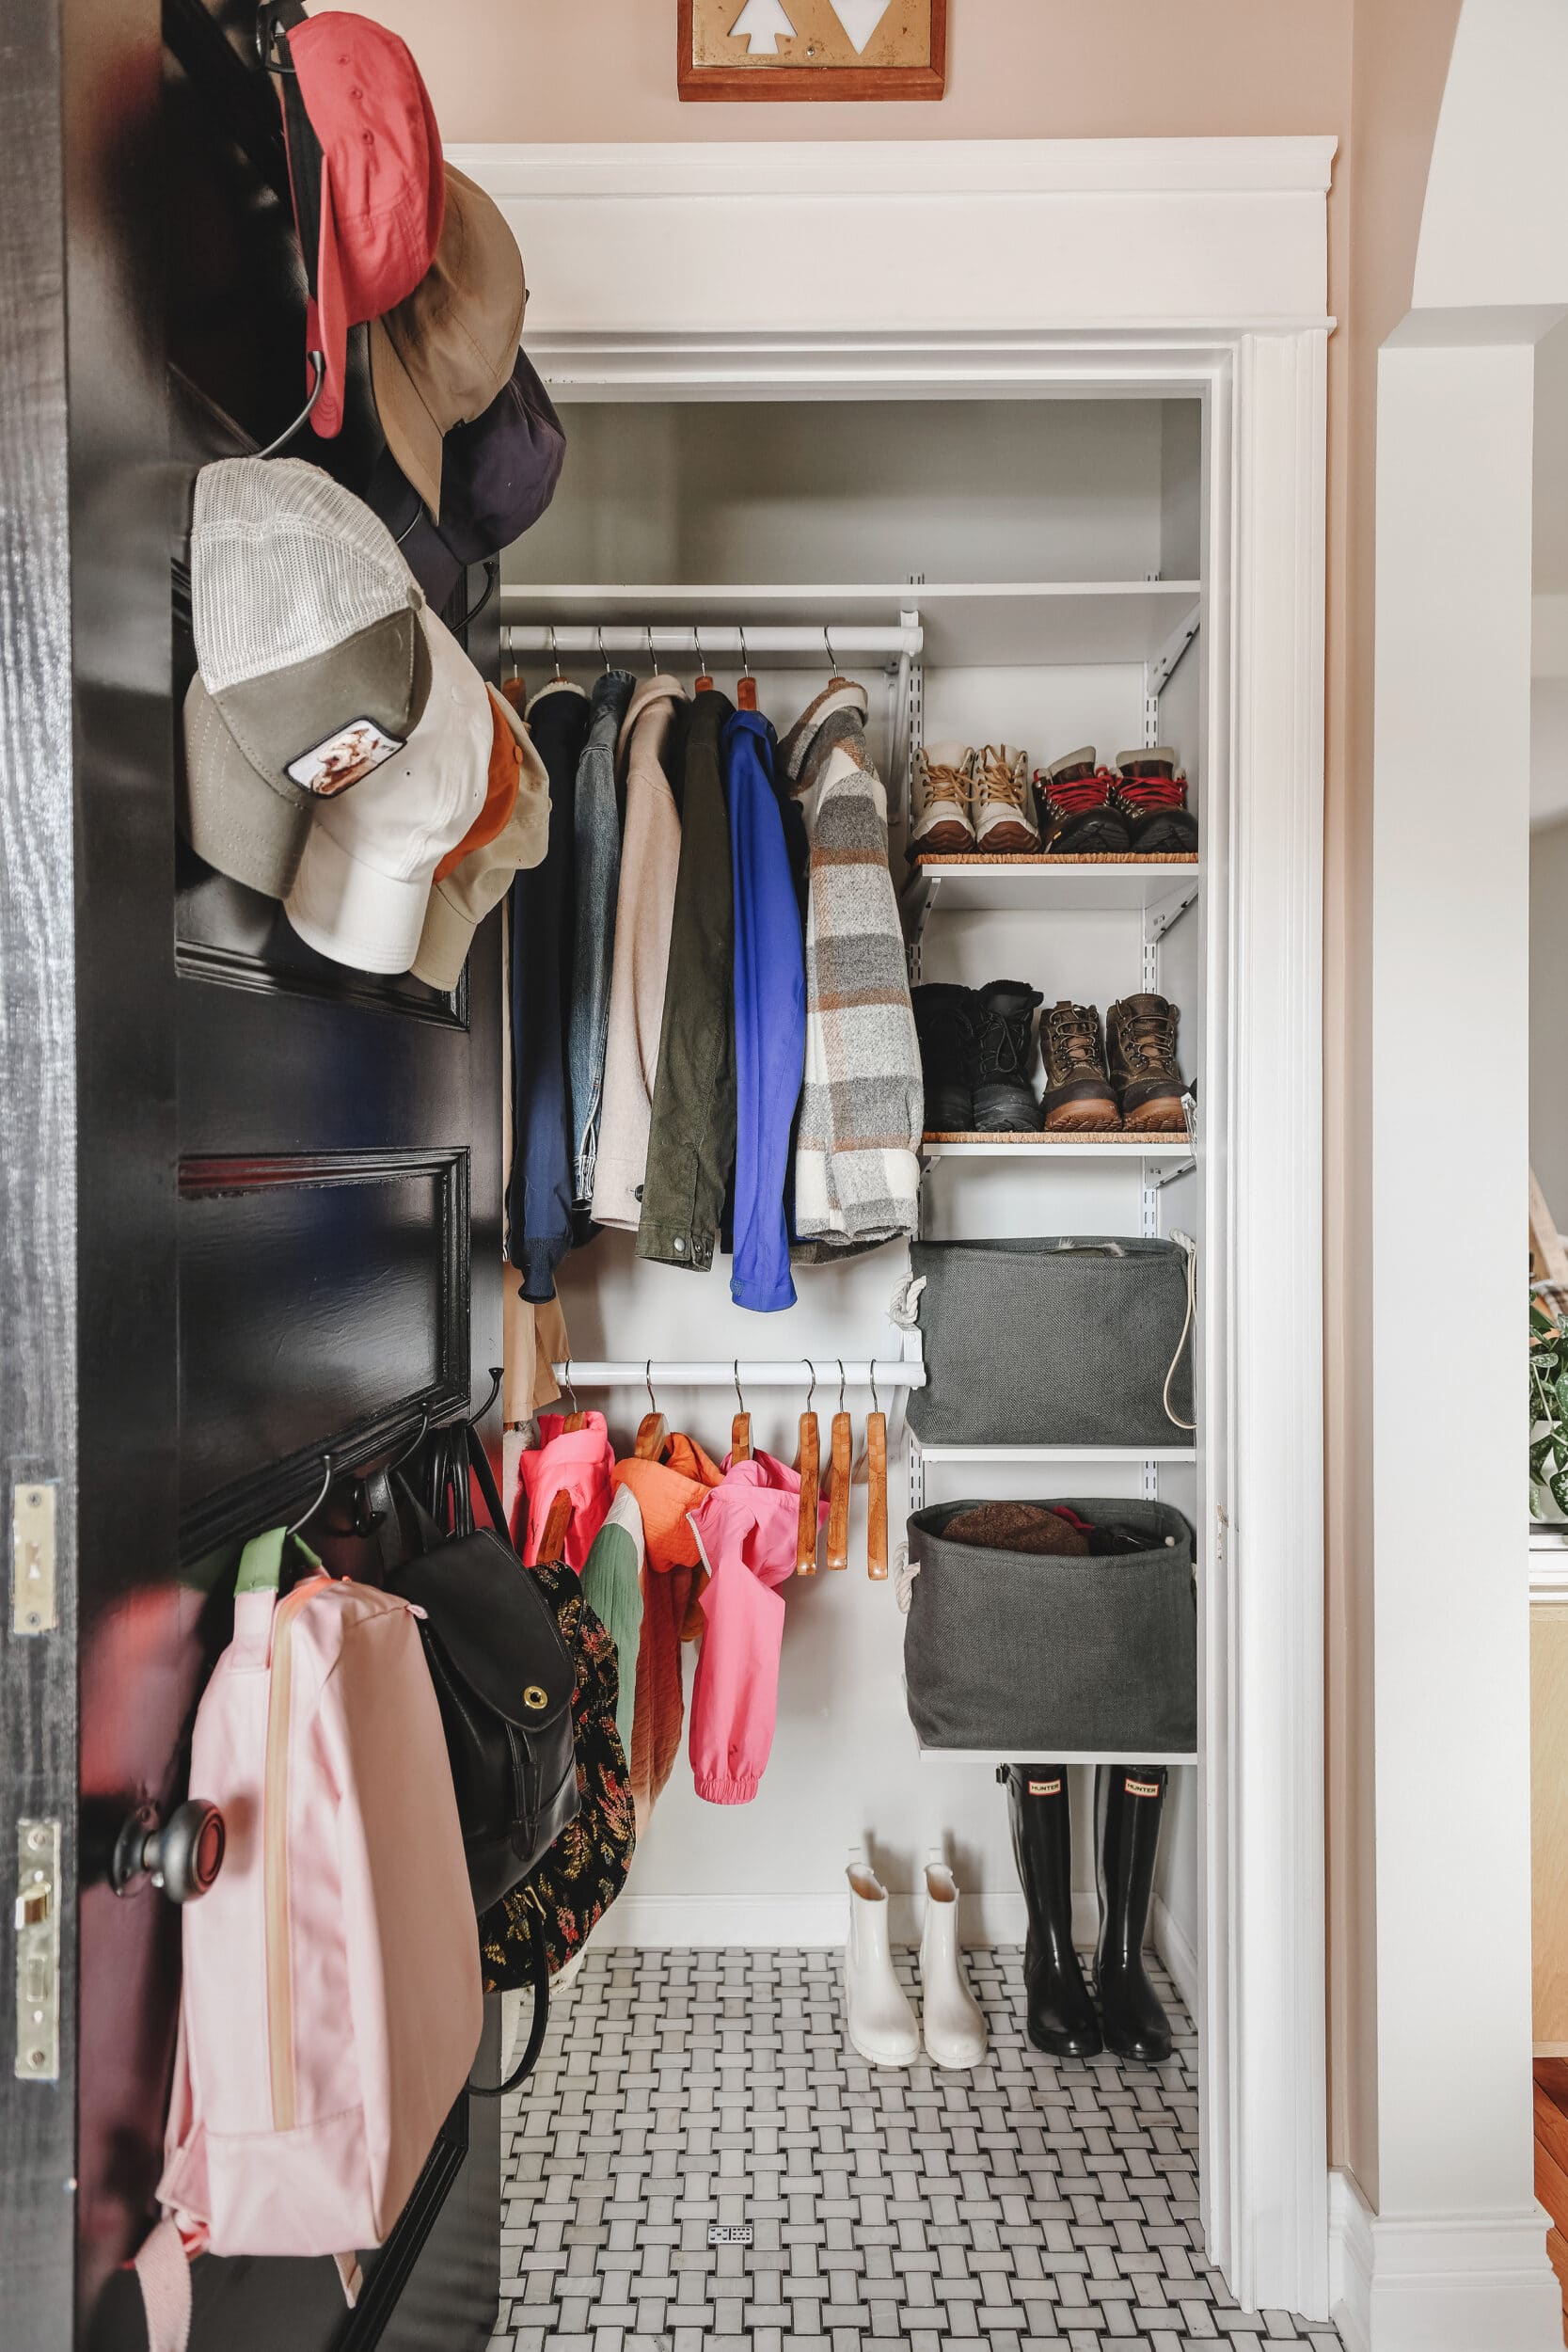
The Rubbermaid shelf support brackets are available in a few different depths to accommodate any space. Ready to use shelves can be purchased, or plywood or dimensional boards can be used for a more custom look. Don’t forget to consider all closet users at this stage – including kids and pups! For example, we hung a low rod for Lucy’s coats so she can get into the habit of hanging up her own things. We’ve also tucked extra dog accessories in the top basket (like Catfish’s leash, winter coat and scarves), and the lower basket is winter gear that Lucy can also reach.
4 | Organize + Accessorize
Now that the organizing system is in place, we fill it up and accessorize! Closets obviously need to be functional, but they can look great too! Here are a couple of our favorite tricks to keep things tidy and also looking great:
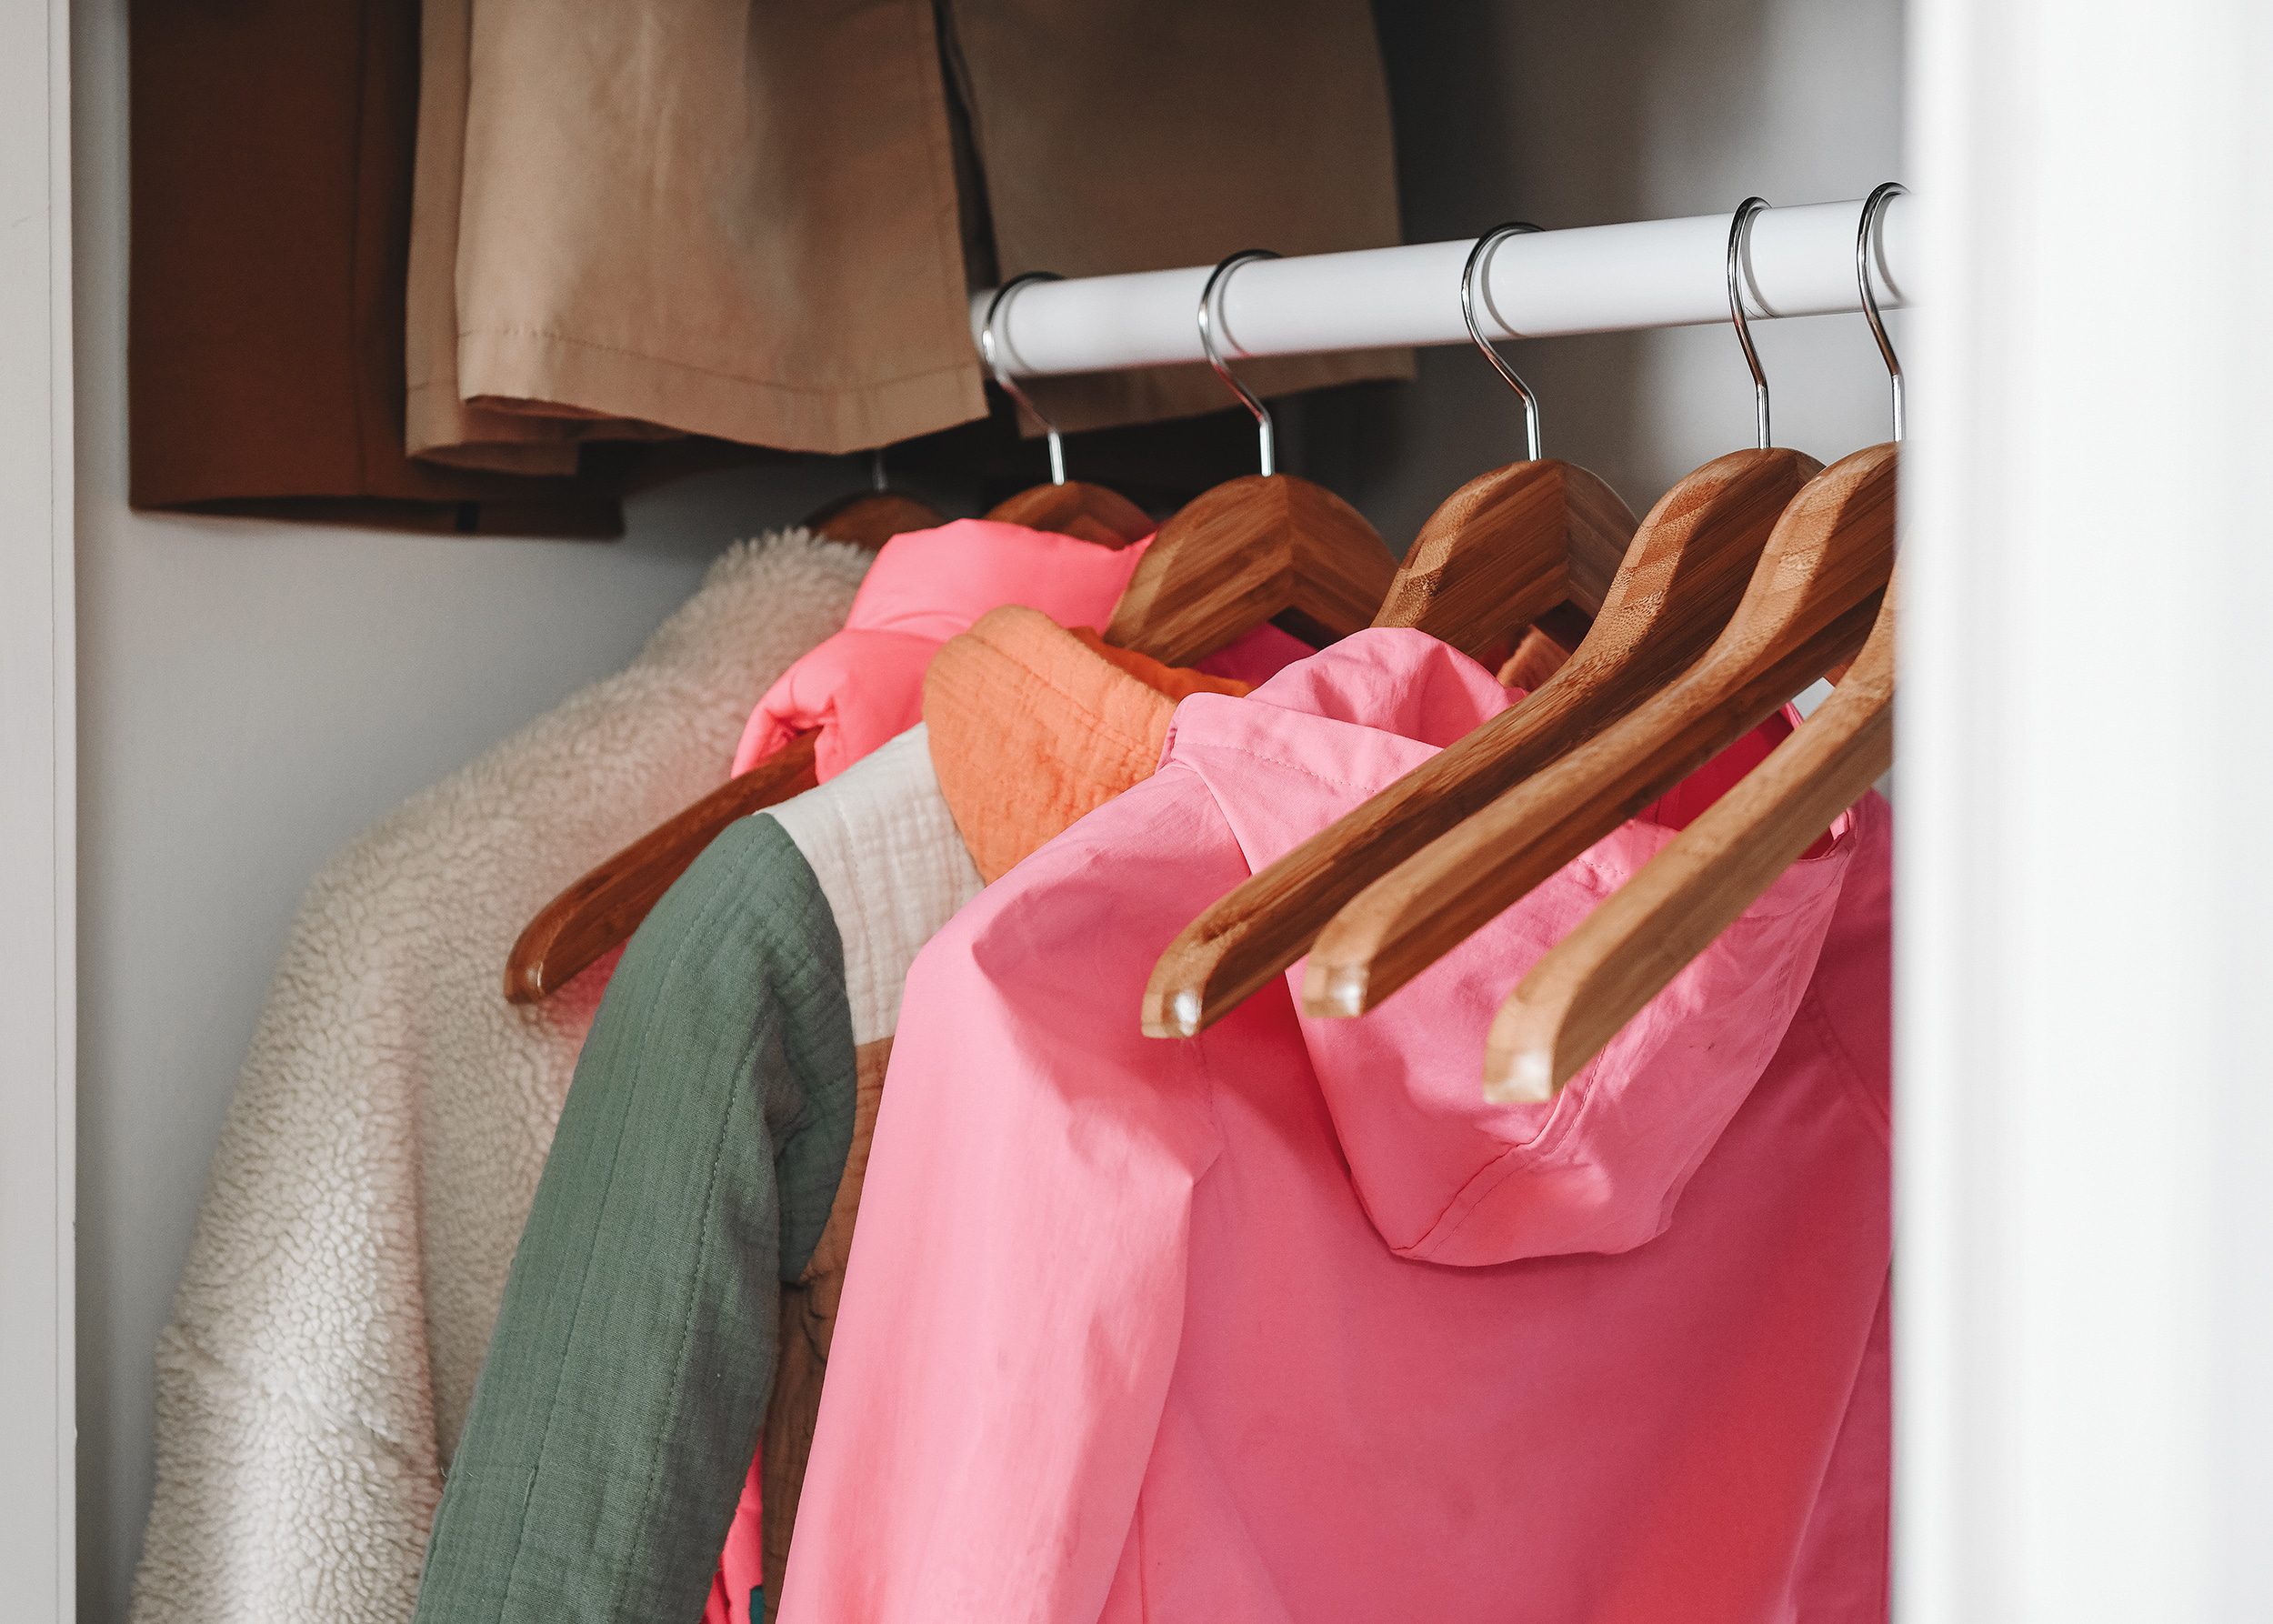
- Invest in matching hangers to save space and keep things looking cohesive. We prefer these sturdy wood hangers. We’ve also used these slim wood hangers for lightweight jackets and loved them!
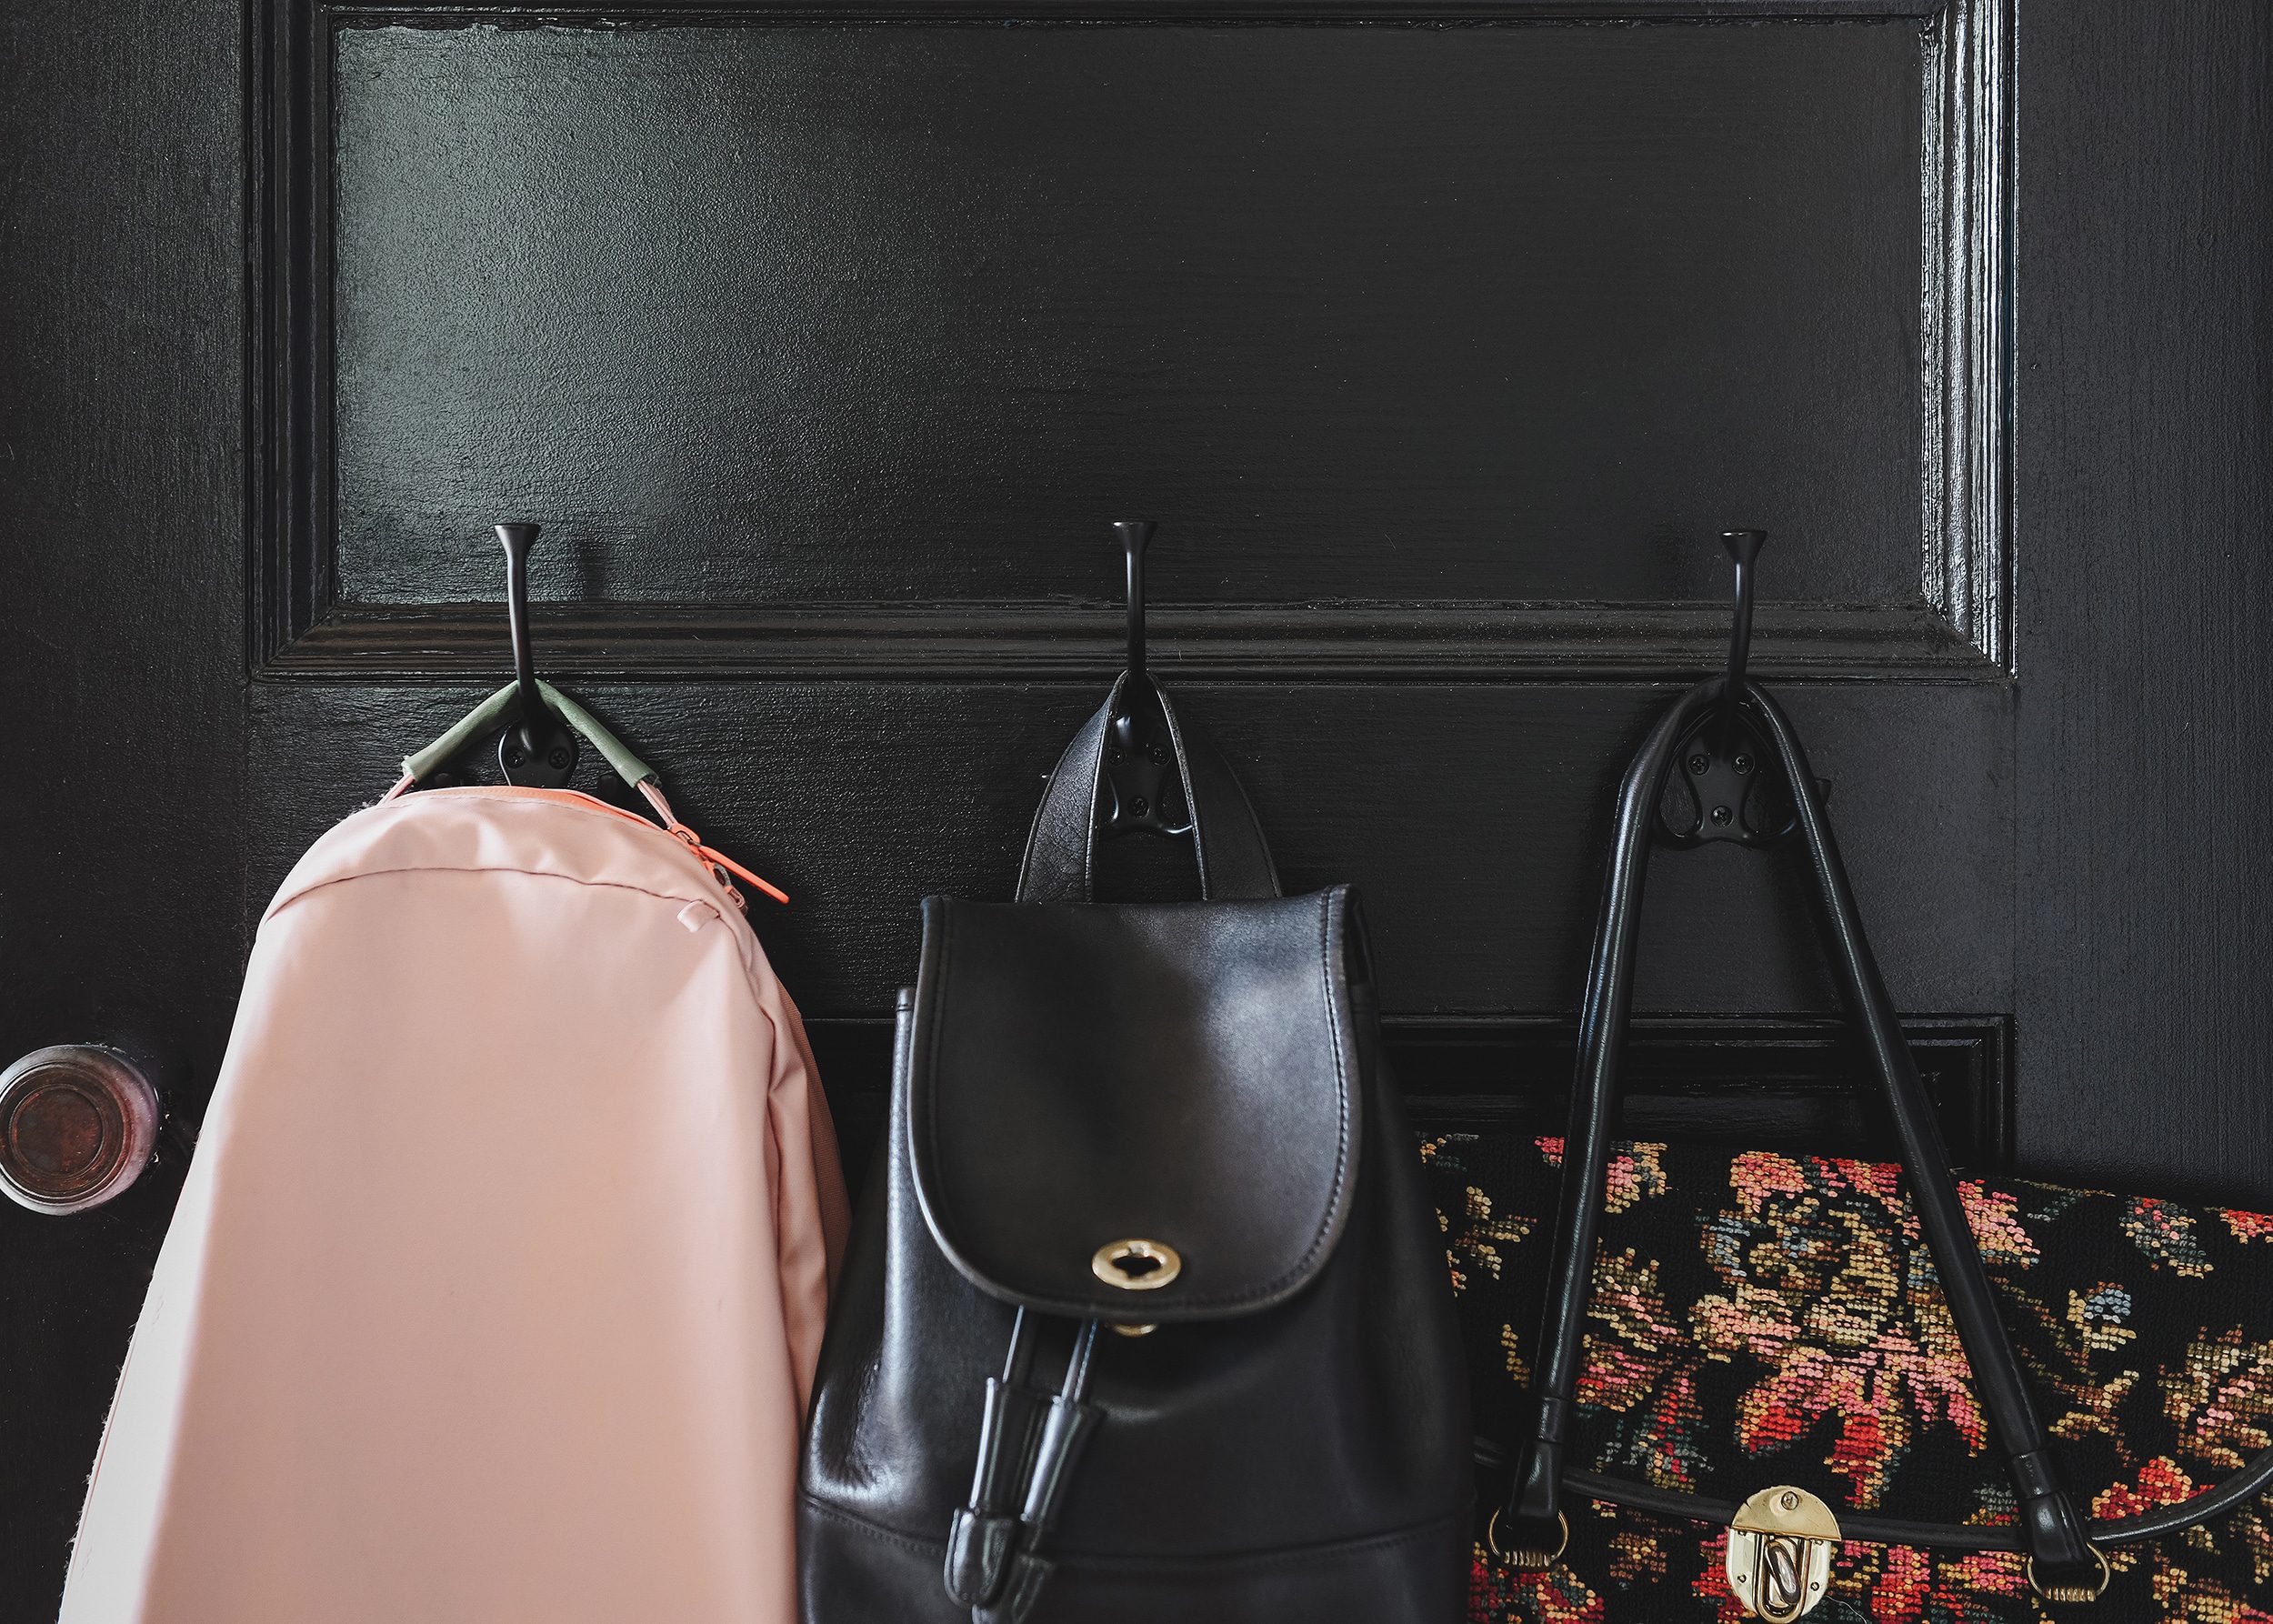
- Hooks are your friend! The back of our solid wood closet door is absolutely stacked with hooks. Purses, hats and backpacks are all within easy reach since the door swings open to extend the closets’ usable space. We prefer a mix of 2 prong hooks and 3 prong hooks for versatility, but base the purchase on what you’ll be hanging.
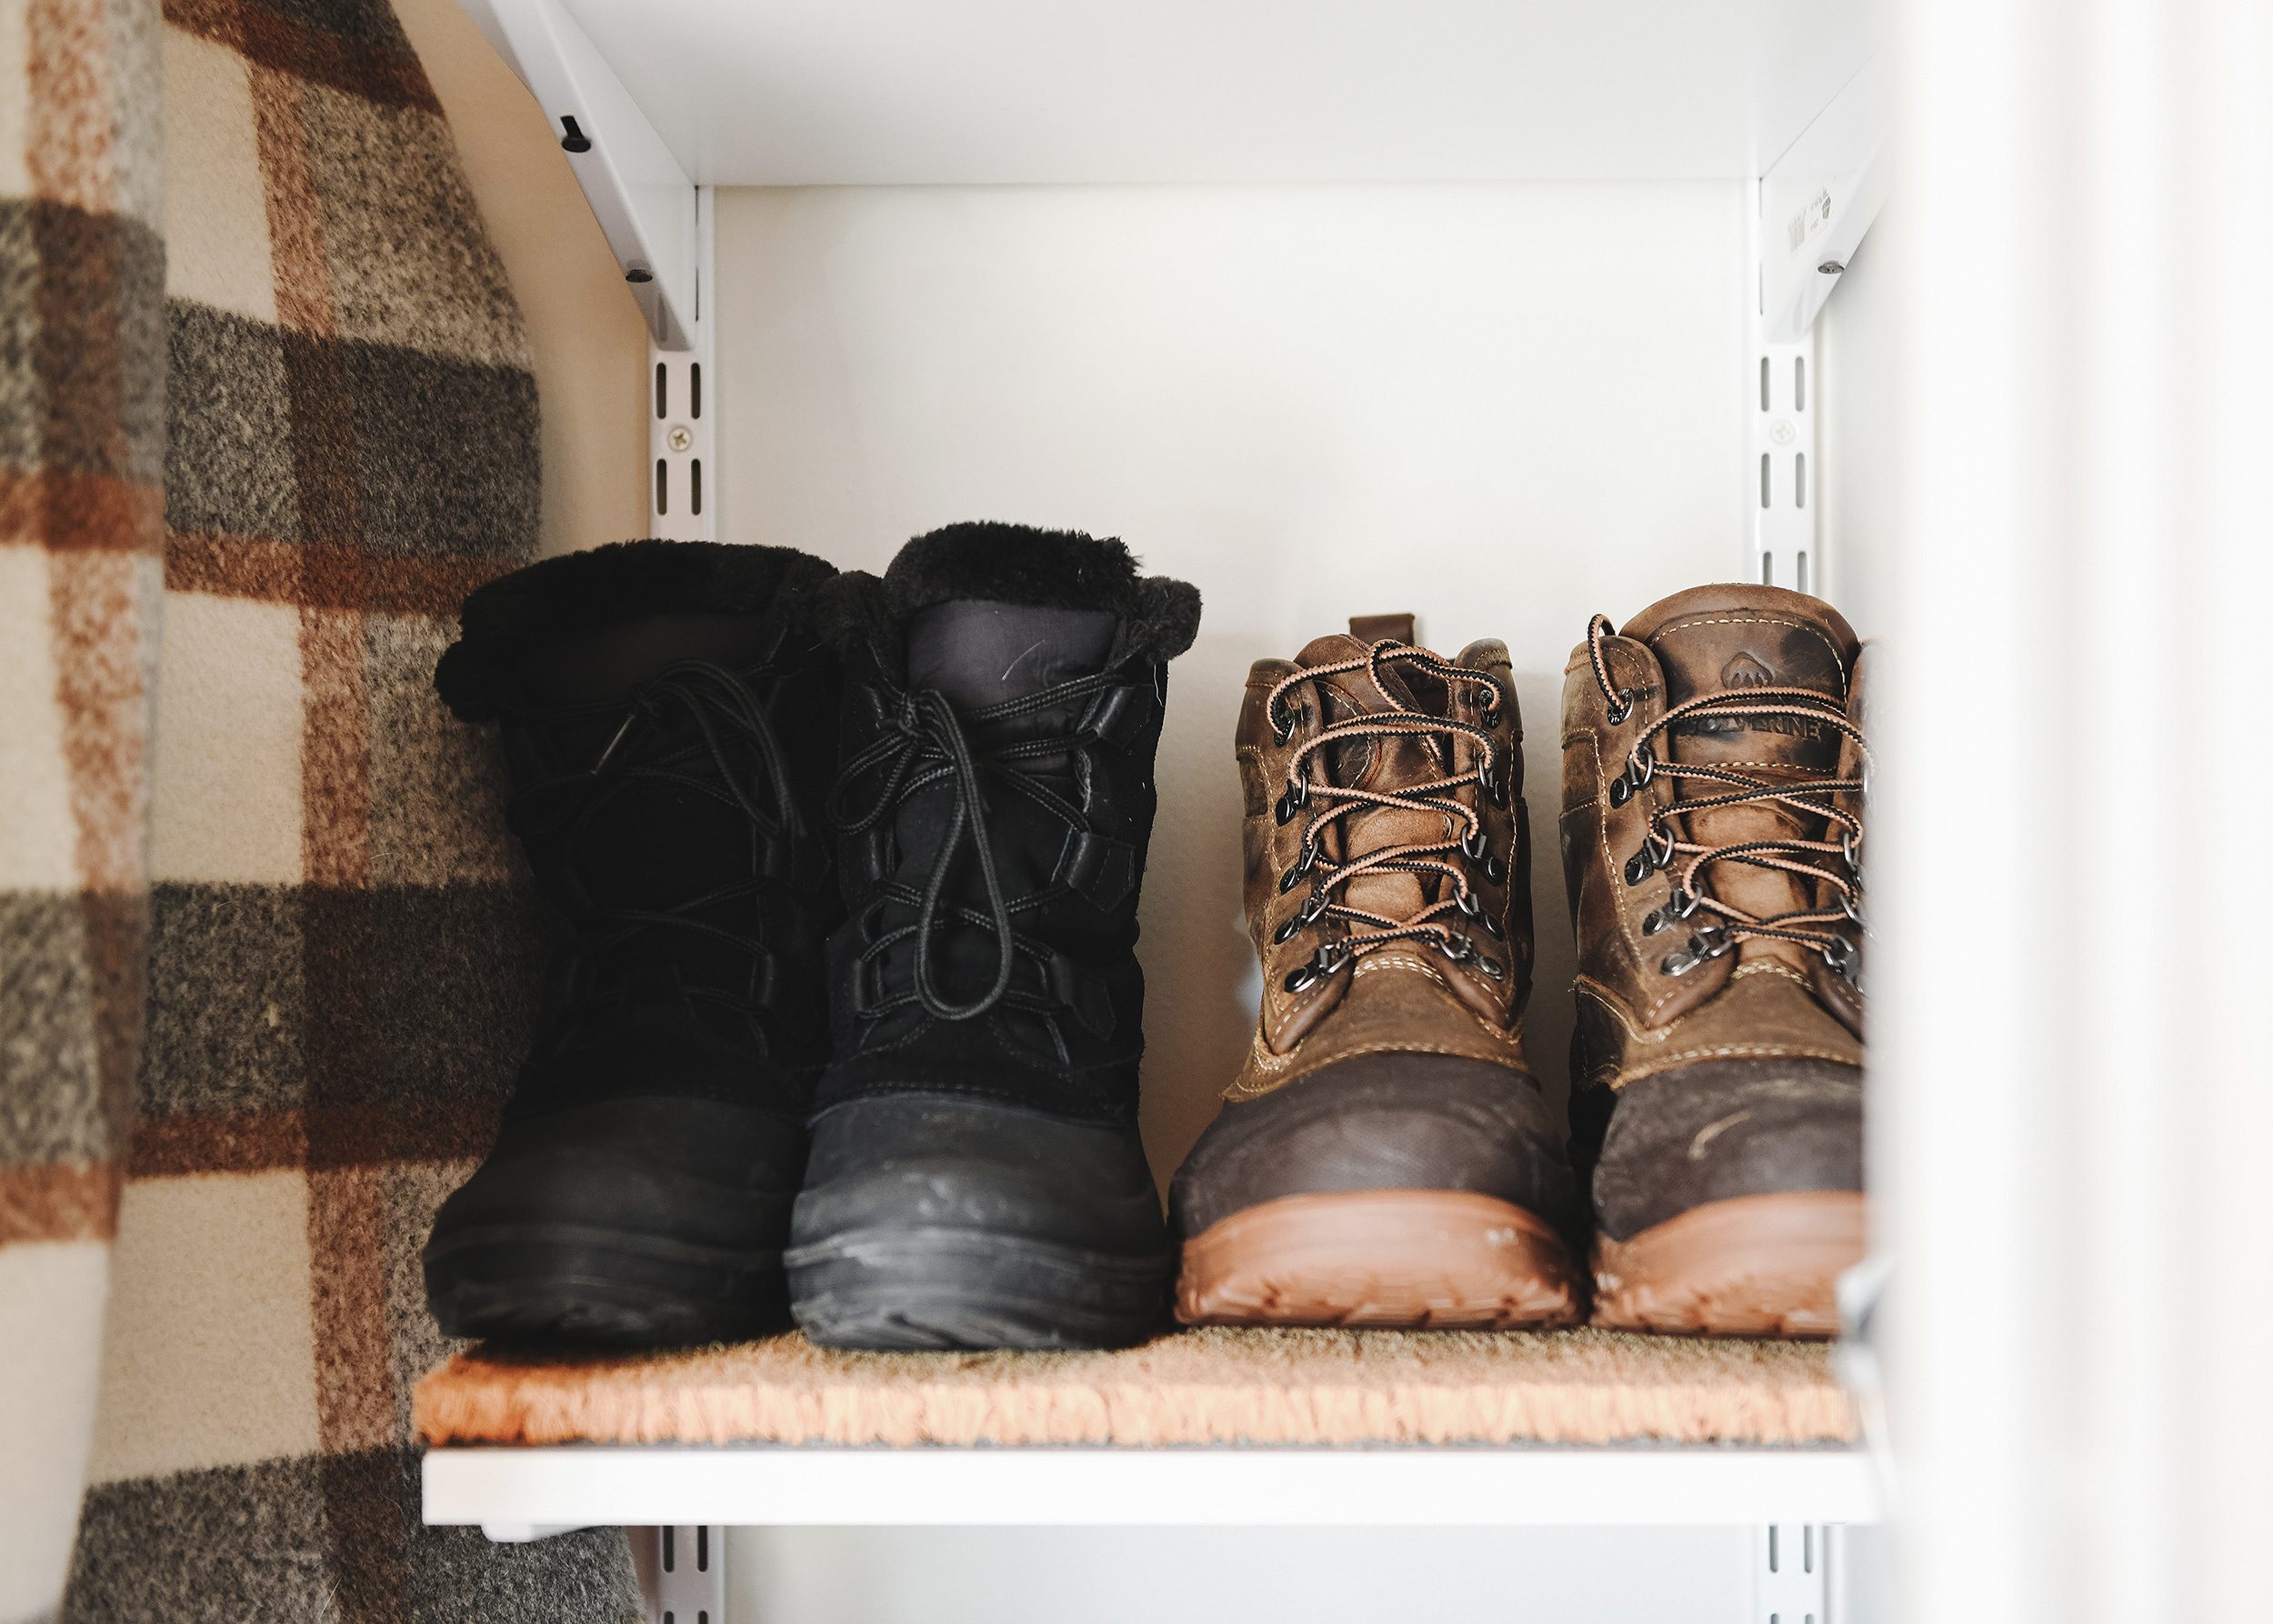
- Coir doormats are a great inexpensive shelf liner for boots or other heavy duty items. We measure and cut them with a fresh utility knife blade.
Done! This version of the closet suits our needs much better than the (multiple) previous versions. The important thing to remember is that it’s okay to change it again later when your needs change, depending on your stage of life.
The best part about this project is that it only took a couple of hours and cost less than $100 since we repurposed a lot of what we had on hand. For us, it was a worthwhile investment to make sure everything has its own place. See, organizing can be fun after all!
PS! See how we organize Lucy’s toys, our Amazon organizing favorites, and a look inside all of our drawers.


Coir doormats used this way is simply brilliant!!
Thank you, Laura!
I already have half the rubbermaid system in my cart, but couldn’t figure out all the components I needed, but your visual is helping me out. Do you have a track on the left side of the closet? Oh my, the green closet!
We don’t have a track on the left side of the closet. Just the two verticals to support the shelves on the right side. Hope this helps!
I’m also putting these Rubbermaid items in cart immediately (what a great idea!) – could you provide a link for the two rods that you use on the left side? I see you underlined the “two rods” in the post but it doesn’t link for me. Thanks!
I love the storage ideas but your snow boots caught my eye. I’m moving to snowy climate and need all the gear. I know it’s the wrong season, but I’d love your recs for winter basics, including snow boots. :)
We both have these Wolverine boots and love them. They’re on crazy sale right now!
Love this and planning on redoing our coat closet as well! Where do you hang your longer winter coats?
Long winter coats fit just fine draped over the low coat rod during winter. They’ve transitioned to our newly reconfigured guest room closet for the off-season!