

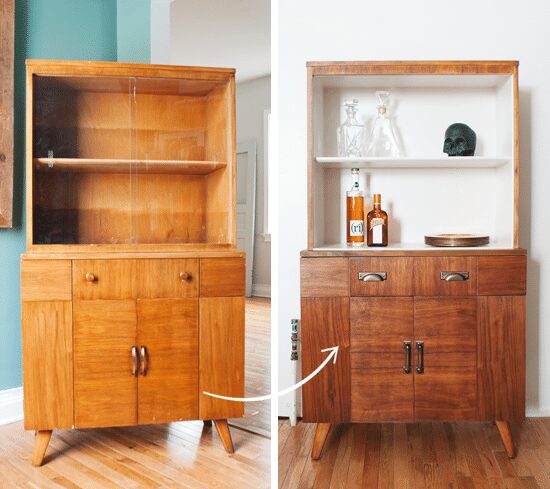
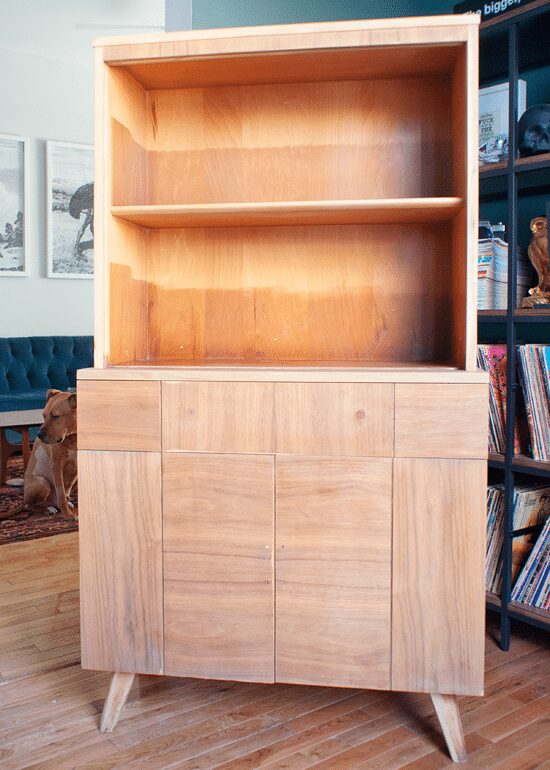
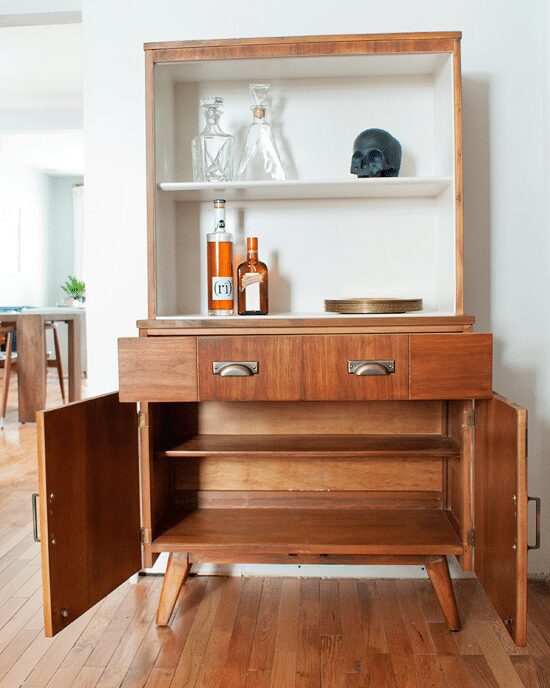
Phew – that beast of a hutch is done! And it’s so cute now!
We knew it would take some work to refinish the wood when we first picked it up a few weeks ago, and that was confirmed when it rapidly turned into one of those projects that required a whole lot of stuff, a whole lot of patience, and several days of work overall. We had all the supplies on hand, but I won’t lie – if you don’t have these on hand (below), I do think a makeover to this extent could add up quickly. This hutch was a bit more work than a more simple wood refresh; the old polyurethane was on thick, it had yellowed quite a bit over time, and we needed a solution for the weird wood-striped back. And now that it’s done? Ugh, I mean, I’ll say it again – it’s just so cute!
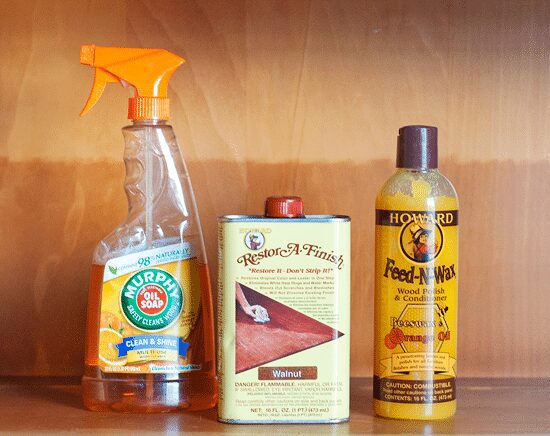
SUPPLIES USED:
Citristrip
Mineral Spirits
No-rinse TSP / deglosser
Murphy’s Oil Soap
Restor-A-Finish in Walnut
Feed-N-Wax
1/8″ thick pine trim strip
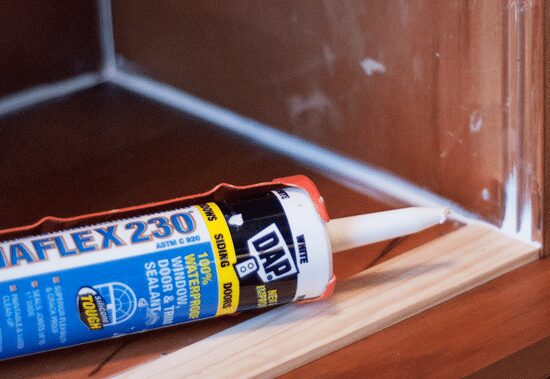
Latex caulk
Spackle or wood filler
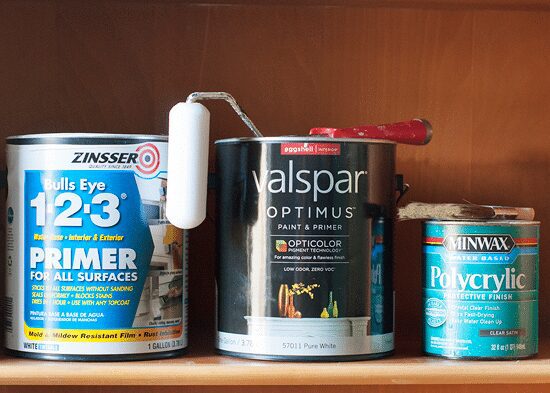
Zinsser 1-2-3 water based primer
Valspar Optimus paint (BM Intense White)
Minwax Polycrylic in satin
TOOLS USED:
Cheap Paintbrush for Citristrip
Putty knife
Orbital sander with 120/220 grit pads
2″ angle brush for paint/poly
4″ foam rollers for paint/poly
Super fine sanding block
Rags
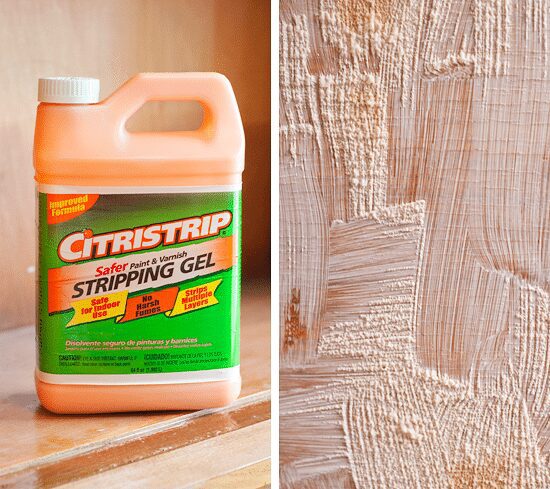
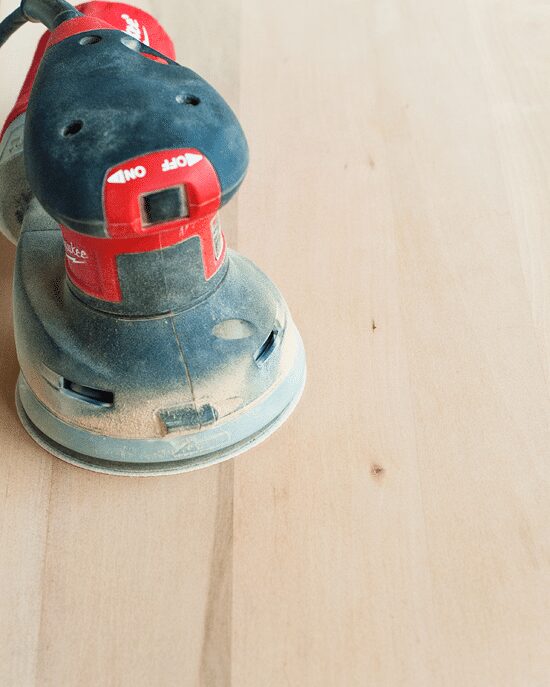
WHAT WE DID: First things first, we absolutely had to get rid of the weathered polyurethane, and because it had been applied pretty thick, we chose to strip it first, rather than just sand it. (This would save us time once we got to that step.) Scott and I used old paint brushes to apply Citristrip, and within 30 minutes, it began working it’s magic. We used a putty knife to scrape it off – which is pretty fun, really! – and applied a thin second coat on some of the more stubborn areas.
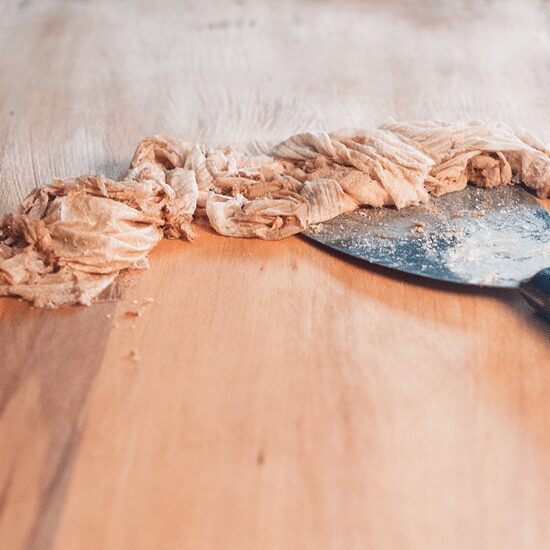
Once every last bit of Citristip had been removed, we used mineral spirits to clean off the residue and moved onto sanding. I started with 120 grit sandpaper and worked my way down to 220 grit, being careful not to get overzealous with my orbital. Parts of the hutch were solid wood, but other areas were a veneer, so I had to work slow around the edges. Also? I did accidentally create a knick or two in the veneer, and at the end of this project, I used a dab of brown paint to touch those up; no one’s the wiser!
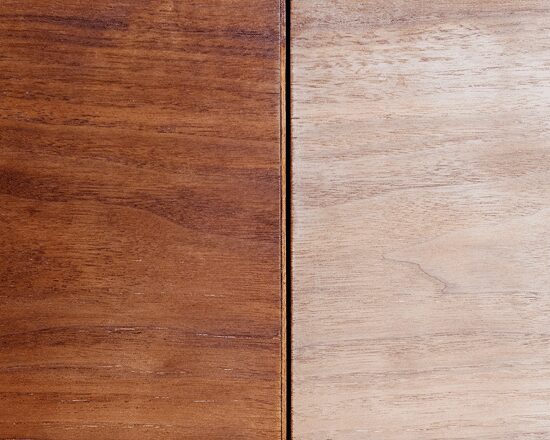
It was looking so much better already, but it was time to move on to the most satisfying part of the job – bringing back that color. Using soft rags, everything was washed with no-rinse TSP, and I followed that up – inside and out! – with Murphy’s Oil Soap to get off every bit of grime. A new rag soaked with Restor-A-Finish brought out a rich, medium-brown shade (way, way less orange color than the original), and once every bit of the exterior had soaked this up, I nourished it with a liberal application of Feed-N-Wax. Two days later, I applied another round of Restor-A-Finish and Feed-N-Wax to darken it up even more, and I did this again over the weekend. The hutch was thirsty!
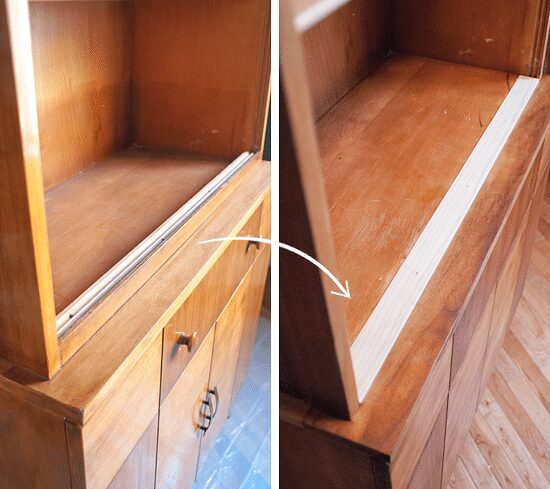
After a bit of back and forth, we decided to nix the glass altogether, which meant we’d need to get rid of the grooves the glass doors rested in. But once that came off, we were left with a lip that was set back a bit too far (looking disjointed), so we filled that in with a thin piece of pine trim. A touch of spackle filled in any scratches and dents (wood filler would work, too), and I finished off the shelves with a bead of caulk to close up any gaps.
Lastly, it was time to paint! We didn’t want to go overboard with color in the kitchen, although we definitely considered it, but since we have our minty pocket door and vintage rug, we opted for the same color as our kitchen walls – Benjamin Moore’s Intense White, color matched to Valspar Optimus paint. Because the hutch will get a workout with our bar supplies, the goal is always to make it last. Using the right products is everything when it comes to painting furniture, and we used our tried and true method: ONE coat of Zinsser Bulls Eye 1-2-3 water based primer, TWO coats of paint and THREE thin coats of Polycrylic in a satin finish. I used a 2″ angled brush to get all the corners and a 4″ foam roller for the large flat surfaces, and a super fine sanding block was used between each coat of Polycrylic to further help with adhesion.
We allowed the paint to cure for a handful of days, mostly because that’s what you’re supposed to do, but also because our kitchen still needed paint at the time. The waiting, of course, is the hardest part, but definitely worth it to avoid damaging the new paint job. We’re not sure if it’ll go here (to the left of the furnace wall) or to the right of the back-wall-of-windows, and once the cabinets are installed, we’ll have a better idea. But! Cute!
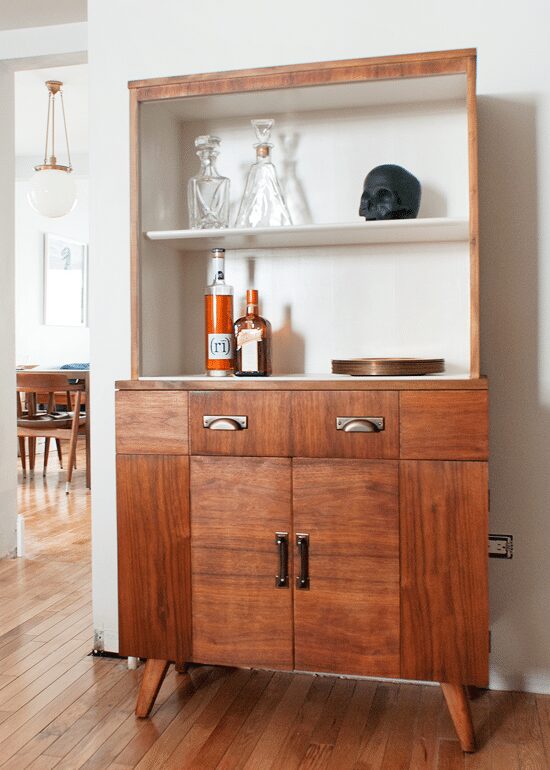
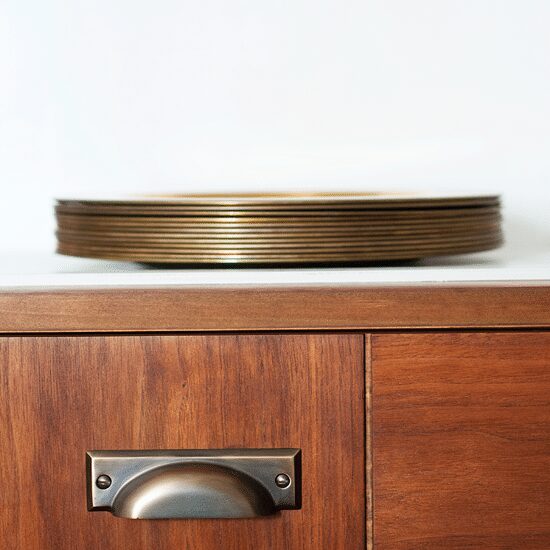
The hardware is truly a showstopper, the most perfect finishing touch. We chose these bevel edge bin pulls and mission drawer pulls from Rejuvenation in a burnished antique finish, which are so subtle. So pretty.

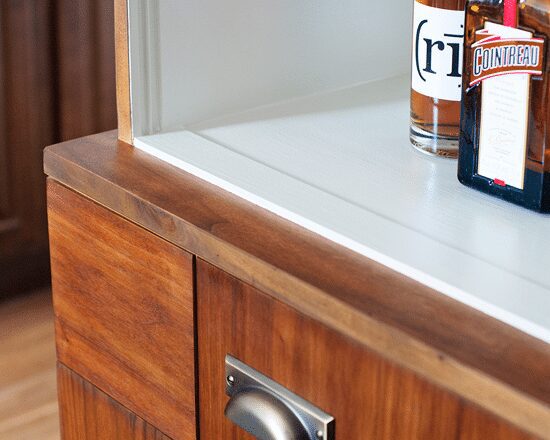
The trim piece we installed looks nice and polished, and although I had toyed with the idea of filling in the grooves along the sides, I’m happy Scott convinced me otherwise. They’re nice little details that add a little something extra overall:
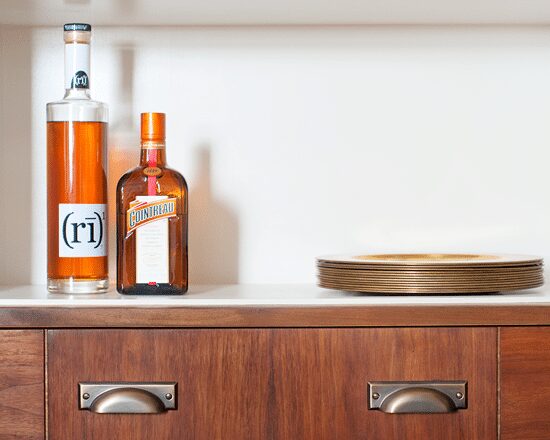
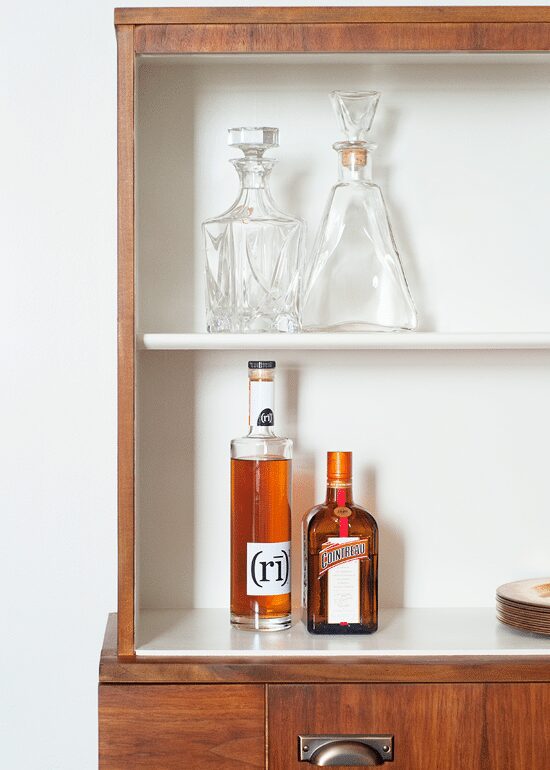
And the storage! We have way more booze to stash away (obviously), but we’d like to collect more glass decanters for the open shelving and stash larger handles below. Looking at the guts of the hutch – which received nothing more than a good cleaning with the oil soap – you’d think the exterior wood tone was always this shade!
Once the hutch was complete, we turned our attention to the island (watch out, I’m a painting machine, I tell you!), and it’s a few coats of Polycrylic from being done with the paint job. We’ve been shopping around for an odd-shaped butcher block that’s affordable, but the more we research, the picker we get. (Is anyone else that way?) I think we’ve narrowed in on a winning hunk of maple, but we haven’t completely counted out Ikea. It looks like our favorite Swedish megastore has recently updated it’s inventory of counter options, but has anyone purchased butcher block from Ikea? What do you think?
Rejuvenation provided the hardware for our hutch, and we’re so, so thrilled they wanted to be a part of our renovation. As always, thank you for supporting those that support us.


So SO good! I’m convinced that there is nothing more rewarding than bringing new life to an old gem! Loving this little cutie patootie!
Wow, you can barely even tell it is the same piece! Very well done, I was a bit skeptical when you first showed the hutch to be honest, but it really turned out SO great! Well done!
its so pretty. I love it! Awesome work!
Beautiful! You guys take the time to do things right and it really shows. Love the hutch.
I installed a 3′ section of Ikea butcher block in my kitchen 18 months ago and I love it. I have the solid oak version and I think it is lovely. I treat it with mineral spirits occasionally but that is it. It isn’t near the sink, but otherwise I don’t bother to keep water off of it and it hasn’t been an issue at all.
Good to know, thank you!
Ditto Alisa’s comments. We installed 6′ of Ikea butcher block 14 months ago and love, love, love it. I did 2 heavy rounds of mineral oil after install, repeat every few months, and wipe up big puddles, but otherwise we don’t treat it too preciously. I love how it’s aged. Would avoid near sinks. I found it a great value in terms of hassle + $.
Dana (of House*Tweaking fame) posted yesterday about the new IKEA kitchen options. Check it out if you haven’t already. I’m so jealous of you ladies that get to redo your kitchens. My checkbook is thankful that my current kitchen was redone when I bought my house, but I can’t wait to gut a kitchen in a future home! Maybe I’ll update my counters and backsplash in the next few years to satisfy the itch…
^^I was about to say that!! Ha!
I think she said their walnut option wasn’t solid wood. But I remember Dana ordering her butcher block from somewhere so you might want to check her archives if you haven’t already.
Thank you! I’ll have to check out her latest post.
Looks great! The hardware is **perfect**, with a few more *****! Stripping is an absolute nightmare, but it looks like the Citristrip worked out pretty well for you! I have used green strippers that were just so-so on the effectiveness and chemical strippers that ate my gloves, so I might have to give that product a try next time.
As far as green strippers go, Citristrip is GREAT. We did run into issues a few summers ago when we were stripping lead paint with it (that was a nightmare for a thousand other reasons!), but for varnishes and latex paint, it can’t be beat.
This looks fantastic! I just finished refreshing some wood furniture I have, and did a combo of paint/ exposed wood like you did, but had the worst time with the Polycryclic, despite going through a million how-to’s and tips and videos. I ended up sanding it off and re-doing it all and finishing with wax.
If you haven’t done the Polycrylic yet on the island, I would love to see some tips, or in-process shots of you laying it on, sanding, etc. I get what I need to do, but I’m more of a visual learner, and didn’t get what I needed anywhere else online.
Thanks, and I love how the kitchen is coming along.
Hi Christina, what were the issues you had with the Polycrylic? And what finish of Polycrylic did you use (satin, gloss, etc)?
I think the reason that it’s hard to find photos is because it’s such a time sensitive step, that stopping to take photos could ruin the results pretty quickly. You have to move sort of fast and efficiently when it comes to the poly! I’m already almost done with that step, but I talk a little bit more about how I do it in this post: https://yellowbrickhome.com/2014/03/27/pink-varde/
I’ve never had better luck than when using Polycrylic, and when it comes to a painted piece, I feel like it just isn’t complete without it! I use a high quality 2″ angled brush for all the corners, and I’ve started using a foam roller for the large flat surfaces. A THIN, even coat is key, and sanding between each coat helps with adhesion. Let me know what you used and what problems you had, and I can try to help!
Kim, thanks for that link. I forgot to check your archives. I used satin finish over a dark latex paint on relatively flat side tables. I had brush strokes in the finish, and even with the sanding step and a second coat, it just kept showing brush strokes. I’ll try the roller next time… maybe with a smaller project to get used to it.
I think my biggest problems were 1) I was working the Polycrylic too much, thus getting brush strokes, or not having enough on my brush to make it through in one pass. But I didn’t want to over-do it and have a thick layer. 2) I panicked when it dried and when I did the sanding, because it looked terrible. If that’s how it’s supposed to look in the beginning, but gets better with more coats, then I would have kept going, but there was nothing online that I could find that told me it would be OK :) so I gave up, haha. I think that’s where the in process shots would have been helpful for me.
Ah, yes, poly in general is pretty tricky when using a brush over a large flat surface. I think you should definitely try a roller the next time, but go in knowing that it WILL show some bubbles. I found that a really quick light roll back over the bubbly areas minimizes them almost completely though. You don’t want to fuss with poly too much – that’s when the trouble starts to happen!
If you really want to avoid brush strokes you can always use foam brushes. I swear by them after painting four wood projects that all ended up with the smoothest satin finishes. Like Kim, I also sand between all coats, from primer to poly finish.
Wow I thought I loved that hutch befor, but now it’s amazing! Good work, I’m jealous!
That hutch is a show stopper now and the hardware is to die for. Well done!
Not sure if you’ve done it before but I’d like to see how you store your tools and stay organized!
We haven’t talked about that yet because our tools are a MESS. But we’ll be organizing all of that in the Work Room (behind the pocket door) once we can finalize the kitchen!
This piece is just amazing. In fact, all of your posts make me uber jealous I live where I do because you can’t find mid century ANYTHING. And if you do, it’s beat to hell.
But wow, gorgeous. It was well worth the work, guys.
Wow. What a transformation. The wood grain looks wonderful!
I have IKEA butcher block in my kitchen. We purchased the Oak and they have worked out well. Initially, we “sealed” the wood using multiple coats of mineral oil, but even though I would wipe the counter tops down monthly with more oil, a few red wine stains got past me! After about a year, I got tired of the upkeep and sealed them with Waterlox. So. Much. Better!
Oh! Thank you for that tip! We’re new to butcher block, so we’re soaking in all your comments.
I’m looking forward to seeing what you do for the island. Have you heard of Horigan Urban Forest products? They’re in Skokie and we picked up some beautiful walnut there awhile back for some small household projects. Their lumber comes from trees in the Chicago area that needed to be moved or cut down for whatever reason.
Thanks for that recommendation! Just checked out their site – it’s definitely a place we’ll need to visit!
What an incredible transformation! I just can’t believe the hutch cleaned up so well – that wood grain is drool-worthy! Way to go!
Wow, it looks beautiful — you totally restored the beauty of this piece. Maybe even better than it originally looked. Well done.
I used IKEA butcher block for the kitchen/island in my old 2-flat in logan square and the one thing that I did notice is that you have to keep up with the care of it. Mineral oil or another finish is well worth the time and effort. The one in the tenants apartment became totally discolored because they didn’t keep up with the care and the one in my apartment stayed looking like new despite all the daily abuse.
Just gorgeous!!!
You two will never stop amazing me. Nice work.
We miss you, Uncle Brain!
great work!! she’s a beaut!
so cute! You make me wish I had the patience to refinish furniture. The coffee table I picked up 7 years ago is still waiting for some love!
Looks awesome! Well worth the hard work :)
Gorgeous. All that work was worth it!
Glorious! Looks awesome
What a transformation! Love the darker color and the contrast with the white shelves. And those decanters! :)
It’s absolutely gorgeous!!
Amazing!!! I was so excited to see what you had planned for this hutch and it looks better than I could have imagined. I picked up a small dresser a few months back and finally decided to paint it. Now that I’ve been reading your blog for a few weeks, I’m inspired to try to clean it up and restore the wood instead (which I totally prefer for this dresser). The drawer fronts are veneer. Will a sanding and then your wood pick-up process work? When do you determine that the finish has to be stripped? Also, can I clean the inside of the drawers with the mineral spirits and the oil soap? Thank you!
Thanks, Sajida!
Does your dresser have polyurethane on it already? (Usually you can tell right away if it’s a little yellowed and shiny.) If so, it will need to be stripped (citristrip) and cleaned with mineral spirits before moving to the refresh. If your dresser does NOT have poly on it, you can skip right to the wood refresh steps – sanding, oil soap, oiling, and feed-n-wax. I’ve gotten into the habit of using TSP/deglosser before the oil soap, since it will pick up any extra grime that may have been left behind in sanding. Depending on how bad of shape it’s in, you might get away with a hand sanding.
This hutch has a real wood veneer, and most veneers can stand a sanding at least once in their lives. Just be REALLY careful close to the edges, because if the veneer chips during the sanding process, the particle board (or usually something similar) underneath will not take the oiling/stain the same way. I accidentally chipped the edges of the front drawer, but I touched it up with brown paint :)
As for the drawer insides, I usually stick to the oil soap or something mild, like Mrs. Meyers!
Thank you so much. Can’t wait to get started!
I’m amazed at the results you got from the Restor-a-finish and the Feed n Wax!
Wow! It looks seriously amazing, you have done a great job.
Leah
x
Your hutch turned out beautifully! I’m refinishing a cedar chest and had originally planned to stain it then poly it. After a good sanding though most of the imperfections have cleared up. After reading your post I’m considering ditching the stain for restor a finish. Did you use poly on the wood areas of the hutch too or just the painted area? The restor a finish instructions say not to use poly over it.
I used Polycrylic ONLY on the area that I painted. The Feed-n-wax was used for the wood areas as a finishing touch to nourish and condition the wood. If you wanted to poly the wood, you would not be able to use Polycrylic because it’s water based, and it would peel off of the oiling that you spent the time doing! If you DID want to protect the wood with poly, however, use an oil based poly. The reason we don’t do that is because, personally, we don’t like the way that oil based polys will yellow over time.
Good luck on your cedar chest!
Wow, I can’t get over how amazing the wood turned out with no stain. Incredible. Doesn’t hurt that you added some sexy hardware! I love Rejuvenation! You guys executed on a really beautiful vision. I can’t believe how quickly your kitchen is coming along too. If I were you, working as hard as you have been on your house, my liquor bottles would be a lot more empty…
:)
Ha! Let’s just say those are only the pretty bottles… the handles (almost gone, of course) will be hidden below.
Wow! Looks great!
Great job! The result is great! The closet looks beautiful! Storage Heasden Ltd.