

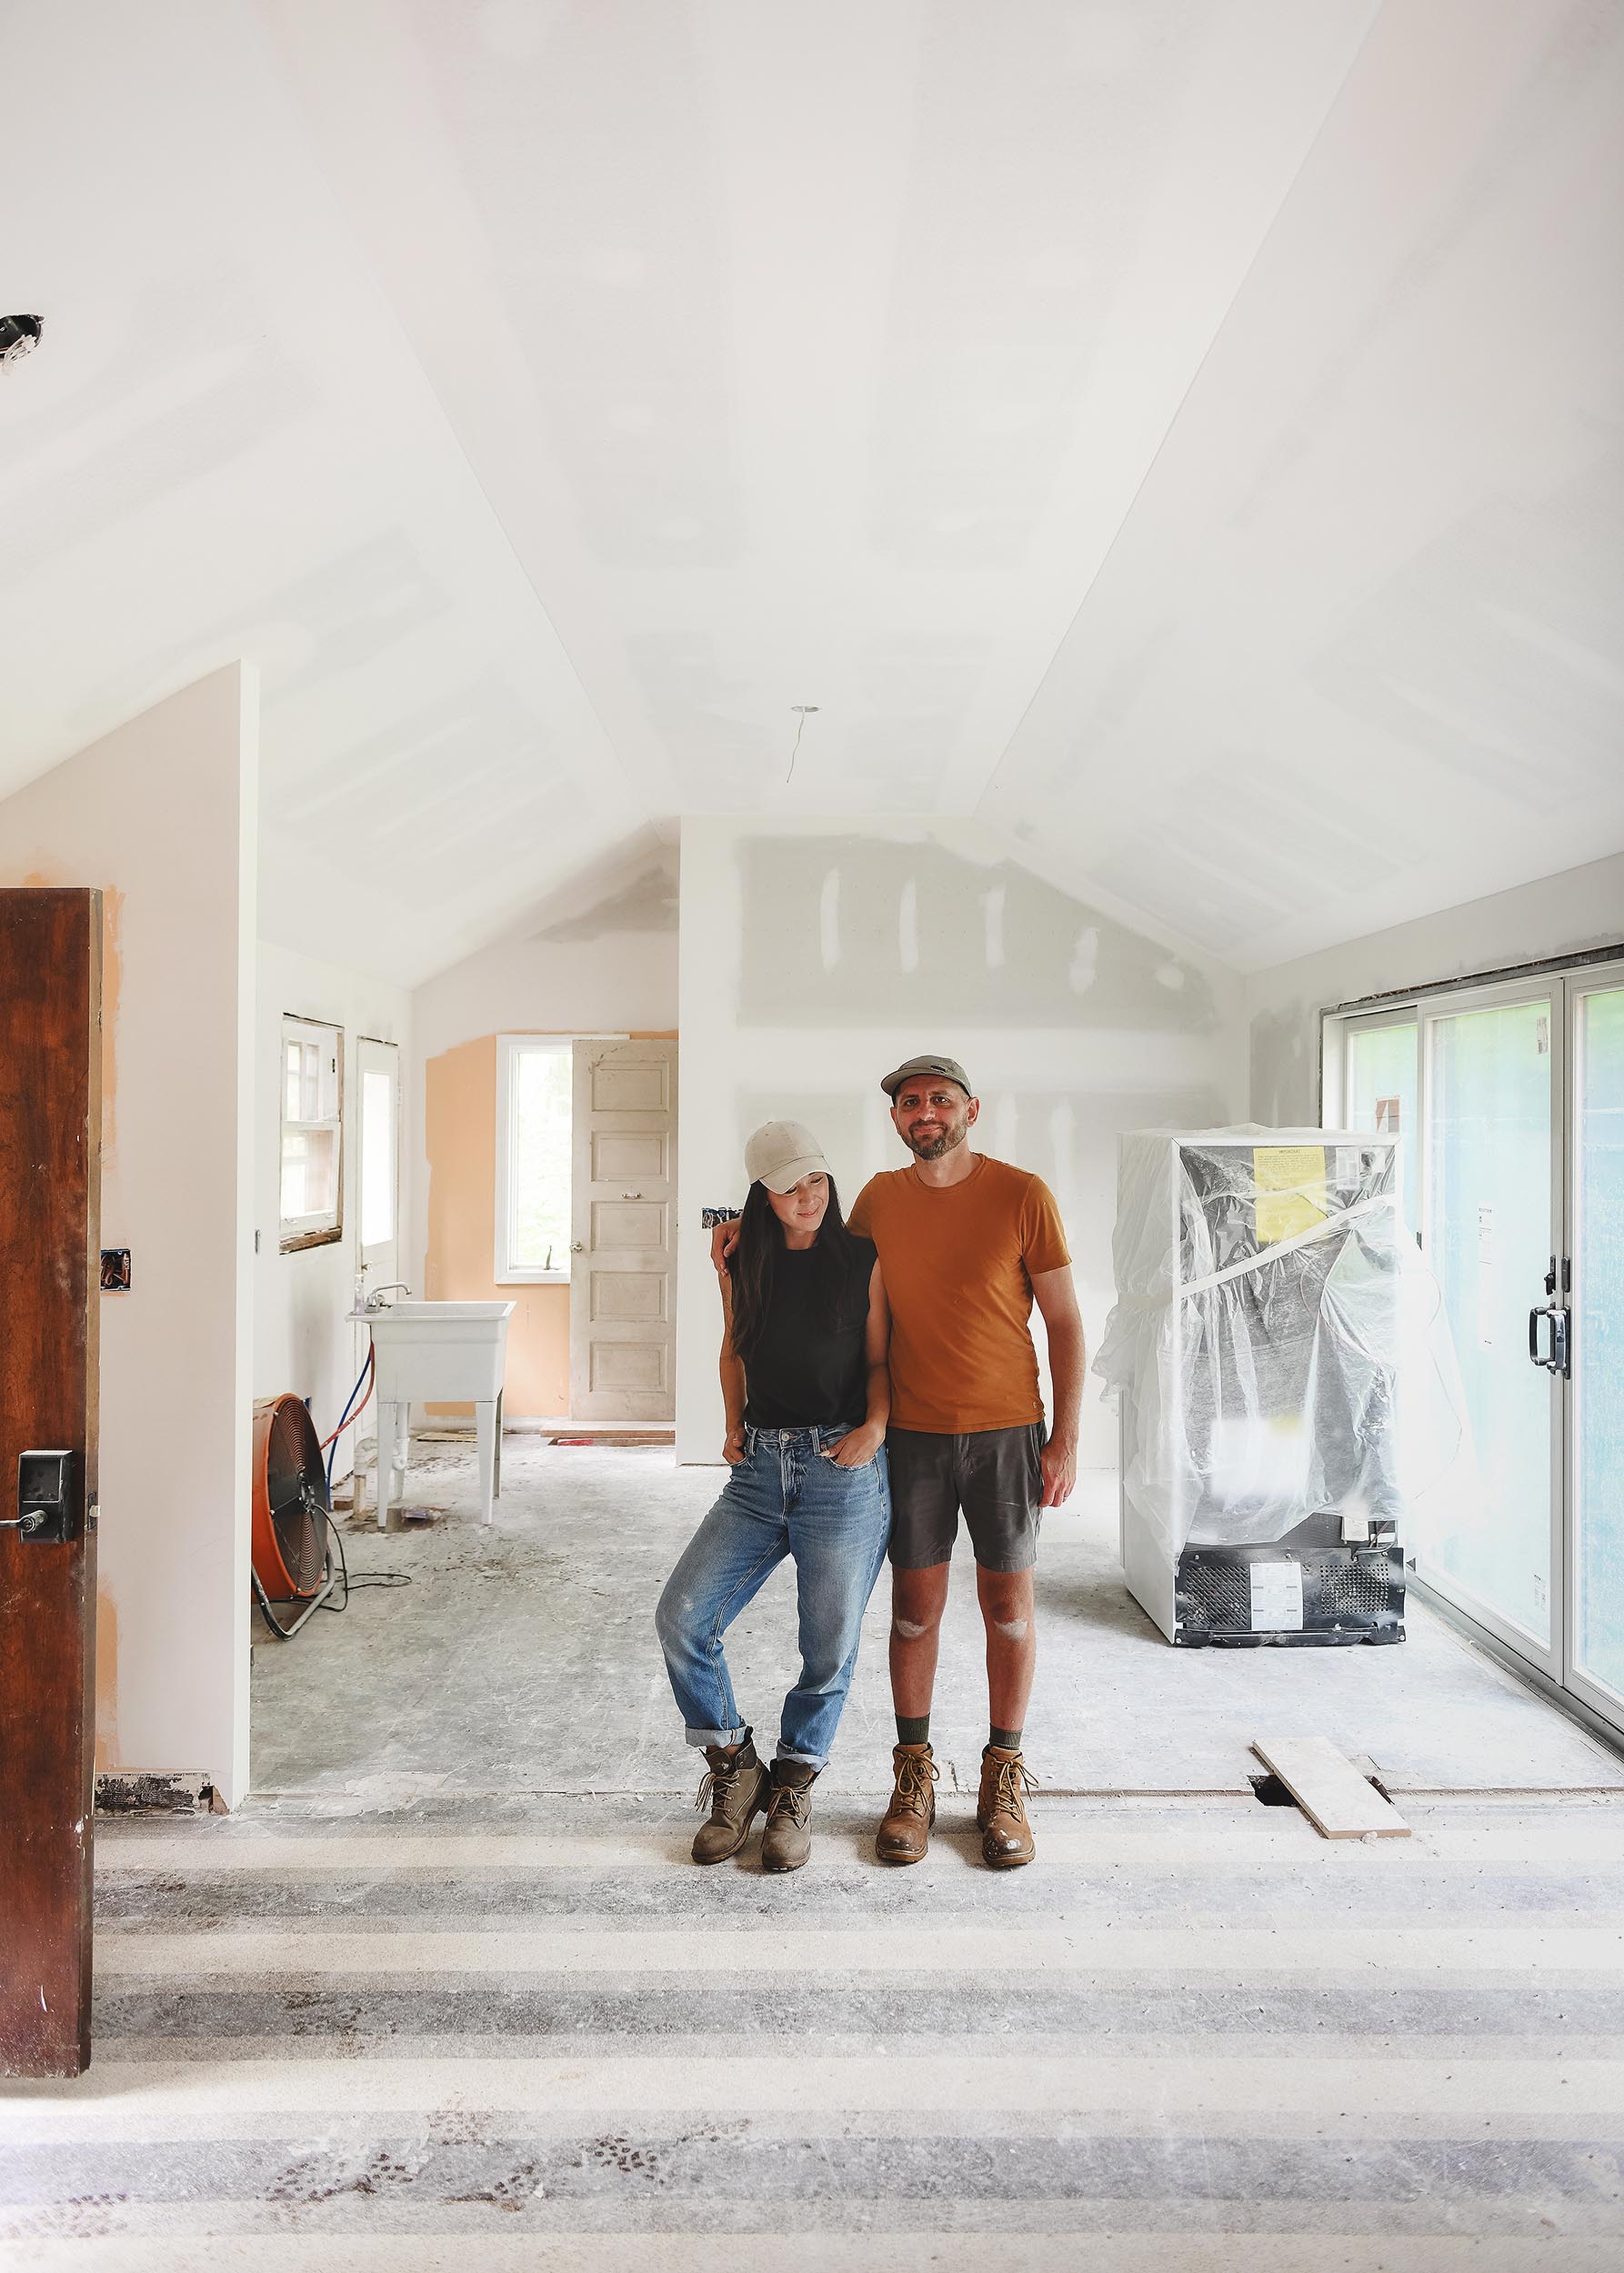
Today we’re revealing the first images of the completed drywall at our Red House project! The ceilings are vaulted and the space is more open than ever!
In This Post
A Long Time Coming!
We almost can’t believe that our Red House project has nearly reached ‘white box’ status. We broke ground back in May and the constant juggling of up to five different contractors at any given time has paid off. The ceiling in the living room/dining room/kitchen space has been leveled and vaulted and drywall is hung and finished.
Let’s have a look at how things have changed, shall we?
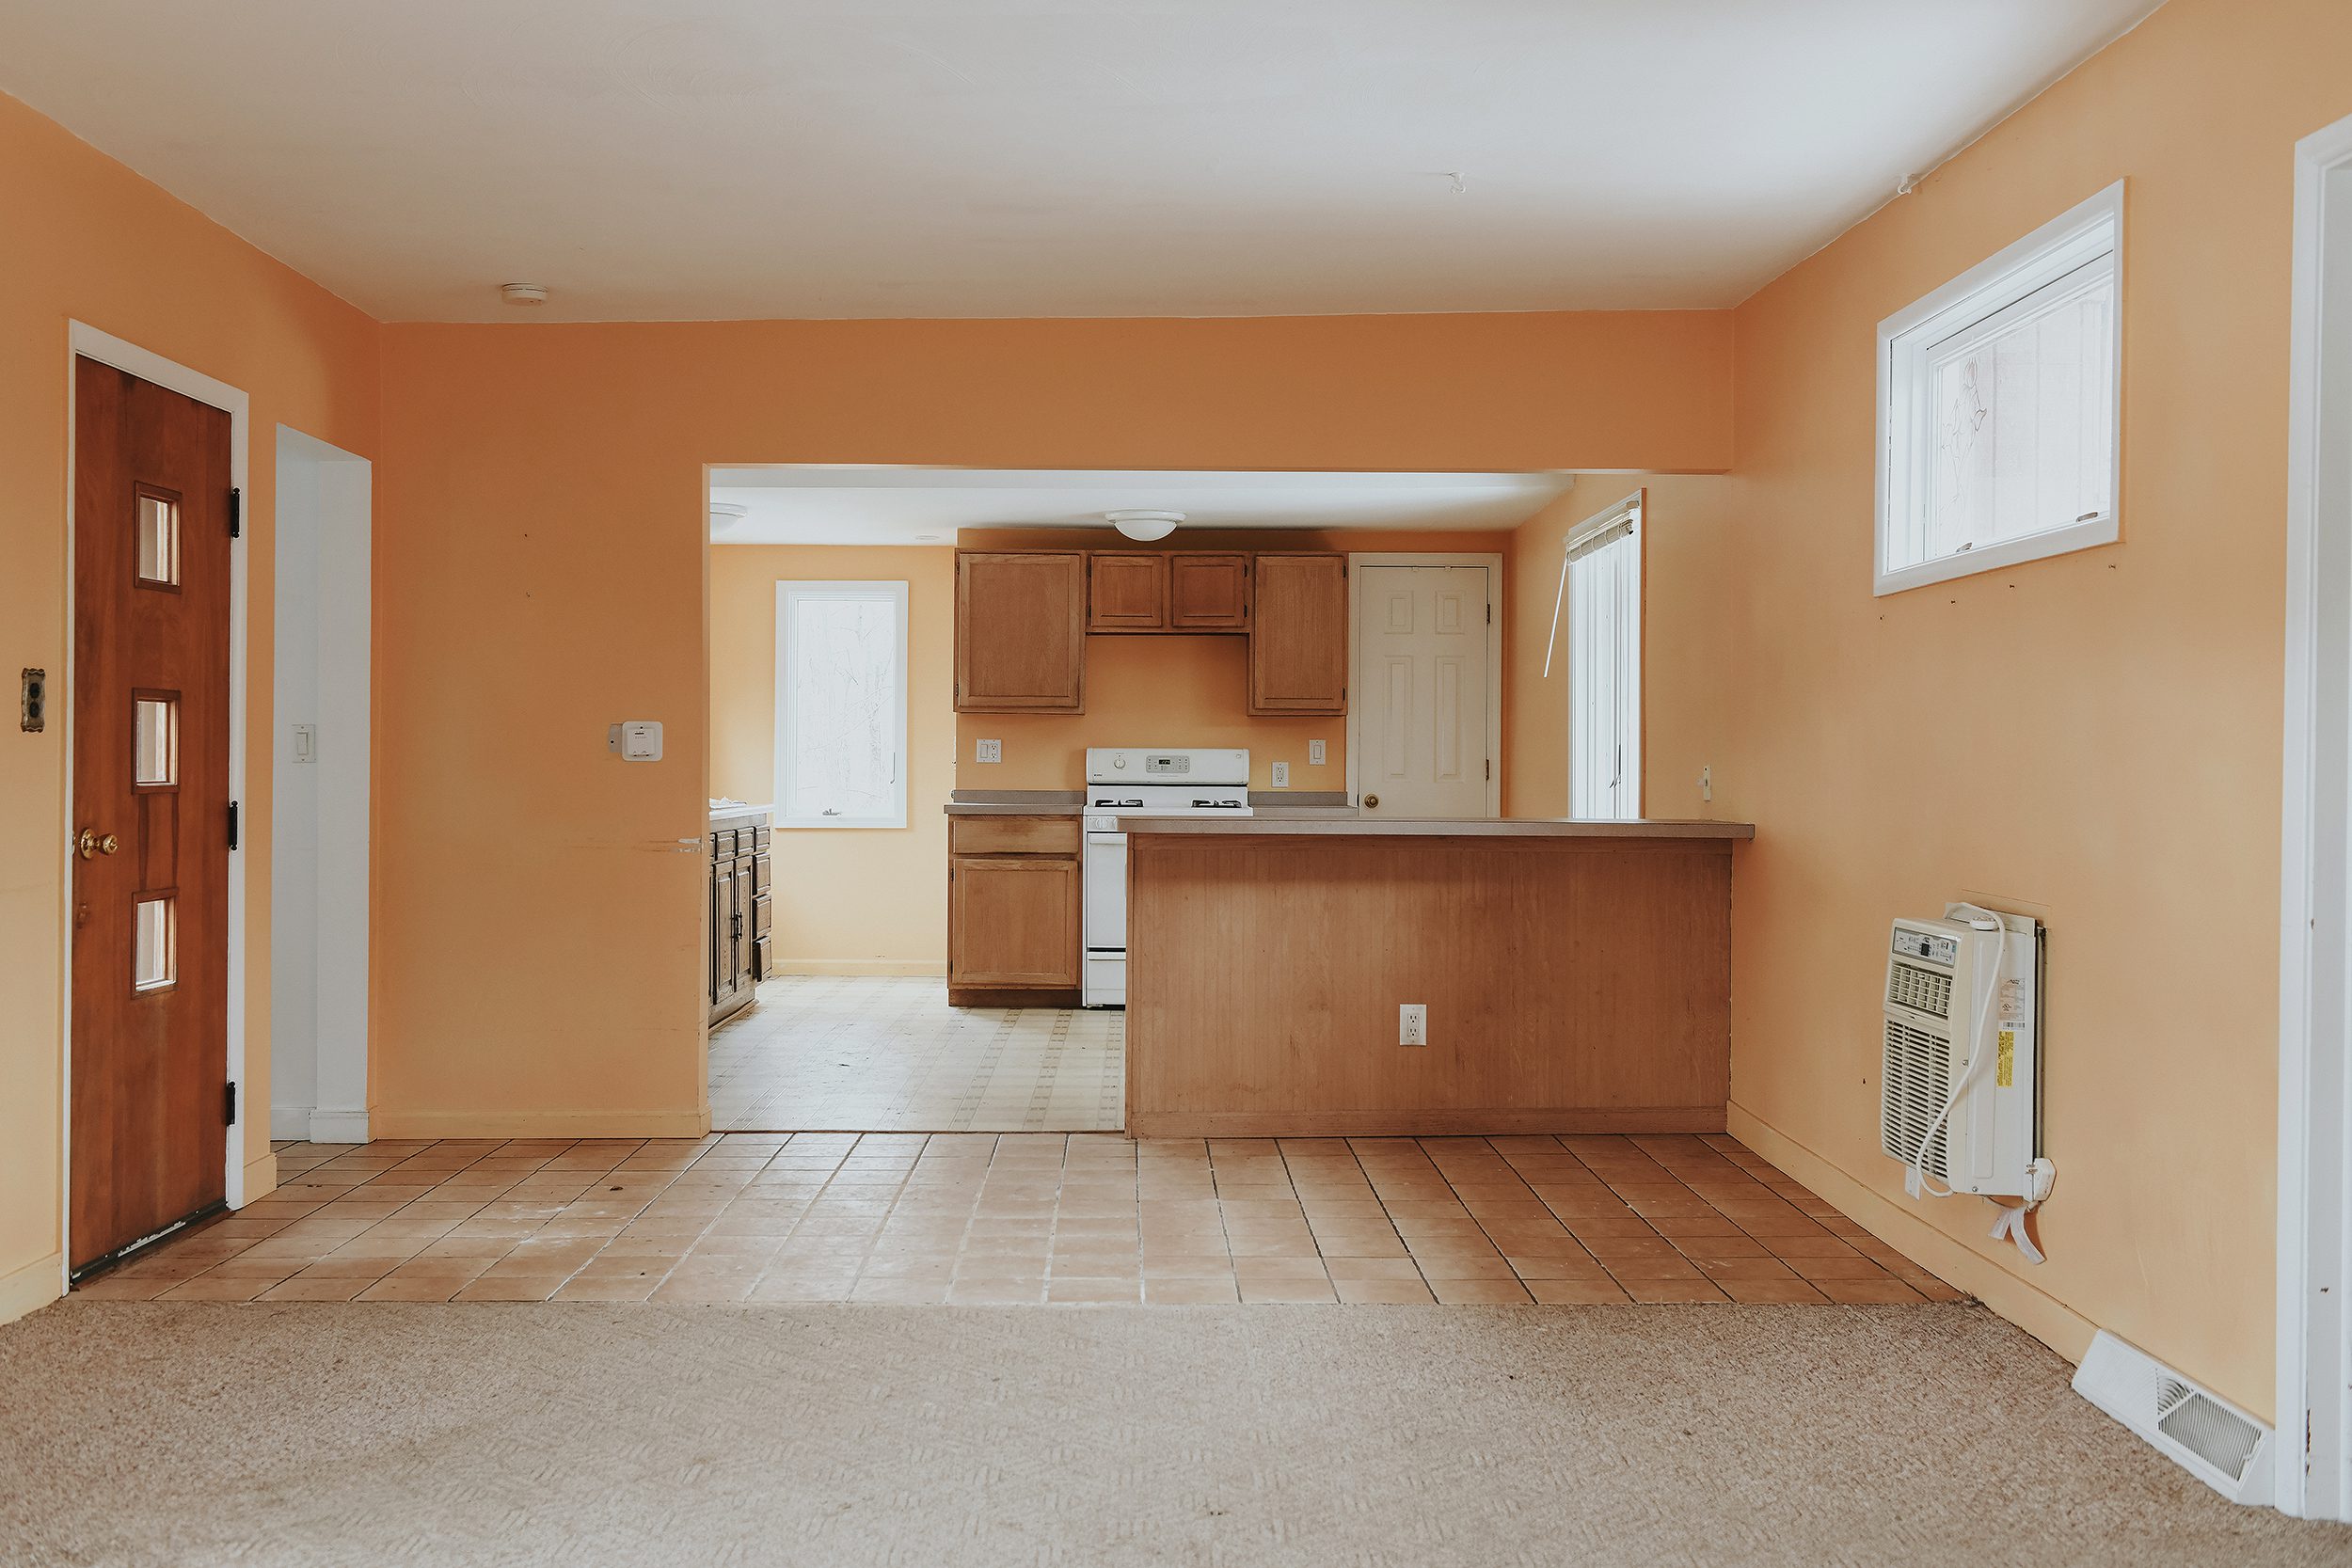
Kitchen + Dining | Before
The kitchen and dining room of this home have always been fairly open, but when presented with the option to eliminate the wall between the spaces almost completely, we jumped at it. In conjunction with wanting to open the space up as much as possible, there were structural reasons for opening things up as well. When we initially opened up the ceiling to figure out why there was an 8 inch step down in the kitchen ceiling, we discovered mold. A lack of proper ventilation was the culprit, so that needed to be addressed as well. After lots of back and forth, the decision was made to vault the ceilings to give us one even open space. The difference is monumental!
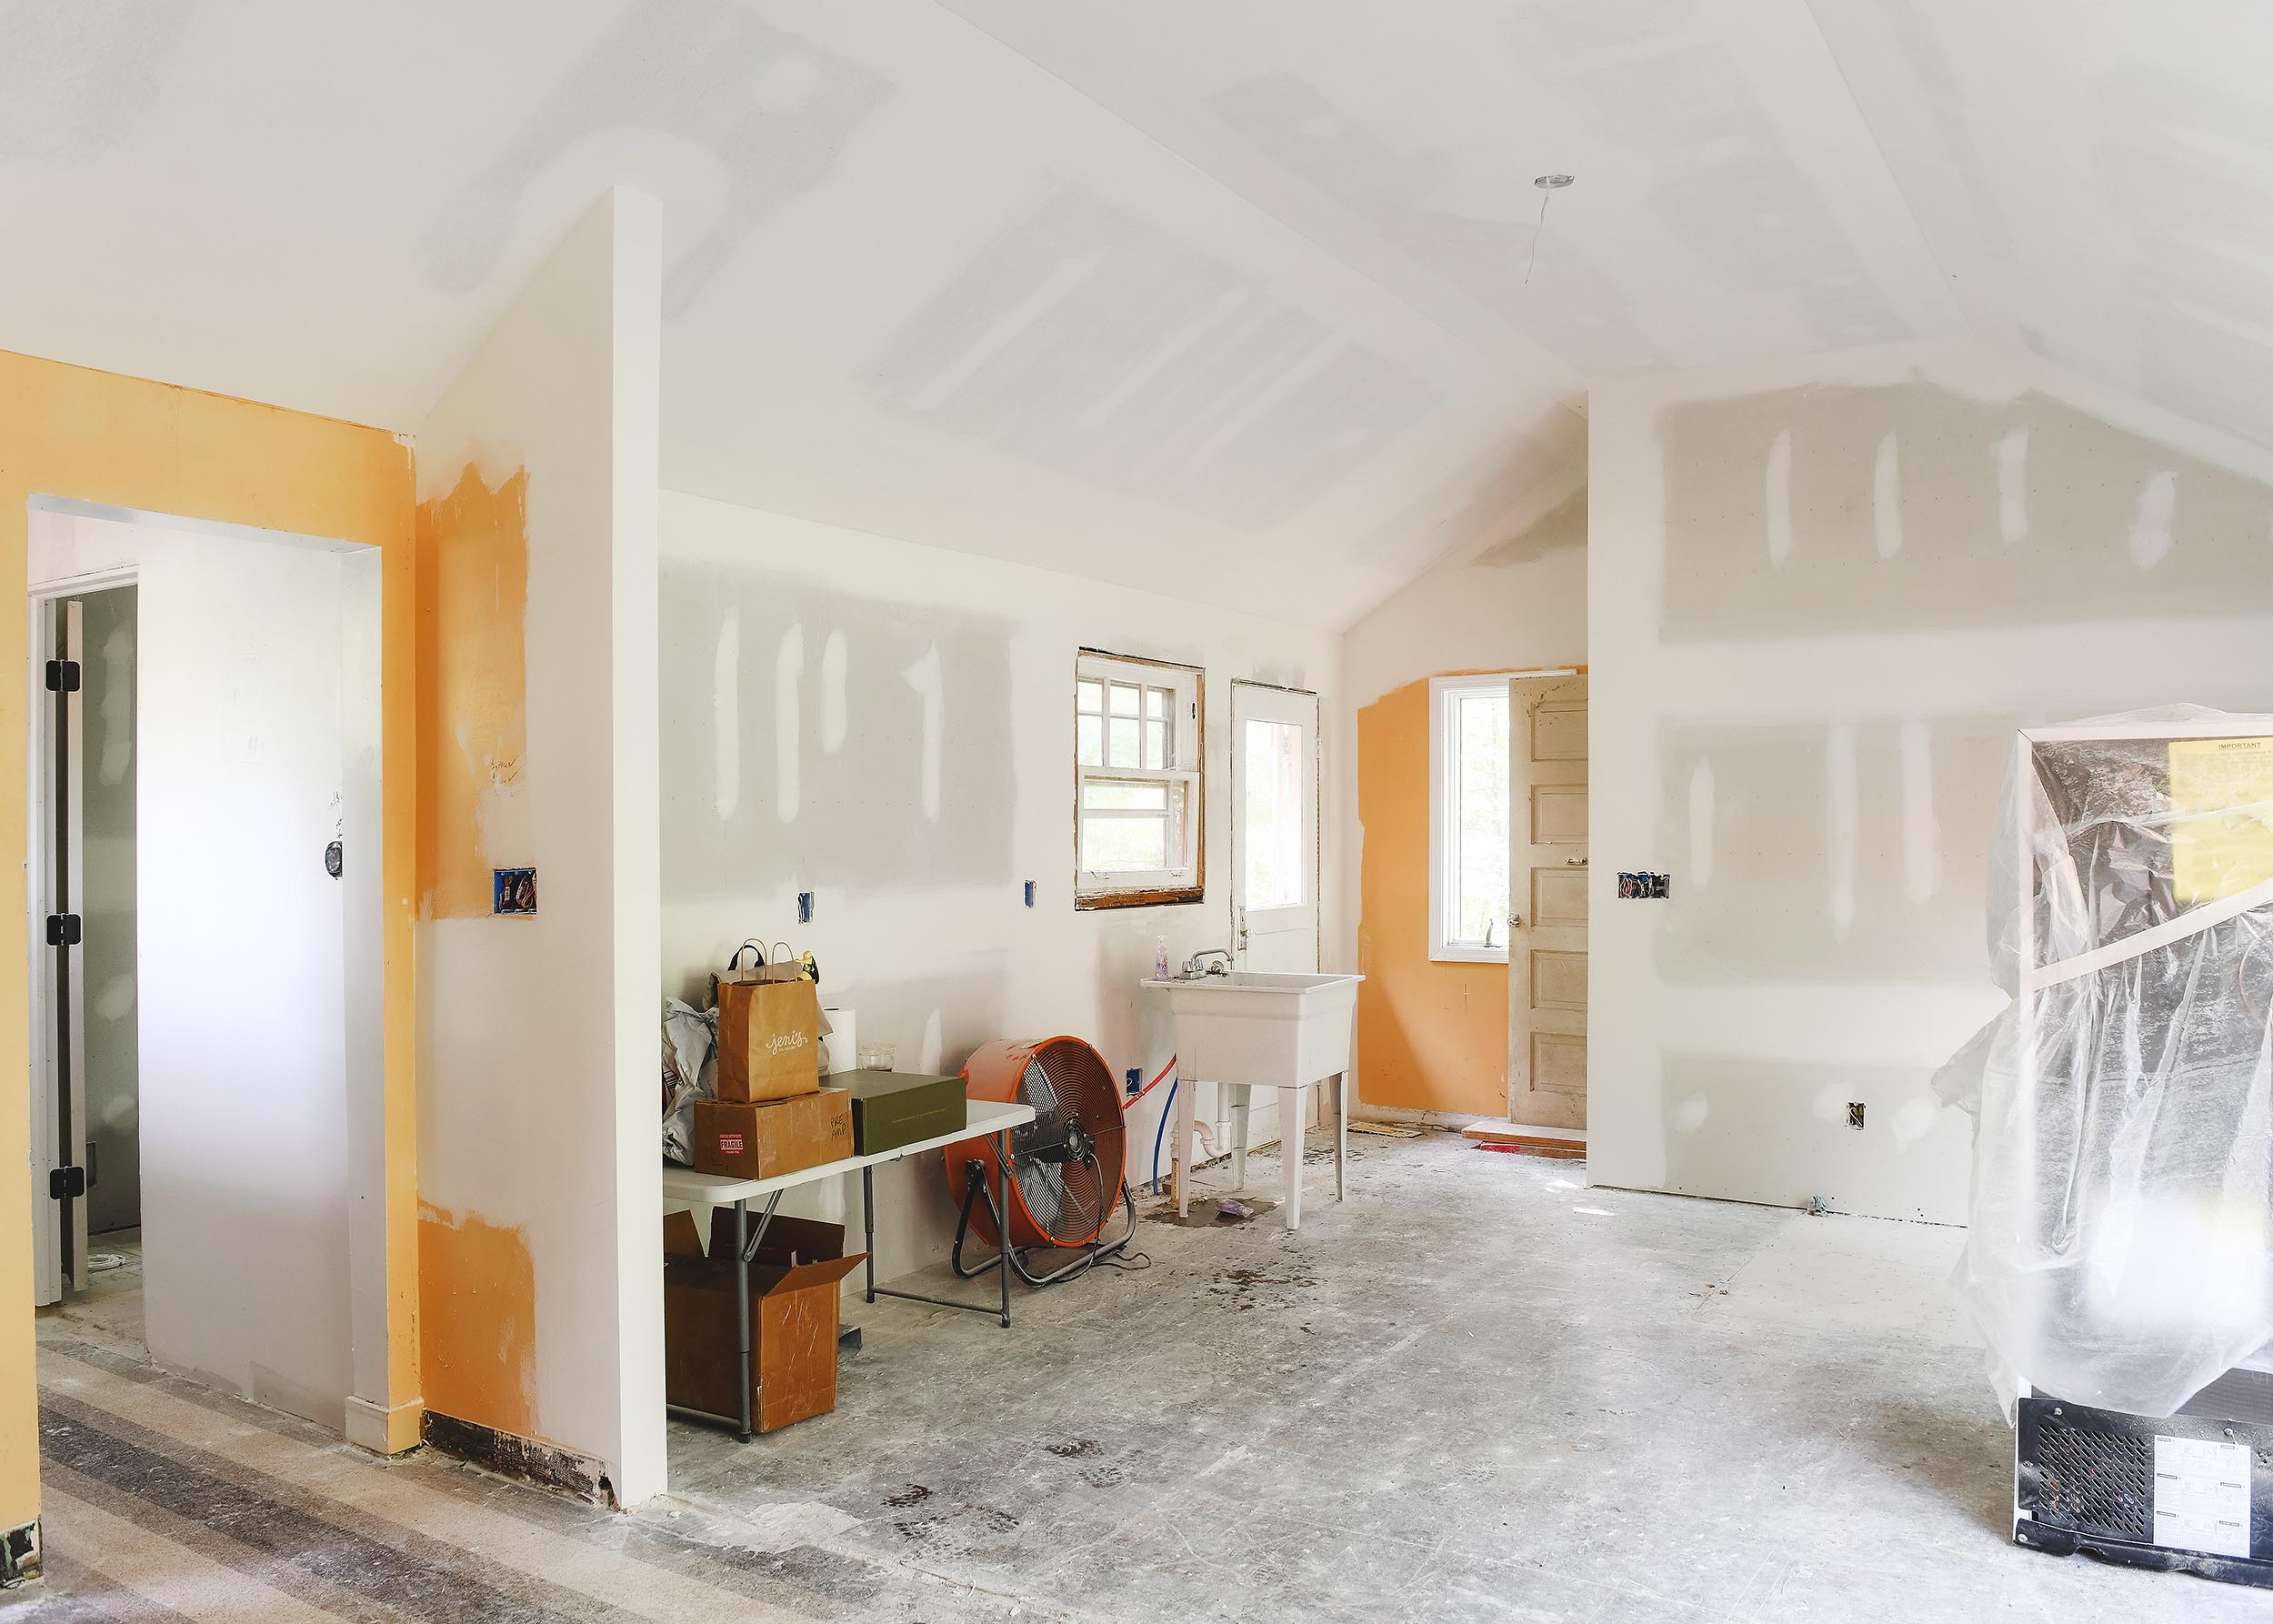
Kitchen + Dining | During

Kitchen + Dining | Today

In seeing the three photos above, it’s almost hard to believe it’s the same space! The ceilings in the kitchen went from around 7’4″ when we purchased the home, to over 10′ at the current peak! The 14′ sliding door allows light to stream into the space and the ceiling shape is a dream.
Designing a Ceiling Around a 1957 Feature Wall
The redwood feature wall(s) and the big bank of 6 windows at the end of the living room are some of the home’s elements that were the most important for us to preserve. When we learned that the ceiling height would need to drop by over six inches at the corners to allow for proper ventilation, we were a little downtrodden. We did, however, realize that gaining two entire feet of ceiling height at the center would visually negate the effects of the decrease at the walls. The photos below will help to explain the change.
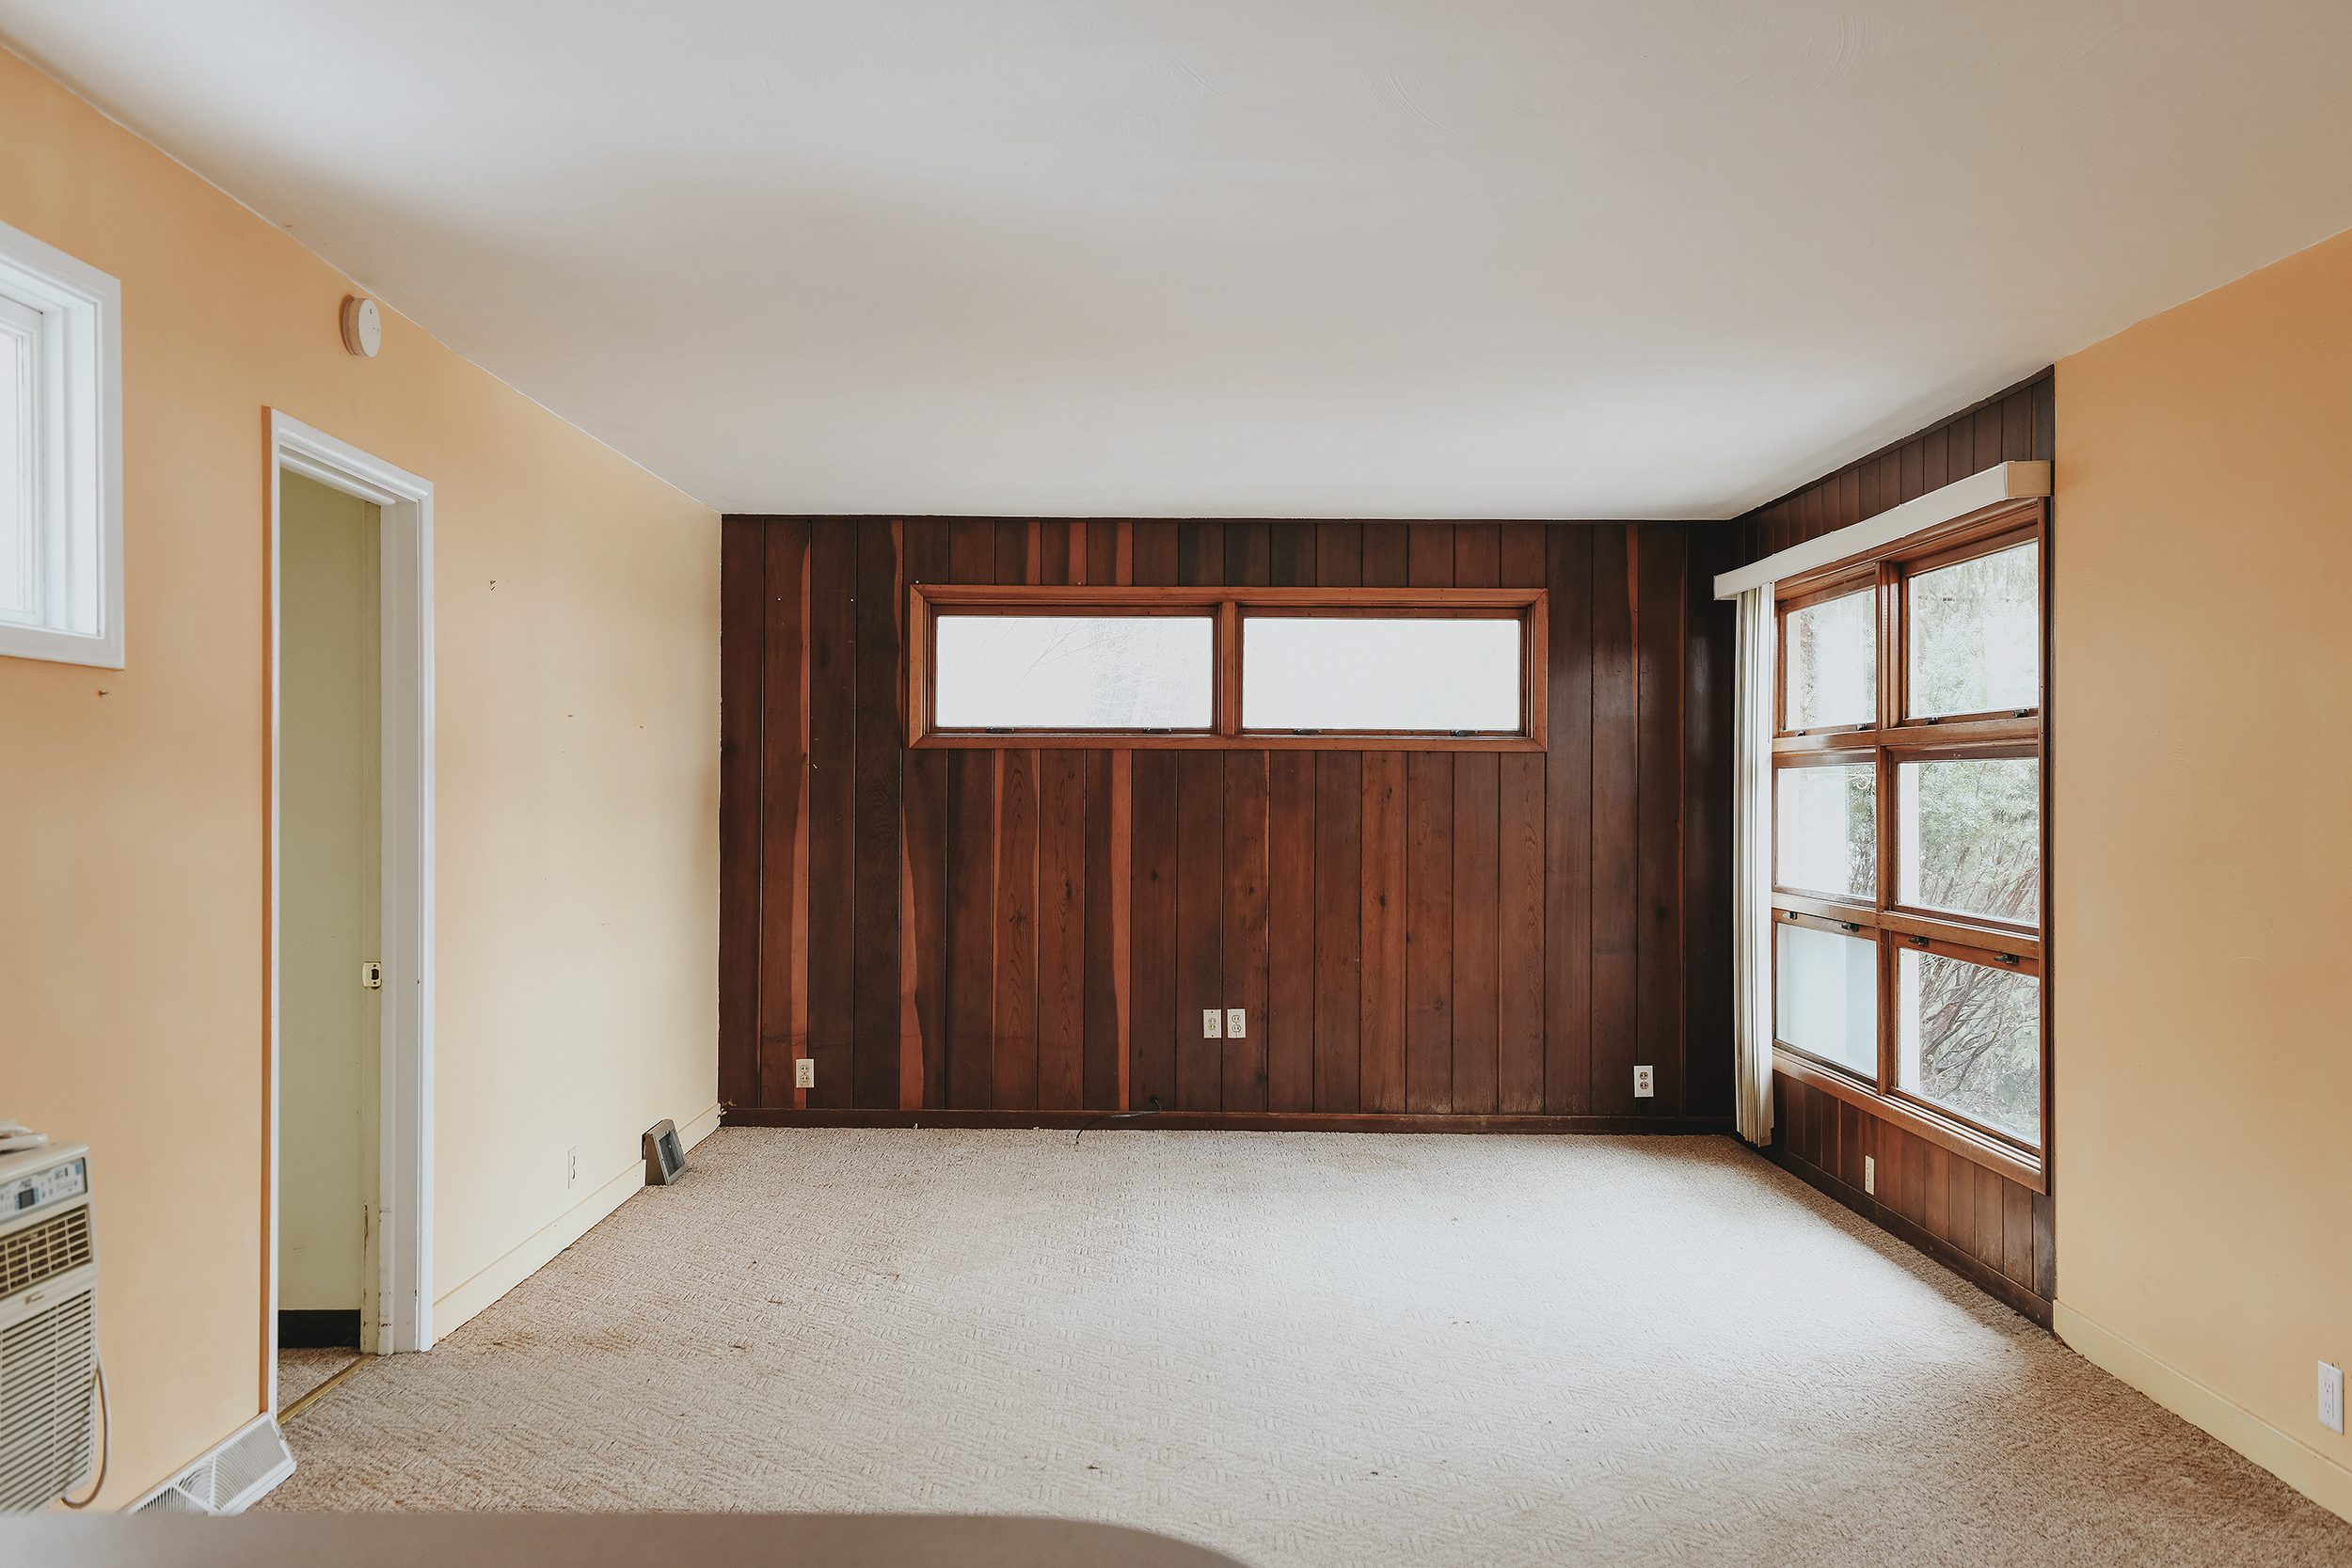
Living Room | Before
Here’s how the space looked on day one. Notice the roughly eight inches of vertical space between the top of the double windows here? We’ll come back to this in a moment.
Living Room | During

Living Room | Today
As you can see below, we lost around six inches of height above the pair of windows below where the walls and ceilings connect. While it pained us to cover up any portion of the redwood wall, it was necessary to gain overall ceiling height at the peak and do it in a way that would allow the home to breathe properly and avoid future mold growth.


The ceiling is drywalled and mudded for now and will likely be primed and painted in the short term. Eventually, we’d like to install a wood treatment to the entire space, but that likely won’t happen until we’ve designed and finished the kitchen. There are simply too many lighting and electrical placements that need to be finalized before we could install a finish. Wood obviously can’t be patched the same way drywall can!
A Shifting Closet in the Big Bedroom
Initially, the larger of the two bedrooms (which we also refer to as the kids’ room) was the one room that wouldn’t have any drywall repair. With the exception of patching the in-wall AC unit hole, this room would act as a safe zone that wouldn’t require much construction. During the demo and planning phase, however, we realized that the closet was about three inches too shallow to accommodate the minimum depth for our selected washer/dryer combo unit. Given this information, we decided to reframe the whole closet to increase the depth. Since the whole front wall would need to be re-worked, we also took the opportunity to rearrange the doors and put the single door laundry closet on the left side. Here’s how it went down.
Kids’ Room | Before

Kids’ Room | Today
Please don’t mind the toilet or the enormous stack of hardwood flooring in the center of the room! Now that the drywall is complete, hardwood flooring and tile install are scheduled to begin next week. All of these spaces will look even more different a couple of weeks from now!

From One Bathroom to Two
The bathroom, as we inherited it, was laid out in a way to meet the needs of the previous owner. A large jetted tub dominated the space and made for a awkward dog leg in the room. We knew this layout wouldn’t serve our family, so we found a way to turn one oversized bathroom into two! Here’s how the full bathroom turned out.
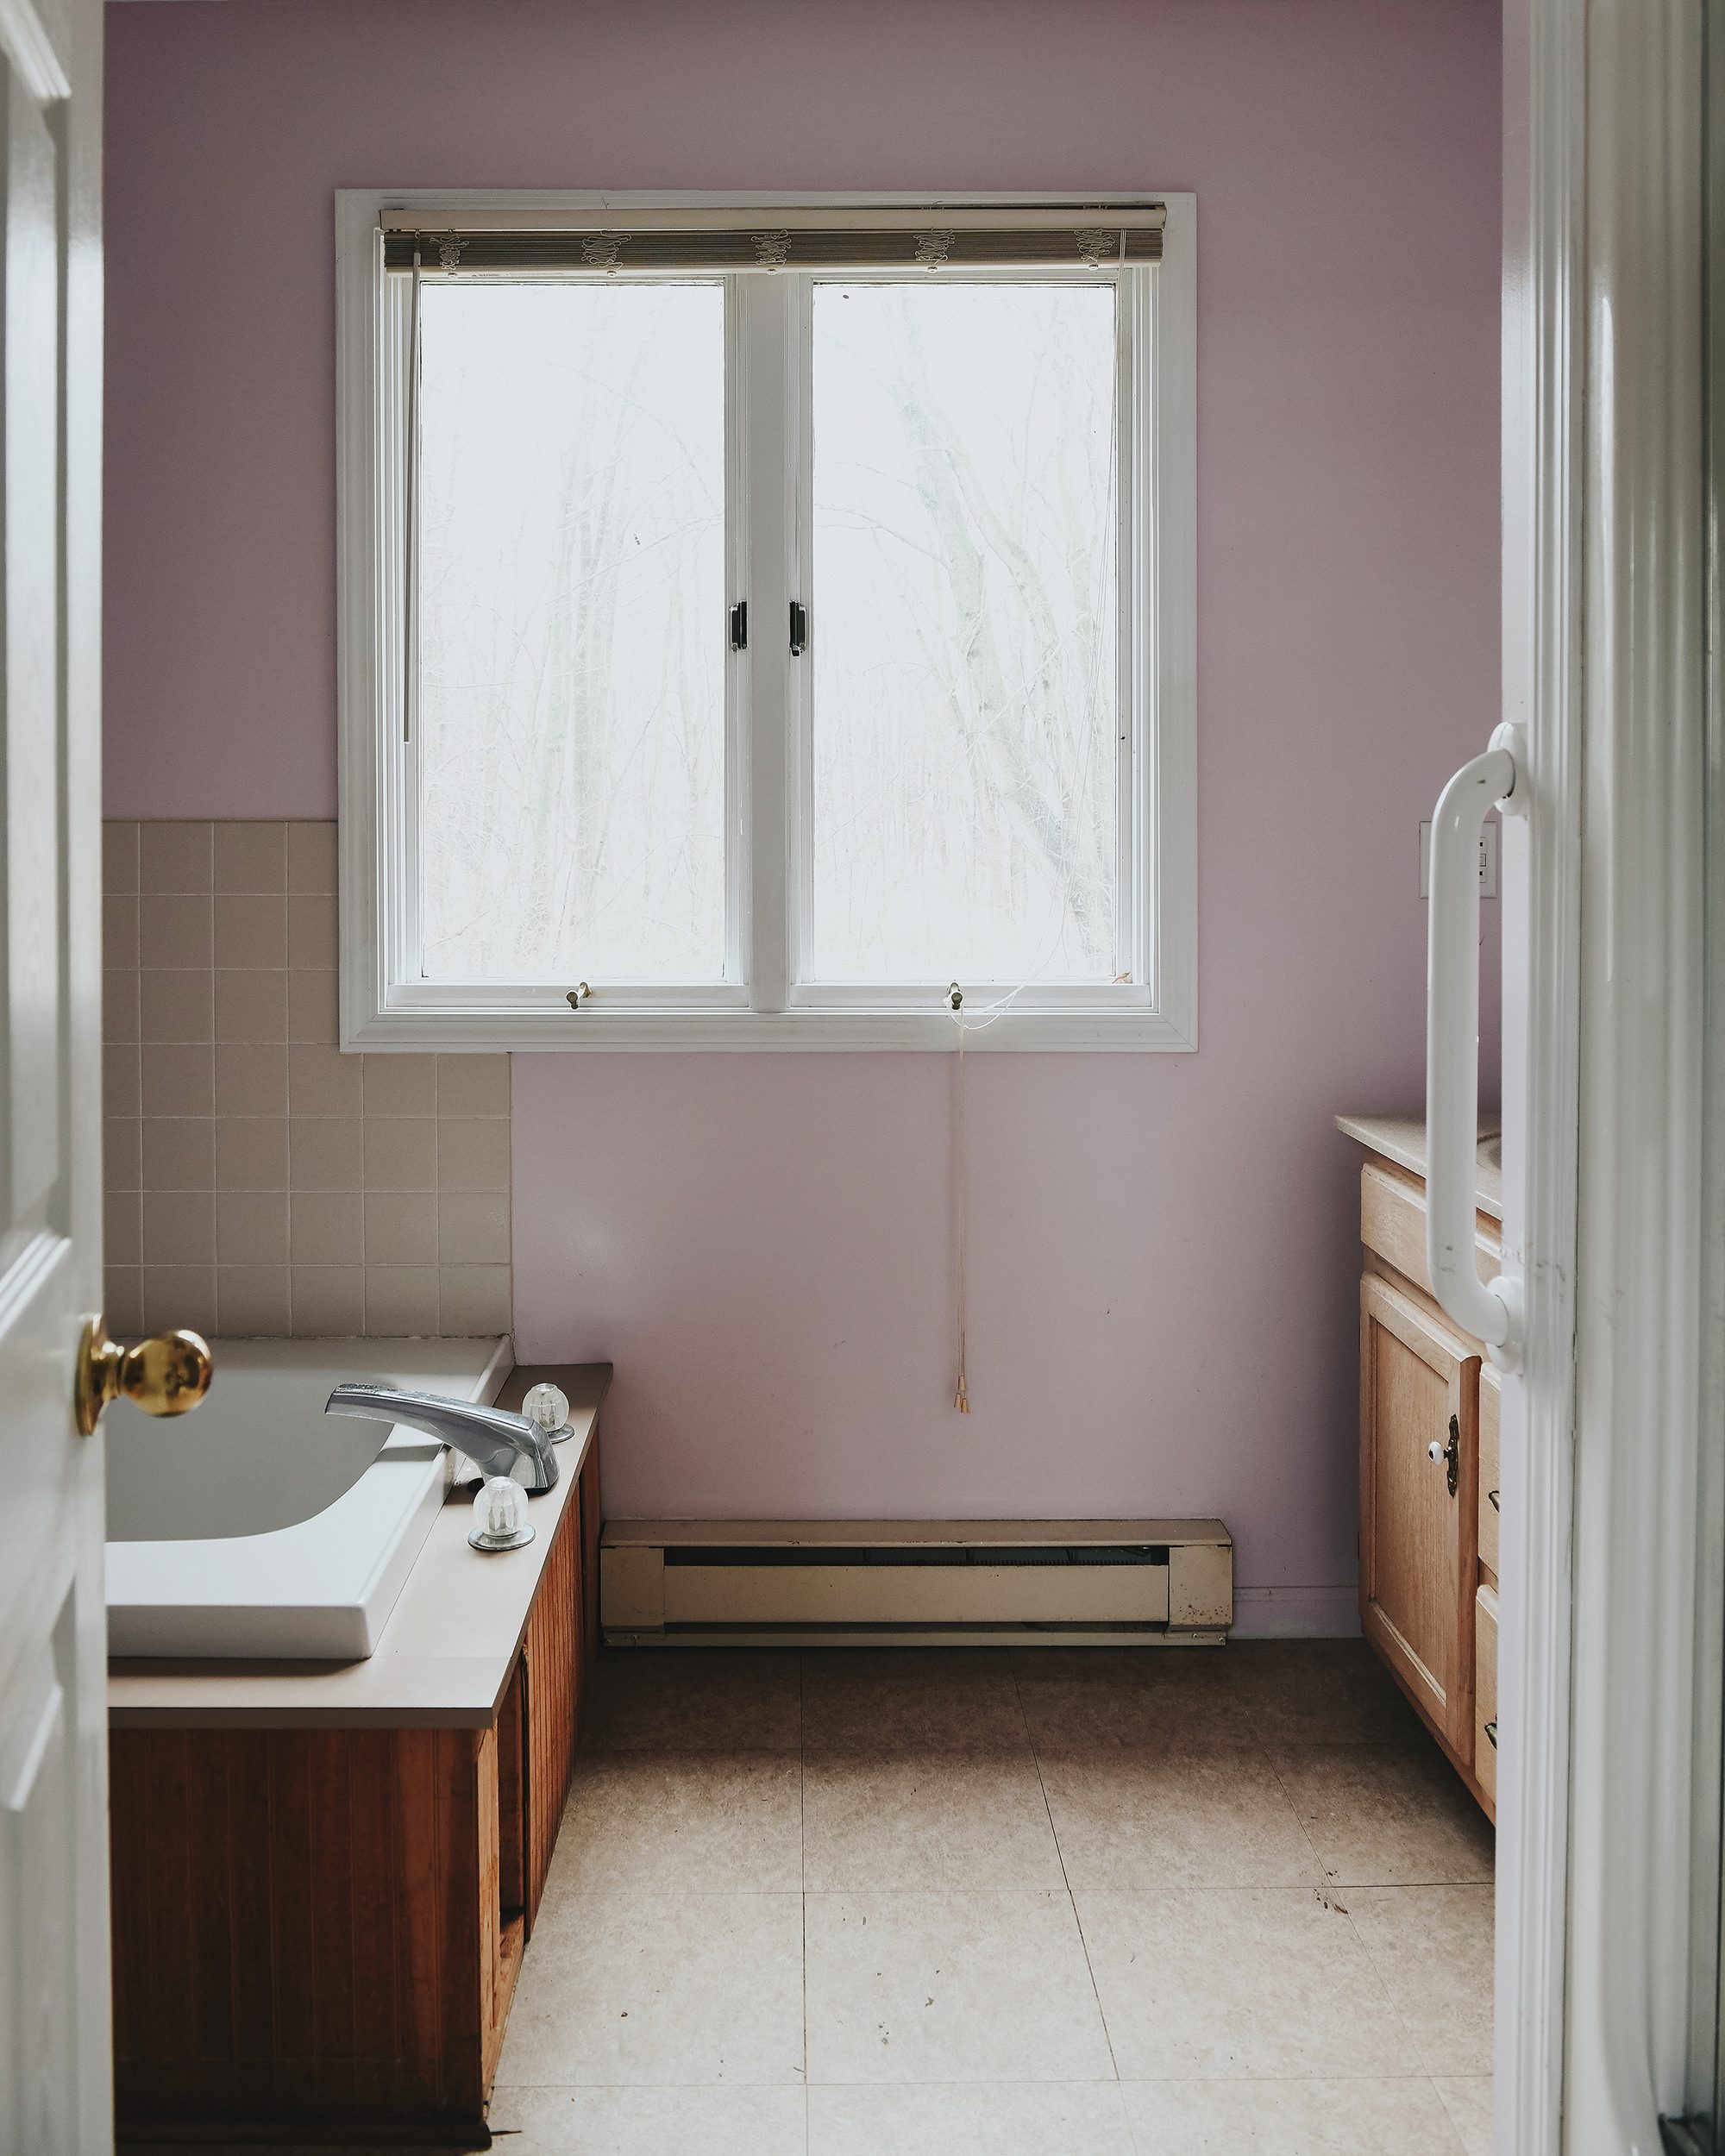
Primary Bathroom | Before
The previous window was large, but we didn’t love the shape or placement. We removed it in favor of a wider awning window that was also positioned higher up in the wall to allow for a sink and countertop below it.
Primary Bathroom | Today
Again, please look past the huge stack of tile and instead focus on the re-sized window and the fact that the room now terminates slightly to the left of it. On the other side of that wall is the ensuite half bathroom that’s located inside the smaller bedroom.

Getting There
While we’ve seen our share of delays in this project, we’ve come to accept them as a part of the equation. Drywall is an absolutely huge step in getting this home prepared for colder weather and moving on to finishing steps. In the next couple of weeks, we hope to see the completion of the hardwood flooring and the tile work in the bathrooms. This will put us one step closer to being able to spend the night in the house since we’ll have a working bathroom. We’re about to enter the really exciting portion of this project and we hope you’ll follow along!


I always look forward to your posts and love seeing the progress on the Red House!!
So happy you’re here, Brenda!
Amazing changes! Great to see how much has changed but it still feels like the same place. Looking forward to seeing what you do with this blank canvas.
Thank you!
Totally agree with this comment! I’ve also enjoyed seeing the progress.
Strangely, all empty it looks smaller to me with the vaulted ceilings (gives me camper vibes maybe?) but seeing the astonishing amount of height added above the paneled wall – wow! I can’t wait to see it all done and be proven completely wrong :)
Haha, time will tell!
Congrats on the great progress! It looks like it’s coming along nicely. As always, thanks for sharing with all of us.
Aw, we appreciate you.
So exciting! Love following along on your journeys!
Thank you!
Wow what a difference. You guys sure have vision!
Love the update and can’t wait to see how it unfolds! I’ve stopped using social media, so I’m always excited for a blog post :).
So why was there an inch difference in the ceiling? White box status is a huge milestone, and I’m excited to see everything else to come!
Hi Julie! The 8″ drop in the kitchen was from an old addition to the home. From what we can tell, it started life as a small cottage that was likely built in the 1920’s. Our best guess is that both bedrooms, the whole paneled section of the living room and the back half of the kitchen were added on with the remodel in 1957.