

This post is sponsored by our friends at Viewrail, the authority in modern railing solutions. Today, we’re talking through the DIY installation of their Onyx Rod Railing system as one of the final steps in our Two Flat renovation!
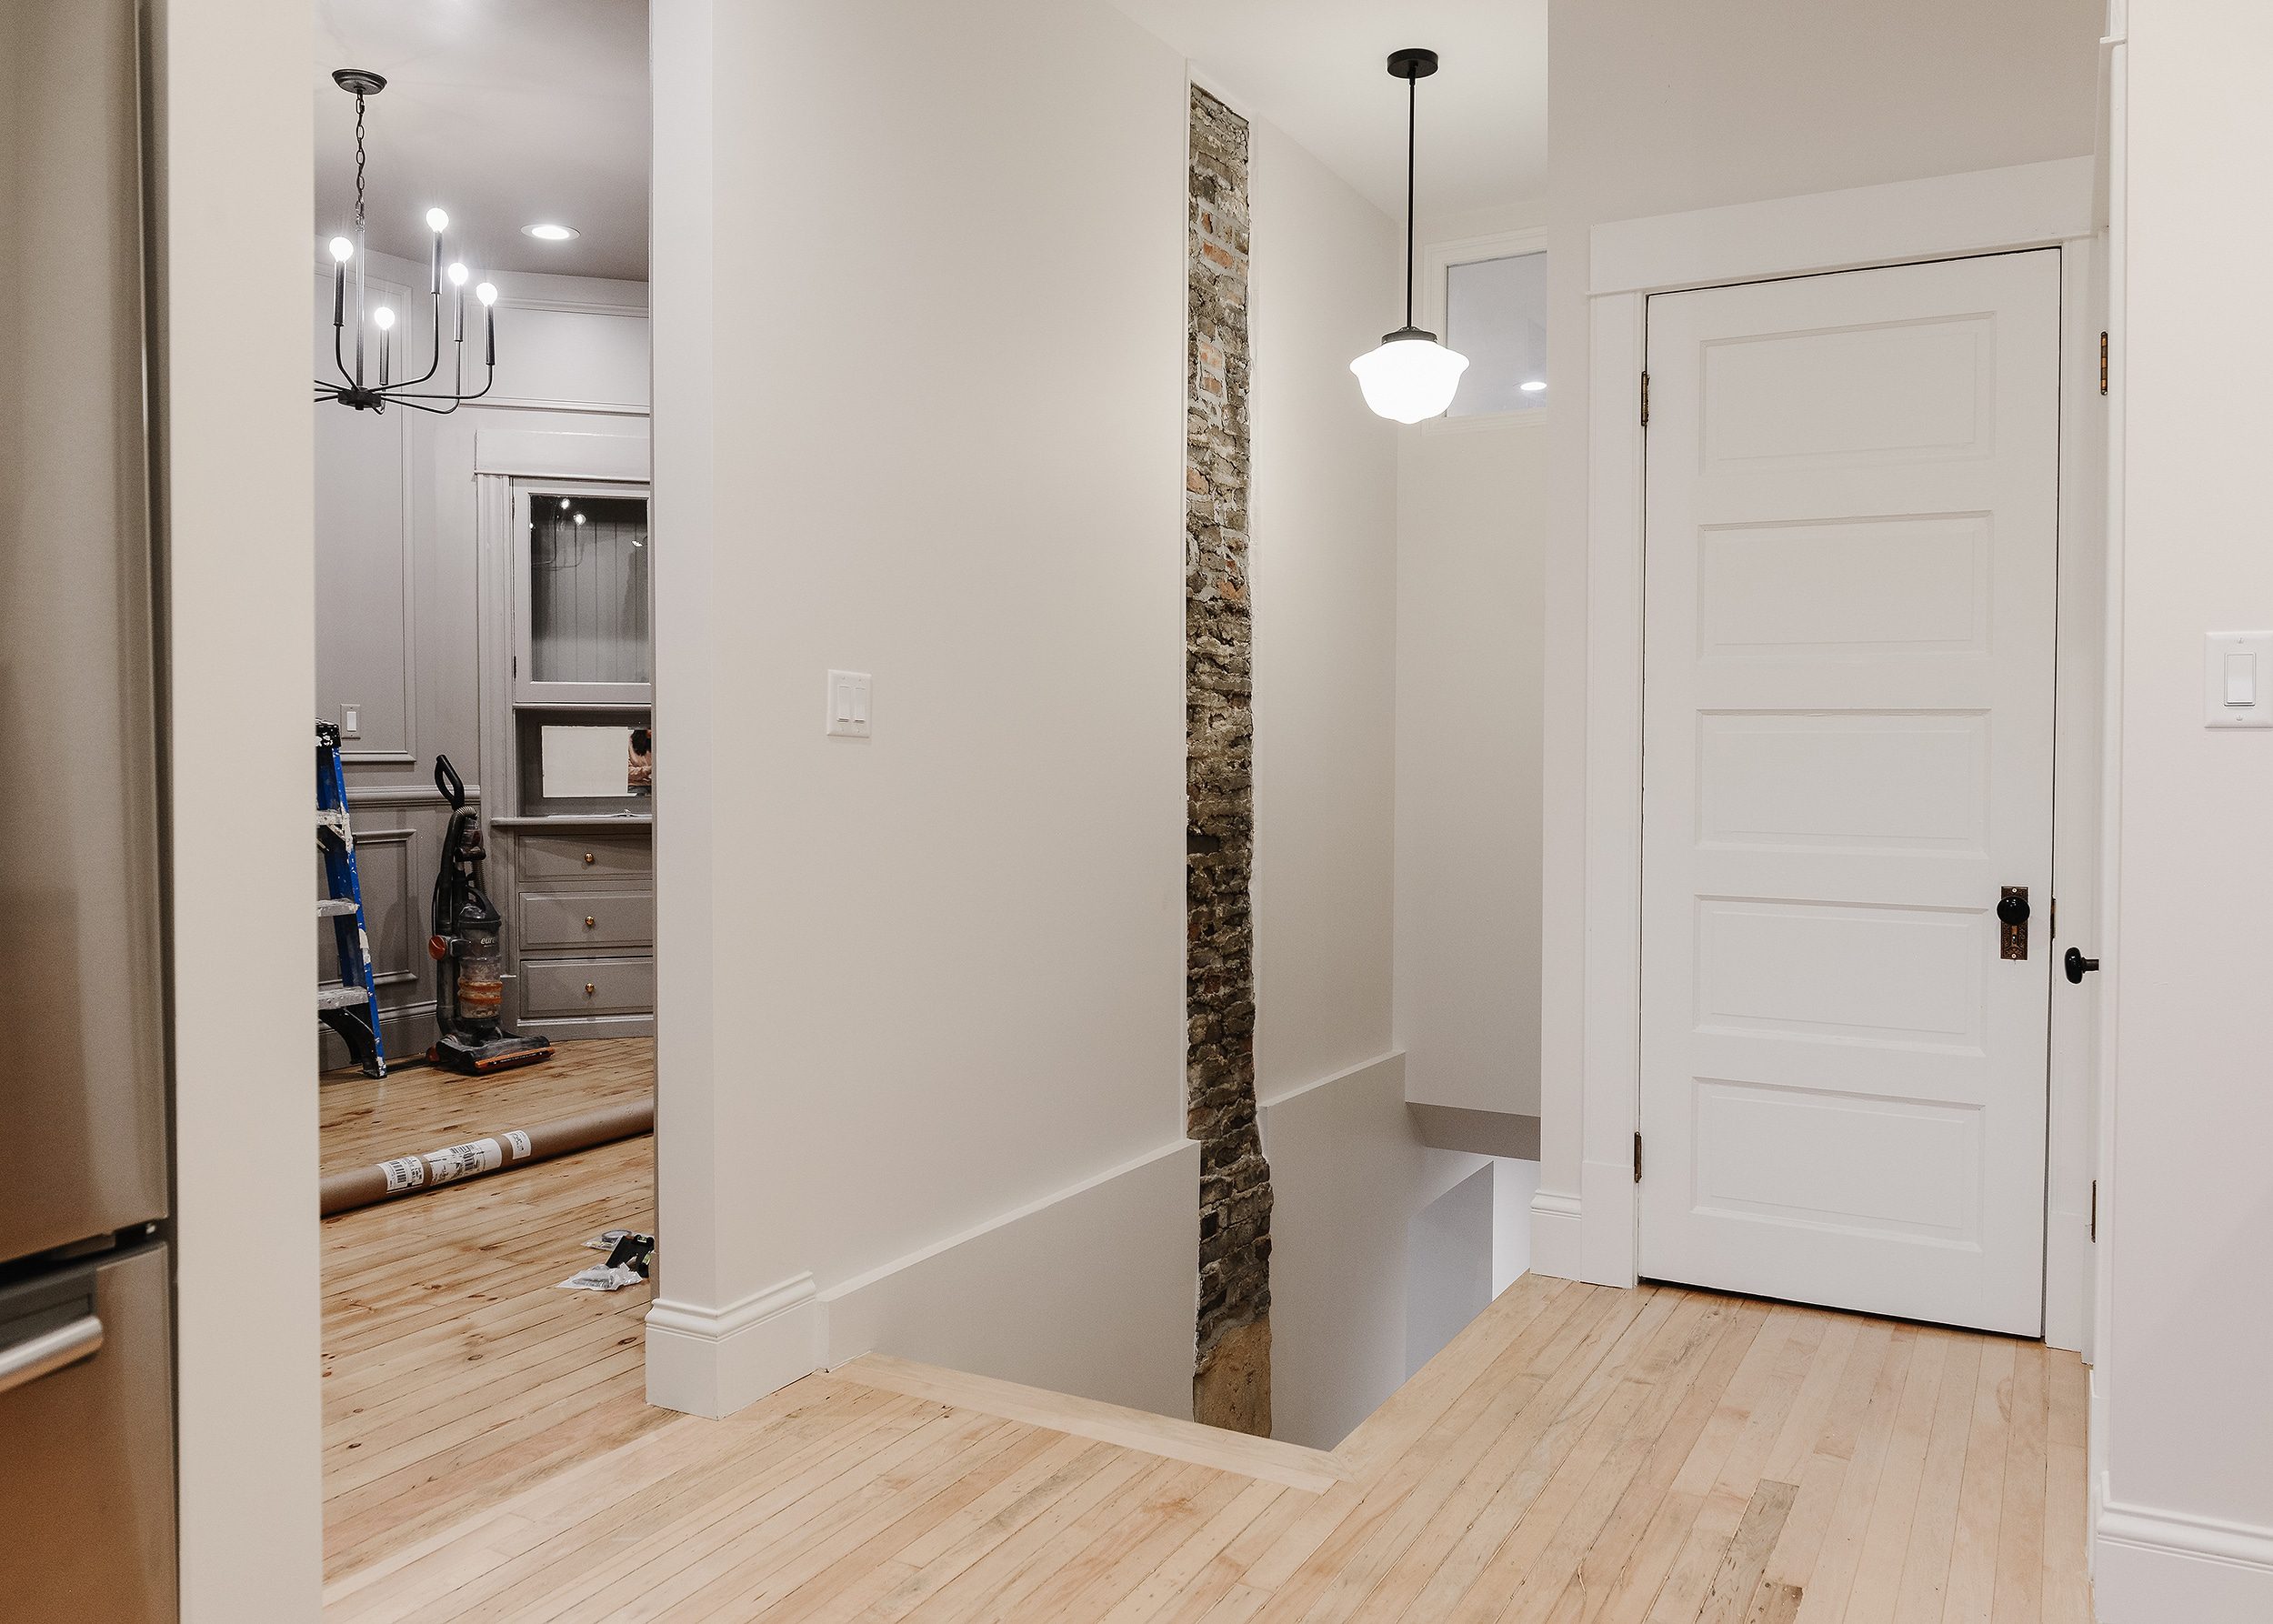
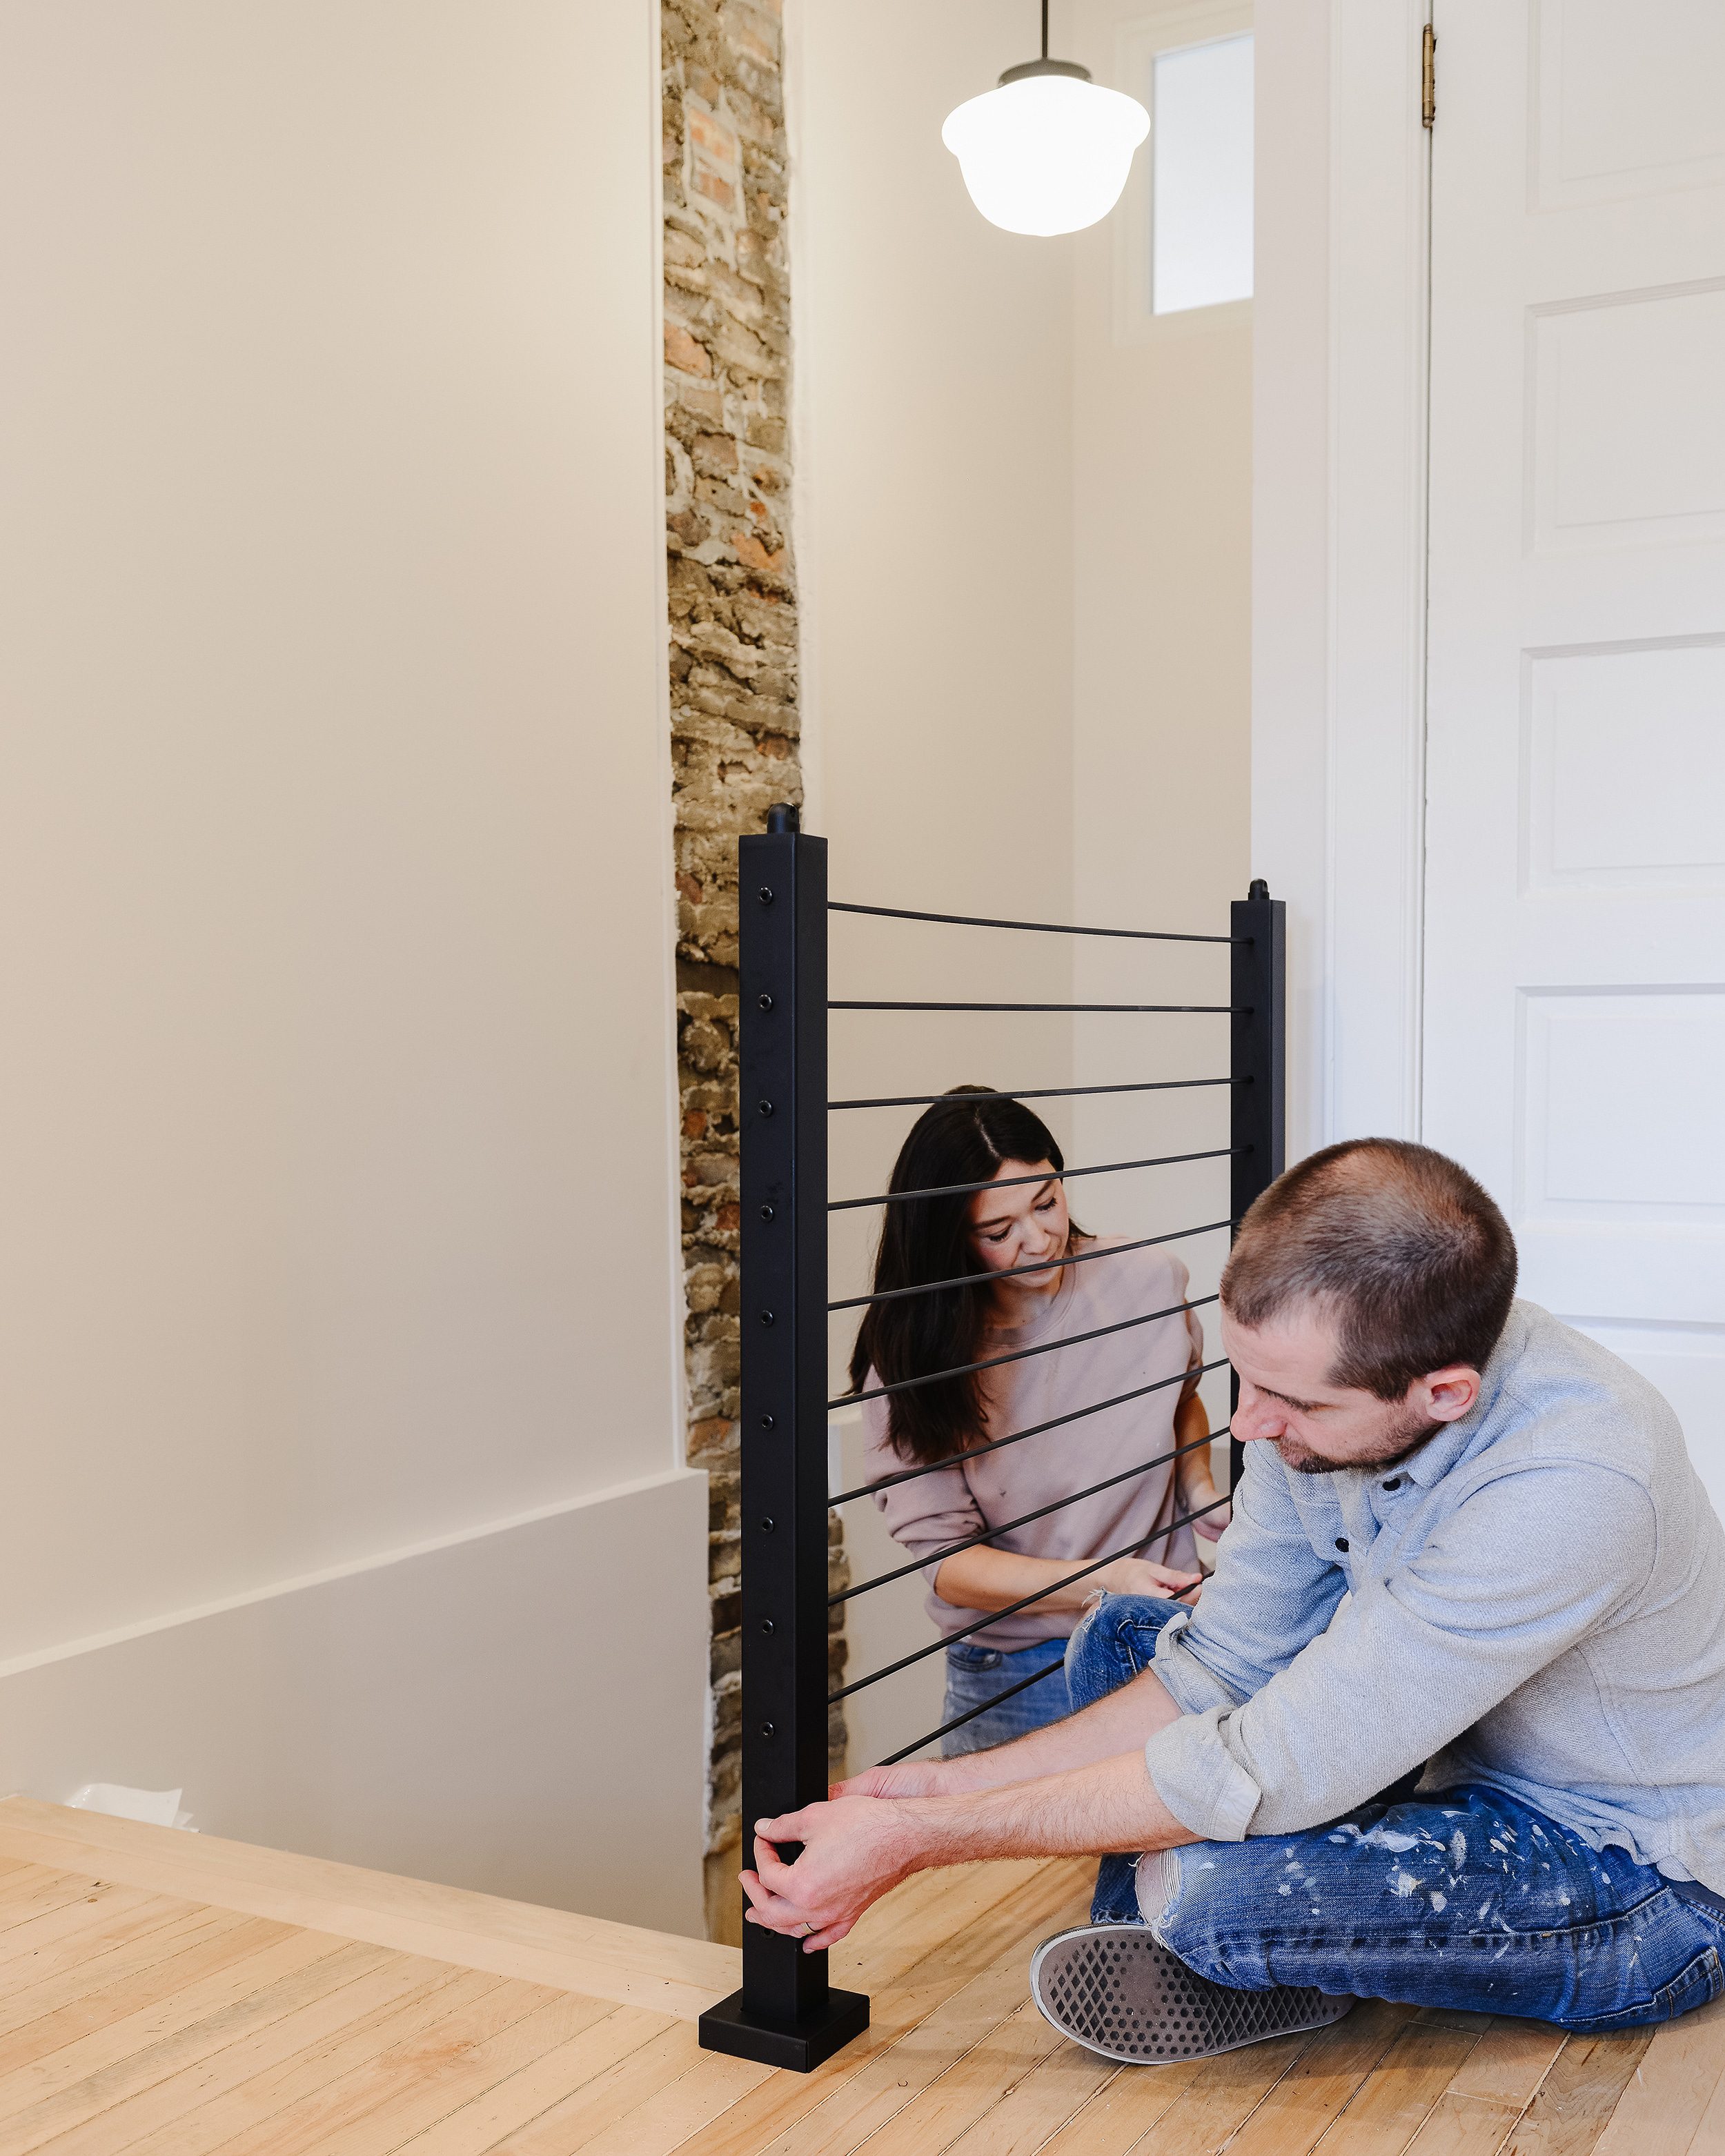
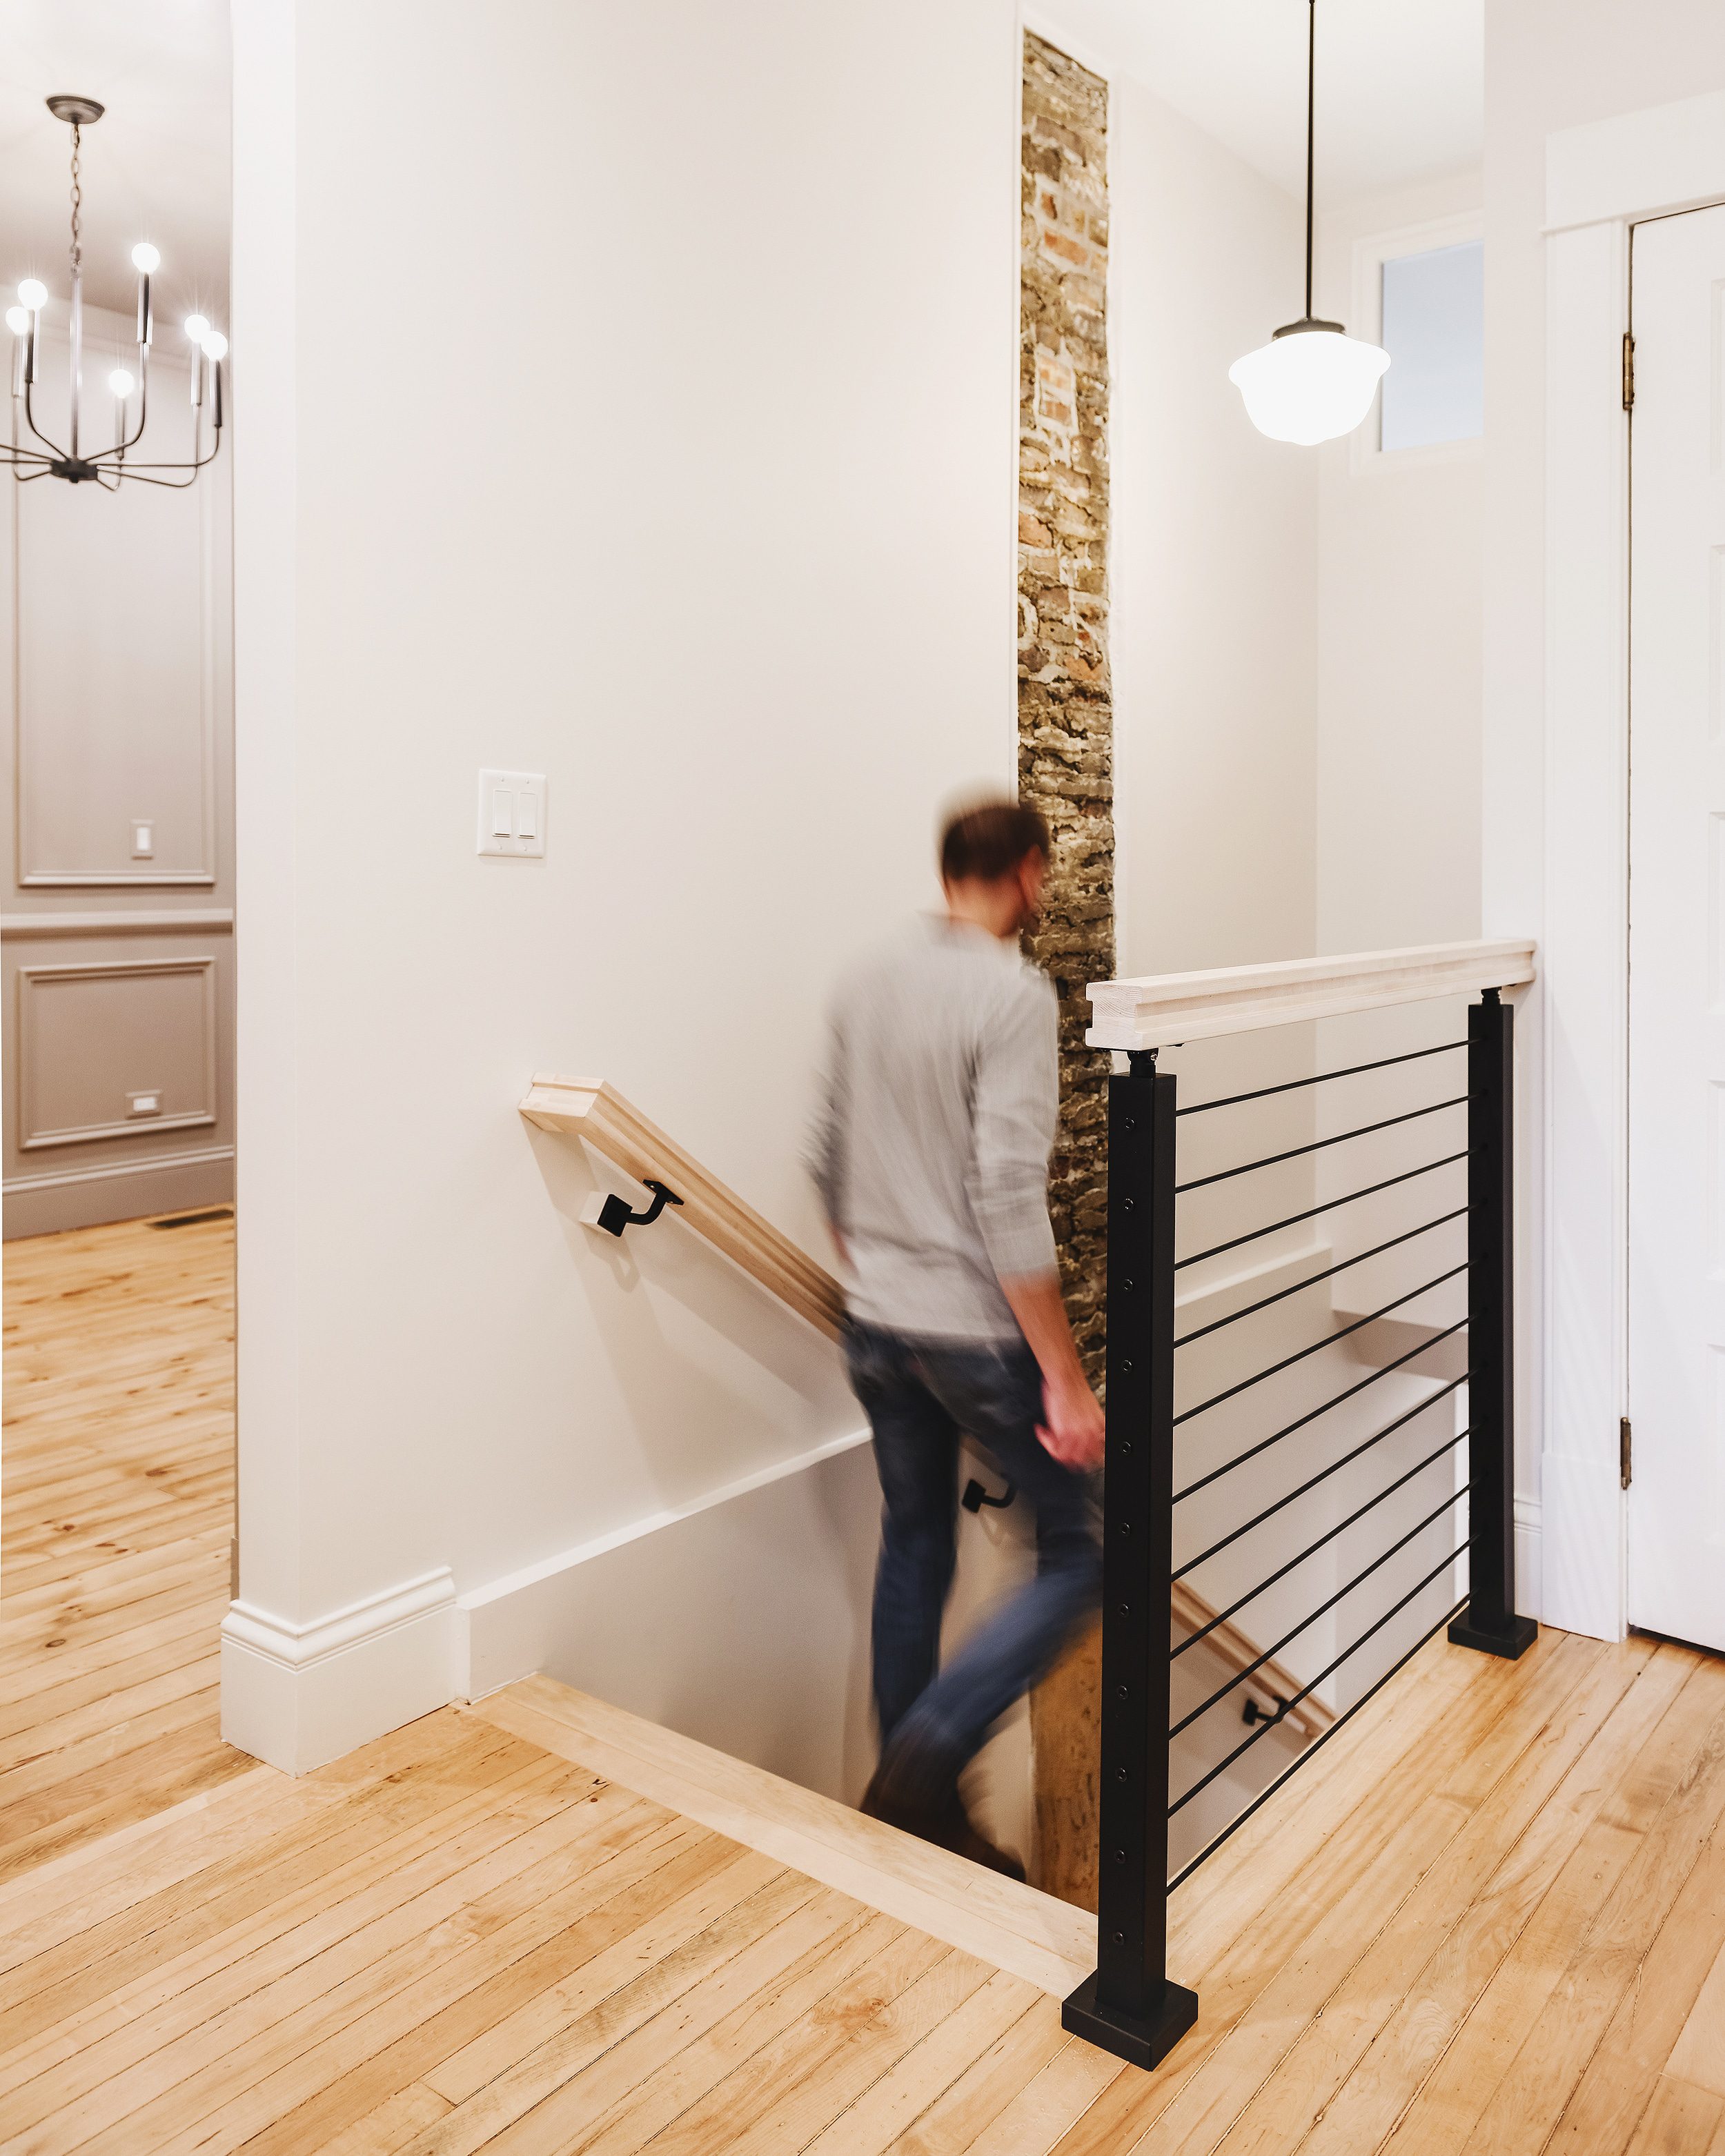
When we reworked the floor plan of the Two Flat, we integrated a staircase from the Unit 1 kitchen down to the formerly inaccessible ‘den’ level. This opened up the space and allowed for the expansion of the bathroom’s footprint and the addition of a generous pantry. In doing so, it left an area to the right of the staircase that would need to be guarded by a railing. Here’s how it looked after renovation, pre-railing solution:
In This Post
Unit 1 Staircase | Before
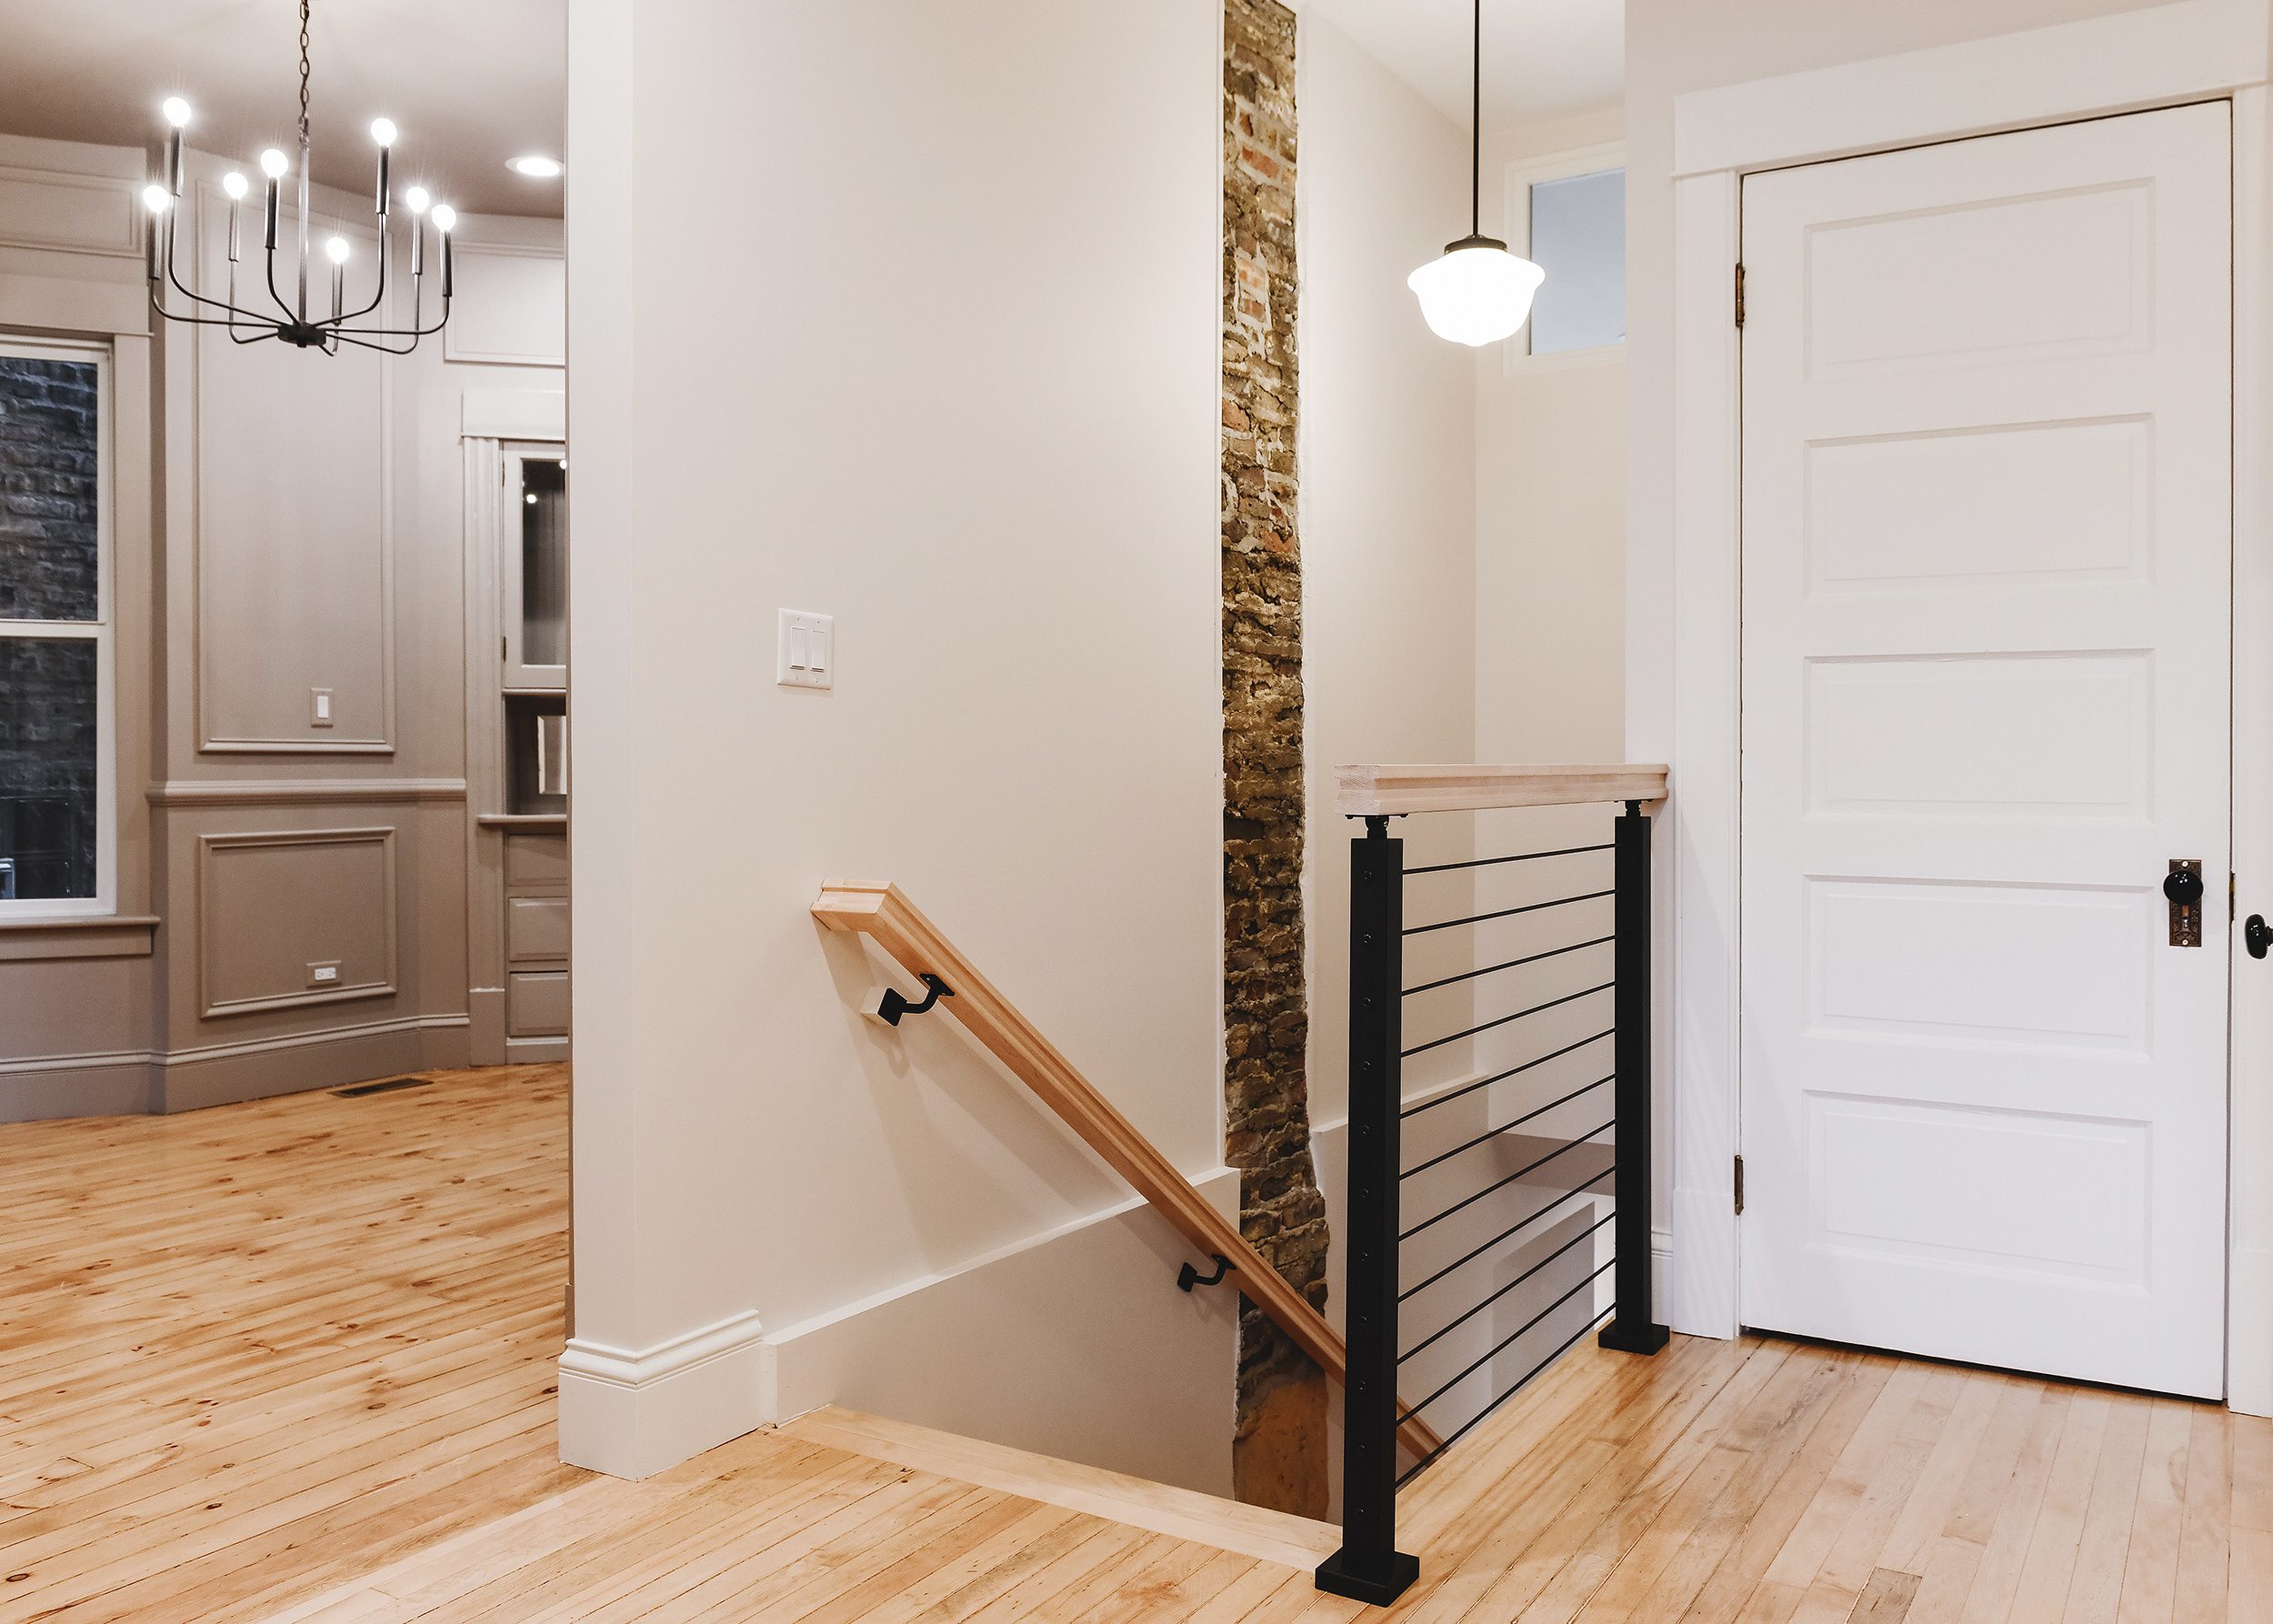
We considered everything from an all wood traditional rail, to all steel, to everything in-between. In the end, it became quickly clear that the Onyx Rod Railing system from Viewrail would be the perfect fit! It’s modern and sleek, but we’d have the option to incorporate maple handrails and we could DIY the installation.
Unit 1 Staircase | After!
Preparation
Viewrail’s railing systems are designed for DIY installation and come with an thorough instruction binder. Their YouTube channel also offers loads of instructional videos, including specific playlists that walk through each installation process in specific order. We studied our binder and watched every video in the Rod Railing YouTube playlist to make sure we were on the right track and then got down to business.
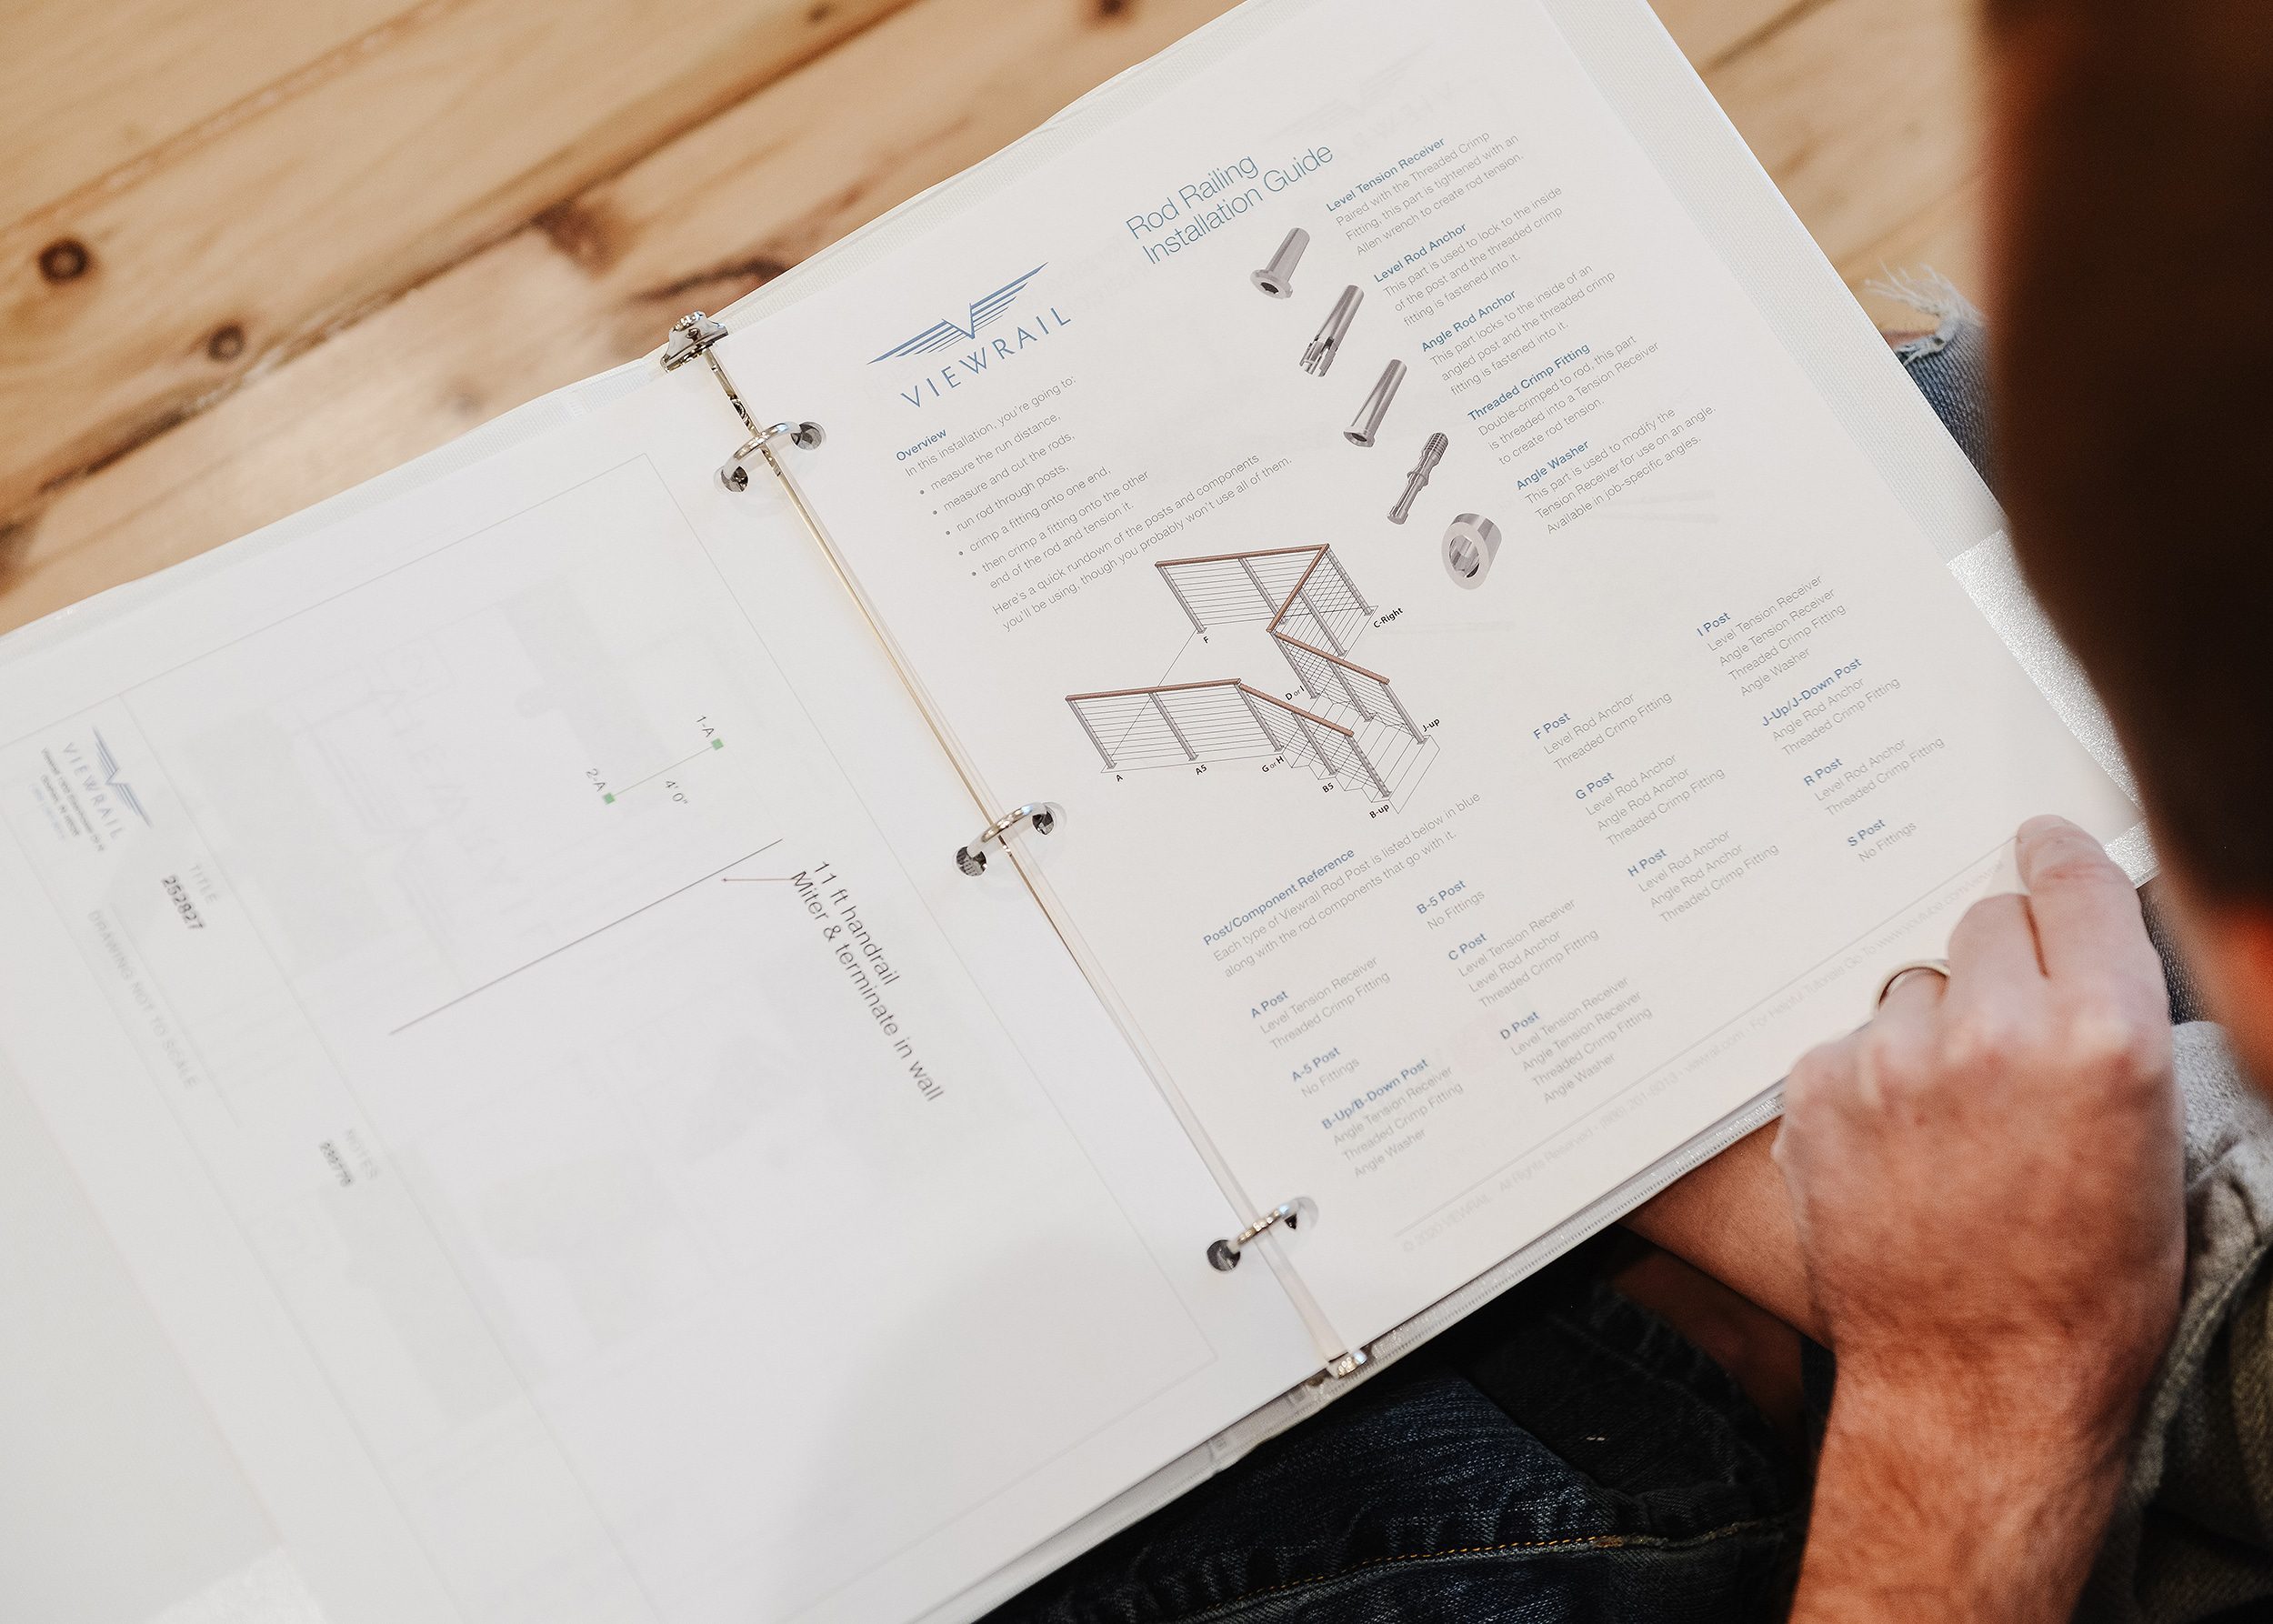
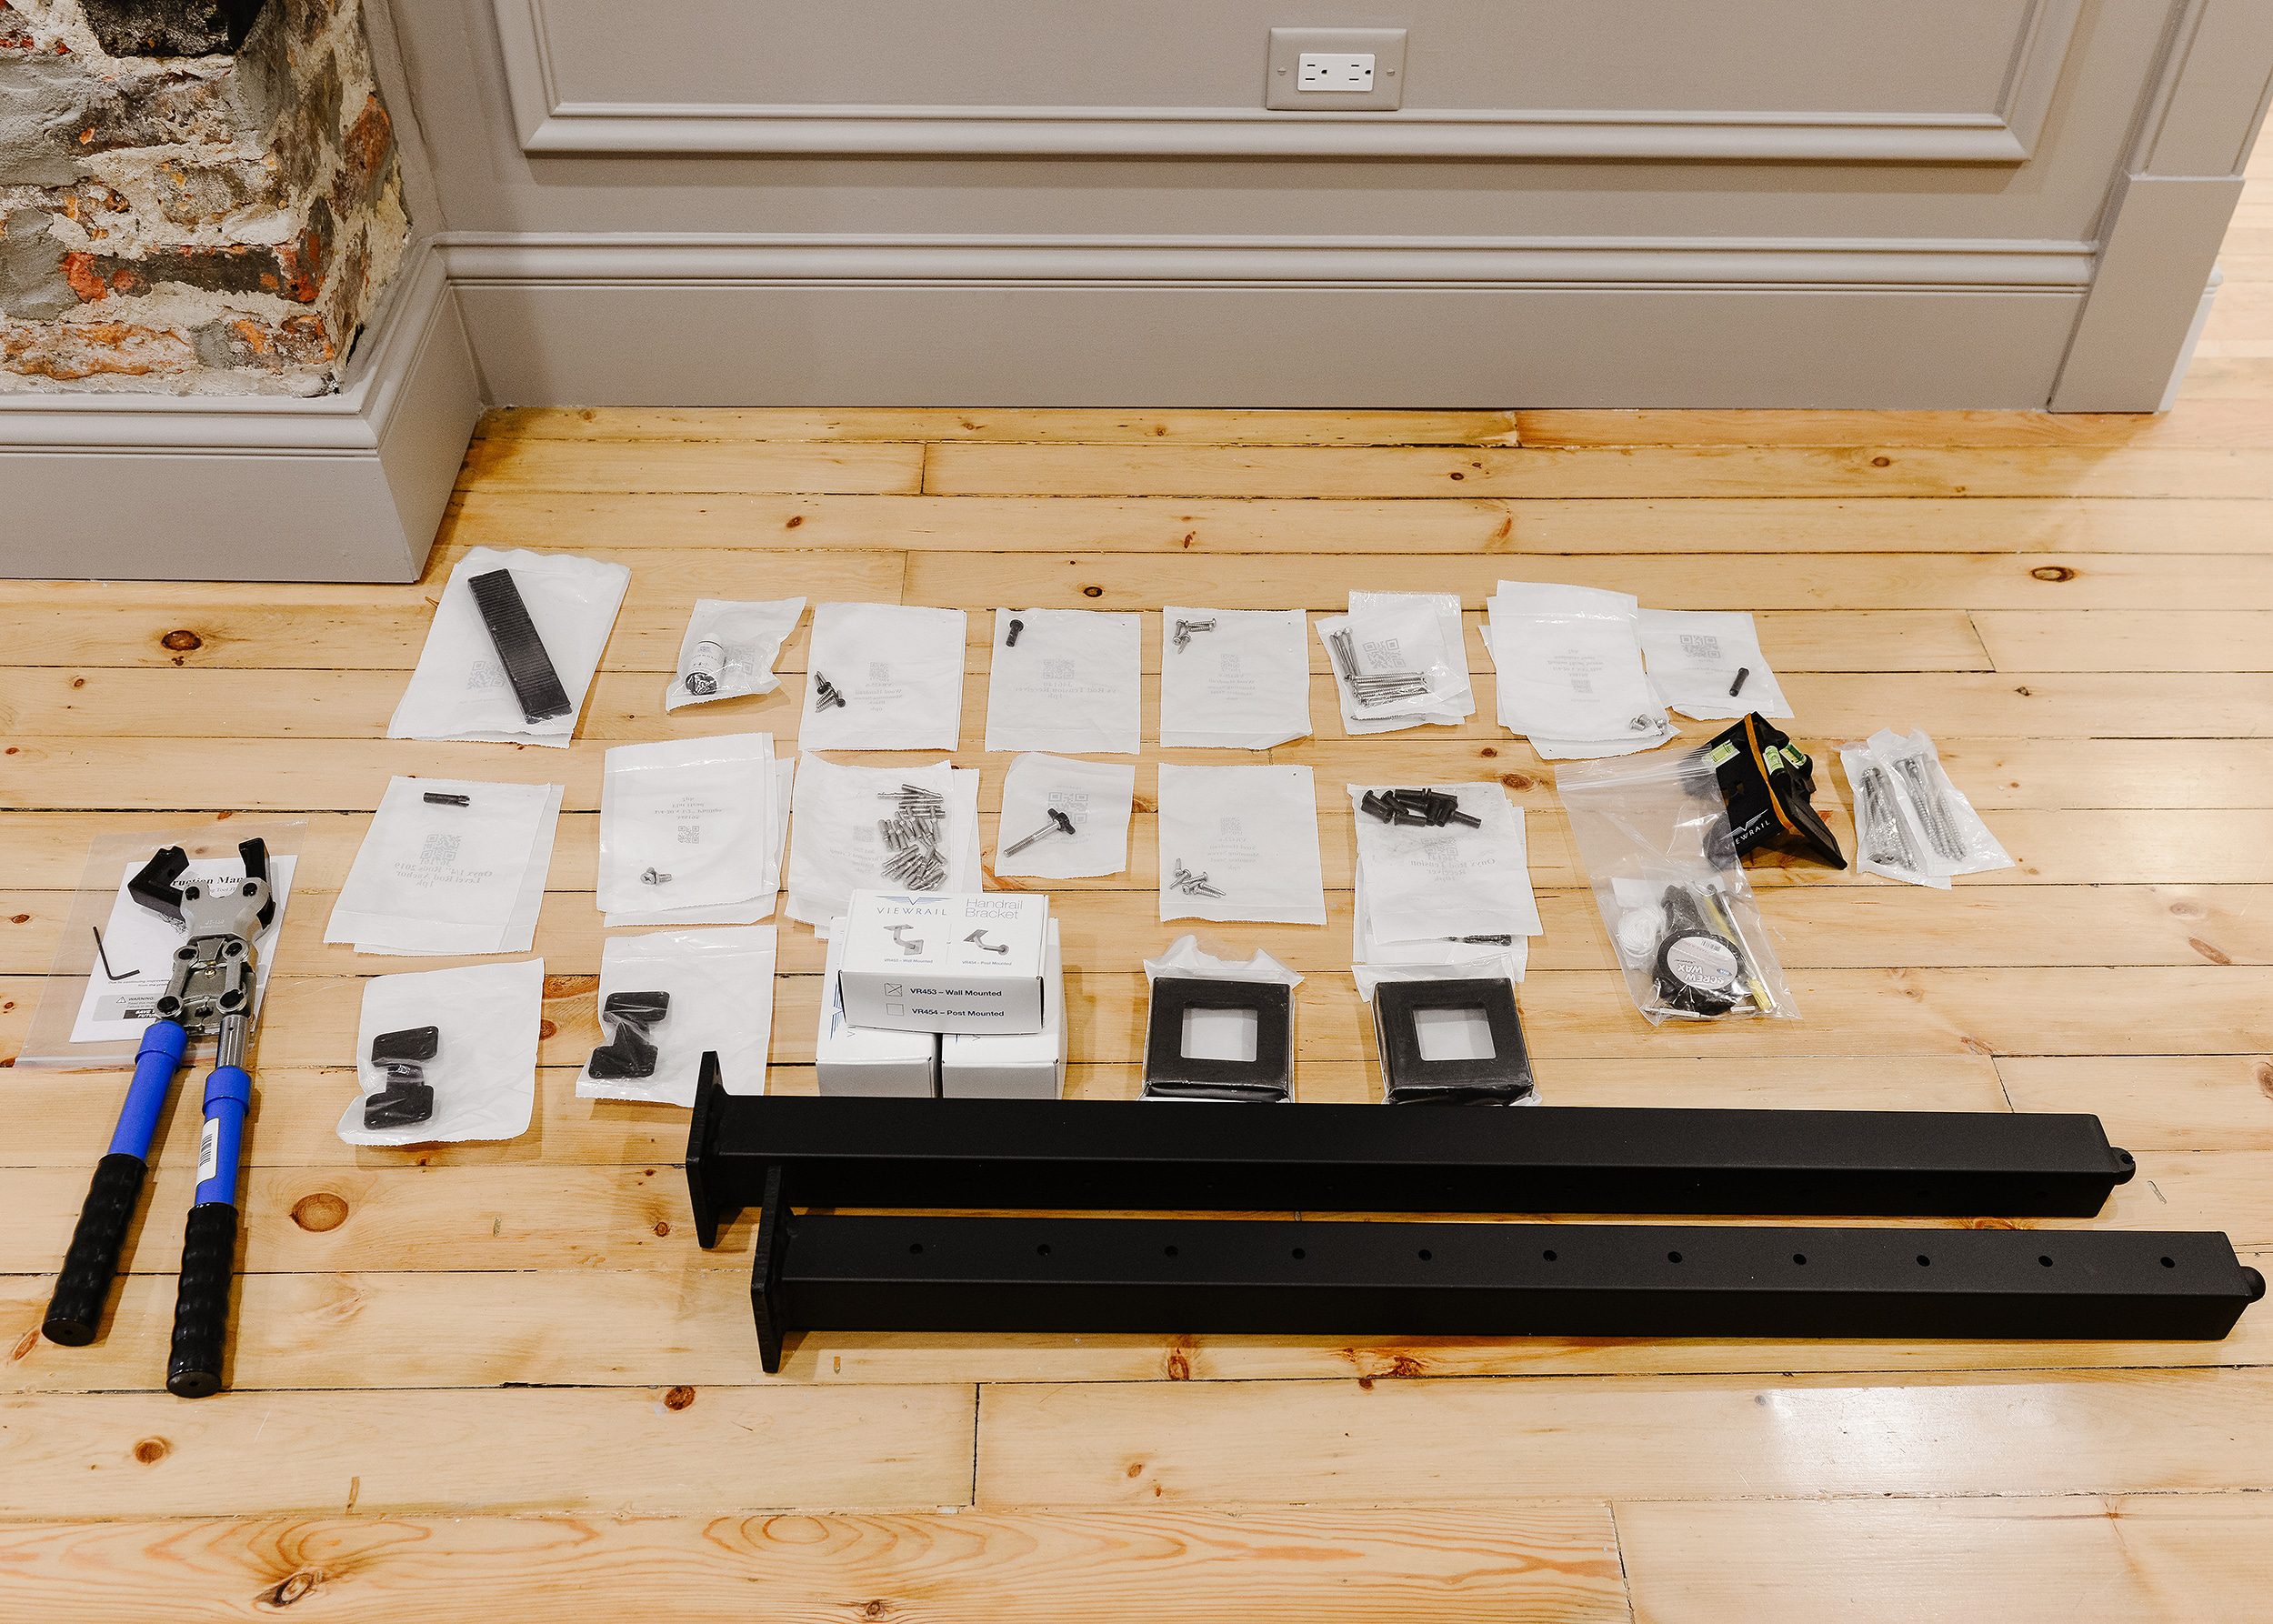
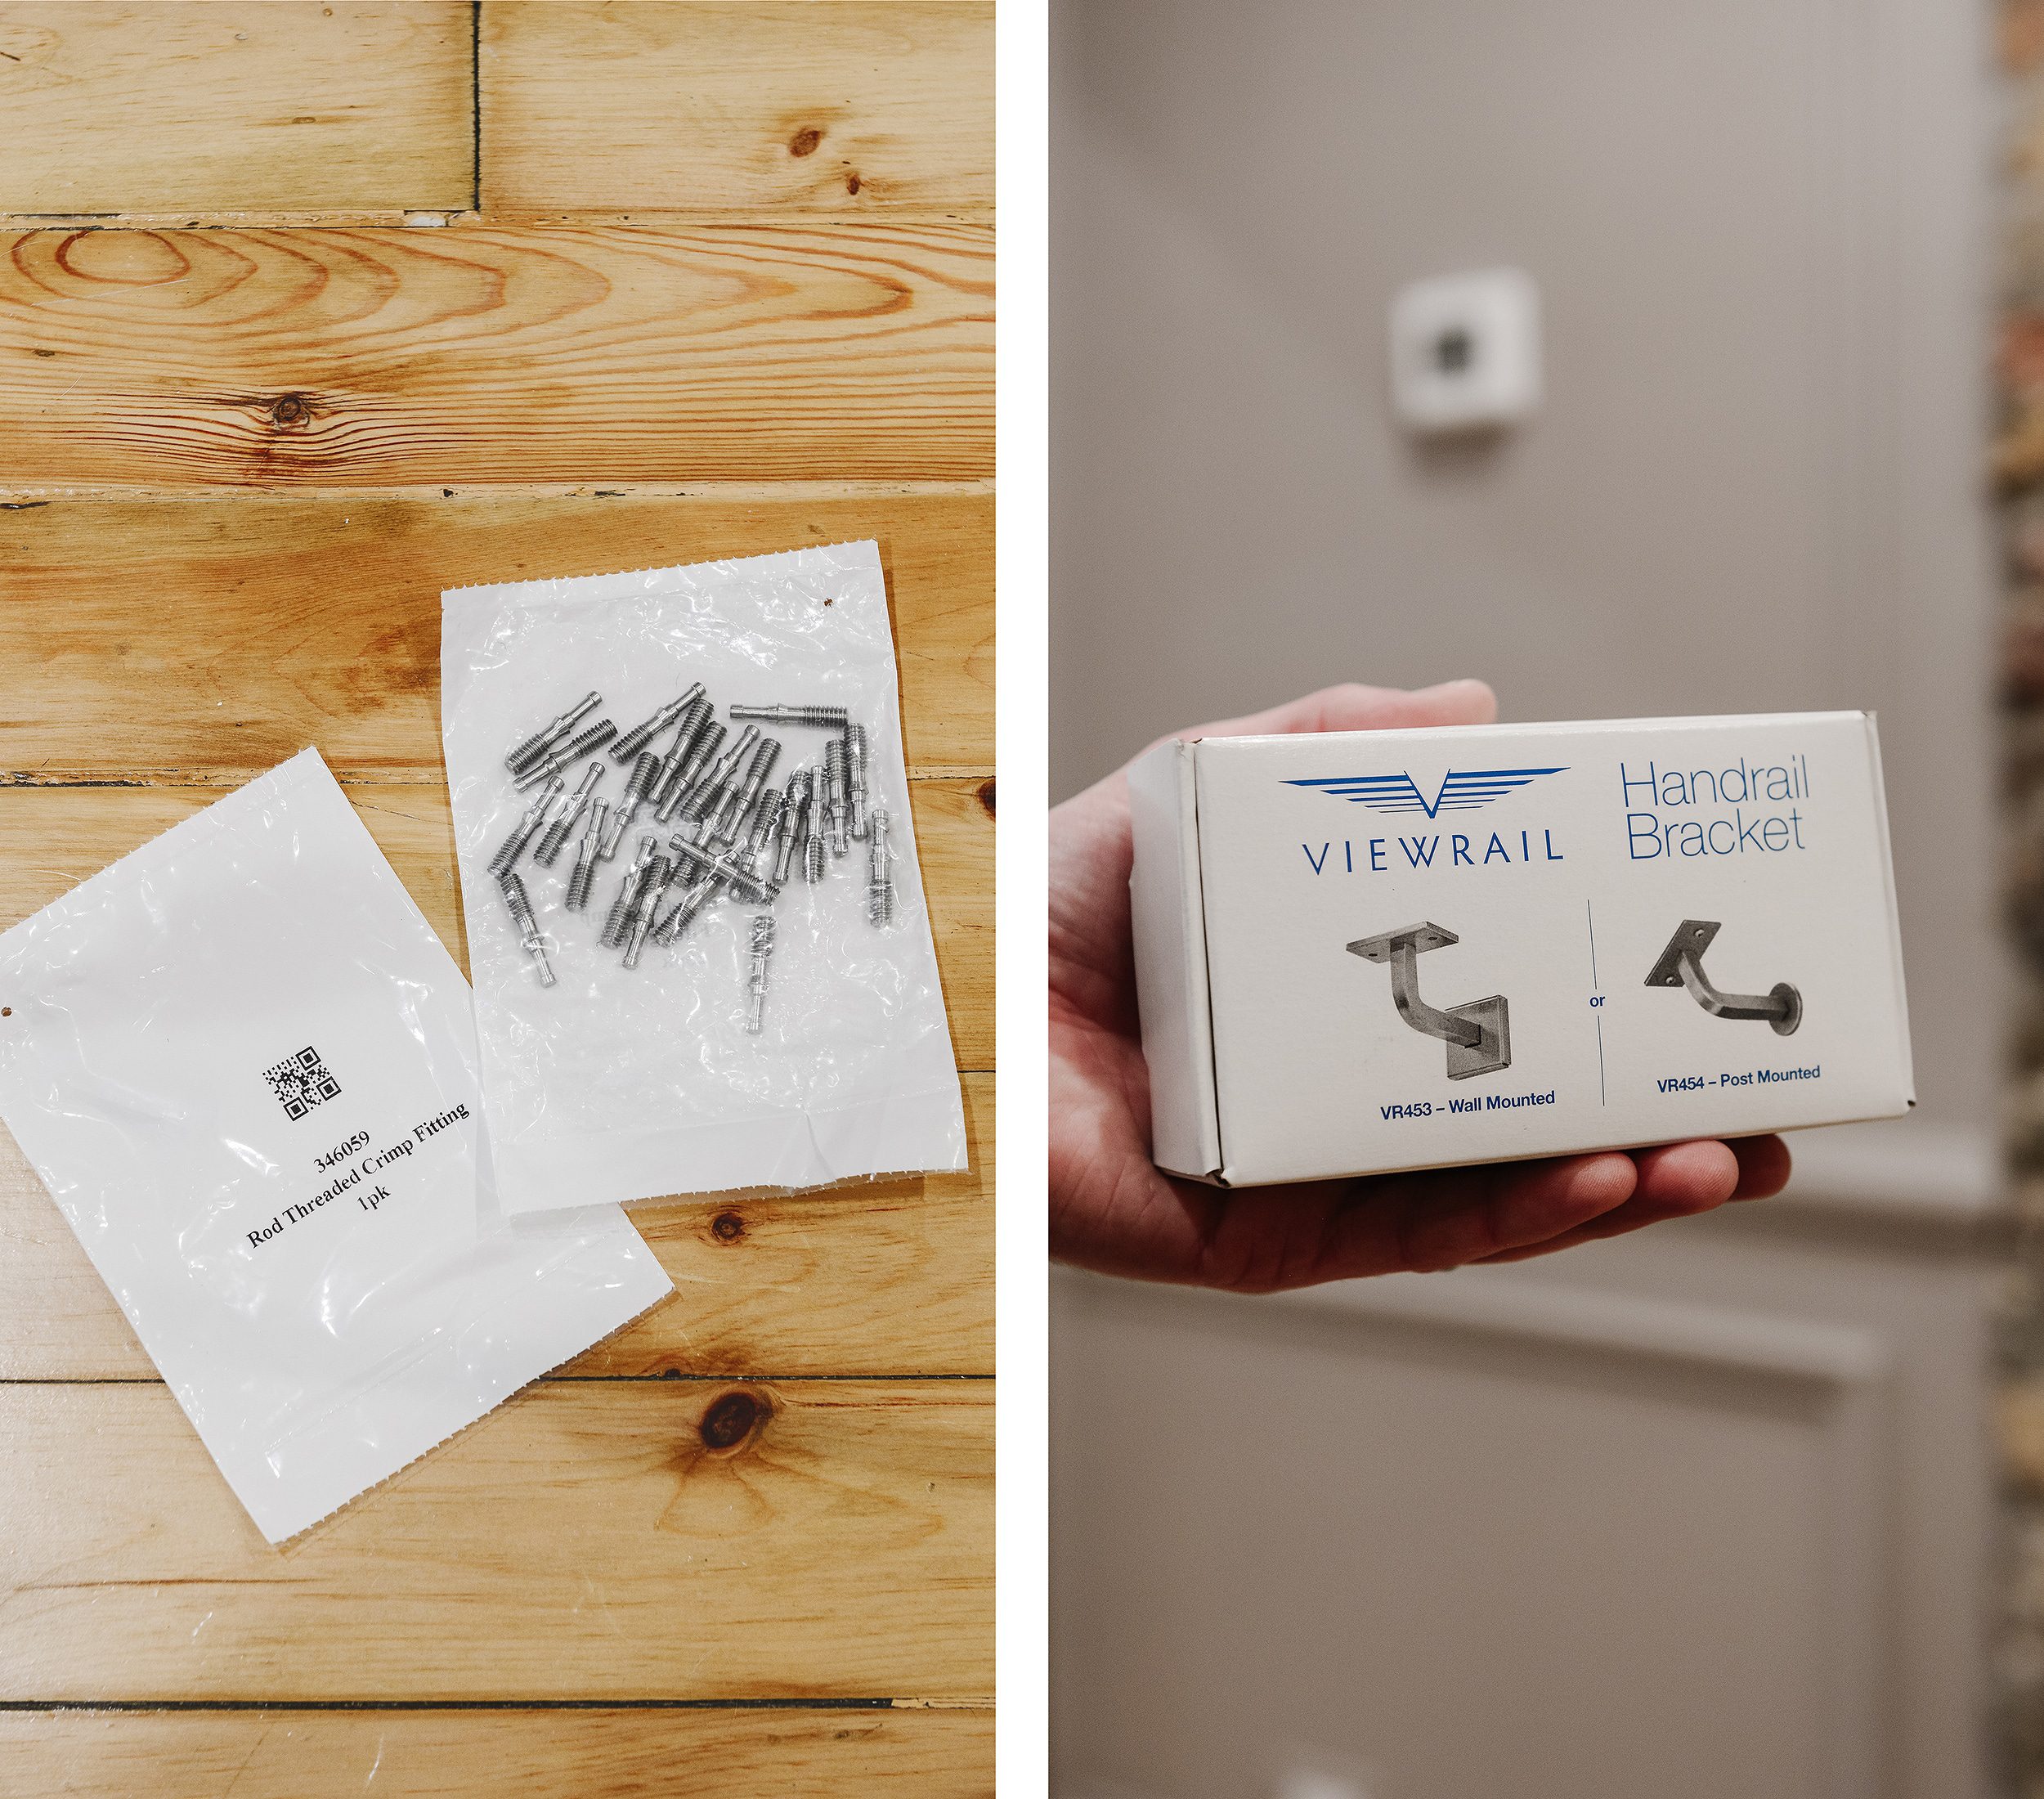
Once we were familiar with the installation steps, we laid out all of the parts to get a better understanding of how everything connected together. Every part was separated into small bags and labeled, making the process that much easier! Our particular installation consisted of the railing to the right of the steps, as well as an 11′ handrail along the left (chimney) side of the staircase.
Installation
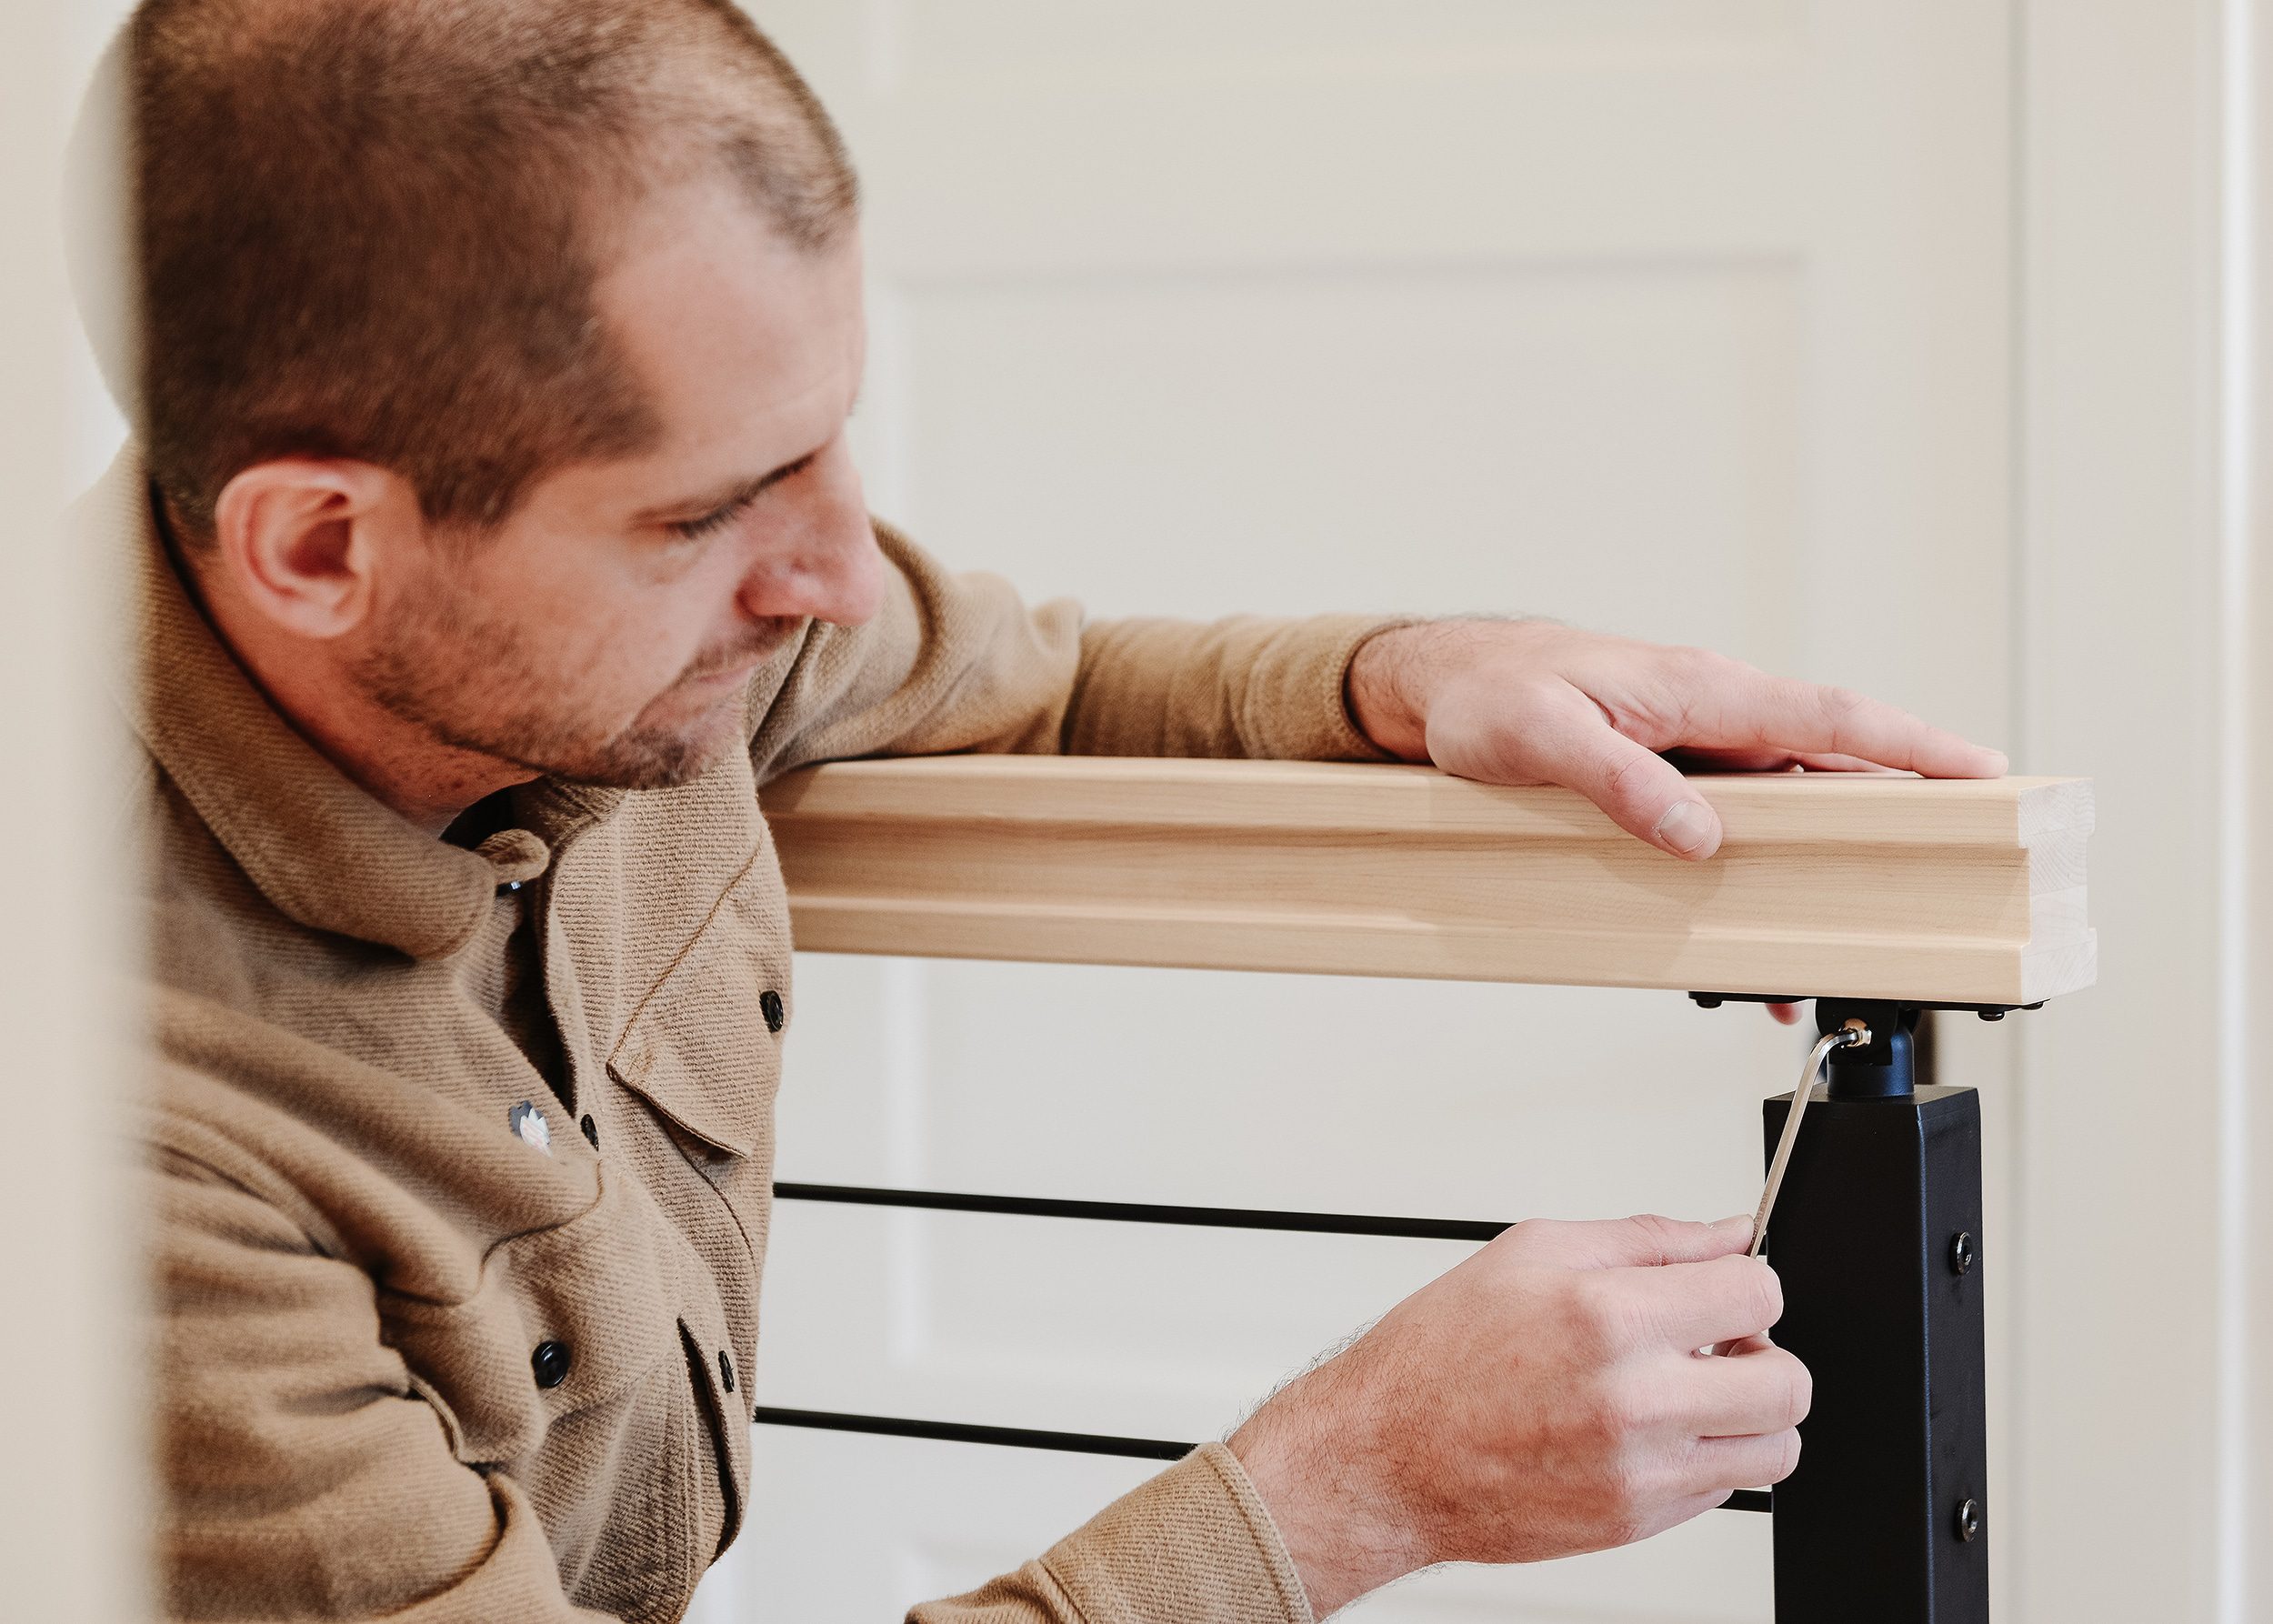
Now on with the installation! As mentioned, the install kit was thorough and even included a post level. Once we’d decided on exact placement of the two posts, the spots were marked, pilot holes were drilled and the provided high quality fasteners were driven directly into the twice-refinished original hardwood floors.
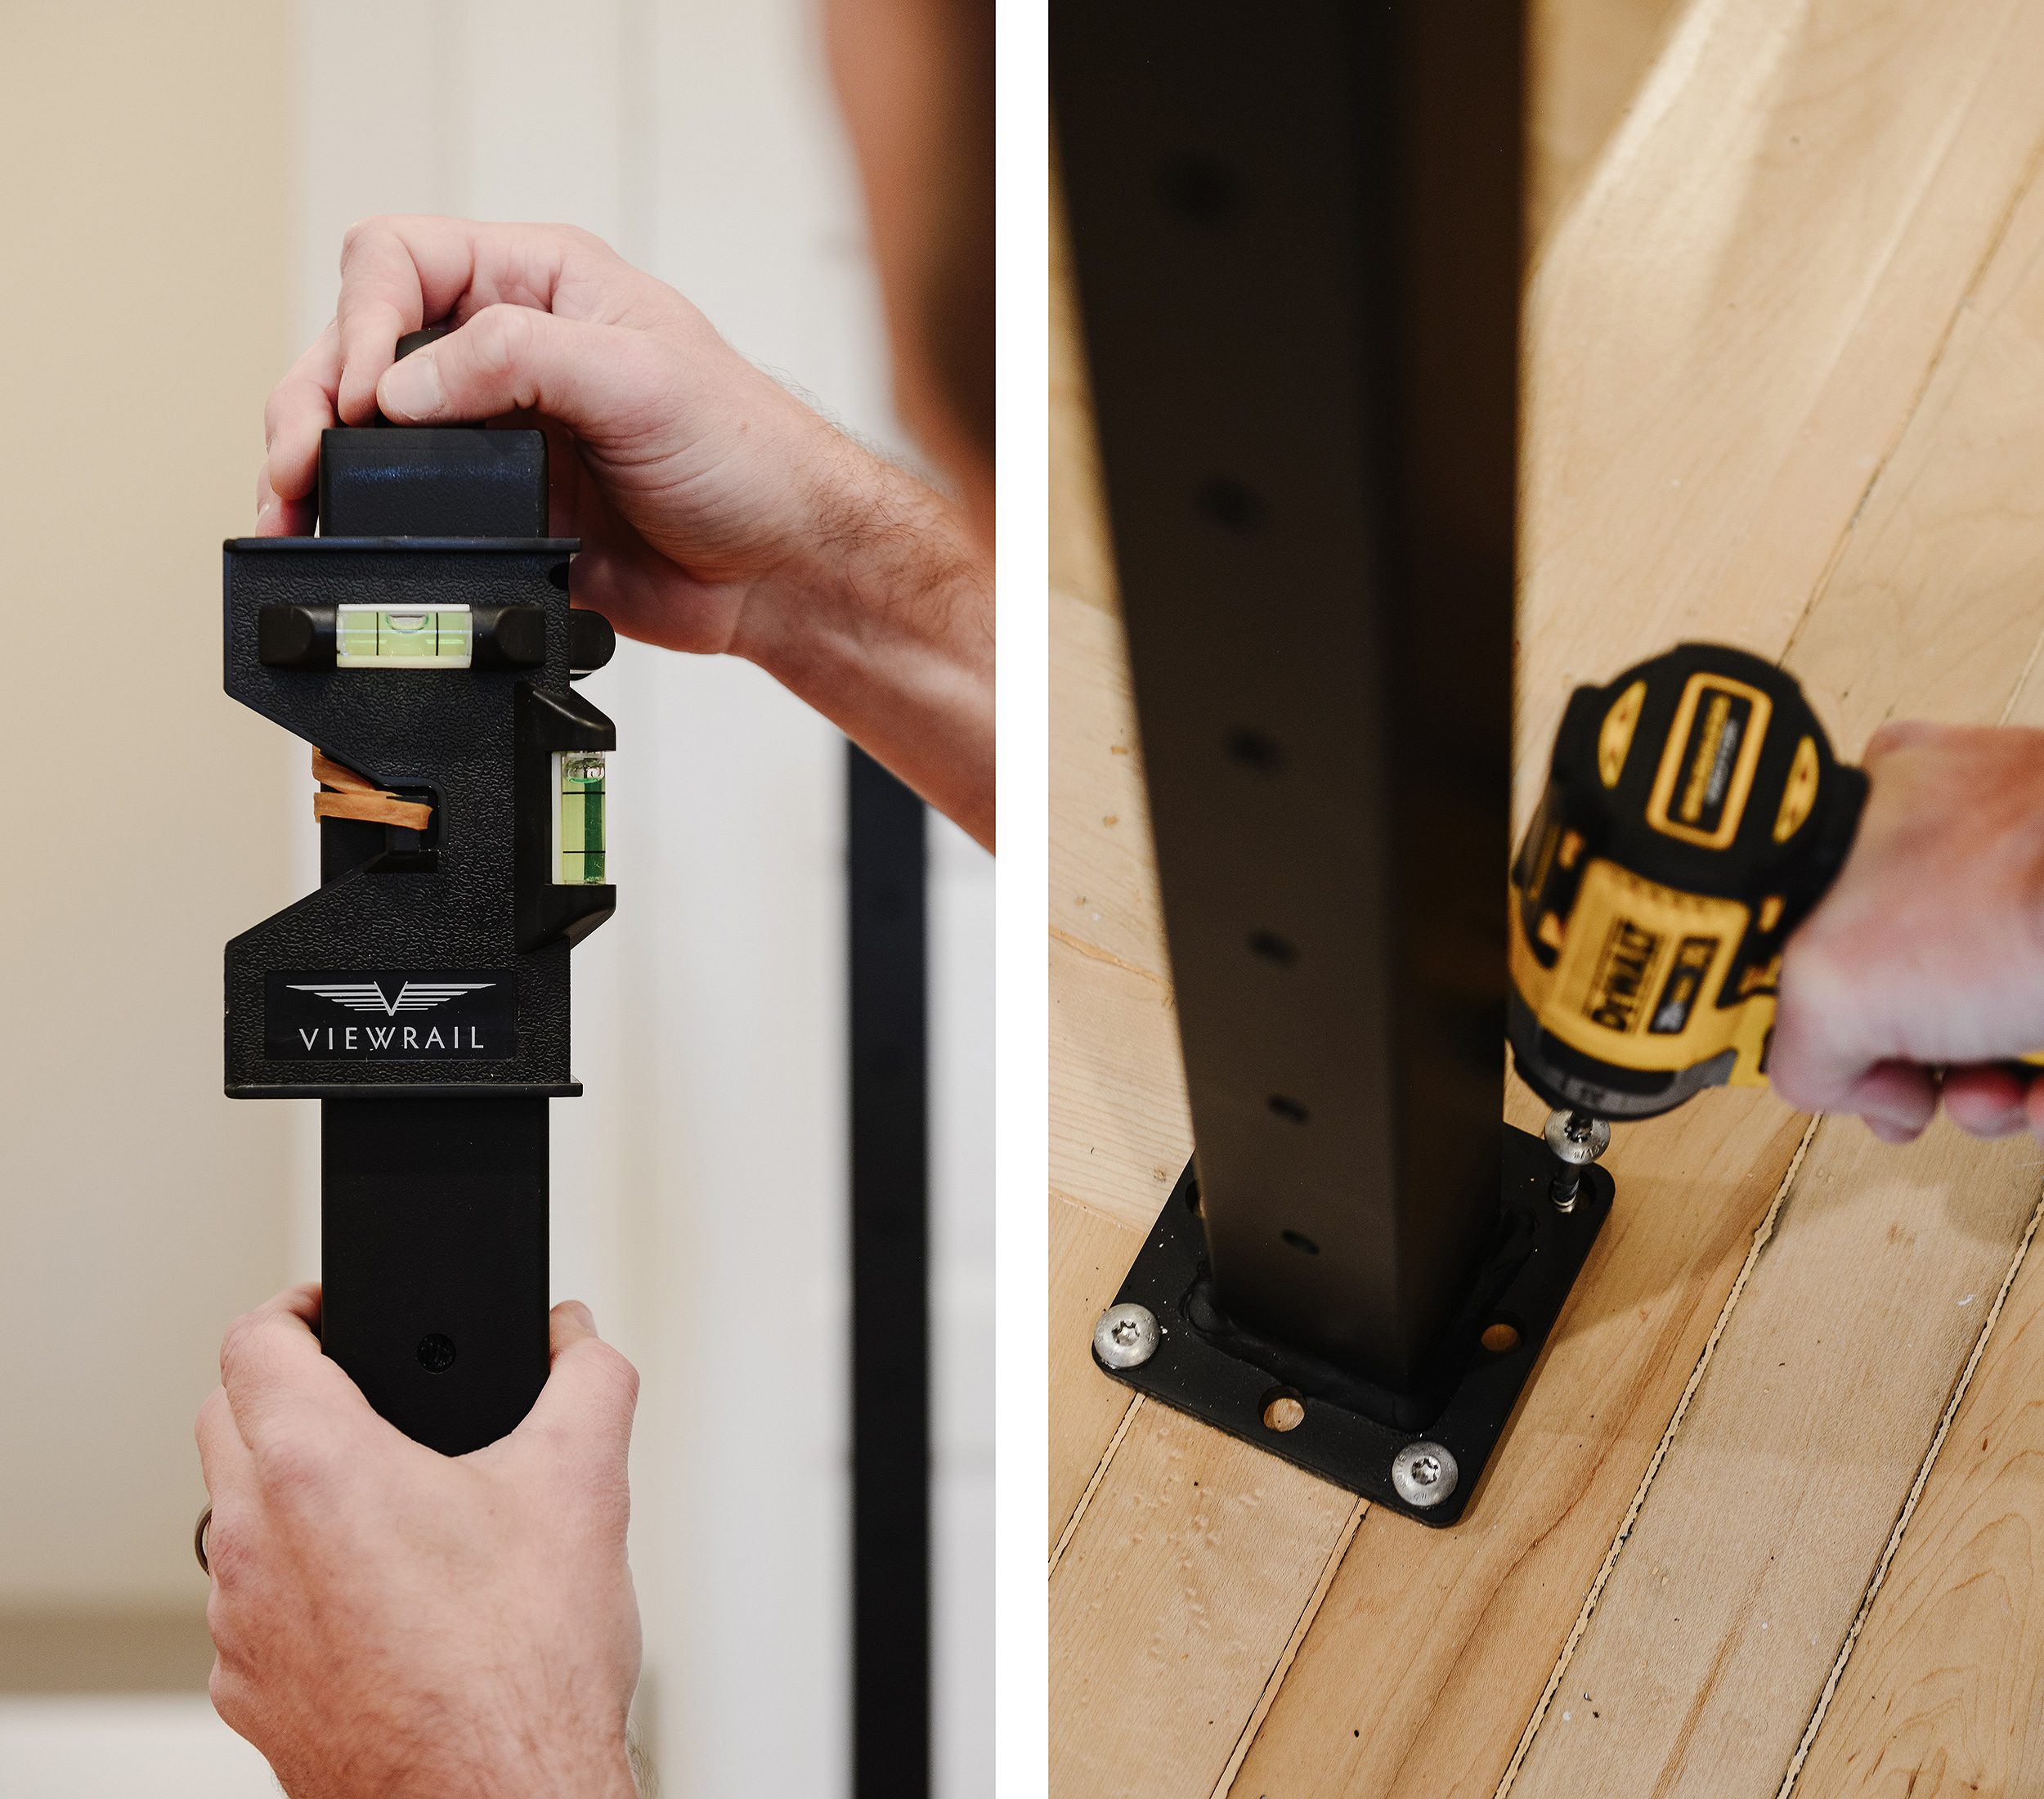
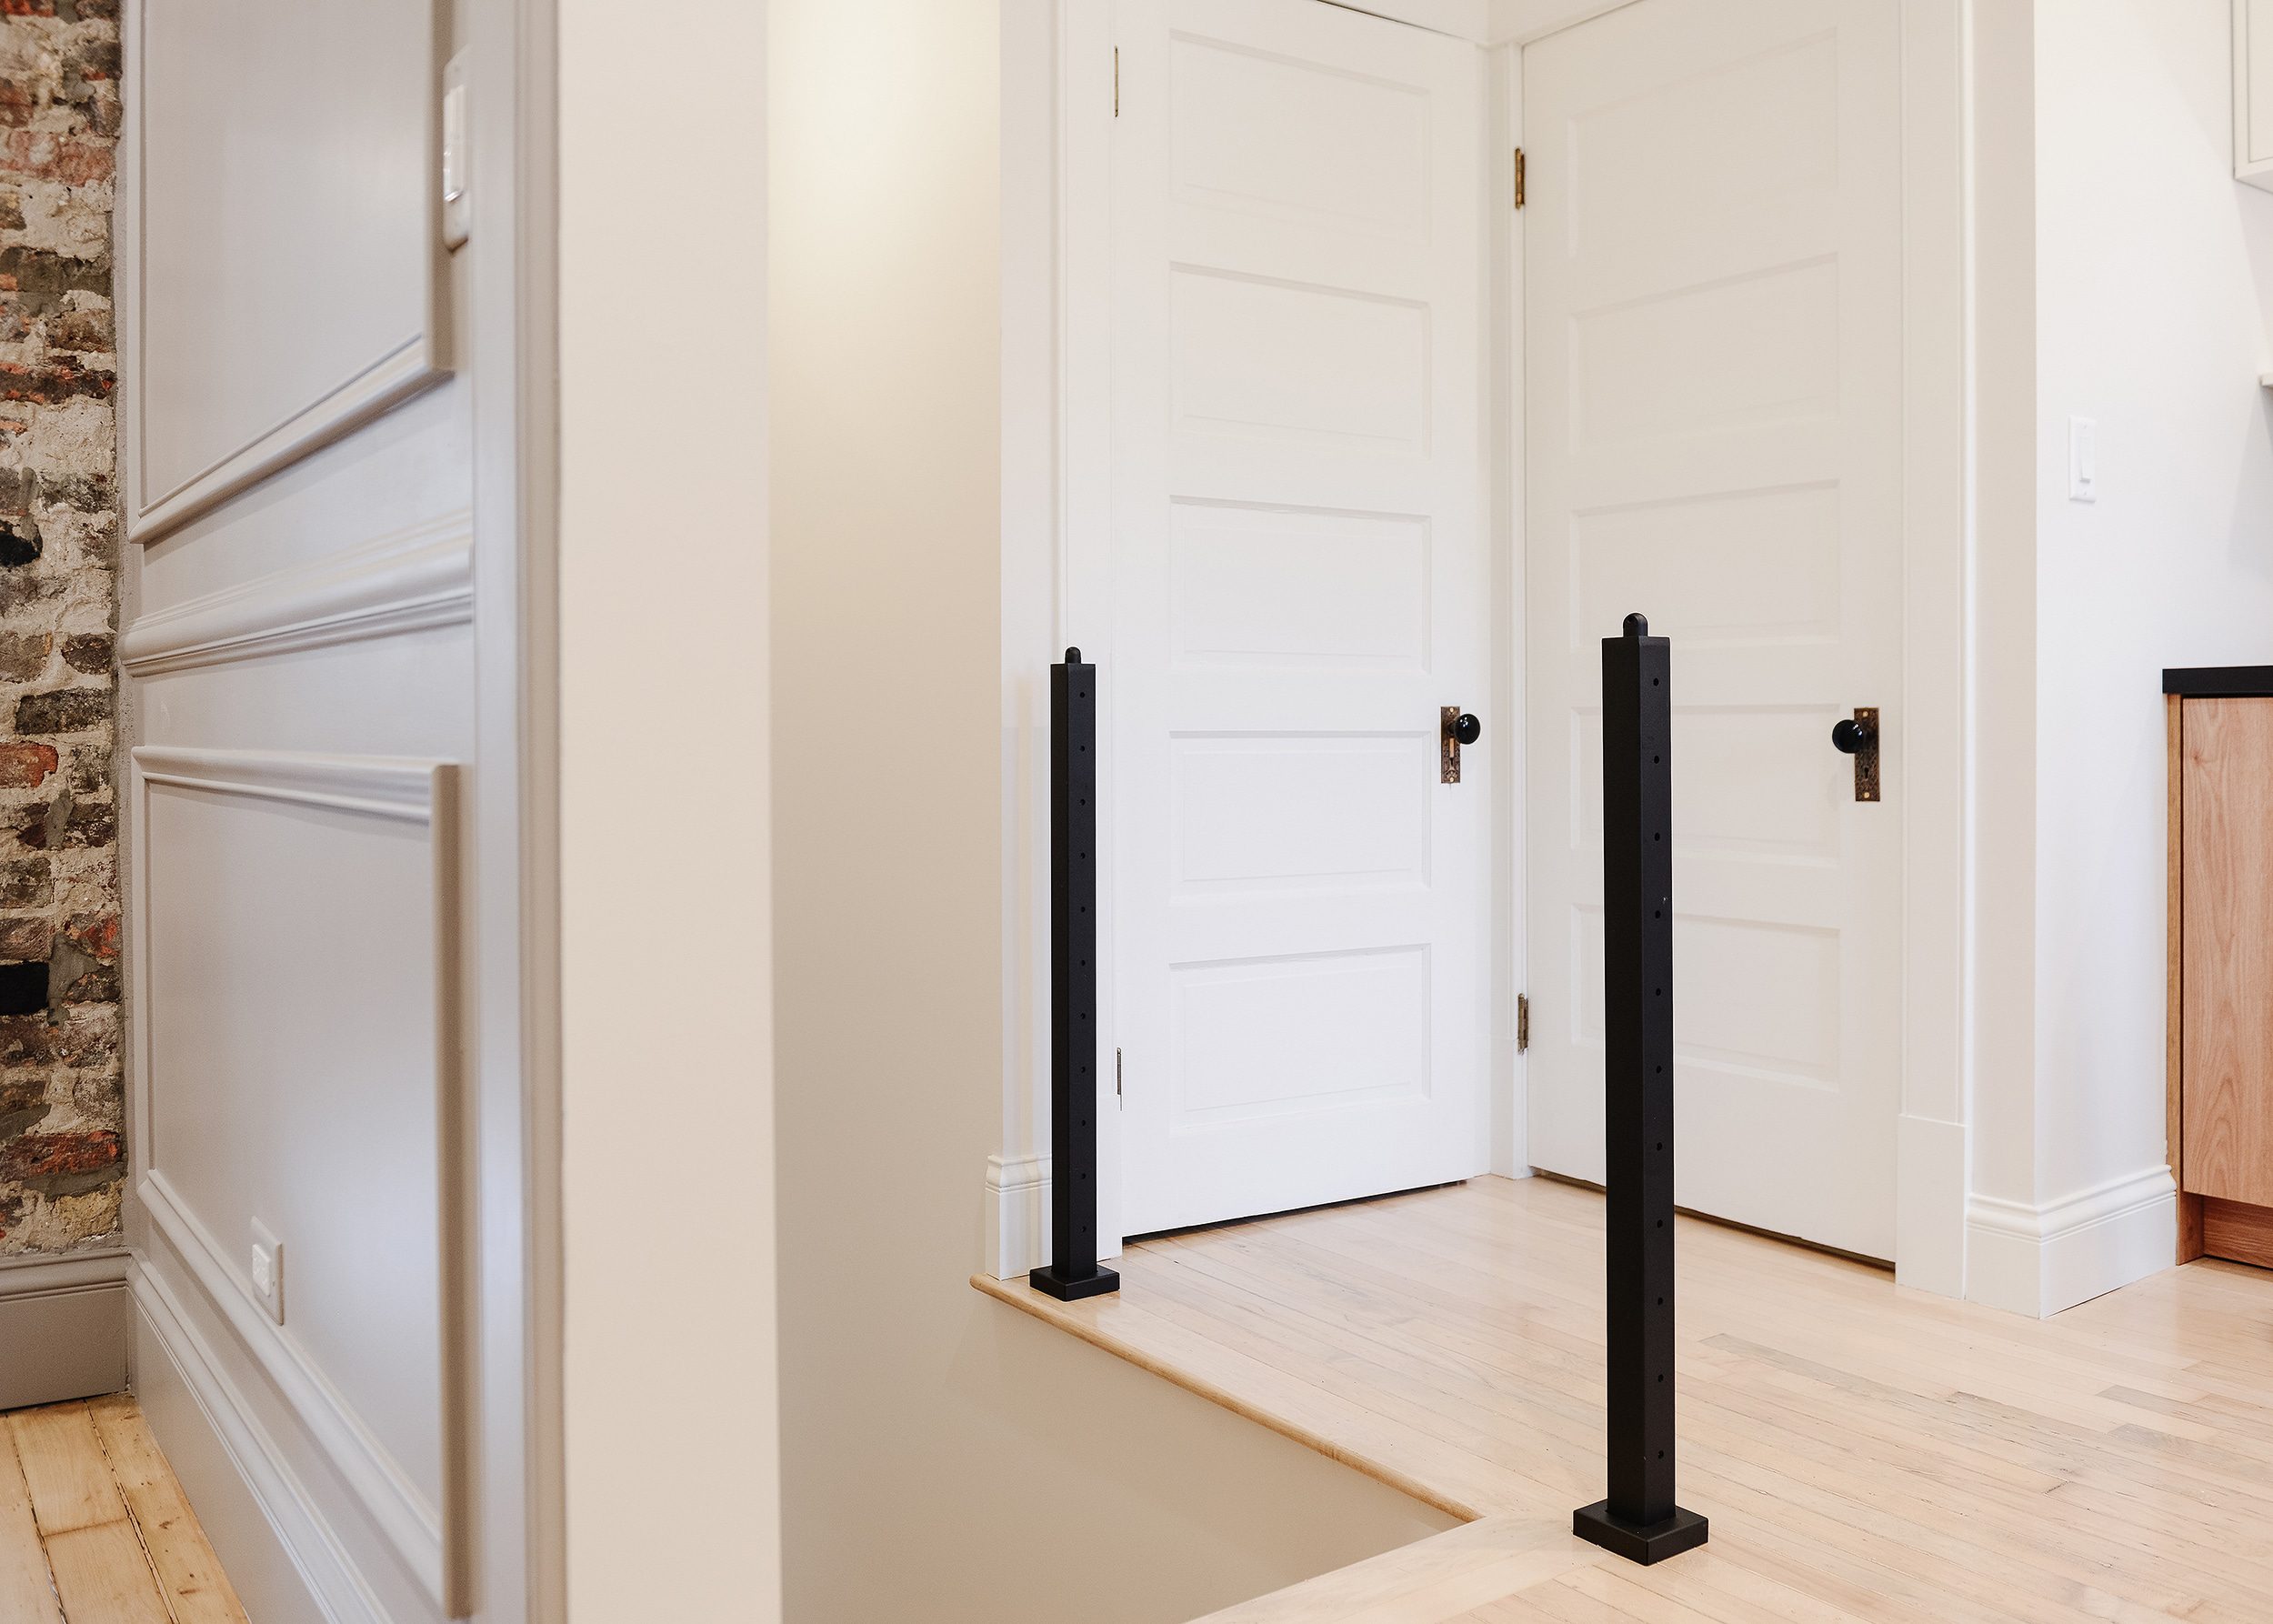
We chose the Onyx finish, which is a matte black powdercoat over aluminum and stainless steel parts. It played off of the new kitchen countertops perfectly and we got giddy as soon as we could start visualizing the finished product! Two posts in, and we were already excited with how things were shaping up!
With the two posts in place, the next step was to cut the rods to length and crimp the fittings into the ends using the crimper that’s included in the installation kit. This process was very straightforward and oddly satisfying!
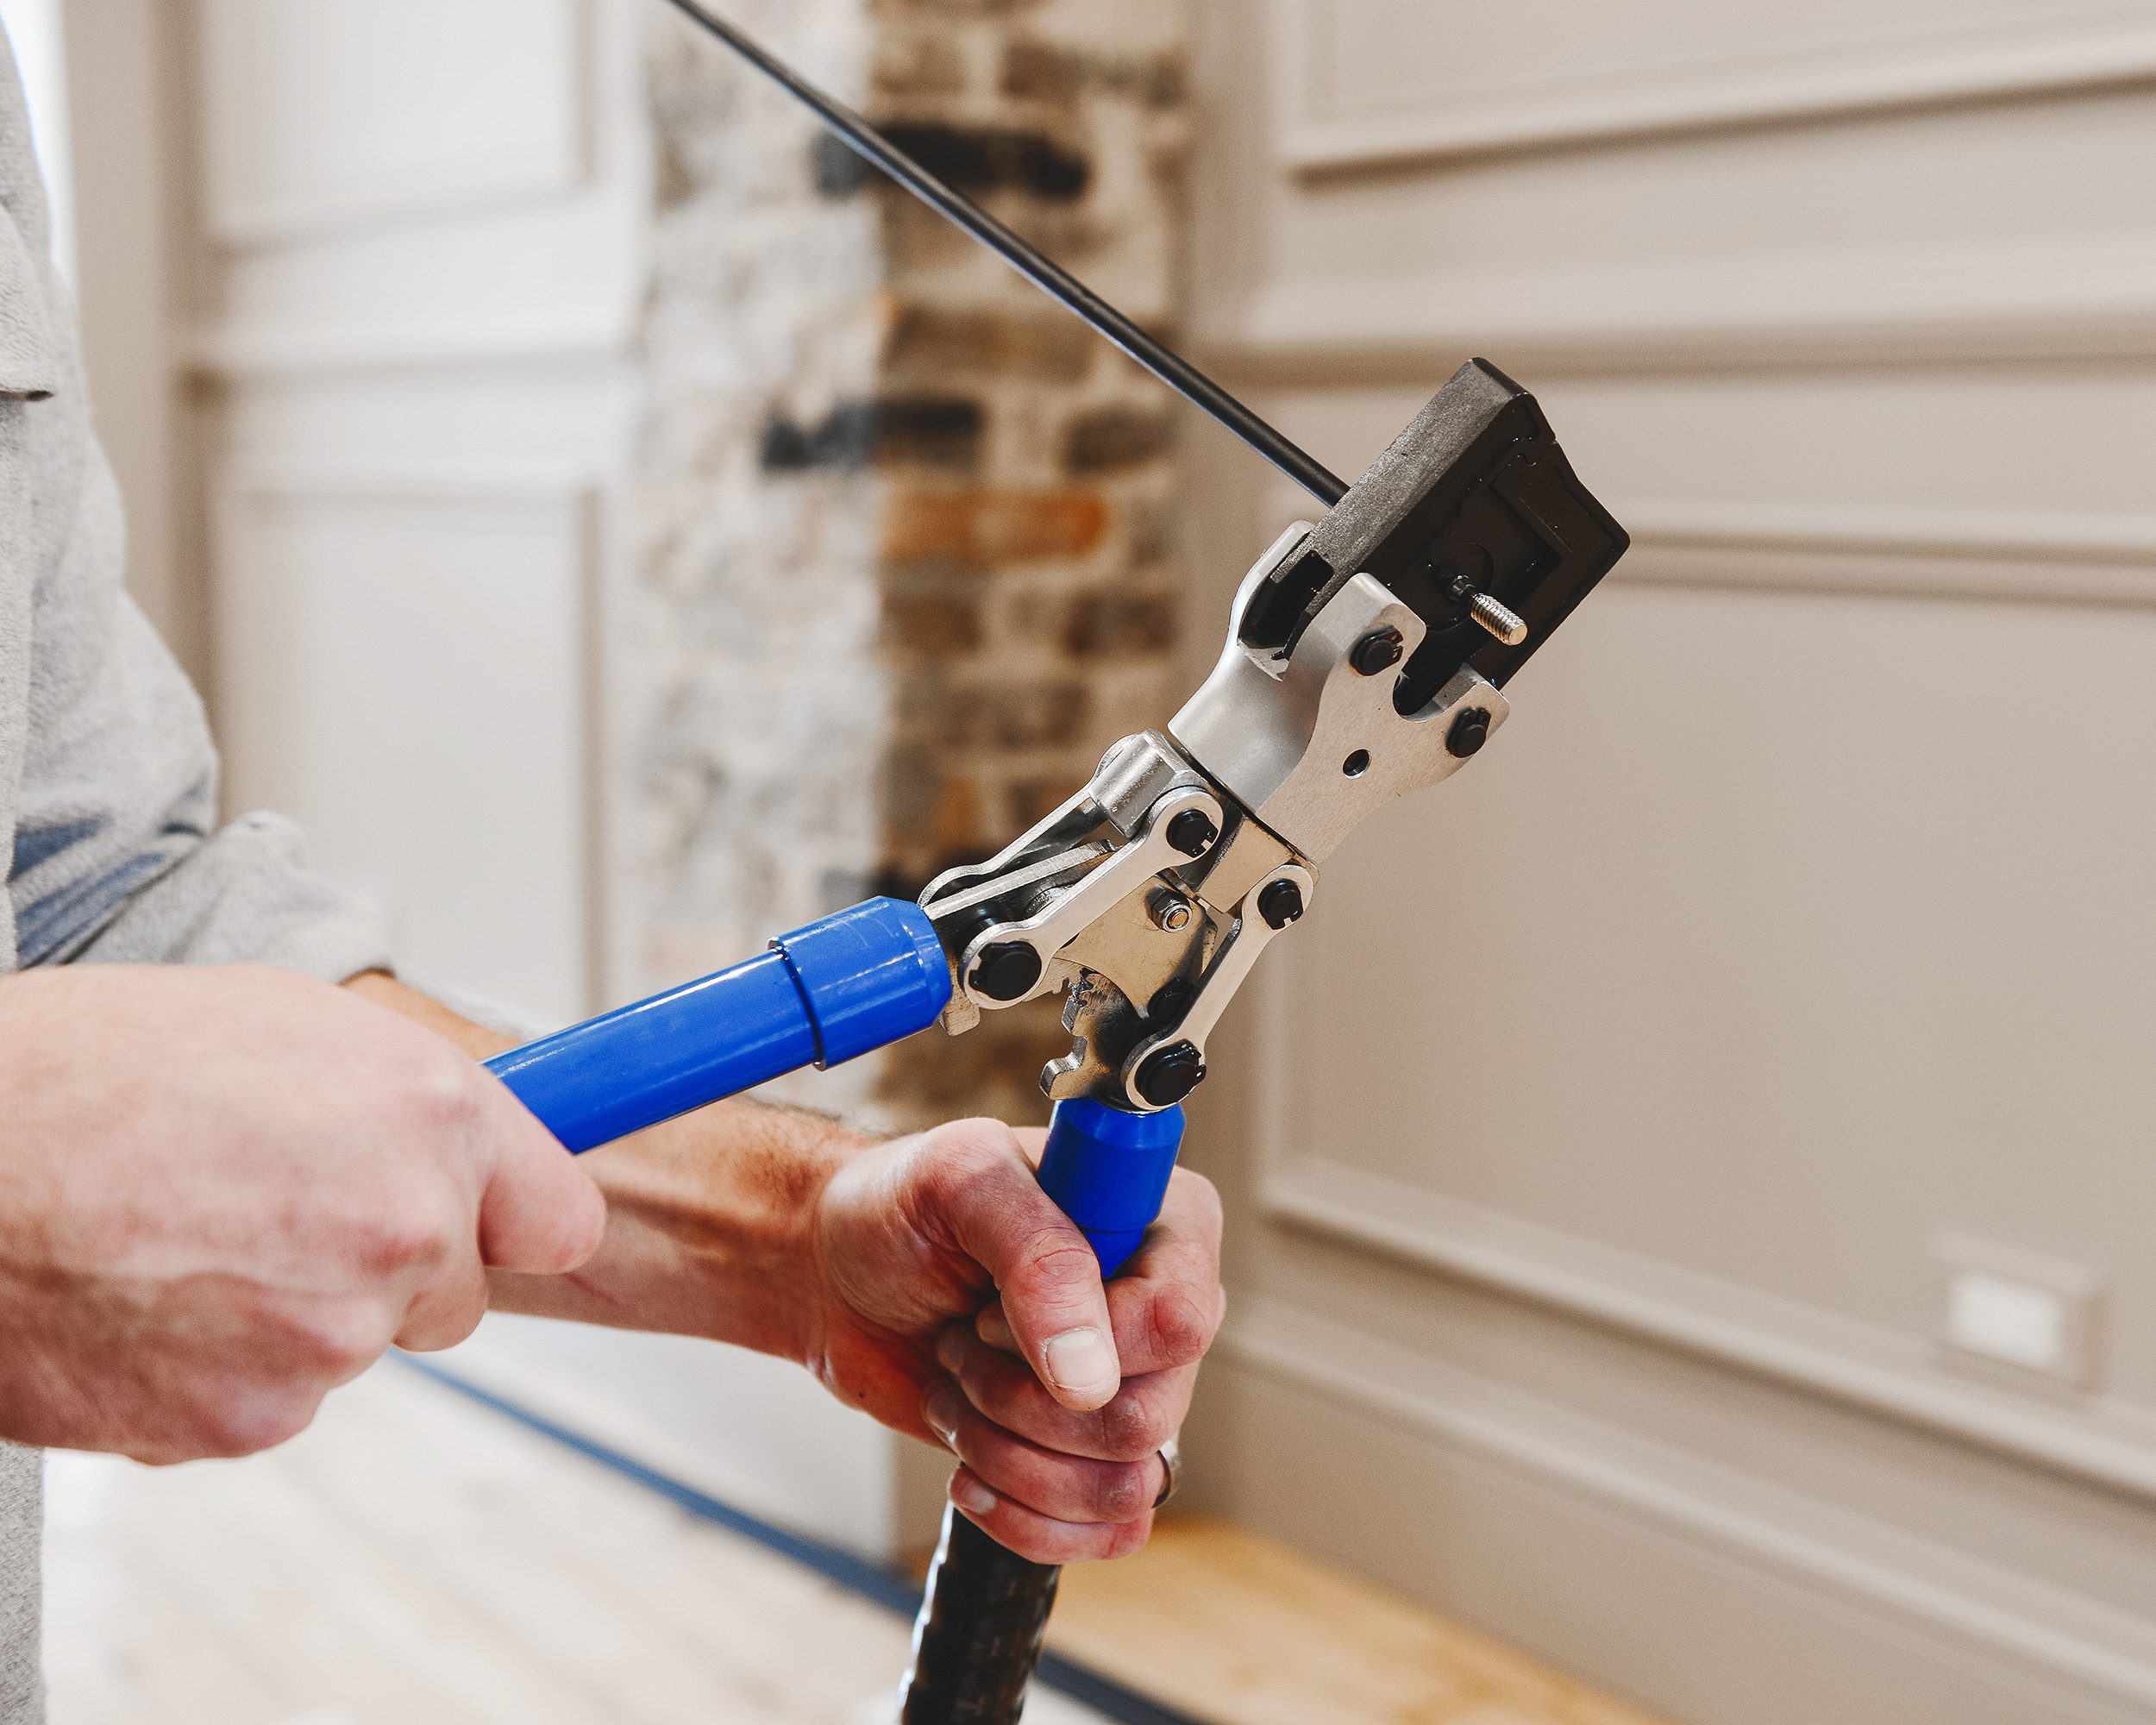
With the fittings installed into the ends of the rods, we were ready to insert the rods into the posts and thread on the tension receivers, those black hex head components on the outside of the posts.
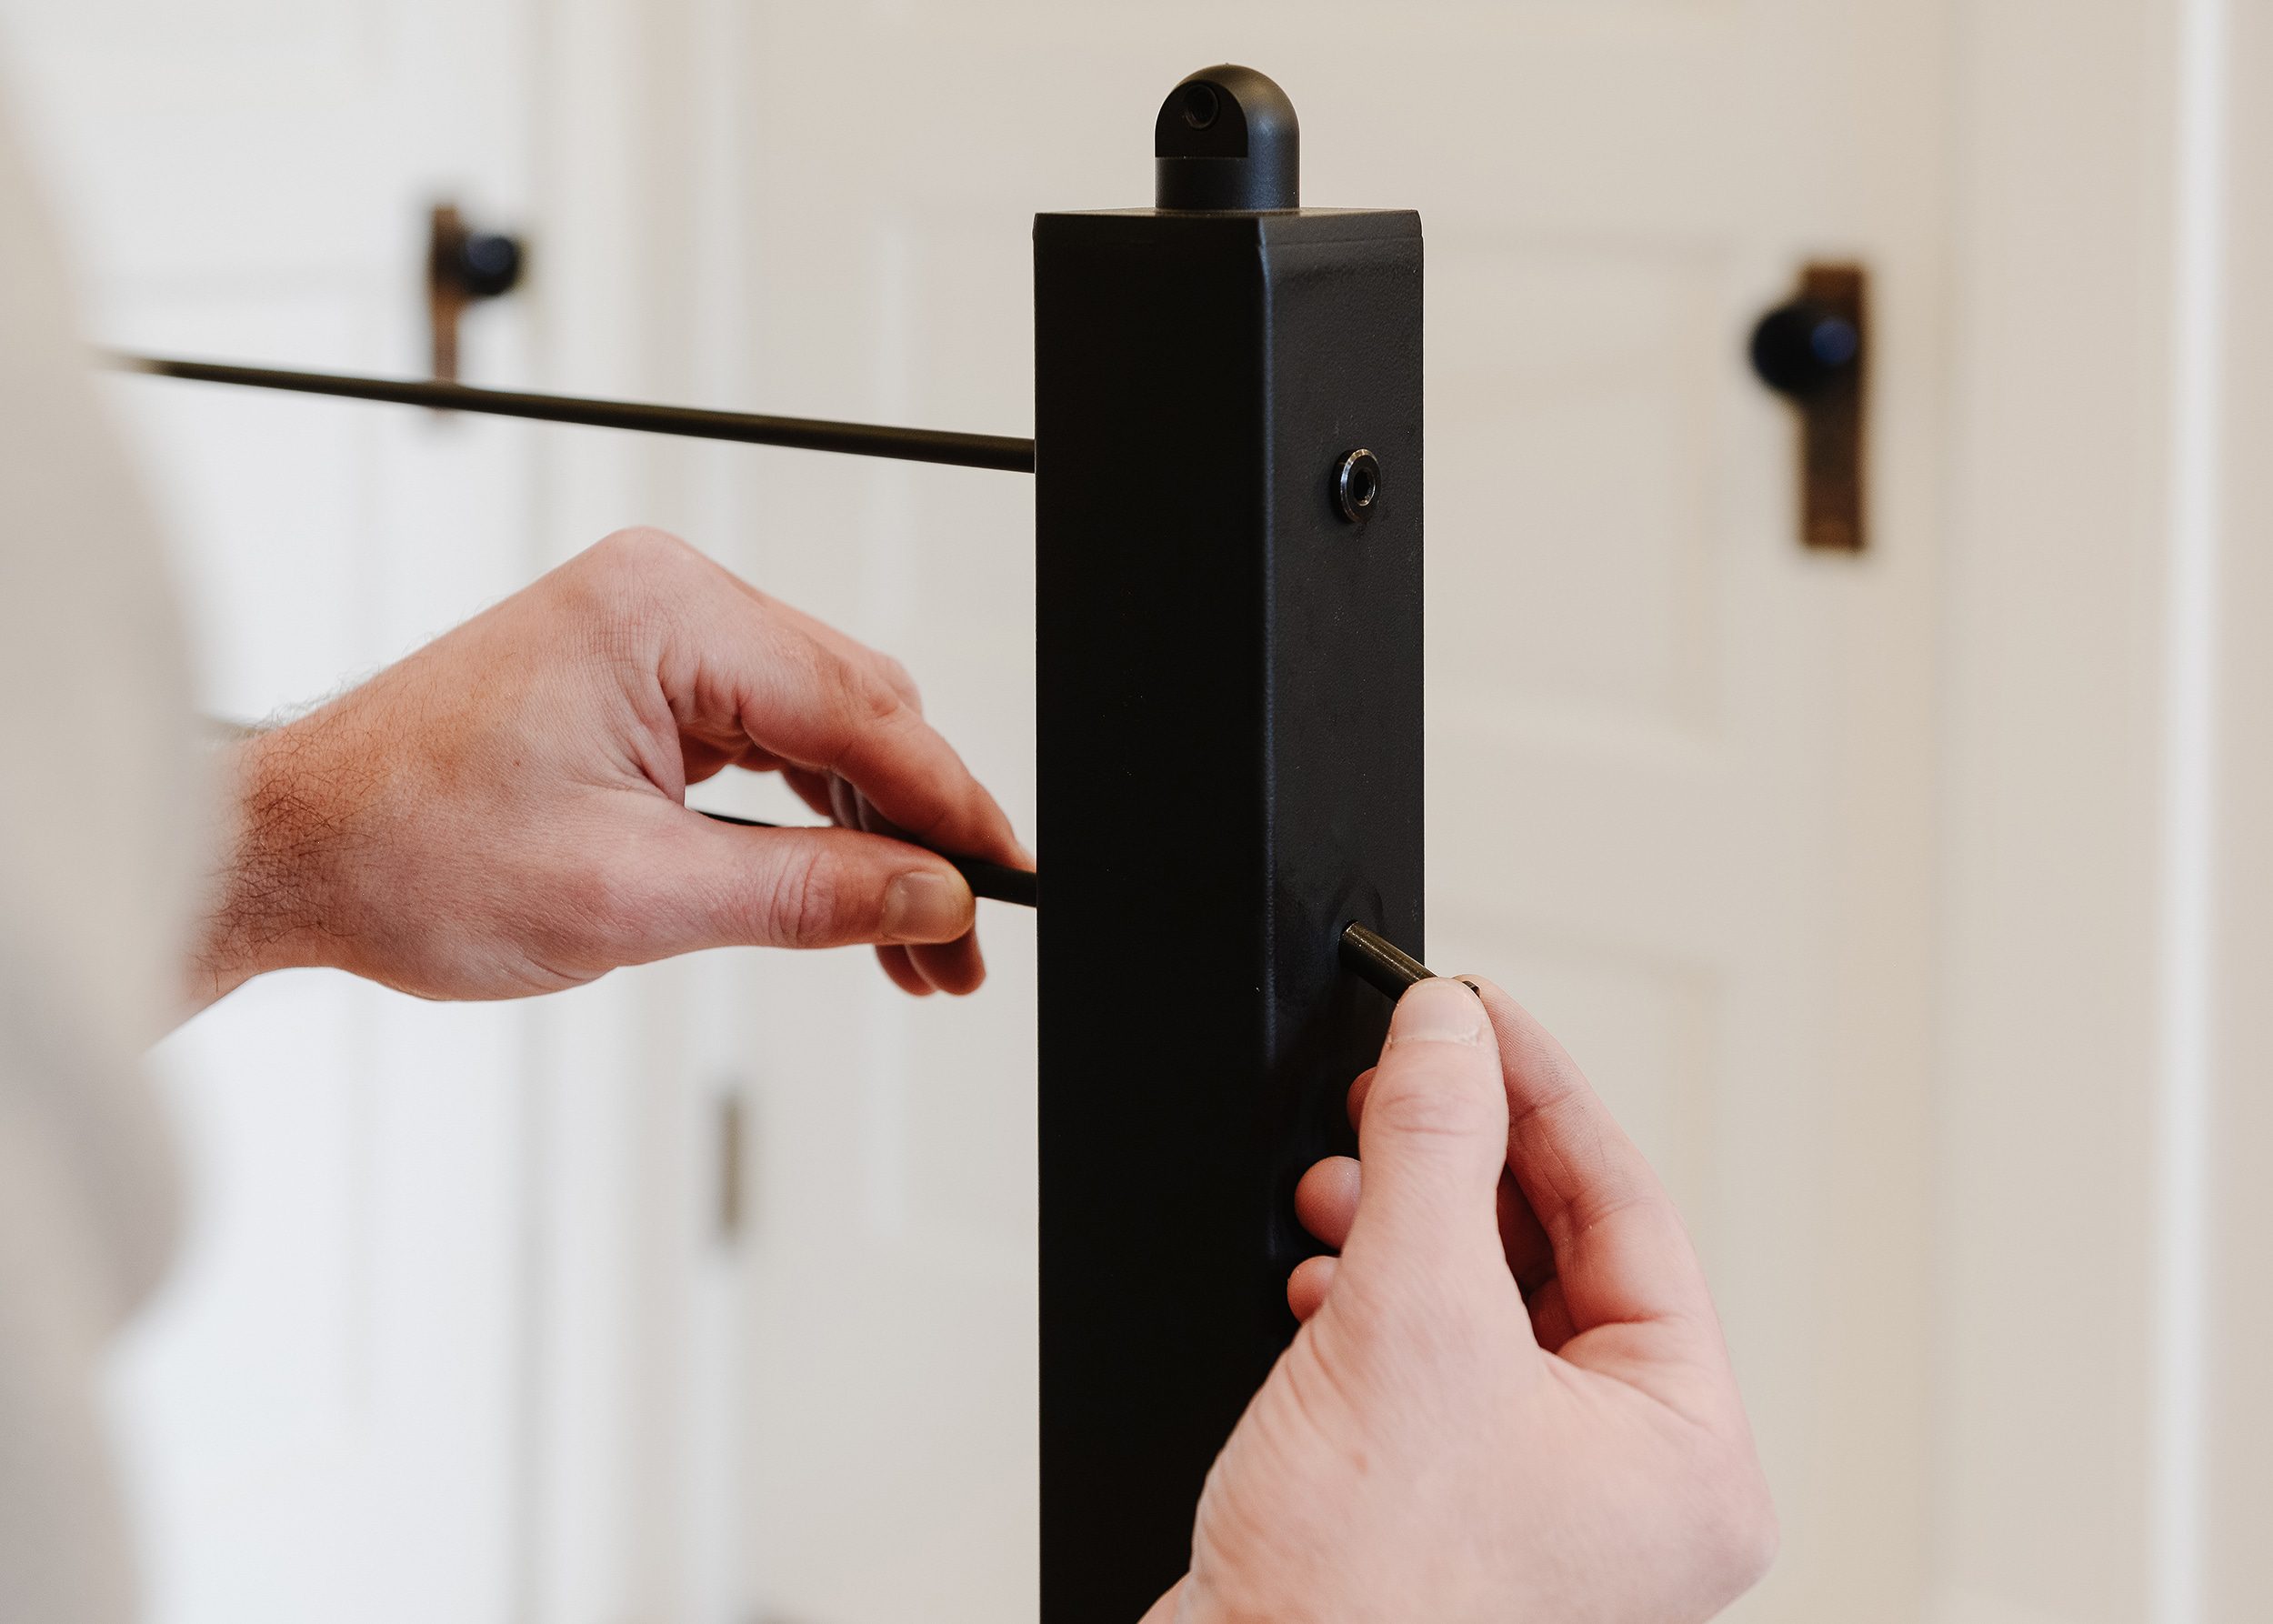
Everything went together ‘finger tight’ at first to make sure our lengths were correct…
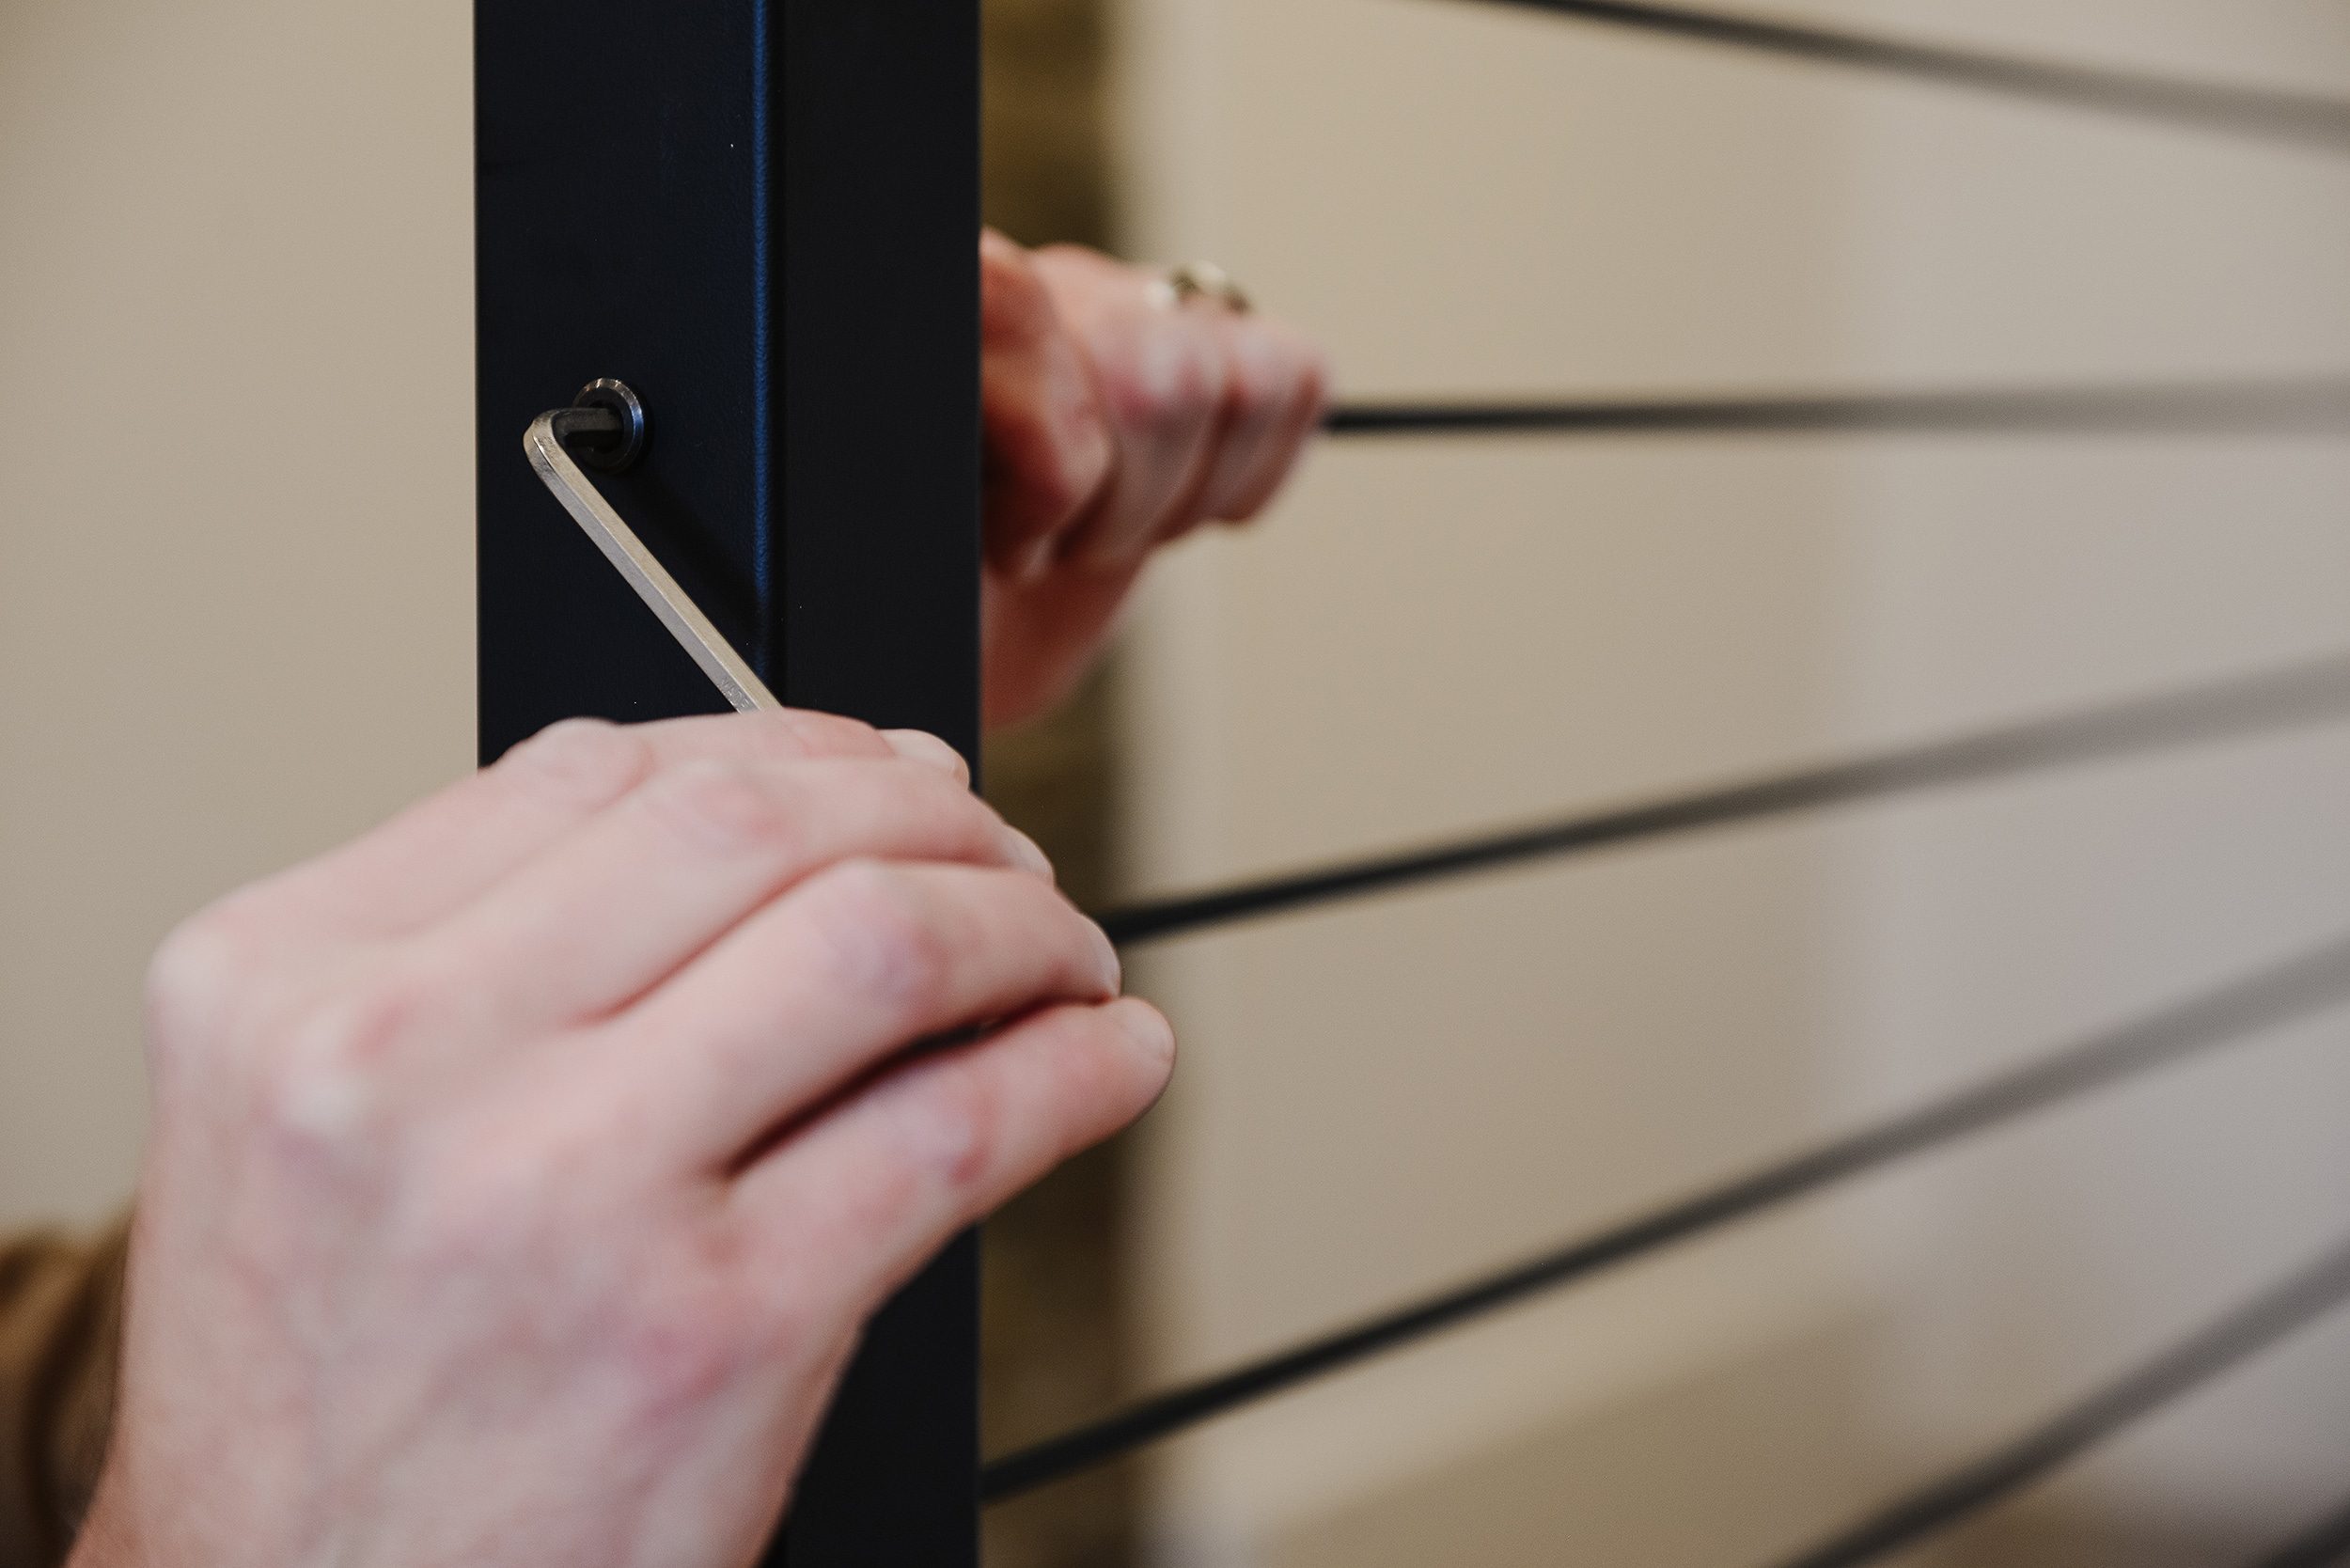
…Then we used the included hex keys to tension everything up evenly in a very specific sequence outlined in the instruction binder.
Fine Tuning
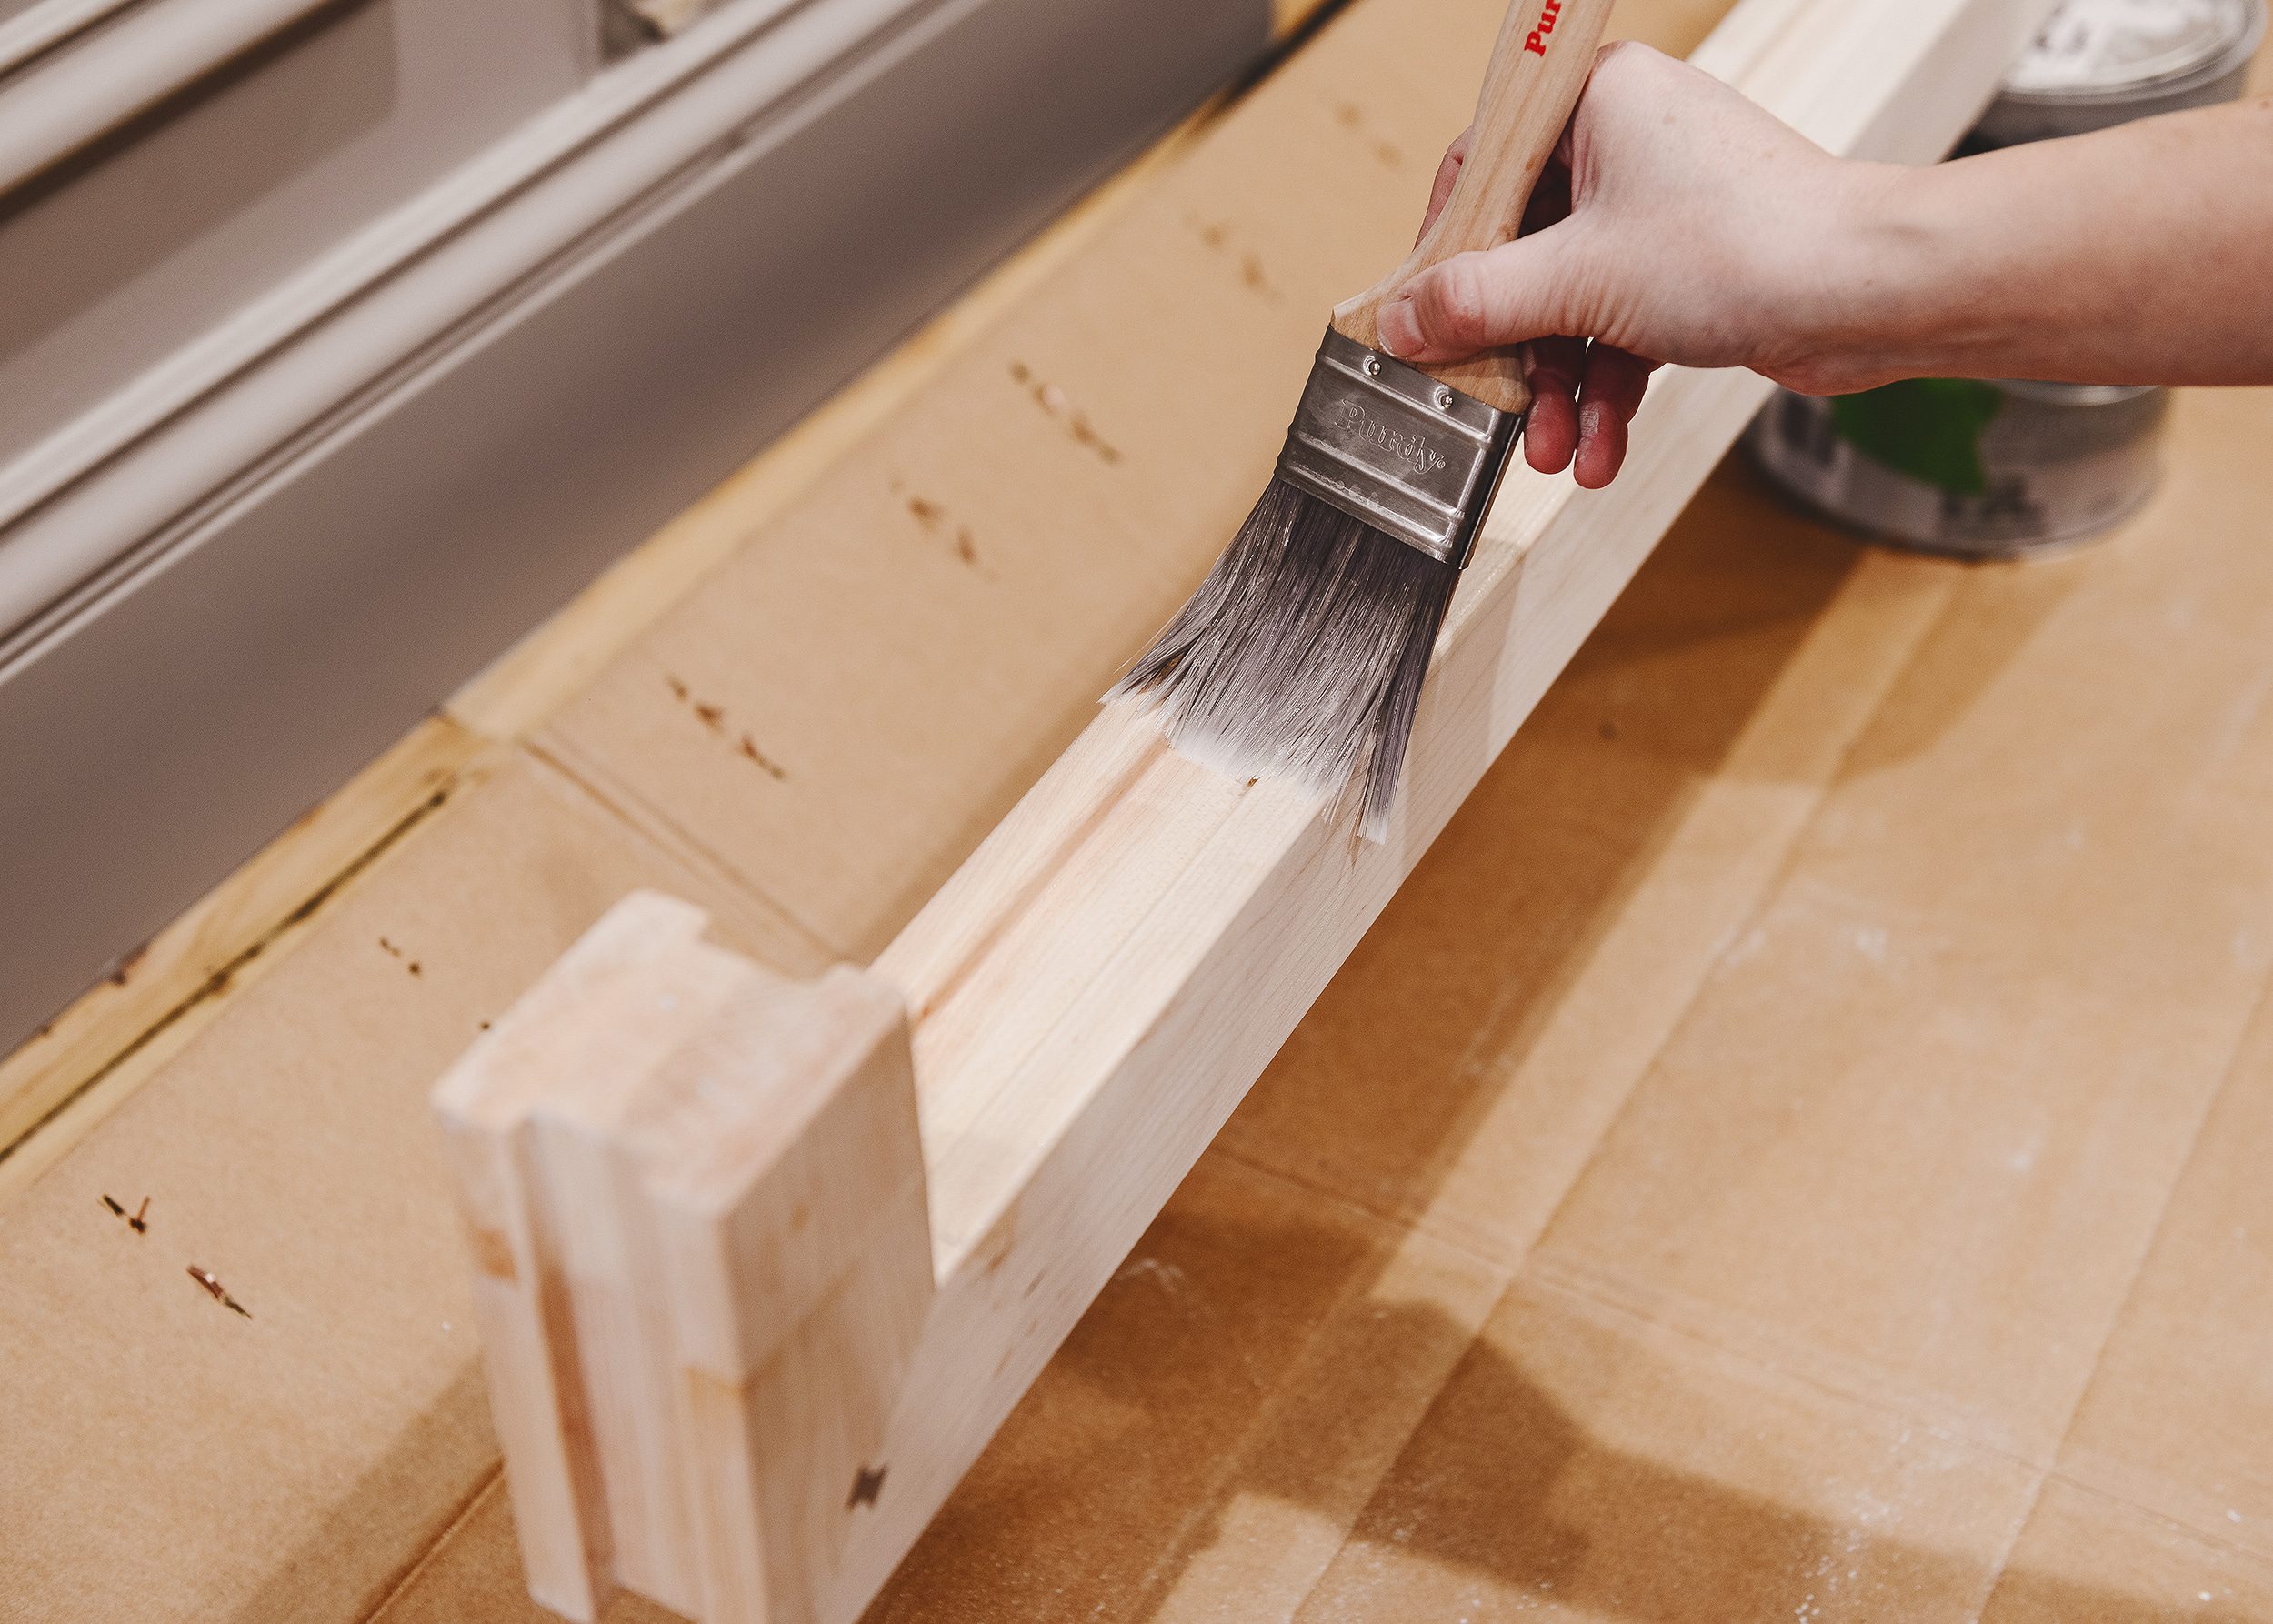
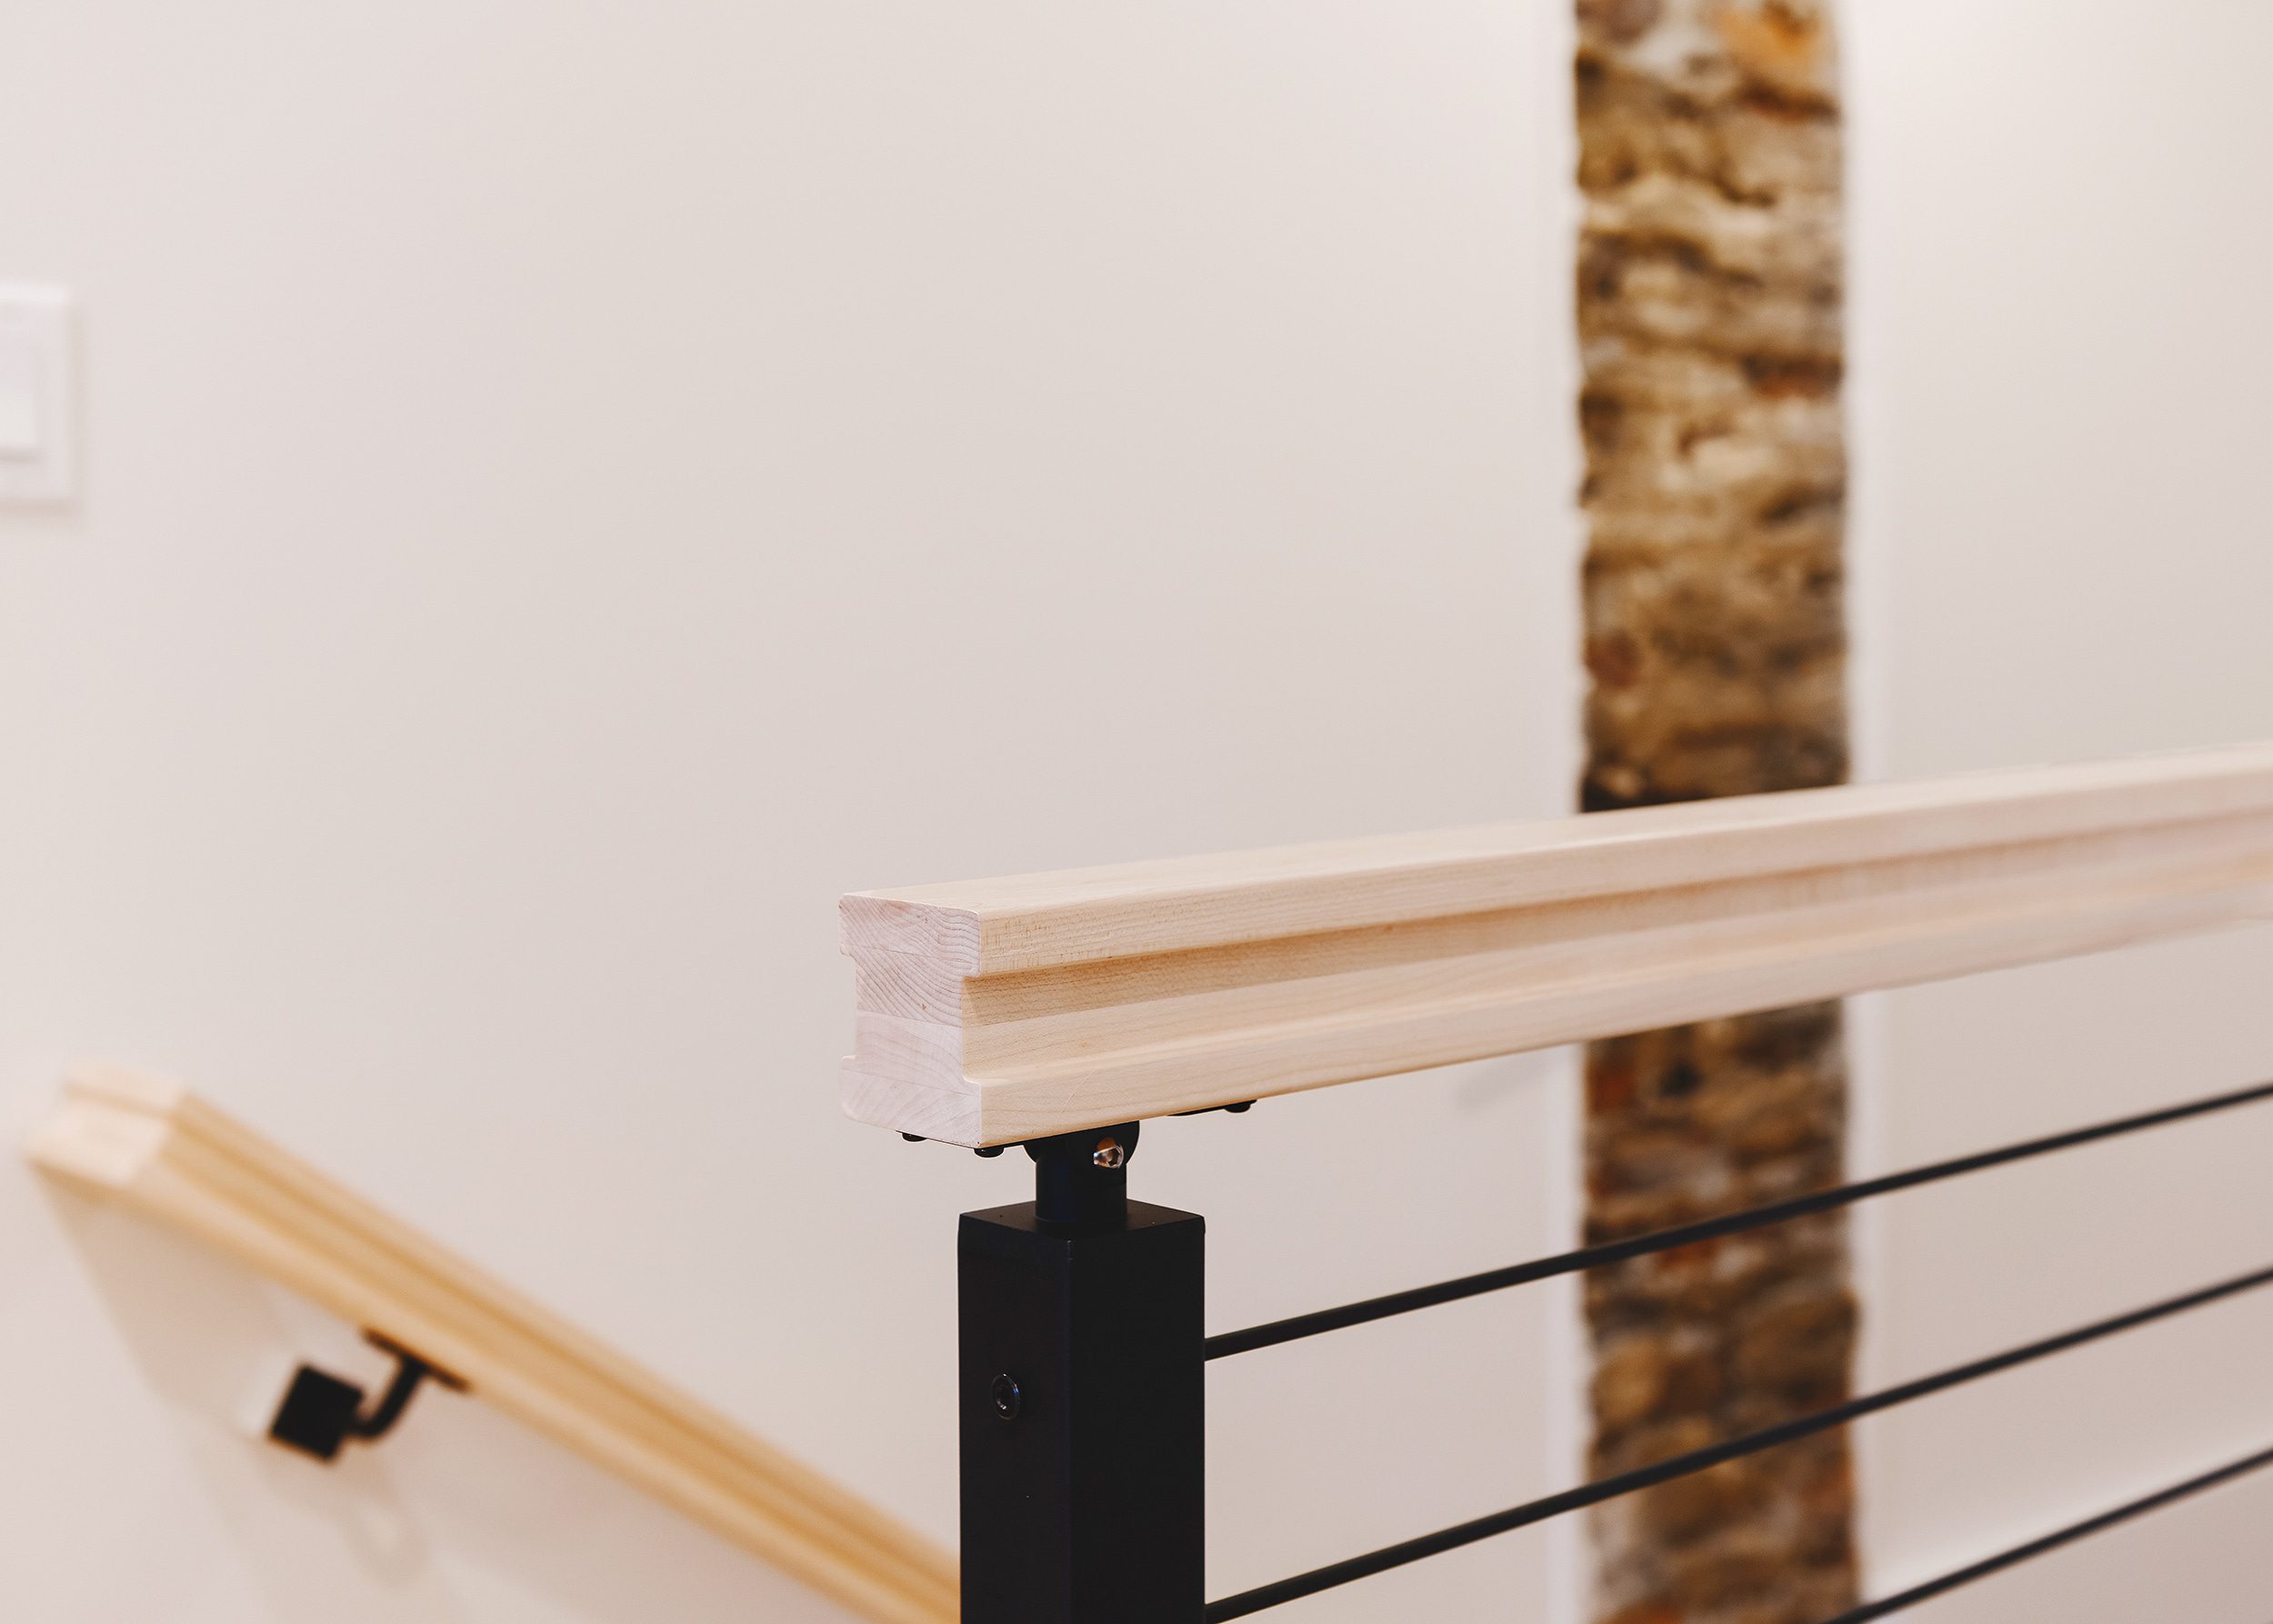
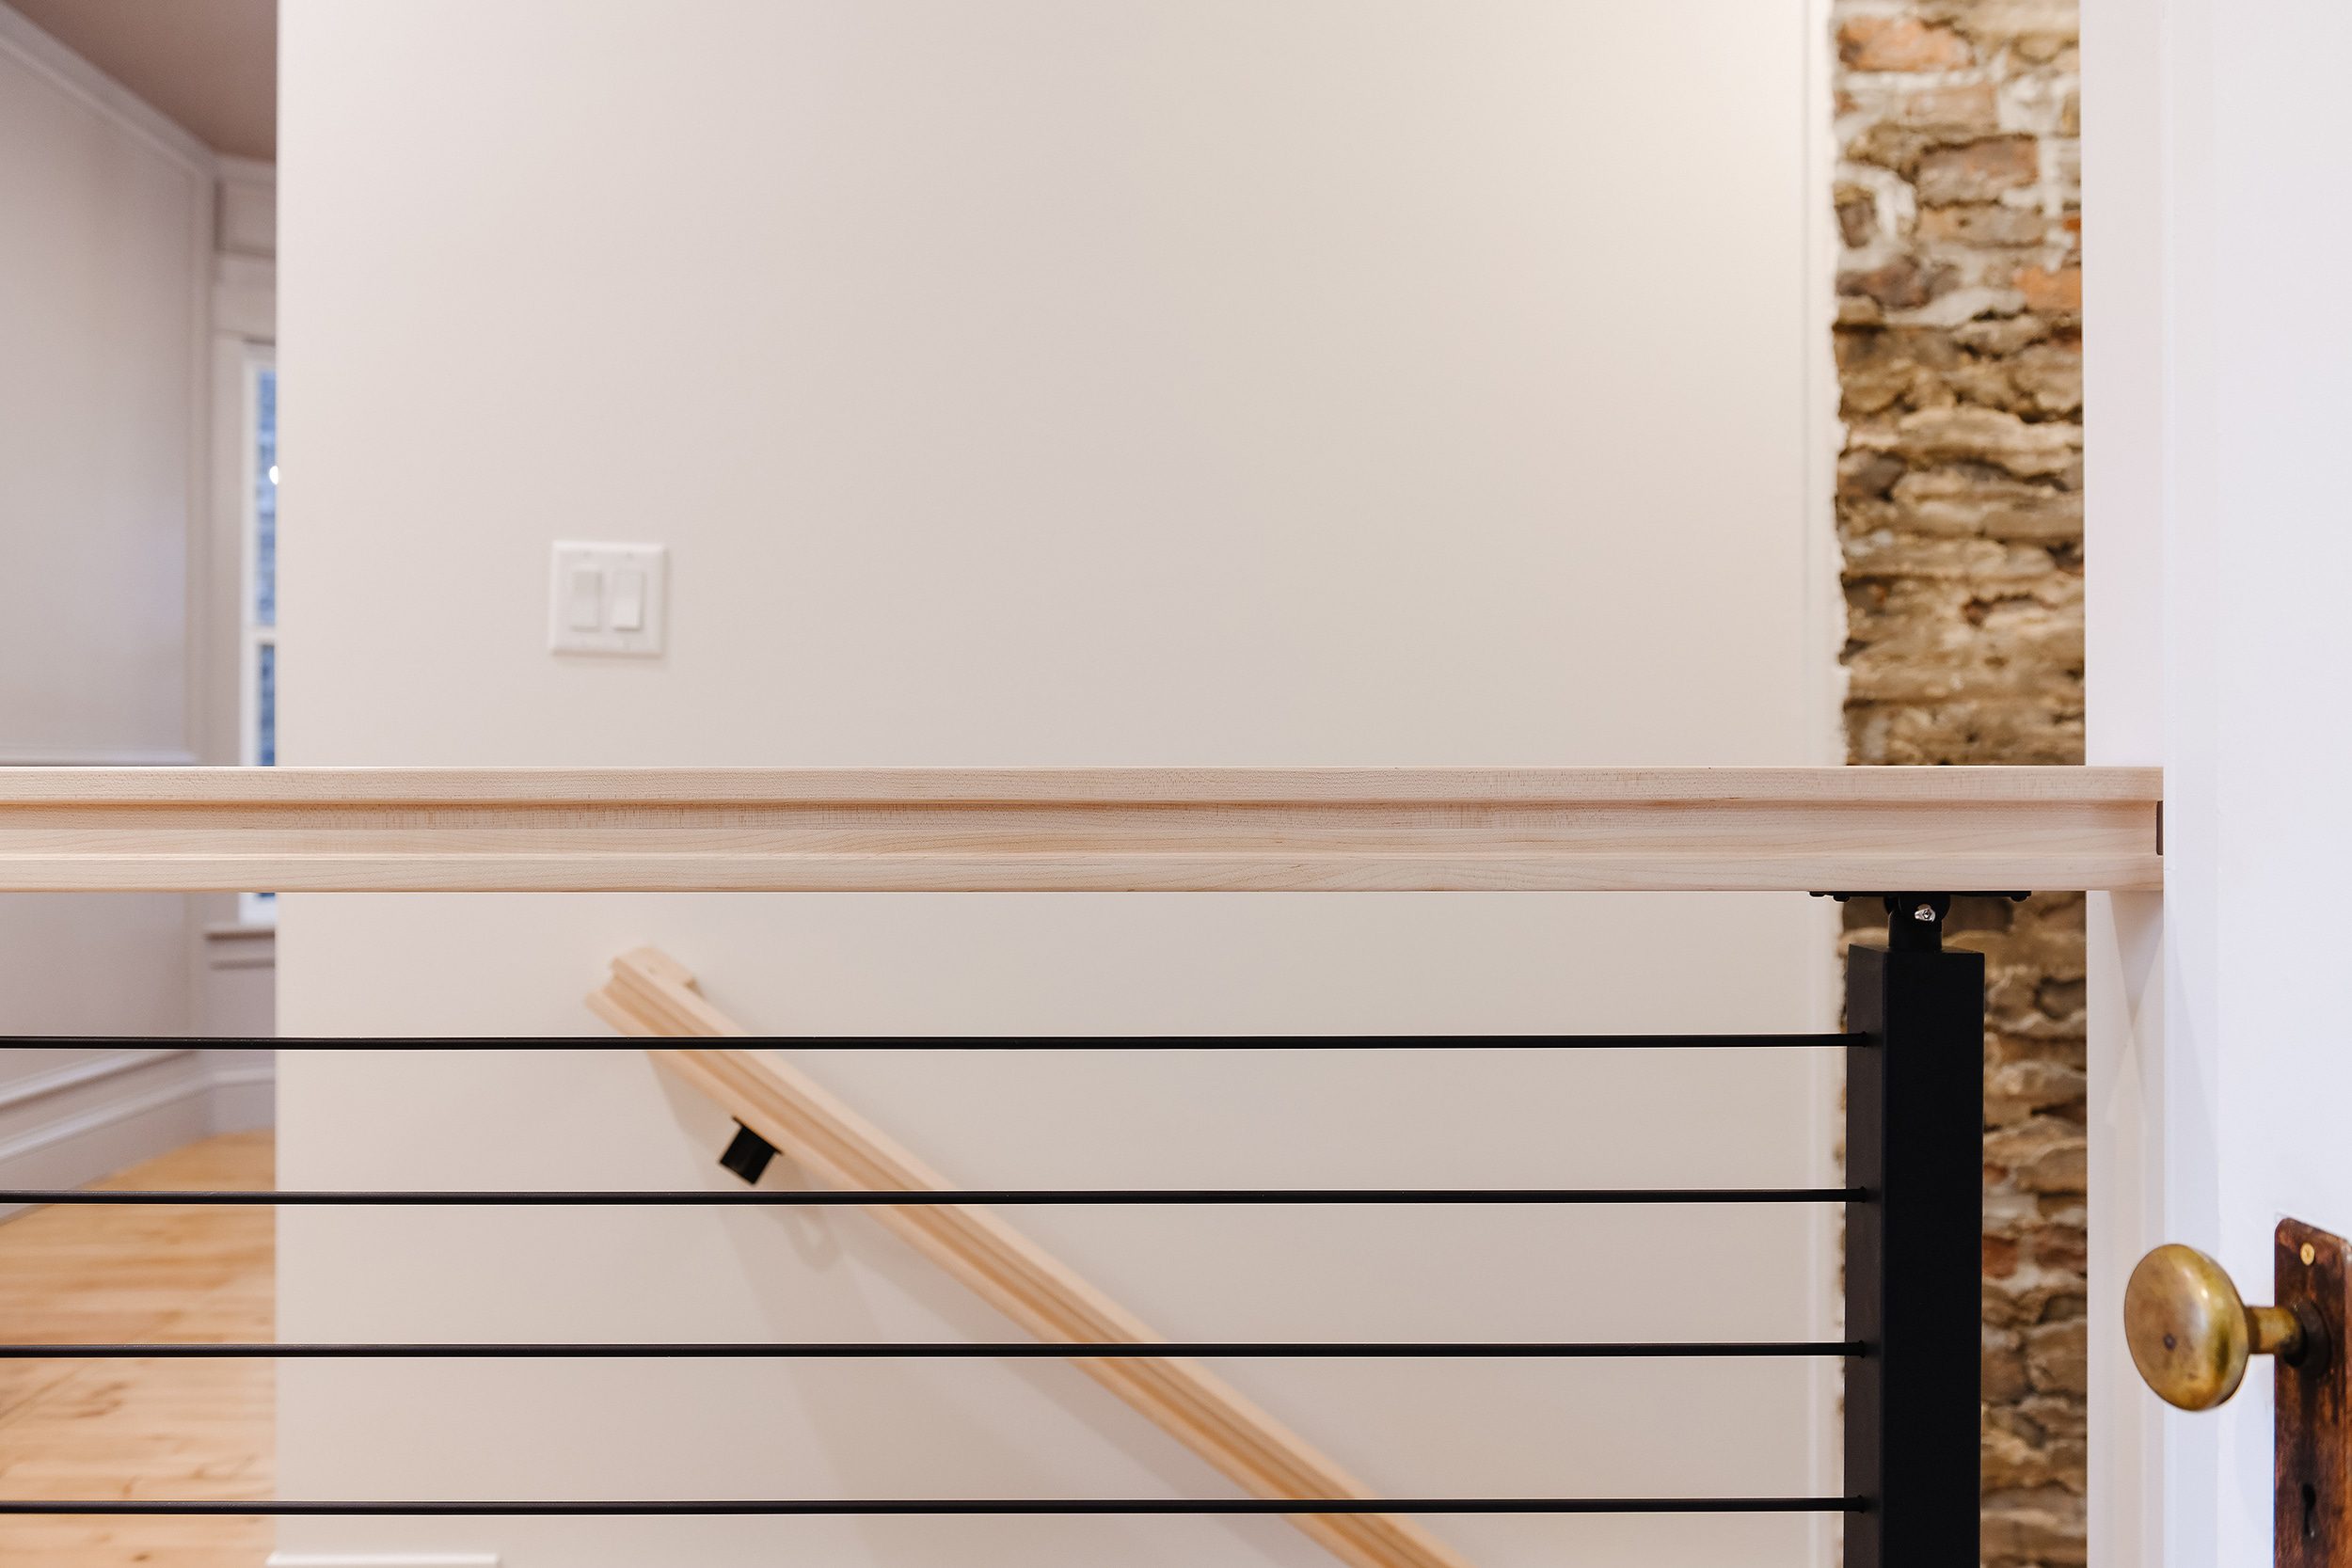
While I dialed in the perfect tension for all of the rods, Kim got to work applying a few coats of Matte Polycrylic to the unfinished maple handrail and railing. The I-beam shape is unique and there’s even a tiny walnut butterfly joint on the mitered corners of the returns. The attention to detail in every bit and fastener provided with the kit was really impressive.
Once the finish coats had dried, the handrail was installed to top of the posts and everything was given a final tension check. The railing felt super solid and secure and the entire installation took a day!
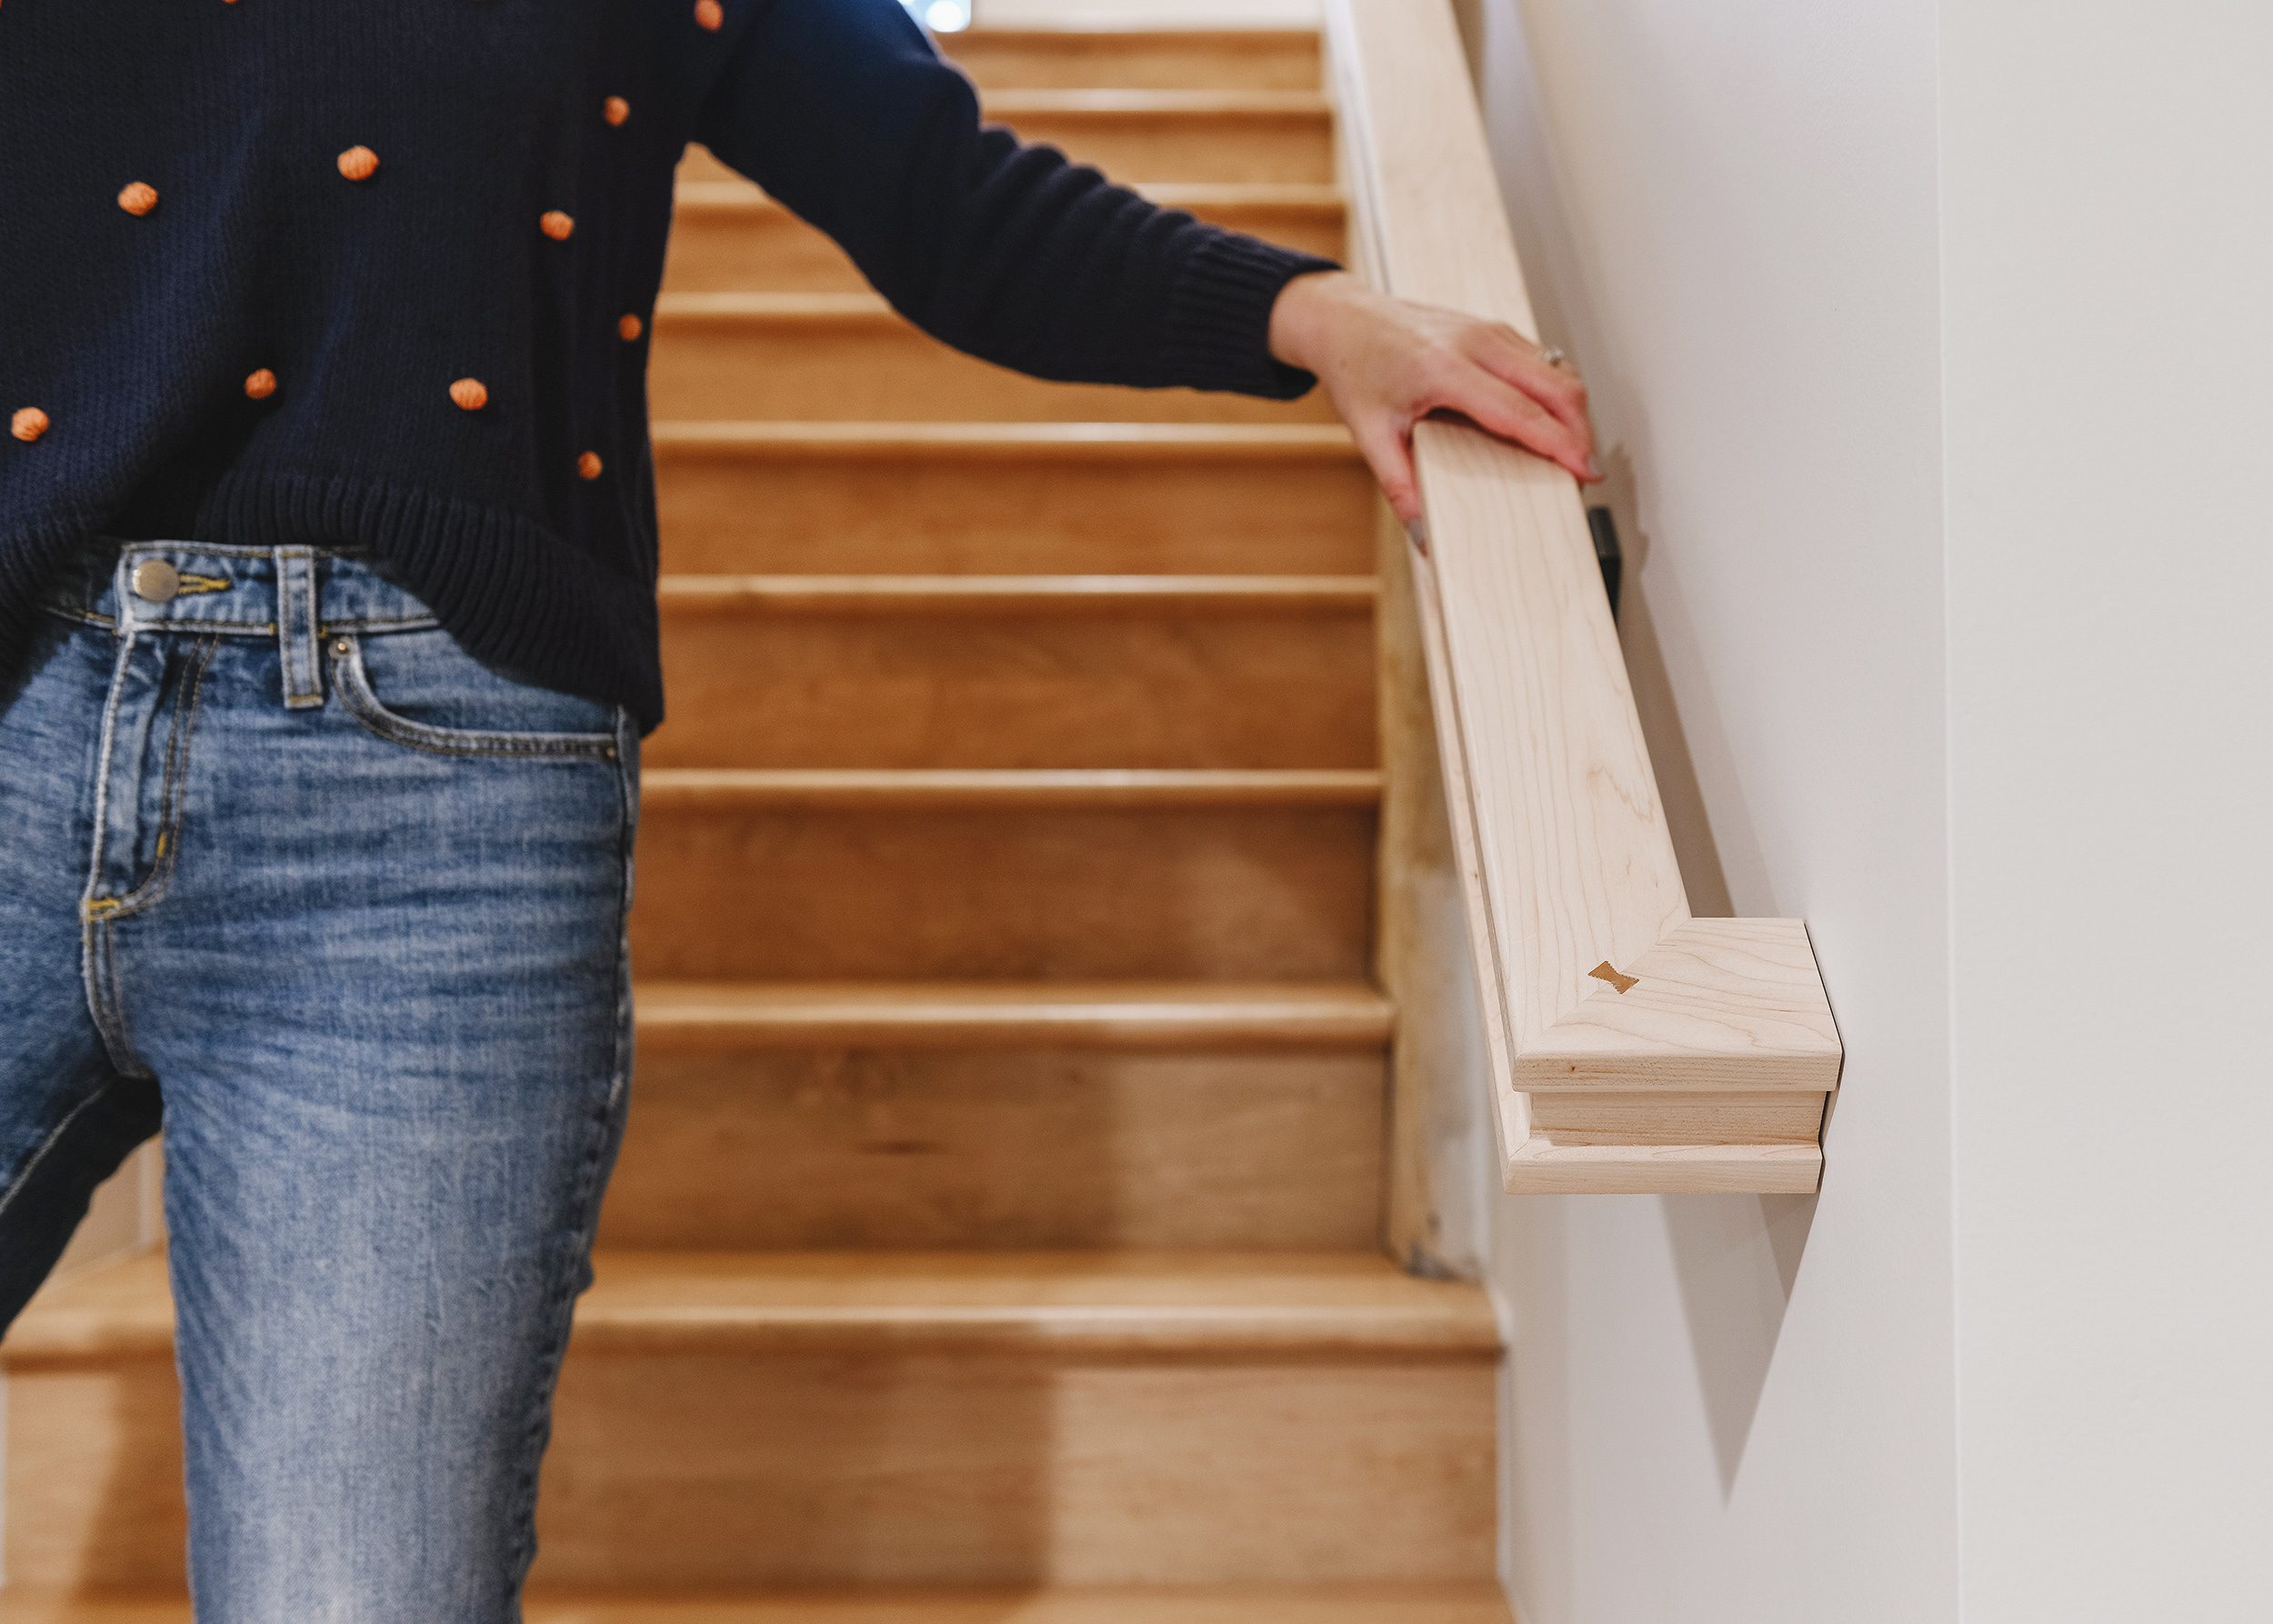
The handrail on the left side of the staircase went into place similarly to others we’ve installed. We simply located the studs, fastened the brackets to the wall with the included hardware and fastened the handrail to the brackets.
The Finished Product!
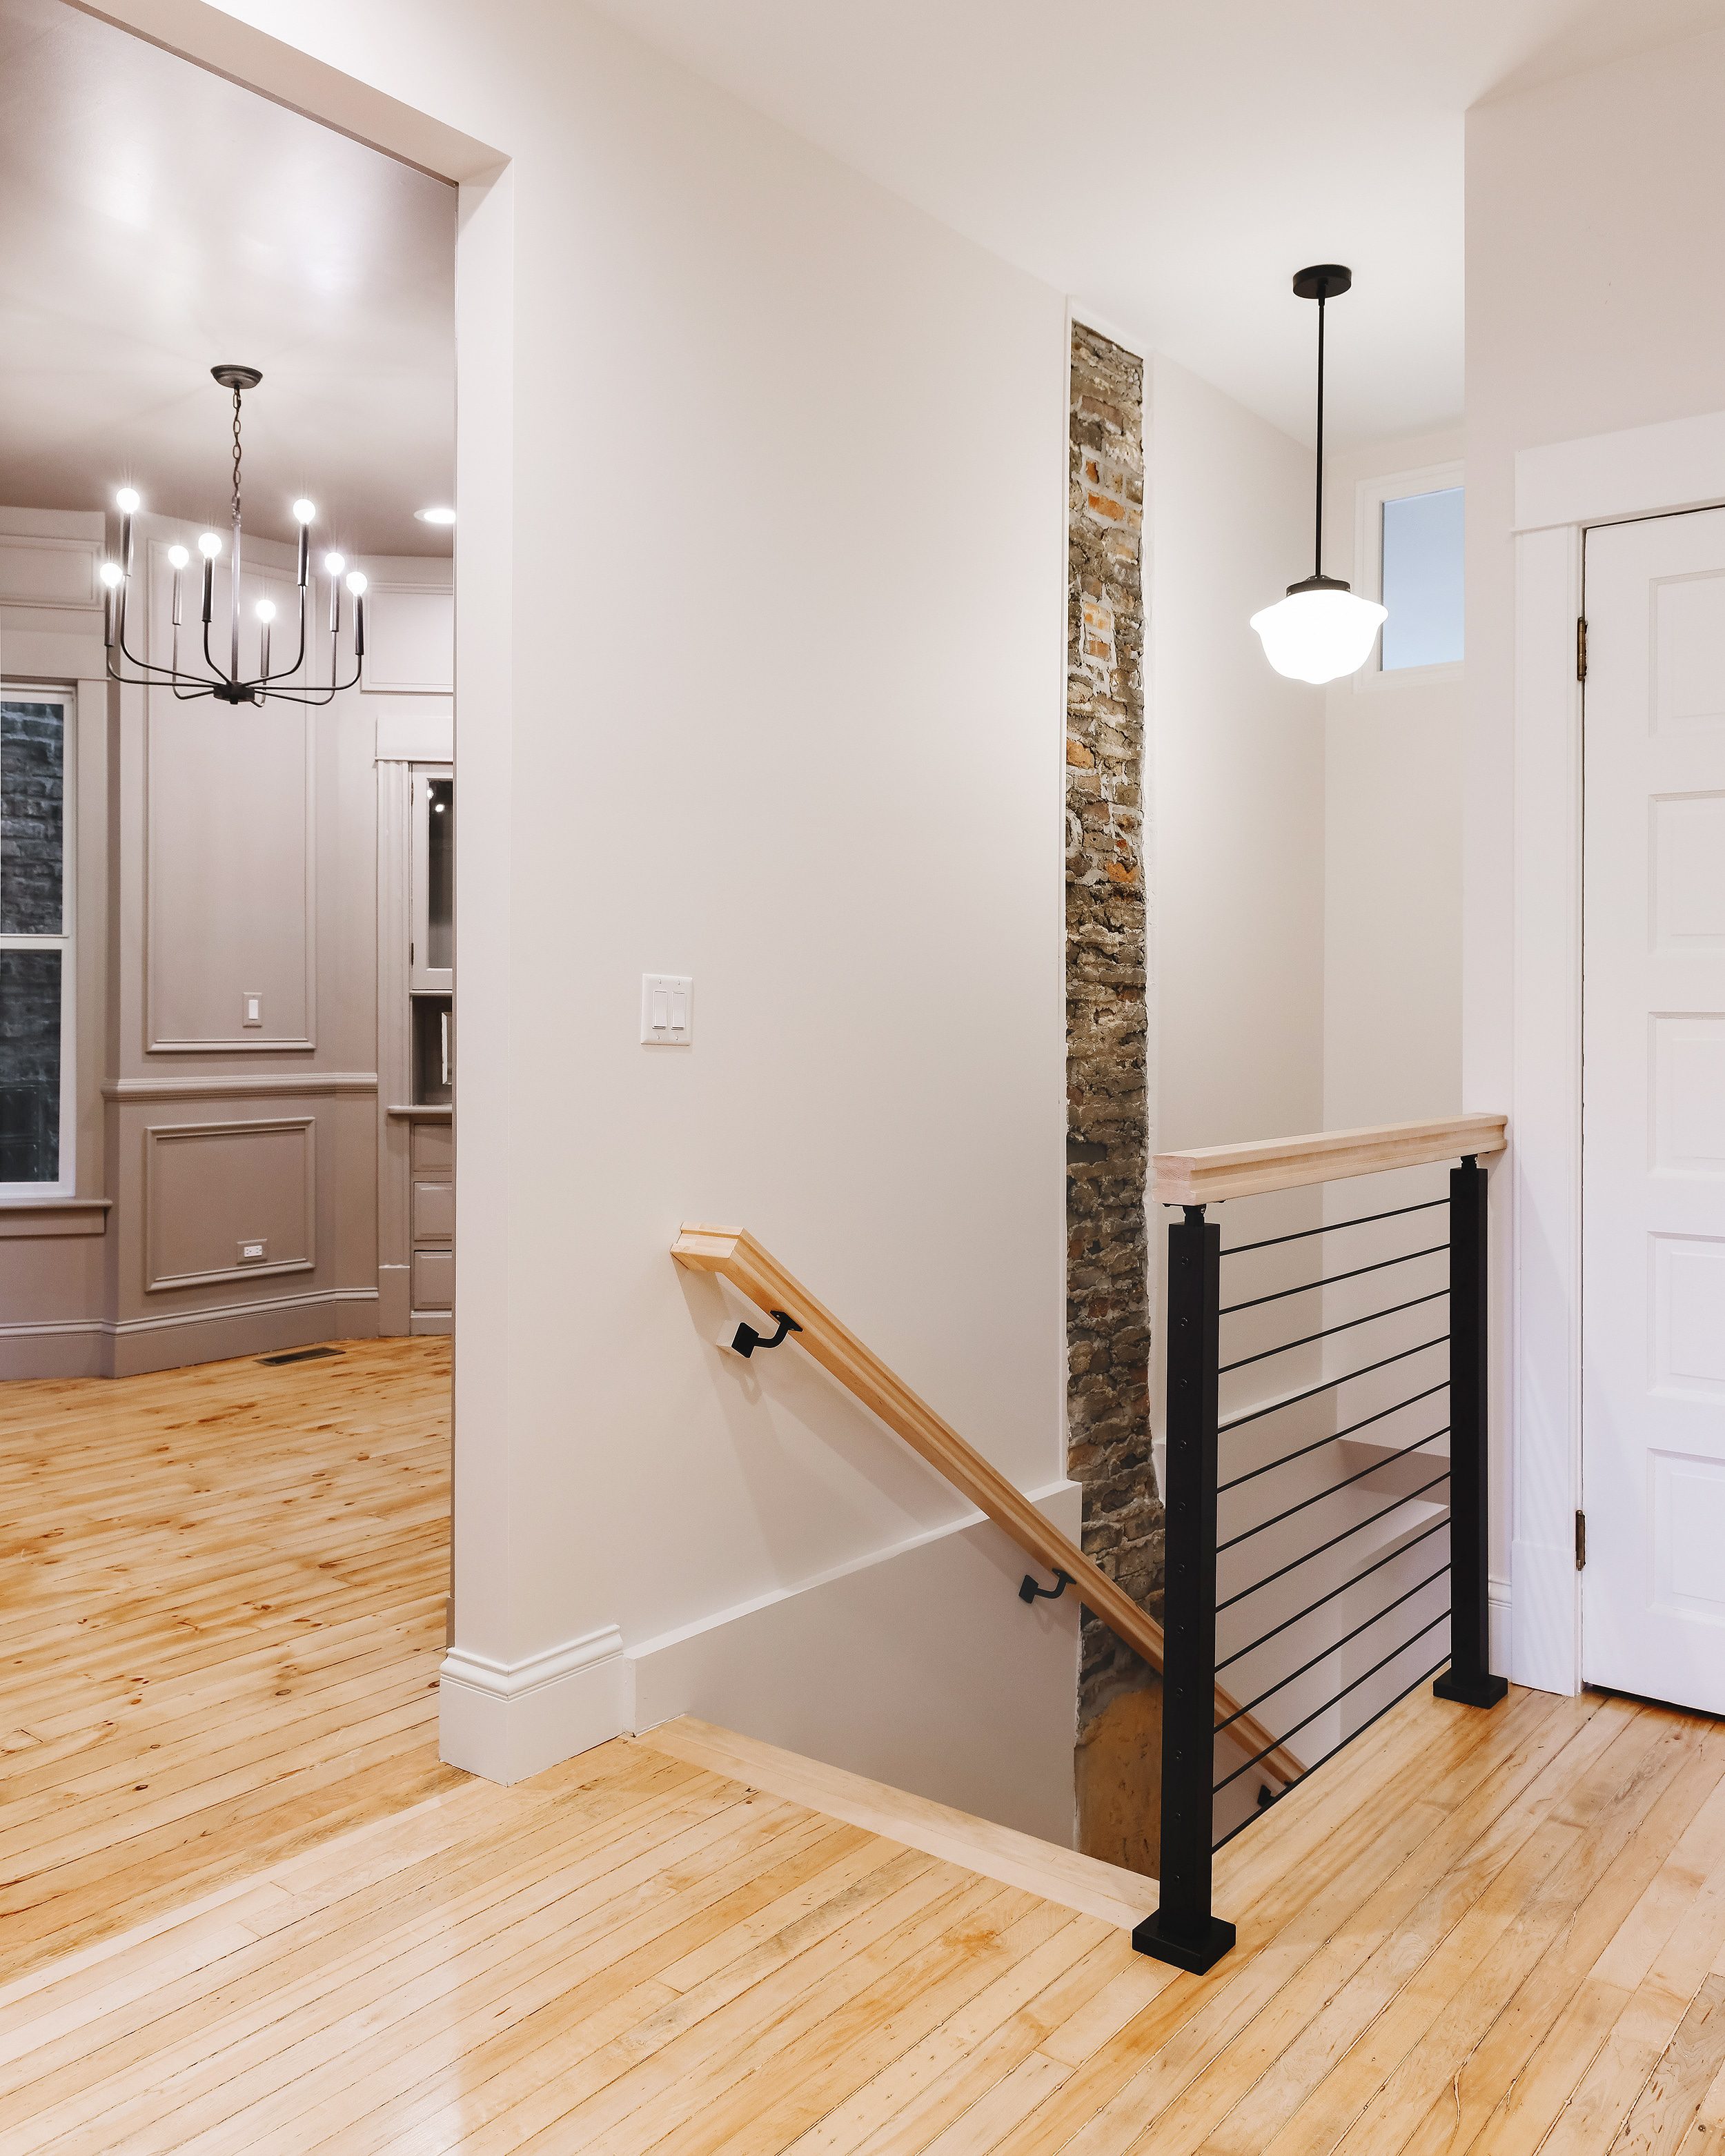
We’re obsessed with how the clean, modern look of the black hardware and maple railing plays against the vintage charm of the refinished maple flooring and brick chimney. And the ‘I’ shaped handrail is a unique touch that offers extra security; we’d lived so long without a handrail in the space that it almost felt strange to walk up and down the stairs with the added support!
Since the railing is located off of the kitchen – but is still very visible through the expanded kitchen/dining room opening – it was important that all of the components played well with the rest of the space. Check it out when paired with our FENIX countertops and quartz apron front sink!

The Onyx Rod Railing system was the perfect choice for this space. It arrived quickly – about two weeks for our small installation – and was more affordable when compared to custom options. The installation went as smoothly as it possibly could have, which is not always the case with DIY. In other words, this is truly a DIY project!
Huge thanks to our friends at Viewrail for working with us on this project and providing the finishing touch for the Unit 1 kitchen! We’re thoroughly impressed with the quality of both the product and installation guidance. Now we just need to find a way to incorporate one of their floating stair systems into one of our projects…
We partnered with Viewrail on this project and used the Onyx Rod Railing system with a maple handrail. As always, we appreciate you supporting the companies that support us!
In This Post:
Viewrail Onyx Rod Rail System | chandelier | stair light | apron front sink | open shelves | yellow sconce | dining room wall color: Kilz Tribute Meadow Mauve | kitchen wall color: Sherwin-Williams Heron Plume


That looks gorgeous! Your eye for detail is amazing, and I have learned so much from you. Thank You!
Thank you!
truly lovely!! are you thinking of colouring in black the silver hardware?
We considered it (they even included black touch up paint with our order!), but we ultimately decided that we liked the look. However, it’s an option they provide for you. There were so many nice touches throughout the whole kit.
Love it- Gorgeous!
It looks really perfect in your space!
that railing is stunning! Love how you pull everything together.
This turned out so beautifully! Would you mind sharing an affiliate link to the wooden railing and brackets for the left side of the stairs? You always manage to pick out such gorgeous products.
You’re so sweet, Caity! The handrail and brackets are all part of the Viewrail system!