

We live 90 minutes away from our Michigan Tree House, so we rely on a handful of smart home products to monitor it and offer peace of mind while we’re home in Chicago. Today we’re walking through the installation of a smart security camera and offering a few tips to help your installation go as smoothly as possible!
Since we usually only spend less than 10 days a month at our little getaway home in Michigan, smart home products that allow us to monitor the home from across the lake in Chicago are incredibly important to us. We currently rely on connected smoke/CO alarms, a smart thermostat and a smart water leak detection device to offer us all of the peace of mind we need when we’re away. Our phones are also set up to alert us if anything out of the ordinary should happen with any of these systems. We’ve said it before and we’ll say it again: We’re living in the future!
We also recently installed this smart deadbolt with forced entry text alerts that will allow us to assign codes and open the door remotely for our future Airbnb guests. Another big step in allowing remote monitoring of our Tree House was the addition of the Nest Cam Outdoor security camera. This will allow us to monitor the delivery of packages and ensure that our home is safe and sound for us and our guests. The installation of these cameras is very straightforward, but we’ve got a few tricks up our sleeves to make for an easier, tidier installation process!
In This Post
1| Use a Drip Loop for Safer Wiring
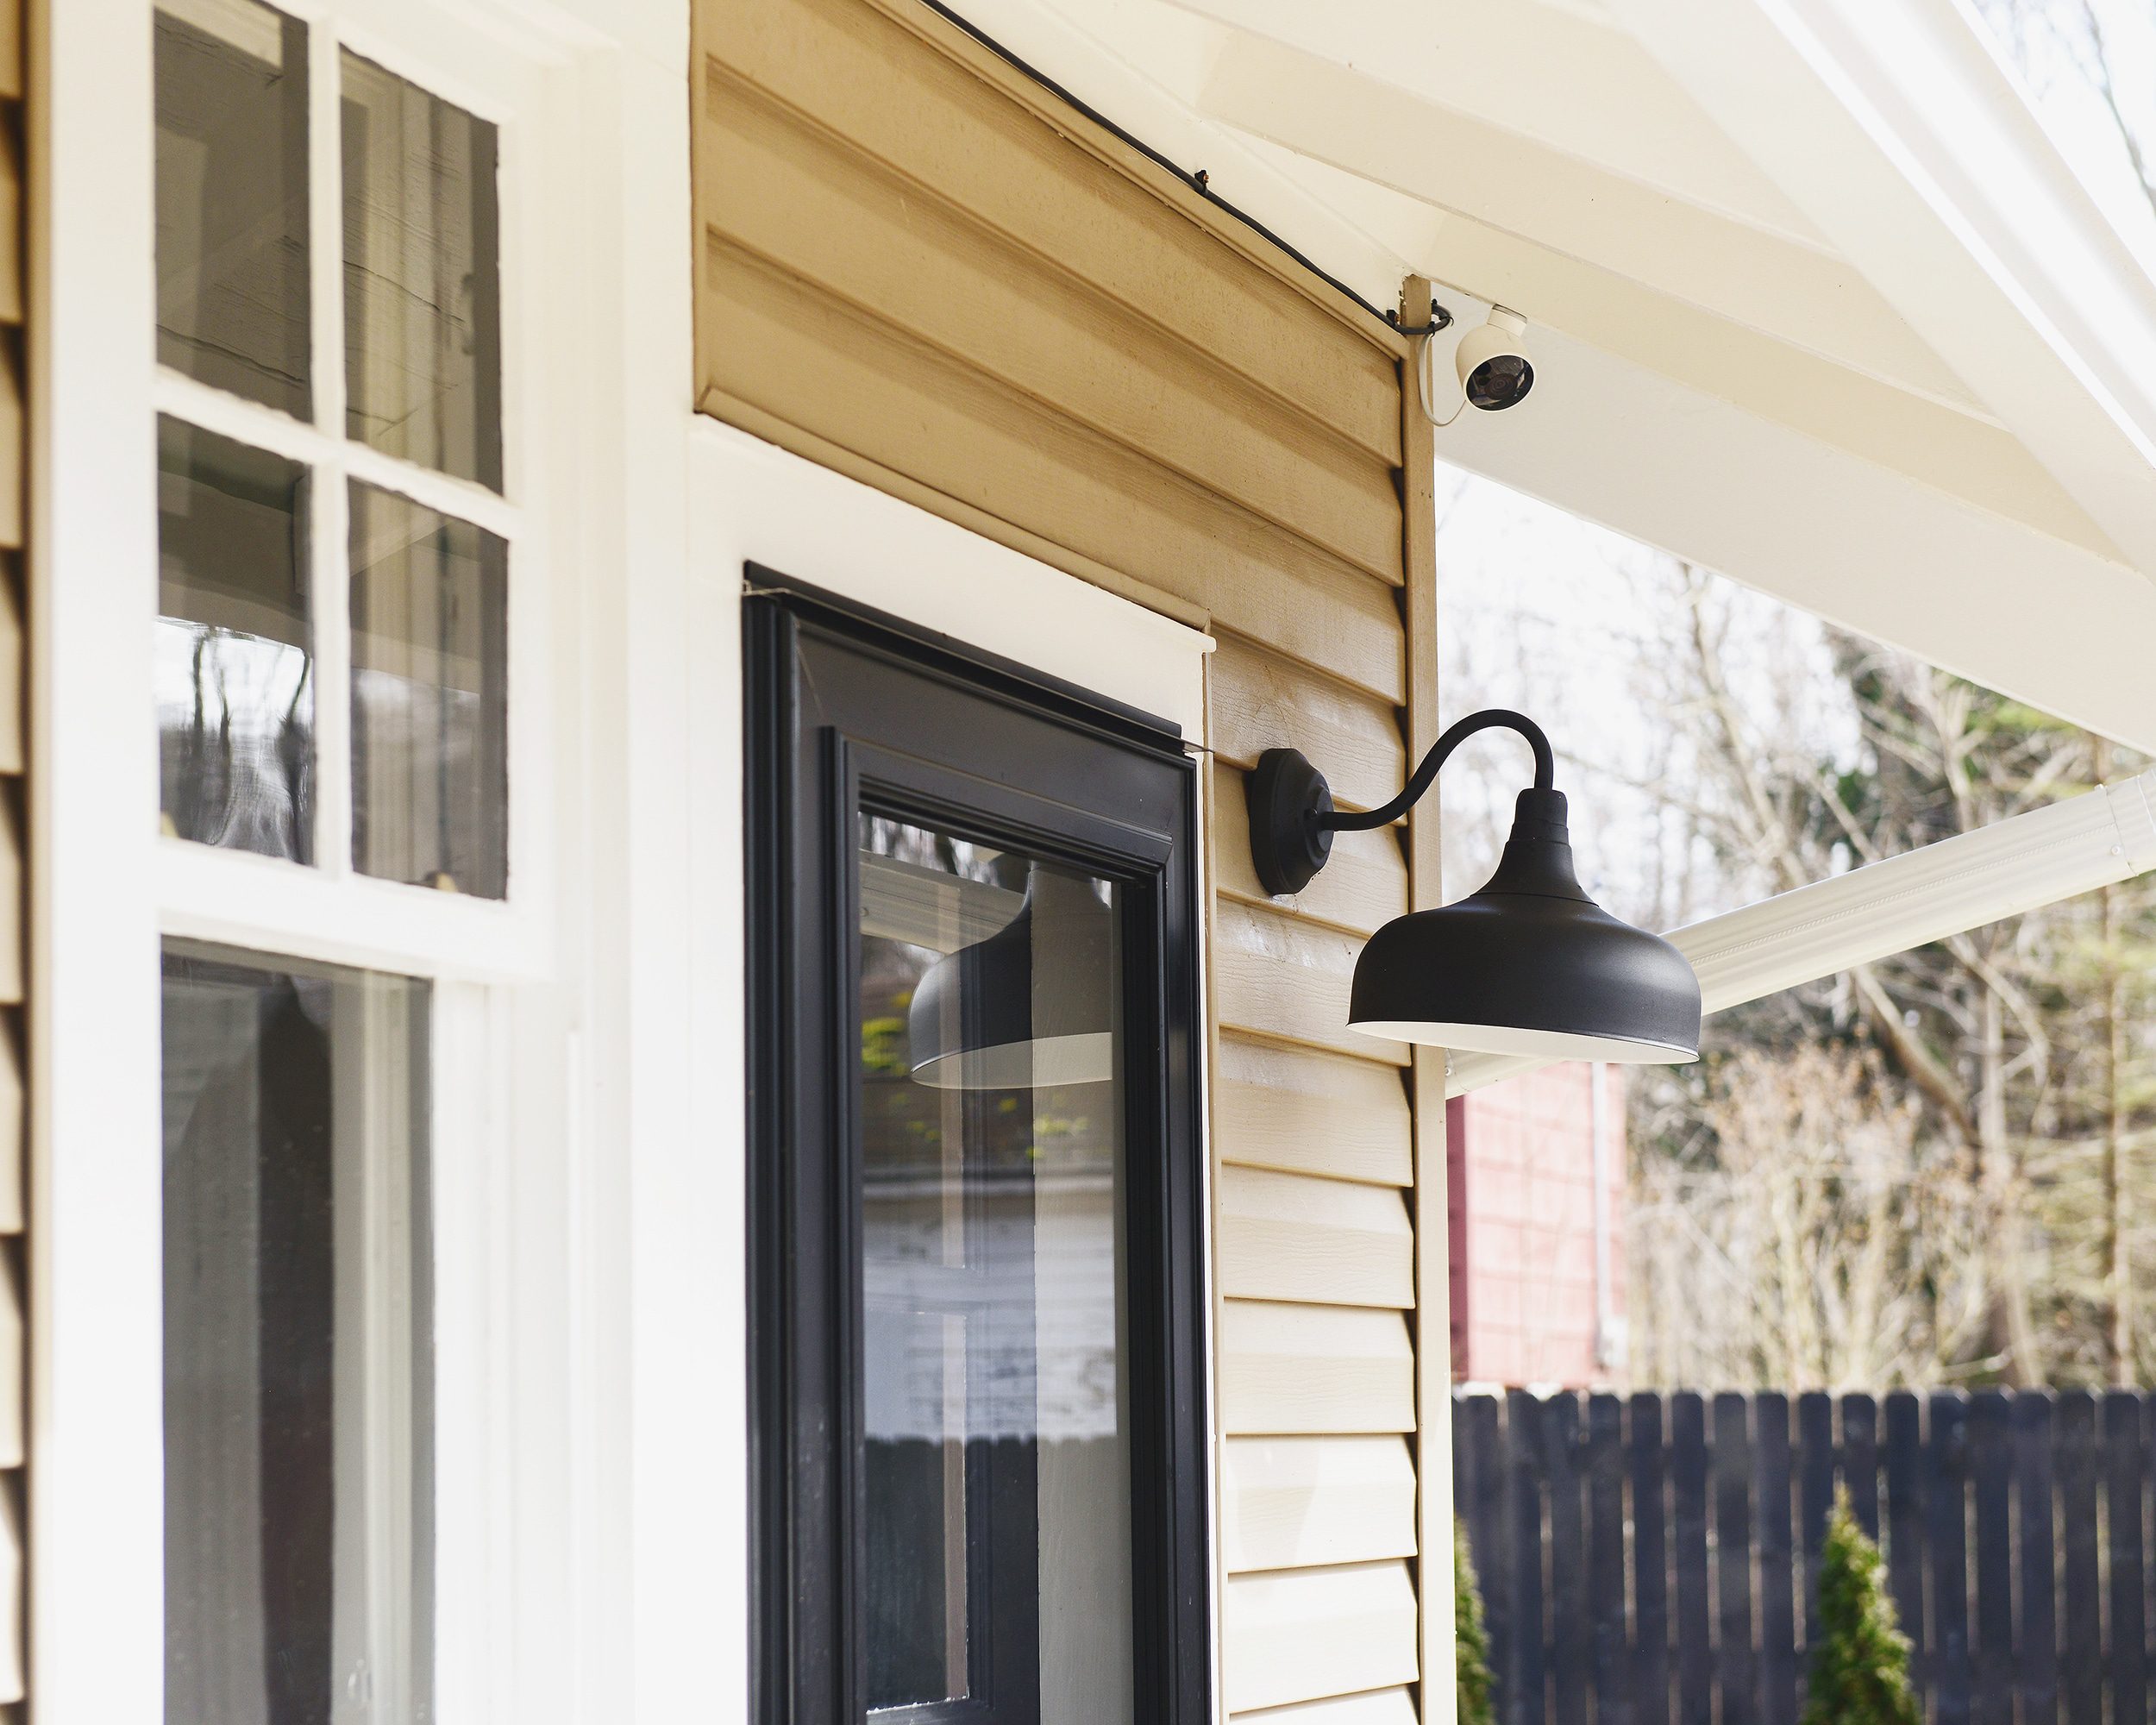
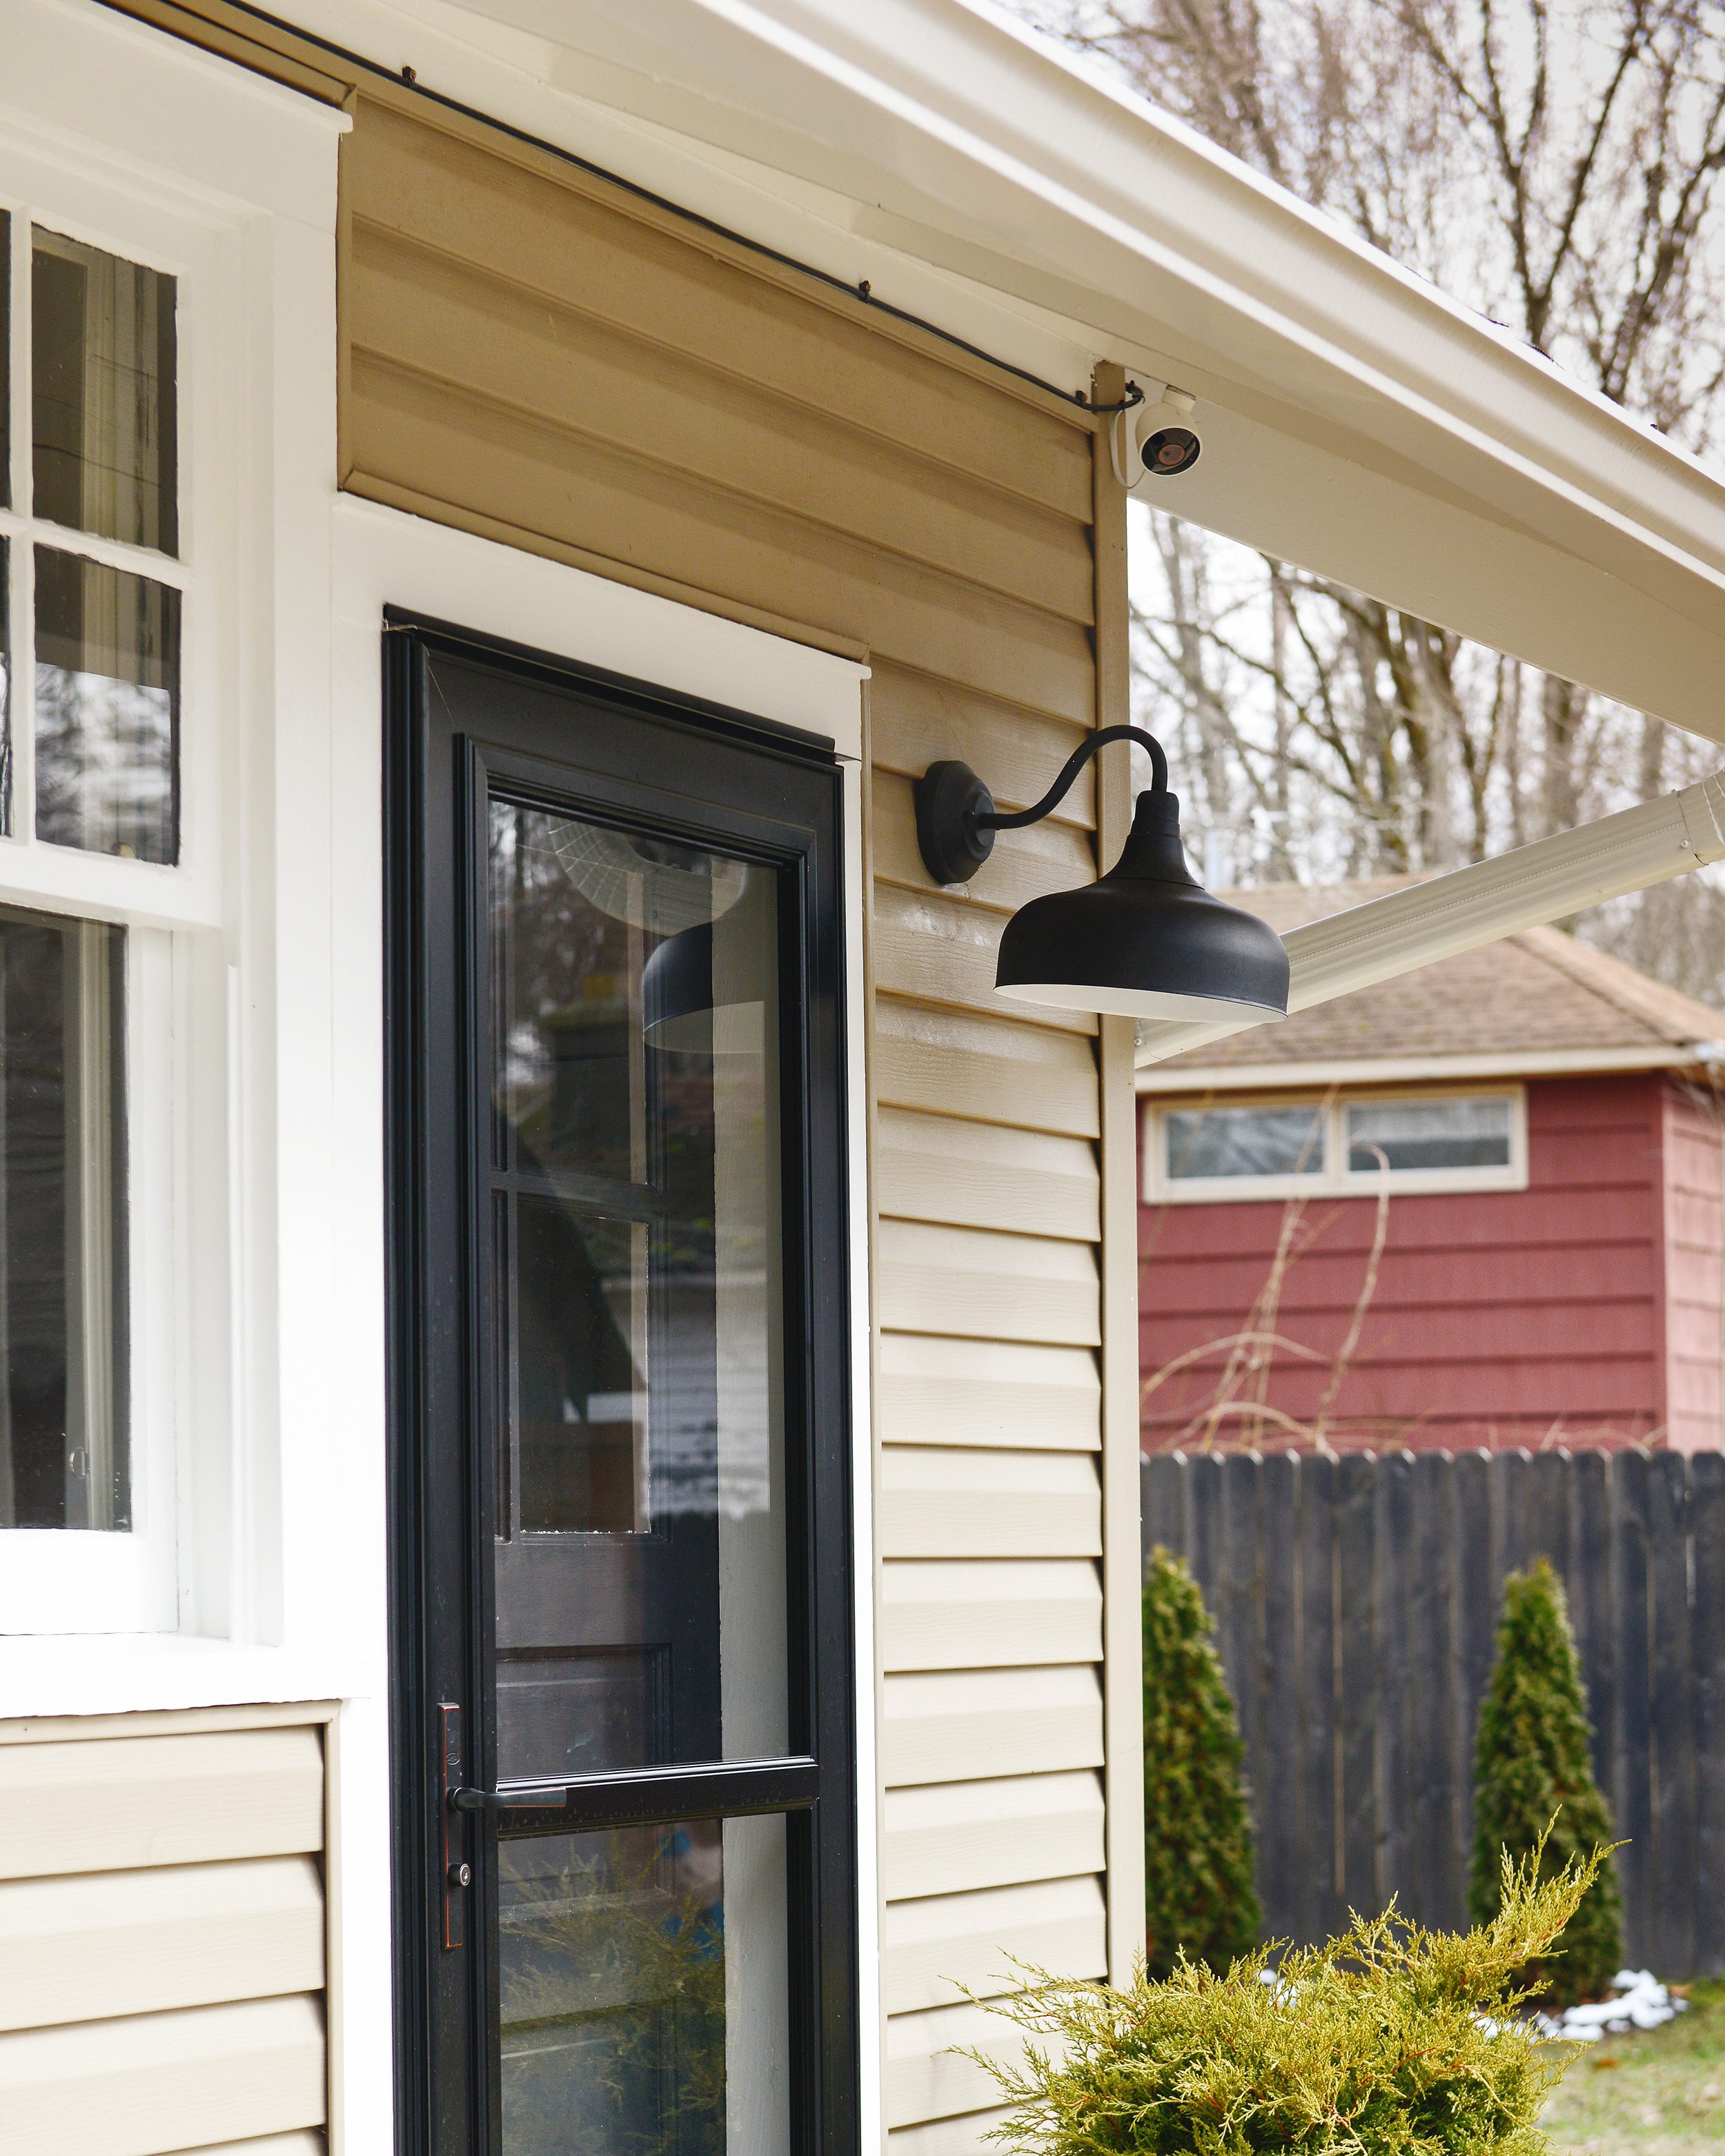
See that little bit if U-shaped white cable that hangs below the level of the camera, below? It’s called a drip loop. A drip loop is a slack portion of cable that hangs below an outdoor electronic device. It allows water to pool at the low point and drip off safely. The nest cam instructions don’t mention this as a requirement, but we’ve always found it to be good practice when installing anything electronic outdoors. We’d rather be safe than sorry when it comes to keeping moisture out of pricey electronics!
2| Use What You’ve Got for Cable Management
We all hate wires. They’re unsightly and difficult to manage. On the exterior of a home, power meters and cable/internet wires are likely culprits that will detract from the aesthetic that we’re all working so hard toward. When adding an exterior device like an outdoor camera, we like to manage the cables by ‘piggybacking’ on the cables that are already there.
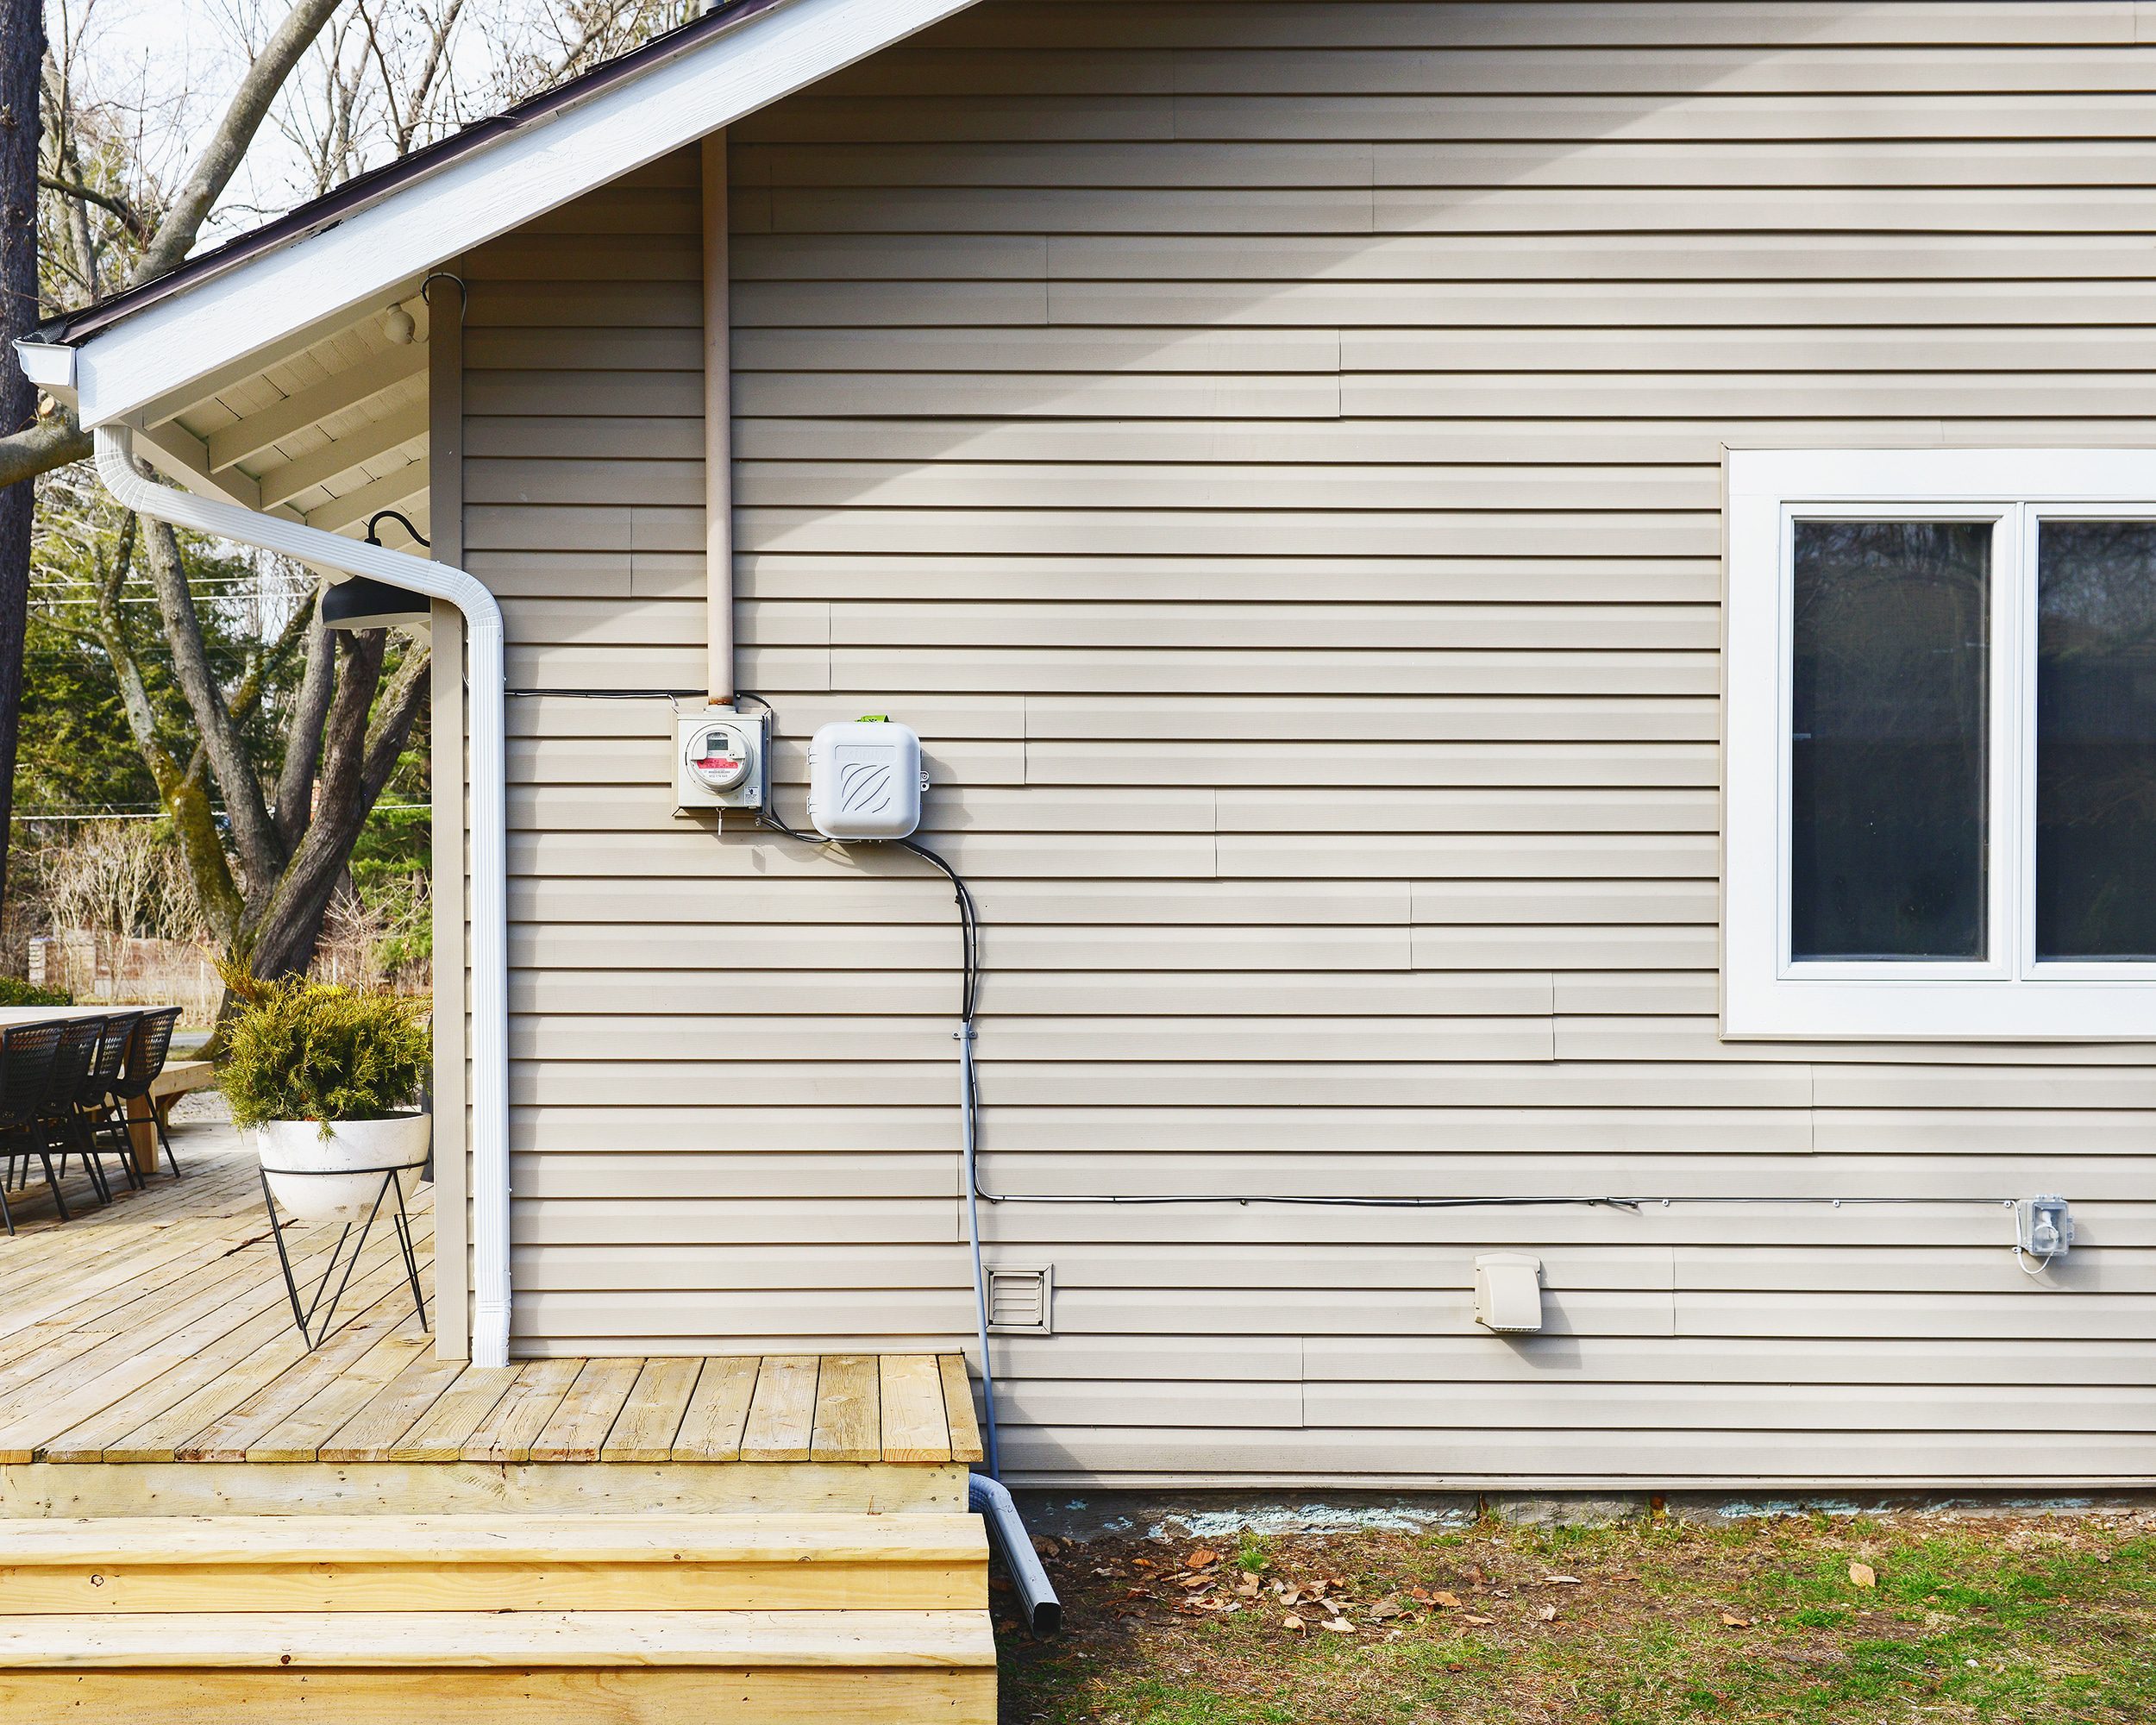
In the photo above, you’d be hard pressed to find the white wire that powers the nest camera! Upon a closer look, the cable’s path can be followed down from the camera (under the eave), beneath the corner siding, past the power meter and cable box, then horizontally to the right, where it eventually terminates at the outdoor plug. Pretty stealthy, right?
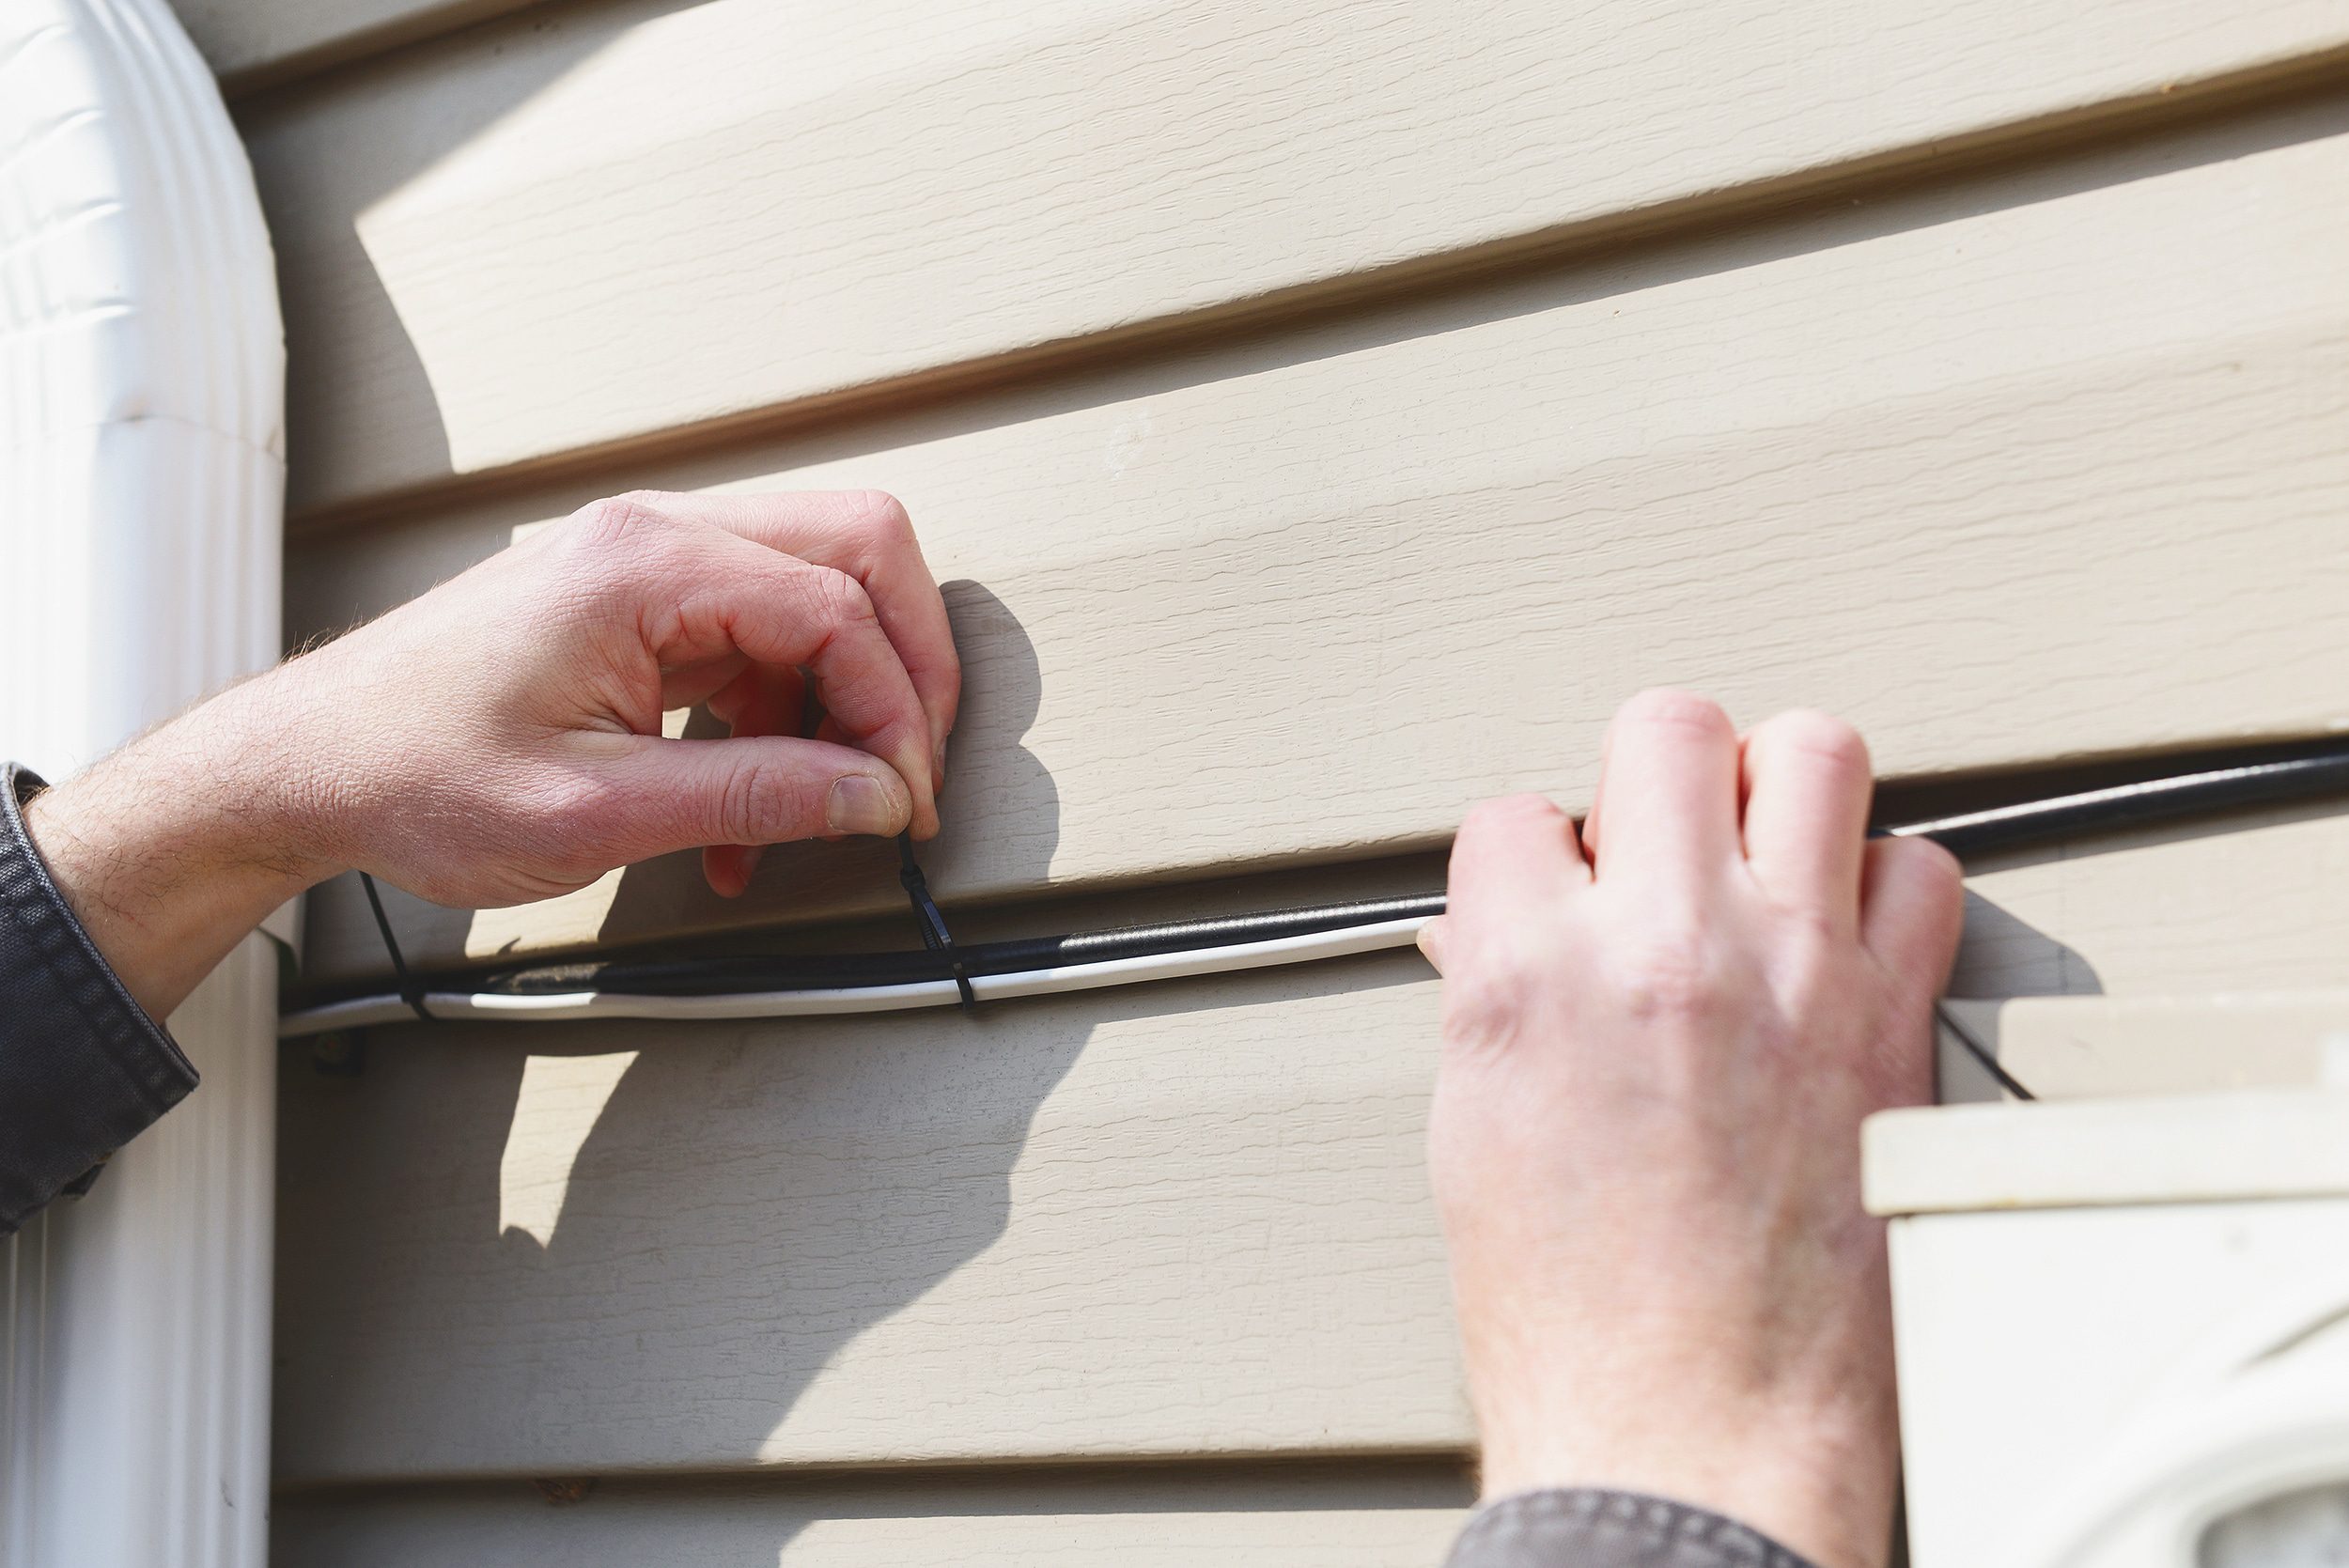
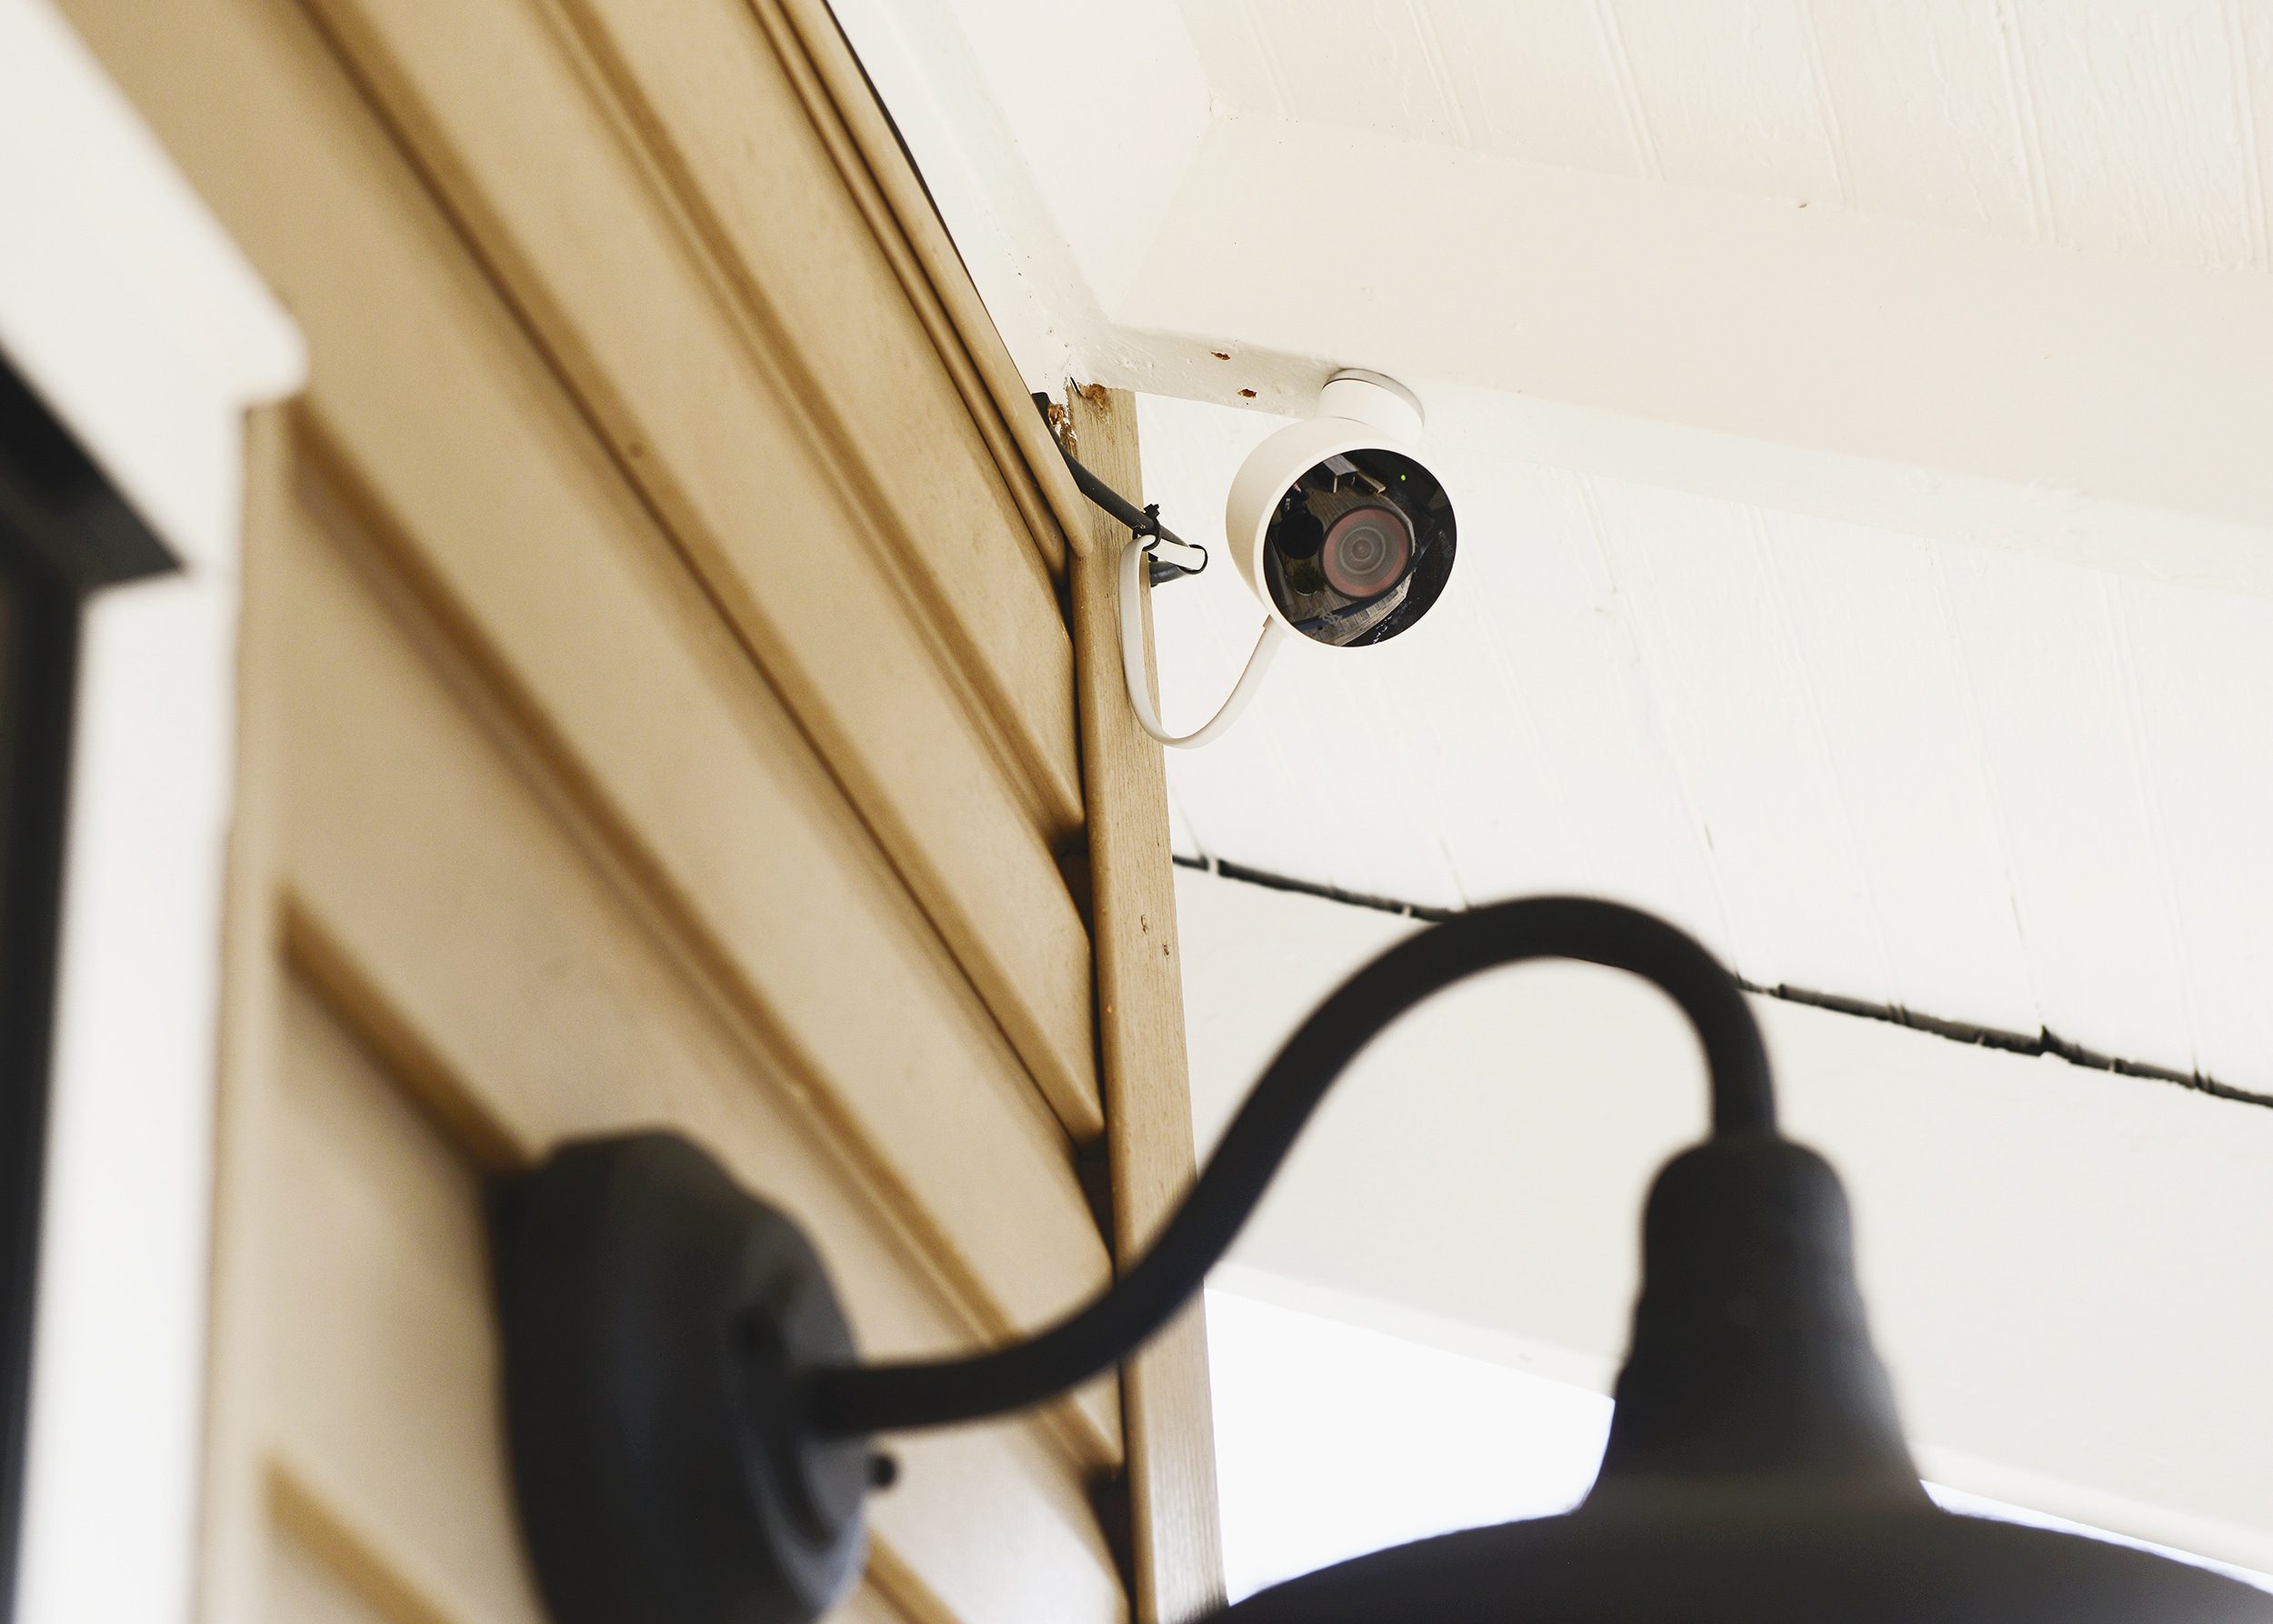
We used tiny zip ties (you can never have enough!) to fasten the camera’s cable to the existing coaxial internet cables. This helped us avoid additional cable runs that would further distract from the simple aesthetic we’ve worked hard to maintain both inside and outside the home. In addition to keeping things looking tidier, this also speeds up the installation process since there are fewer cable clips that will need to be screwed into the homes’ siding. Cleaner, easier installation that requires fewer tools and fewer holes in the siding? You can’t lose.
3| Extra Security Measures
The exterior outlets that we’ve had installed at the front and rear of our home are a pretty standard variety that are relatively common on modern homes. In addition to creating a weatherproof seal over the electrical connections, many of these outlet boxes also contain a small loop (on the lower left corner of the box below) that allows for a small padlock to be added. This prevents unwanted tampering and disconnection of devices, which is helpful since security cameras won’t work without power! While a tiny padlock certainly isn’t going to stop anyone truly determined to disconnect power to your new camera, sometimes a bit of a deterrent is worth the extra effort.

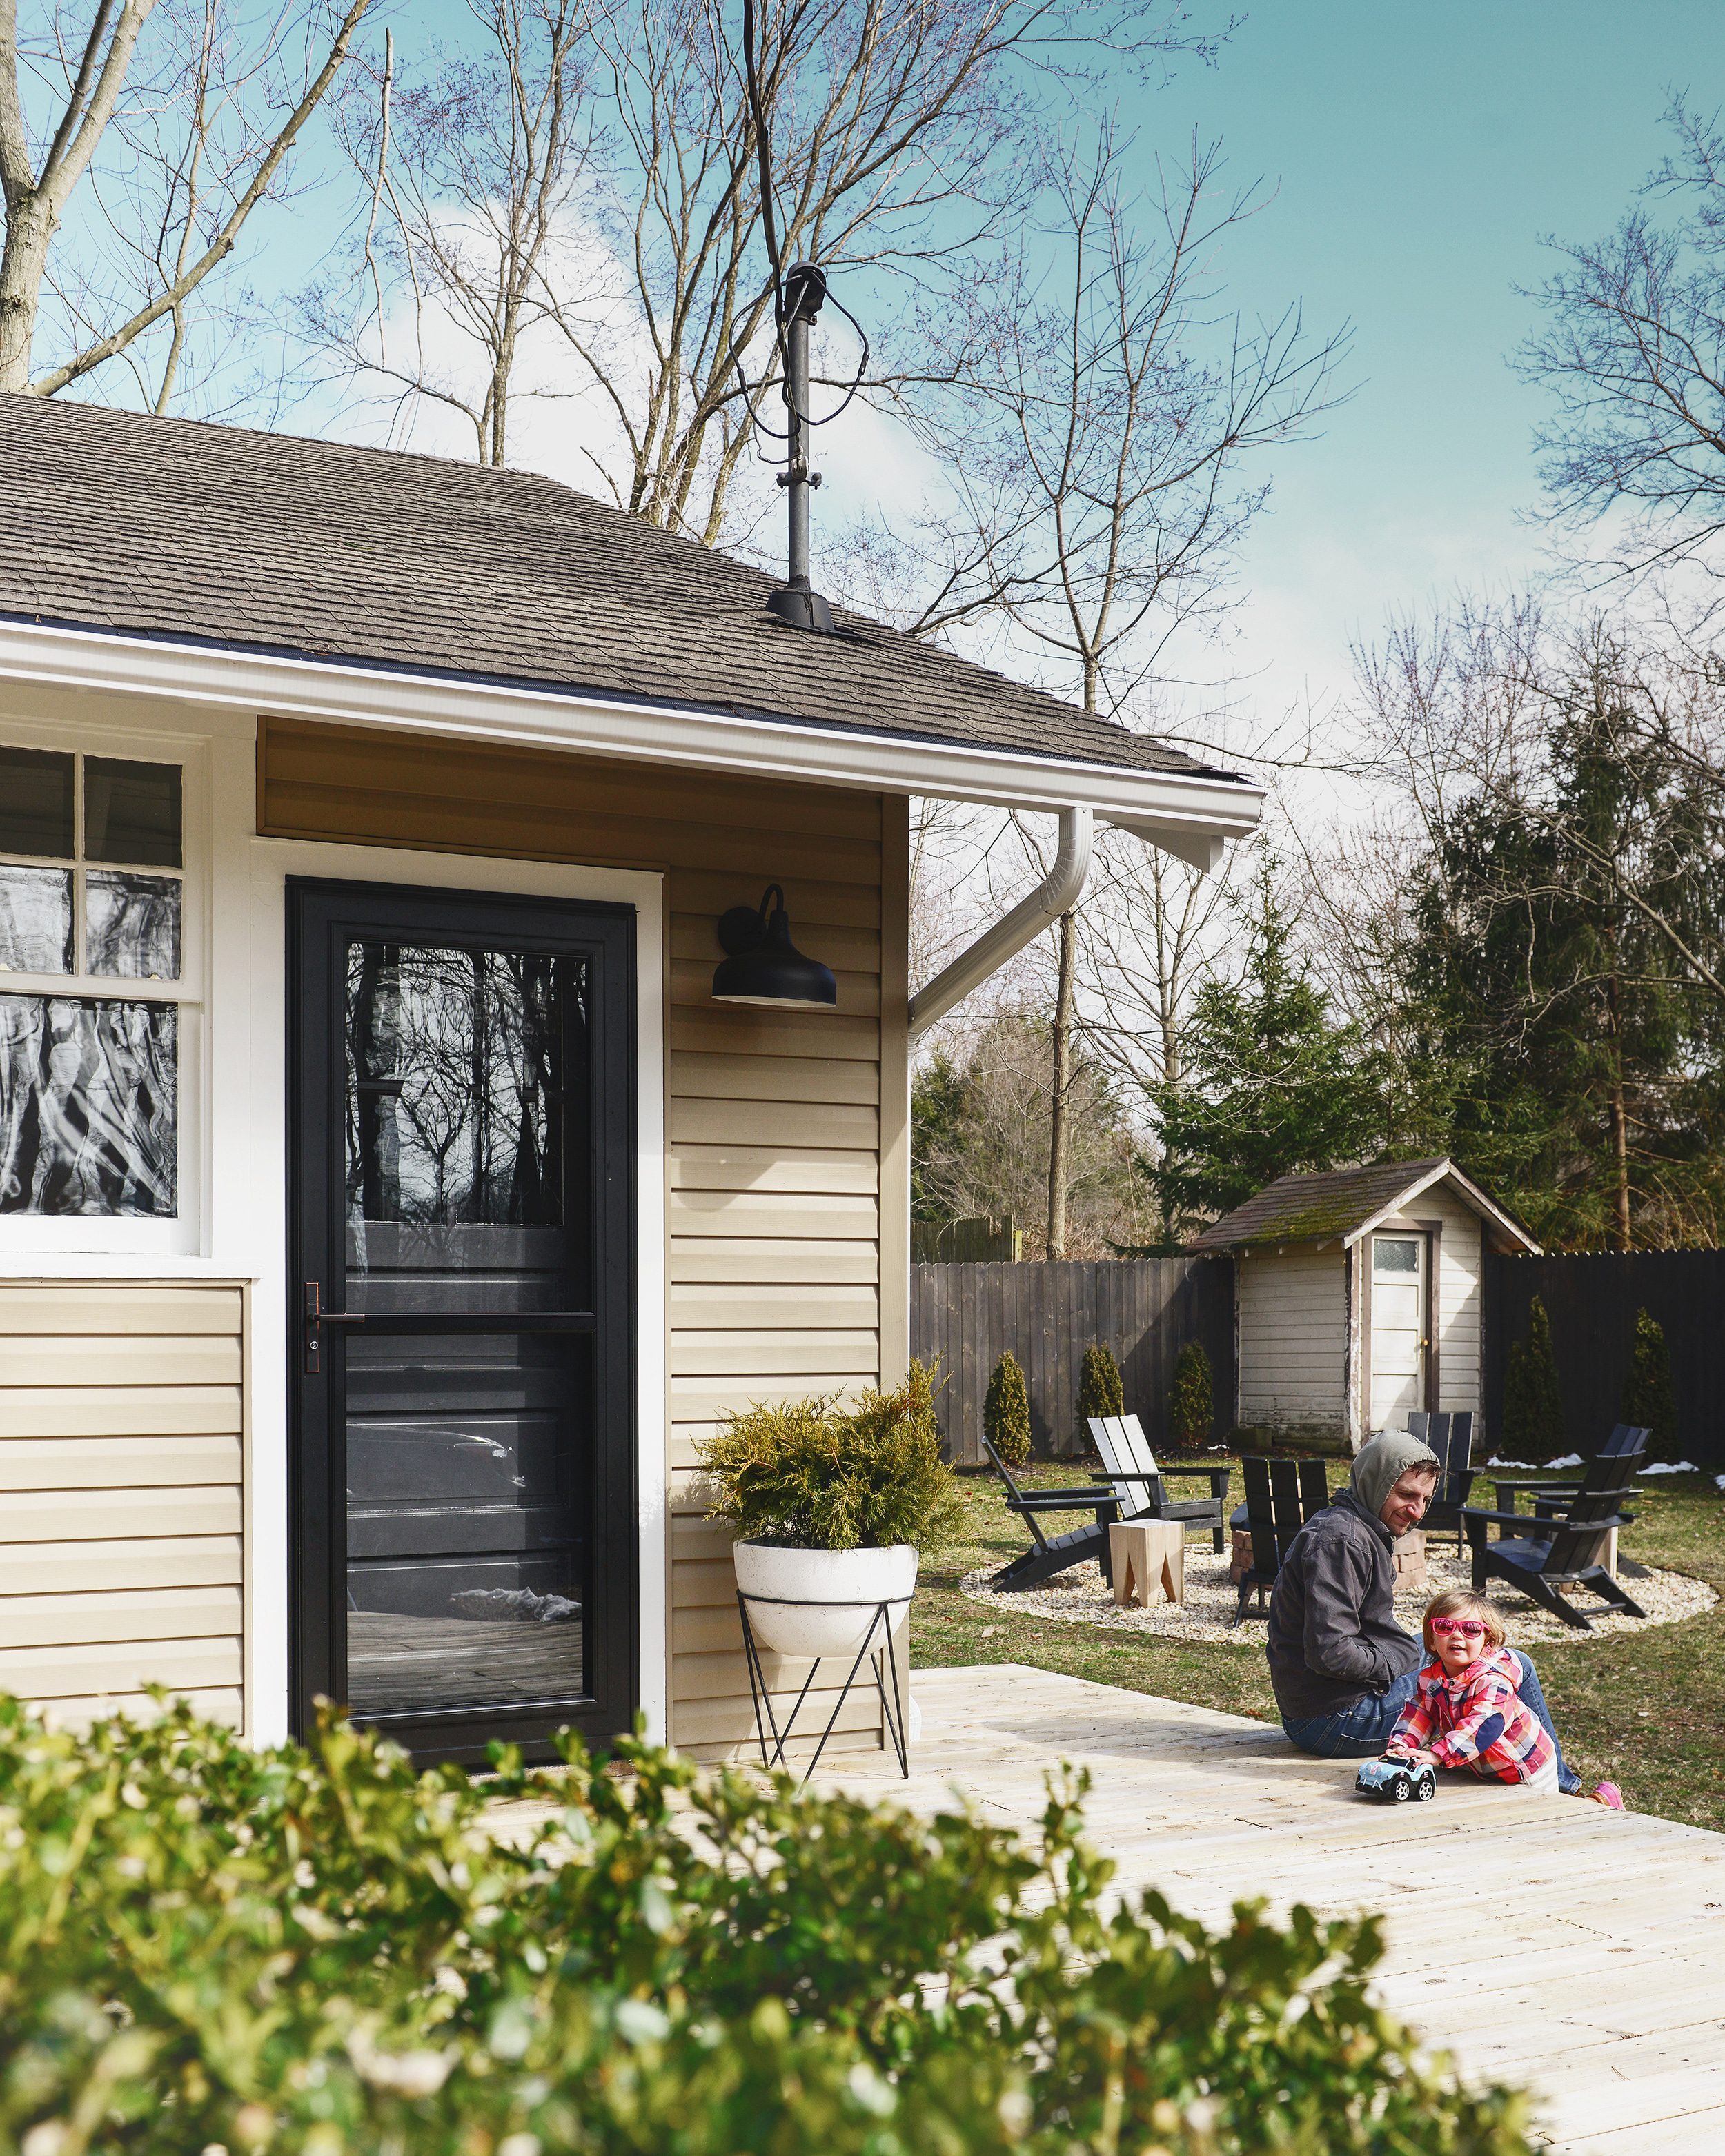
We love that the camera can’t be spotted from the driveway, but is able to capture the vast majority of the deck thanks to the wide angle lens. We’ve also had a chance to test some of the alert features and are really impressed with the ‘person detection’ capabilities as well as the motion sensing and two-way communication functions.
Since we already use nest products in both of our homes, integration was a snap and there were no additional apps to download or manage, which is a huge plus in our book! Using technology to manage our property from afar has helped us maintain peace of mind and will allow us to be better-prepared as hosts once Airbnb season is in full swing… when that time finally comes!


I love you attention to detail with the zip ties and getting it all to look so seamless! We have a lot of the same security measures in place for our Airbnb and it makes the biggest difference for peace of mind.
Where did you get your cool tree house sign?
It’s from George & Willy!
https://www.georgeandwilly.com/
Would love to hear what you use/pay for monthly subscription/storage. We are trying to compare cameras (nest vs ring etc) and there seem to be so many different prices and options!
We’re not using a subscription for storage at this point!