

We love old houses, but you’d be hard pressed to find a clean 90-degree angle anywhere. Today, we’re breaking down some of our favorite tricks on how to make things look straight and level, even when they’re not!
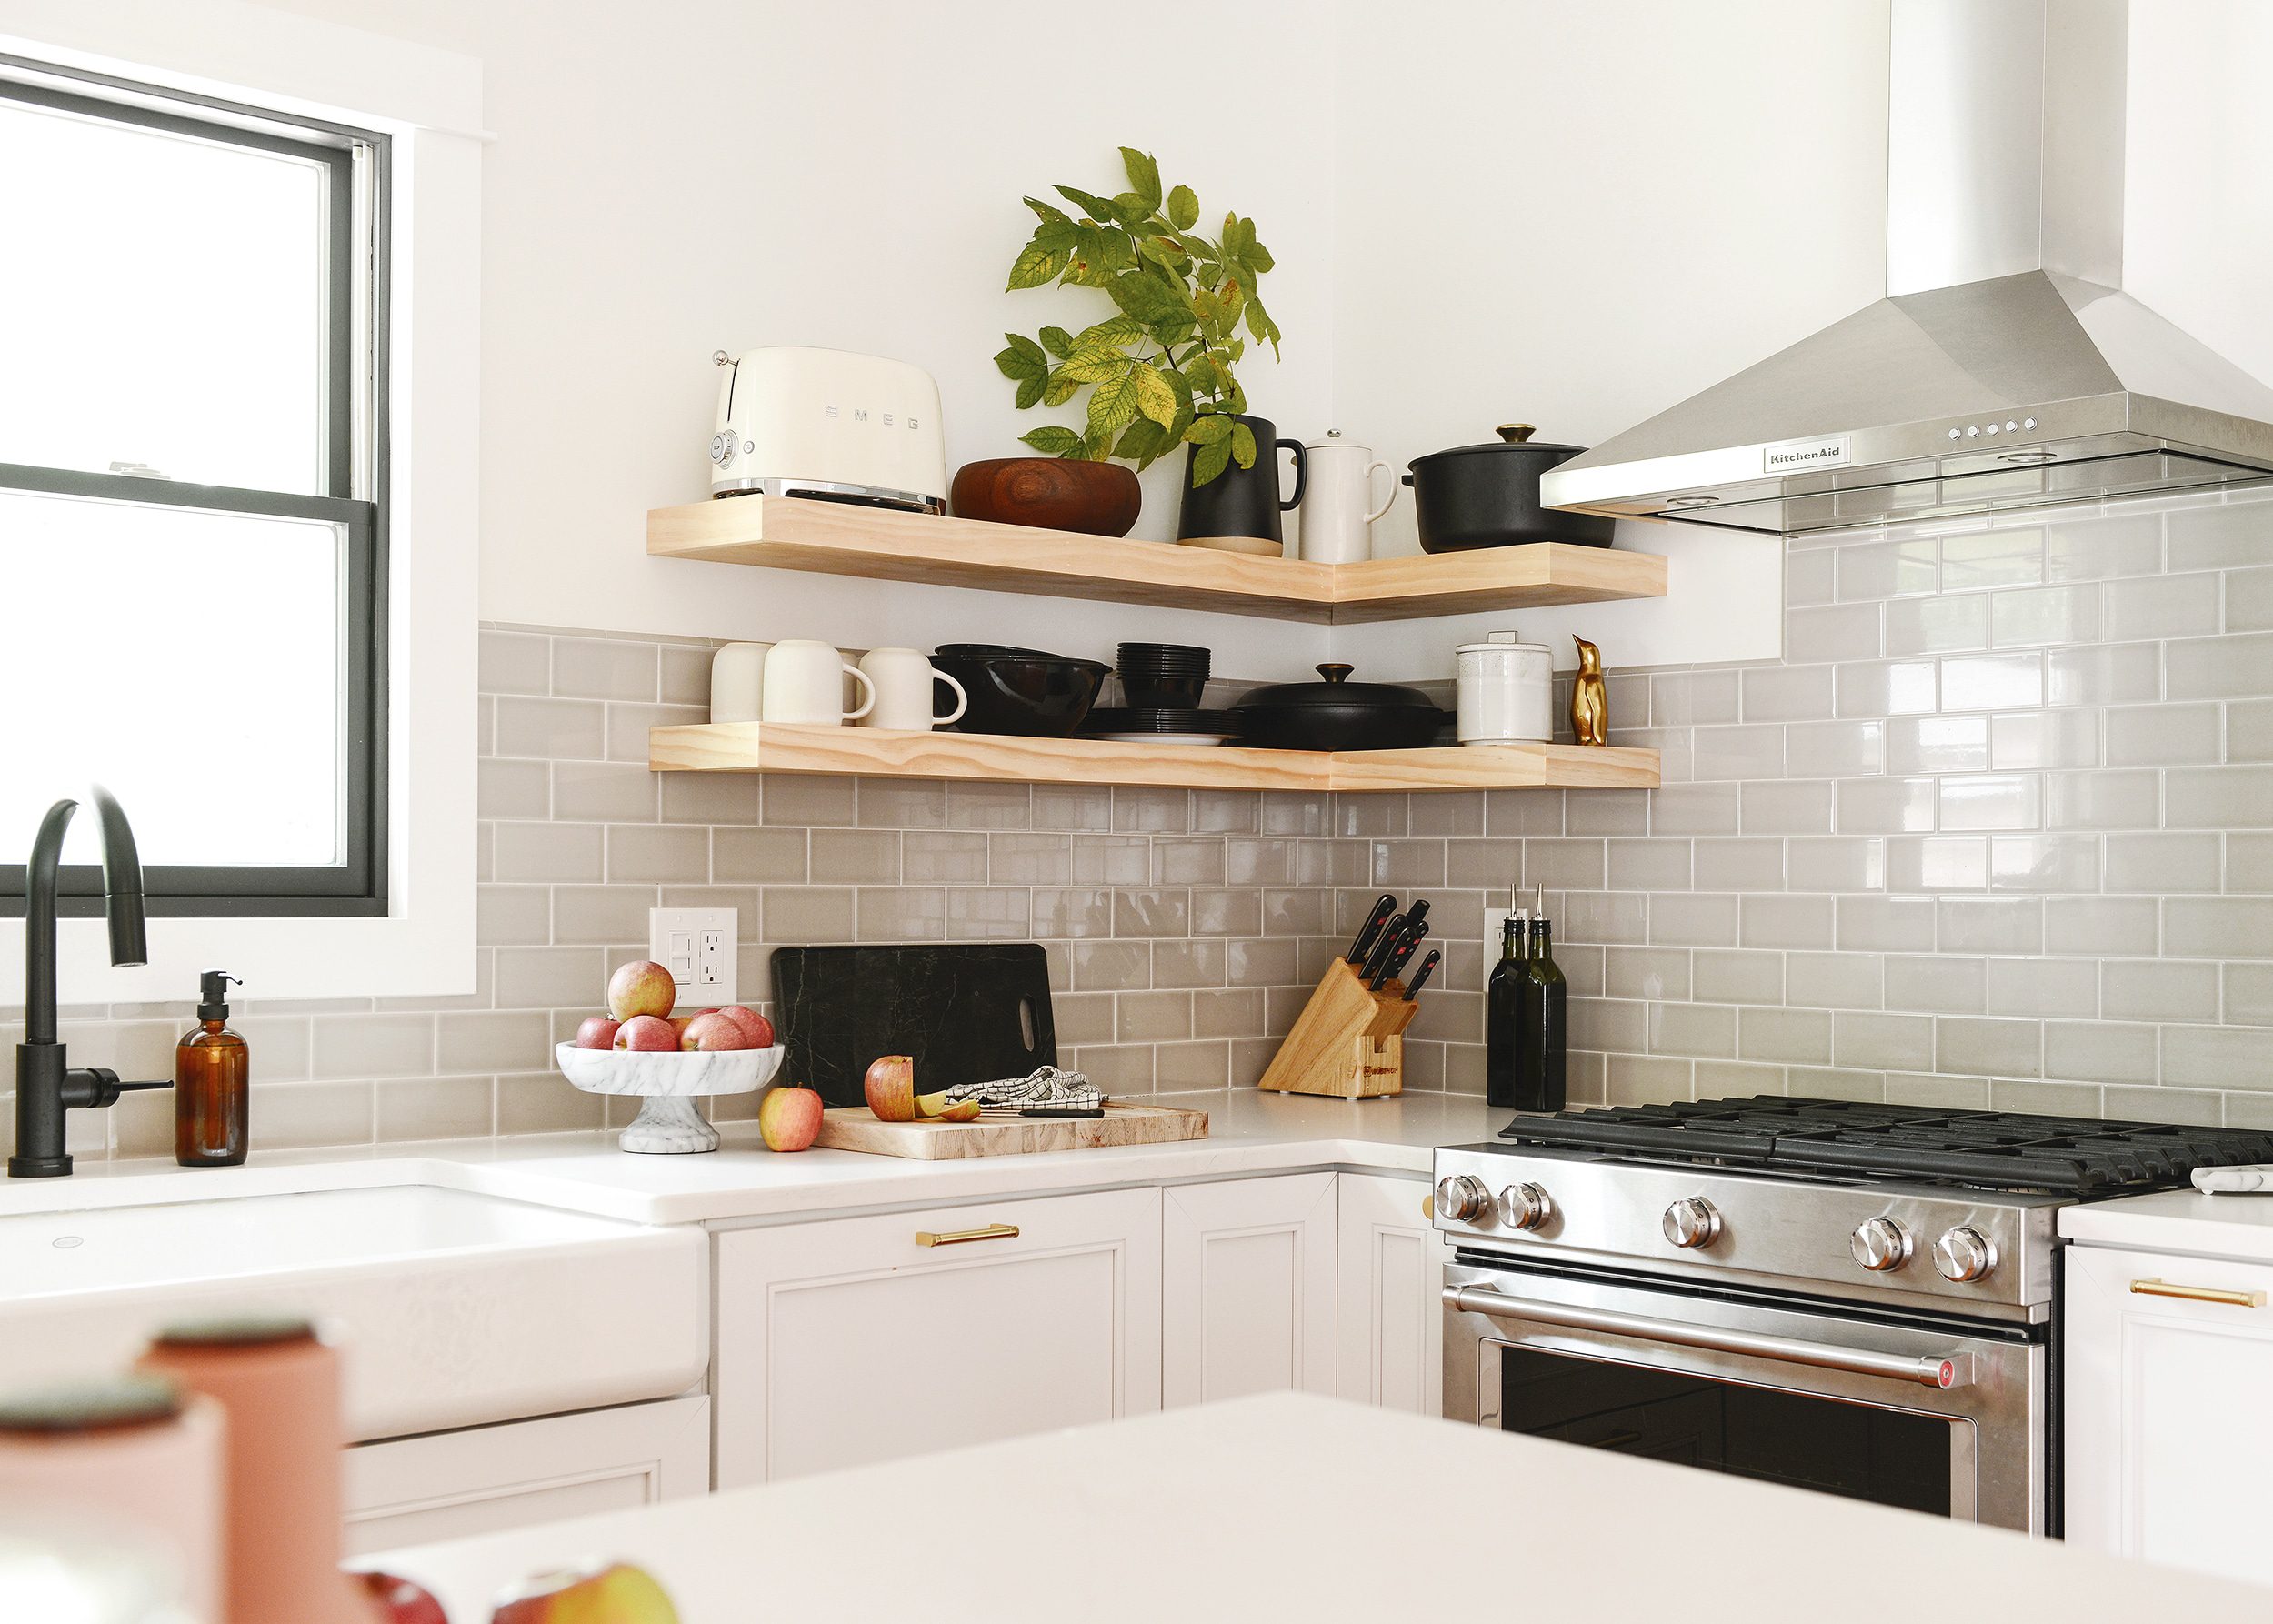
Here’s a (not so?) fun fact: regardless of when your house was built, it’s imperfect! The floors aren’t perfectly level. The walls aren’t perfectly plumb. The corners aren’t perfectly square. But guess what? Whether you’re hanging a curtain rod, installing kitchen cabinets or replacing a bathroom vanity, these imperfections are generally not that big of a deal if you know how to deal with them.
In This Post
But before we jump into how you can work around the fact that your home isn’t perfect, let’s define some terms.
Plumb | Exactly vertical or true. In a home, this applies to vertical surfaces such as walls, door jambs and cabinet fronts. This can be checked for accuracy with a plumb bob, level or laser level.
Level | Having no part higher than another. In a home, this applies to horizontal surfaces like floors or countertops. This is also usually verified with a level or a laser level.
Square | Forming a right angle. In a home, this applies to the meeting point between two perpendicular surfaces such as two walls, or the junction of a wall and a floor. This can be checked with a speed square or framing square.
Many factors can contribute to a structure being out of plumb, level or square. Age, settling of a building, human error and inaccurate measuring tools can all contribute to this type of Old House Charm, as we like to call it. Regardless of your home’s age or how it earned its – ahem – charm, there are countless ways to work around it! These are our favorites.
We measure with lasers
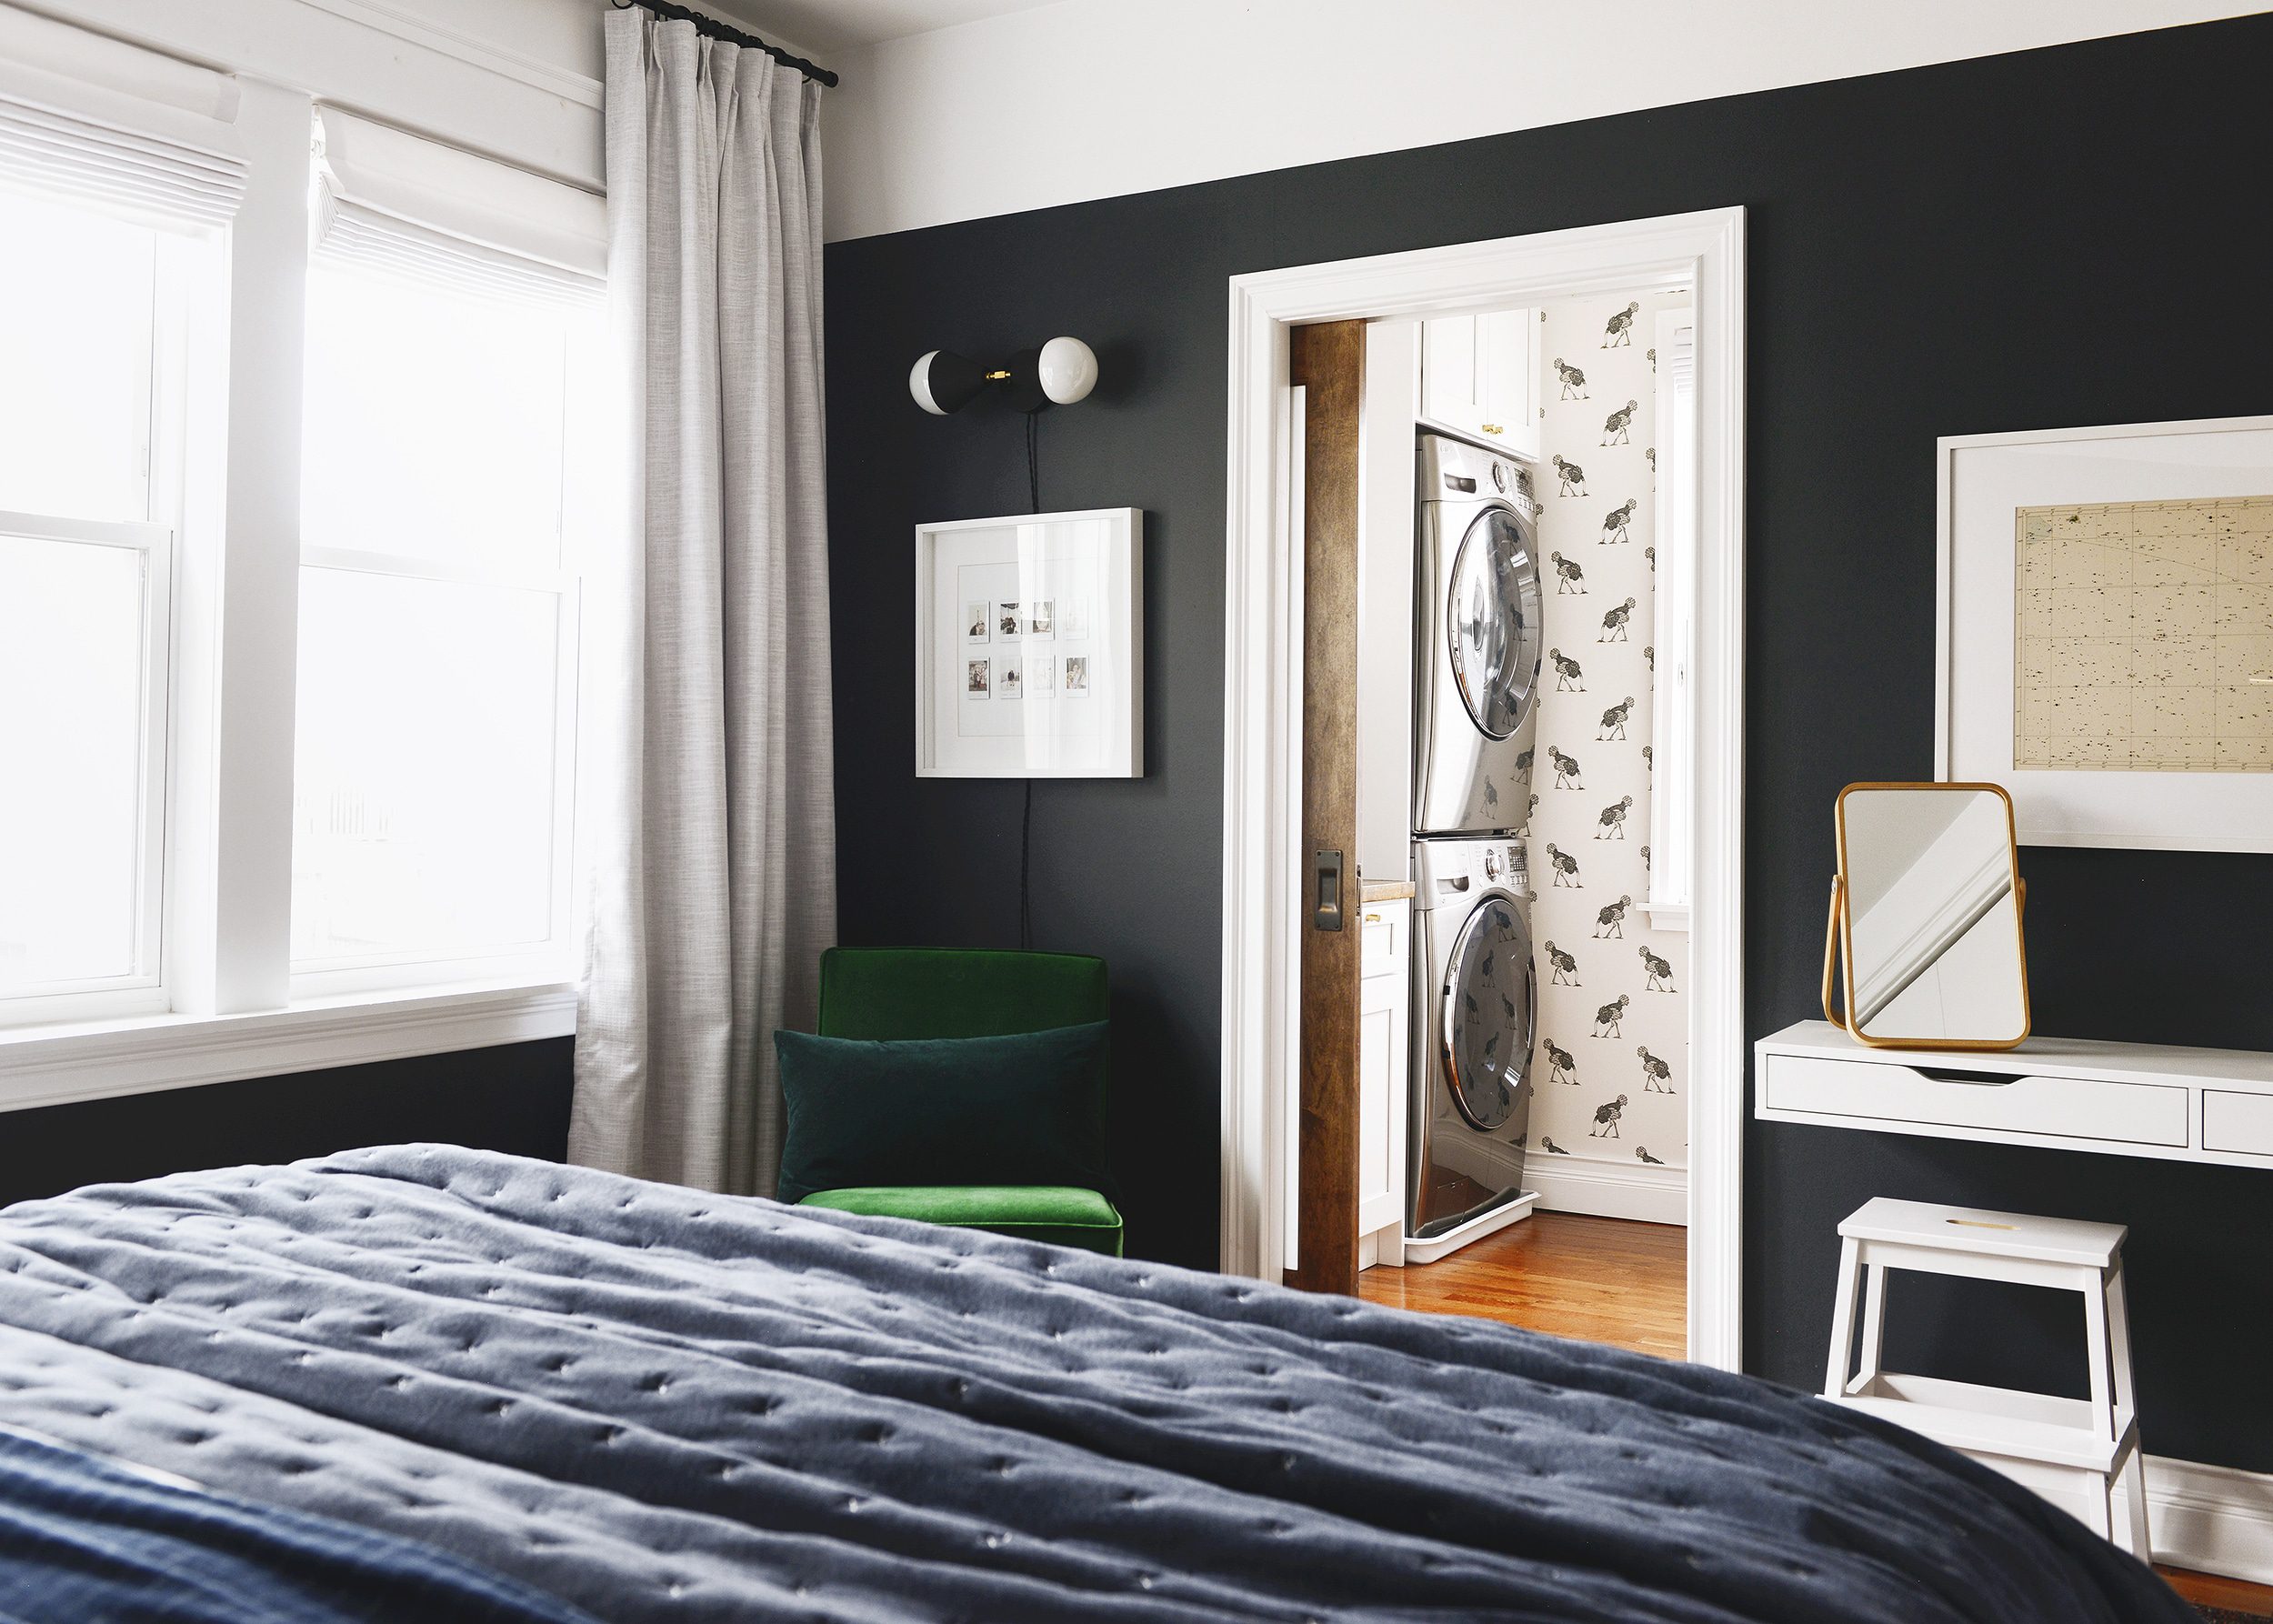
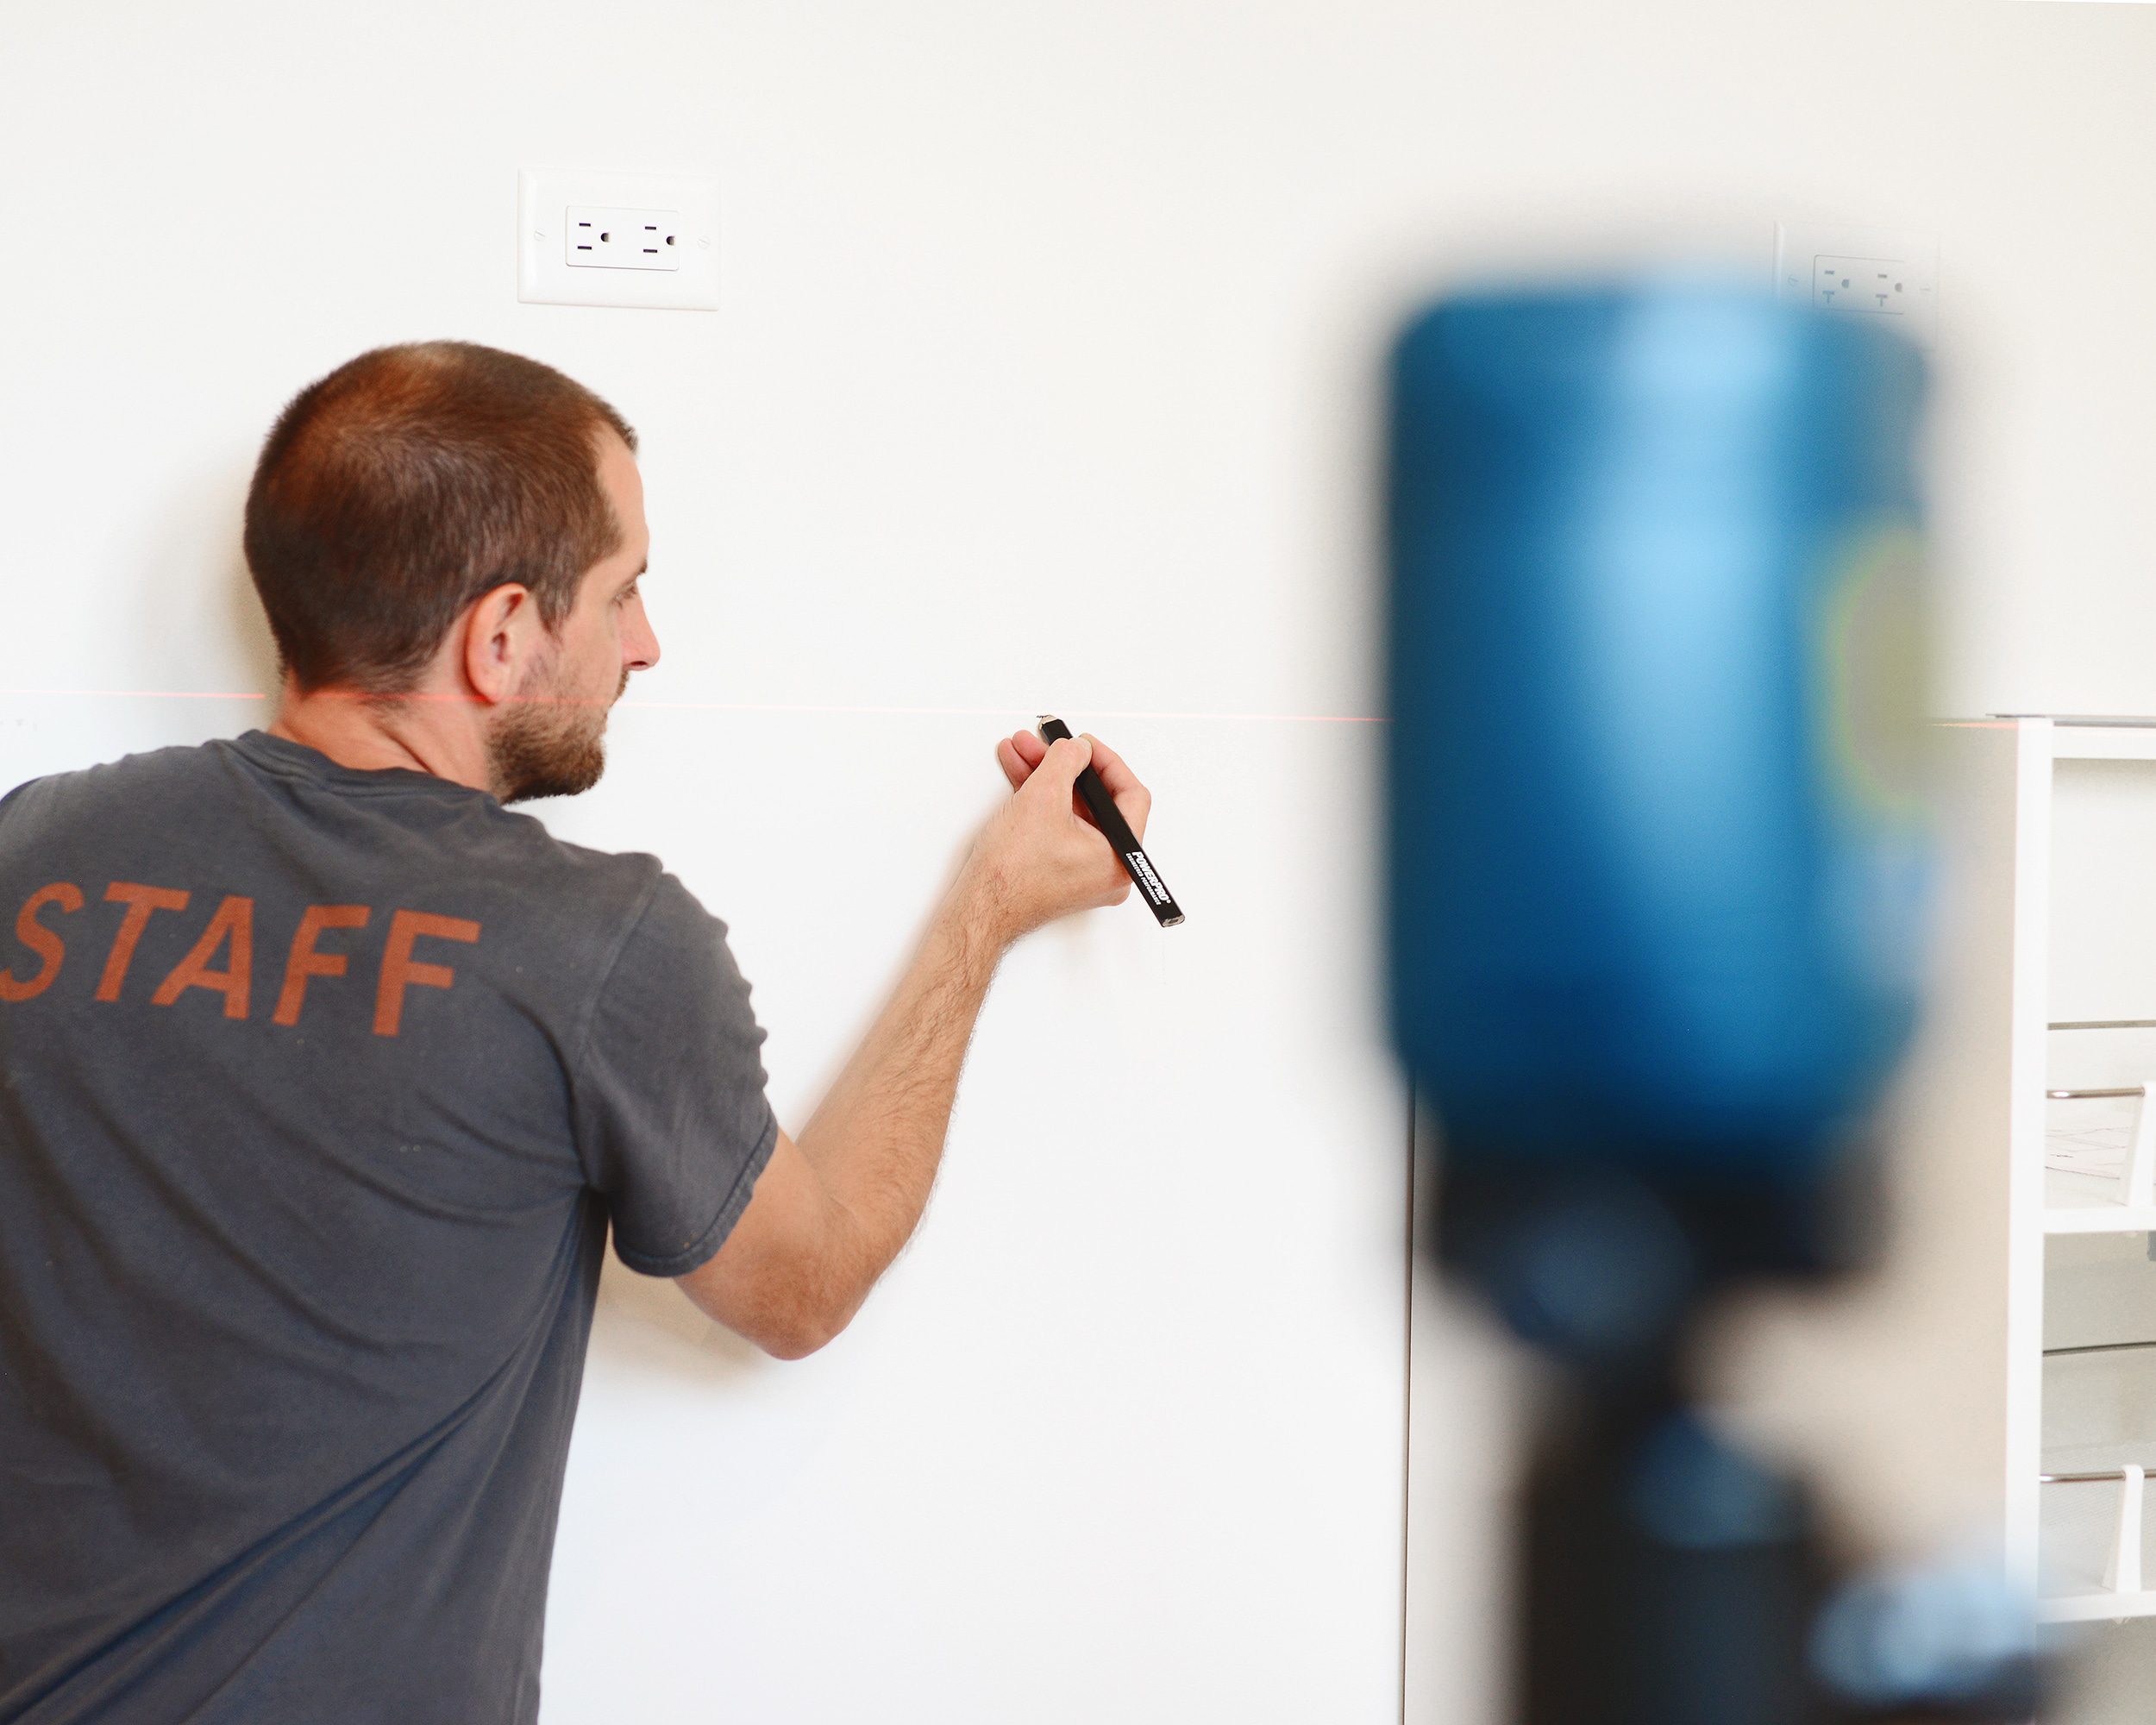
Self-leveling laser levels are absolutely indispensable for old homes! We’ve used our favorite Bosch unit for everything from installing kitchen cabinets to hanging artwork and gallery walls. Perhaps our favorite use though, was creating a level paint line two-thirds of the way up our master bedroom walls:
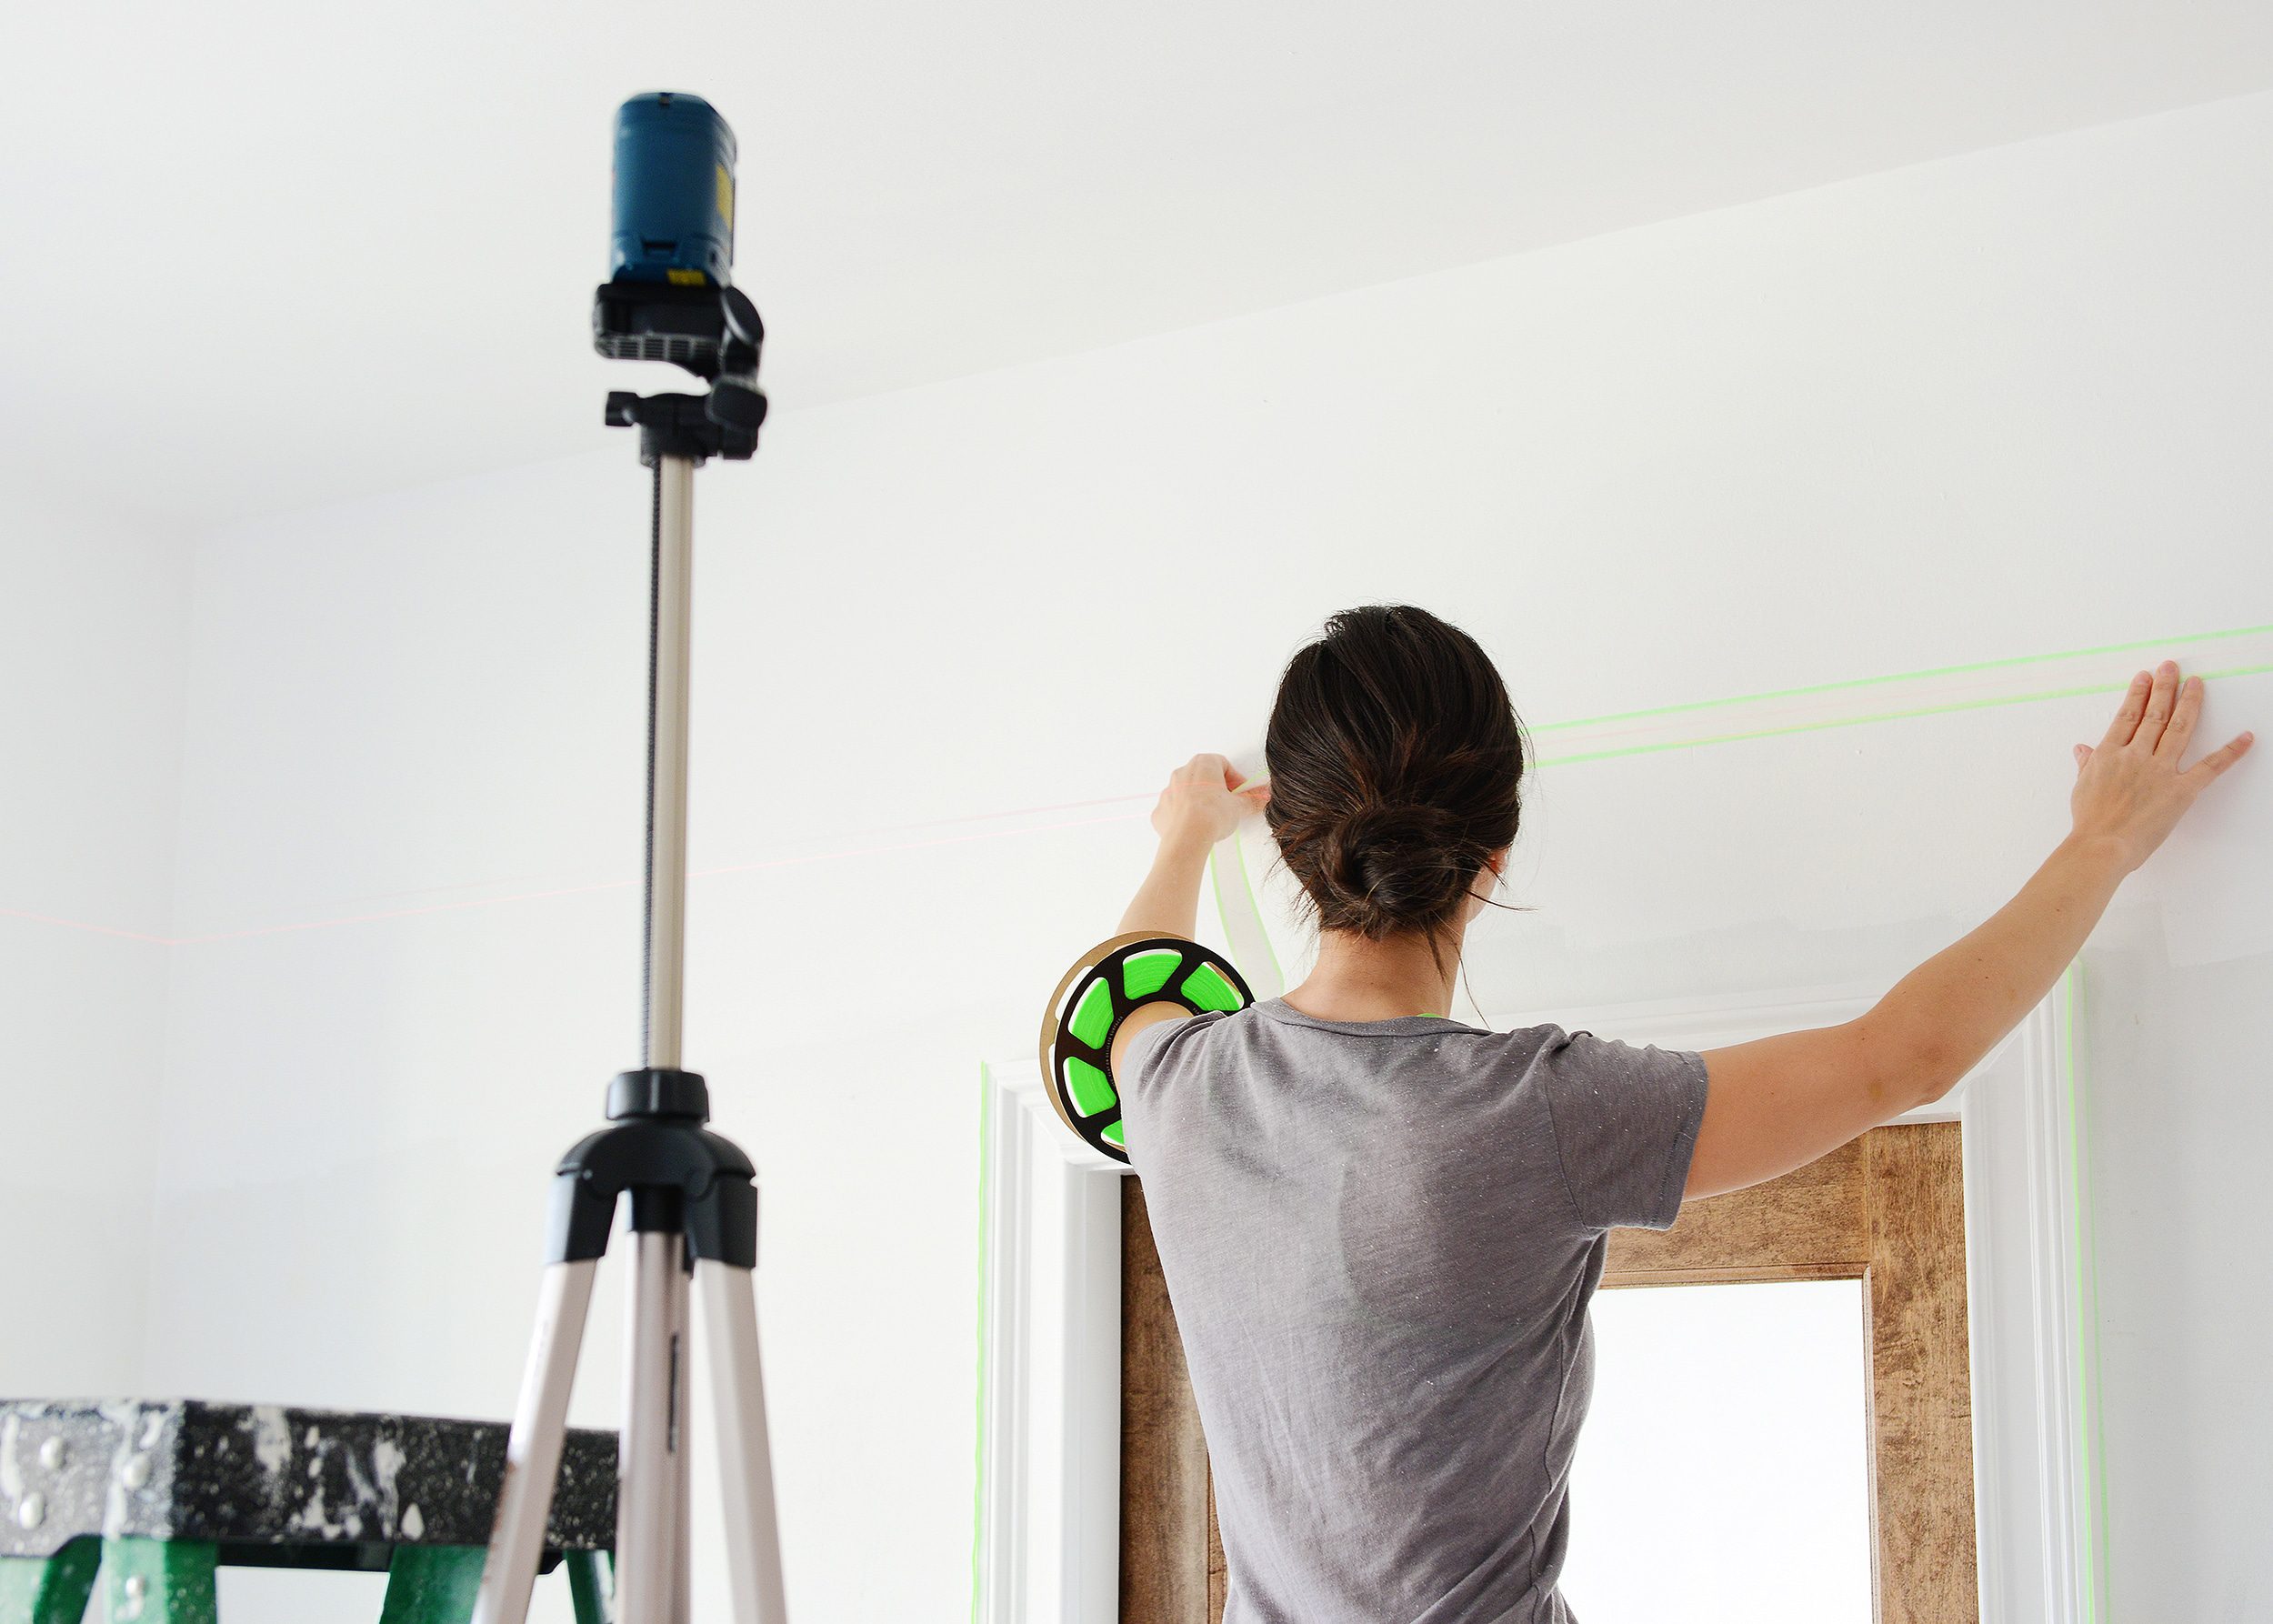
Starting at one point, then shooting a laser beam around a room to ensure consistency is as easy as it looks! Just make sure your laser doesn’t move throughout the process and you’re all set. Often times, I’ll mark the floor with painter’s tape where I need to keep the laser level. Below, we used it to mark the level line to install IKEA mounting rails for the Two Flat’s Unit 2 kitchen!
See also: How we cheated our way to a straight ceiling!
We caulk (almost) ev-er-y-thing!
We like to joke that caulk is the glue that holds an old home together! So much so, in fact, that we even wrote a whole post about it. That’s obviously not the case, but filling joints of varying degrees of imperfection with a smooth bead of paintable caulk is a great, inexpensive way to eliminate the visual distraction of uneven seams and joints.
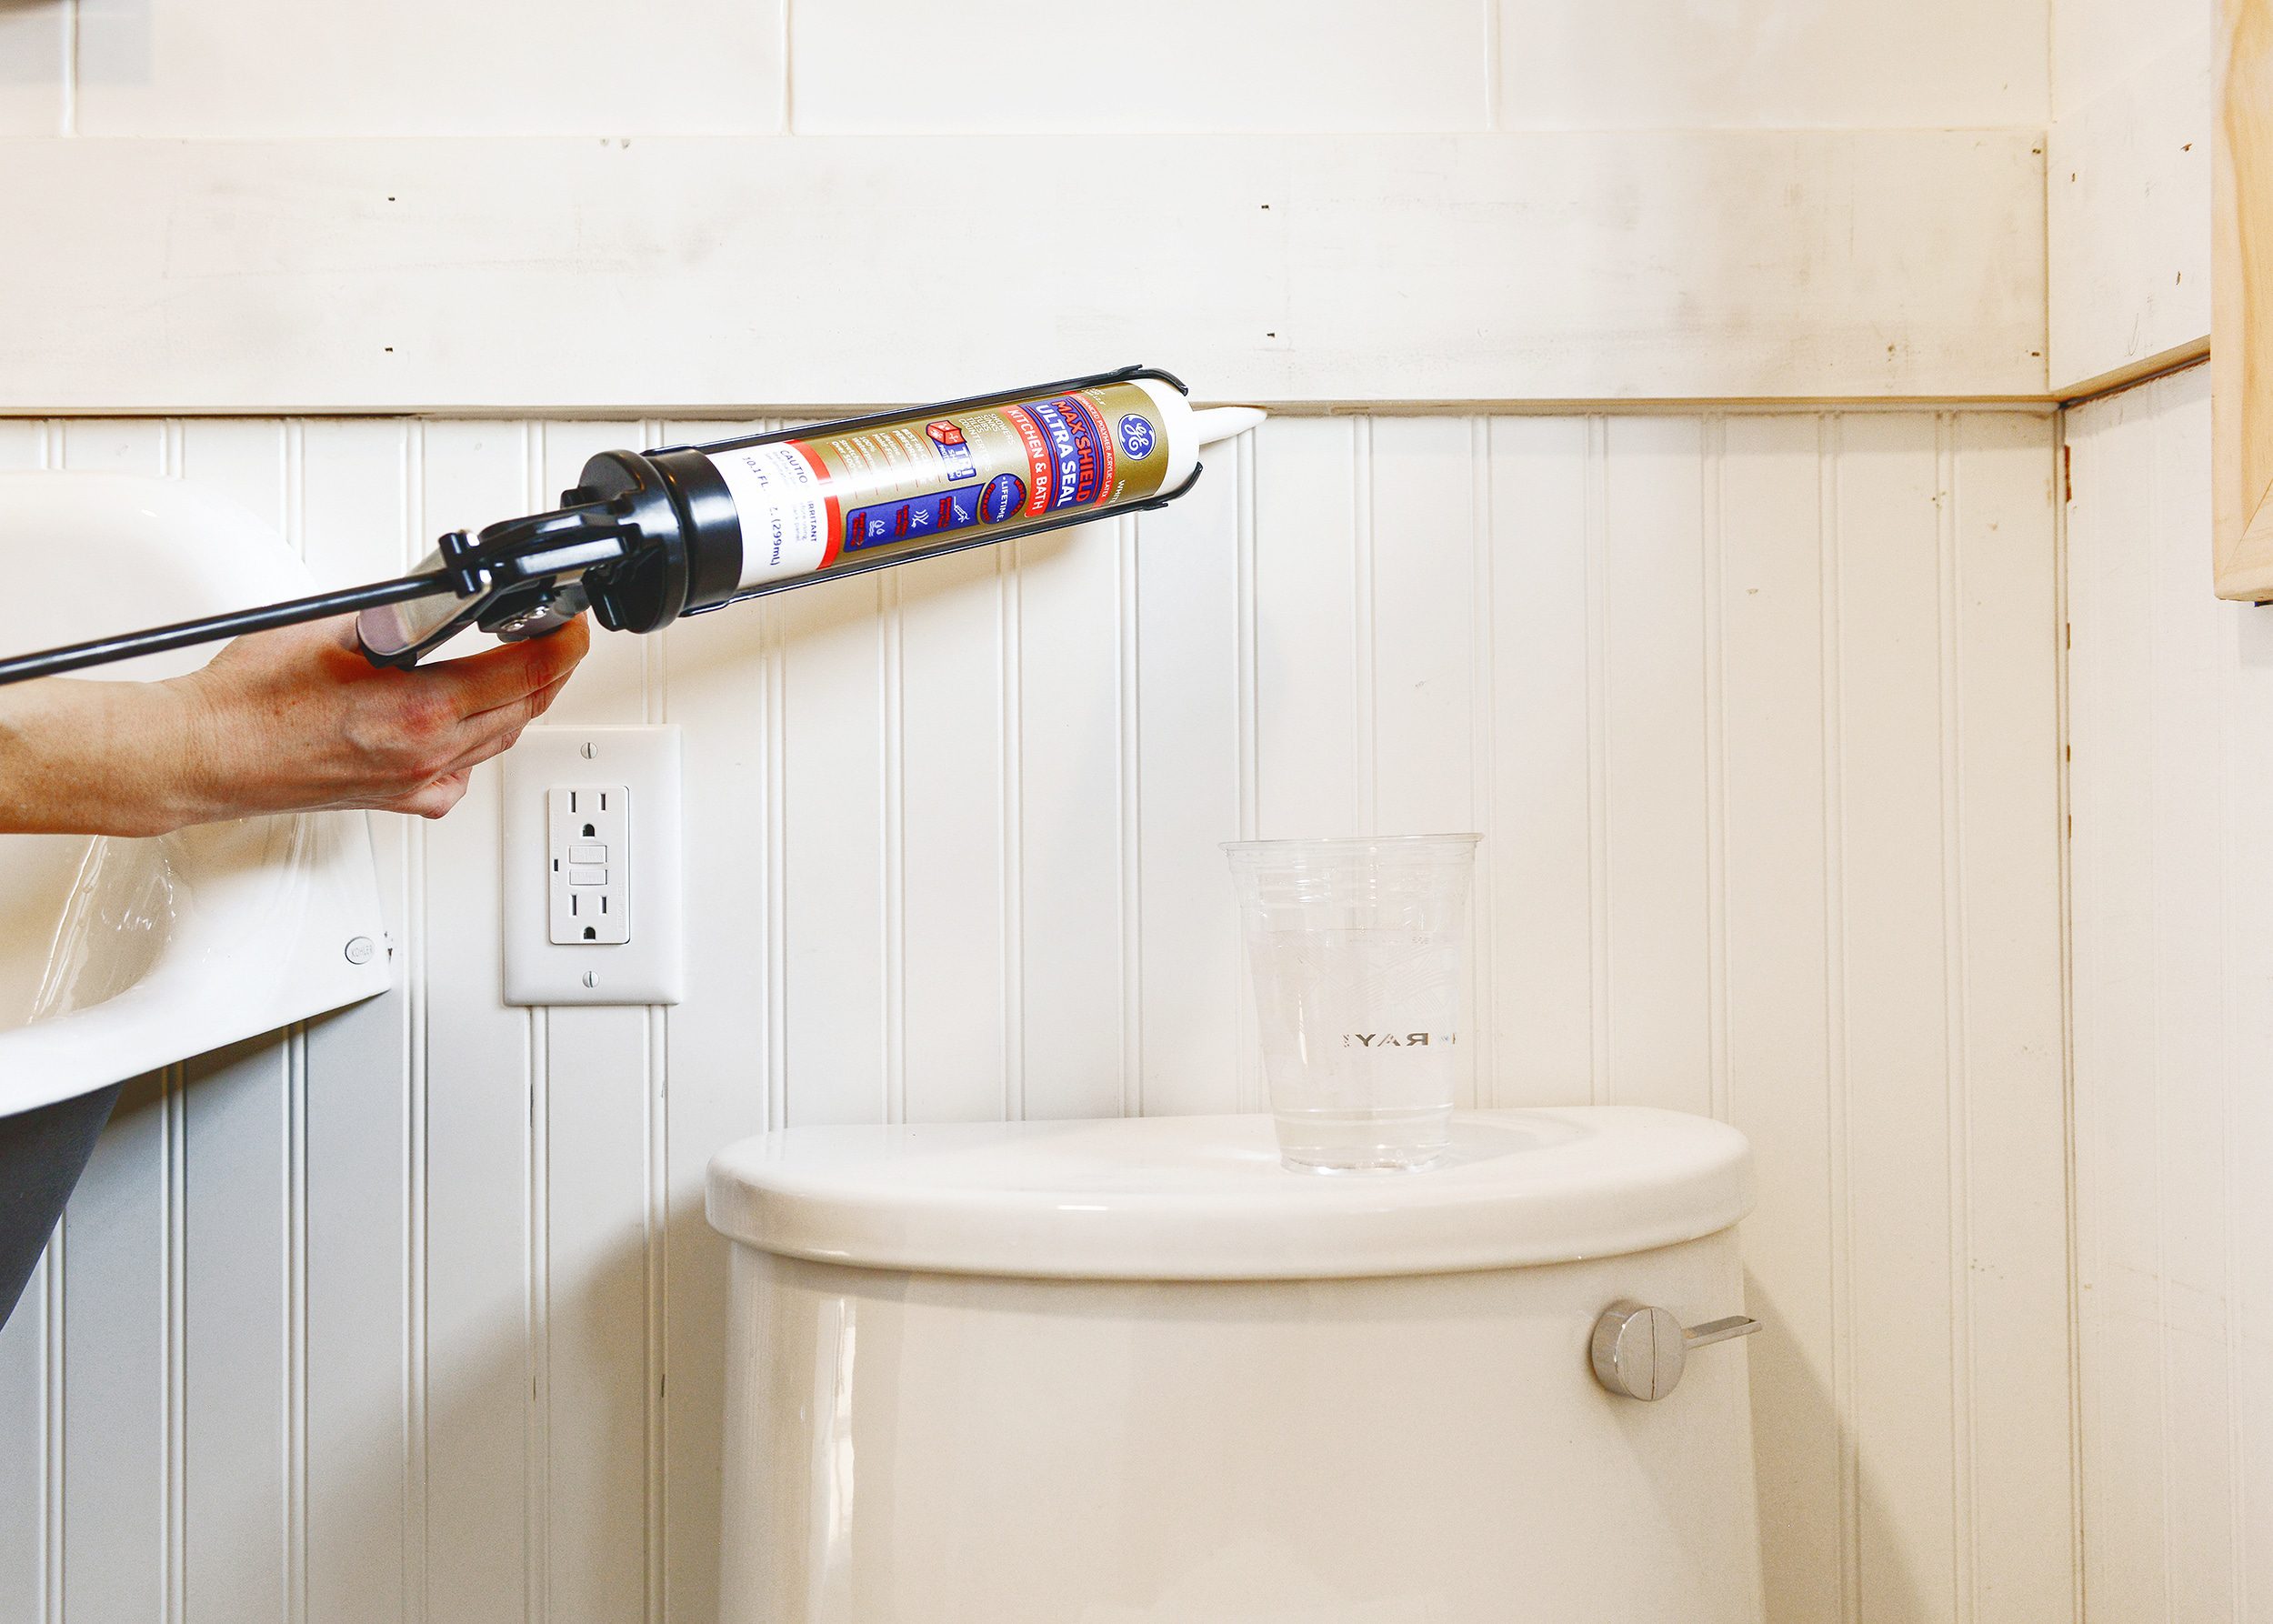
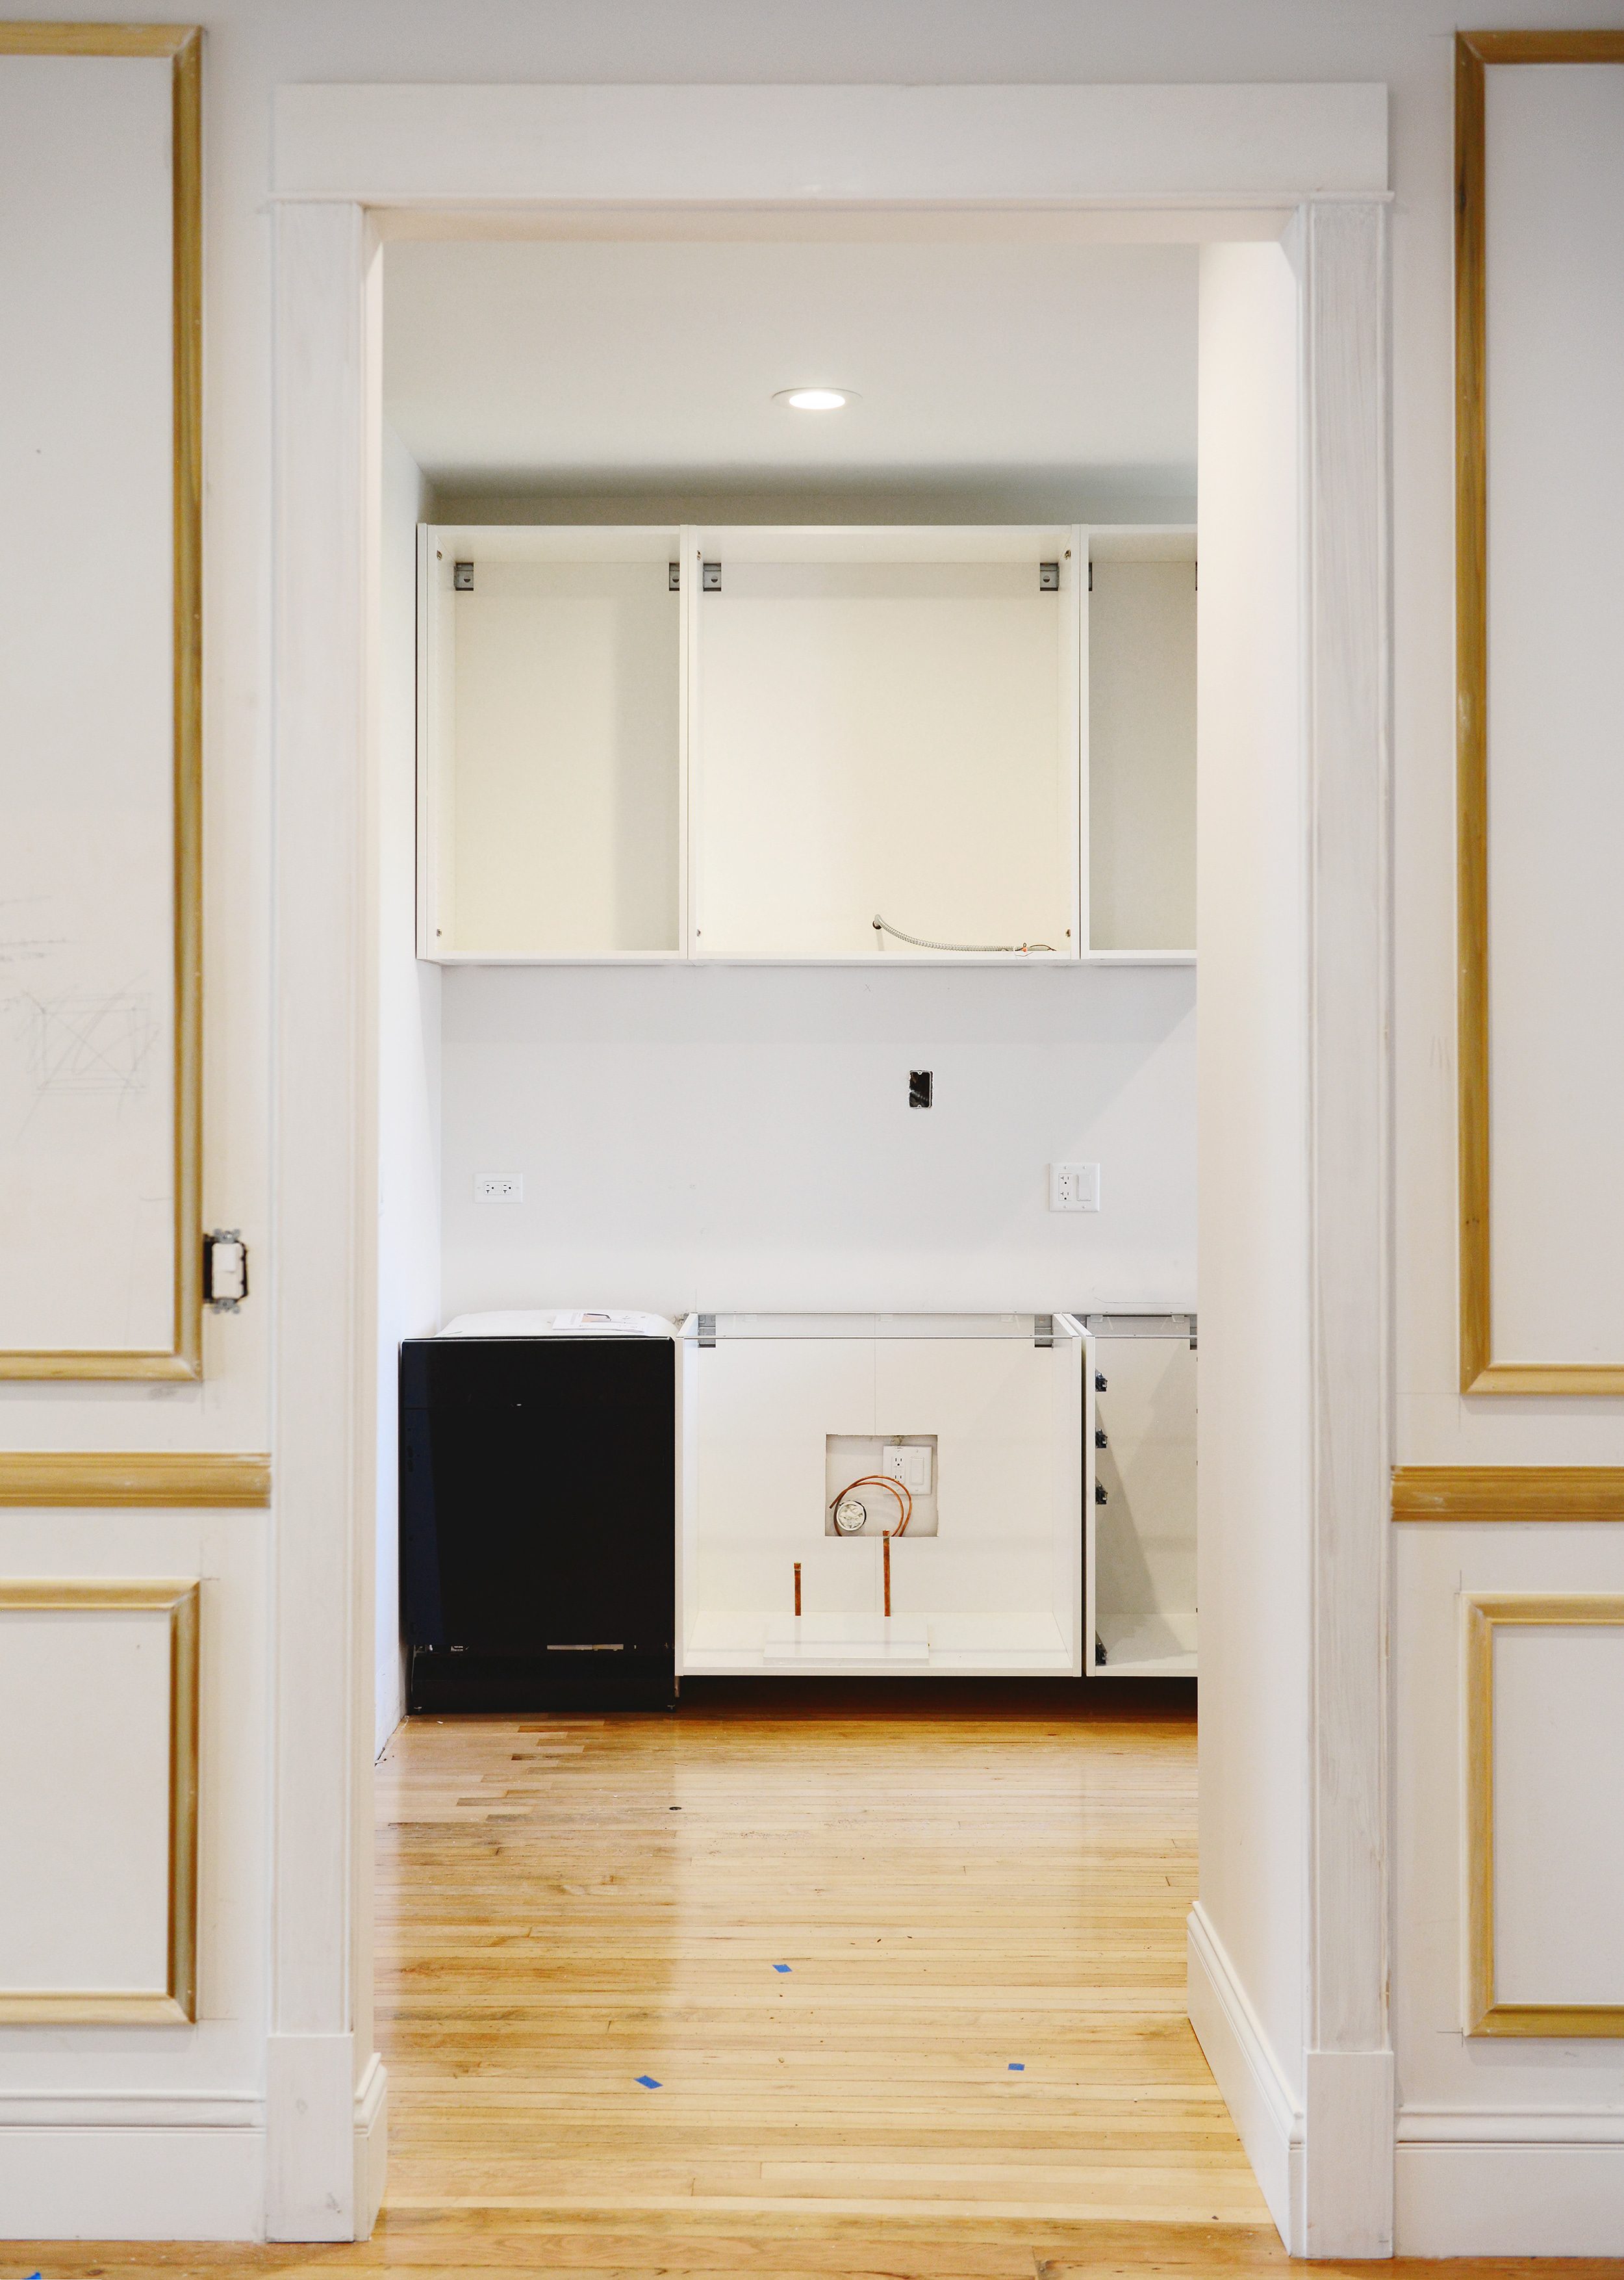
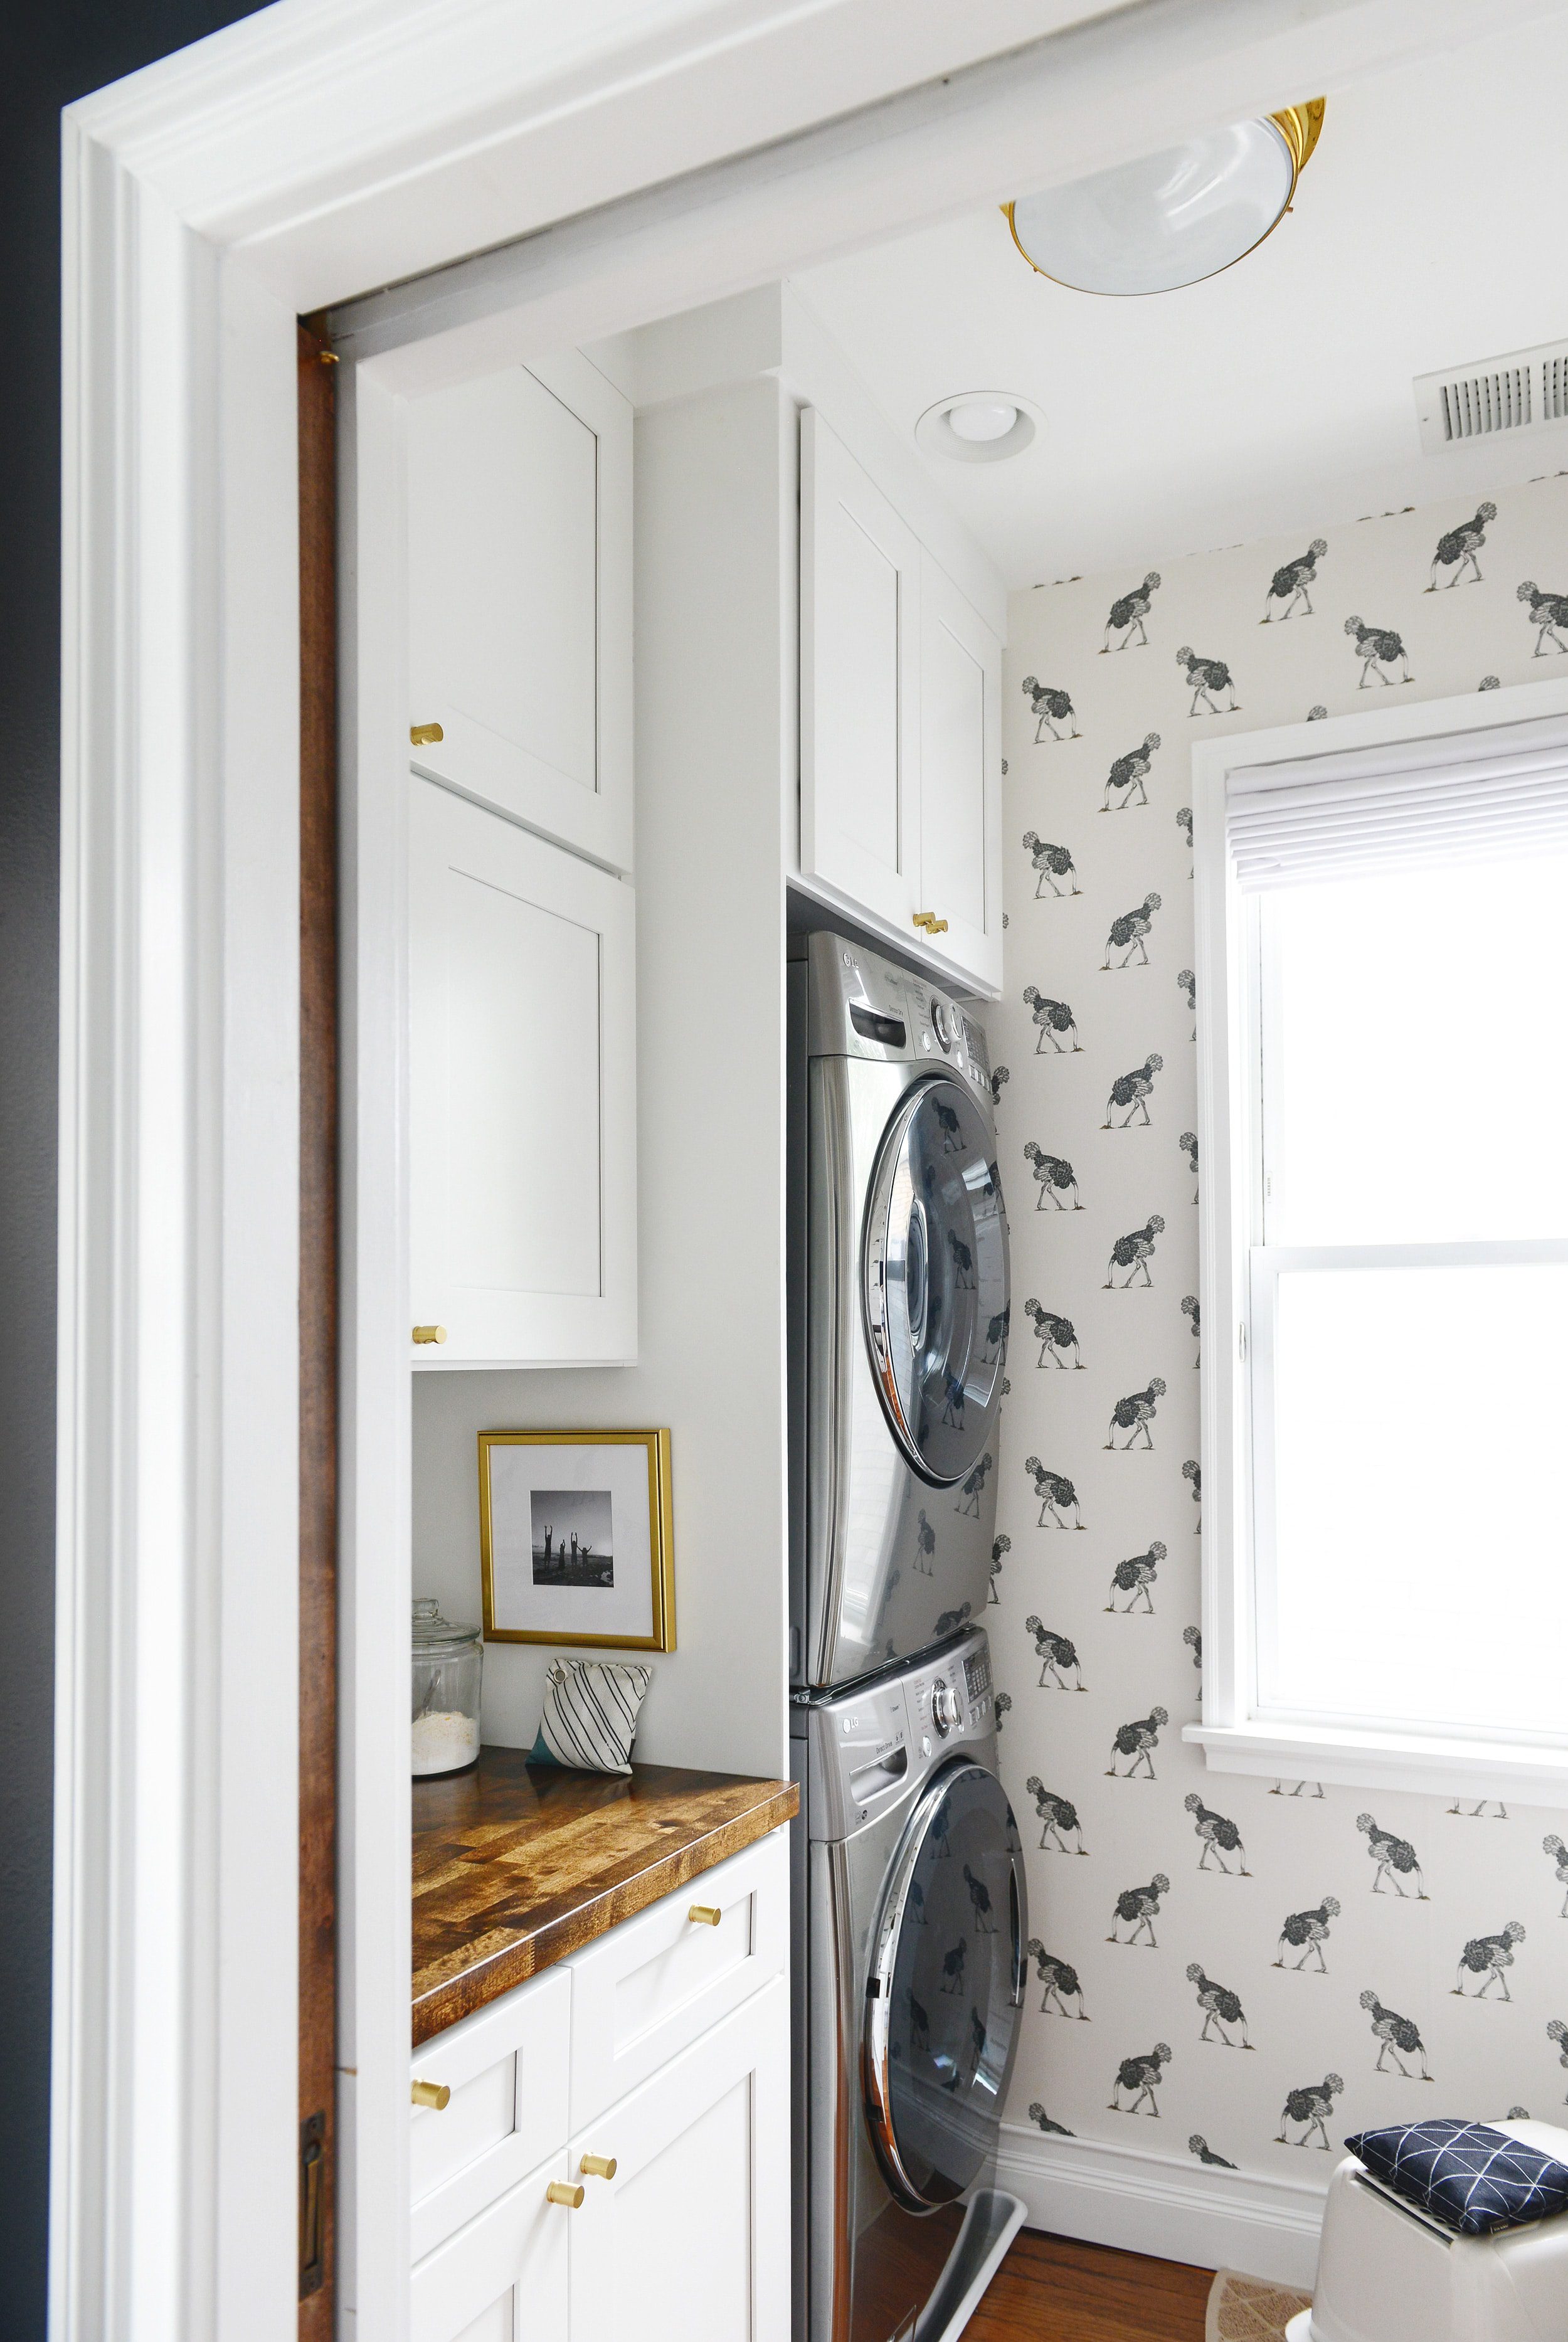
For example, the ceilings in our laundry room are very much out of level. When we went to install the fillers at the top of the cabinets, we did our best to scribe our cuts, but we filled in the final imperfections with (a whole lot of) caulk. Once the caulk was dry, everything was painted and the result is what looks like a perfect joint. Tip: For extra large gaps, try using backer rod! It gives the caulk something to adhere to, rather than emptying a whole tube into the abyss.
See also: How to get a perfect caulk line + our favorite caulks.
We rely on filler panels + trim
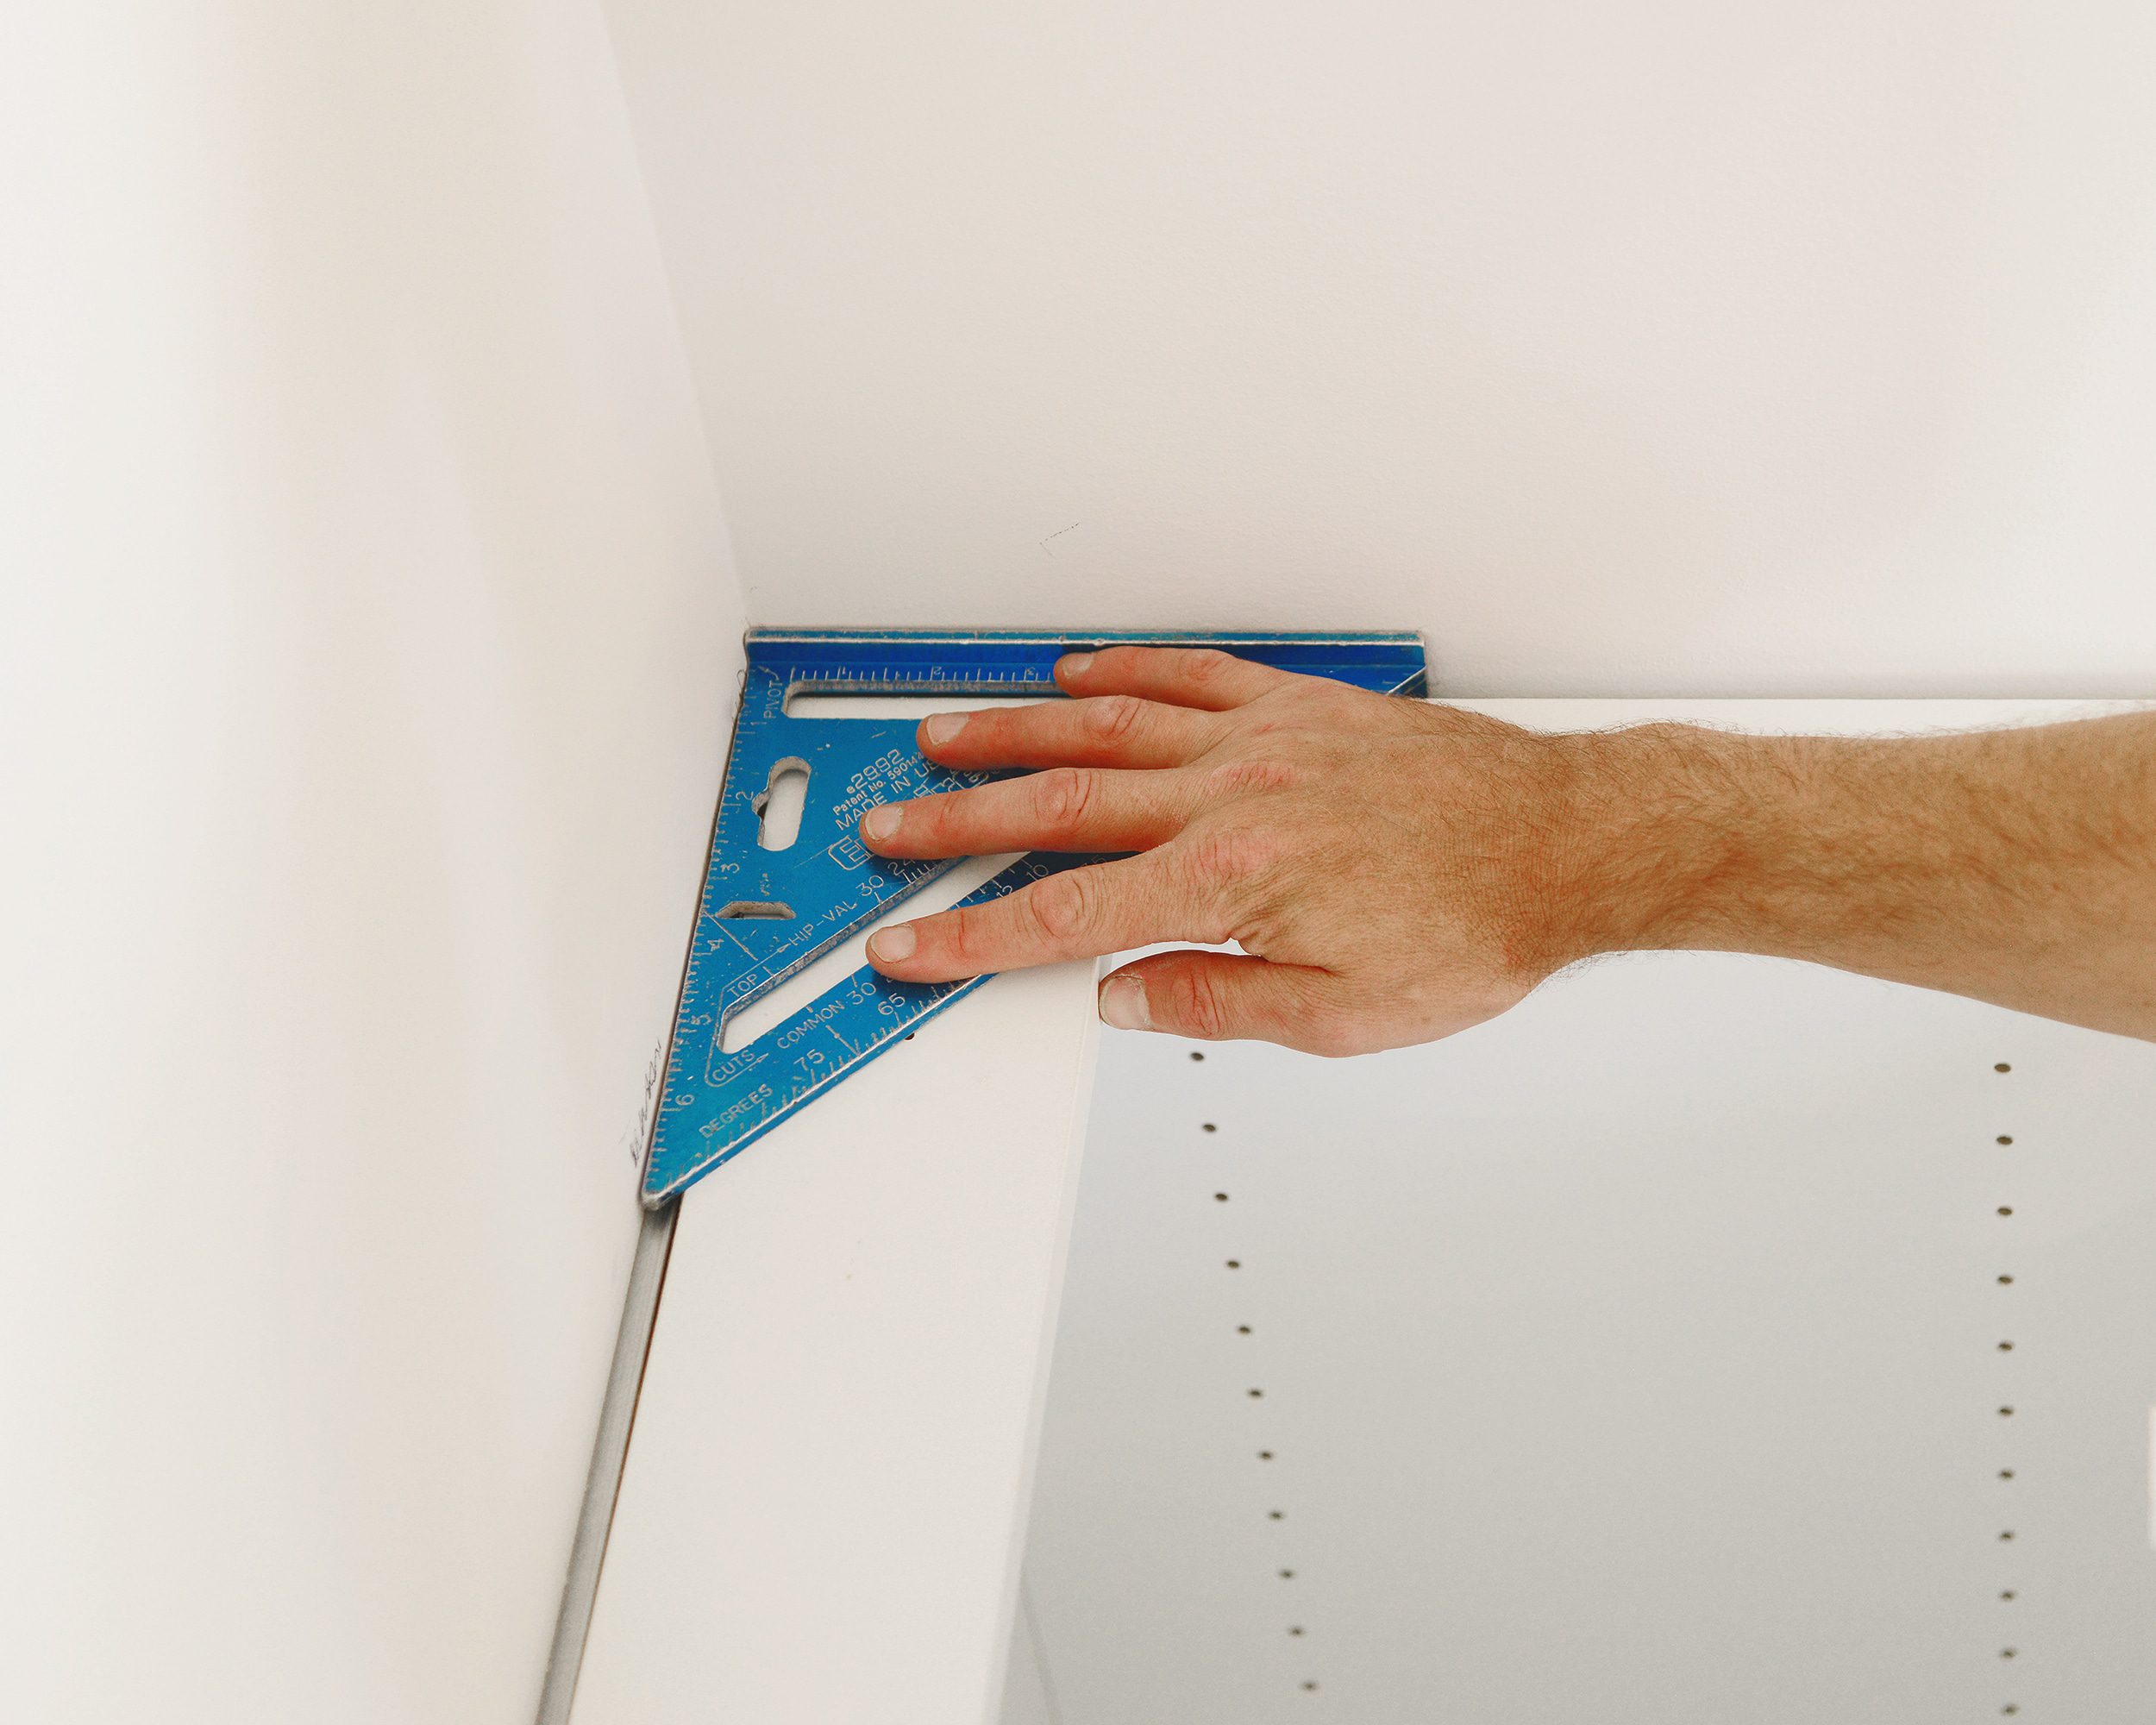
Installing filler panels eliminates larger unsightly gaps between surfaces. They’re also integral in filling gaps between cabinets and walls. Very rarely, if ever, will the wall that a cabinet meets be as perfectly square as the cabinet itself. This is where filler panels come in. Essentially, a filler panel is a length of finish board that fills in the space where a cabinet doesn’t meet the wall or where cabinets meet each other.
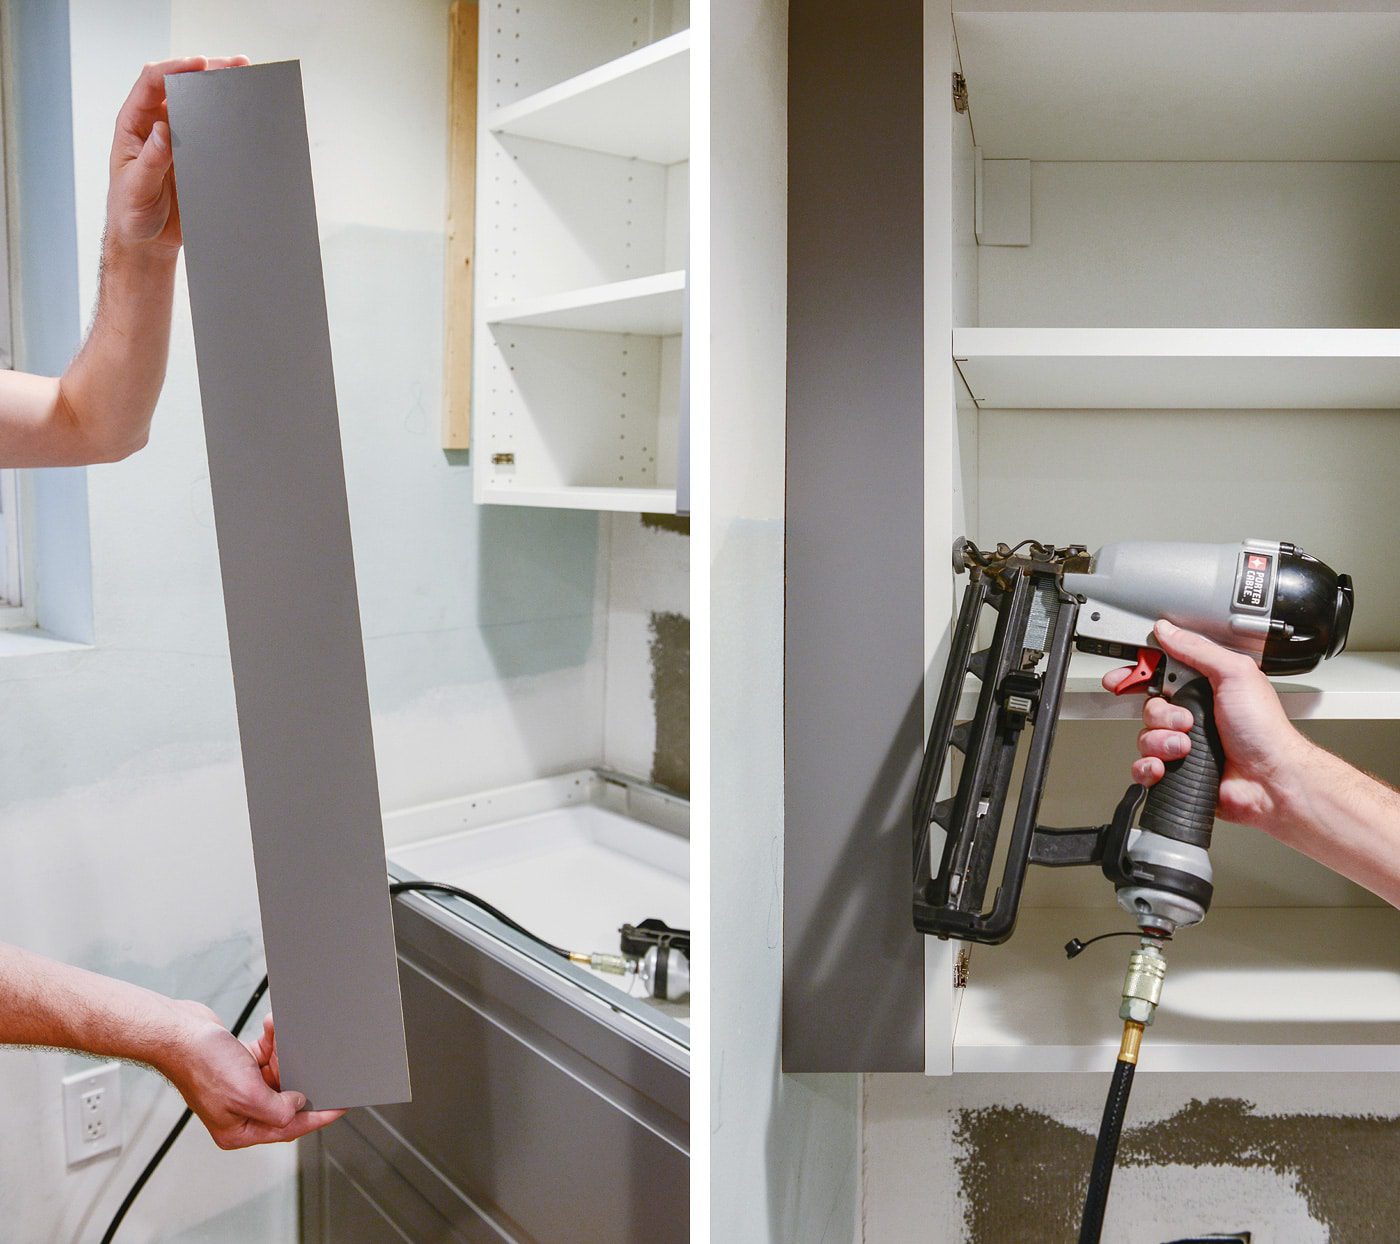
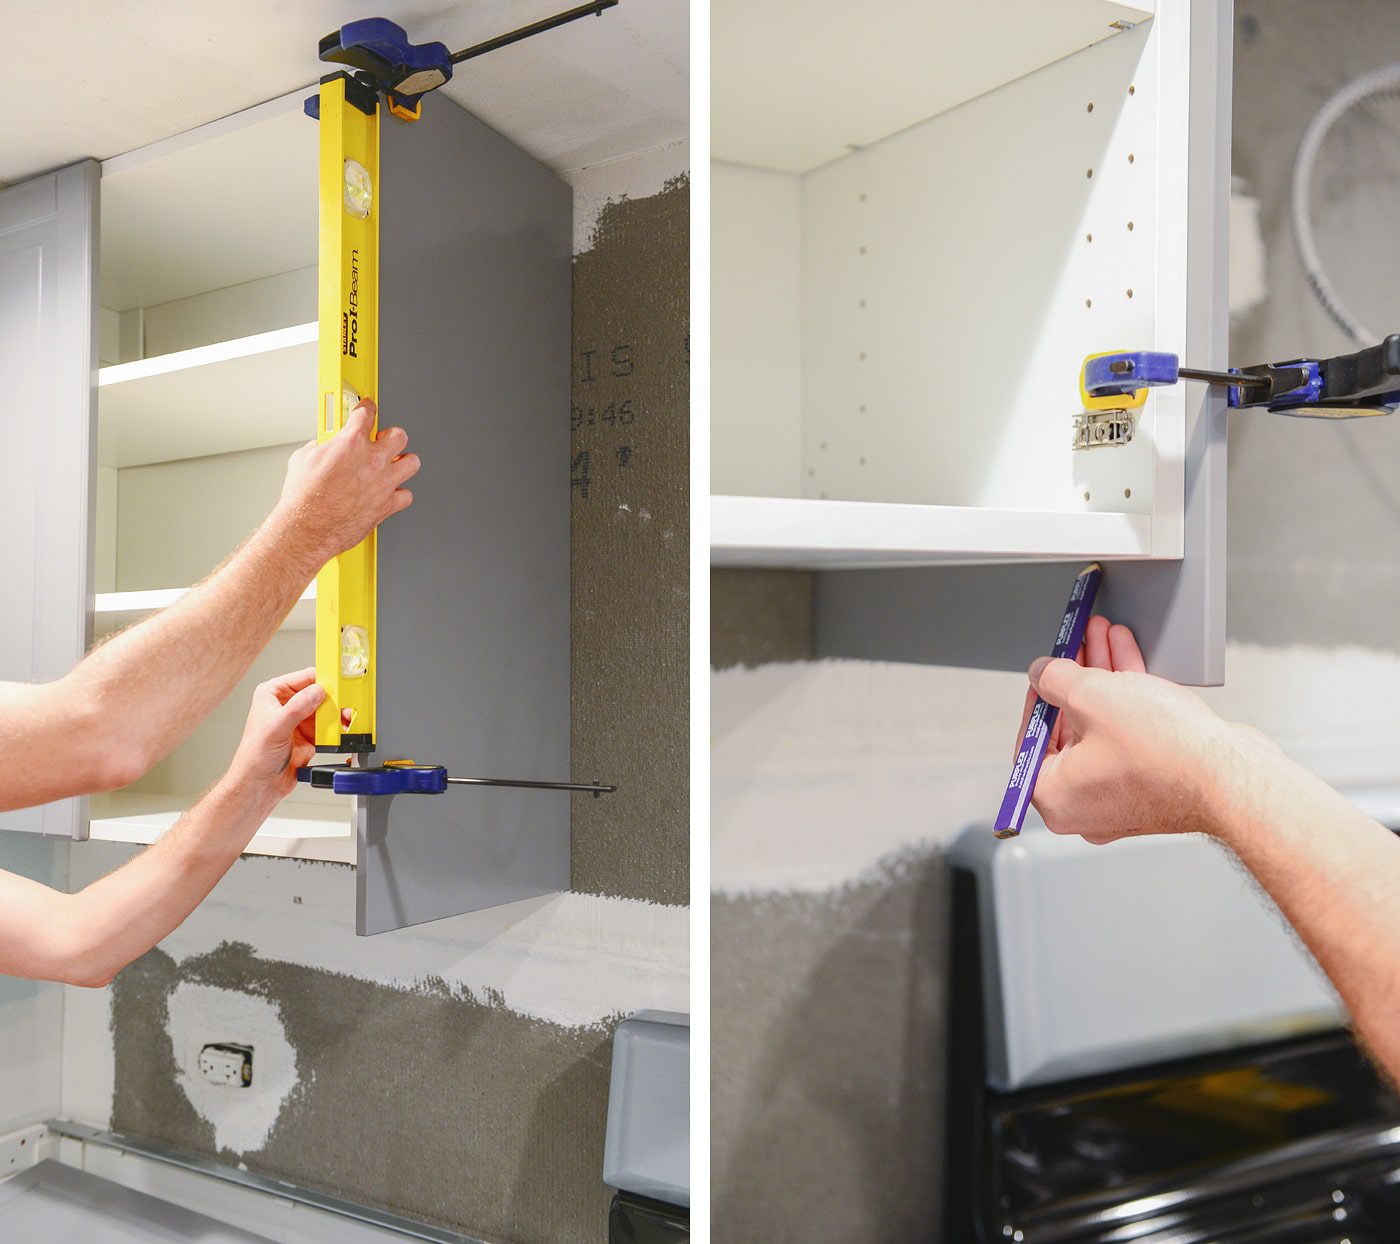
When walls are really out of plumb, filler panels can be scribed or cut intentionally out of square. Using clamps to scribe surfaces is a handy way to make sure panels align with the cabinet sides they’re intended to conceal.
See also: How to install filler panels in a kitchen, and why filler panels are so important.
We’re okay with ‘visually level’ and splitting the difference
Finally, when all else fails and no amount of math or careful cutting can make a surface perfectly level, it might be time to settle for visually level. Visually level is exactly what it sounds like. It’s an acceptance of the fact that a disproportionate amount of effort would be required to make something perfect. For example, completely removing an entire windows’-worth of trim molding just to make an adjacent surface look level might be a fool’s errand, and I’m not touching that with a ten-foot pole!
A time that this trick comes in extra, super duper handy is when we’re hanging high curtain rods. In our Chicago home, our ceilings aren’t generally perfectly level, but splitting the difference between the un-level ceiling and level window casing can pull they eye away from noticing. In a case like this, almost perfect can end up appearing perfect if you use your eyes as a level as opposed to using an actual level. Sometimes it’s the only way!

What are we missing? Do you have a go-to trick when things aren’t level, plumb or square? We’d love to hear your tips, because we still have two kitchens’ worth of filler and trim panels to install in our 130 year old Two Flat. Old home lovers, unite!


Thank you for this post! Our home was built in the late 1950s/early 1960s, and recently renovated by the sellers. There is still a lot of work to be done, and the house is not fully level, so I’ve been looking for ways to either adapt to the imperfections, or give a visual illusion of level-ness.
We’ve found that a combination of adapting to the imperfections and giving the visual illusion of level is often the best solution!
I’m constantly finding places in my historic home that just aren’t level. My laser level has become my best friend!
Yesssss for laser levels!
Love these tips as we are tackling our first DIY and realizing our house is anything but plumb. Any tips on installing bifold closet doors and there’s a big gap on one side because the wall isn’t plumb? Can you hide that gap with trim?
That’s a tricky one! In our garden apartment, we had a similar situation and found it was best to gently shave the door down on our table saw. It closes properly and clears the VERY out-of-plumb opening nicely. Trim would be the next best option, in our opinion.
Hey there! Do you guys add shims (or have other recommendations) behind the Ikea Kitchen rails for walls that are a little wavy and out of plumb/level over the course of distance that you need the rail? Thanks!
Hi Ryan! There are a couple of things to keep in mind here. Adding shims can keep the rails straighter, which will help the cabinets hang nicely. However, it will also kick the boxes away from the wall by the thickness of the shim, so you’ll end up with a wider gap between the cabinet and wall. If you’re installing side panels, this isn’t an issue, bit if you’re not, the gap might look overly large. Hope this helps!
whew what a help this is! i’m obsessed with getting things square and level, and our 1923 philadelphia rowhome is rarely so forgiving.
Live in a 40’s house with plaster, and when we open up walls to work, it looks like a lot of our studs are uneven, easily hidden with plaster, not so much with replacement drywall. Any tips? Thanks for the great post!
You’ll want to look into furring strips to help get your drywall level!
Do you ever have problems with gaps appearing due to expansion/contraction? We added filler strips around our kitchen cabinets and then caulked the the gaps (our scribing skills could have been better!). It looks fine in the summer, but in the winter a gap appears between the filler strip and the ceiling as they shrink away from each other. The caulk doesn’t seem sufficiently stretchy to accommodate the movement. Did we use the wrong brand of caulk? Any tips?
It happens, for sure, and will require touch ups from time to time. I recommend checking out Big Stretch caulk for great expansion!
Finally reading this post after having had it marked for the last month! I don’t know if you’re still monitoring comments, but if so, have you ever dealt with extra space between the bottom of the trim and the floor? My 130-year-old house has all kinds of quirks, including gaps of varying sizes (some fairly significant) between the trim and tile, and I’m wondering if caulk is an appropriate solution there. Or is there another way to make the gaps less obvious?
We have a few of those as well, it drives me nuts, but I just embrace it as old house charm. I don’t recommend using caulk between the trim and floor, because you will always be touching it up and it won’t look right.
So I am building a bbq kitchen island with bricks and mortar and the front is 2 inches higher than the back I am 16 courses high on all corners but I am 2 inches max out of level I haven’t put the plywood on yet.
So not only does the 20 ft wall in my kitchen have numerous bows that I will need to shim to deal with, I believe the entire wall is fairly rotated in addition to not being plumb (my floors are just as wavy). (I know how to figure out how not plumb a wall is and how to shim (ikea) cabinets for it. ). But Im stumped on the rotated wall though.
Any tricks for determining how much its rotated? (Ie how many inches one end of the wall is futher in towards the room vs the other end of the 20 ft long wall)? I cant measure to the wall across from it, since it too is rotated. The room is kinda like a parallelogram or some kinda rectangular but not exactly rectangular shape I guess. lol.
I think your best bet would be to us a combination of a laser level and a laser measuring device. You could mark spots on each wall and find the differences from side to side that way maybe? Hope this helps!
Does this not affect people more with symmetry OCD though?
Your results may vary.
We have remodeled our whole first floor of 1978 house, complete gut and moved walls. It is almost finished and we installed our tall wine fridge and noticed the nook that was made for it is off. The space above the fridge is uneven. Contractor says well the house isn’t even and so the framing wasn’t even and they had to frame it to the ceiling…basically telling us there is nothing that can be done except add a stainless steel trim piece above it to hide the imperfection. Please help me find another way. I am not sure if contractor is over 6 months into project and walls are painted and not wanting to fix it or if there truly is no solution. Thoughts? Suggestions as this fix might be something I have to do.