

Remember a long, long time ago when we said – out loud! – that we would have our trim and baseboards finished by the end of May? The end of May.
Ah! Ahaha!
Those were good times. In any case, we can see the finish line, but we’ve been doing a whole lot of problem solving and road-block-crushing along the way. Installing baseboards seems like it would be an easy enough job, and it sort of is, but there’s also a lot (a LOT) of time that needs to be set aside to just get it done. Time that could be spent on painting the kitchen, or choosing a rug for the guest room or organizing our tools or even cleaning the bathroom. You know, things that are more fun. In our heads, we think, oh, pffft! The studio should take a few hours. Fast forward to 8 hours later and two extra trips to the hardware store, and joke’s on us.
But as little as I enjoy baseboard installation, the end results make it all worth it. Really! And because Scott doesn’t mind trim install (he claims to enjoy it – weirdo), we balance each other out, and together, it becomes a manageable mediocre project. (Right?) If you’re thinking, wait, we’re still talking about baseboards? To which we say, this is real life in real time, and this is us, still knee deep in baseboards, but thisclose to being finished (not counting the bedroom. Or kitchen. But the big spaces? Almost knocked out!). We’re almost there! Hip, hip!
Although we’ve talked about our installation process many, many times, we’ve finally hit the point where we stumbled into a whole new world of problems, which thank goodness, were surprisingly easy to remedy! And so, for any of you with an old house, hitting road block after road block (oh, ancient house, how we love you), our hope is that our solutions might help you, too. This is why we continue to talk about baseboards. We’re all friends here; let’s hug.
Okay, so here’s what we had going on:
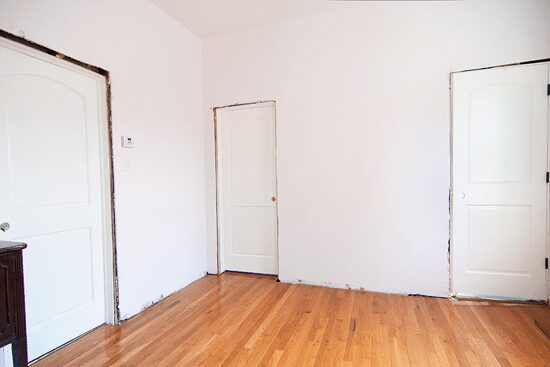
(On a side note, the floors are still far from straight, but my lens does add a lot more distortion than is actually there.) Up until this past weekend, the studio door + trim progress came to a stop after we hired out the door install. We did paint them, but then we dived right into outdoor projects, halting the entire operation.
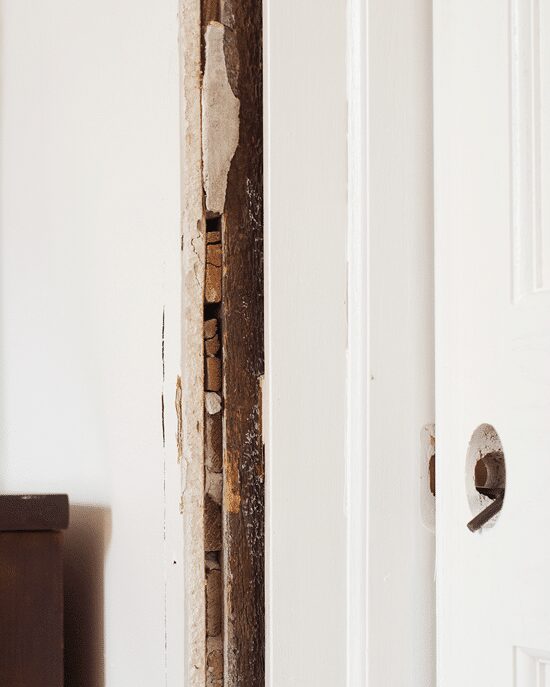
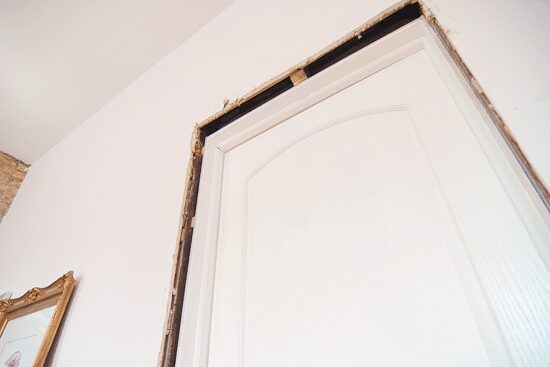
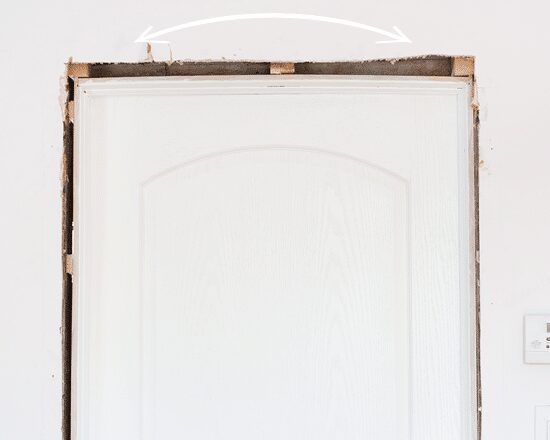
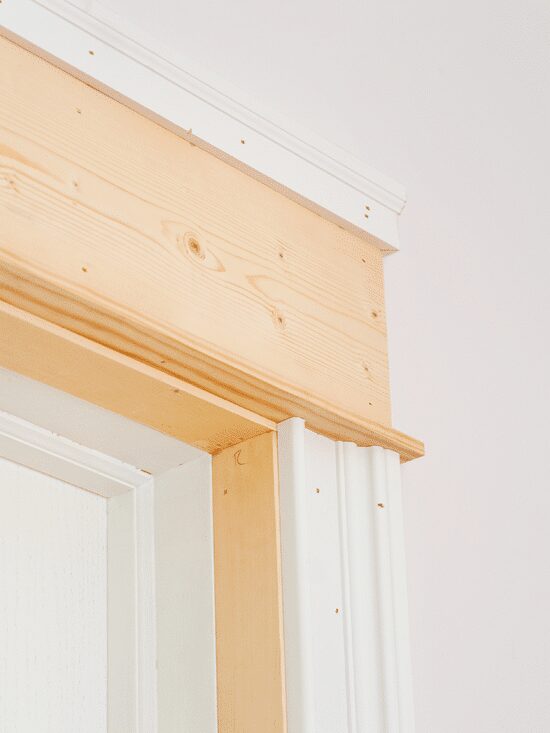
We knew trimming out the doors was going to be a bit of a process, because if you remember, the doors we purchased only had a jamb that was 4 1/2″ wide, whereas our actual jambs are easily 6″! Below, you can see how the installed door looks recessed, and you can still see the original 2×4 studs (and lath and plaster) that are framing out the doorway:
You can actually buy jamb extension kits, but added to the cost of the doors themselves, we decided to make our own extensions using a few 8′ lengths of 1″x6″ pine. All of our doors required different measurements (and the bathroom’s have been put off completely until we’re able to renovate them), so I’ll use our second floor guest room door as the example.
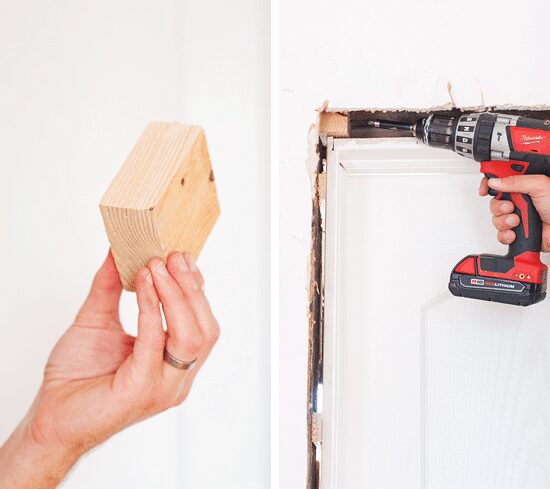
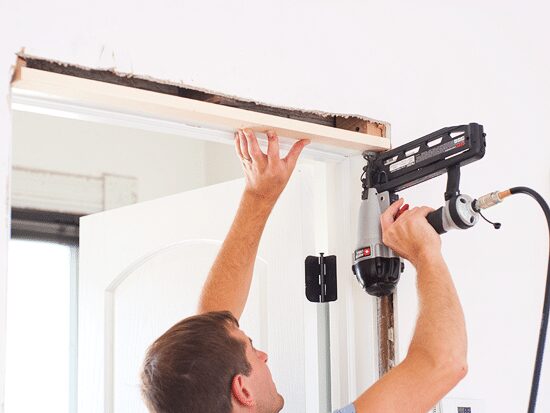
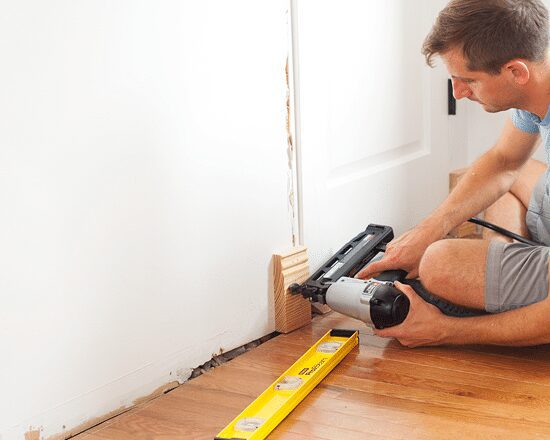
For starters, in the photo above you’ll notice that there’s only one 2×4 stud across the top, which gives us virtually nothing to nail into. Scott took a couple of 2x4s blocks and screwed them into the vertical studs, which then allowed us to use our nail gun to install the jamb extension across the top.
Once we had the door prepped, we took measurements from the current door frame to the drywall along all three sides of the door, and we took at least three measurements along each of the sides. This old house = very, very uneven everything. For example, the largest depth of the non-existent jamb was 2″, whereas the shortest depth was closer to 1 1/4.” On our table saw, we ripped down our 1x6s to the larger depth, which would allow for a bit of overflow past the drywall in some areas. With our pieces ready to go, we started at the top and began nailing them into place…
… continuing down the left side…

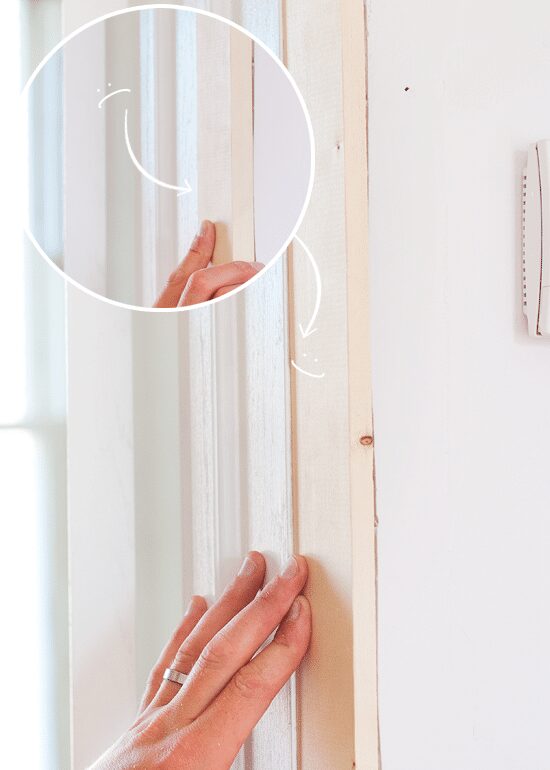
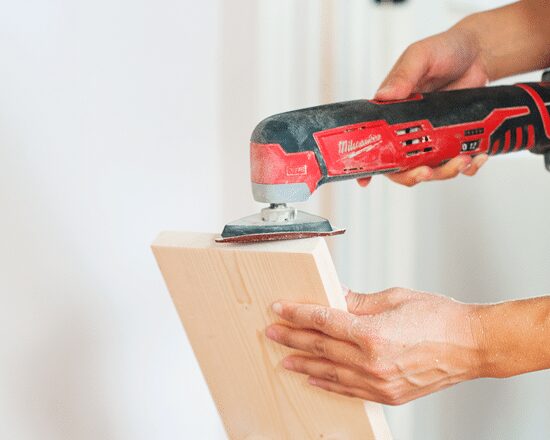
… until, of course (!), we reached the first road block along the right-hand side. I’ll admit that it may be tough to tell in photos, but if you take a look at the inset below, you’ll see that the 1×6 is completely flush with the door frame. We preferred to have a small lip, which not only allows for easier and more secure caulking, but it just looks better. The left-hand side had a lip because that side of the door frame was shimmed, so to stay on course, we very carefully used our table saw to rip down the depth of our 1×6, shaving off a teeny, tiny 1/4″ to achieve this:
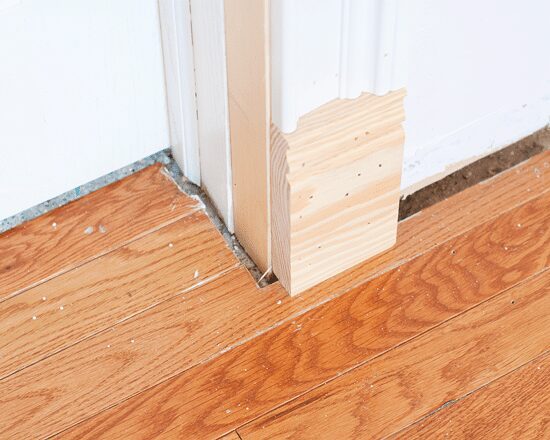
But as soon as we finished the first jamb extension, we came across road block number two – the gaps in our floors! The previous baseboards were installed before the floors, and even then, they didn’t properly meet up with the floor boards completely. This left a huge gap, which our door trim was unable to cover.
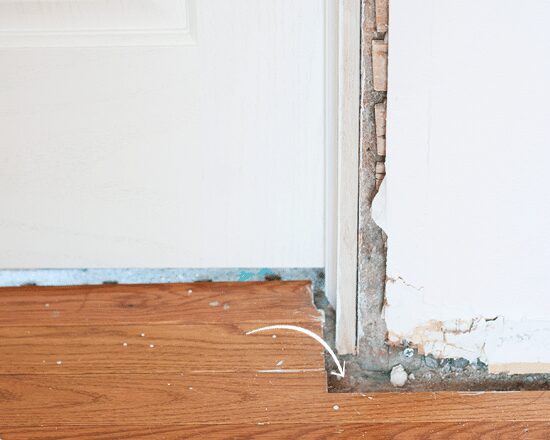
We always knew these gaps were rather large, but we thought nothing of it since our baseboards would also get quarter round. For the door trim, however, there’s no way to install quarter round along the decorative front edge. And so? Each of our doors got a big chunky plinth at the base! Once we start baseboard install, we’ll be able to put quarter round on the inside of the door casing, so that’ll cover all of our bases.
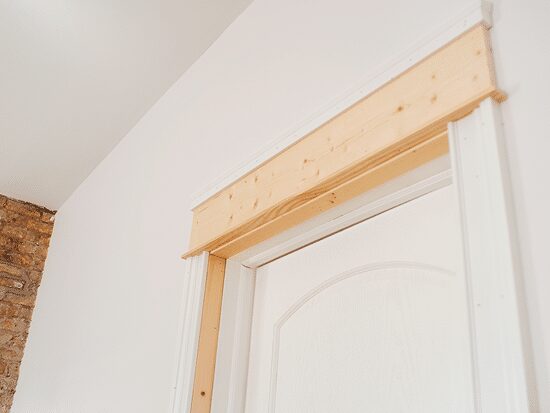
From there (and a quick run to the store later!), we were able to trim our doors as usual. Just as we did on the first floor, we kept up the tradition of tall headers, giving our doors more weight and dimension – especially since our ceilings are close to 10′ tall.
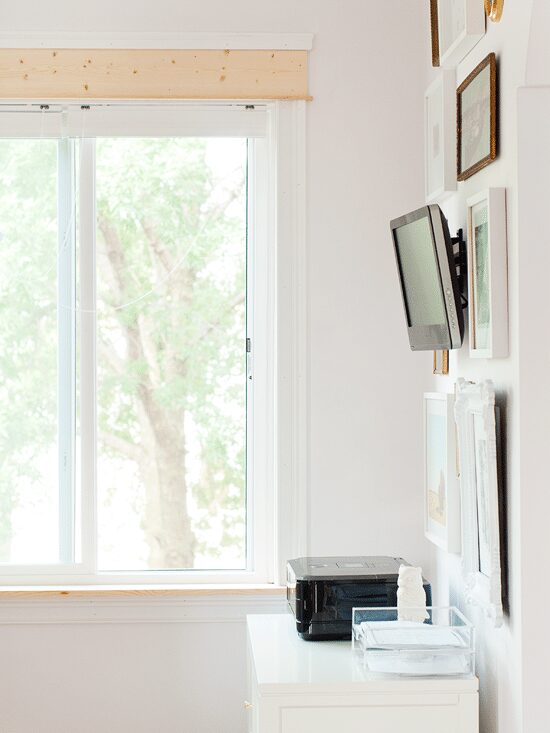
The view from my desk has gotten so much better in just the last couple of weeks alone!
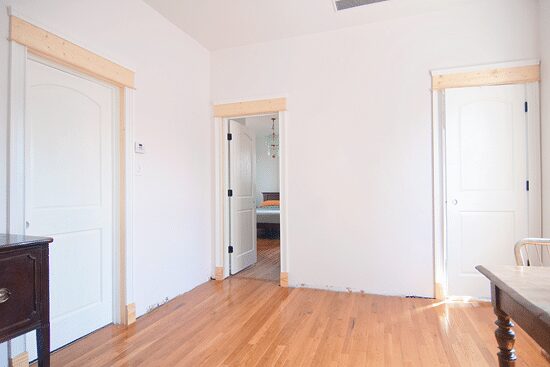
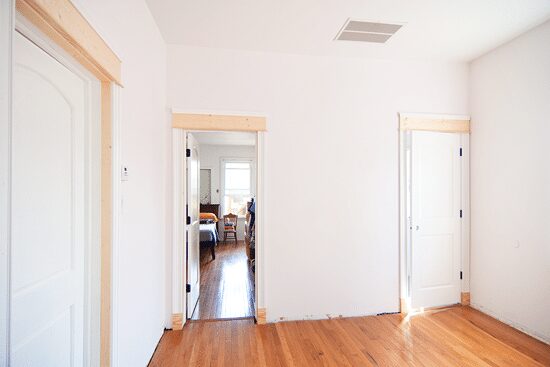
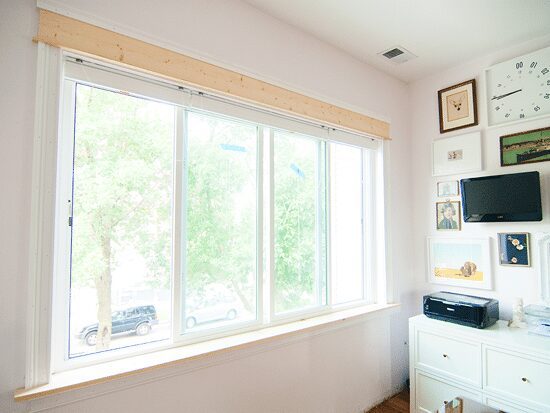
While we were at it, we gave the front window a trimming as well, which closely mimics the style of our doors and is an exact match to the one on the first floor.
At this point, nothing has been spackled, caulked or painted, and we hope to knock out the rest of the baseboards this weekend. At the same time, we’re juggling a bit of down time on the holiday weekend with another project or two that’s been on our list, so here’s hoping we can find some balance. These baseboards are nothing if not major time hogs. (Rude!)
PS! Our little nook got an upgrade with some new blinds! See the transformation over at the Bali Blinds blog, where our sweet Chunk makes an adorable appearance.


Our baseboards are so rude, too. Although we’ve been looking the other way for months and we’re finally diving in. Such a big task.
Congrats guys, keep up the good work ! I really like that you are showing us how hard and long it takes to get the job done, because when my own home improvement turns into a sort of a nightmare, I’m always thinking of you and how perfect things always go for you. Now I know you’re both humans, too. And those trips to the store… I do them too ! You’re both really brave, I’m impressed.
PS : Love CC’s face in the nook. Congrats on the blinds, too.
Thanks, Marie! Oh, boy. Things are far from perfect, so definitely remember that we run into the same problems as you… But having a CC definitely helps.
Woo hoo! Best feeling in the world to have a room feel complete, even if the trim isn’t 100% finished, they sure look great!
Oh man, that does look tedious, but you guys are doing a beautiful job! Good luck, hope you guys have a lovely weekend!!!
It’s looking really good. I love the way top heavy casings look on doors and windows!
We ended up making our own jambs or finding salvaged ones to accommodate the larger width walls, which is a major pain. I remember spending all day making one (cutting, sanding, etc), then I was making the final cut and didn’t take into account the tape measure when making my measurement. Wouldn’t you know, that damn jamb was exactly 3″ too short. Go figure. It was not a happy moment.
If you’re ever making jamb extensions in the future, the only thing to consider would be to make some shoulder cuts at the joints in the corer to give a bit more surface area to glue to. Might help prevent future separation. But then again, caulk will pretty much do the same. :-)
We debated that… And then we thought – caulk will fill that. Ha! Good point though. Perhaps if we weren’t so fed up with spending so much of our weekends on doors, trim and baseboards, we would’ve made a mitered corner. We have a whole new respect for millworkers! (Even considering we’re doing things the “easier” way!)