

It’s a Monday Rewind! Yellow Brick Home has 13 years of archives, so every now and then we’ll be sharing our favorites from posts past. This tutorial was originally published in September 2020. Enjoy!
We’ve been renovating our Chicago Two Flat (a building with two units) for the better part of a year-and-a-half, and rarely has a project gone as smoothly as our dining room makeover. This room has been a labor of love and weeks of hard work, but the results are better than we ever imagined!
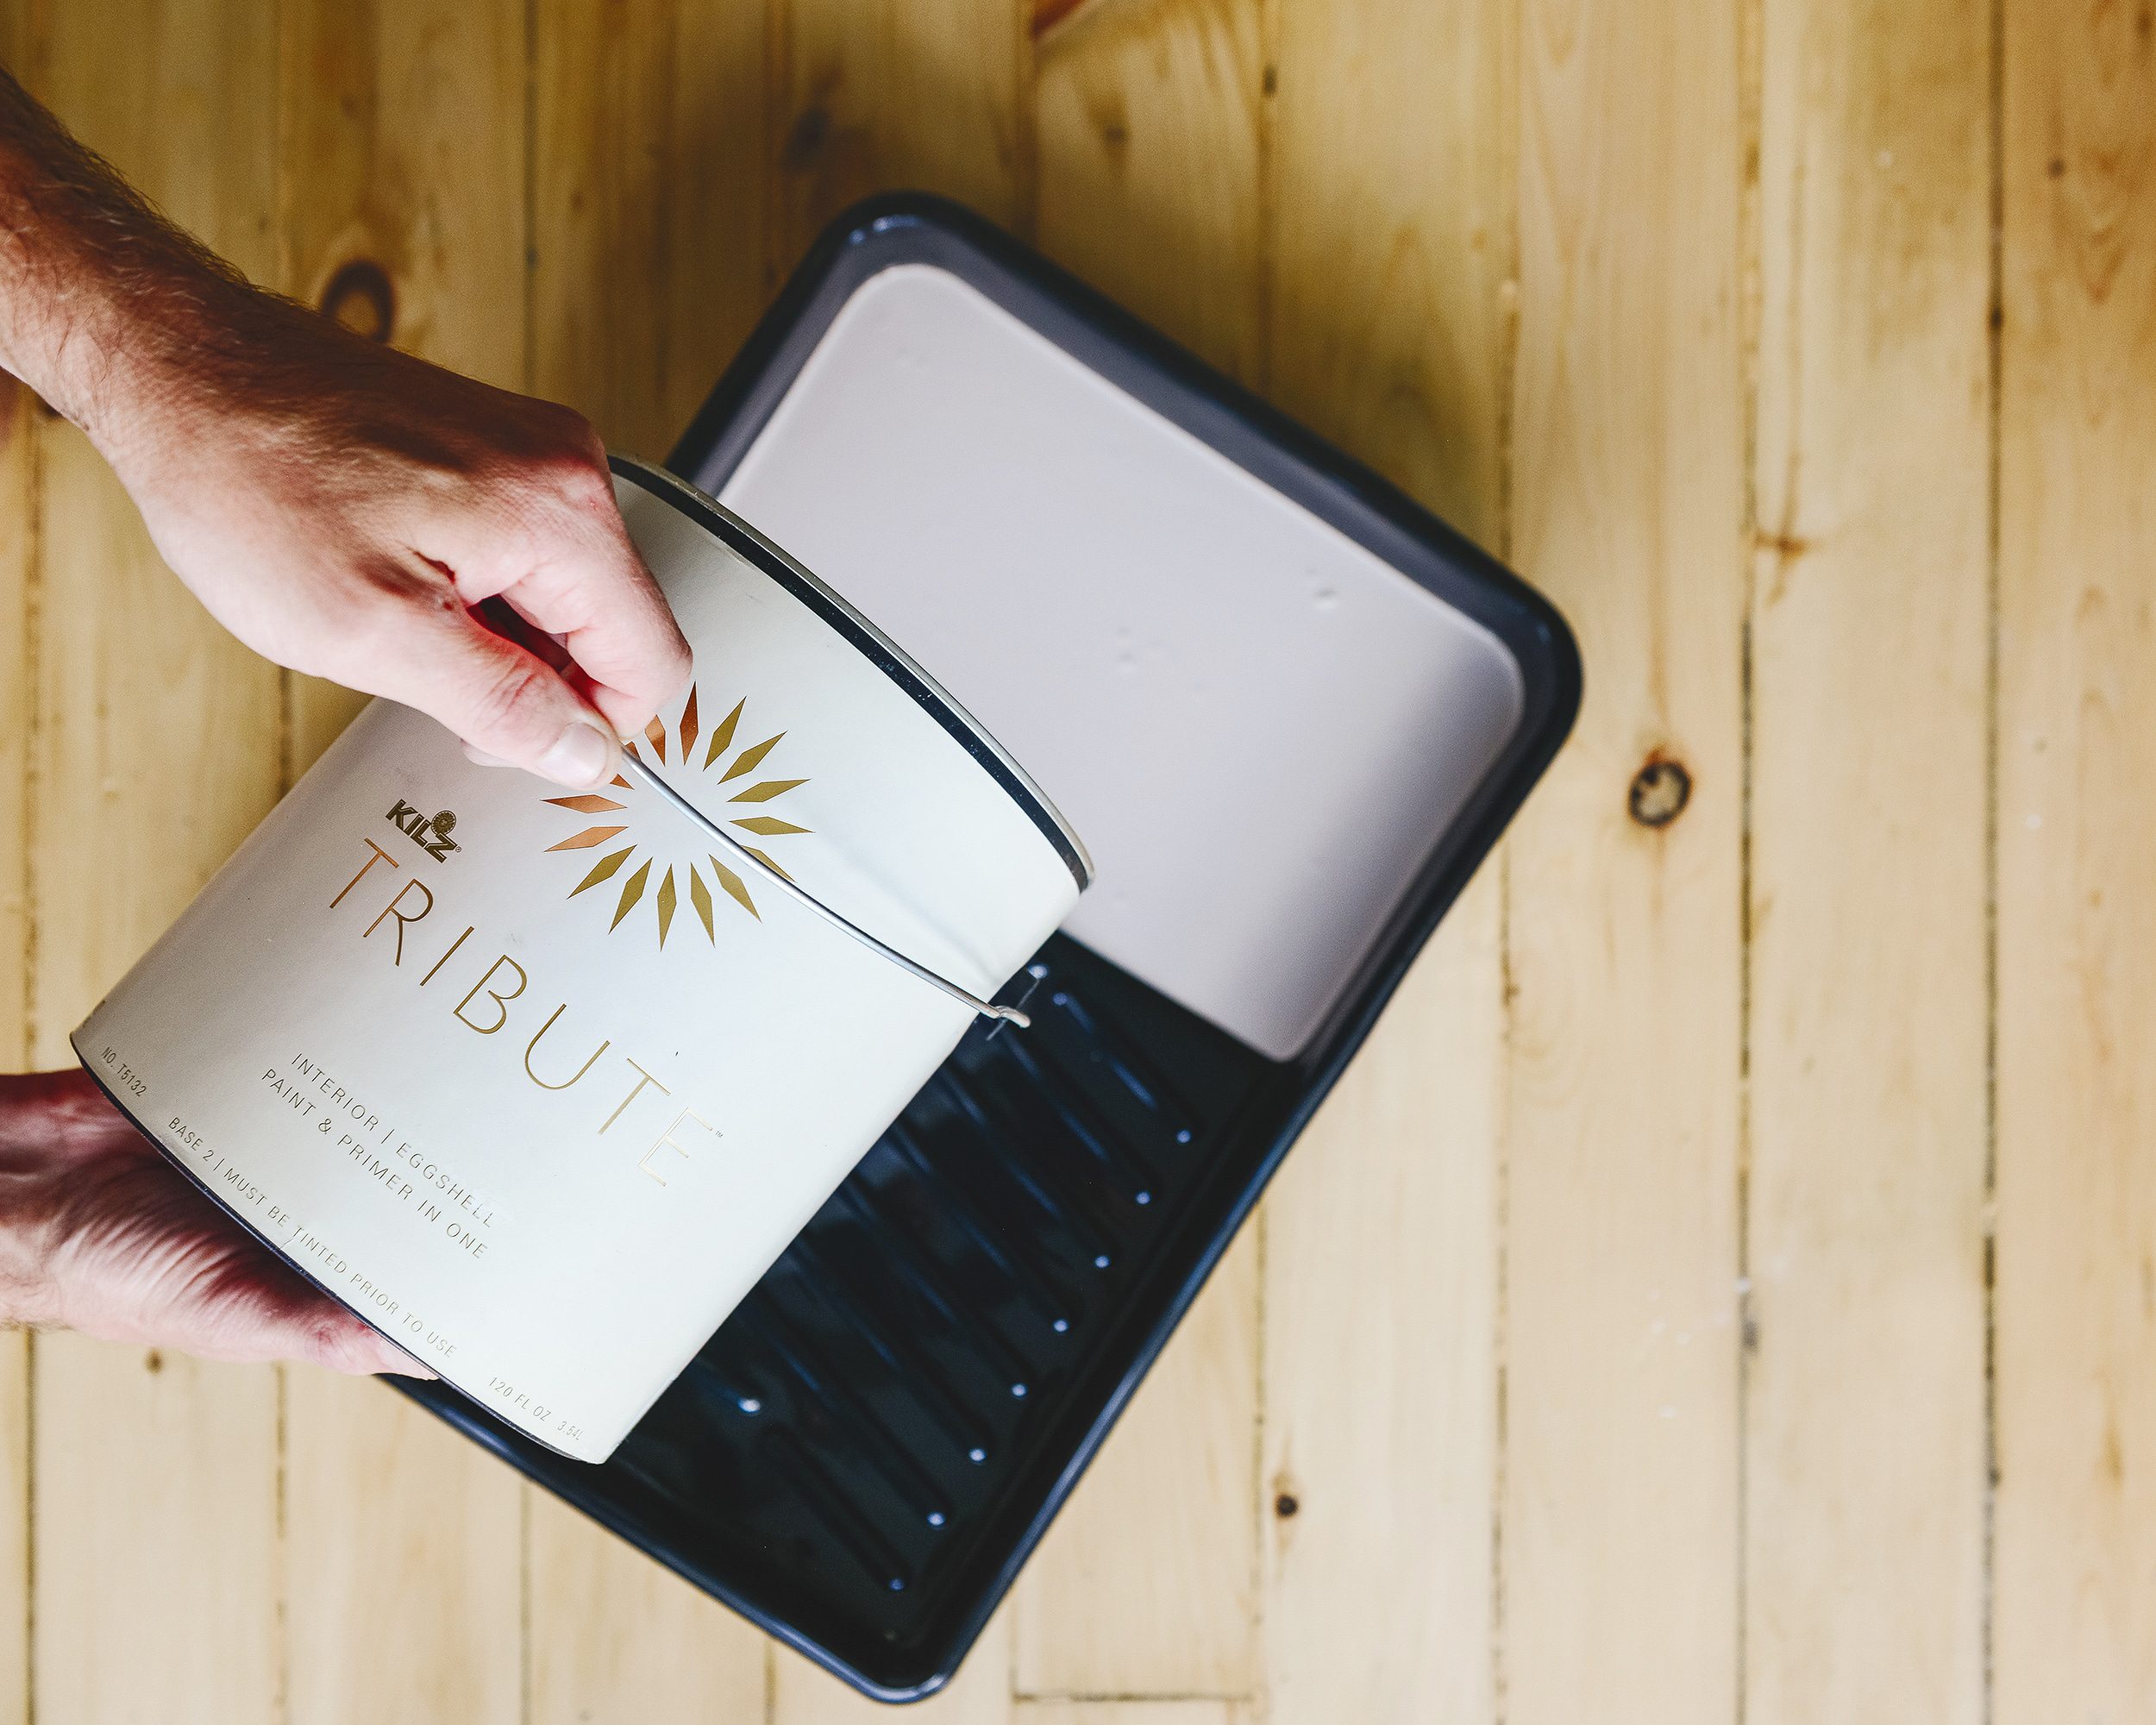
From head-to-toe, the room – walls, millwork, ceiling and vintage hutch – were primed with KILZ Restoration interior primer and painted in Meadow Mauve from the KILZ Tribute line of paint. It’s lavender, blush, greige and taupe all rolled into one, and Scott said it best when he described the color as a ‘hug.’ I won’t keep you waiting much longer, let’s dive right into the before and afters, and then I’ll take you through our process!
Tip: You can purchase KILZ® Tribute color sample pots and paint directly from Amazon! See the options right here.
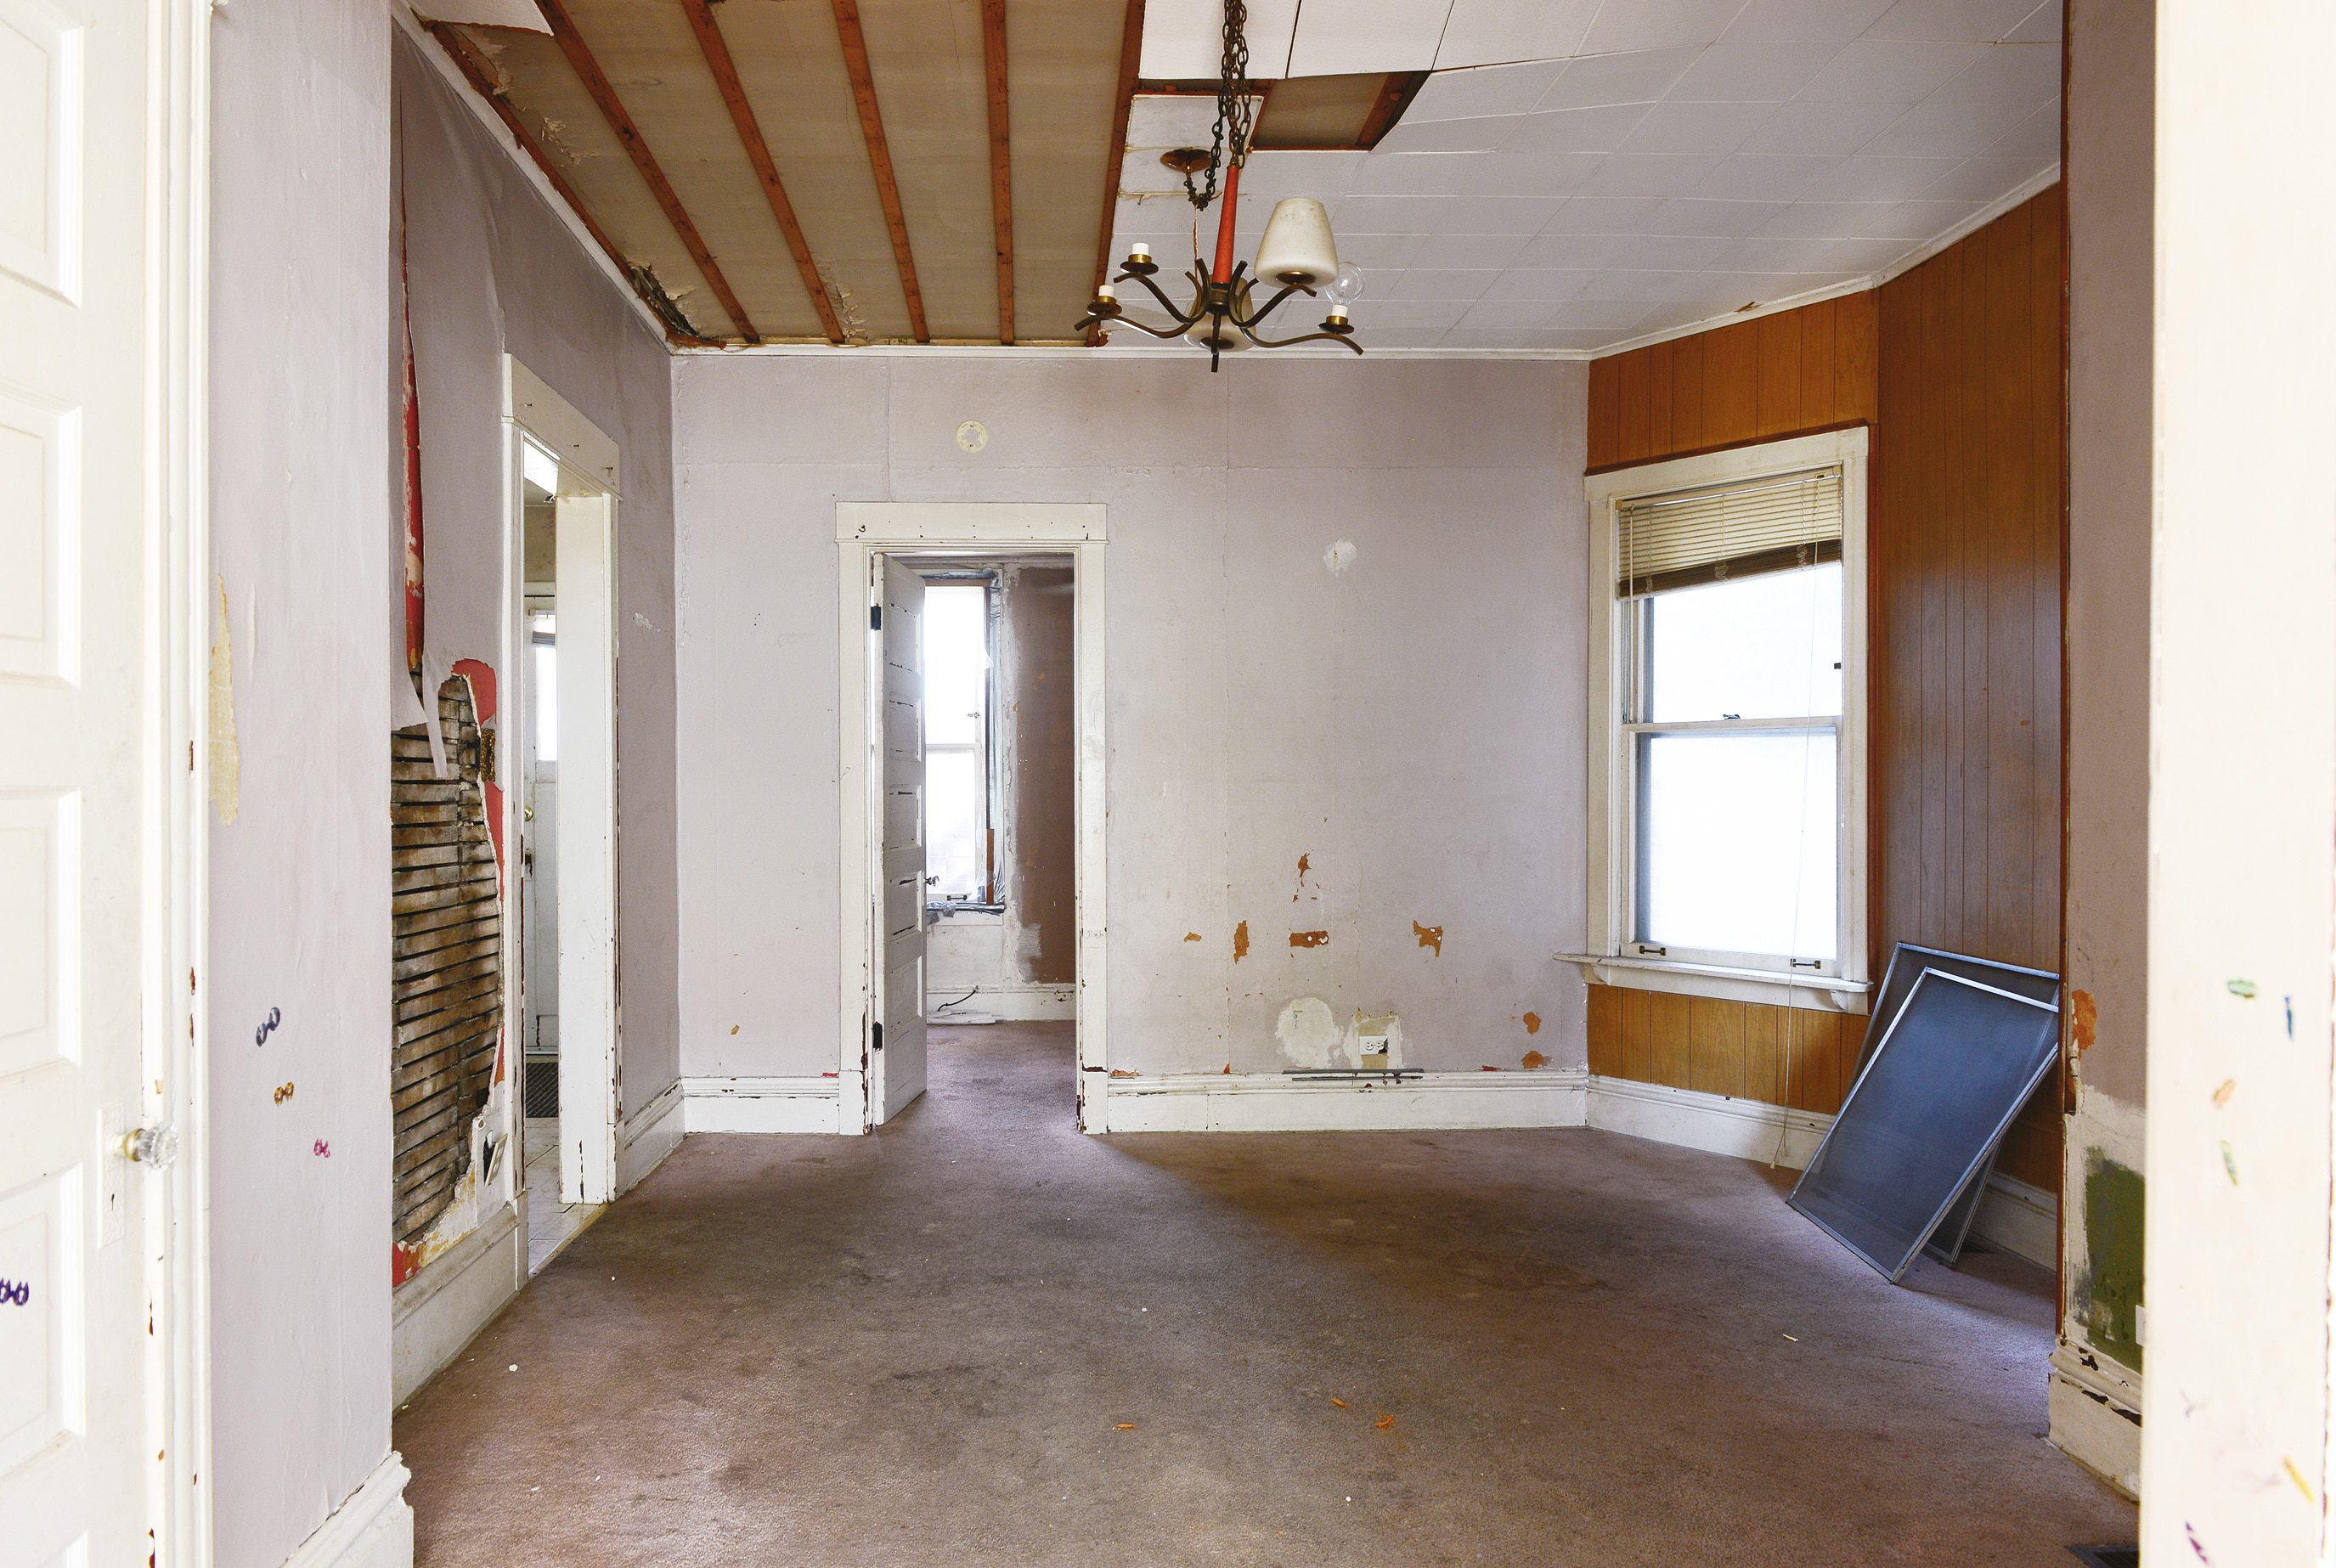
Dining Room | Closing Day
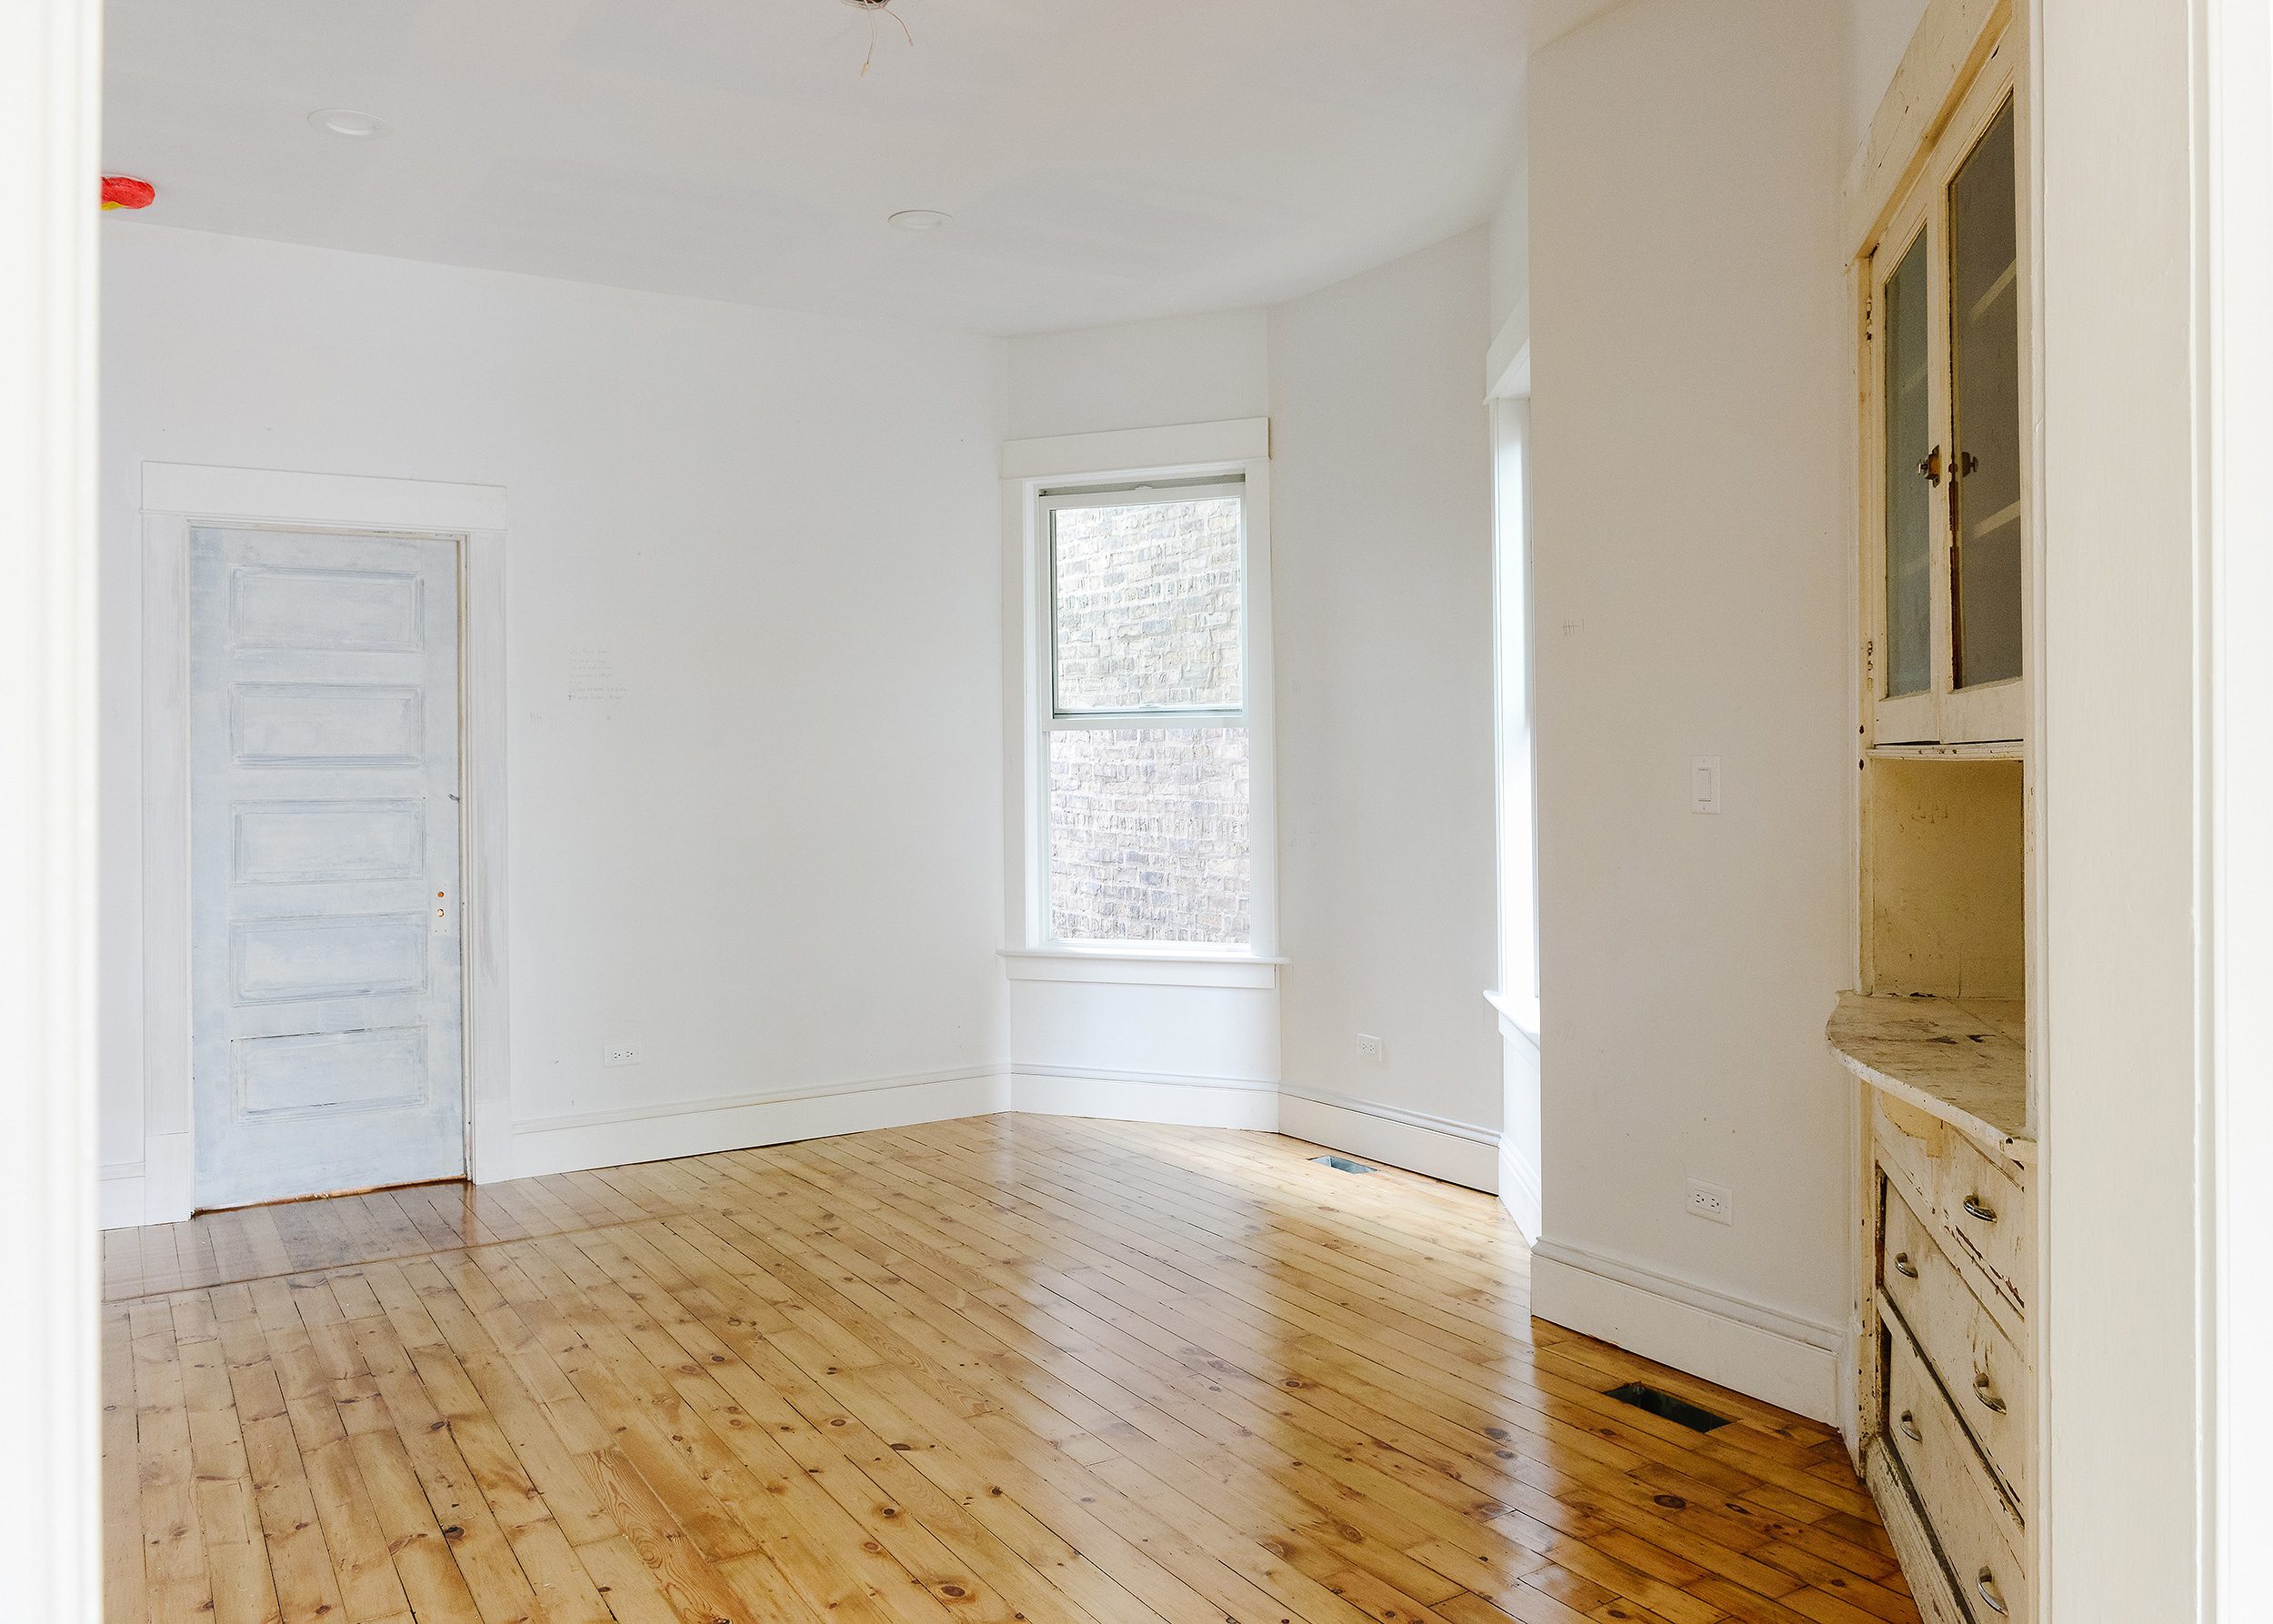
Dining Room | Blank Slate
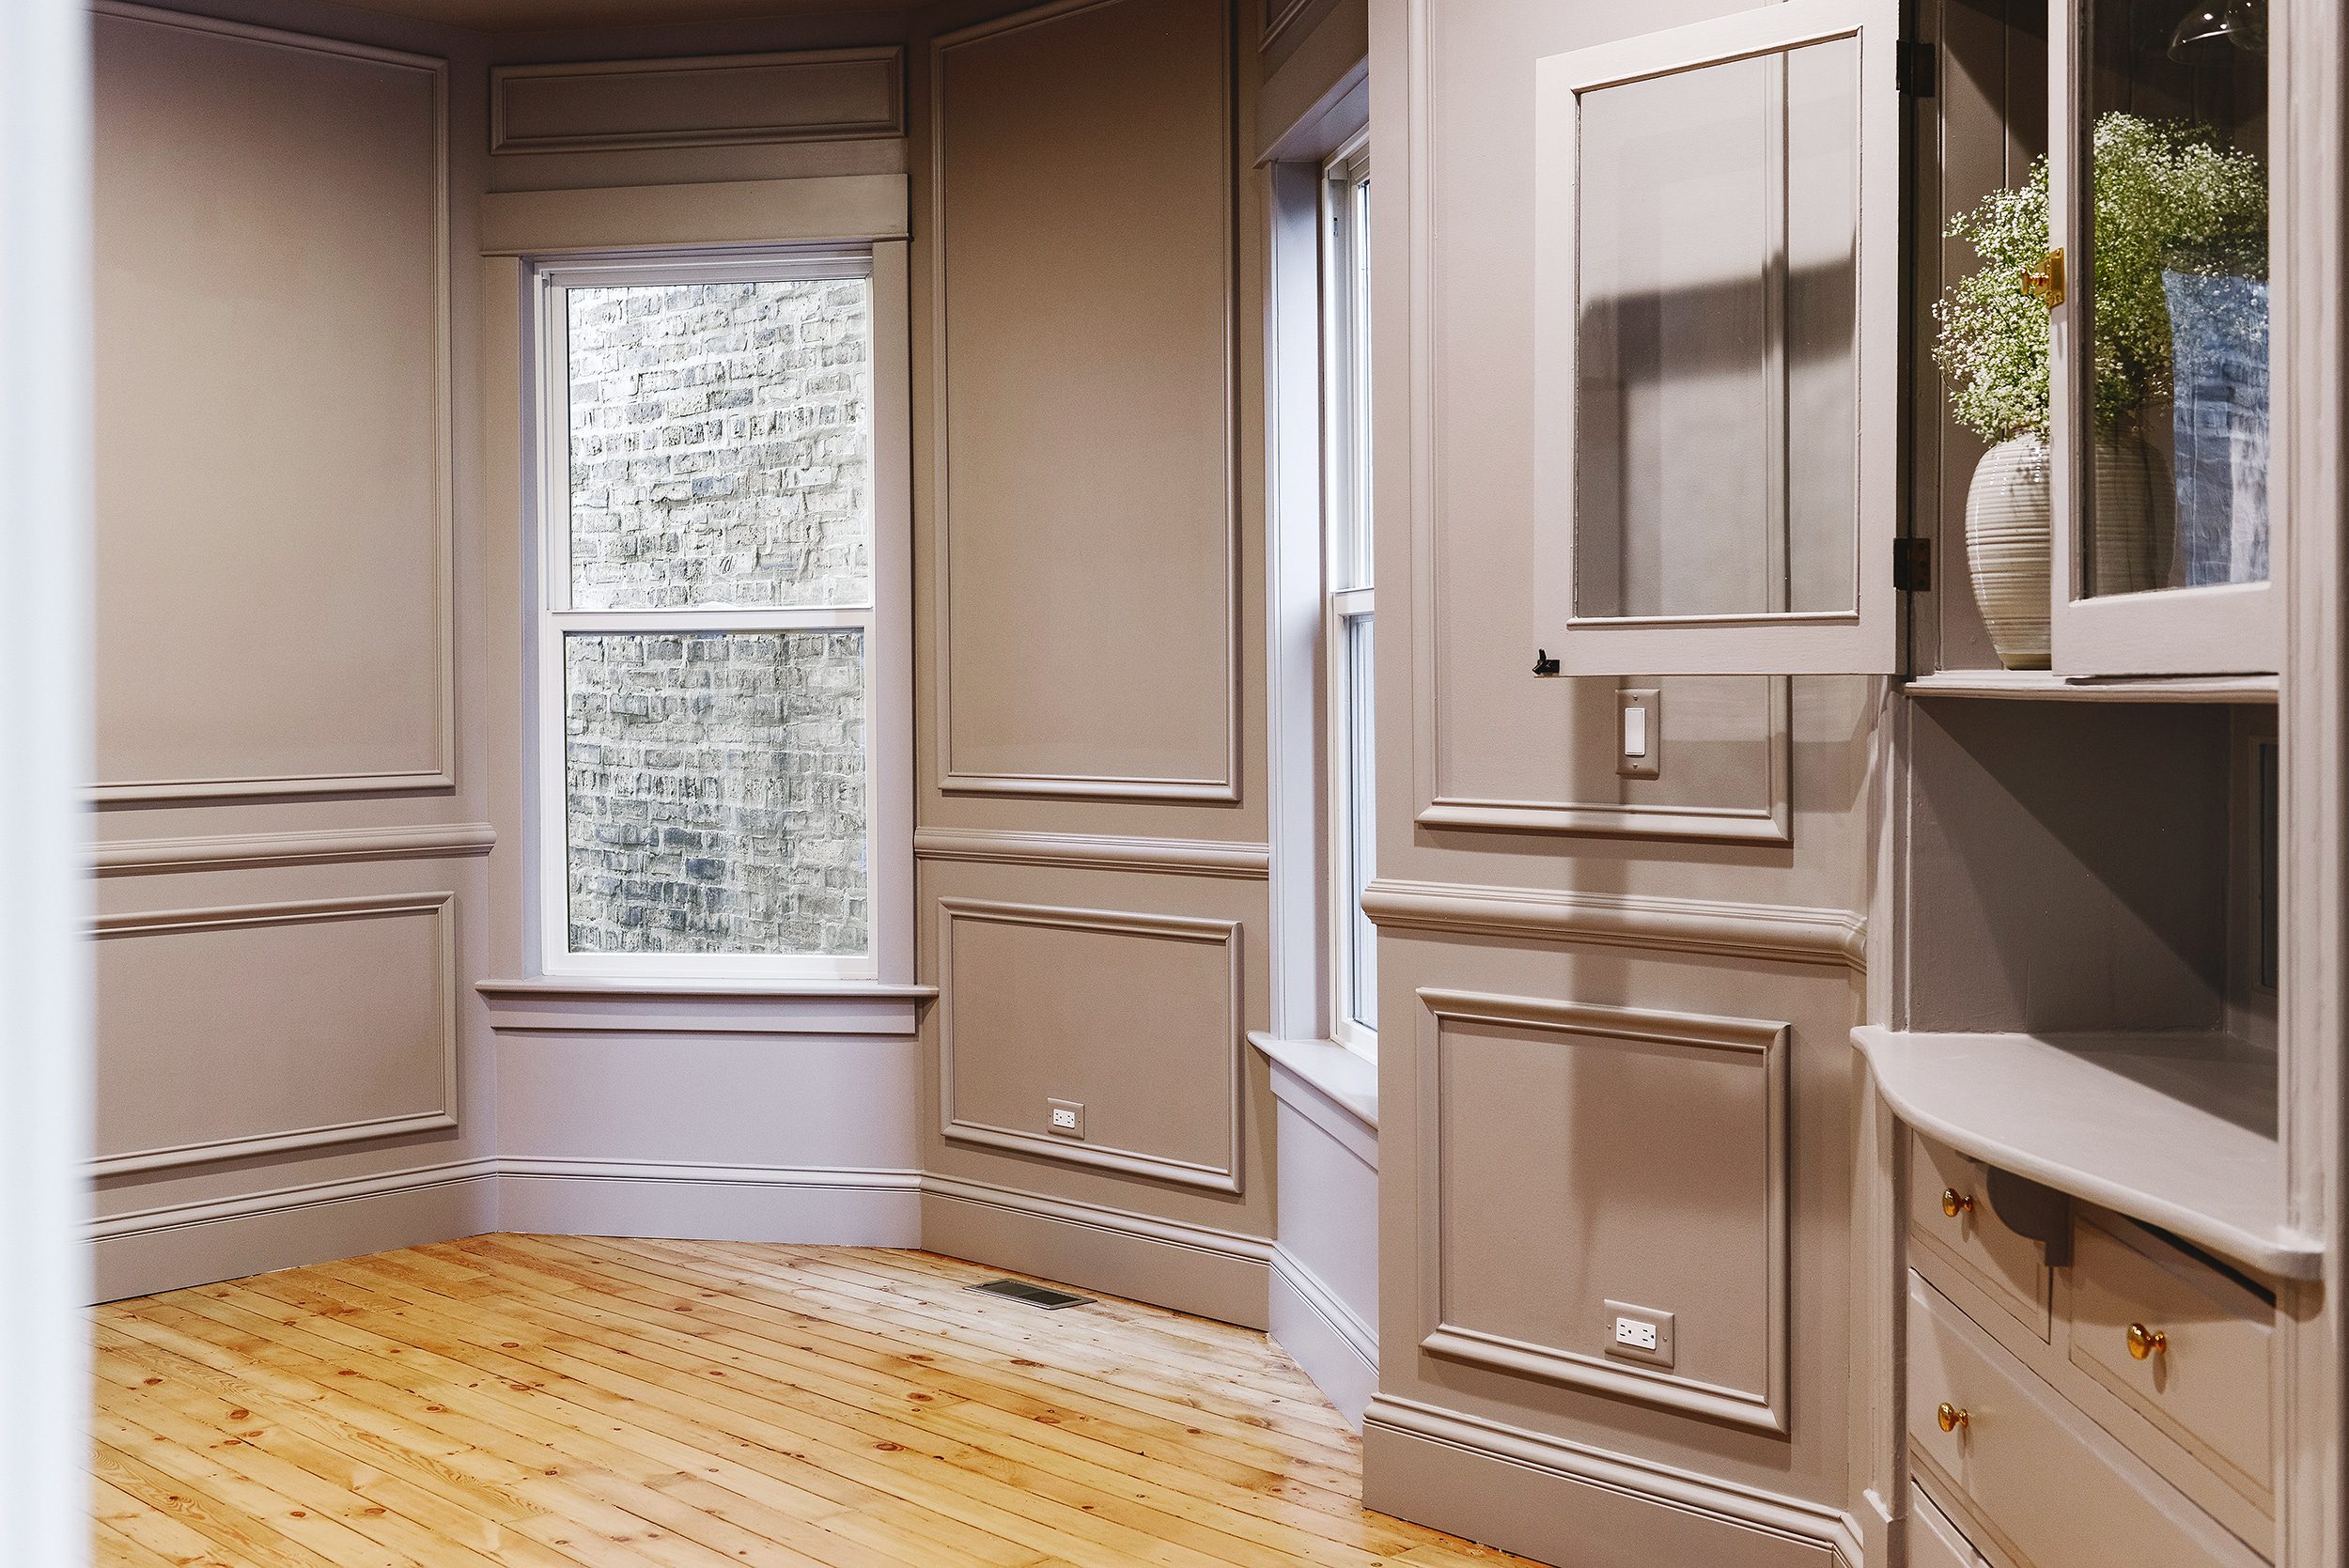
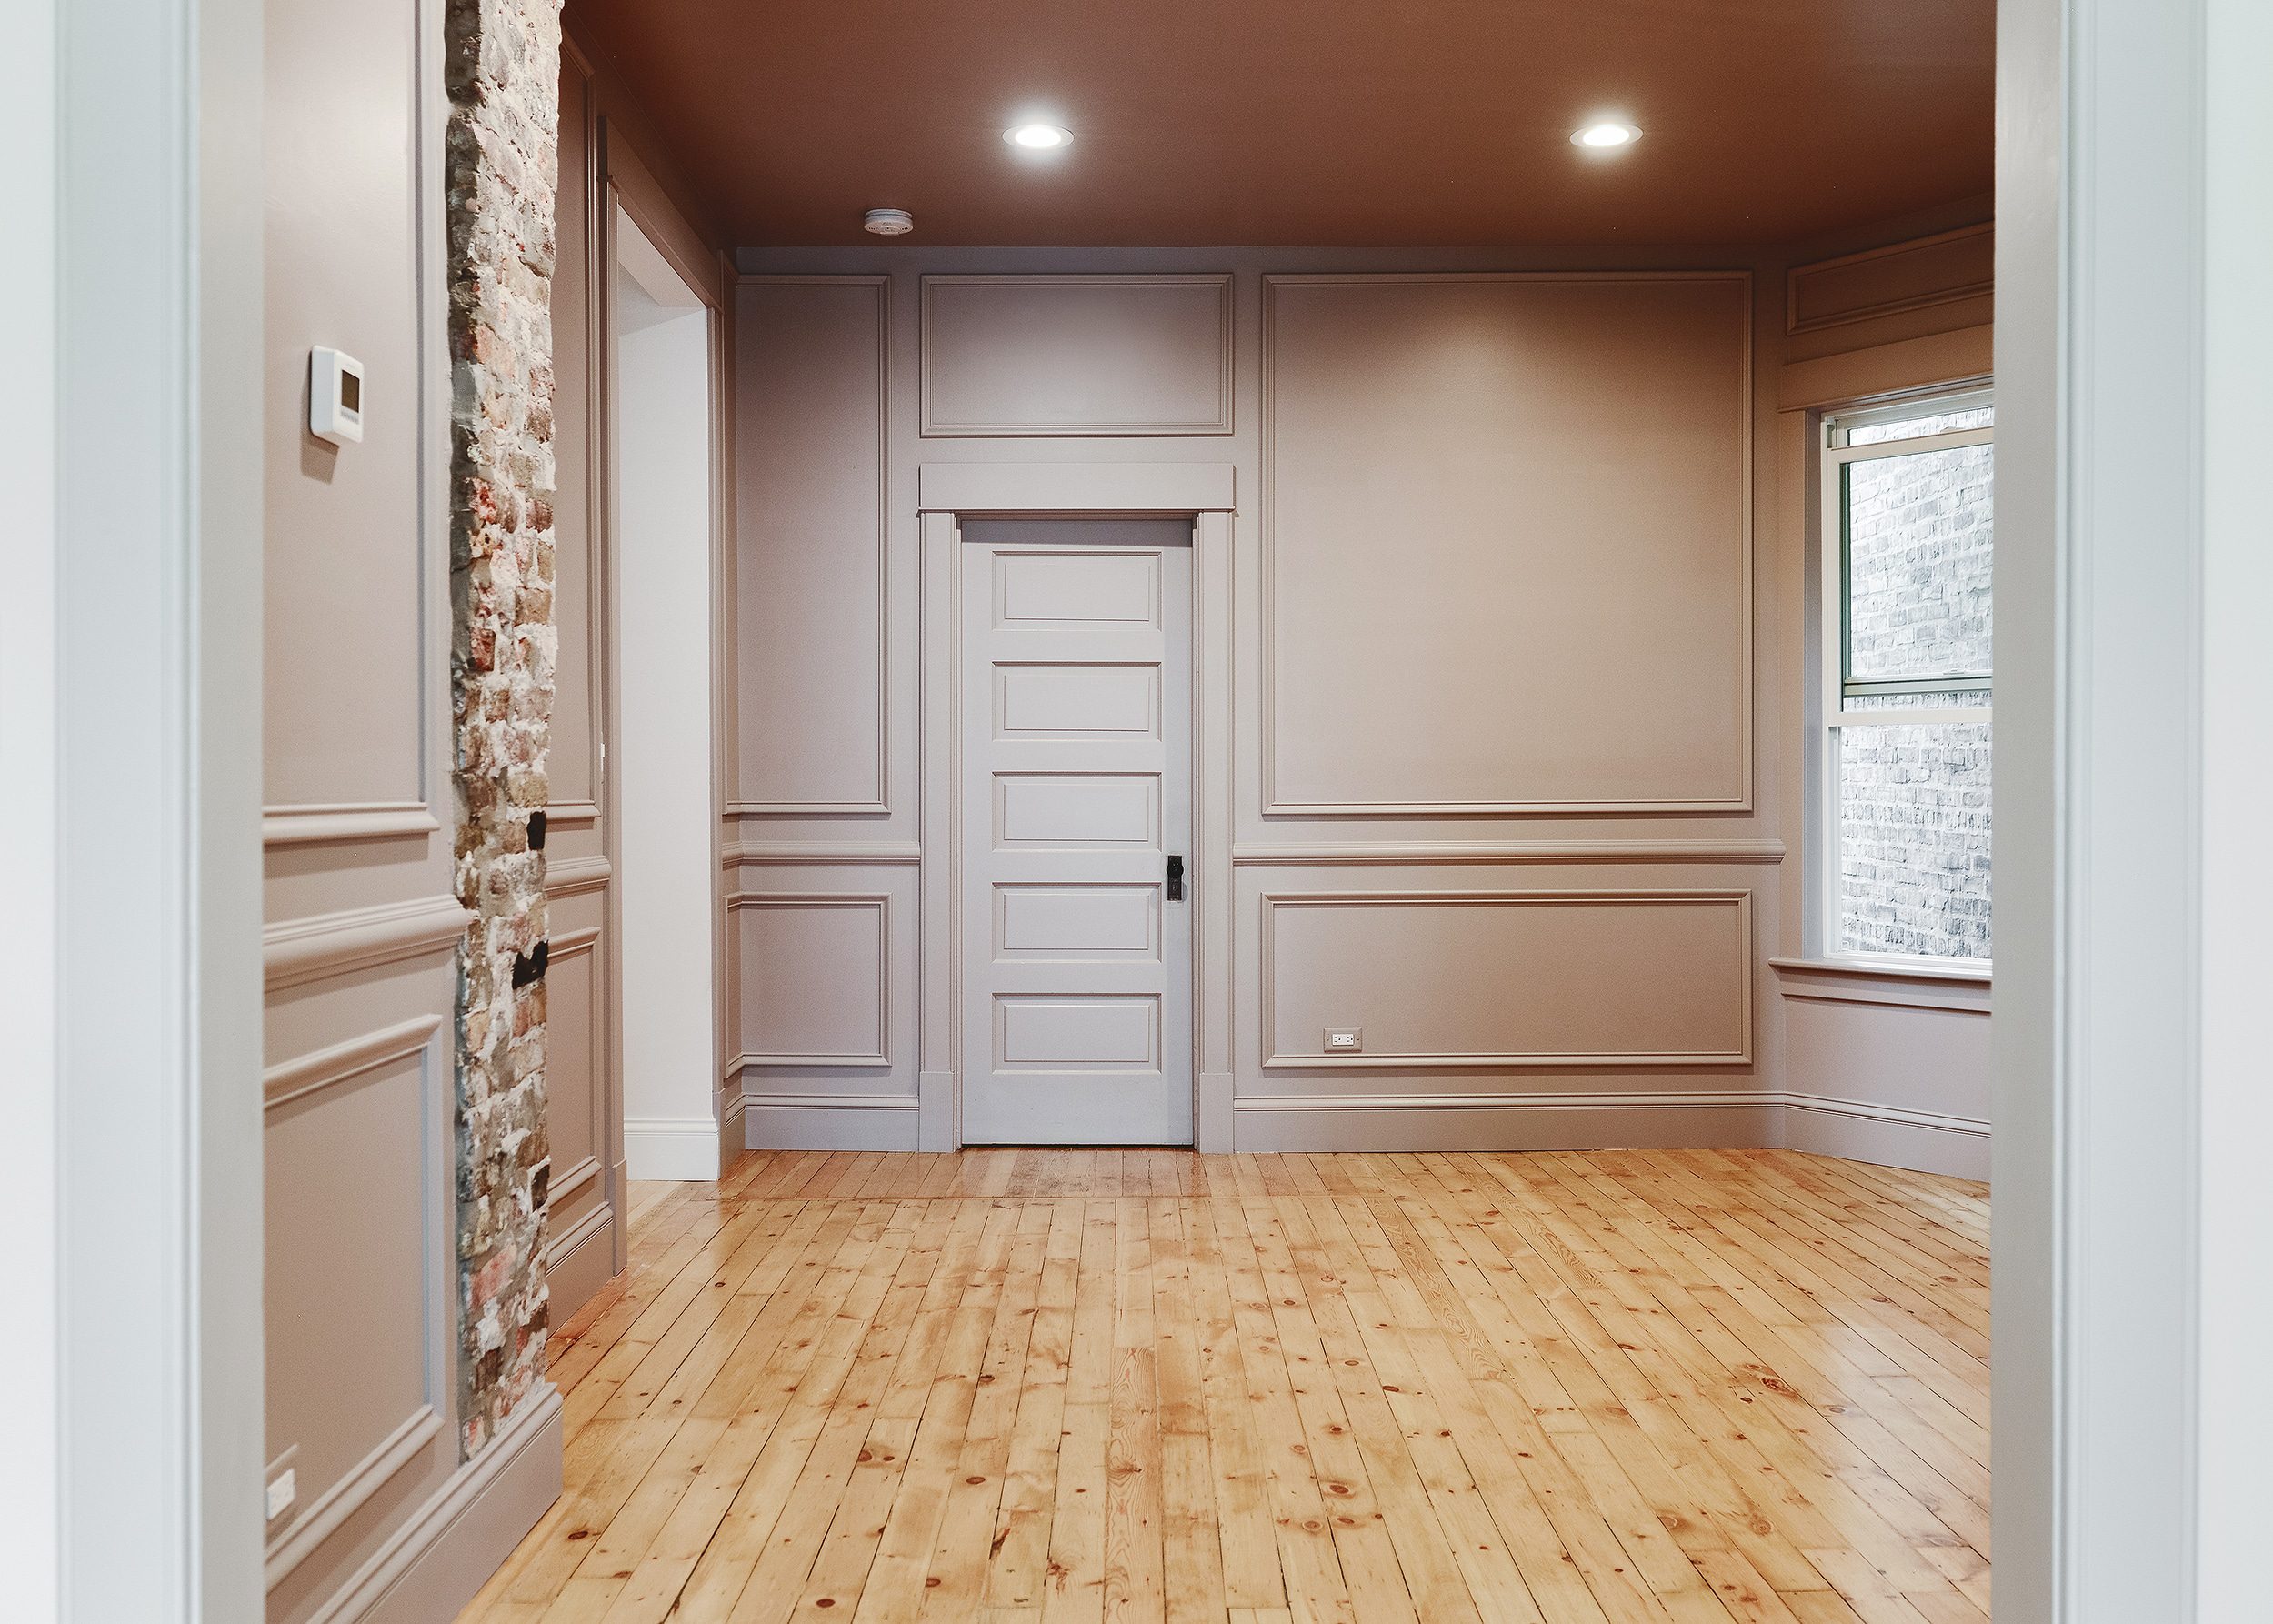
Dining Room | Today!
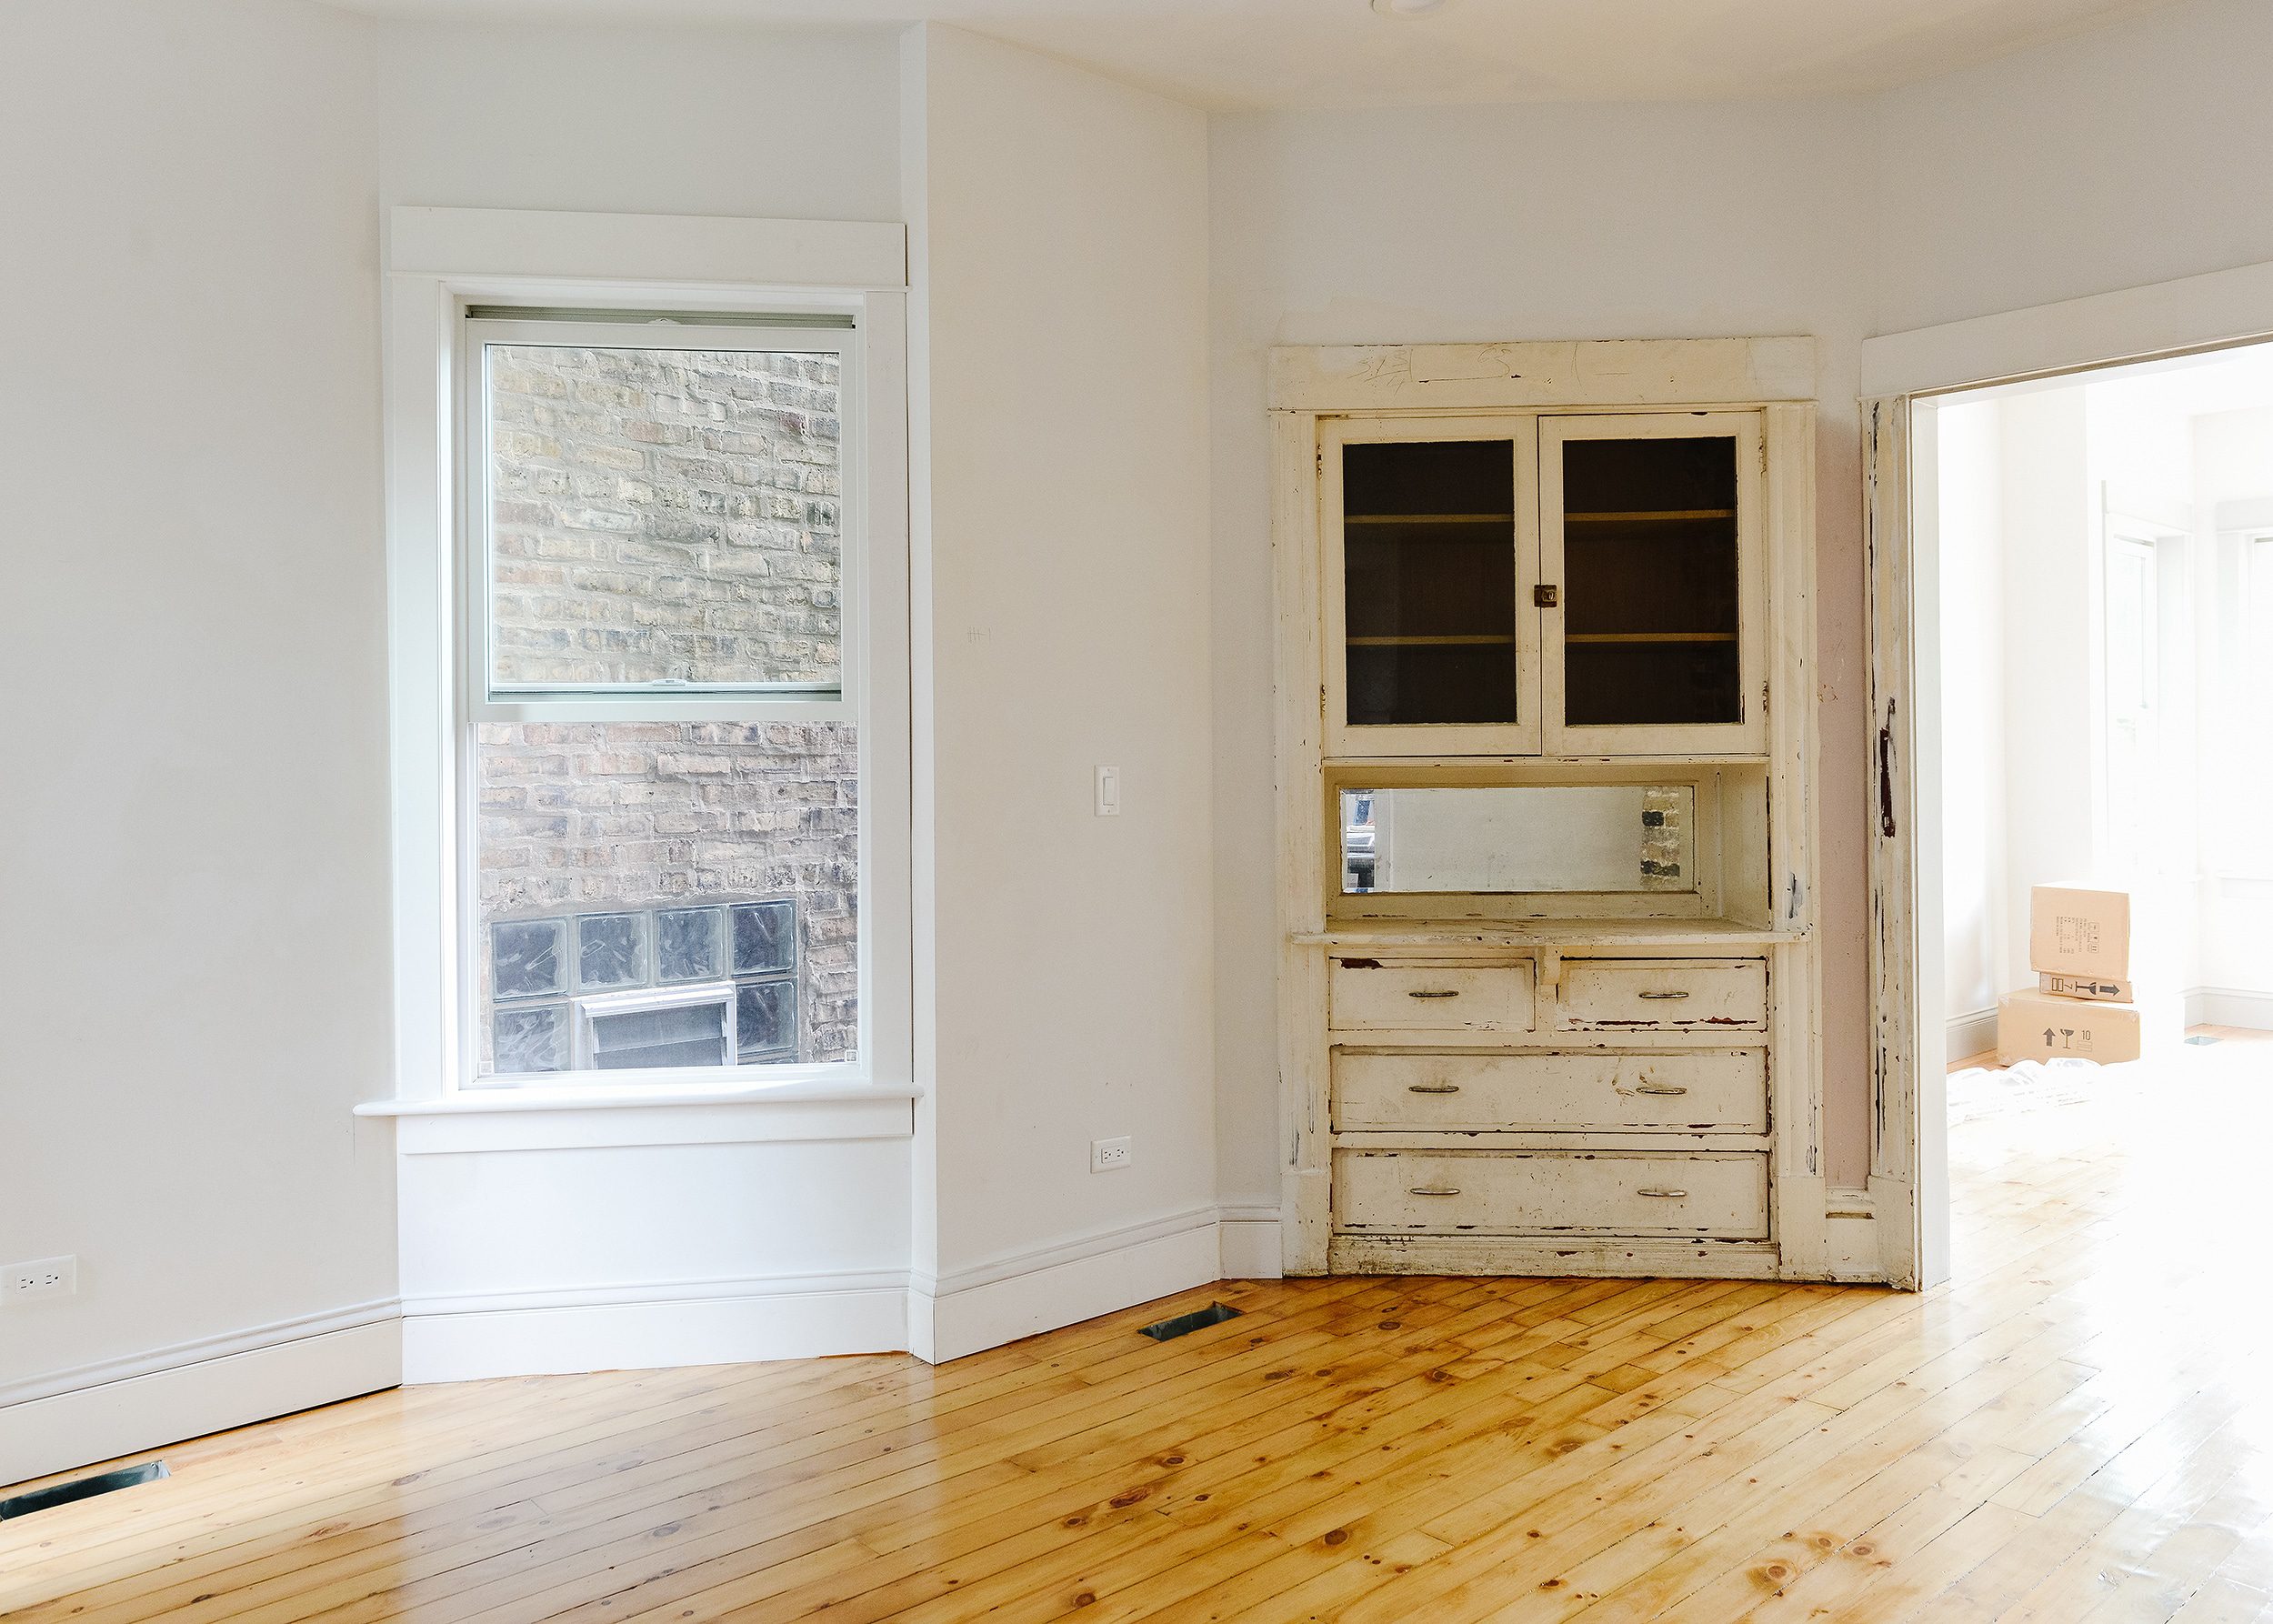
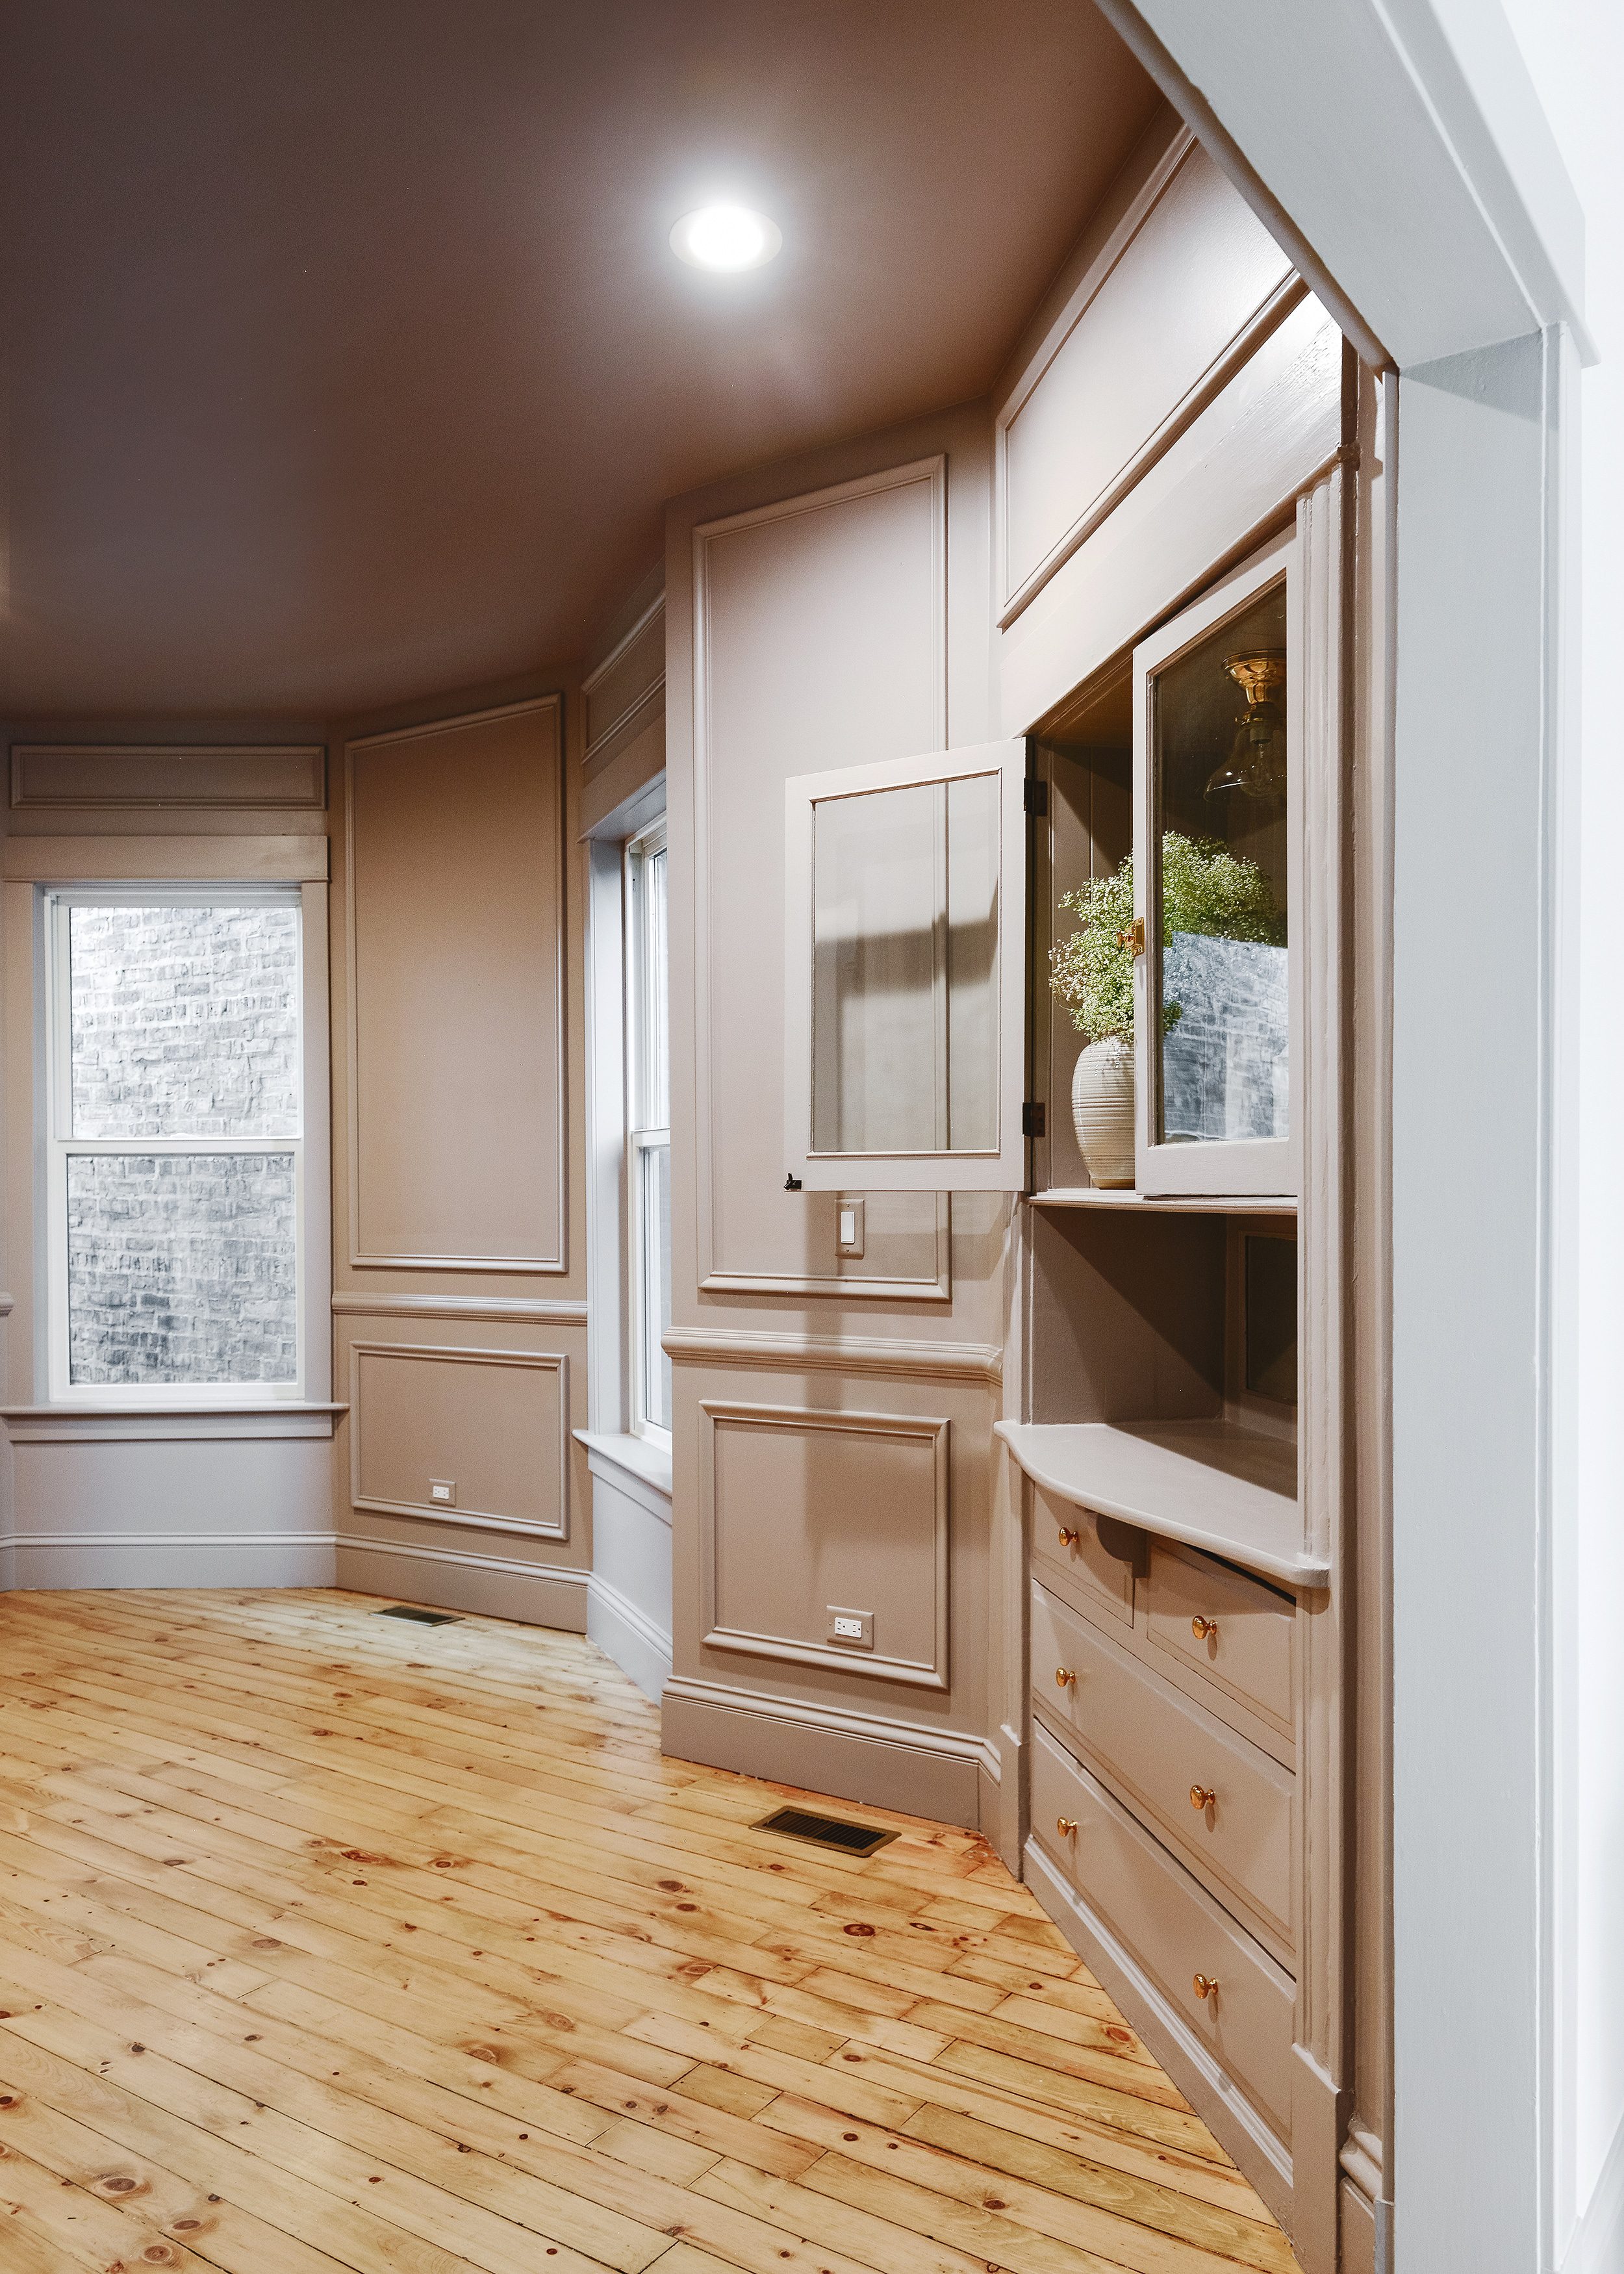
Dining Room Hutch | Before
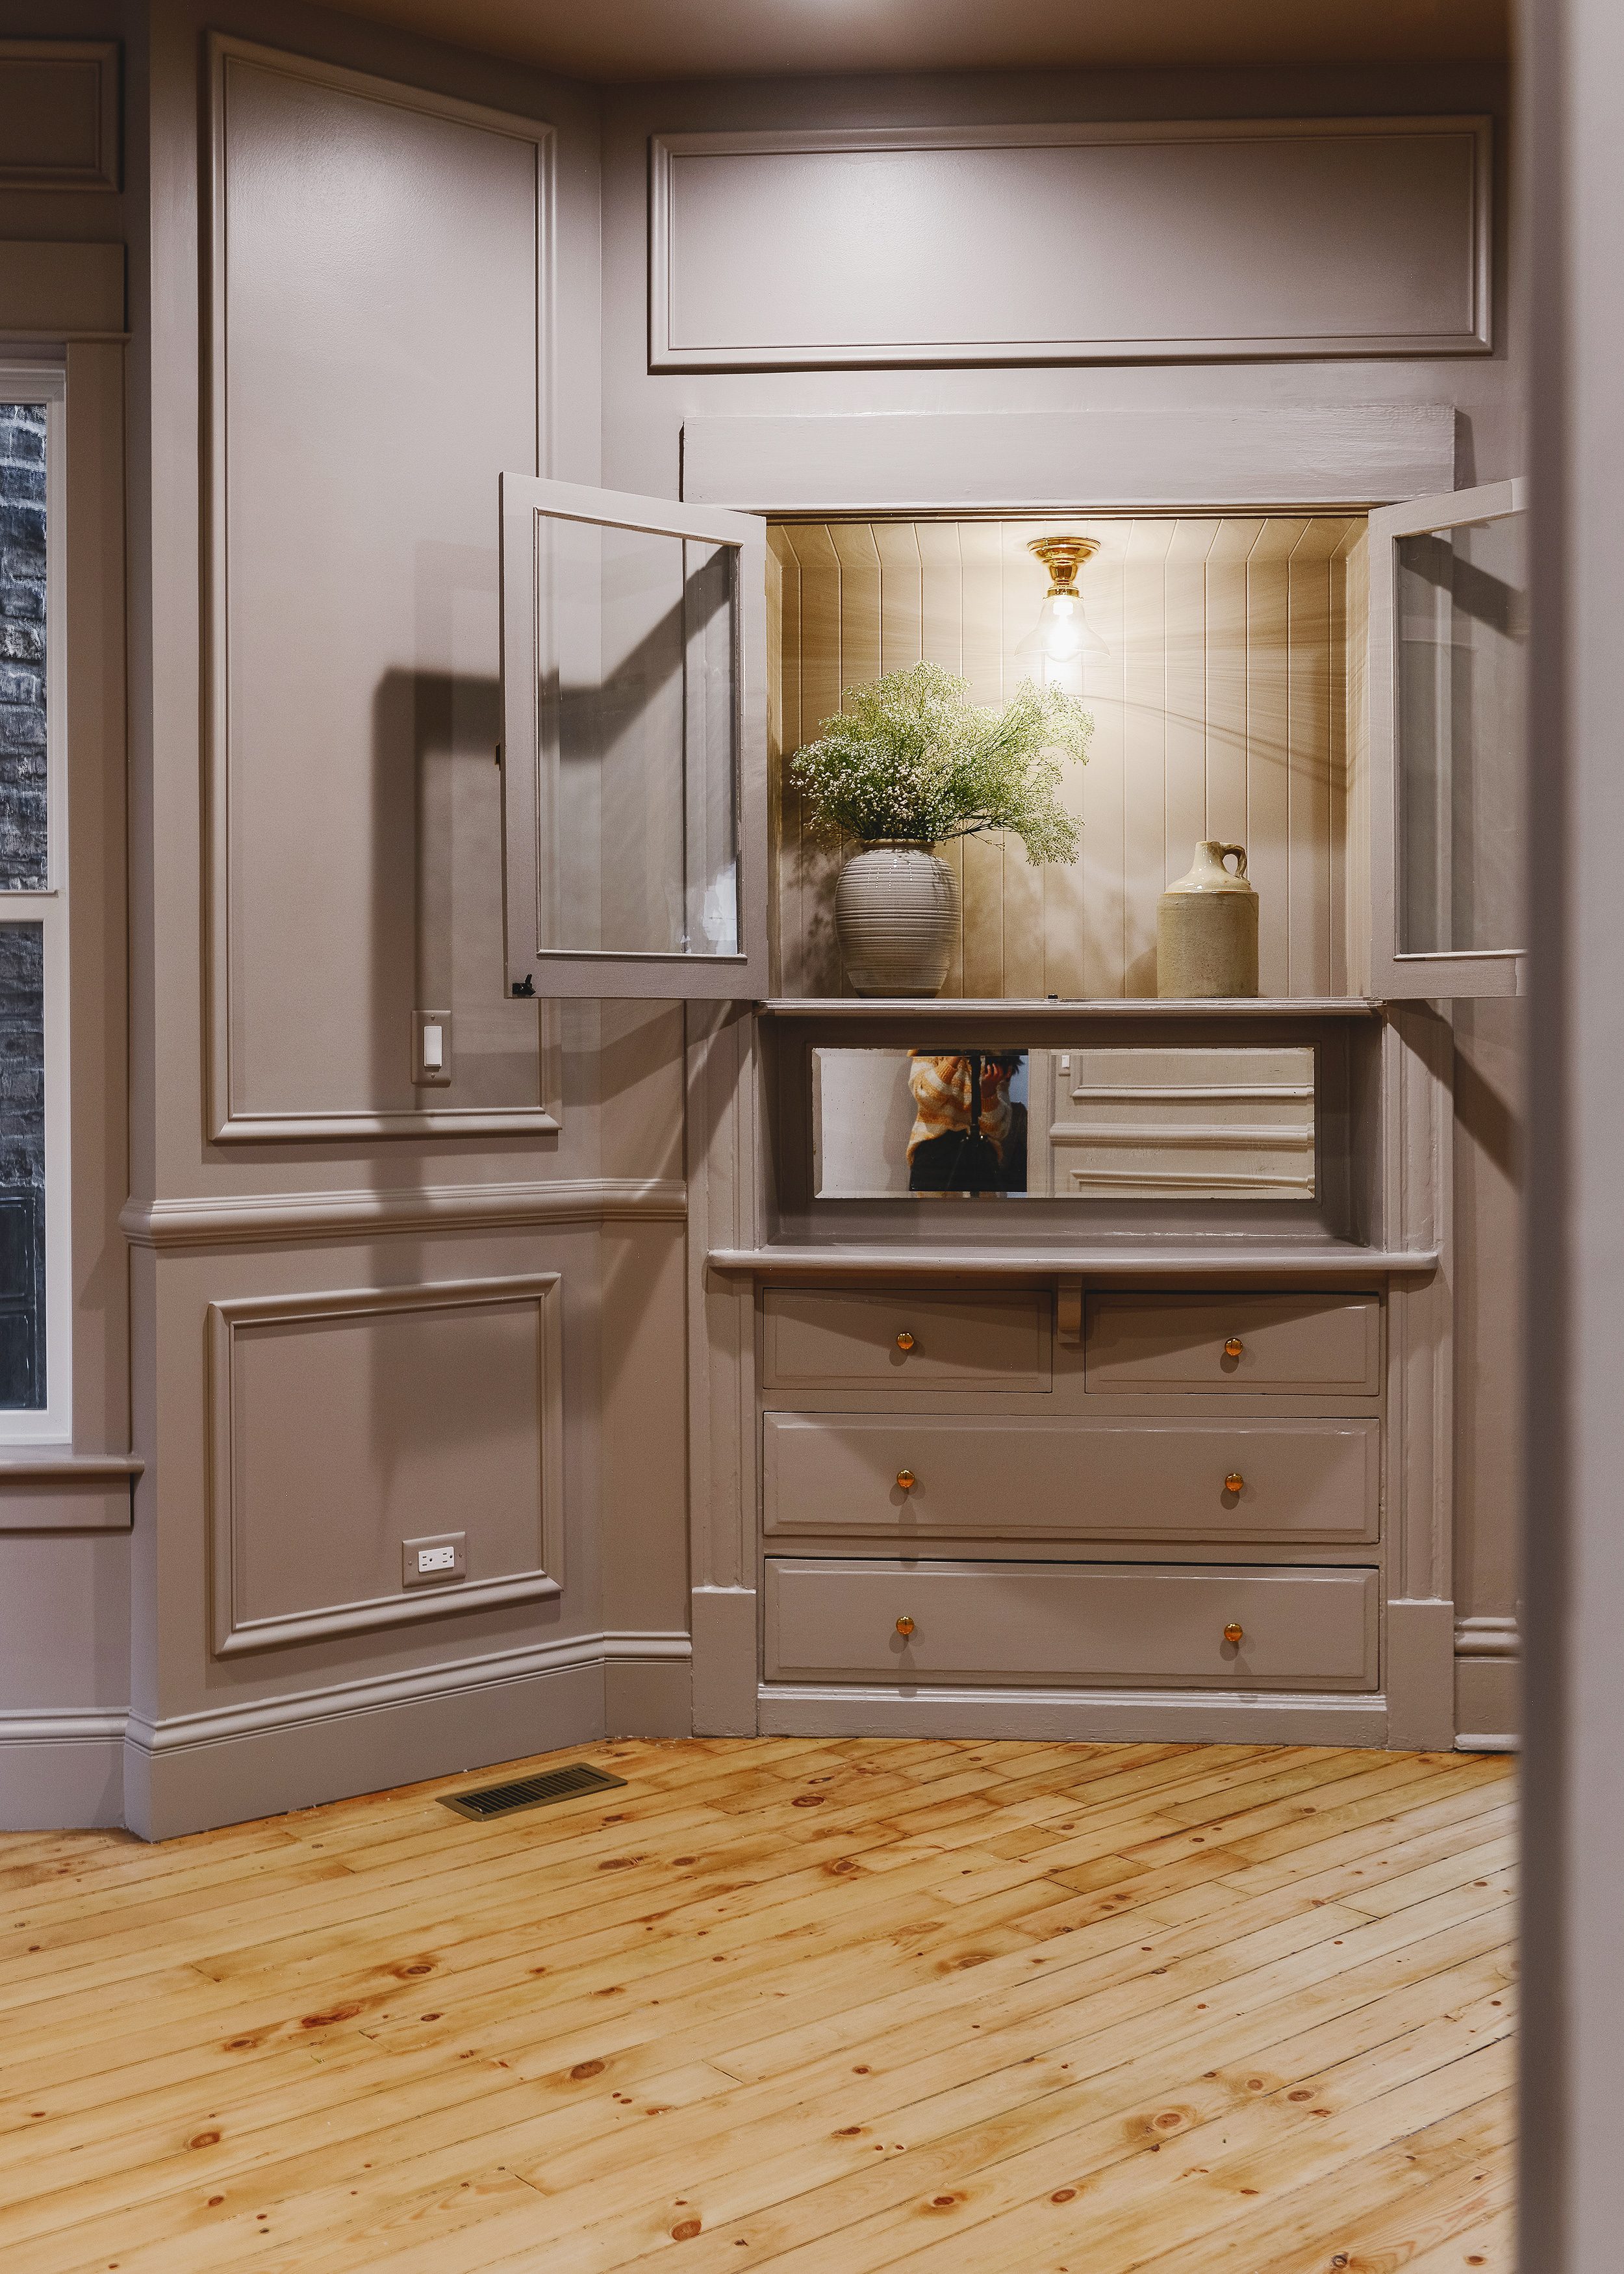
Dining Room Hutch | After
View of Window Wall | Before

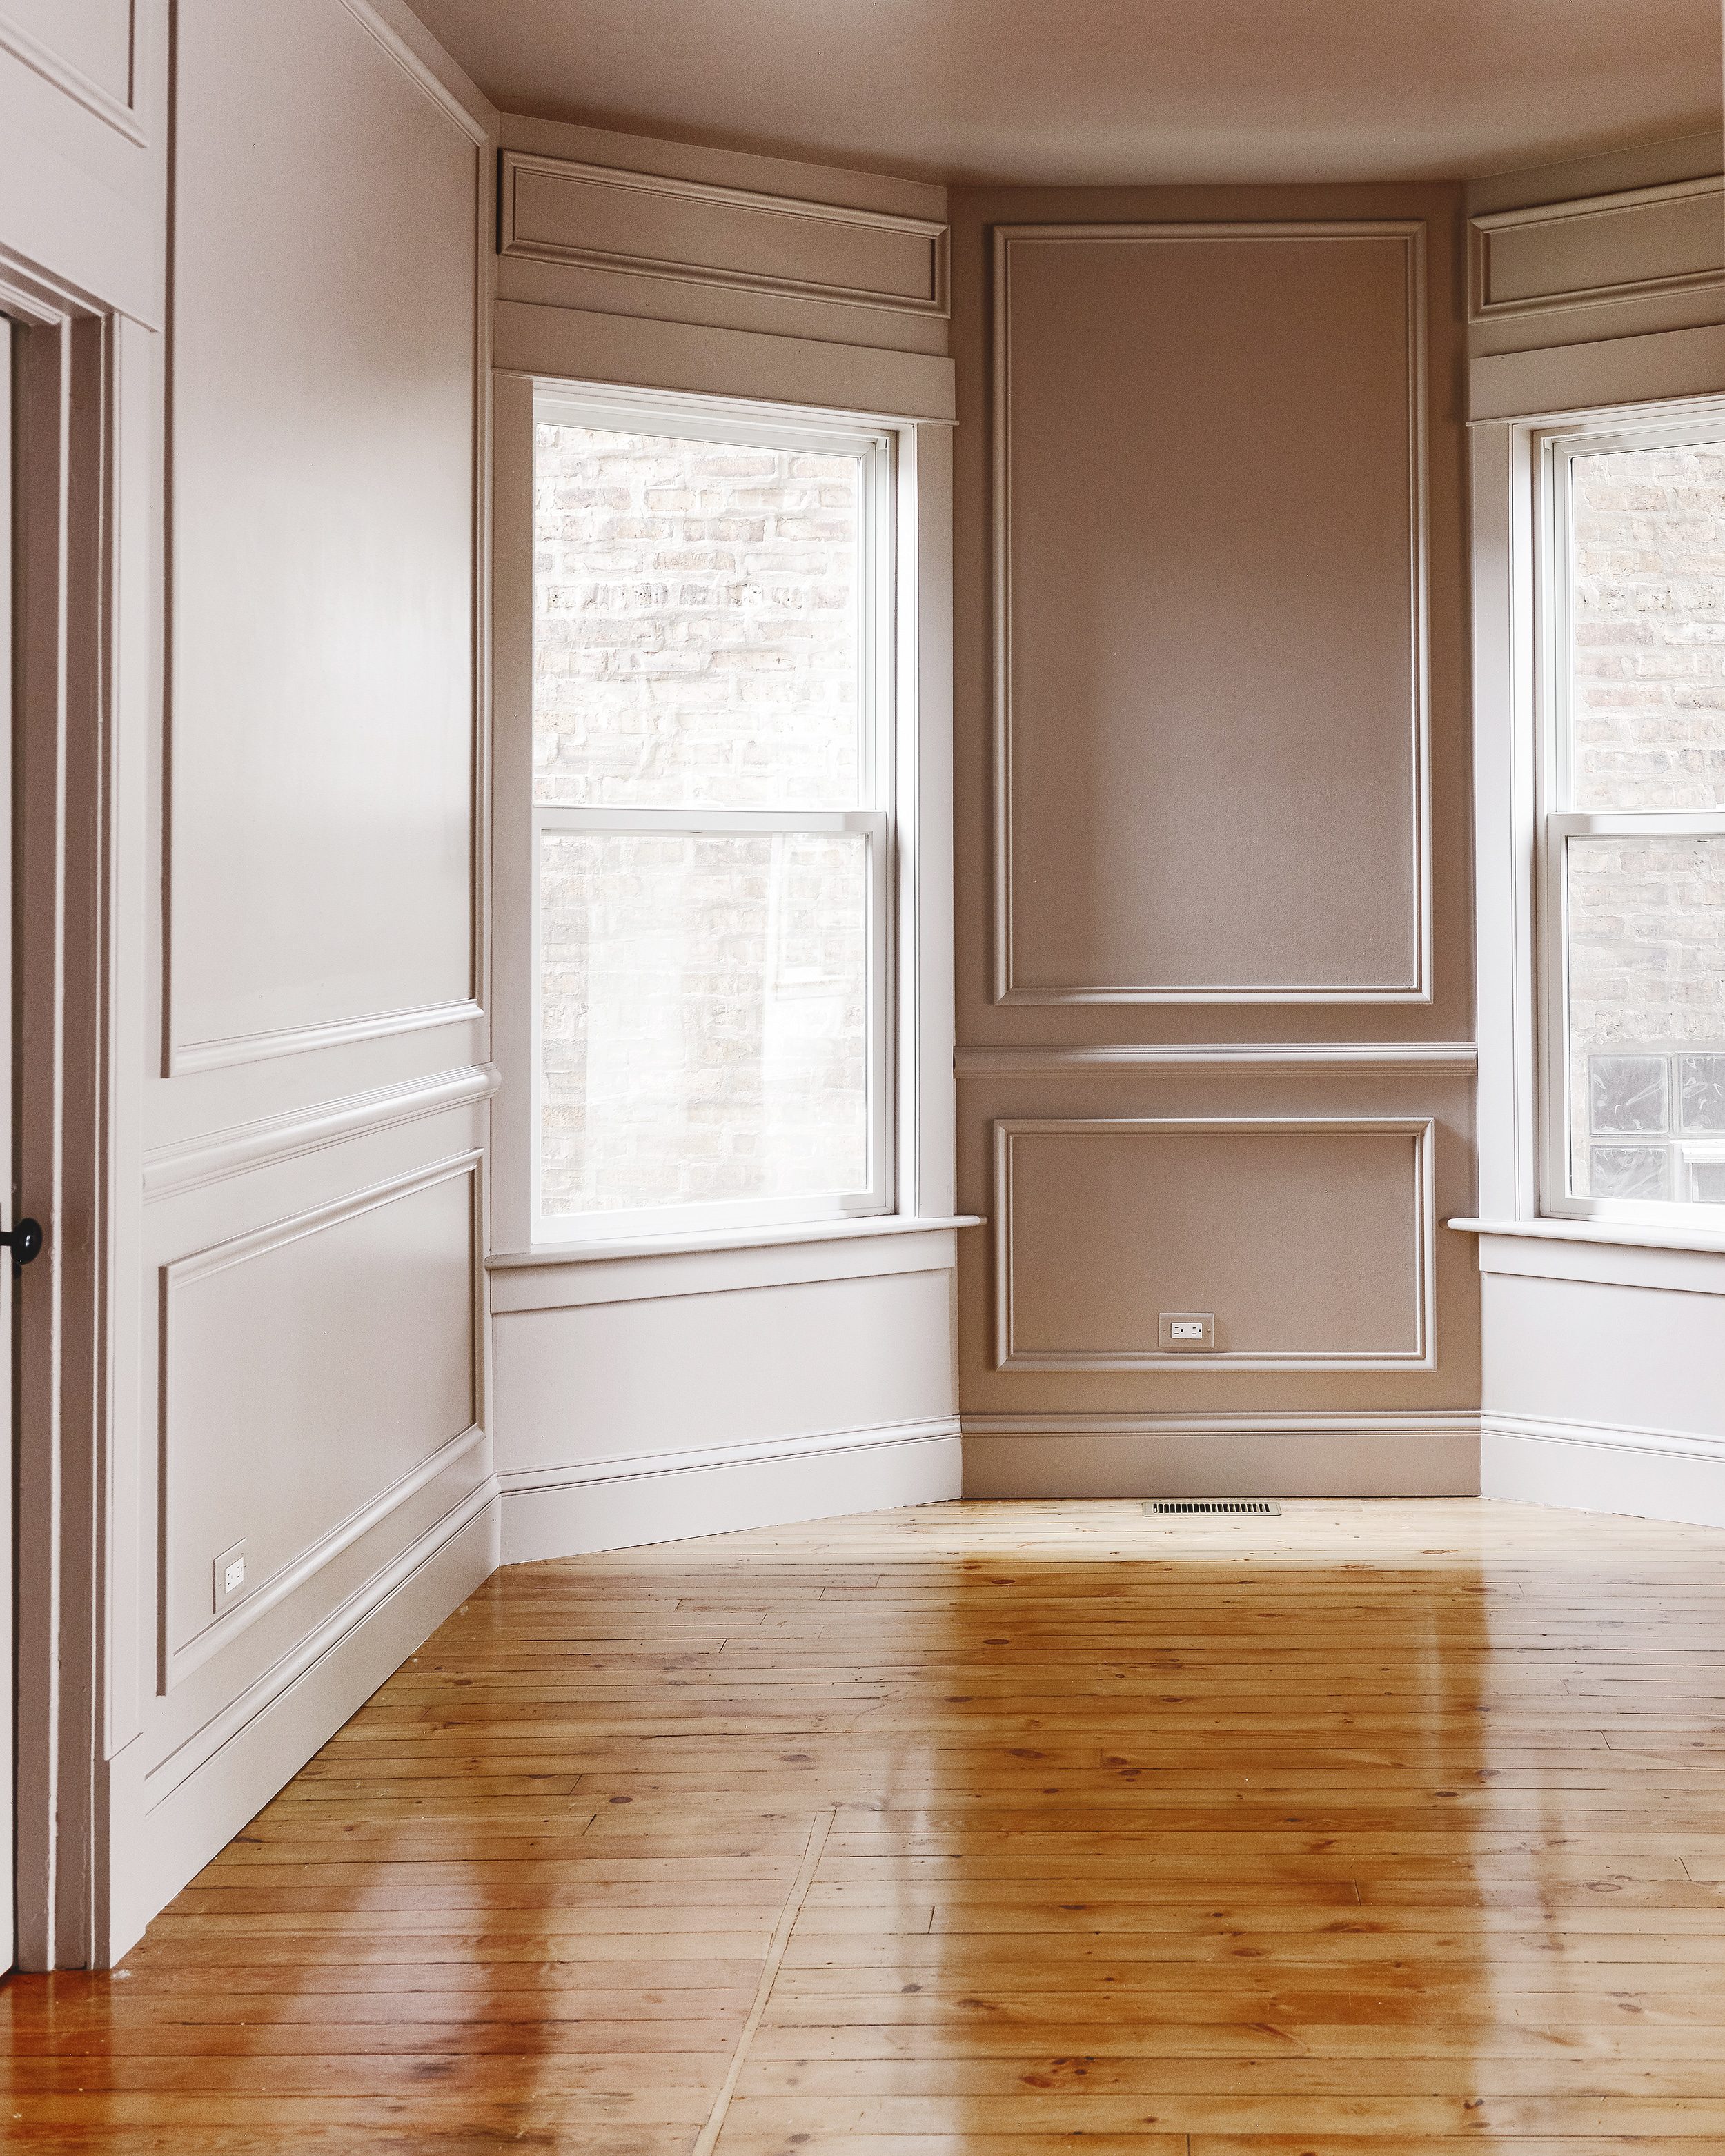
View of Window Wall | After
The dining room is the heart of Unit 1, situated perfectly between the sunny family room and narrow kitchen. I’ll be sharing more photos from every angle at the end of this post, but first, How did we get from A to Z? The room was divided into three big projects:
- Restoring the vintage hutch
- Installing the panel molding
- Prime and paint from head-to-toe!
1| Restoring the Hutch
I knew I loved this home the first time I laid eyes on this hutch. We think it’s as old as the house itself, which would ring it in at 130-years-young. Everything about her is slightly imperfect – sagging drawers, peeling contact paper, rough around the edges – and yet to me, she’s perfect.
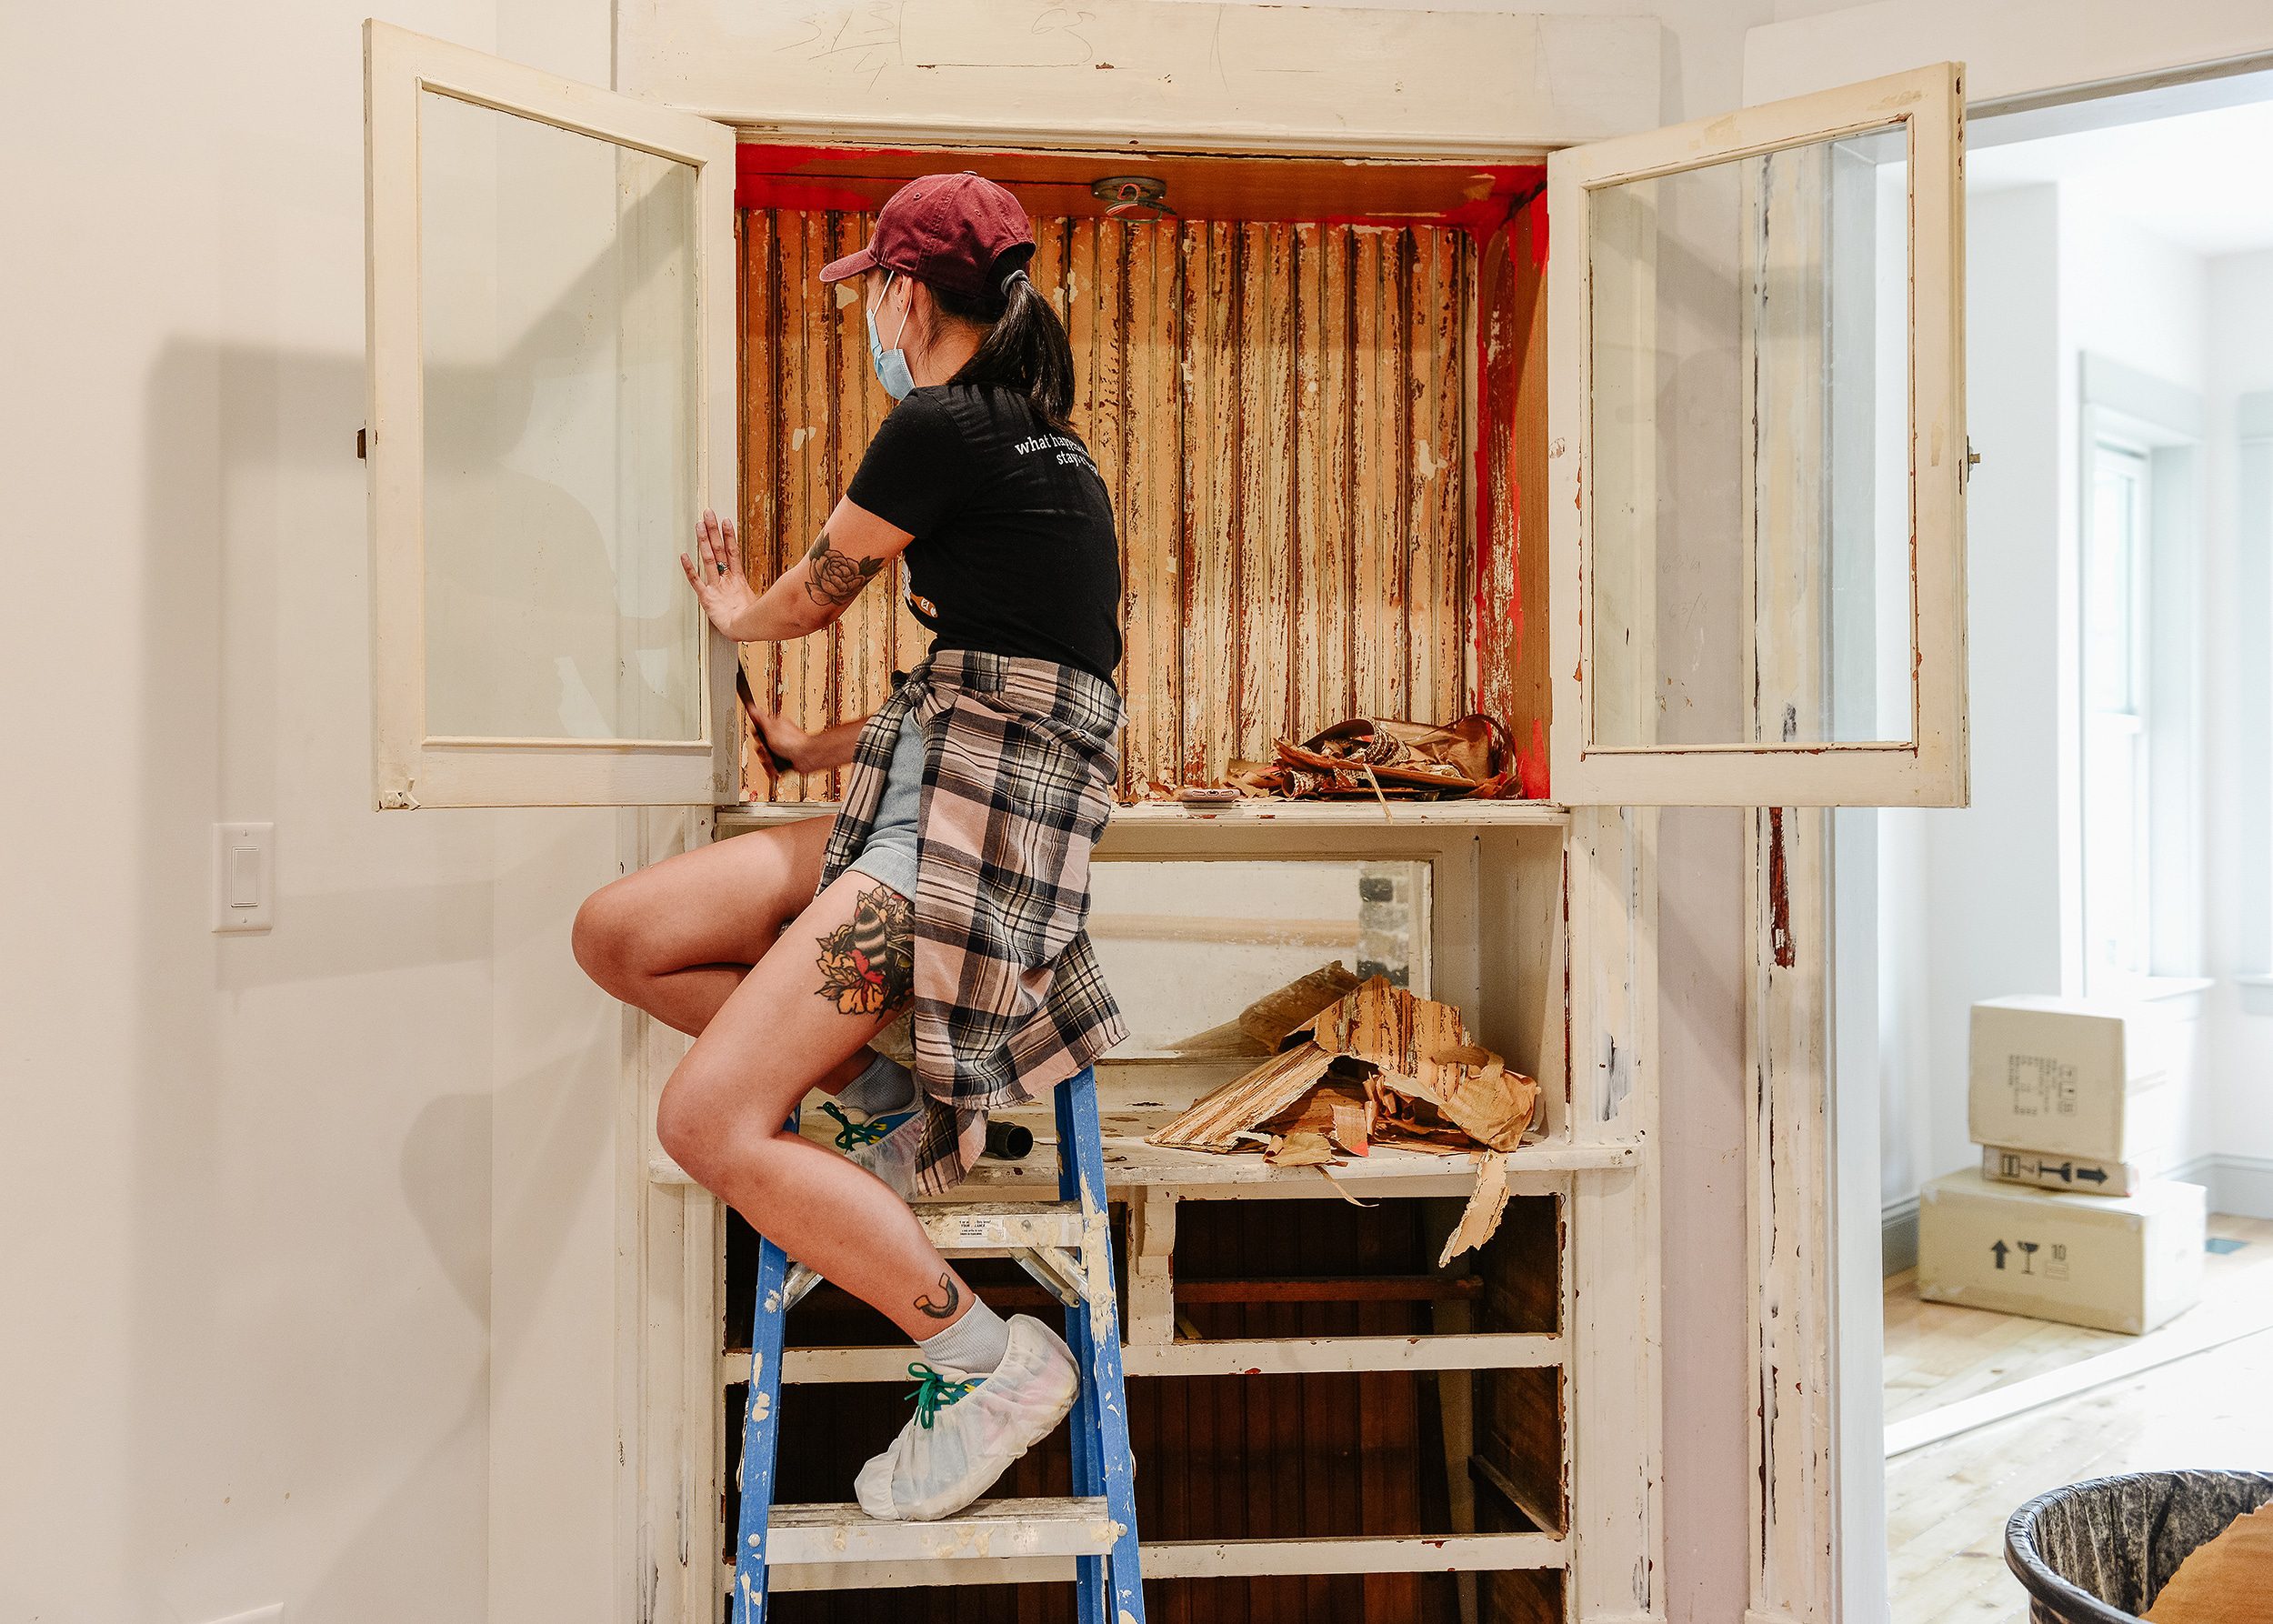
Our friend Kristine came over to lend a hand, and together, we worked on preparing the hutch for paint. Our goal was never to make the hutch perfect-perfect, rather, she needed a good scrub, touch up and wood filler to make her whole again. We started by removing contact paper from the cupboard and scraping up any loose, flakey paint:
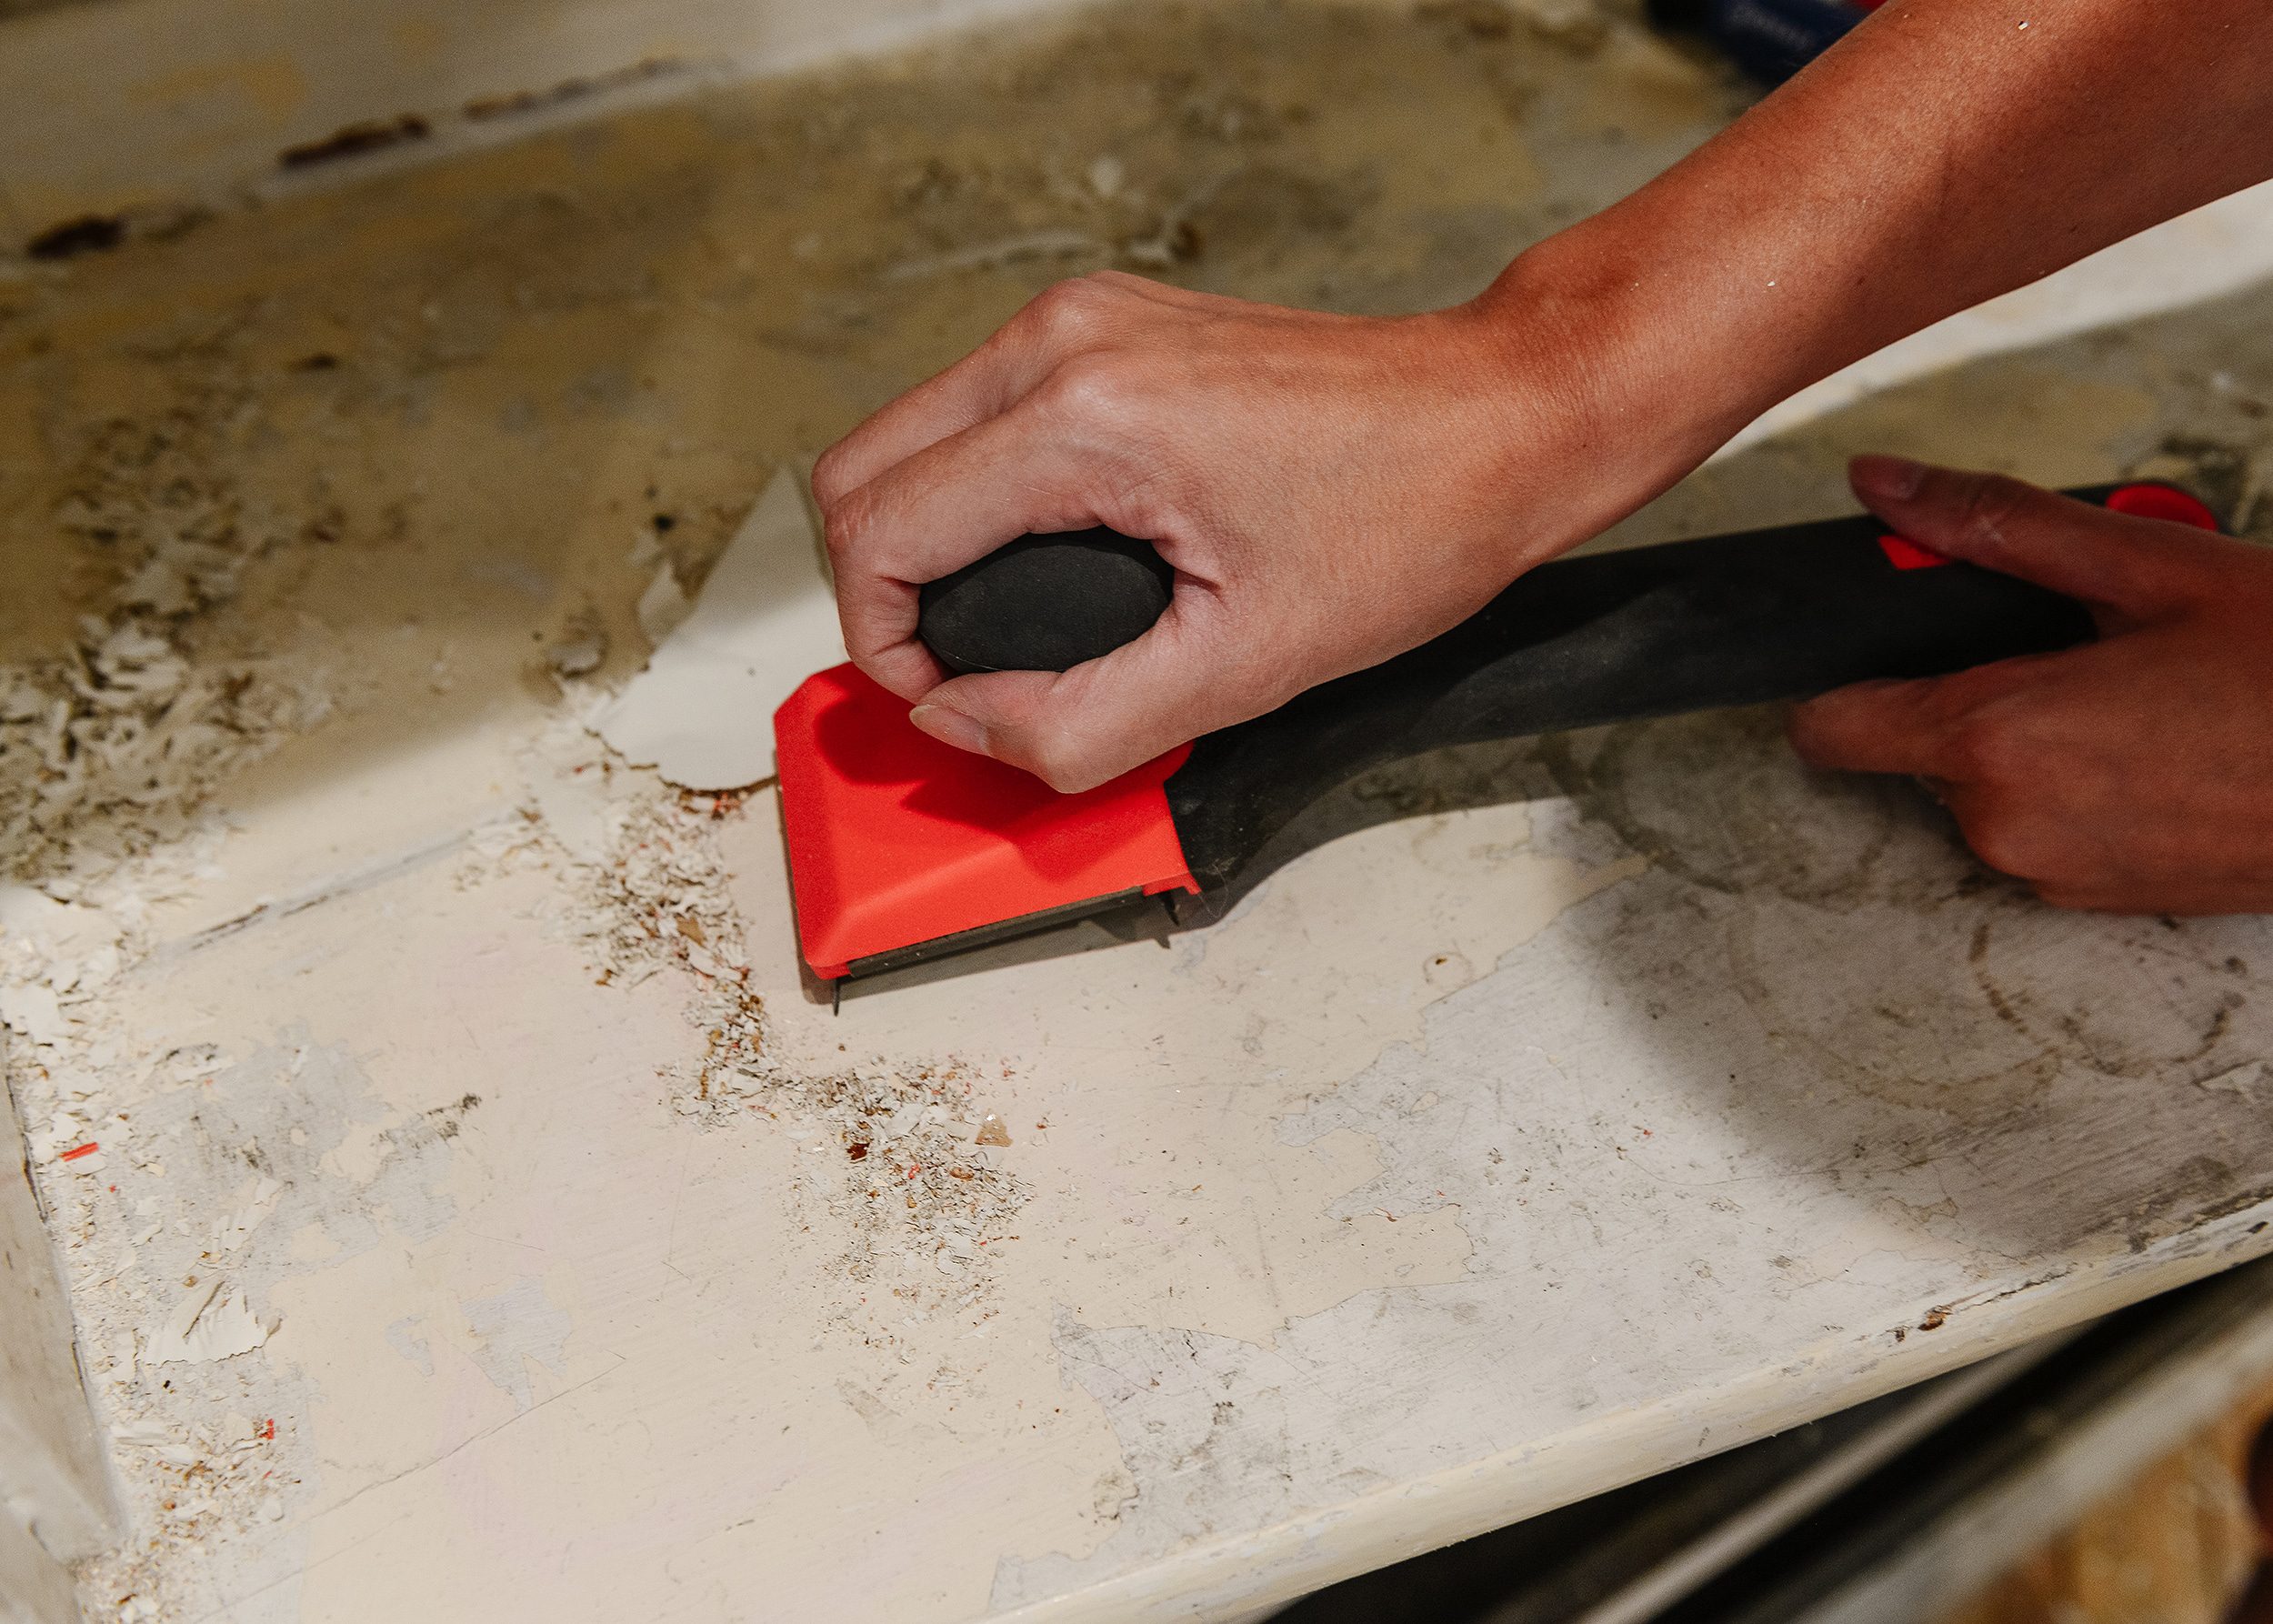
Once we vacuumed everything up, we smoothed wood filler into cracks and gaps. I also removed the doors, cleaned up the hinges and scraped the glass clean. Tip: Always wear a mask when restoring old furniture, and use a vacuum with a HEPA filter.
When we removed the old contact paper from the cupboard, we discovered something exciting – old tongue and groove! The problem? It was cracked and splintered, having seen better days. Feeling inspired, I decided to use a v-groove beadboard to enhance the cupboard, making sure that all my lines matched up along the way.
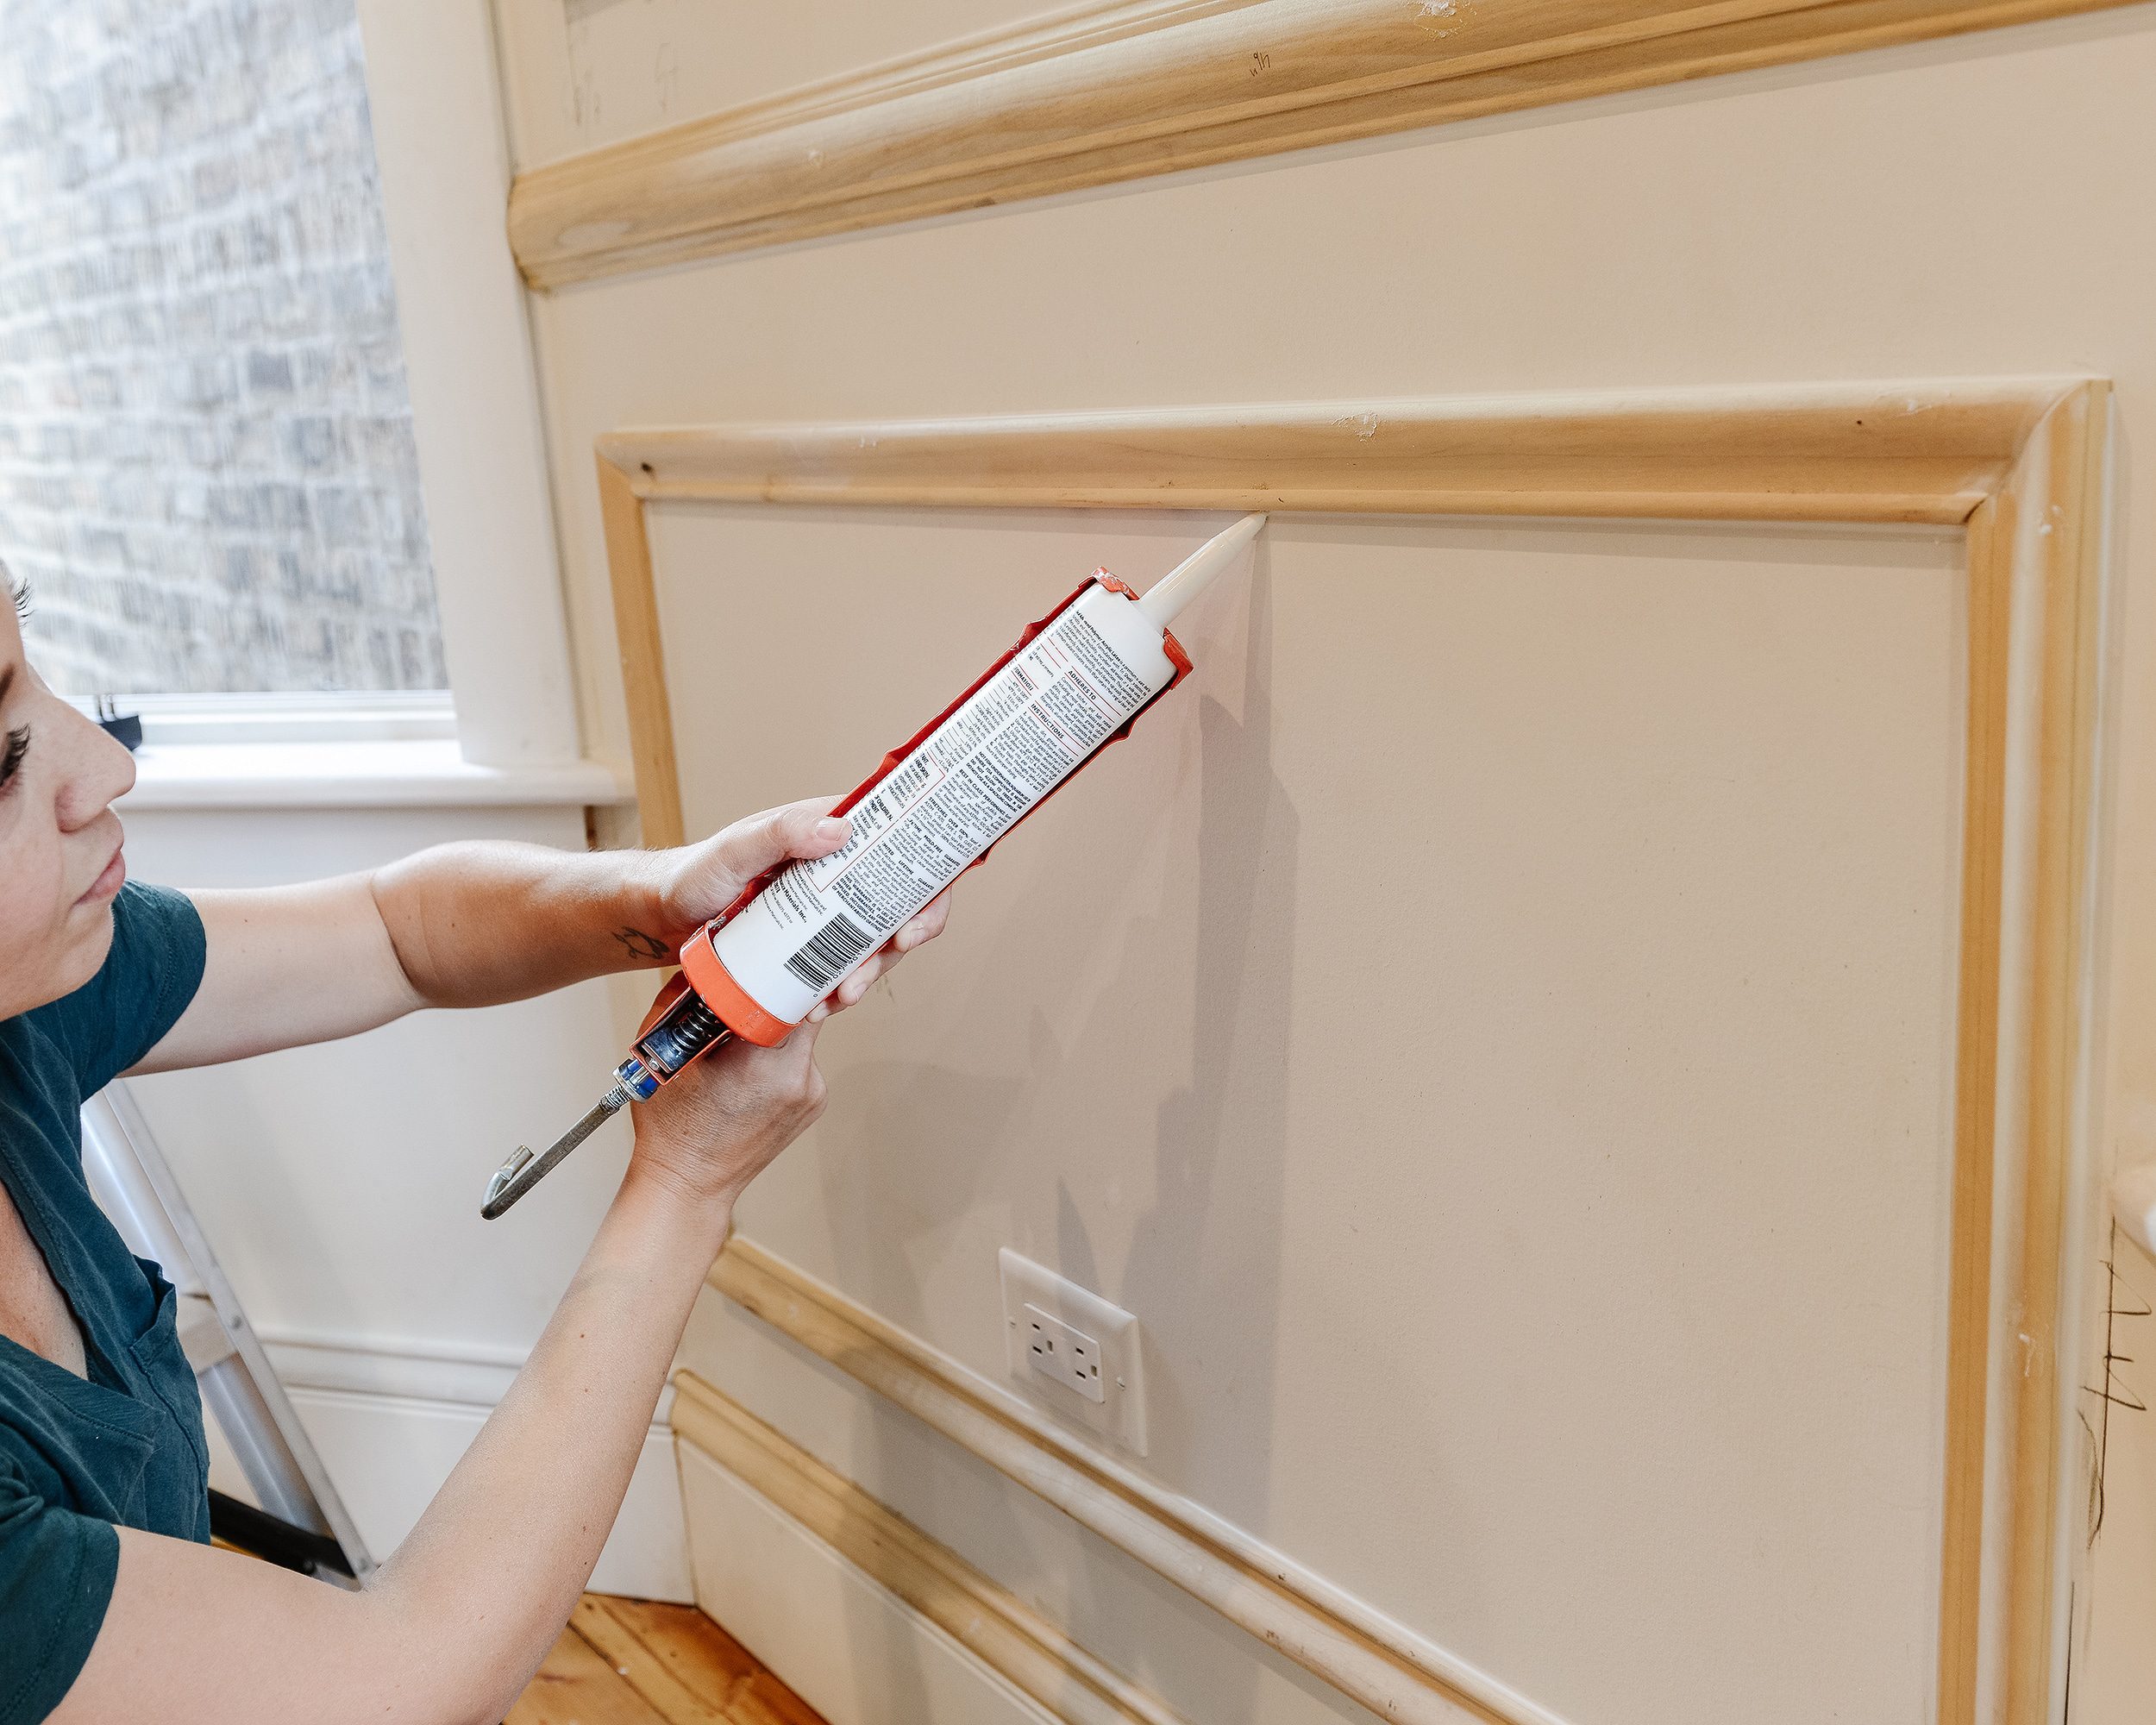
Afterwards, every last hairline crack was caulked and smoothed. Caulk is the saving grace for an old home; it blends away imperfections and once painted, you’d never know the secrets that lie beneath.

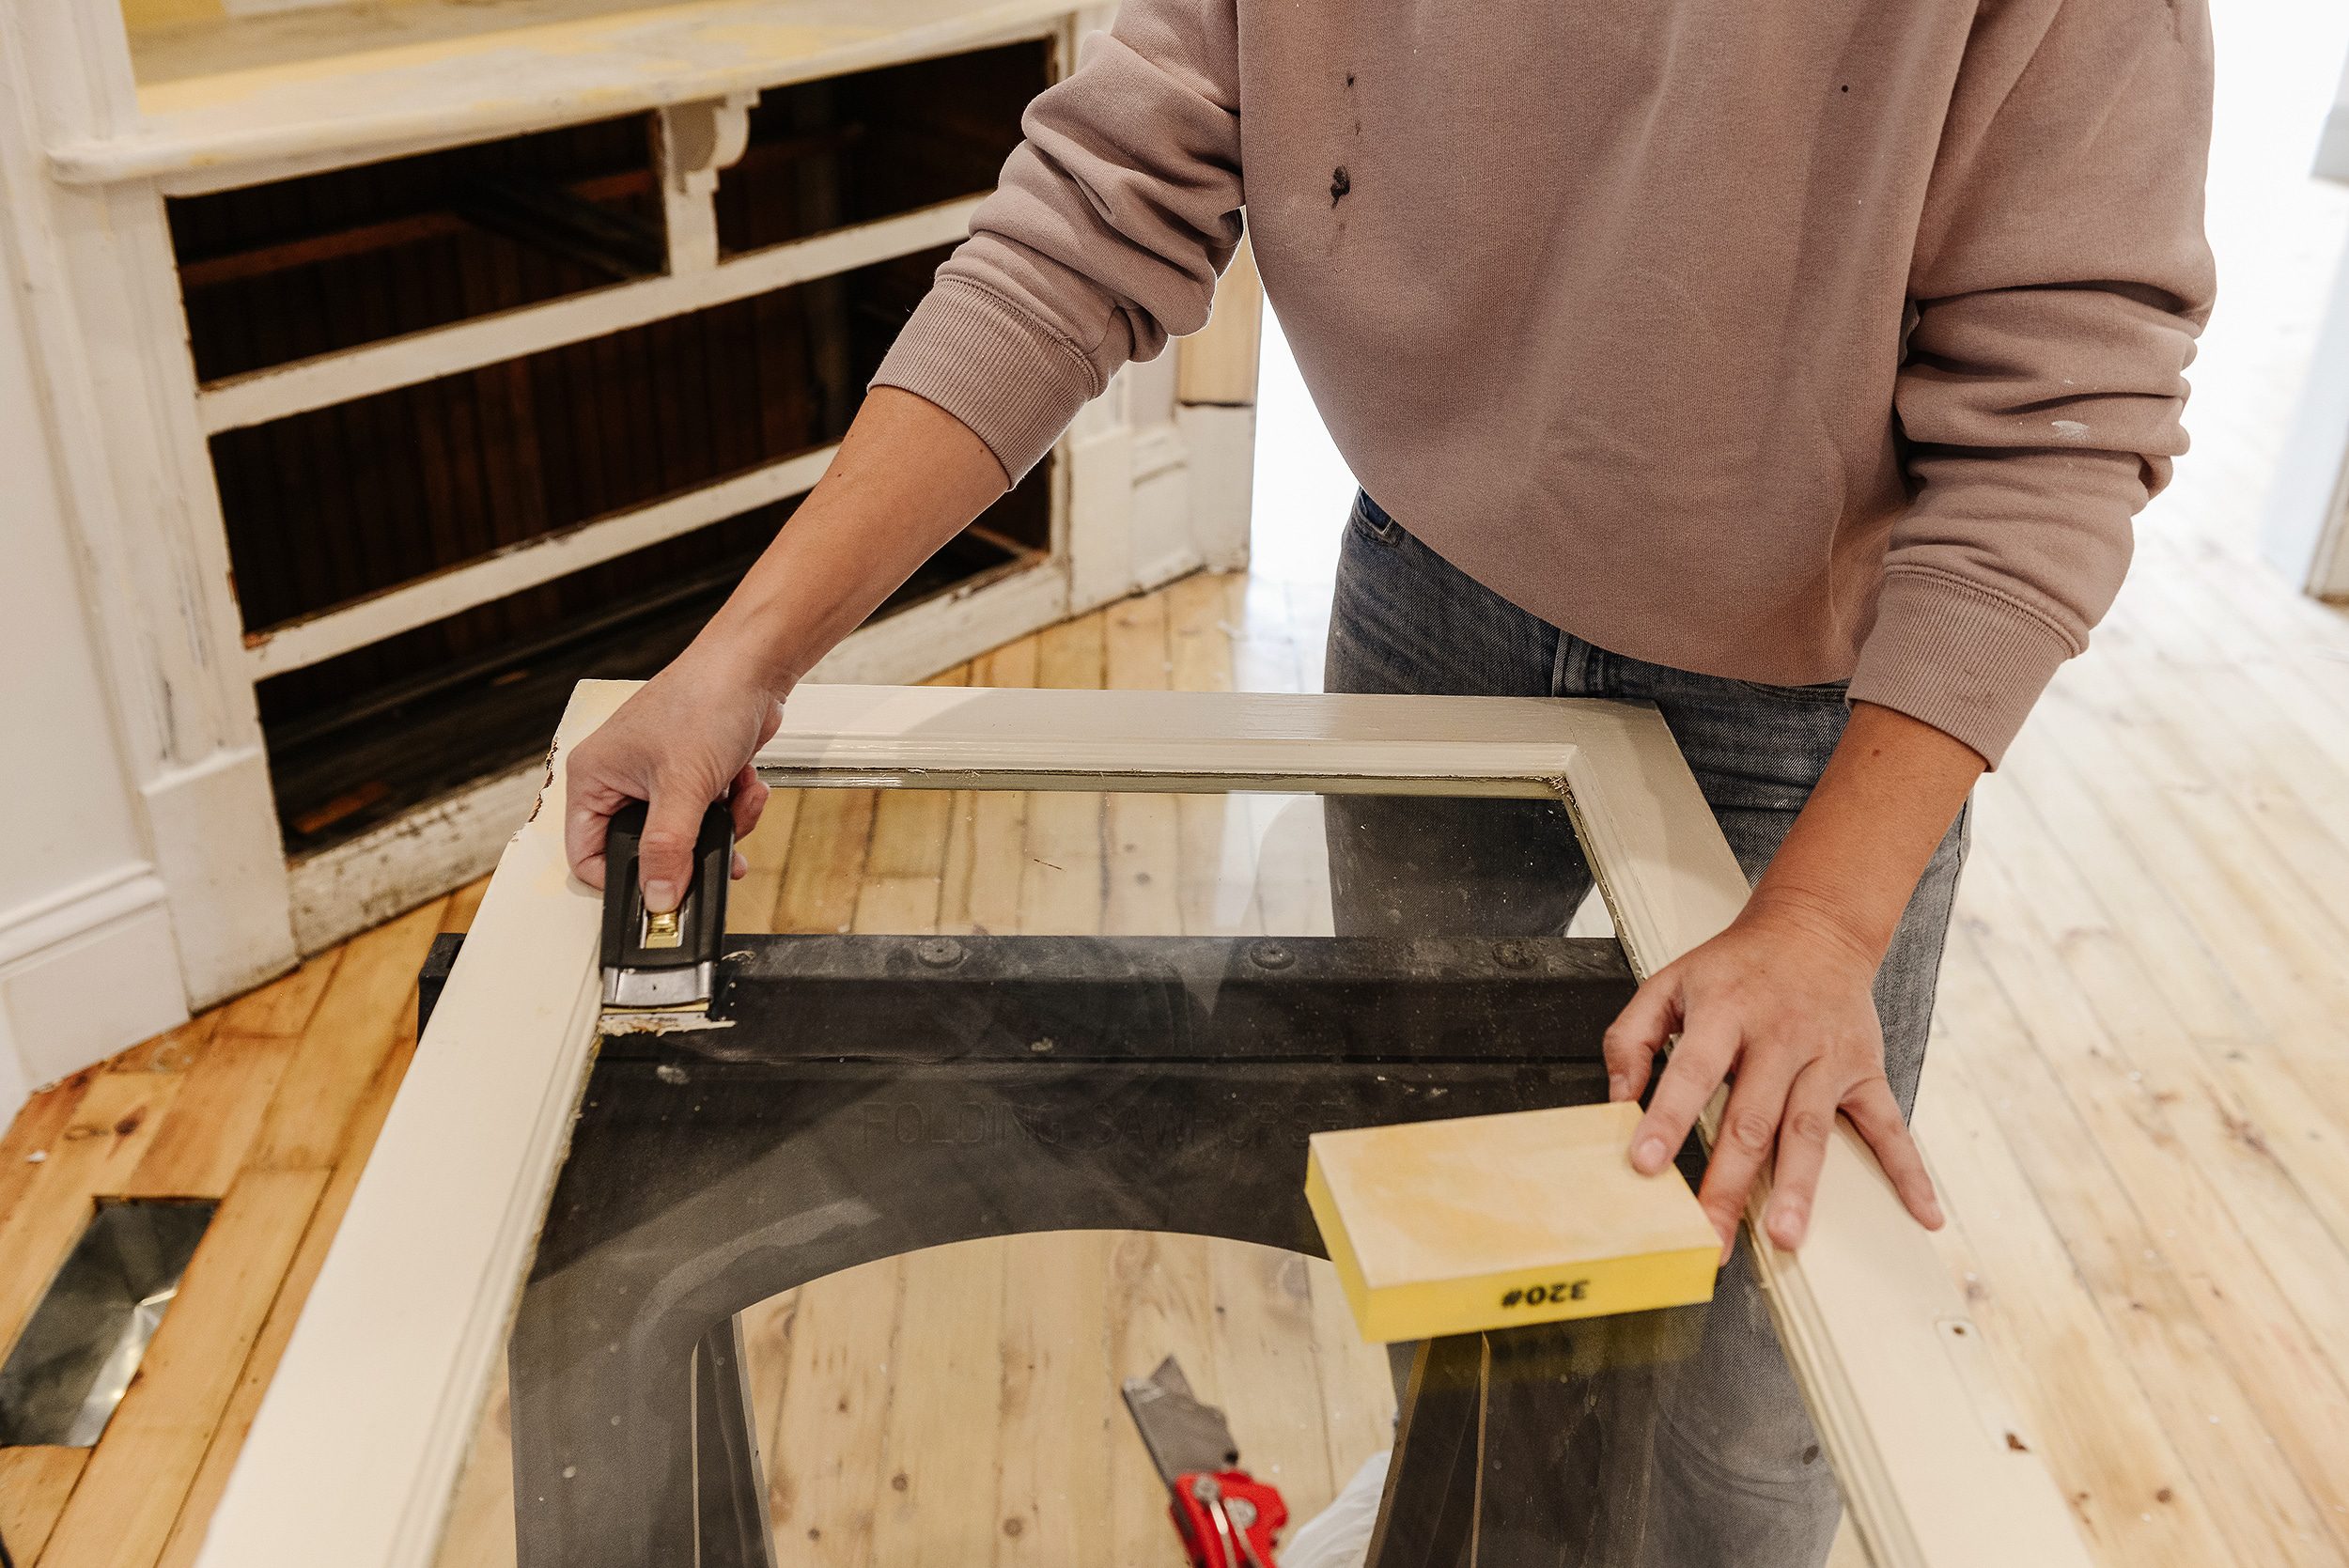
2| Installing the Panel Molding
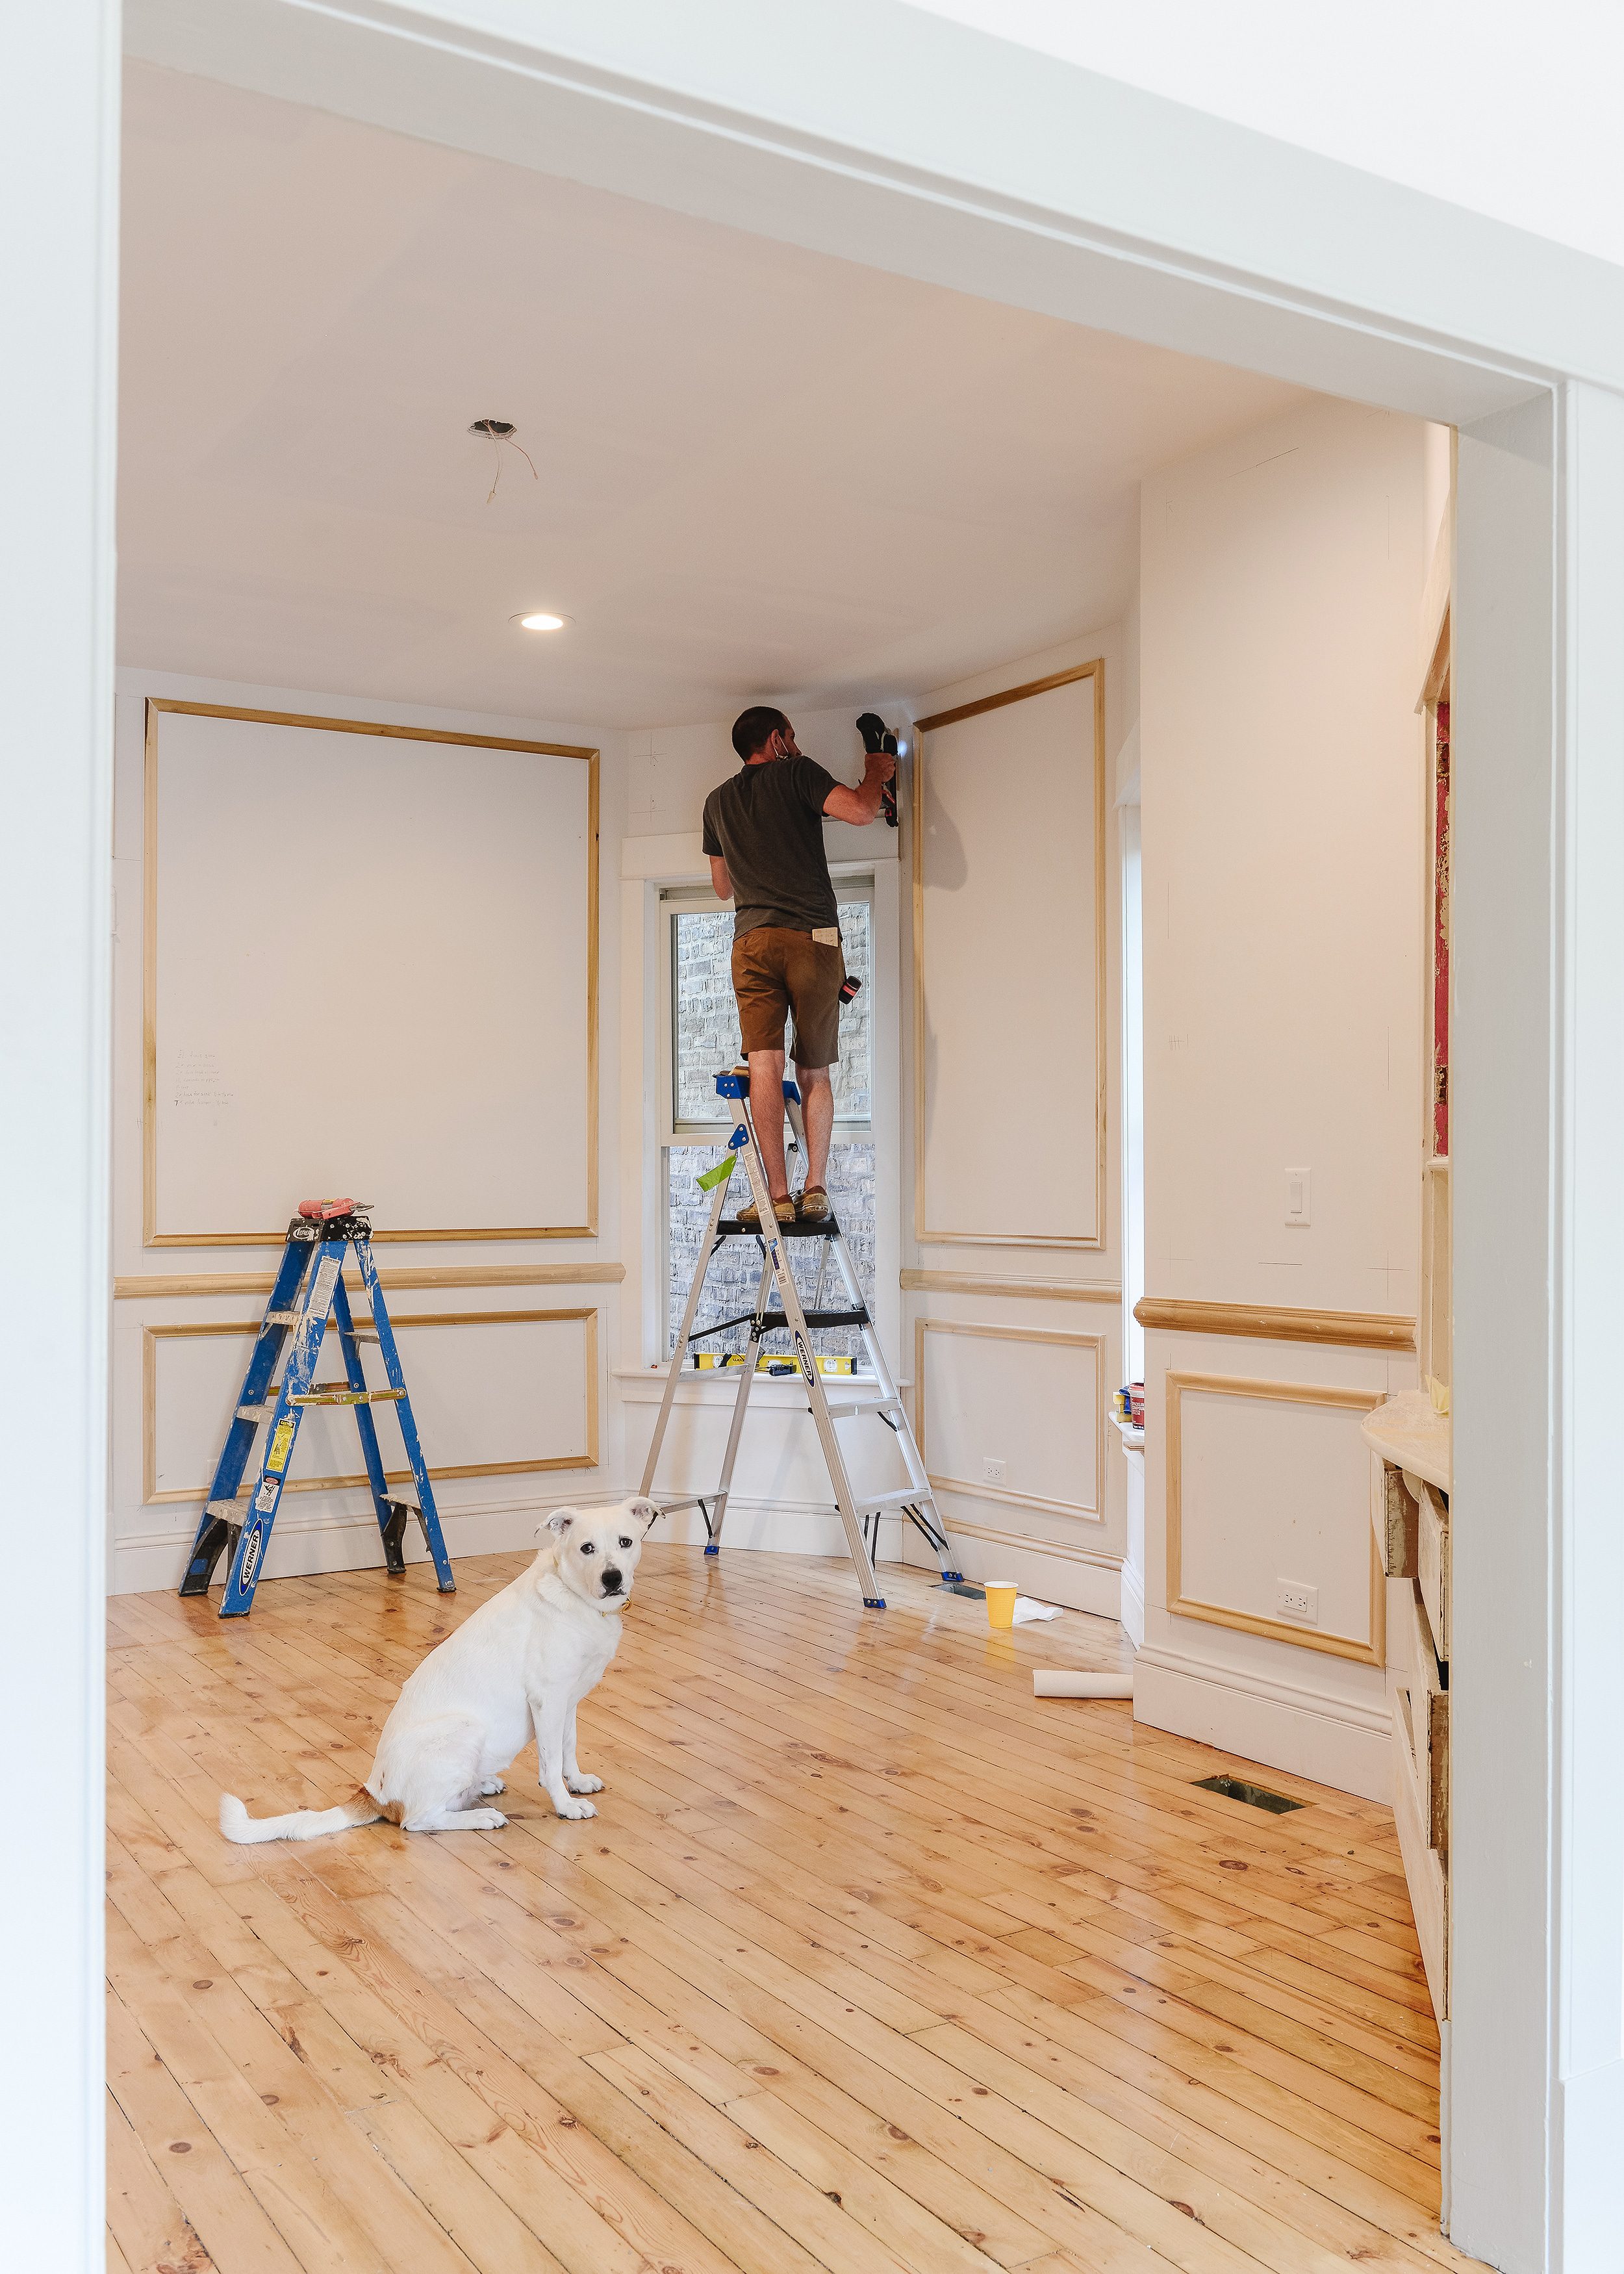
While Kristine and I tackled the hutch, Scott got to work on the panel molding (and I pitched in once the hutch was ready for paint). What we love about panel molding is that the design and layouts are endless! On the other hand, the designs and layouts are endless. In the end, we went with a more traditional layout that included a chair rail, with a box panel above and below the rail.
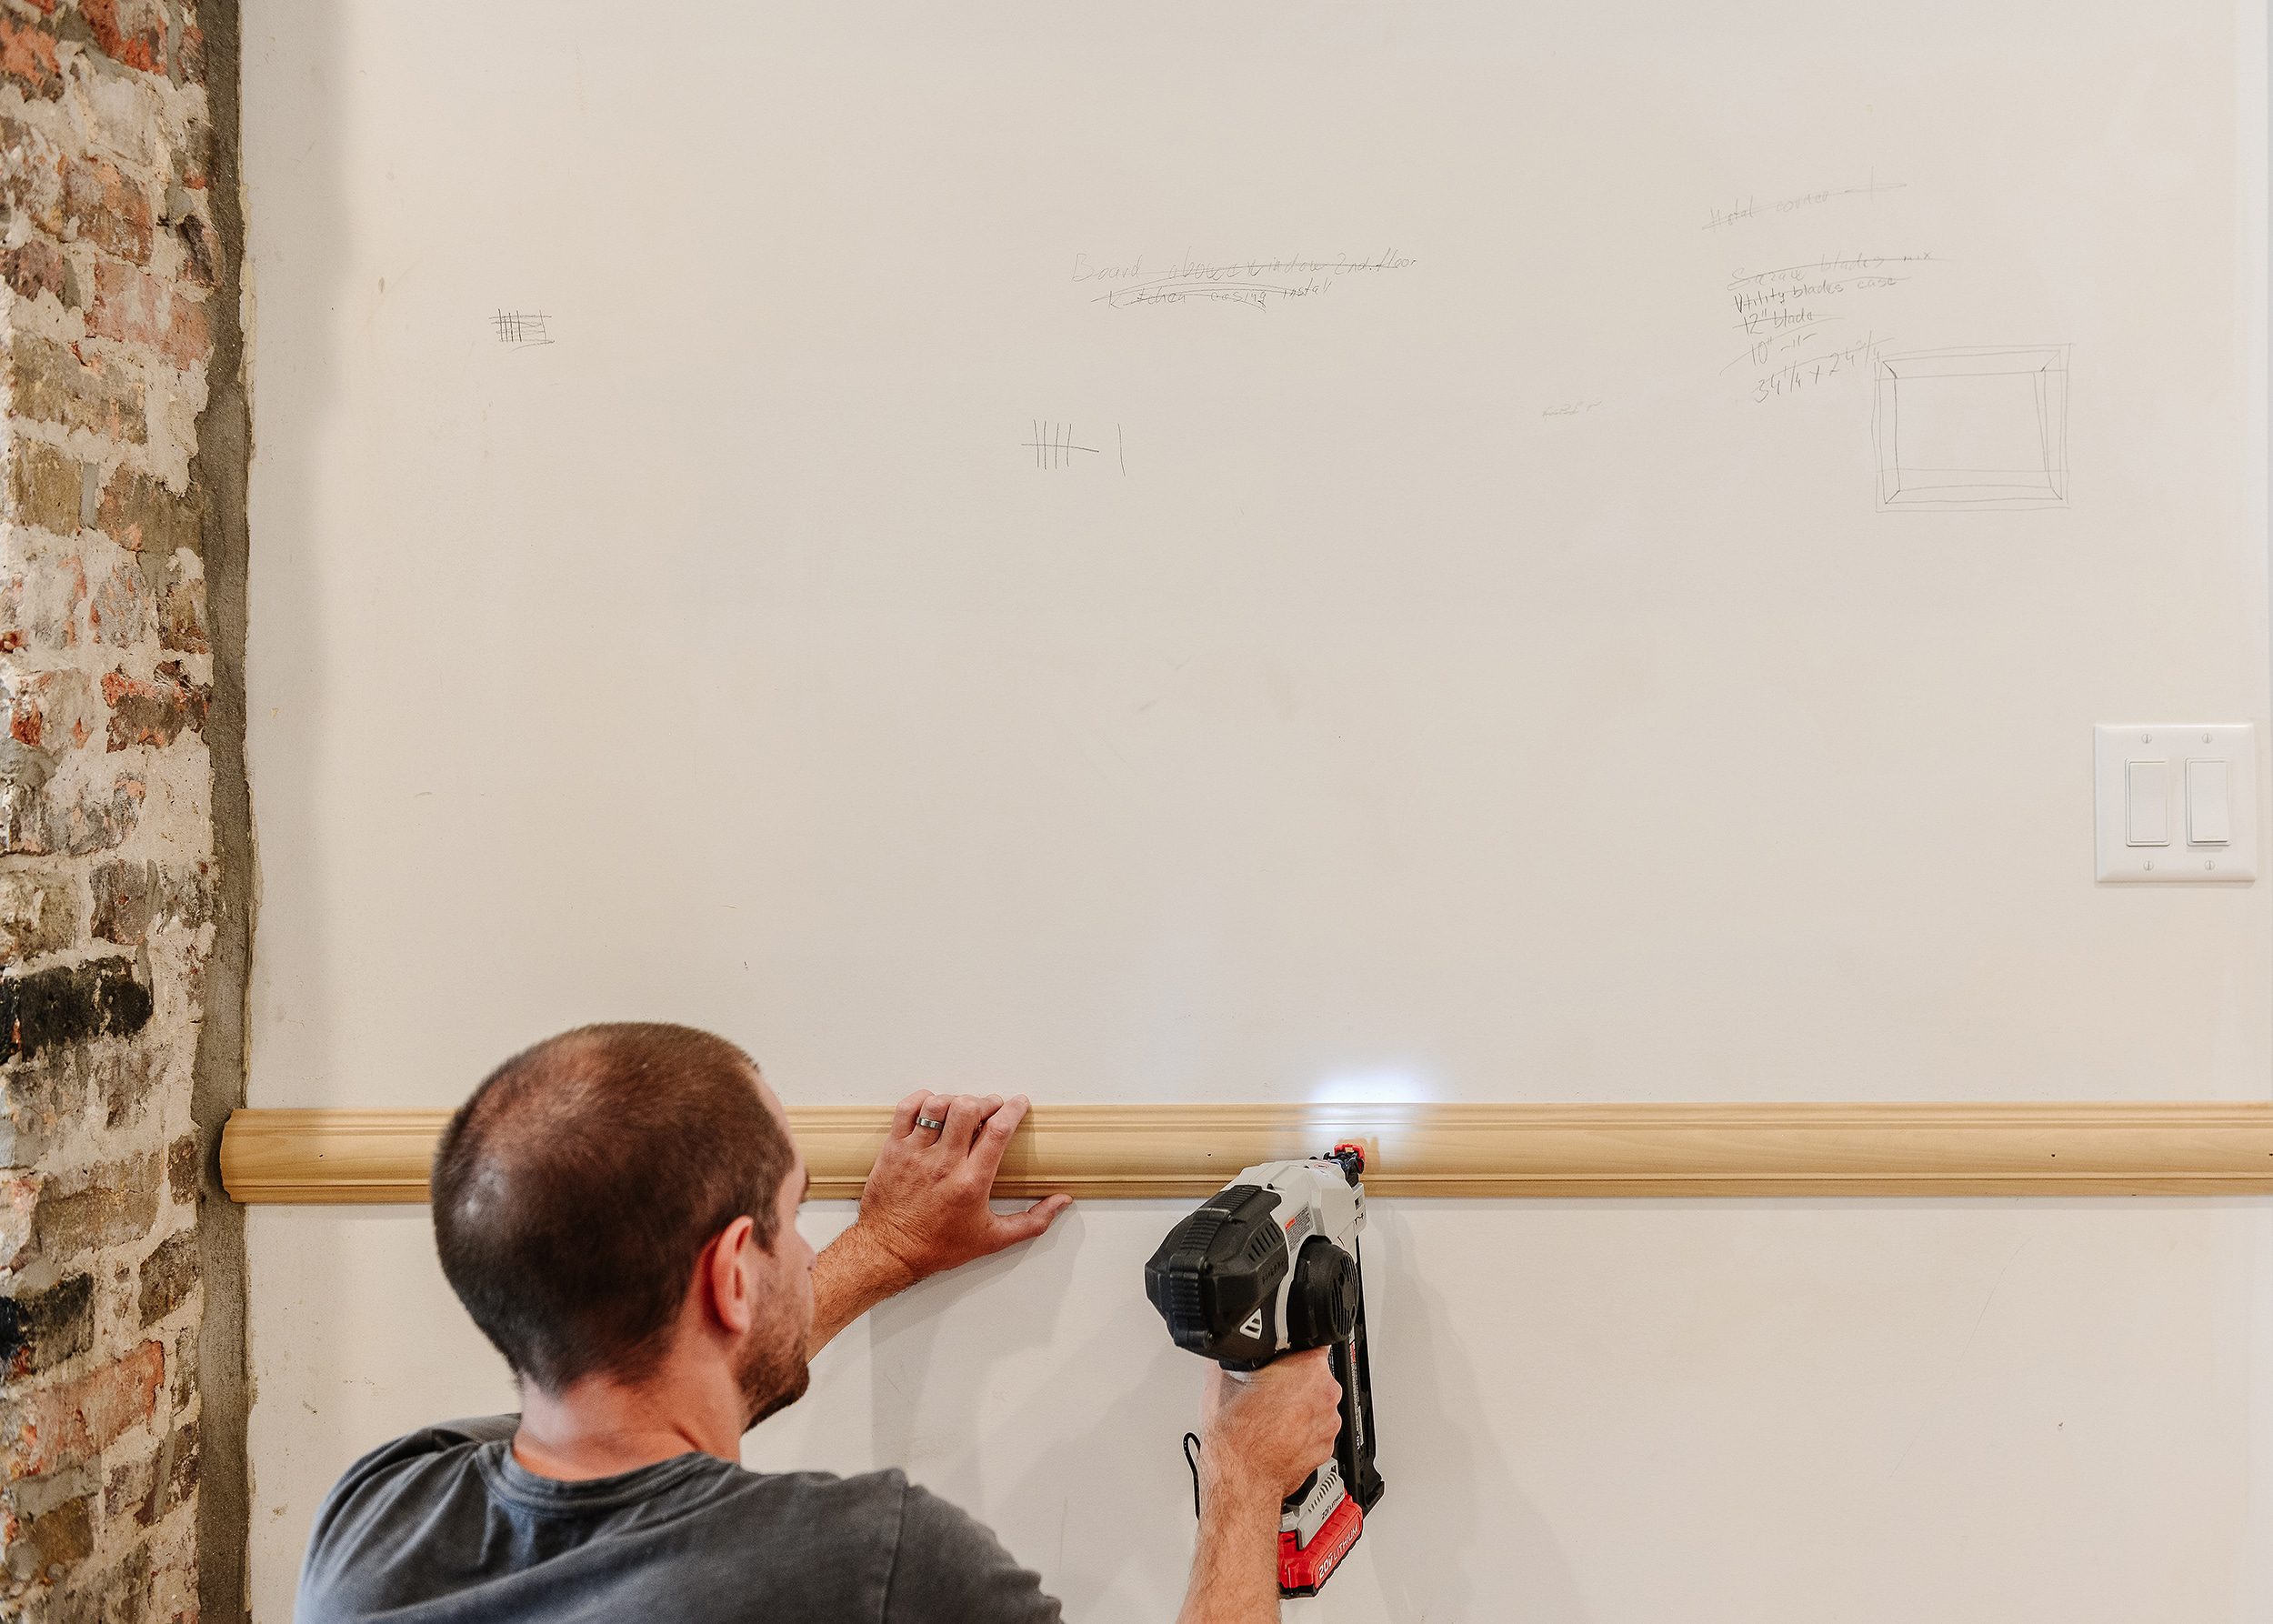
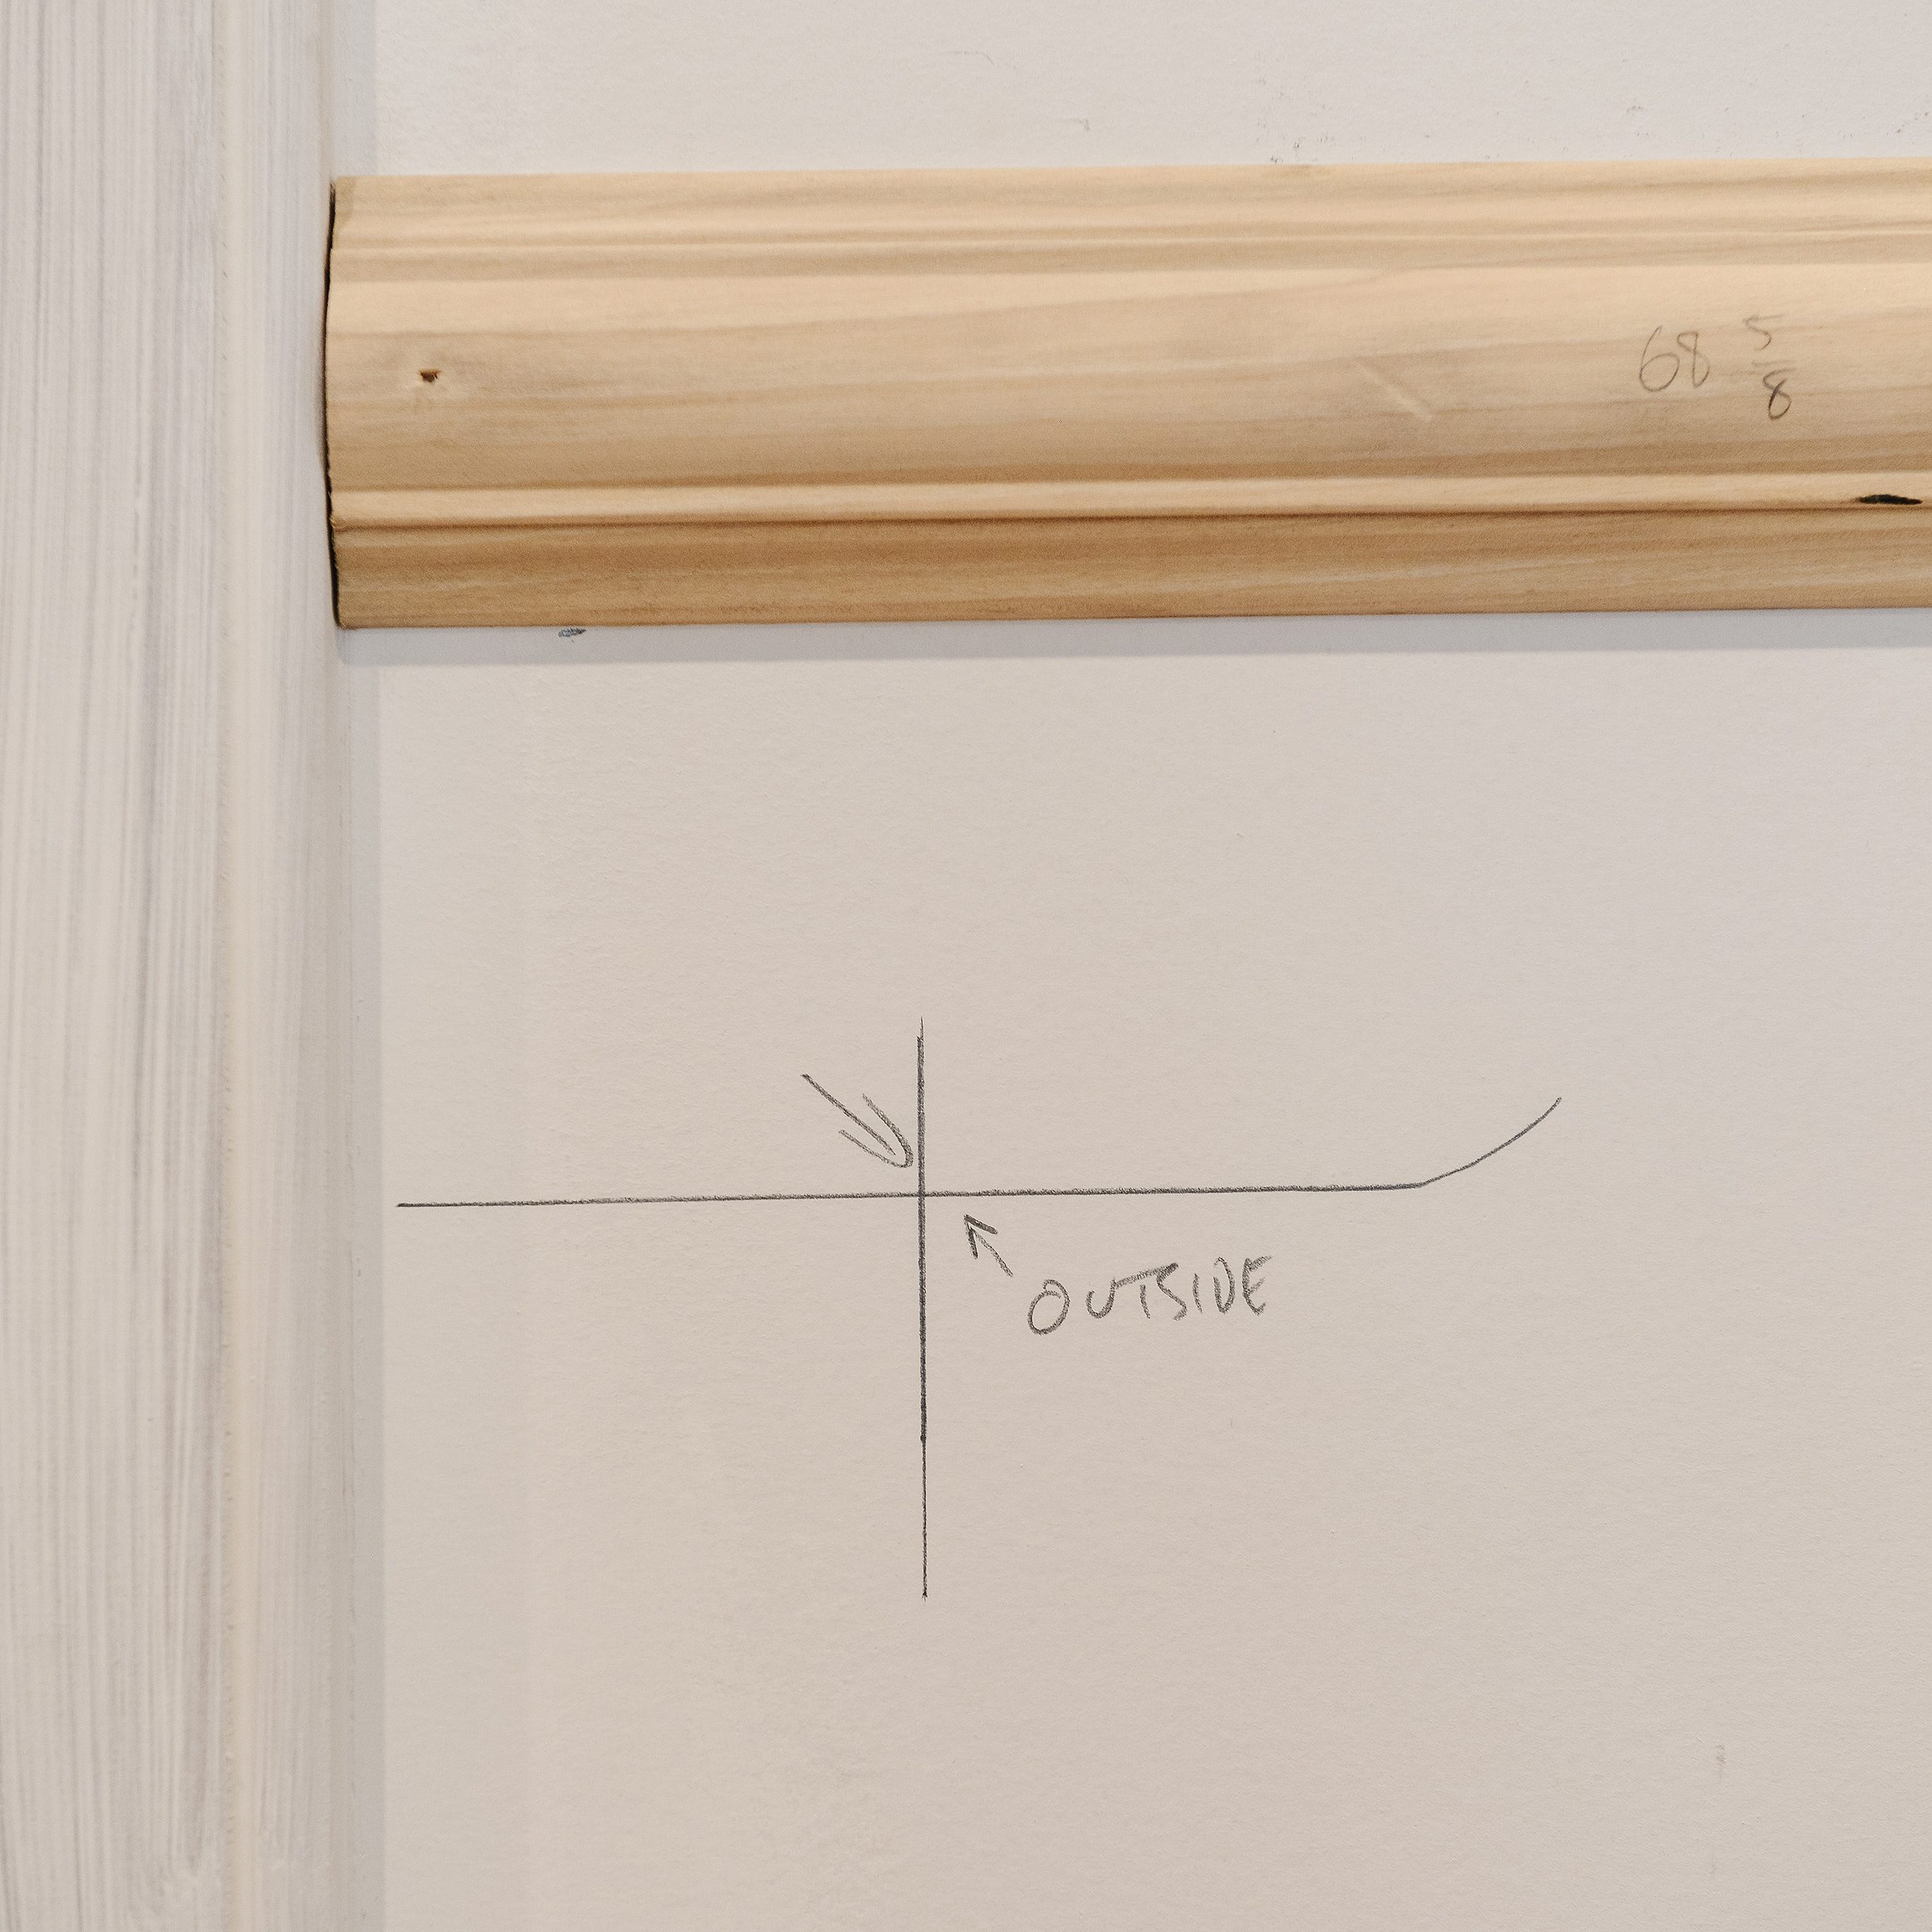
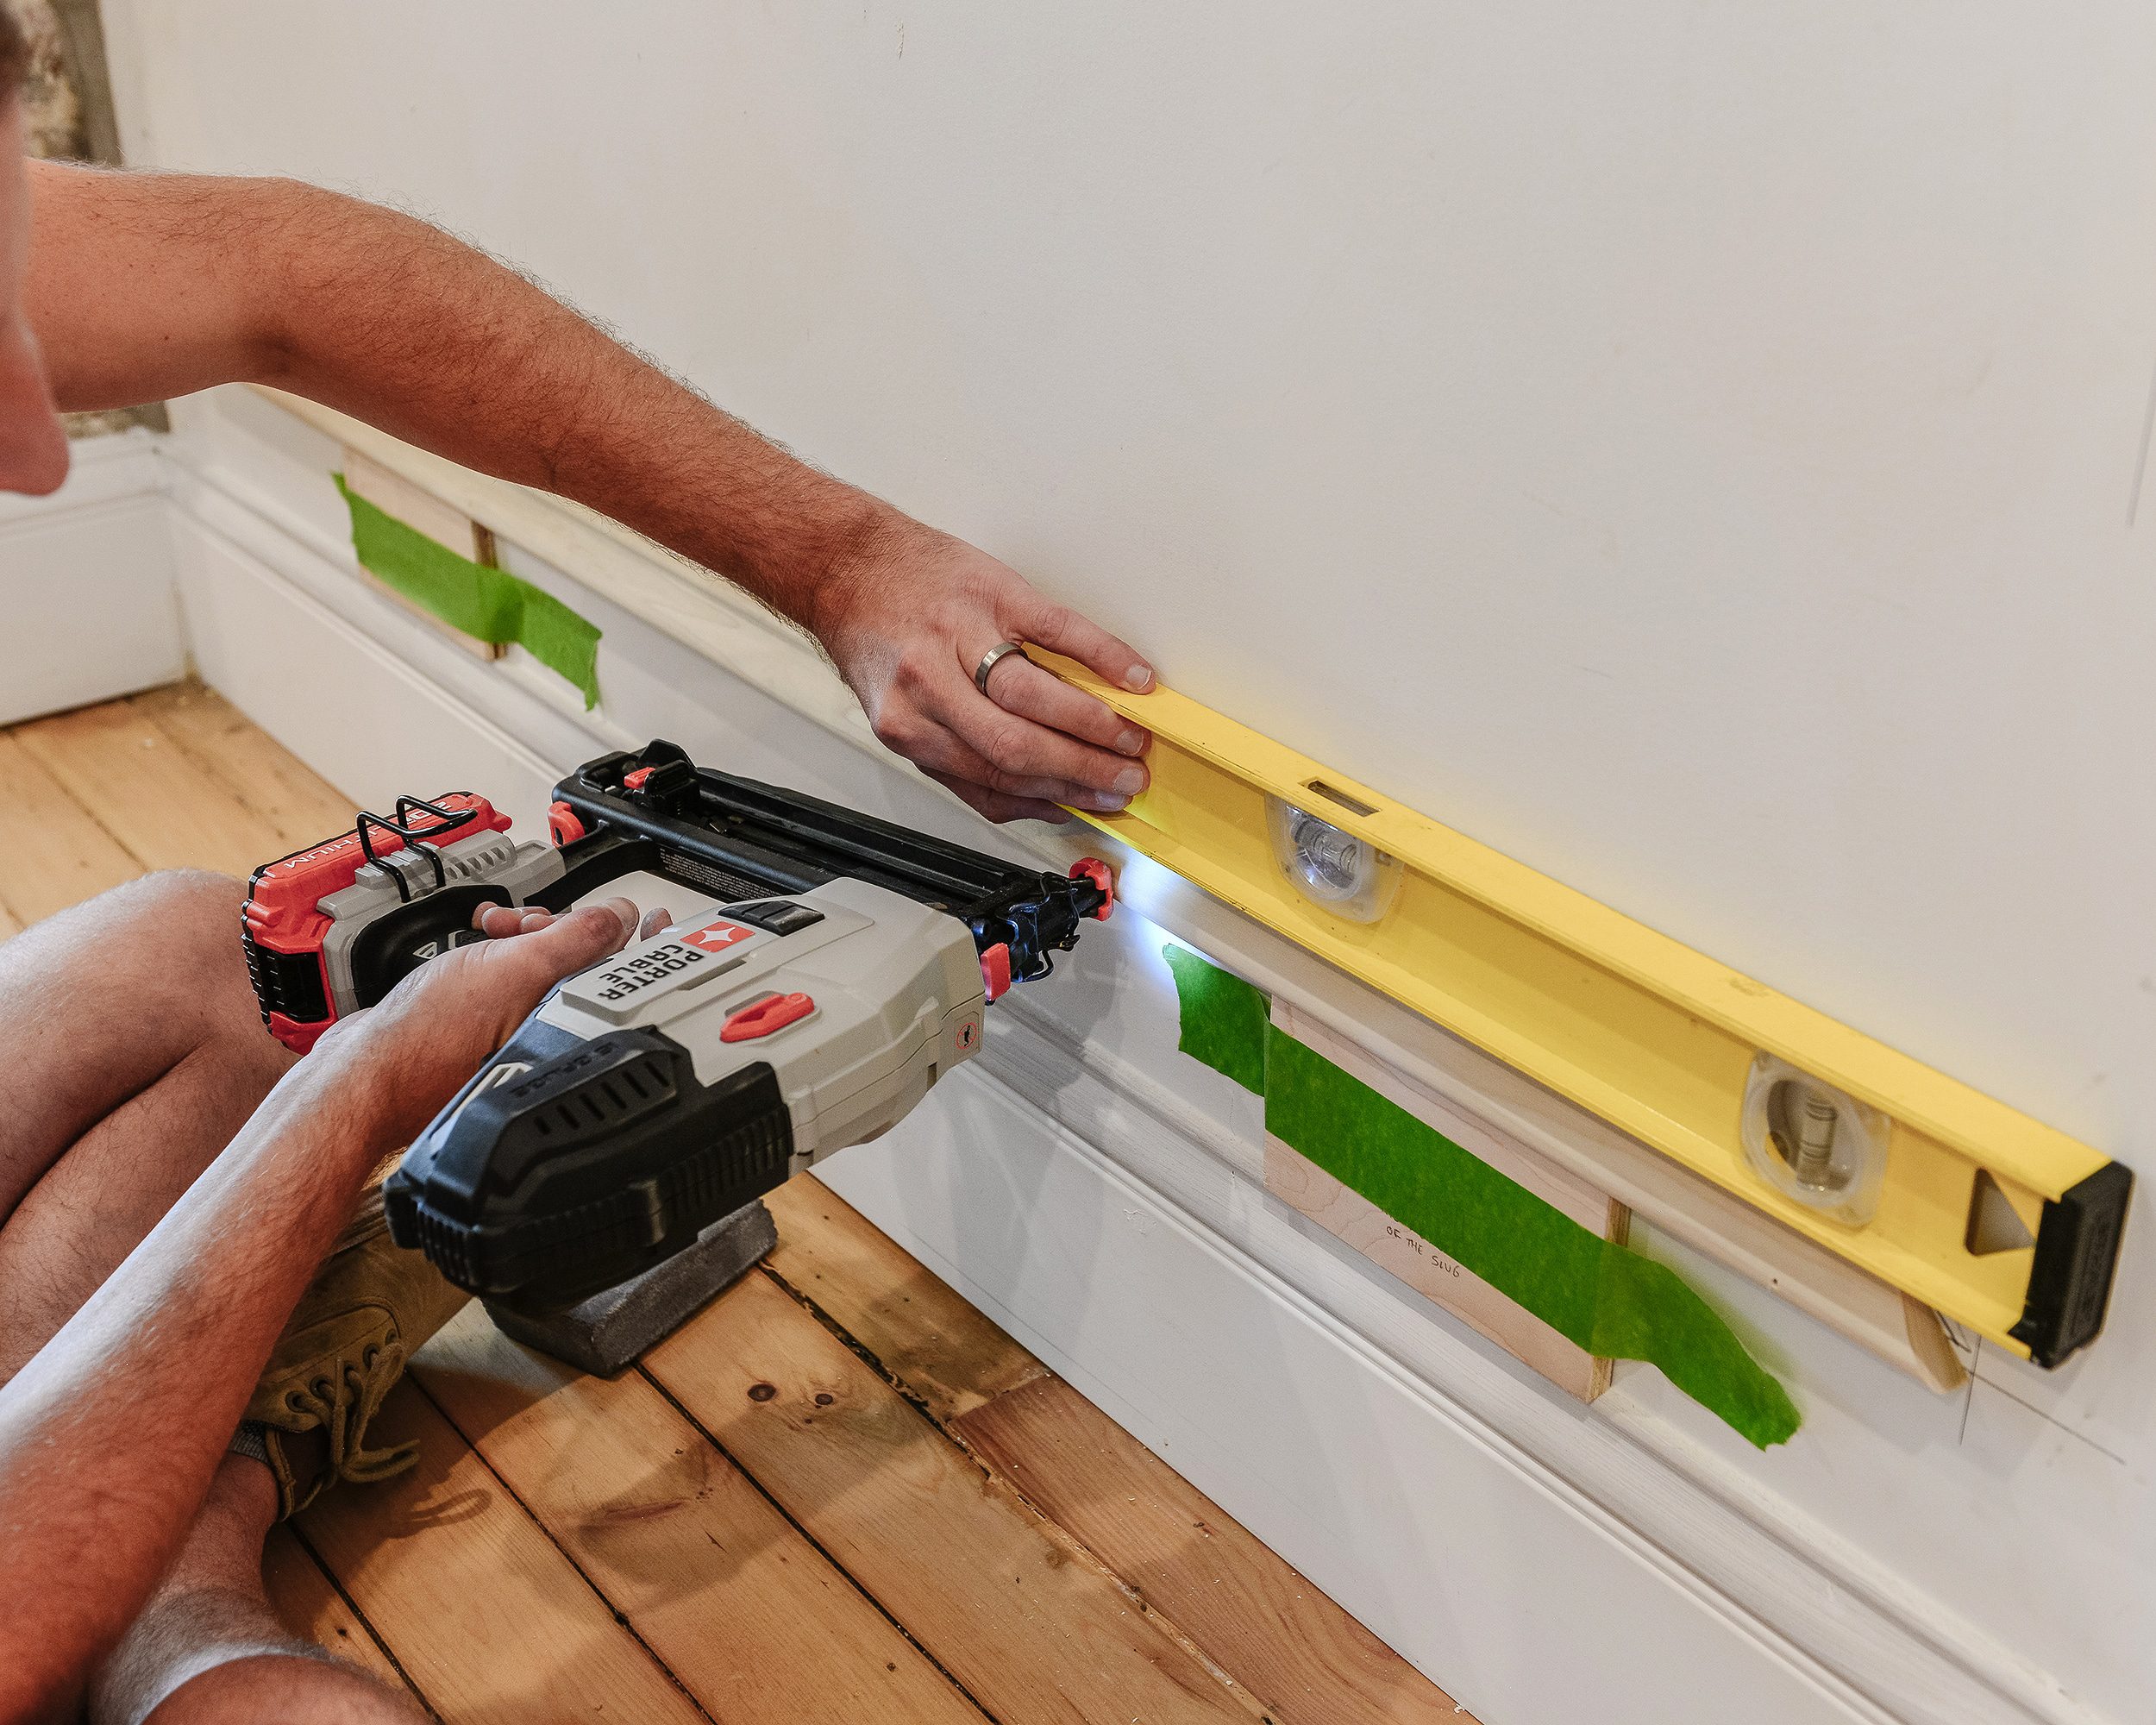
Installing the chair rail went quickly. The ceilings in the dining room are almost 10’ tall, and we chose to have the chair rail at a height of 3’ from the floor. We knew this would make the top panel taller and more grand, which would make the ceilings feel even taller than they already were!
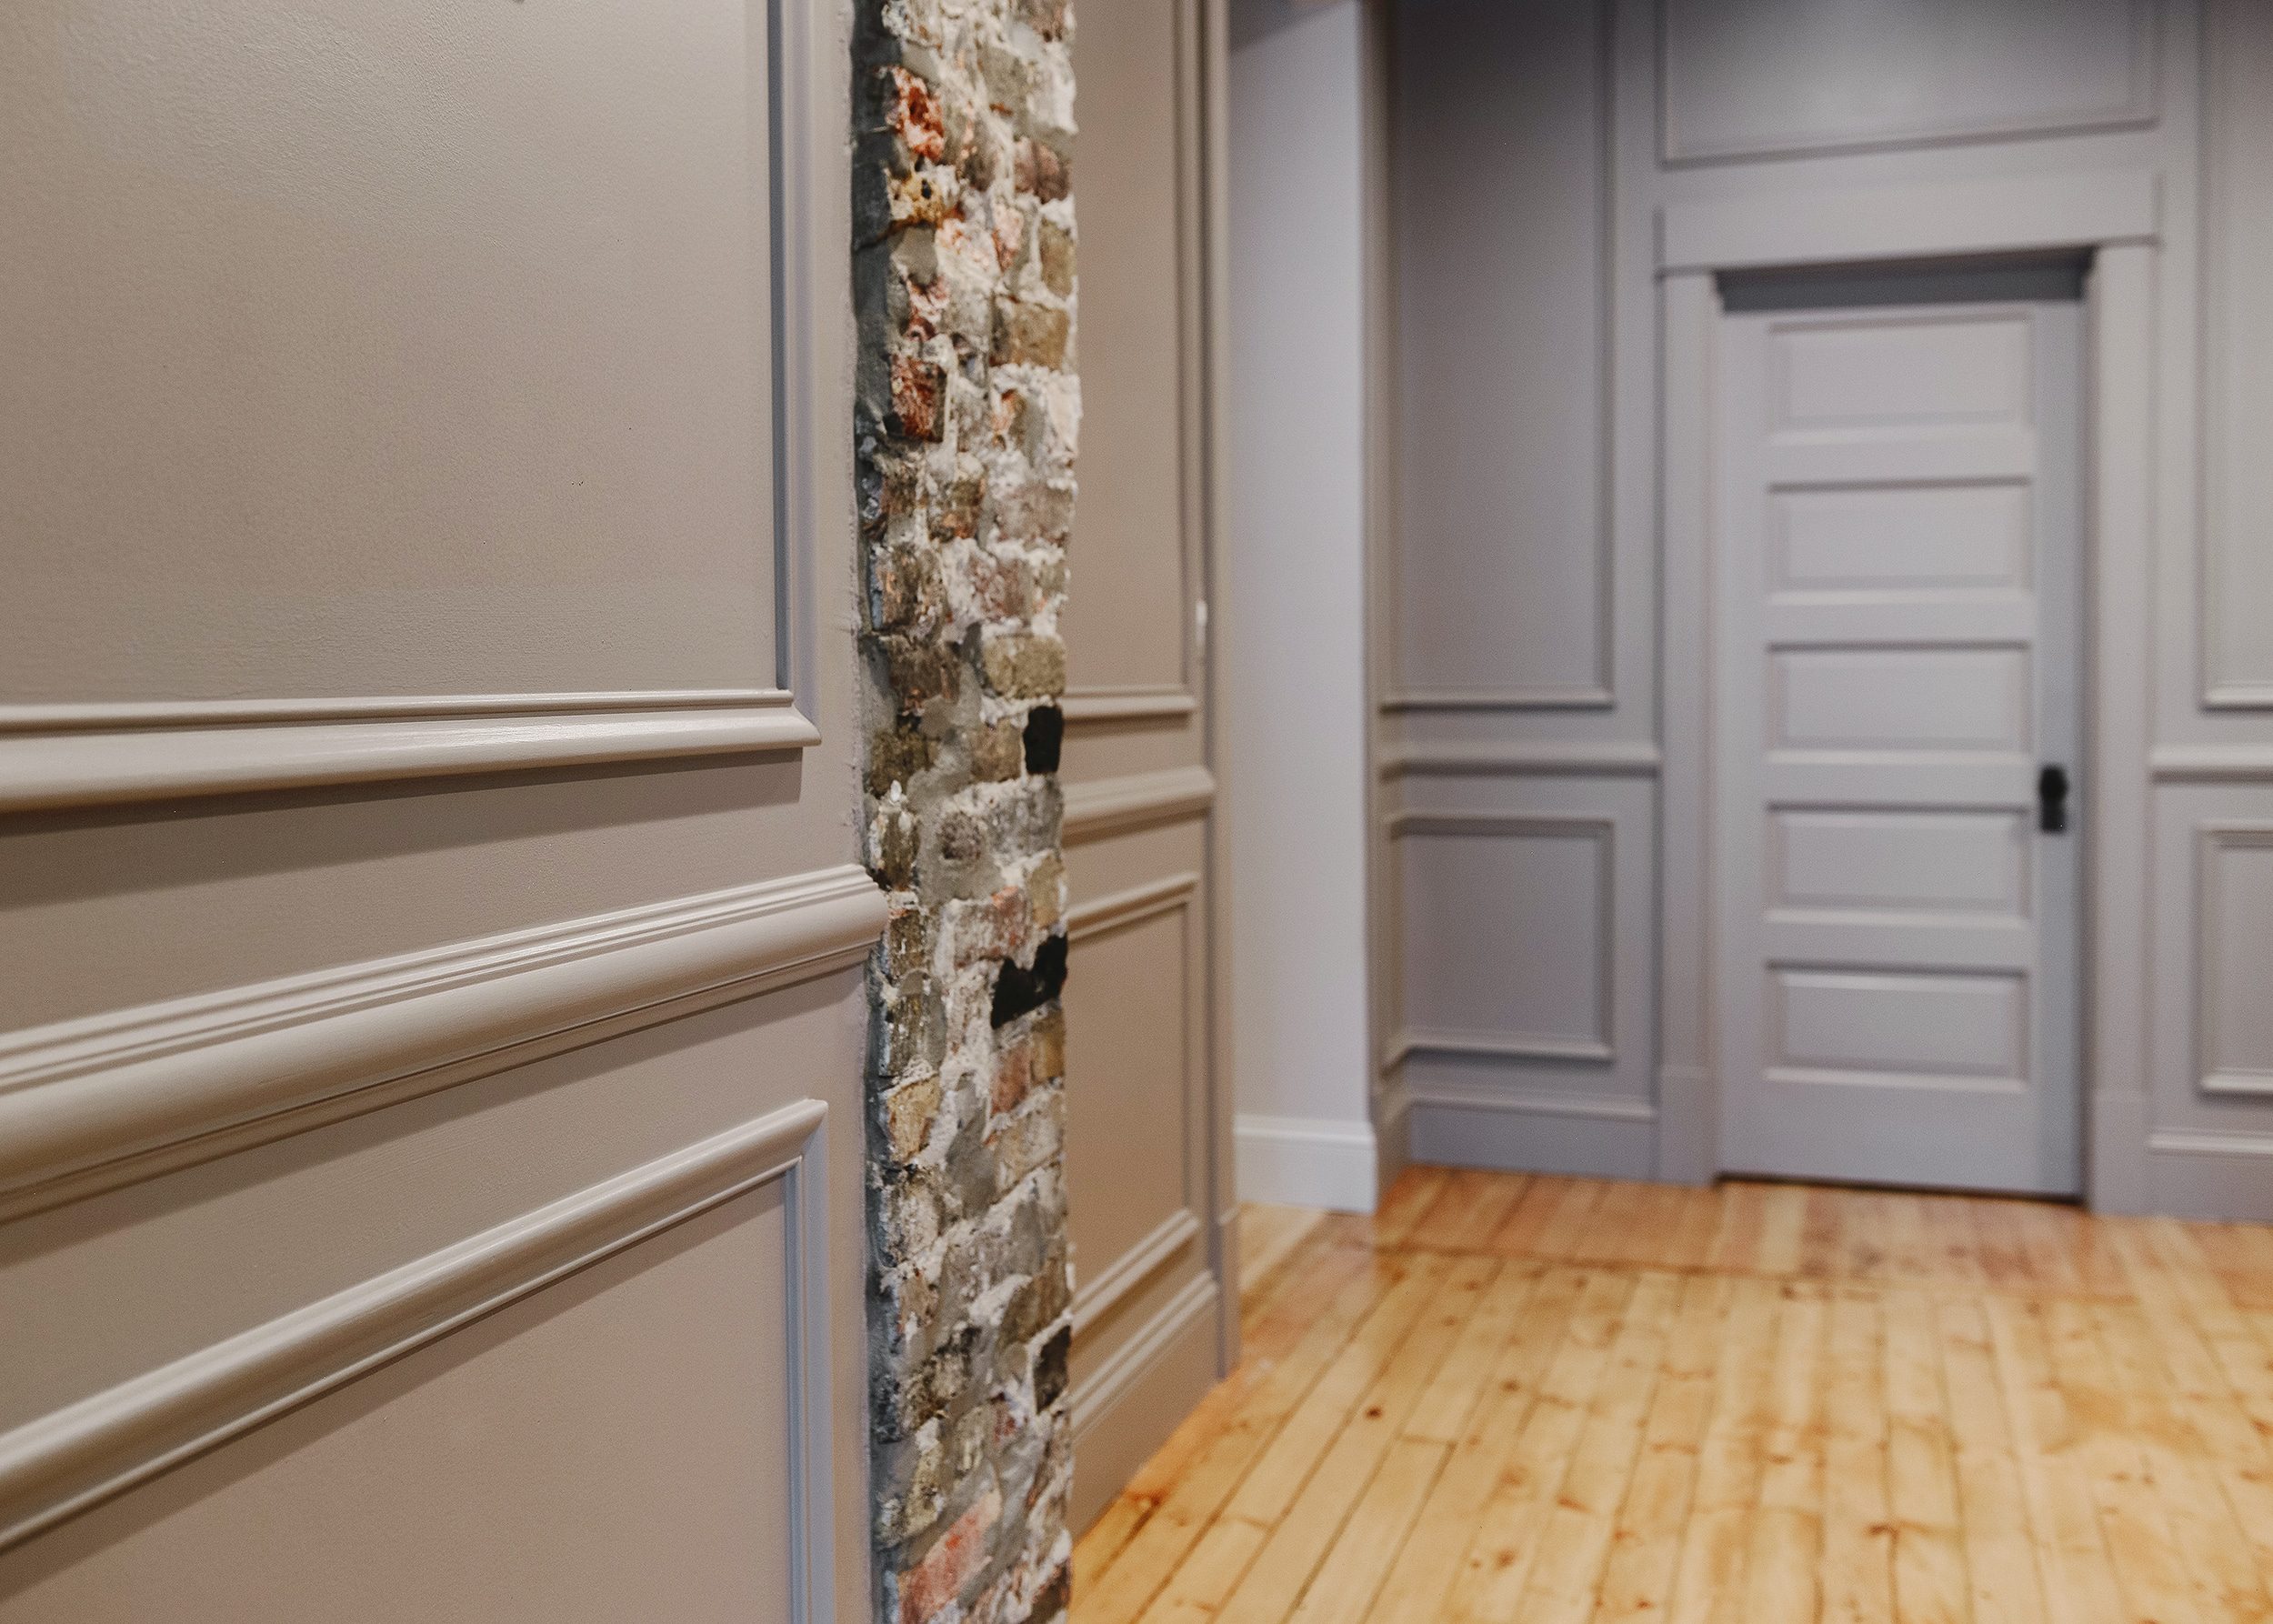
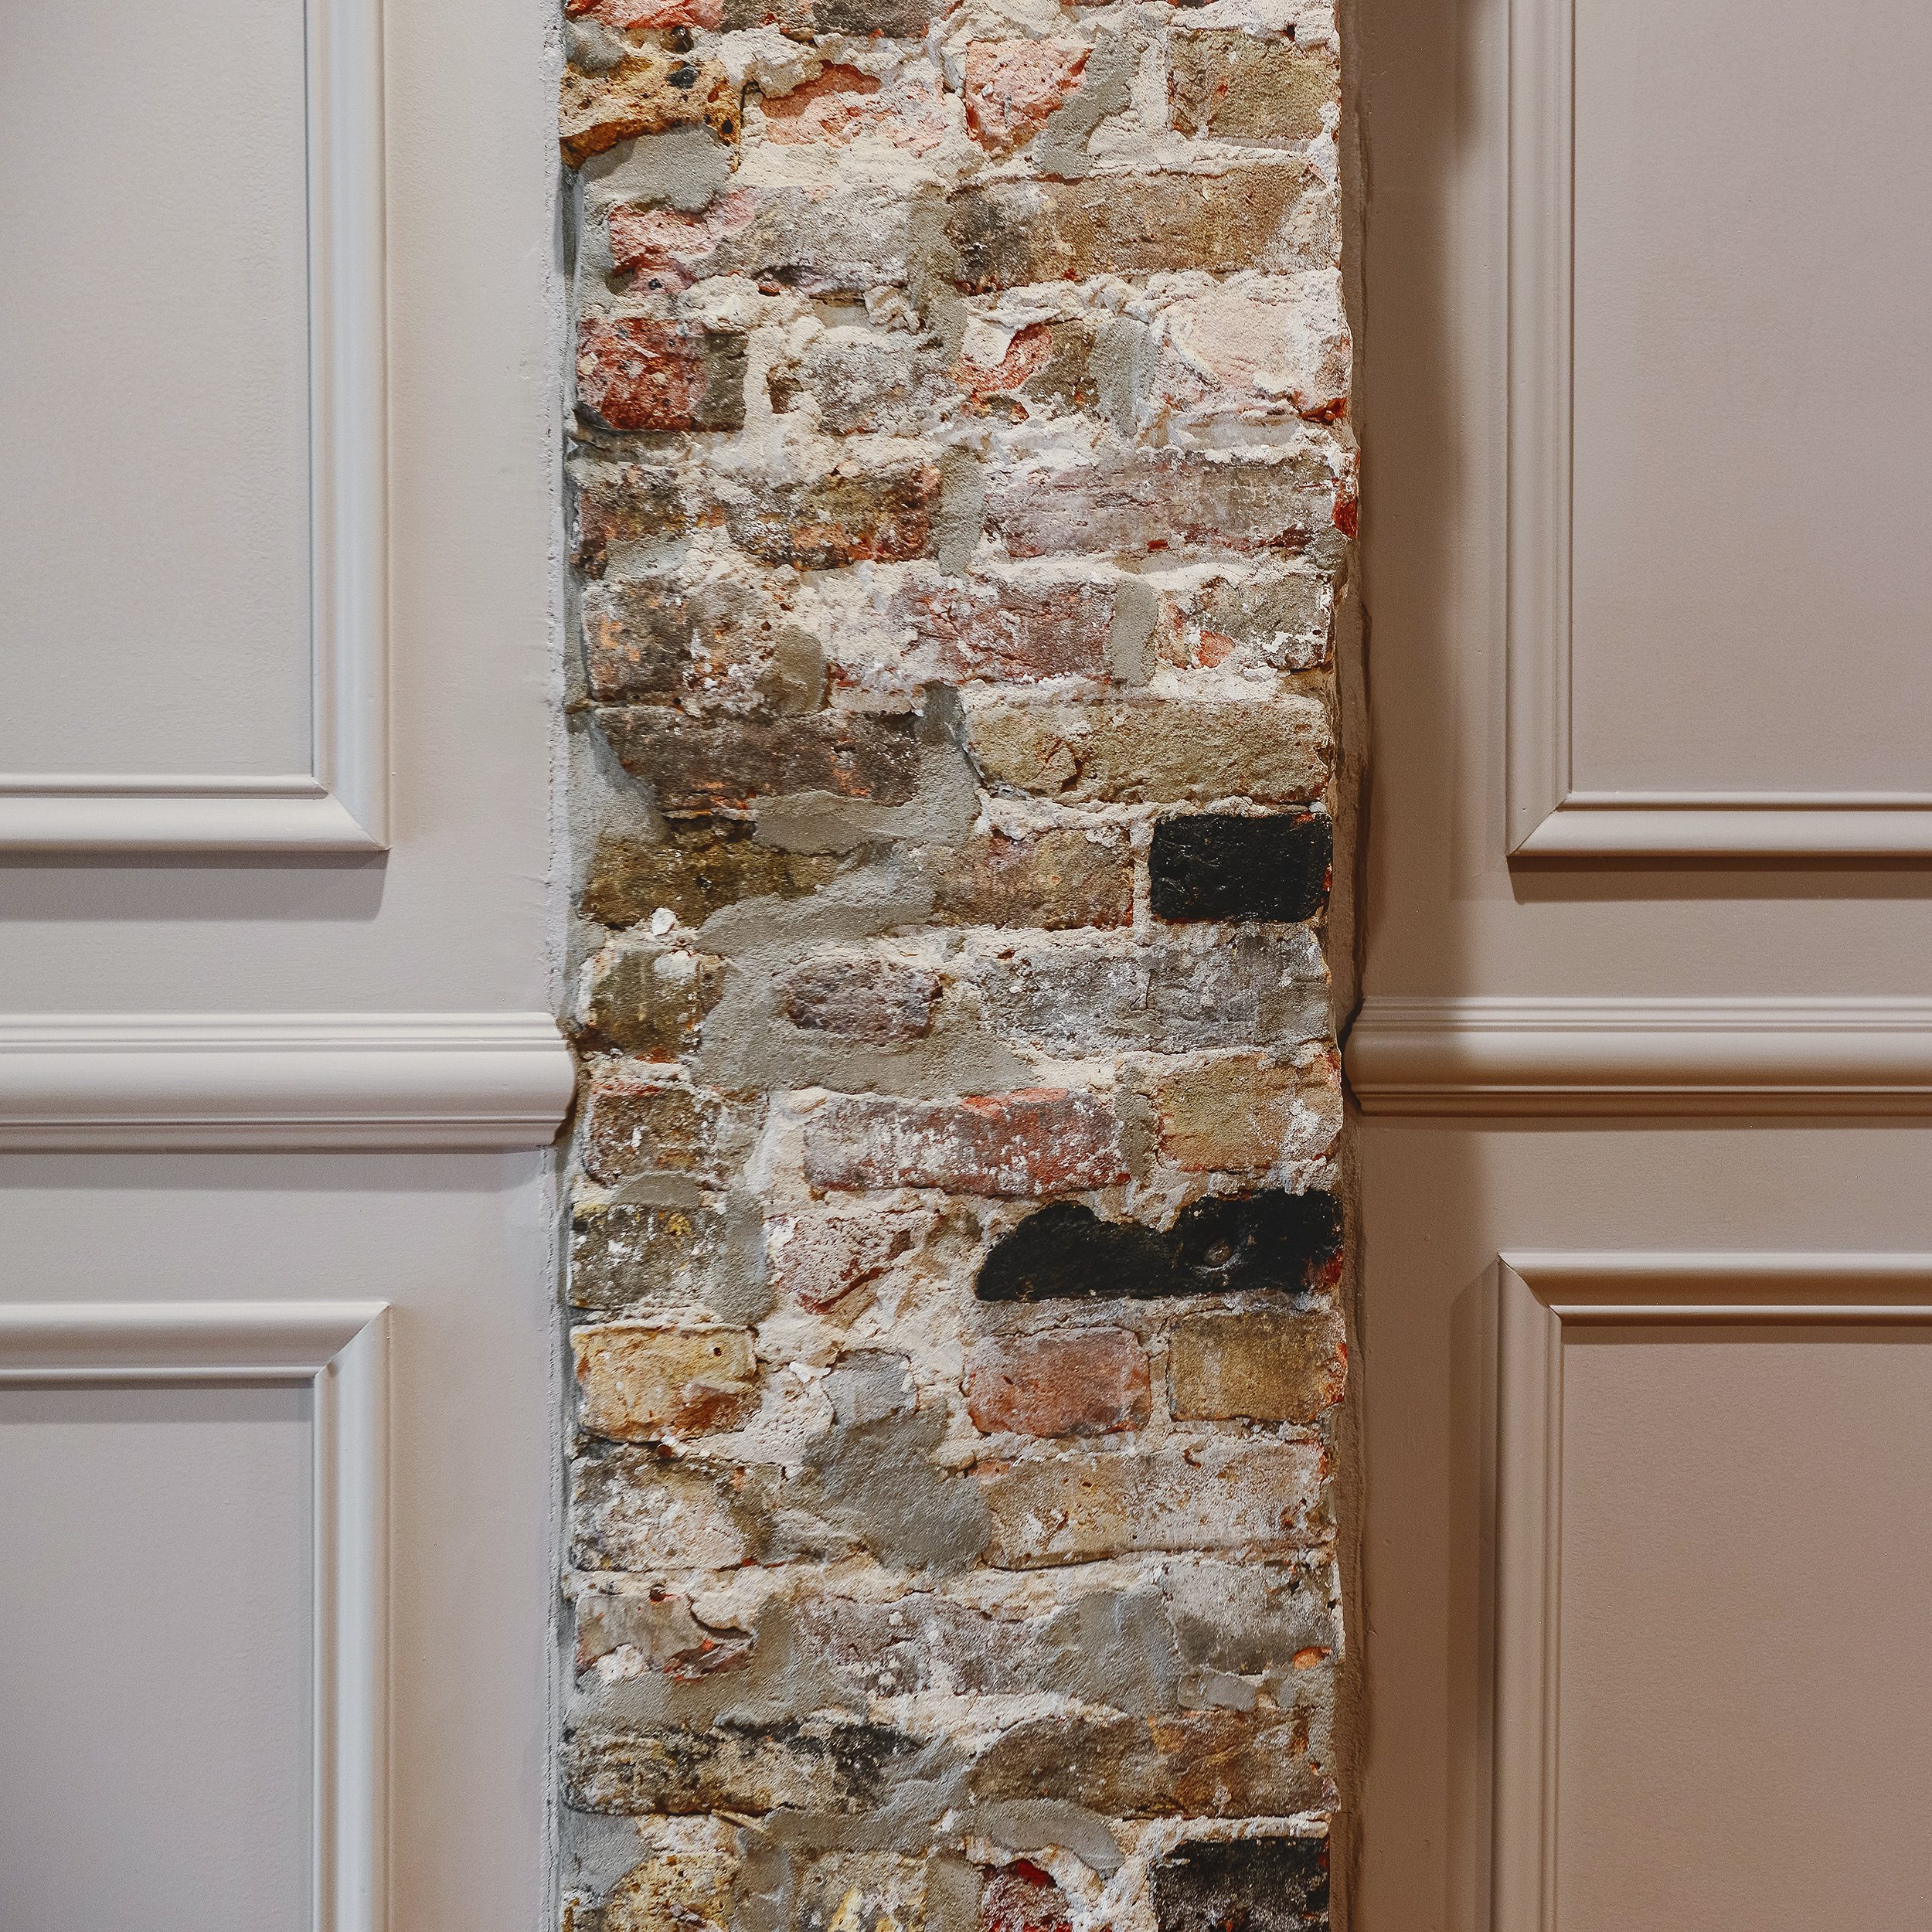
There were a few tricky cuts where the railing met up with the exposed chimney, but Scott mitered the ends and added a return for a truly custom feel:
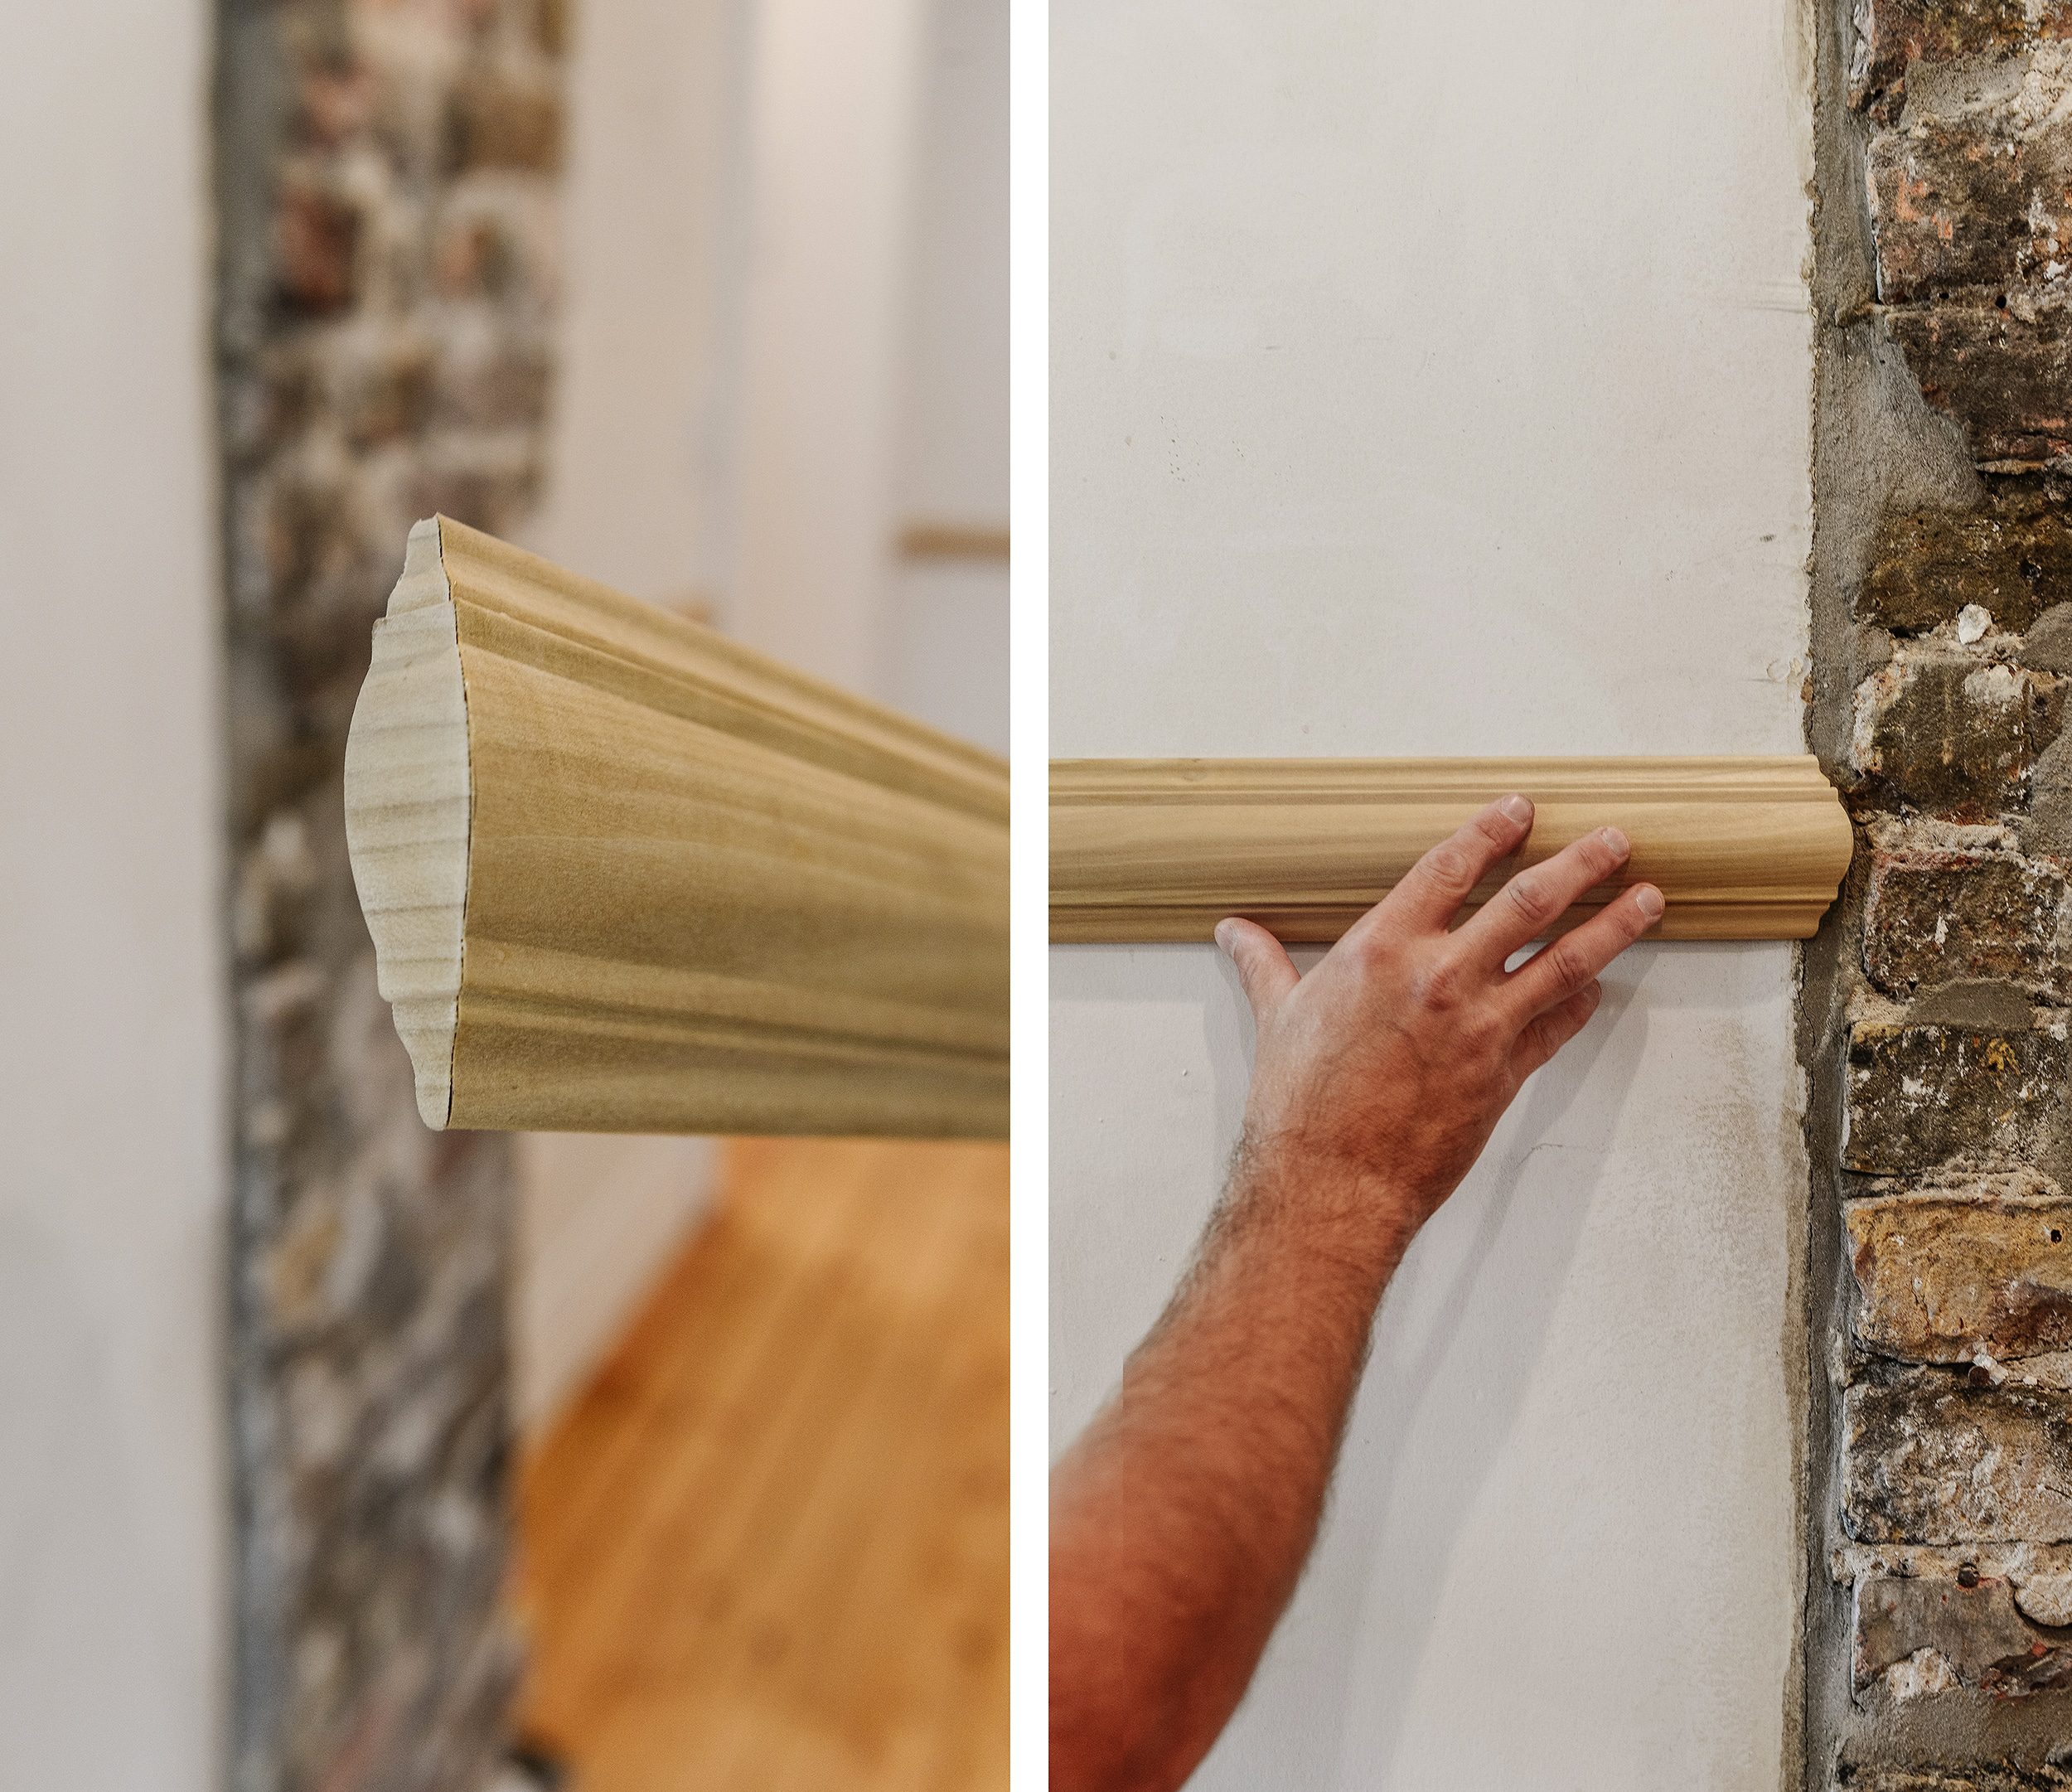
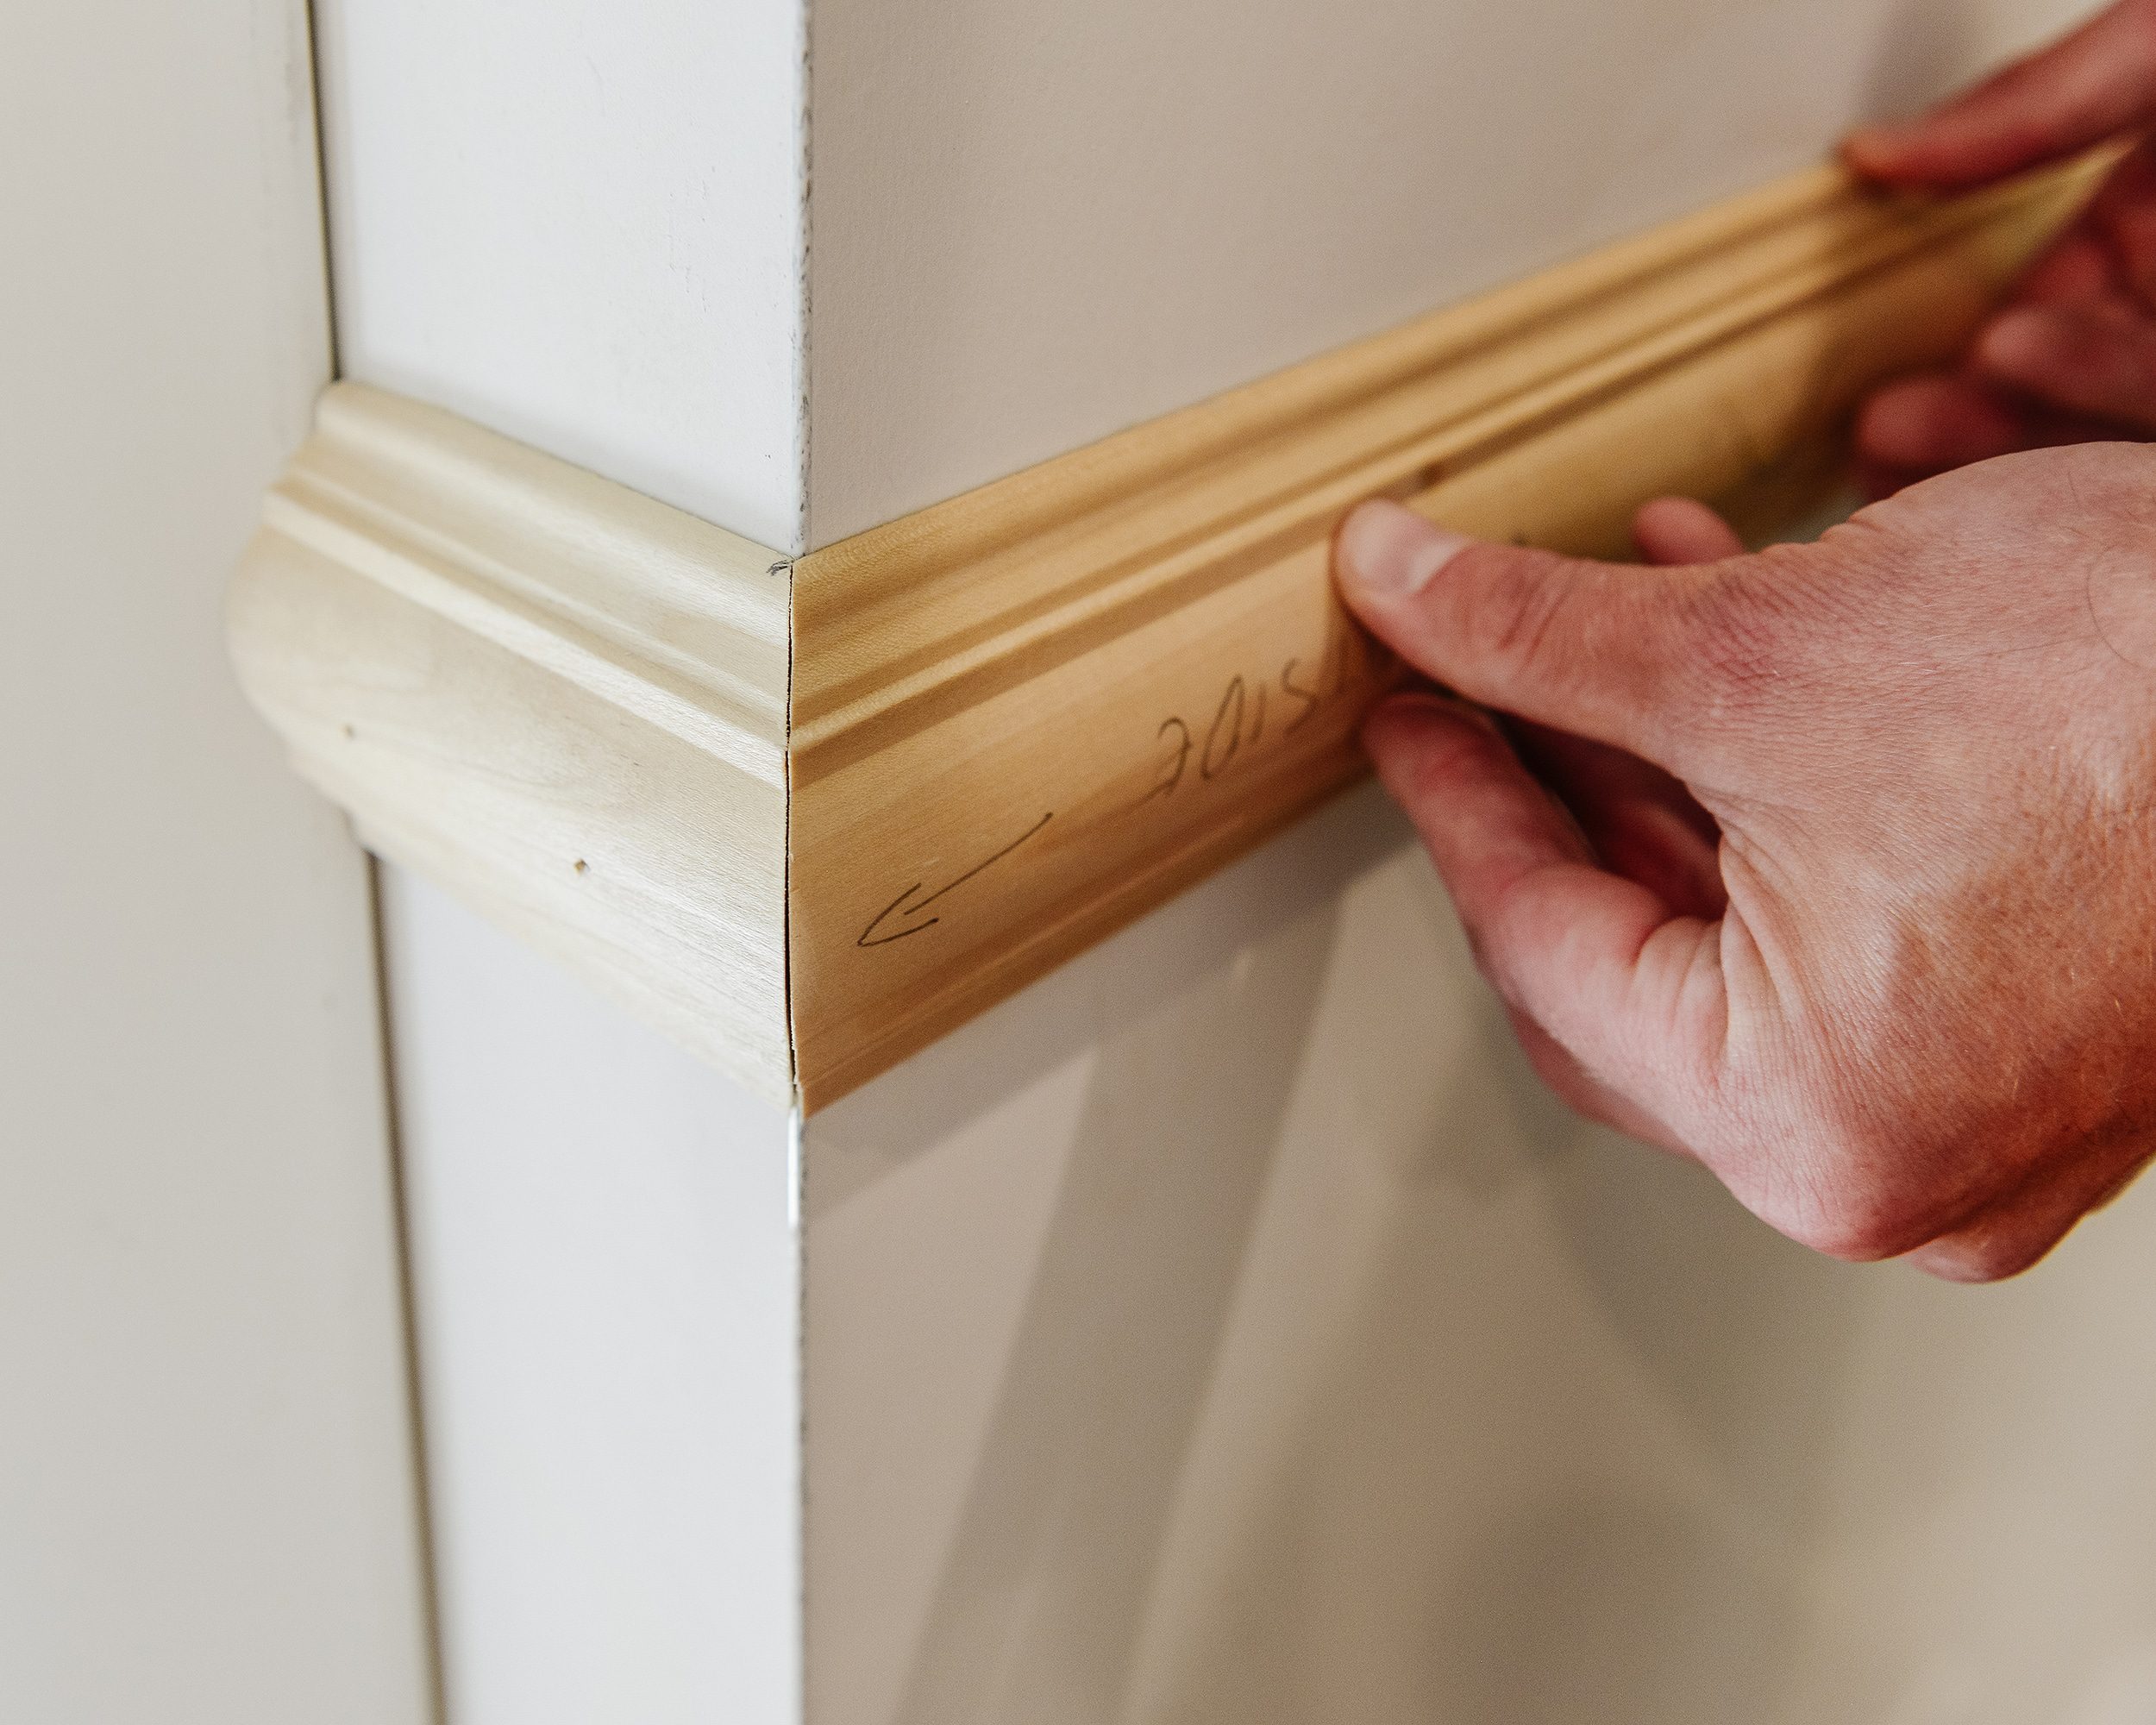
Outside corners were also mitered, creating the prettiest profile!
With the chair rail installed, it was time to make the box molds! Scott made this quick and (mostly) painless by making a slug (that he aptly named Doug the Slug, naturally) from scrap wood. This little template – or ‘slug’ – was used to ensure even spacing from the chair rail, door trim, baseboards and ceilings to the box molding. We decided on a spacing of 3.5”, but the beauty of panel molding is that you can do whatever your heart desires!
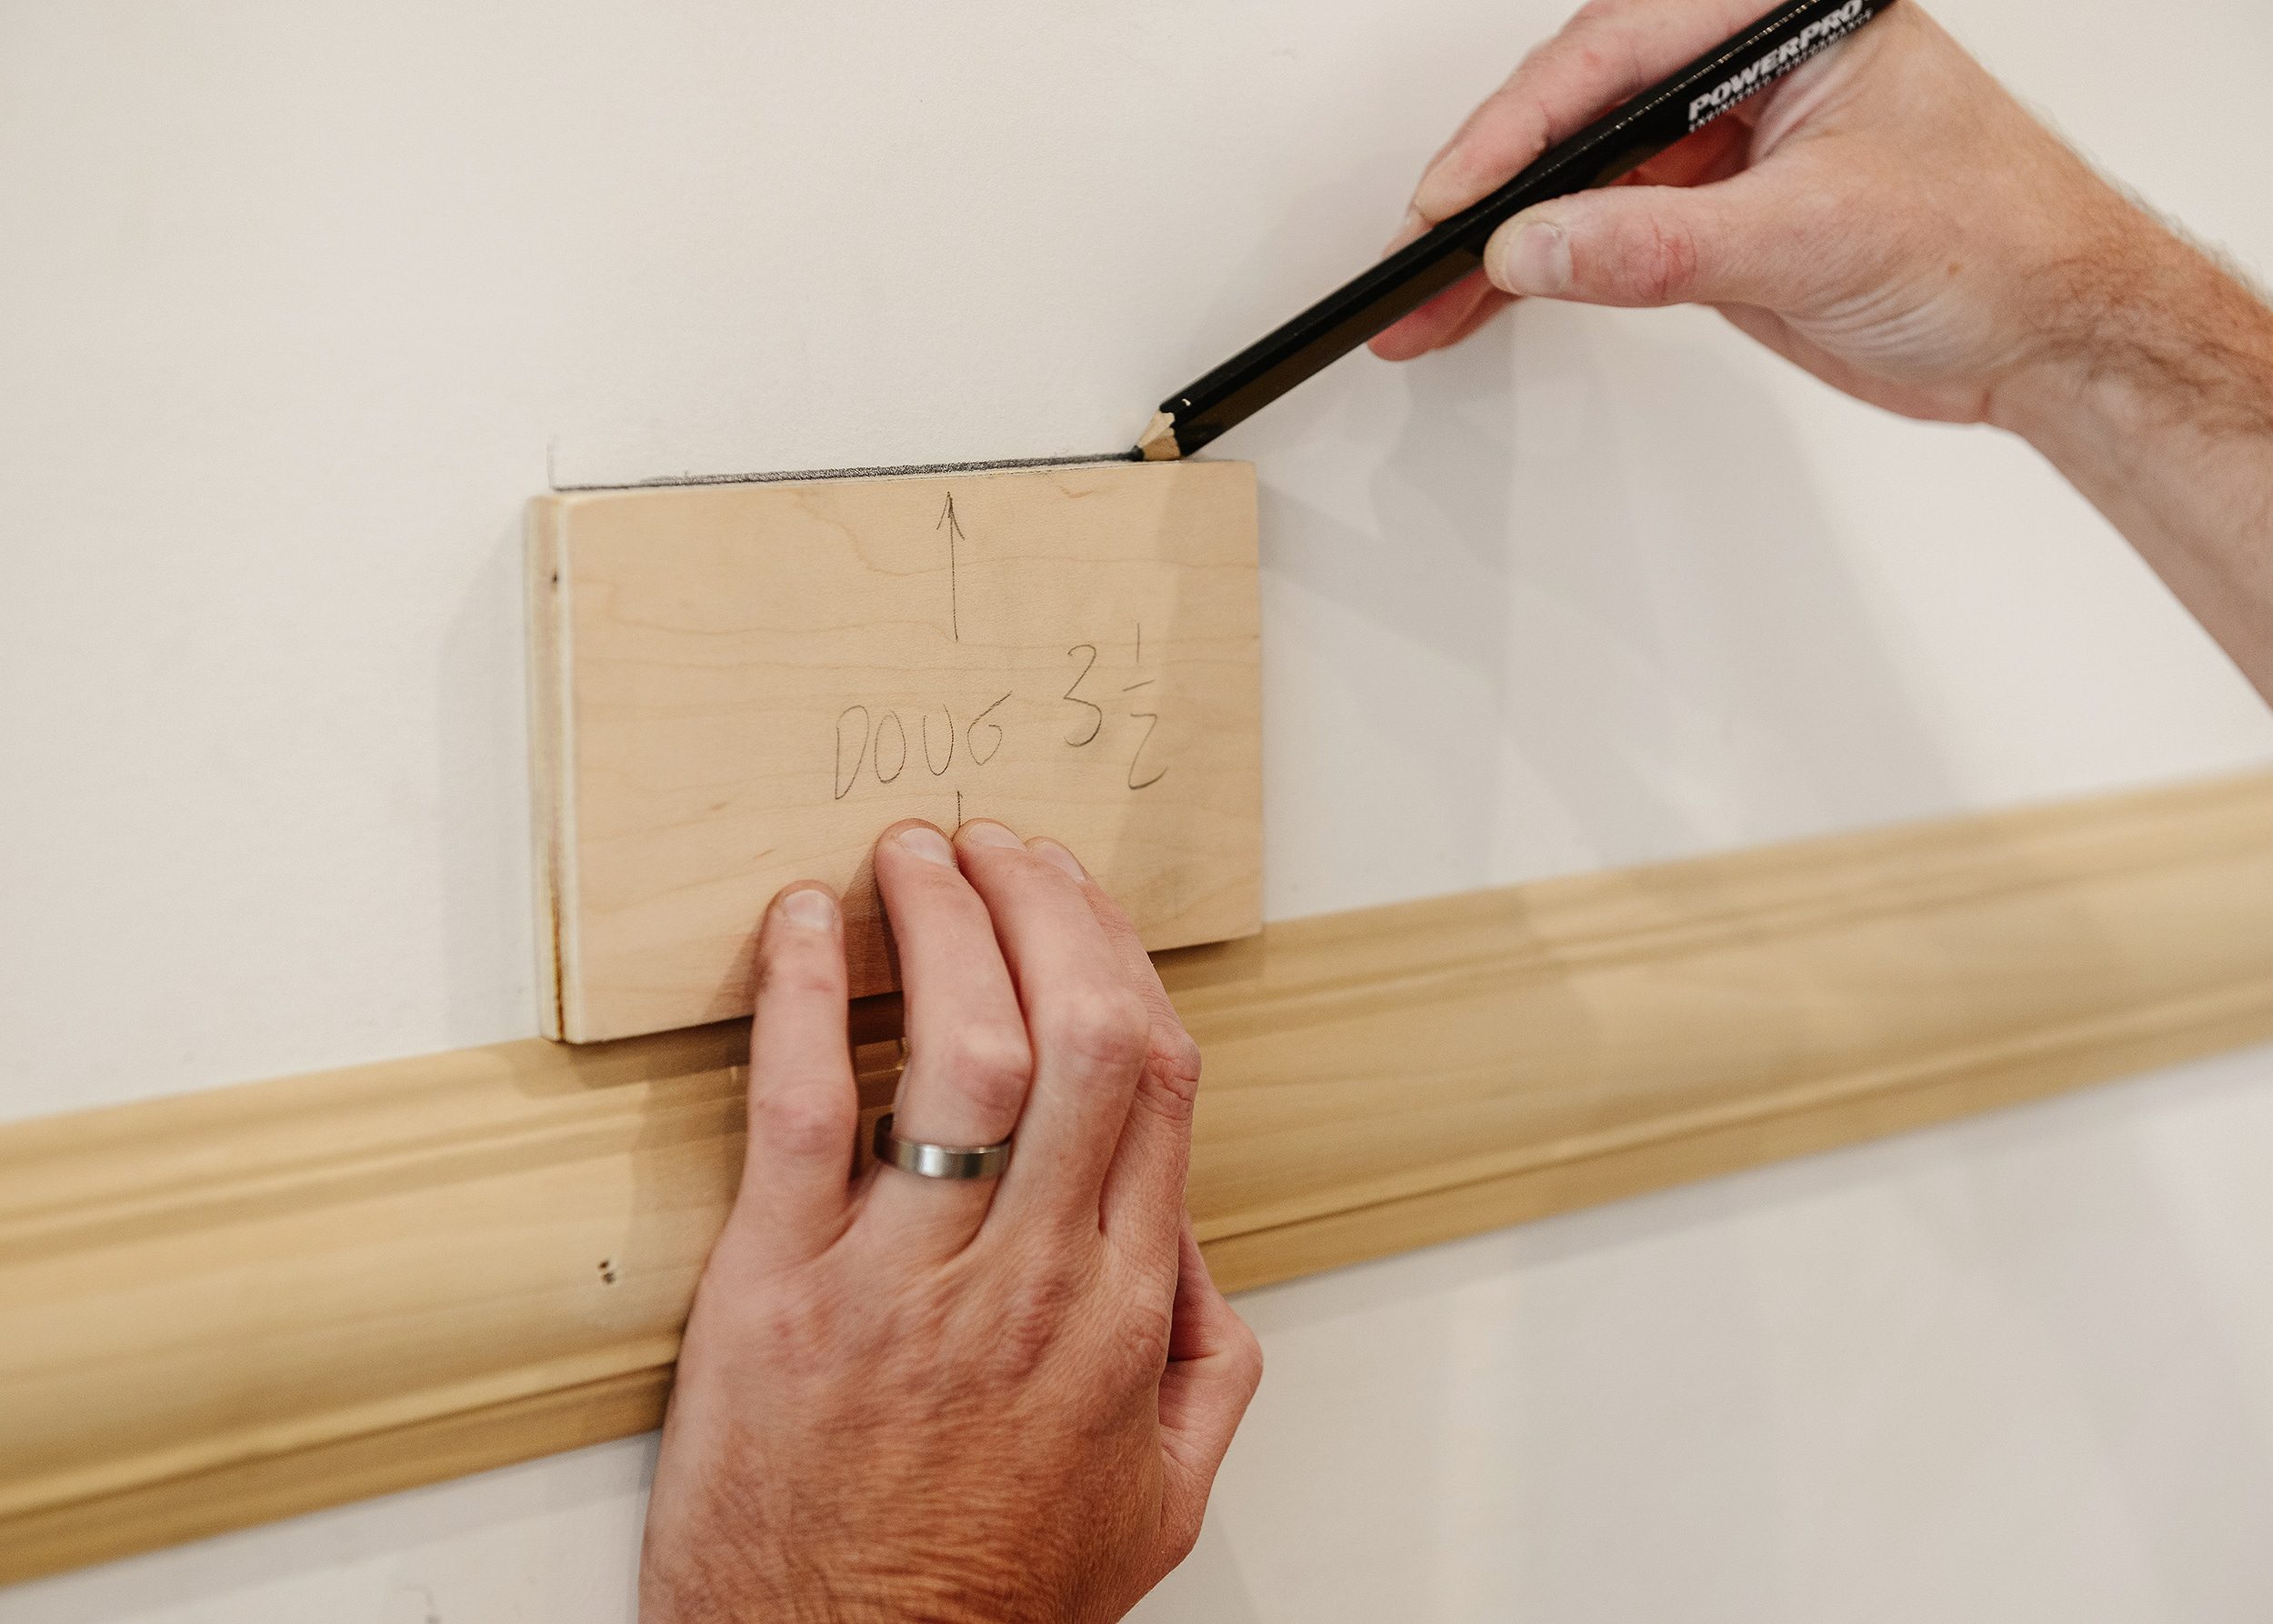
He was even able to use his slugs to install most of the box molding without needing a second hand to help:
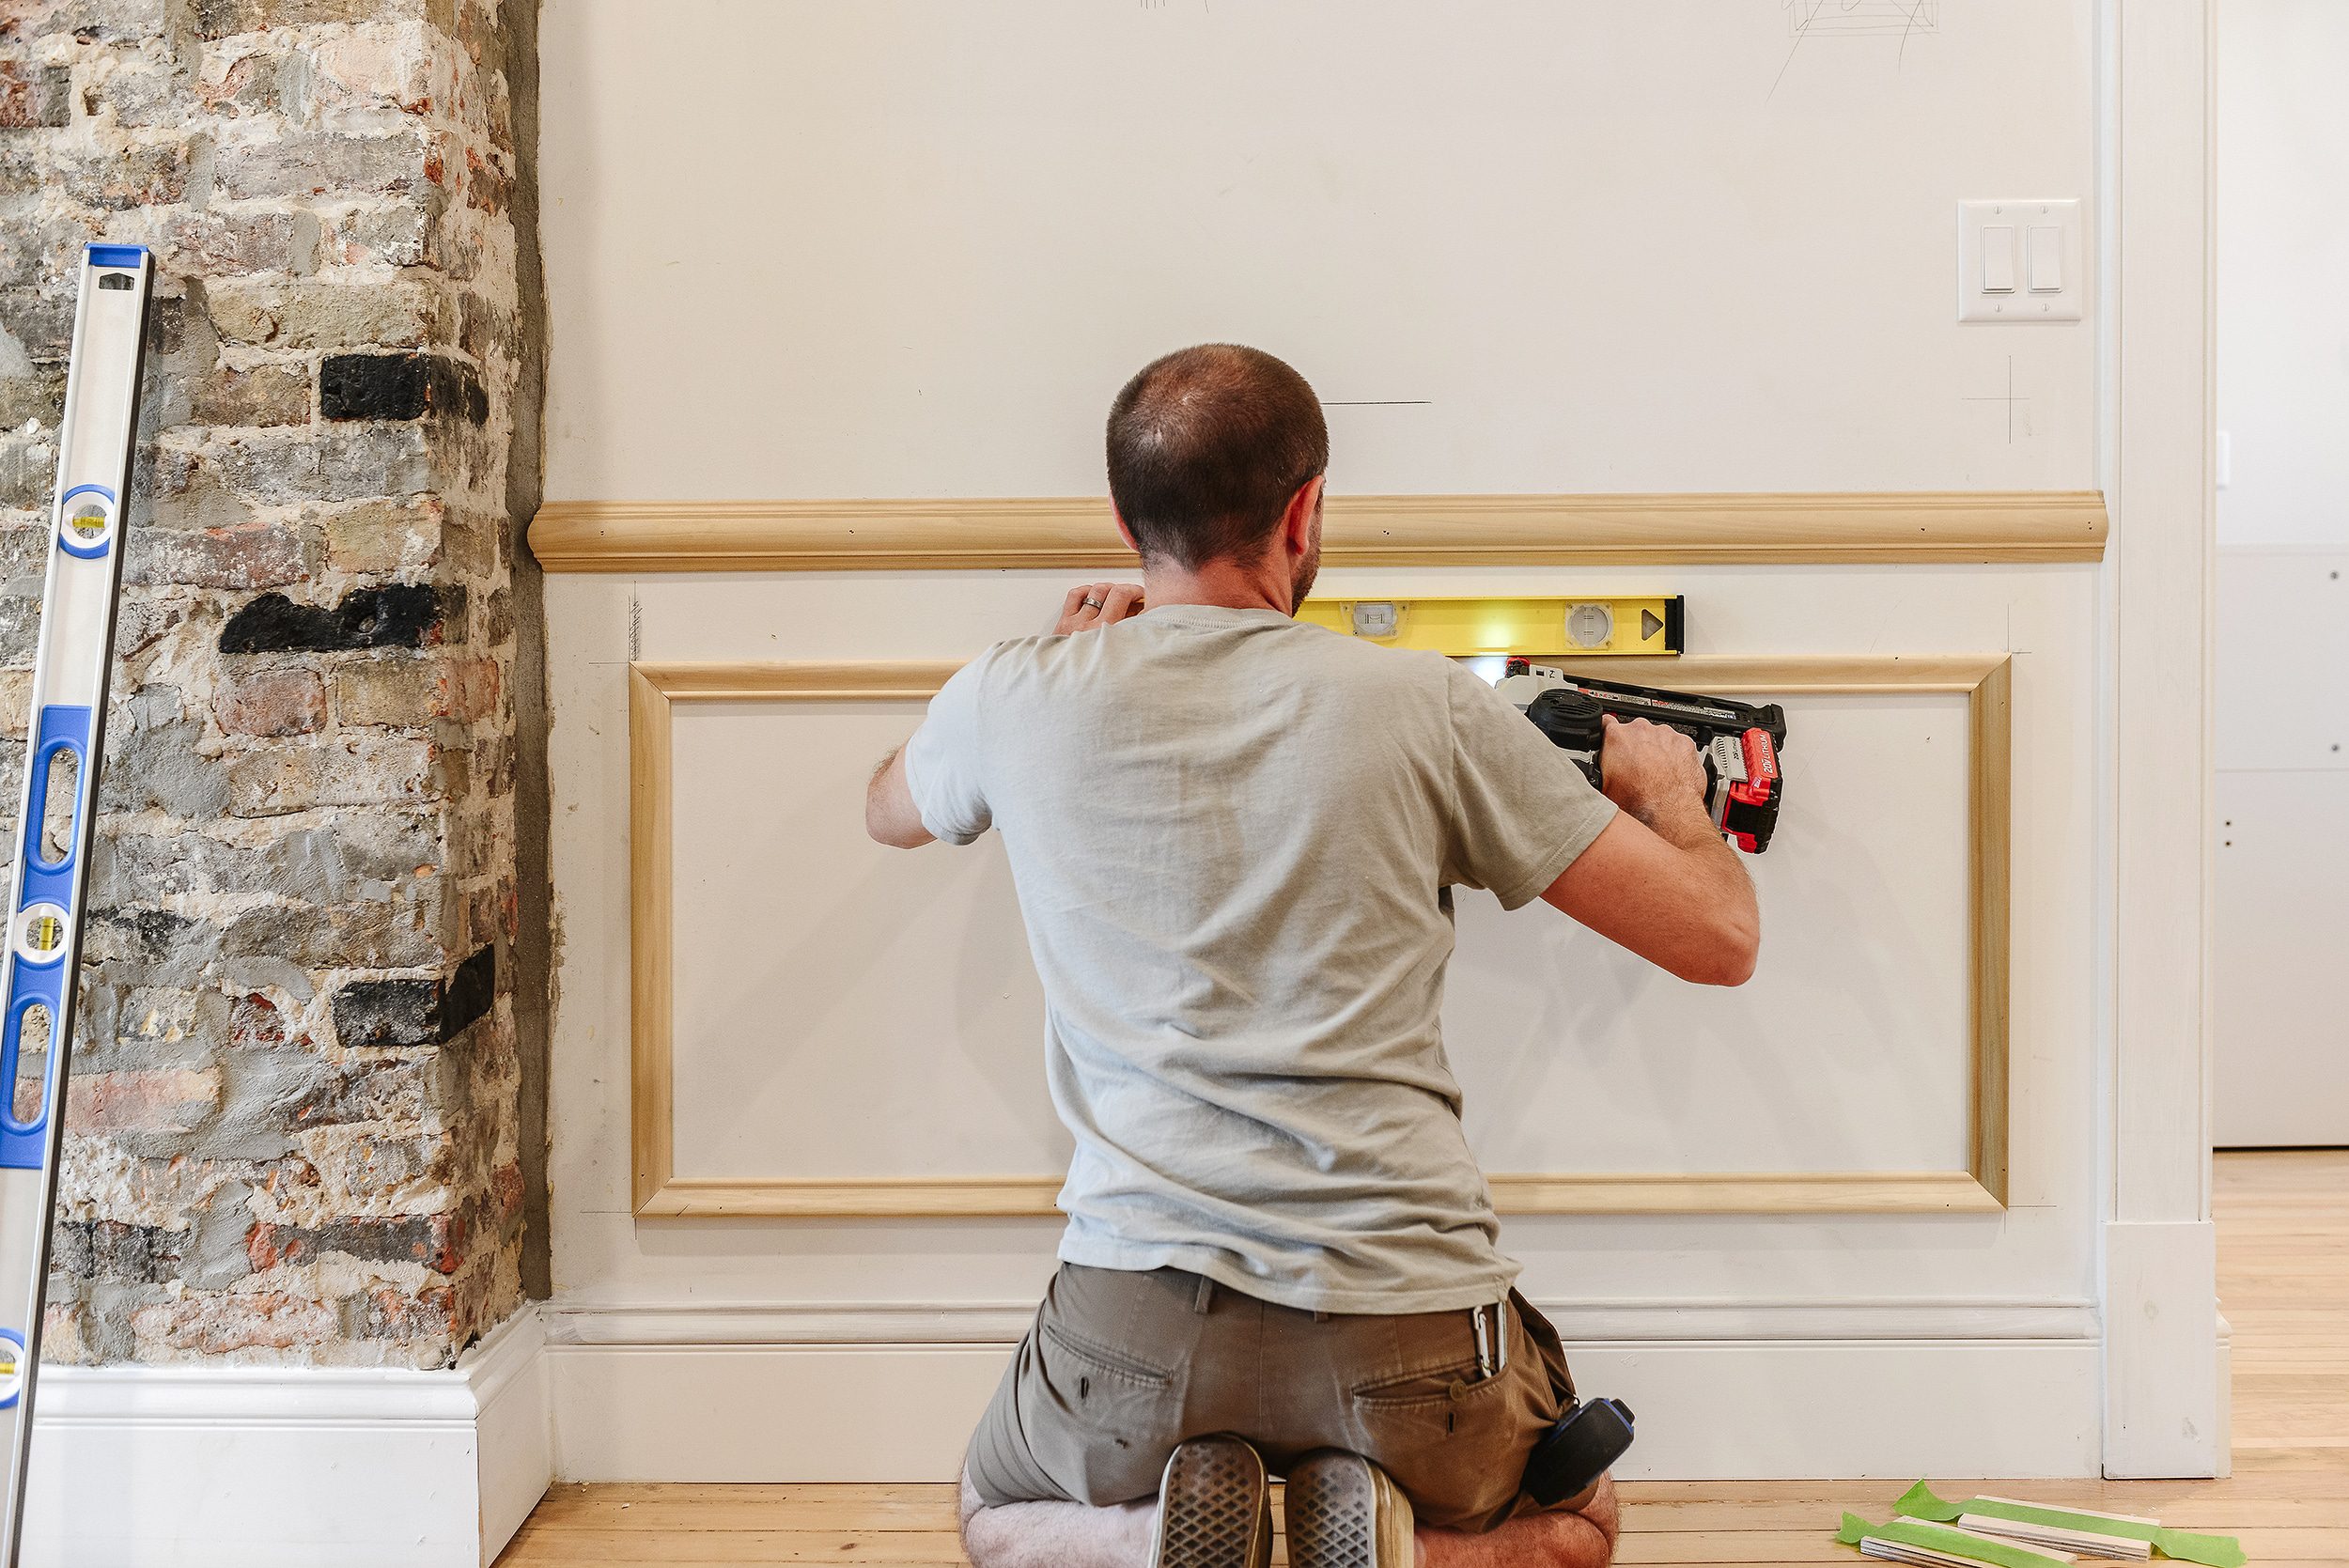
He worked his way around the room, and every now and then we needed to make a decision. Should we wrap the inside corner? (Yes.) Should we add a box above the door and windows? (Yes.) What about below the windows? (Nope.) Again, the final layout and design is personal preference! We had fun figuring it out and creating the best layout we could for this sweet dining room.
With every last piece of trim in place, it was time to caulk! Just like the hutch, the caulk helped to fill in any gaps that could be noticeable once painted. I went around the room carefully, making sure to fill in every edge. This took some time and patience, but a good podcast helps!
3| Prime and Paint from Head-to-Toe!
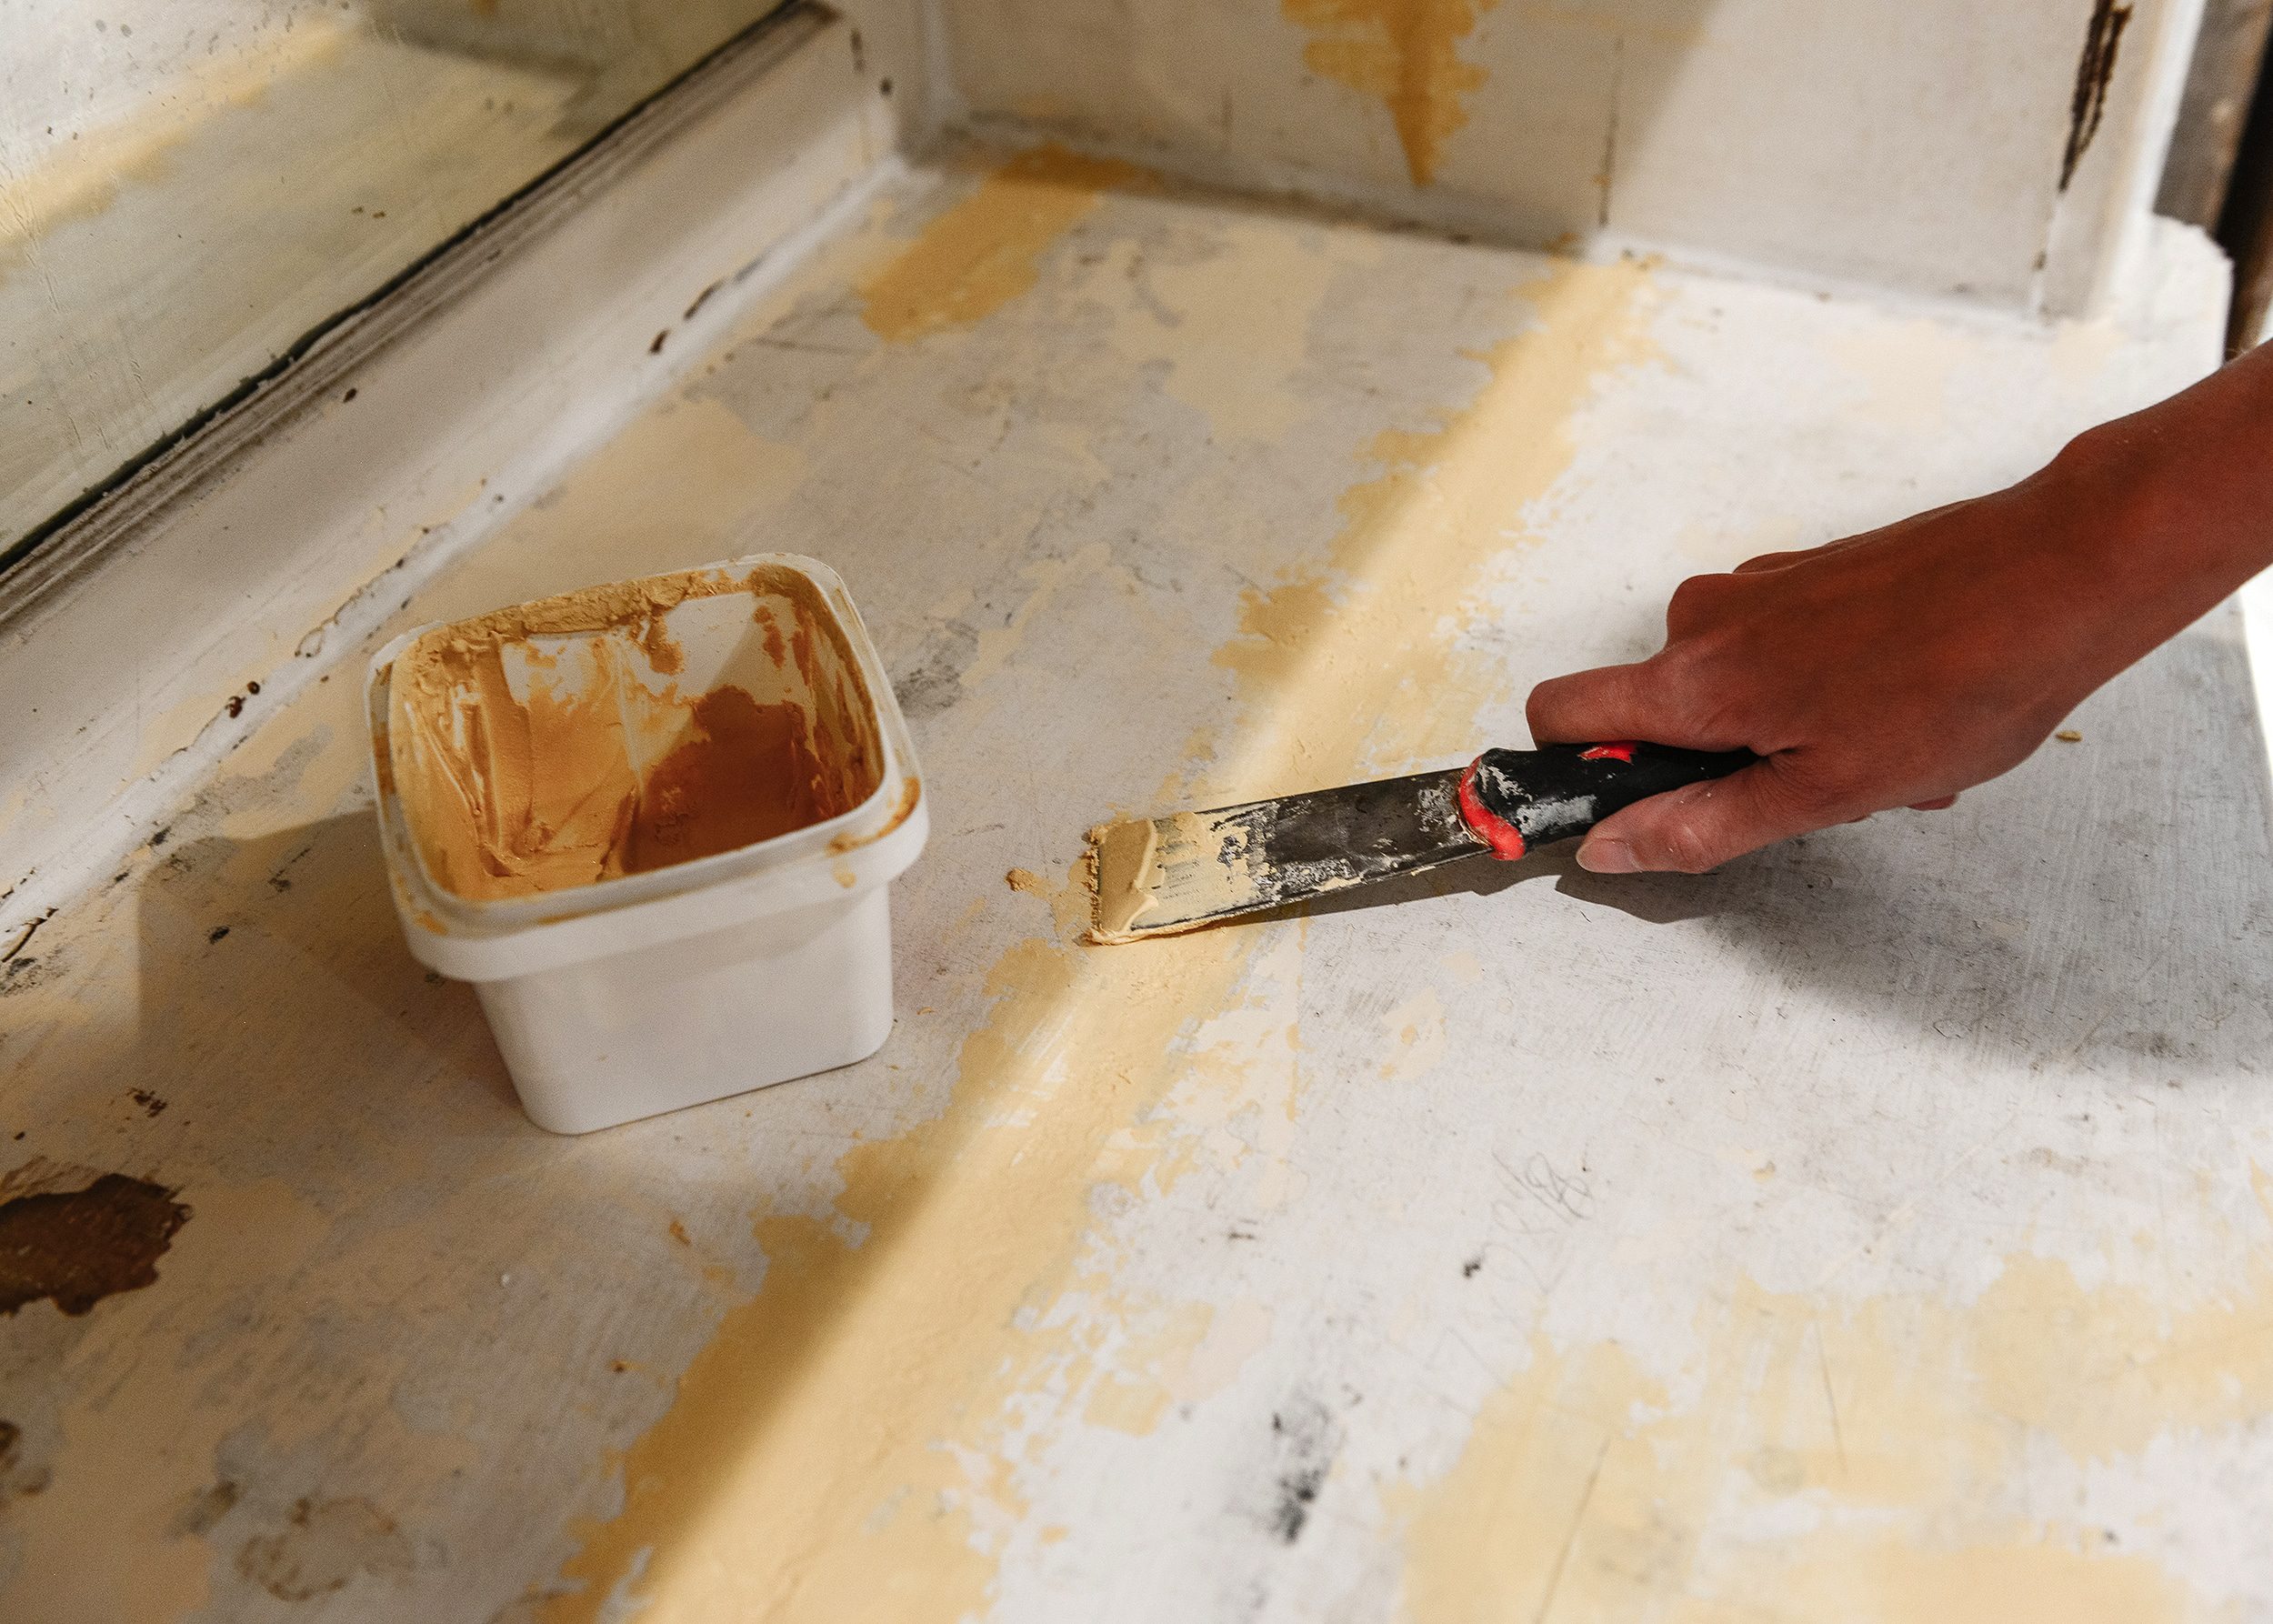
Because all of our panel molding was raw wood, we knew we wanted to prepare it for paint with KILZ Restoration primer. It’s a water-based primer that performs just as well as an oil-based primer. Yes, please! We prefer to use water-based primers over the oil-based counterparts for ease of use and cleanup.
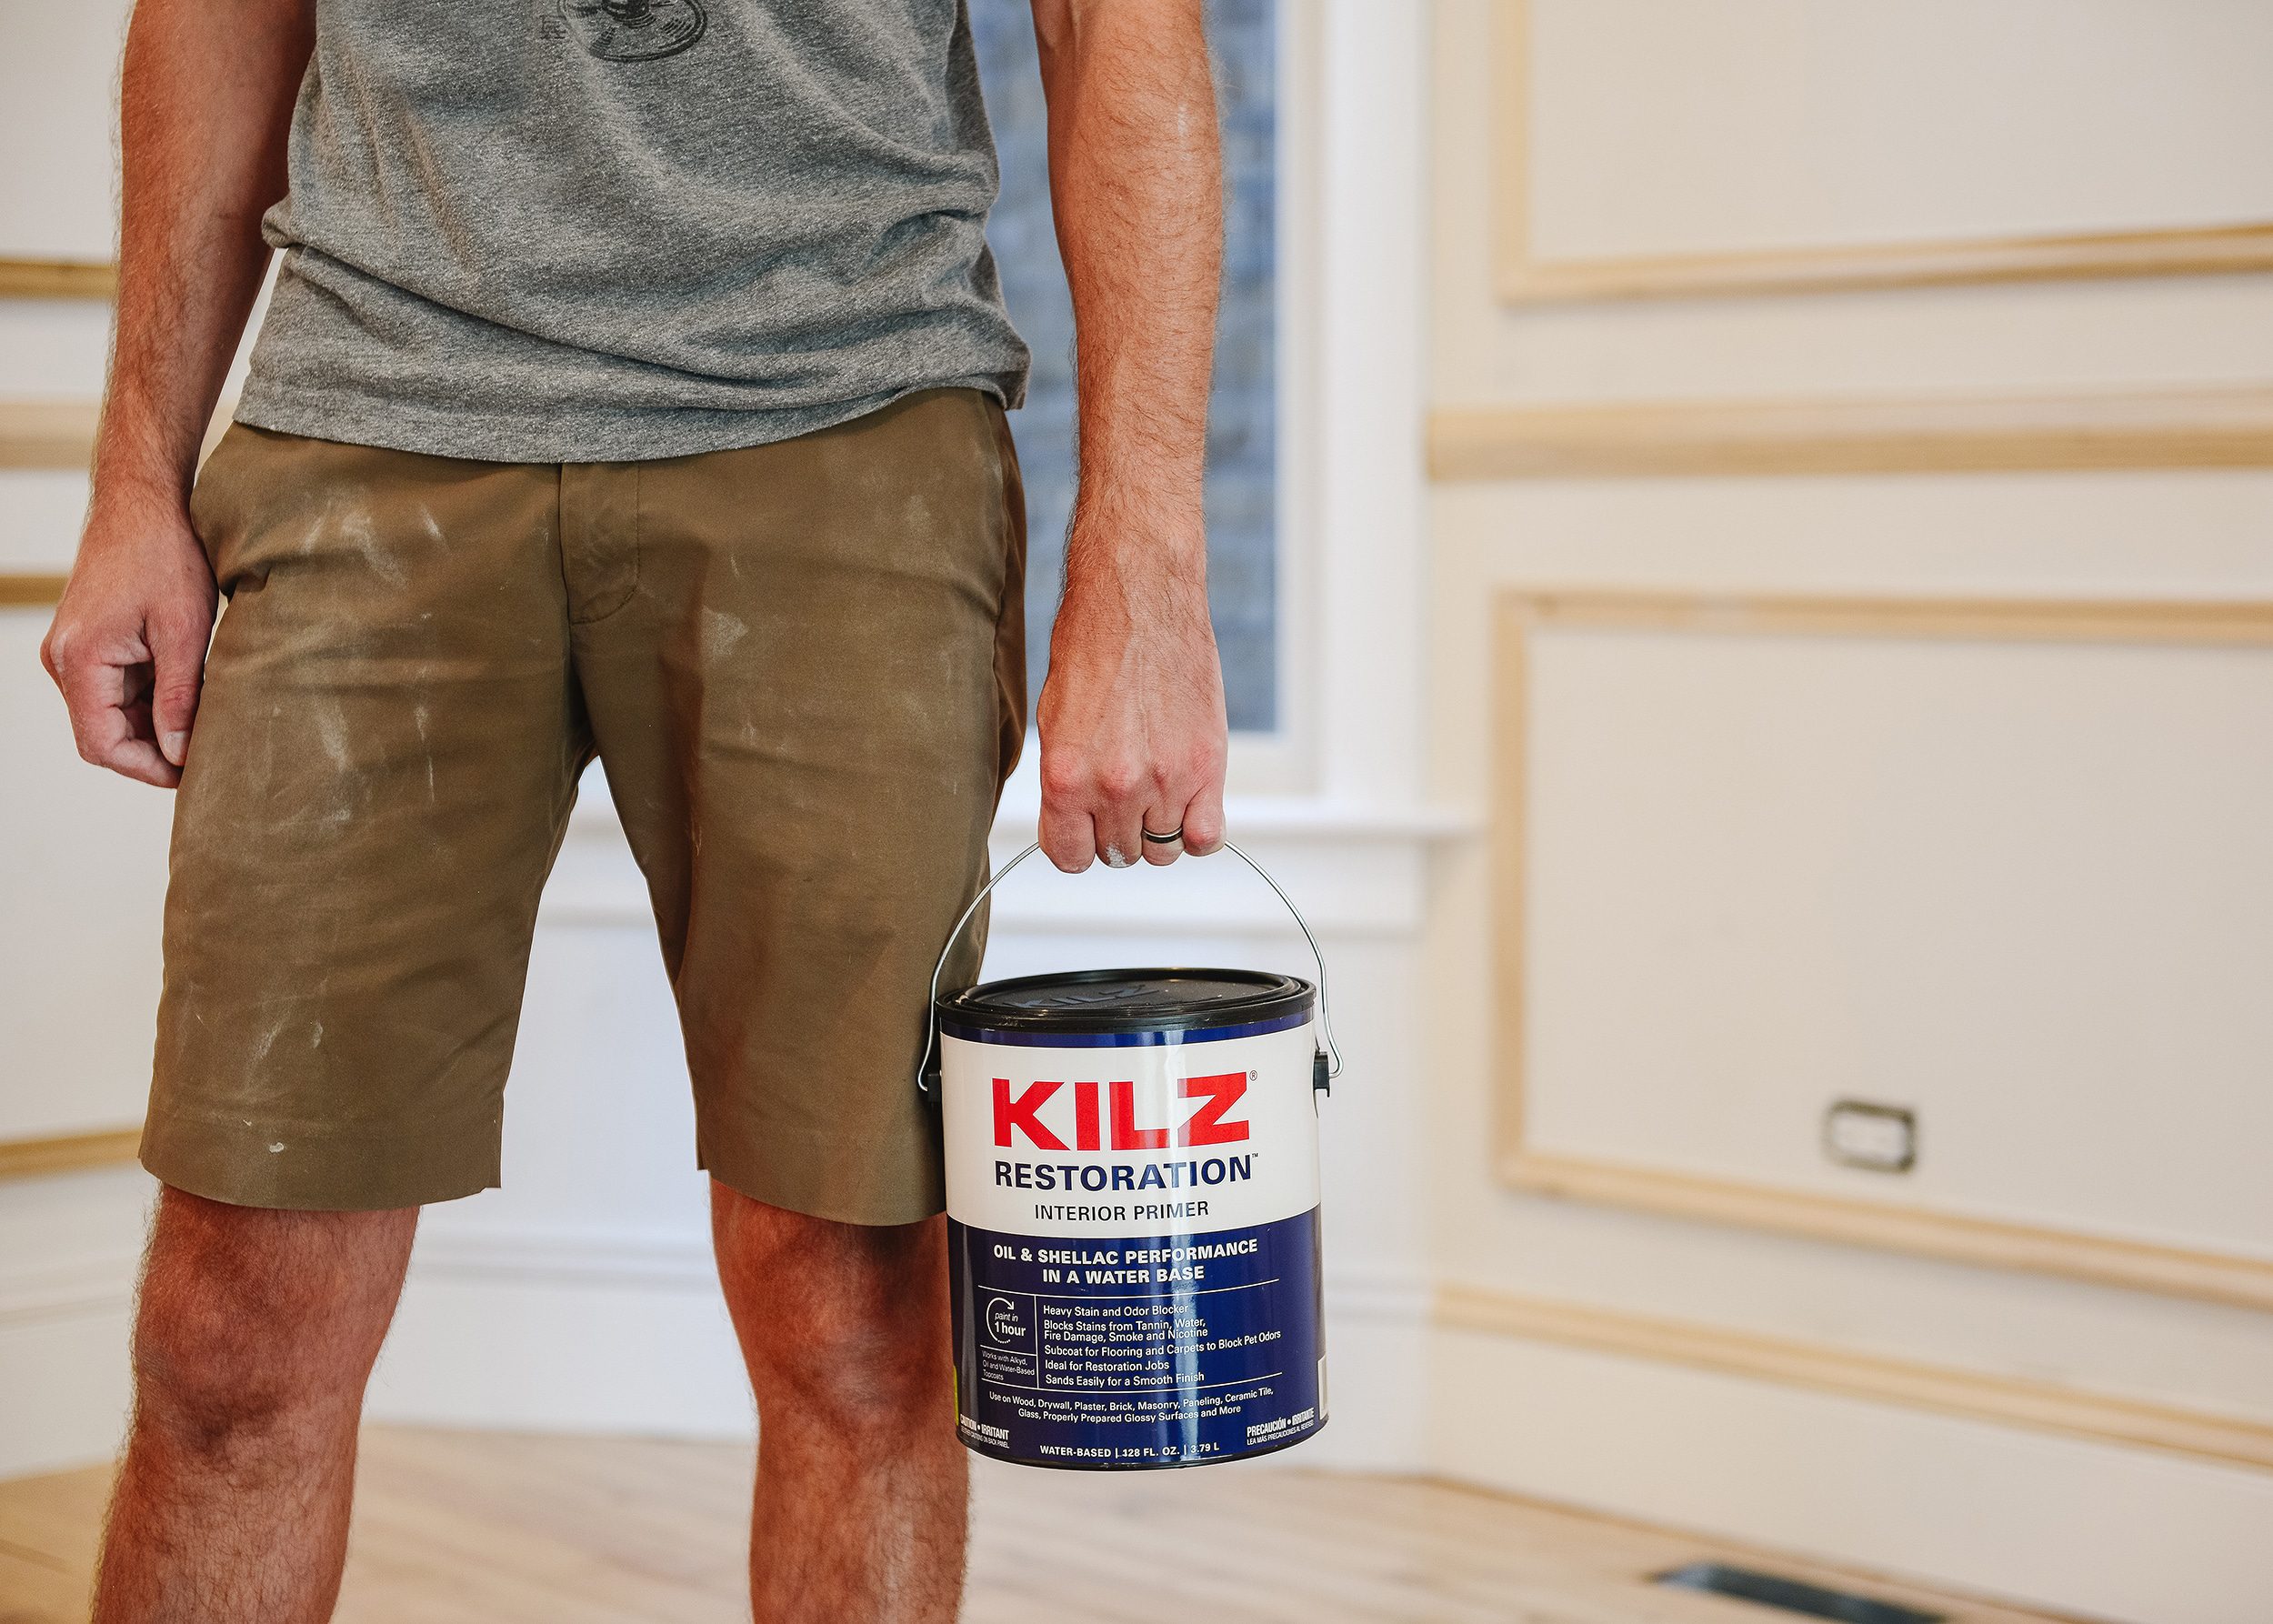
We went around the room and used the primer on all the exposed wood and any bare drywall. Most of the drywall had been primed before we started, but there were still areas that had been patched along the way. Although we were priming all new surfaces, KILZ Restoration interior primer is a good bet for stains, too! Think: water damage, pet stains, smoke, grease and more. Already, the room began looking shiny and new!
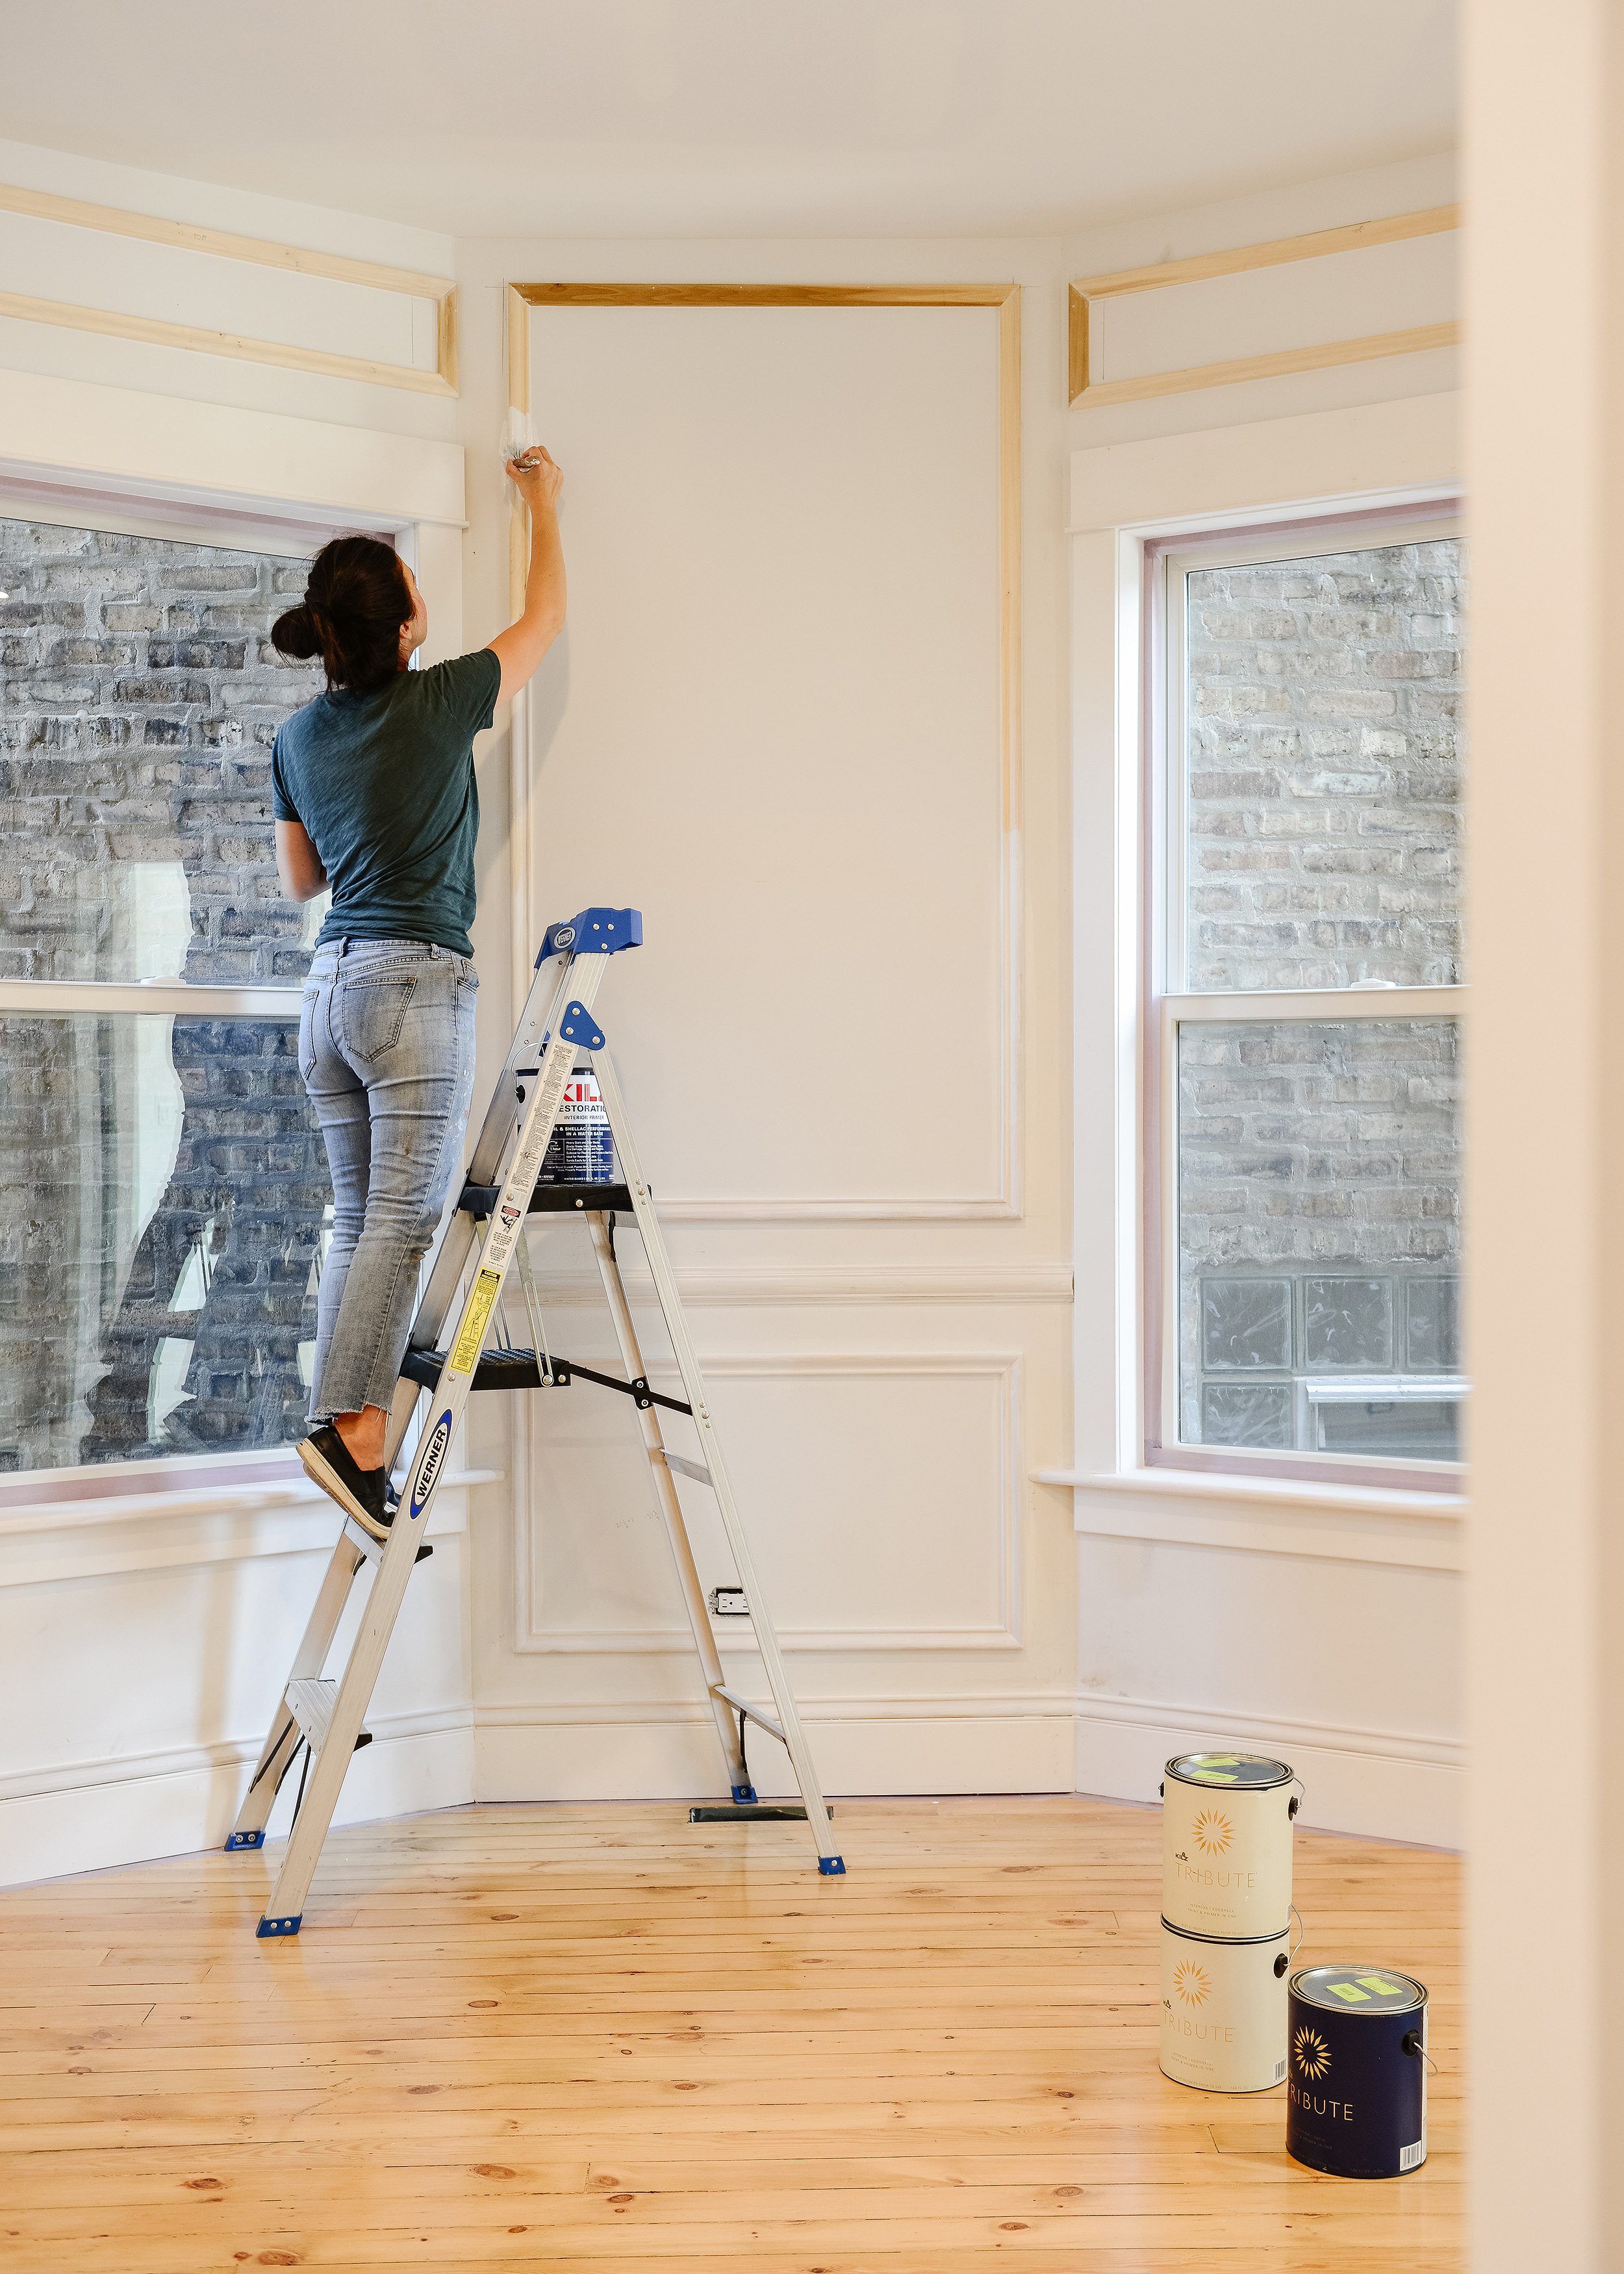
Once all of the raw wood was primed, things got really fun. It was time to choose paint! We would be using paint from the KILZ Tribute line, and I have to say, the hardest part of this entire makeover was narrowing down the color. The Tribute line of paint is a beautifully curated collection of colors, and we couldn’t decide what we wanted. Terracotta? Chambray? Stone Cold? They were all stunning.
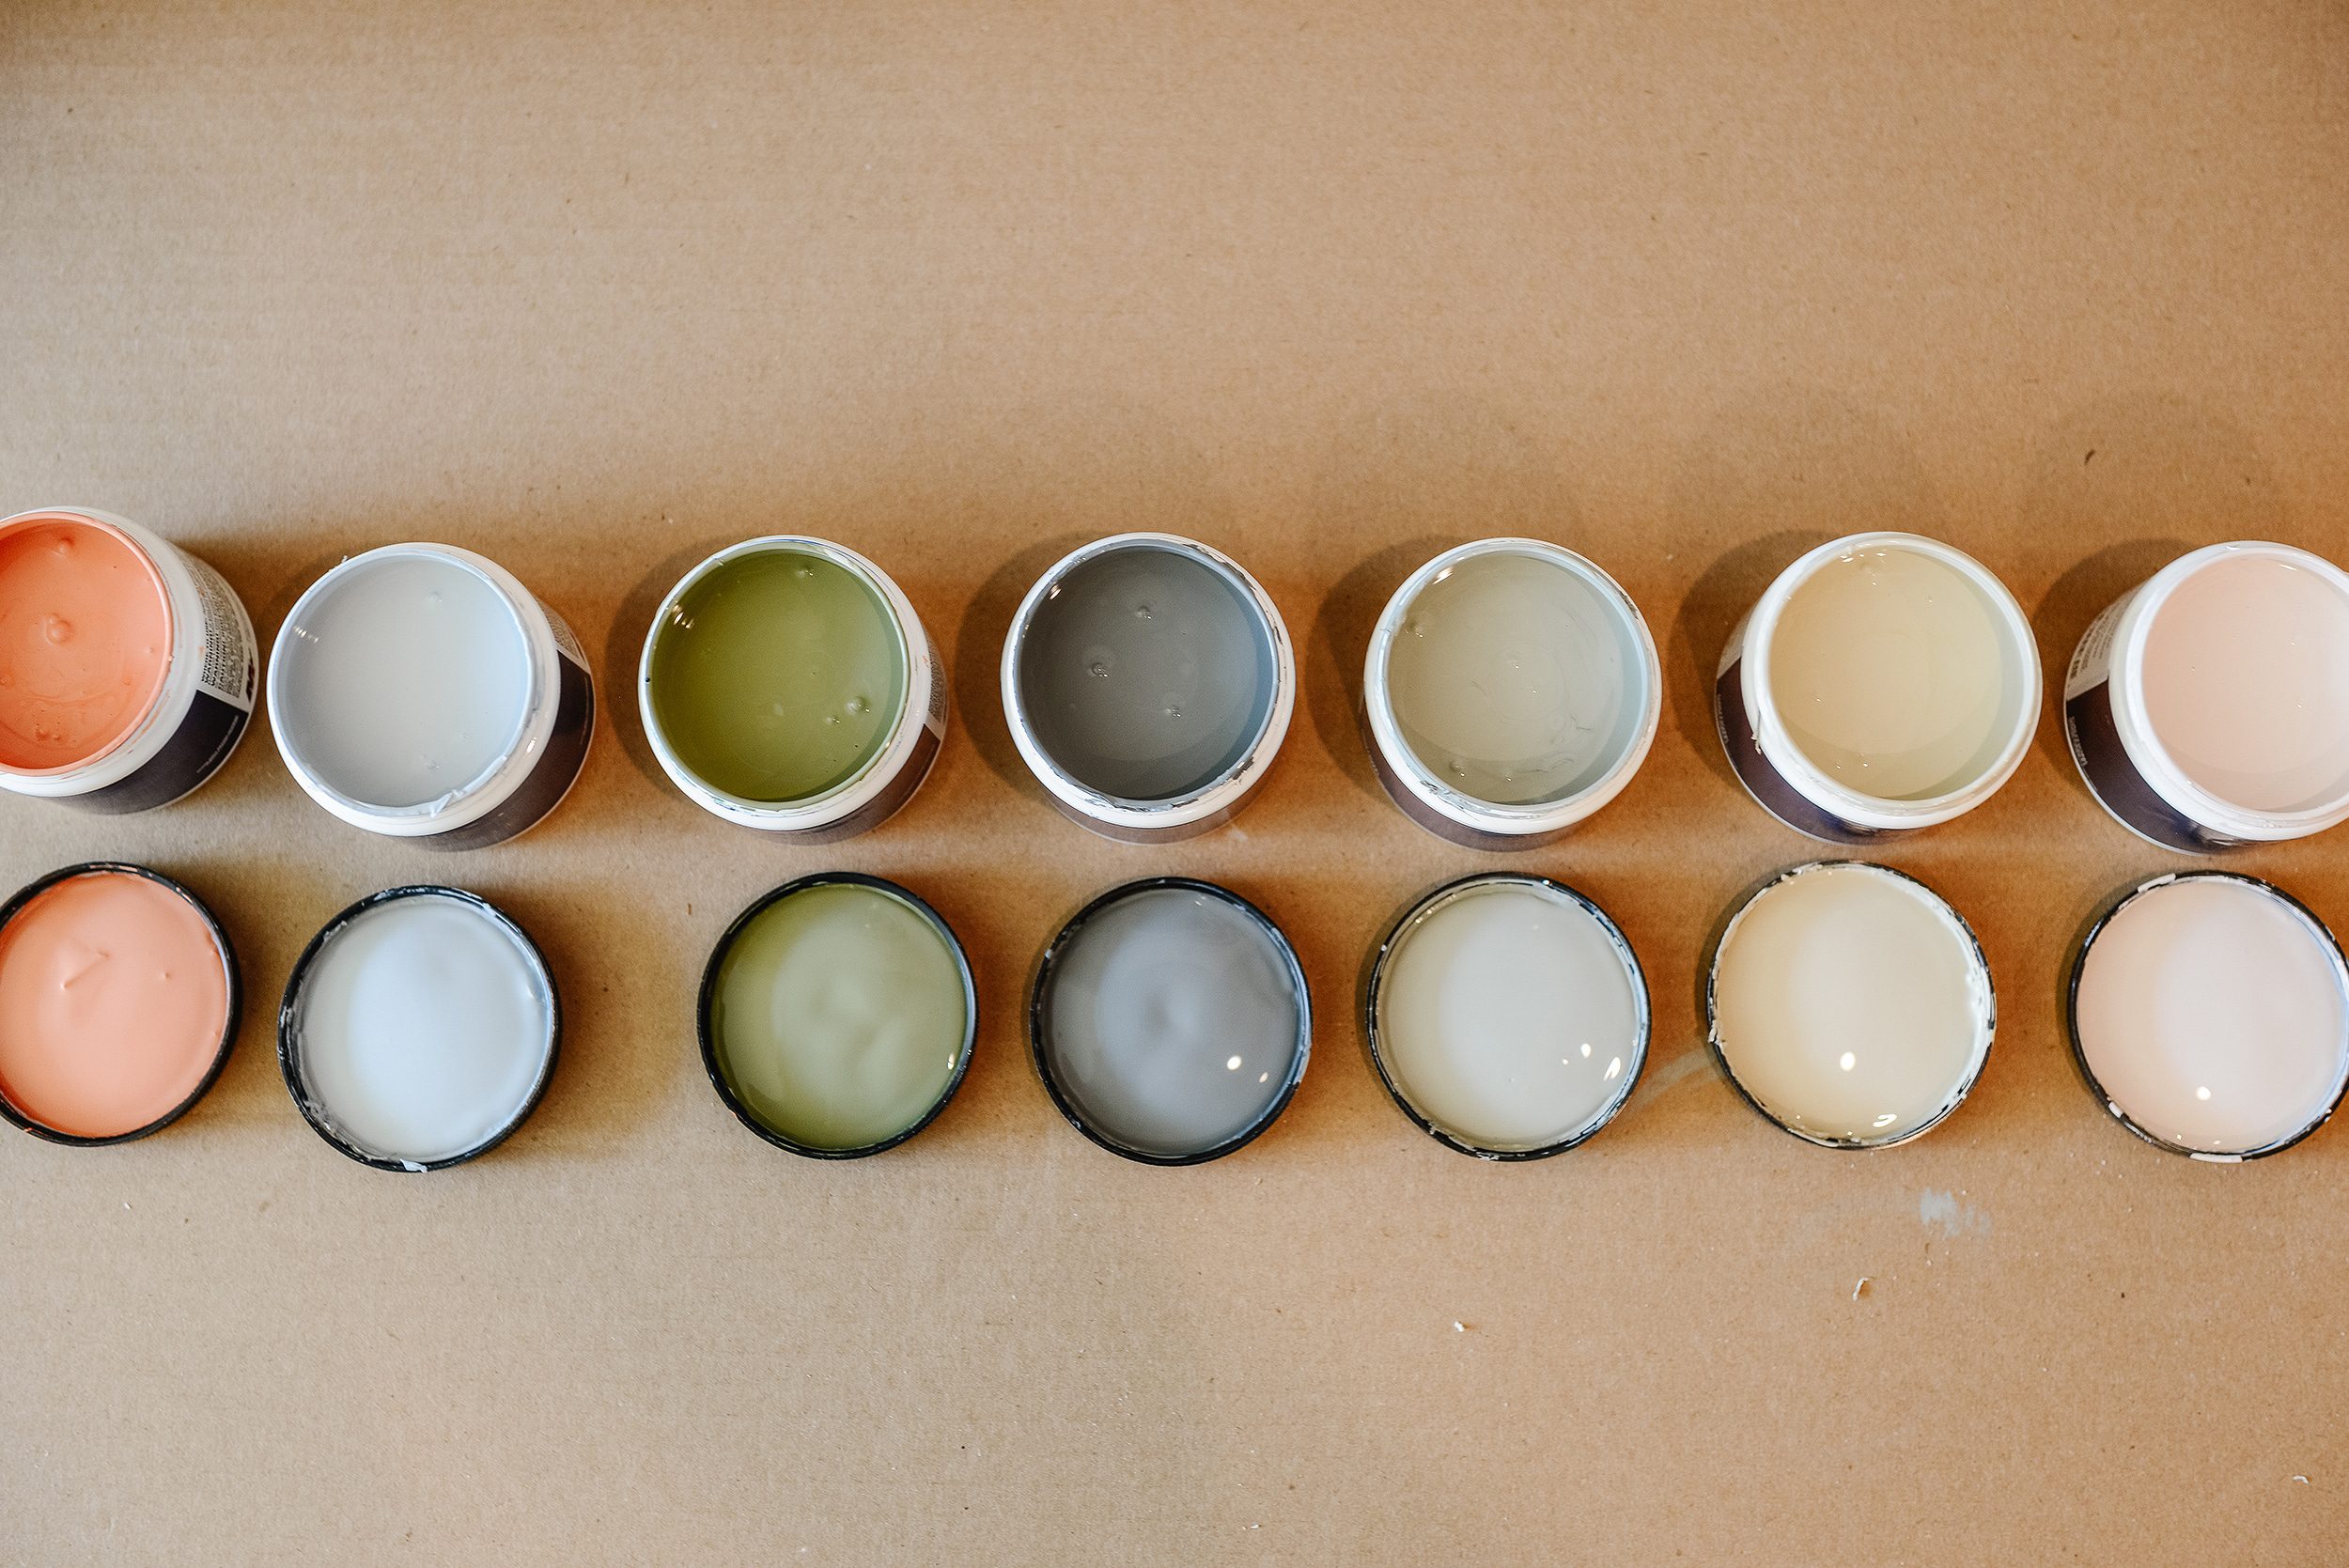
I ordered countless sample pots from Amazon, and I used foam brushes to get them on the wall around the room. But as soon as I brushed the first stroke of Meadow Mauve on the walls, I knew. Meadow Mauve was The One.

Although we landed on a single color for the whole room, I ended up ordering two different sheens! We used an eggshell finish for the walls and most millwork, and we used satin for the door and hutch. Both finishes are equally wipeable, but I thought that the satin sheen would be a fun effect and more durable on those highly used surfaces.
Scott and I usually fall into a natural rhythm when we paint. I trim, he rolls. But in this case, we both grabbed a brush and started trimming – there was a lot of ground to cover, with countless nooks and crannies that a roller wouldn’t be able to reach!
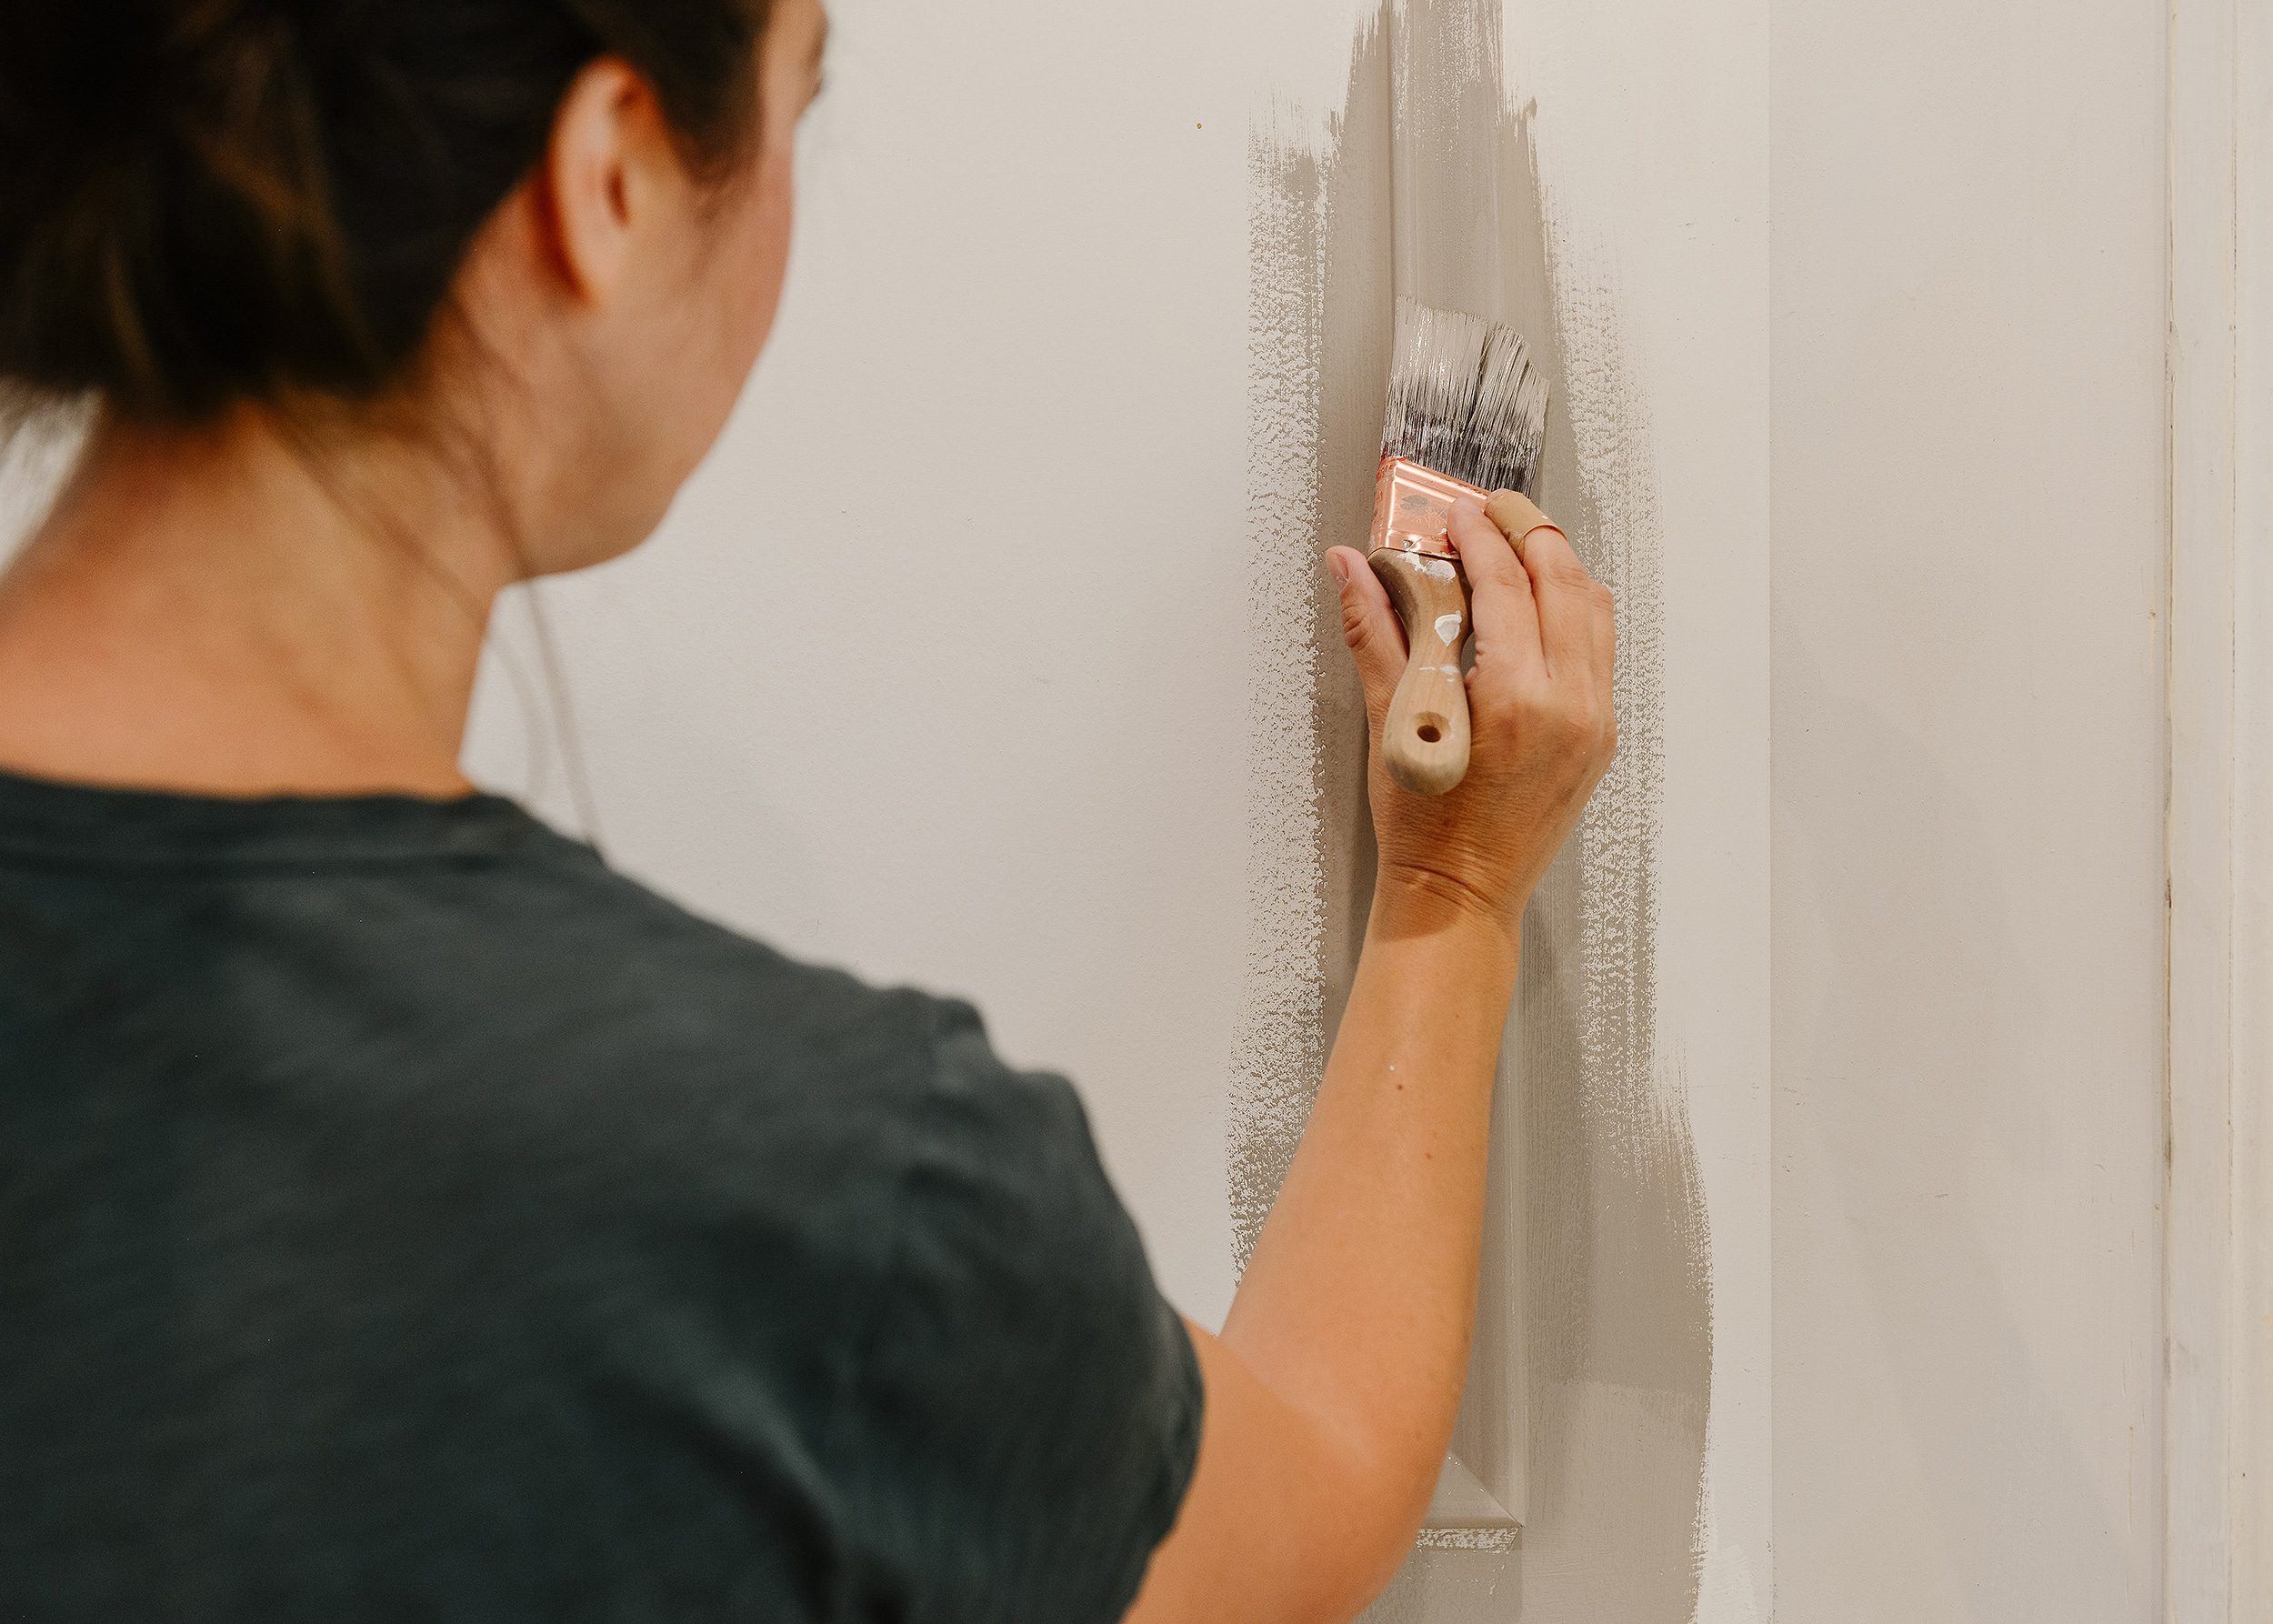

This was our first time using KILZ Tribute, and we couldn’t stop remarking on how buttery smooth it was! It’s a low VOC paint with high stain-blocking capabilities. In the photo above, you can see how well it covers after just one coat!
Our Whole Room Reveal!
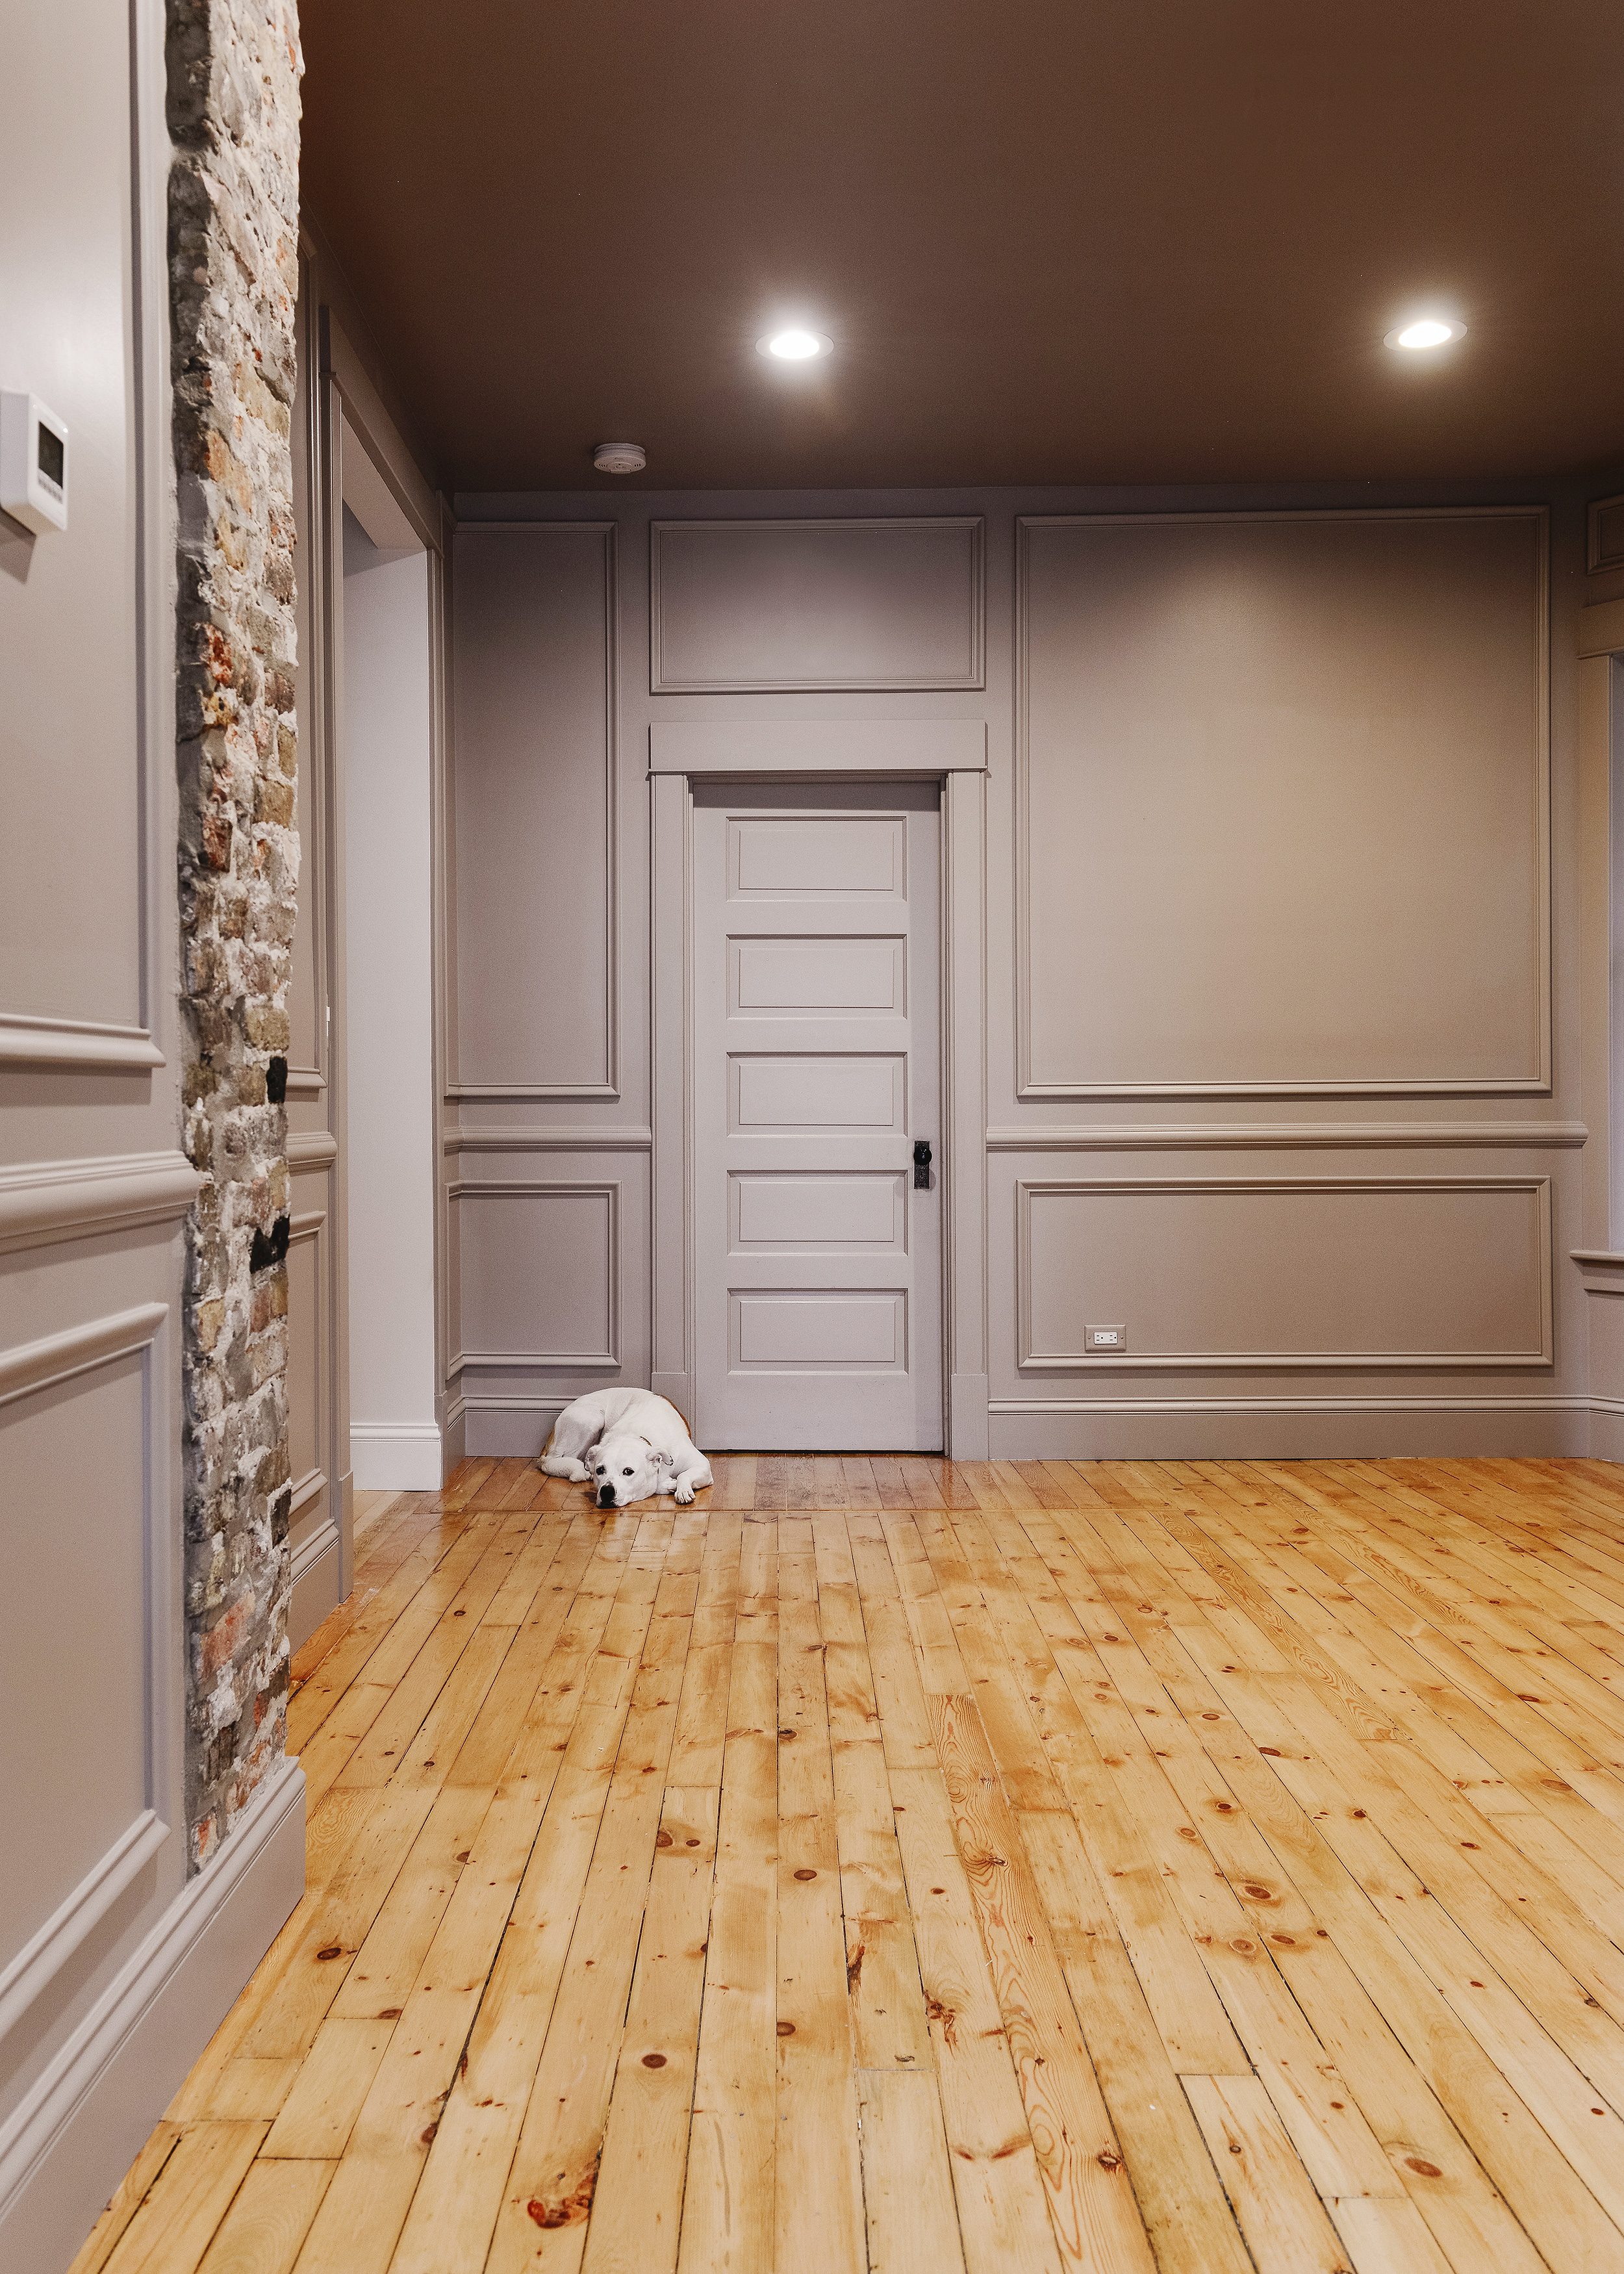
Friends, are you ready? We are over the moon with the results and the floor-to-ceiling effect of using a single color. Our hearts sing every time we step into this room!
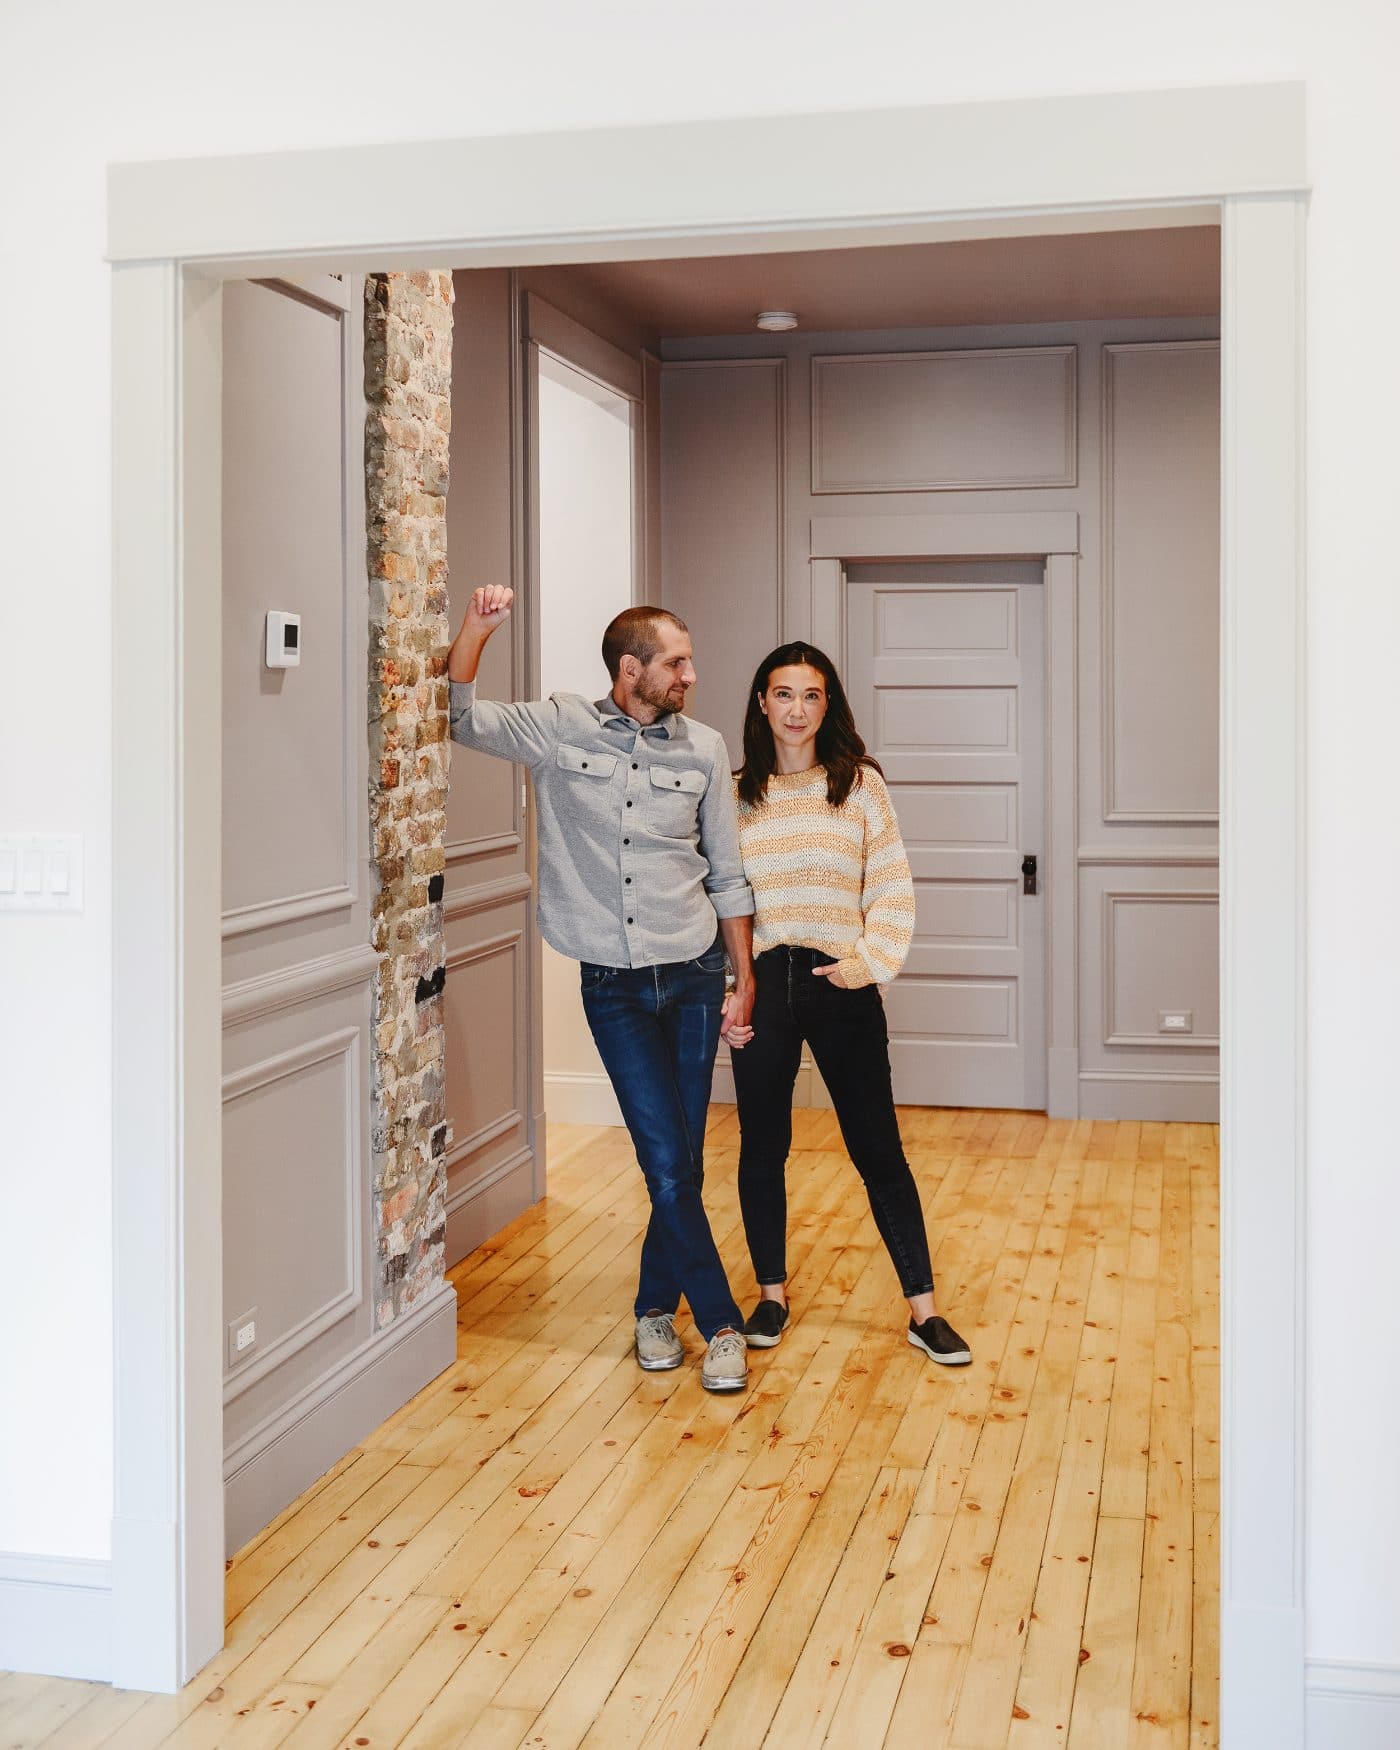
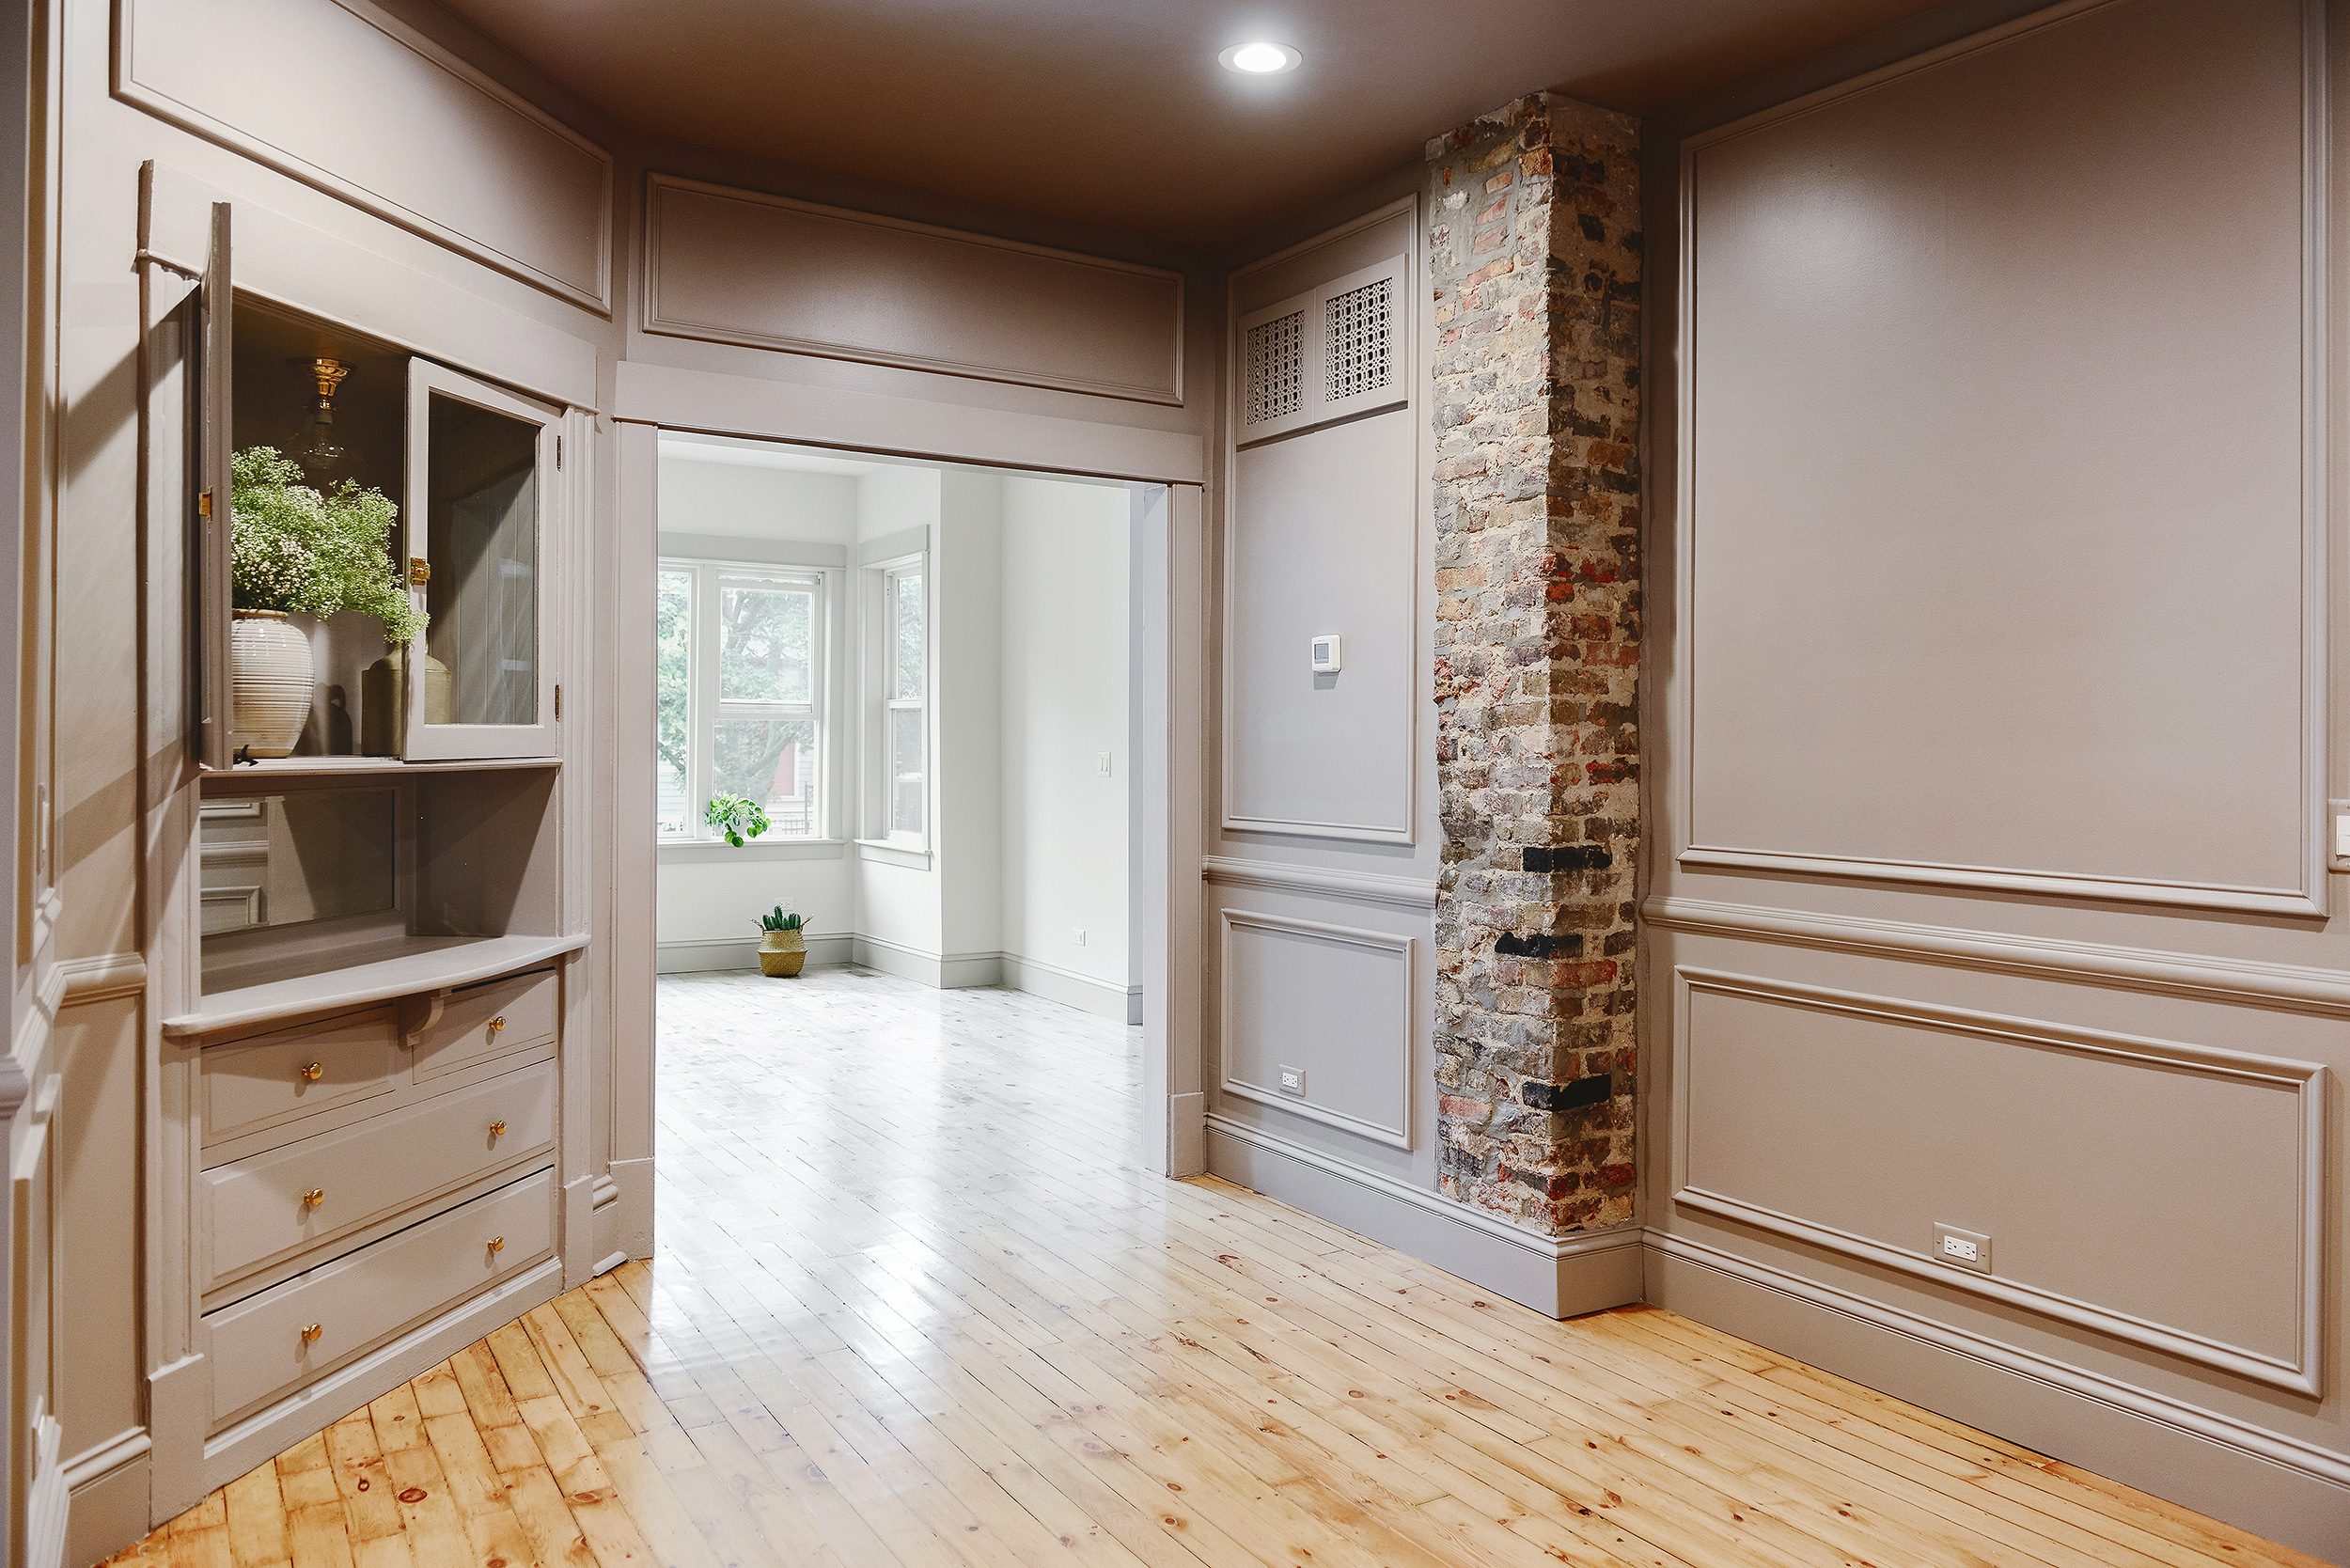
This mid-tone color highlights our panel molding in the prettiest way. The shadows and light around the contours of the molding is mesmerizing. The room feels calm yet moody, dramatic yet fresh. Is Meadow Mauve my soulmate? I think yes.
Meadow Mauve is a shapeshifter. She’s warm in the morning, cool as the sun goes down. The color leans lavender, but on an overcast day, we see hints of taupe. Where the sun hits, we might see blue or blush. In the corners and shadows of the room, she’s rich and refined. Yes, Scott was right: Meadow Mauve is most definitely a hug.
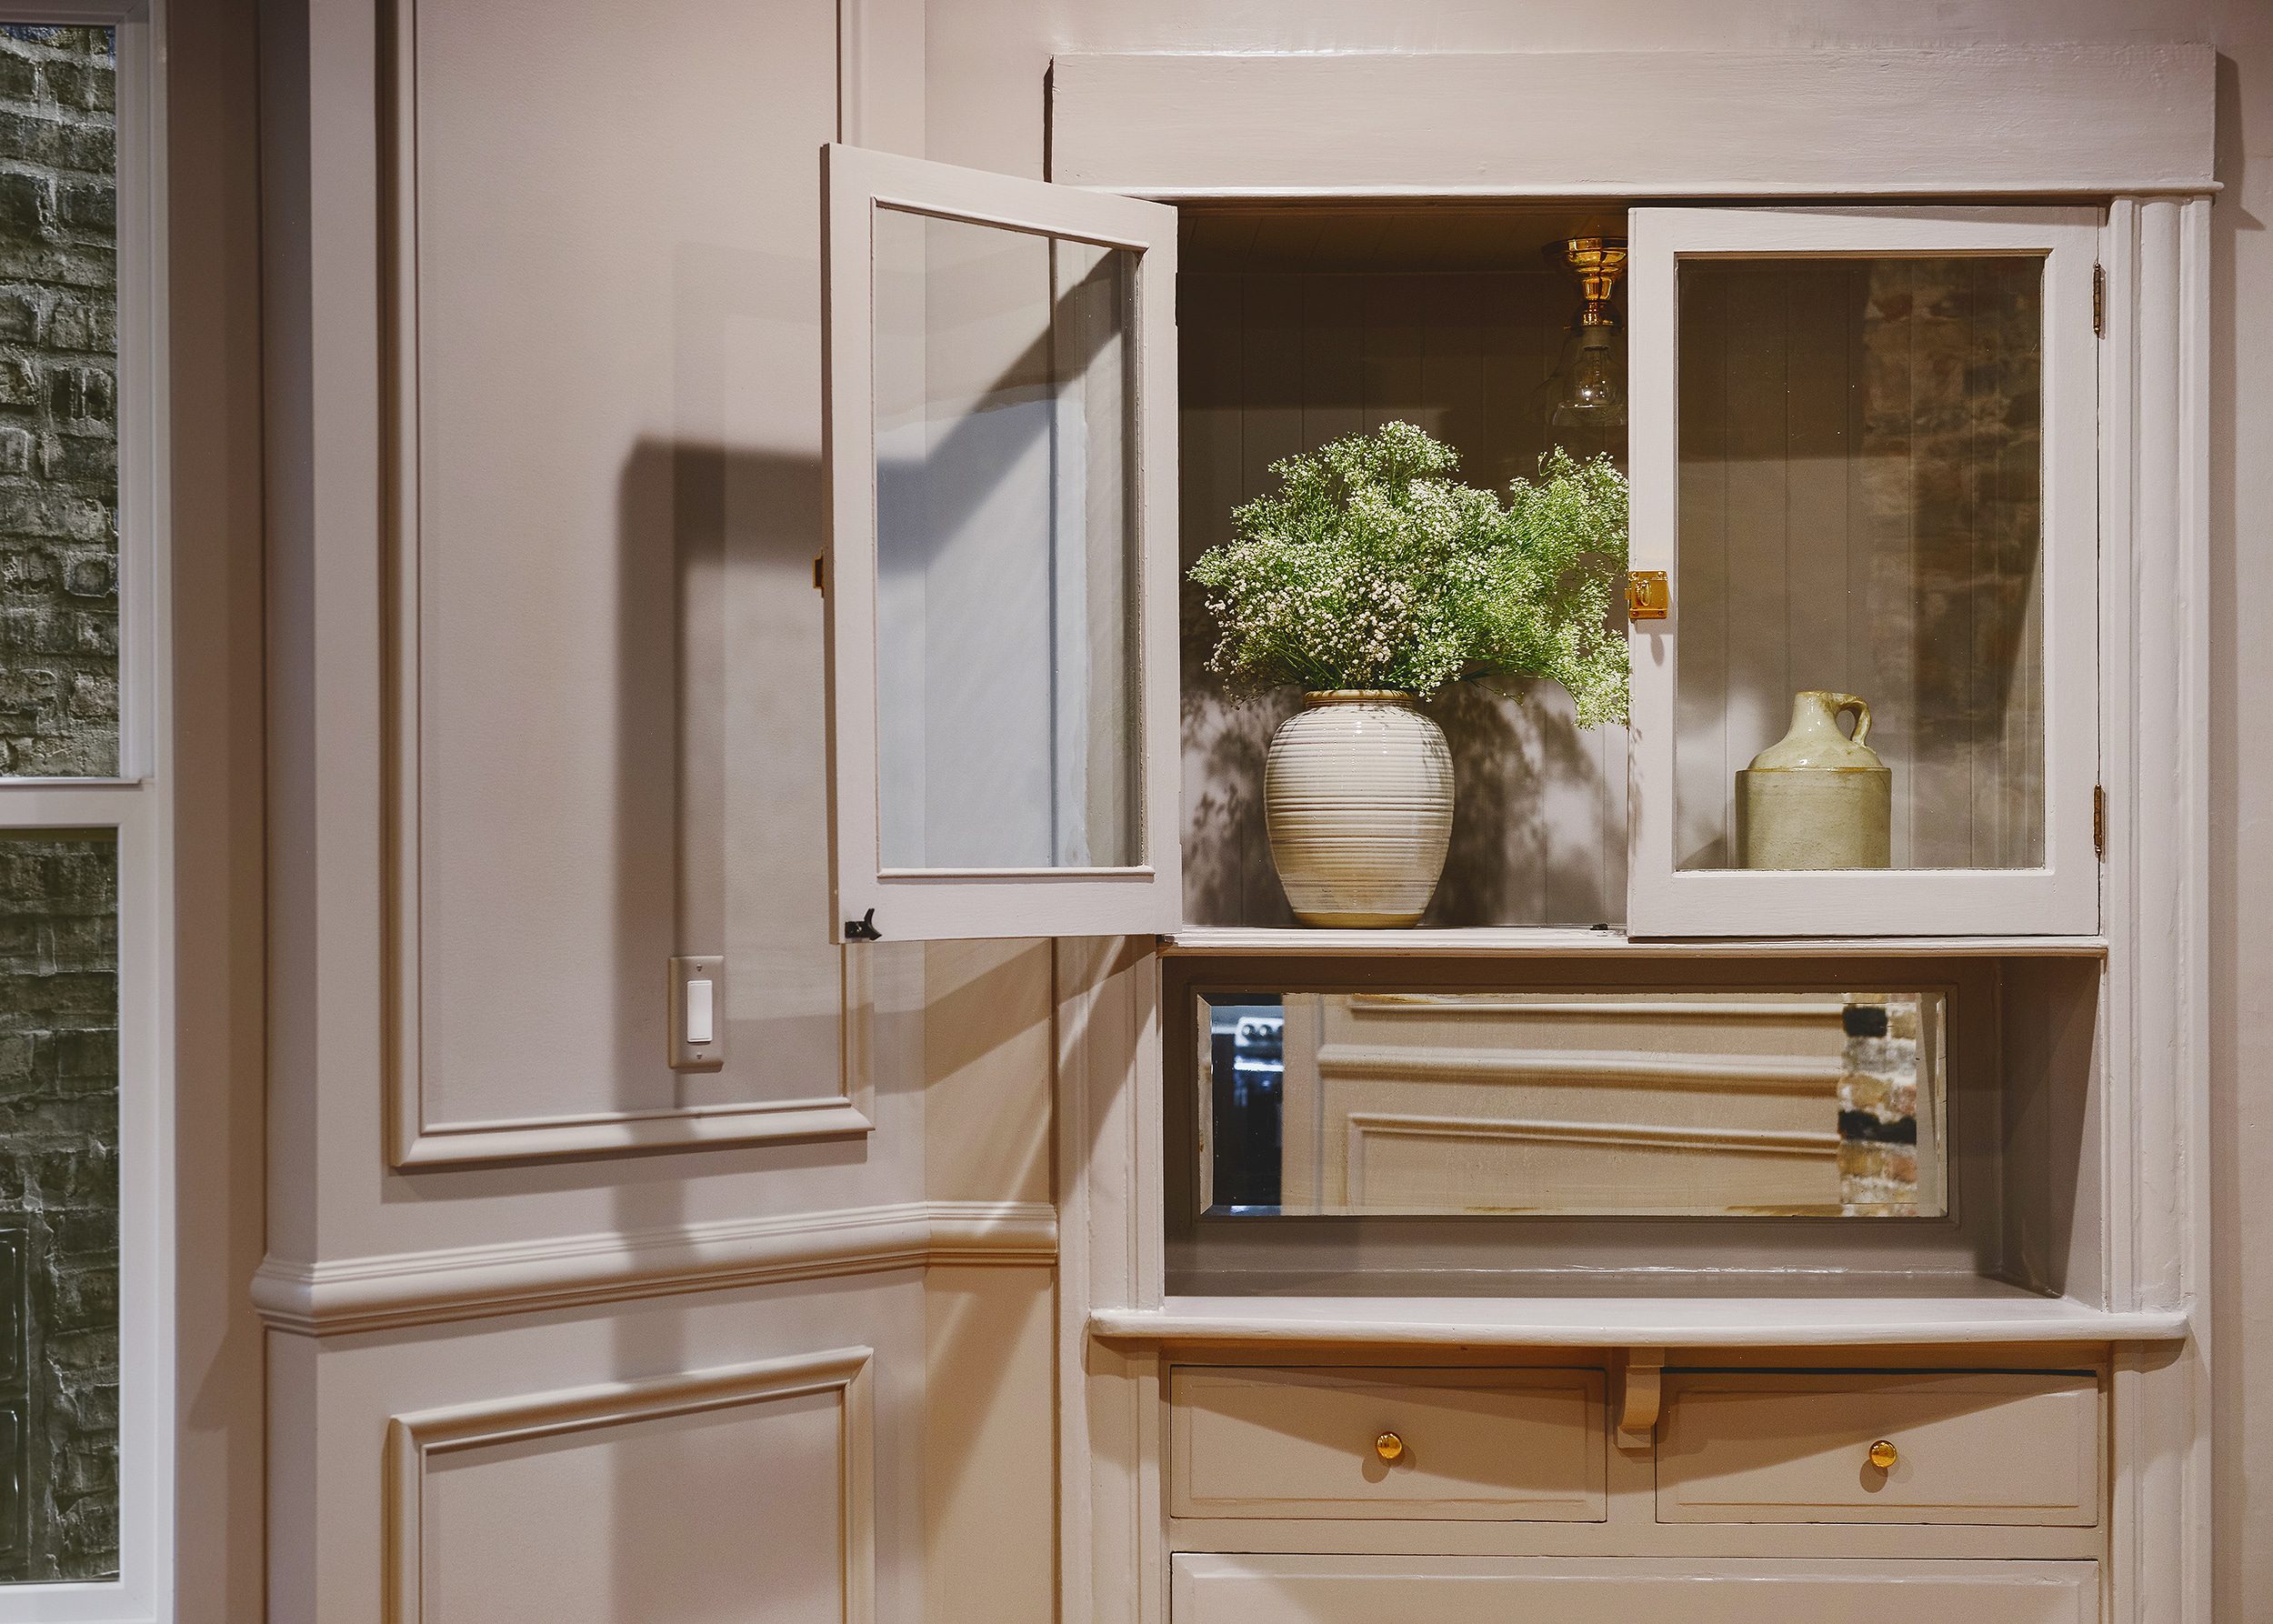
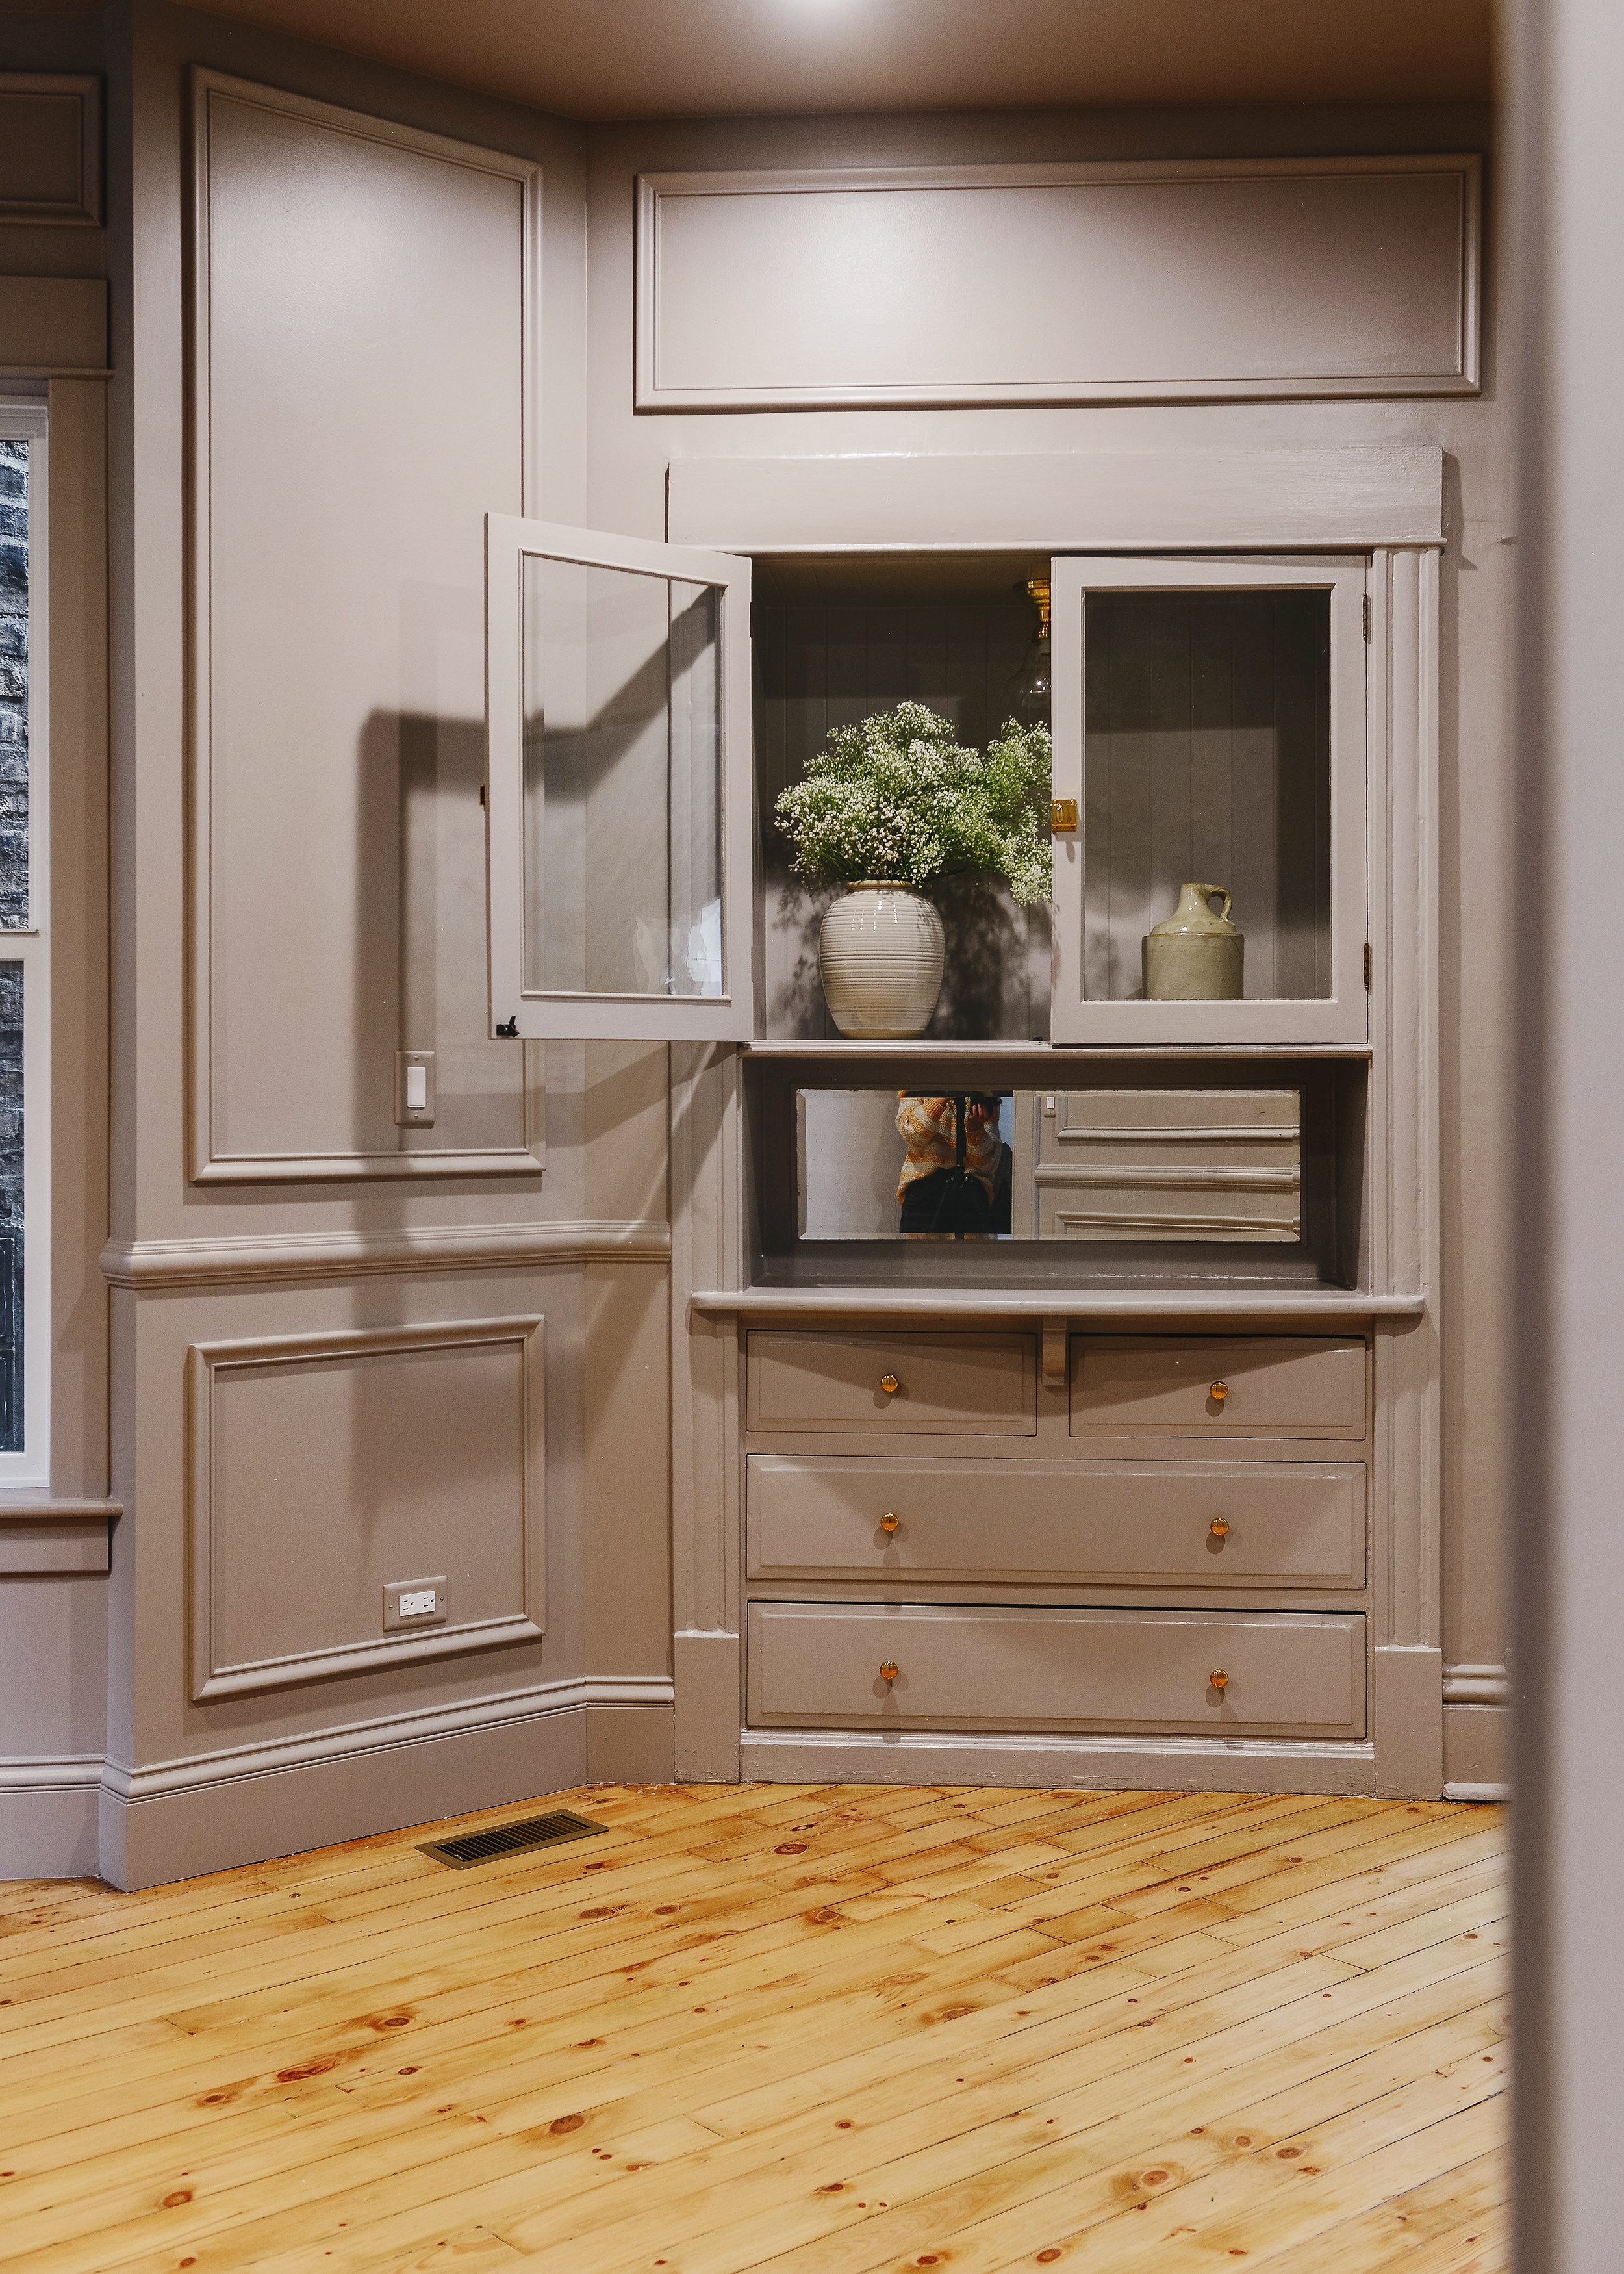
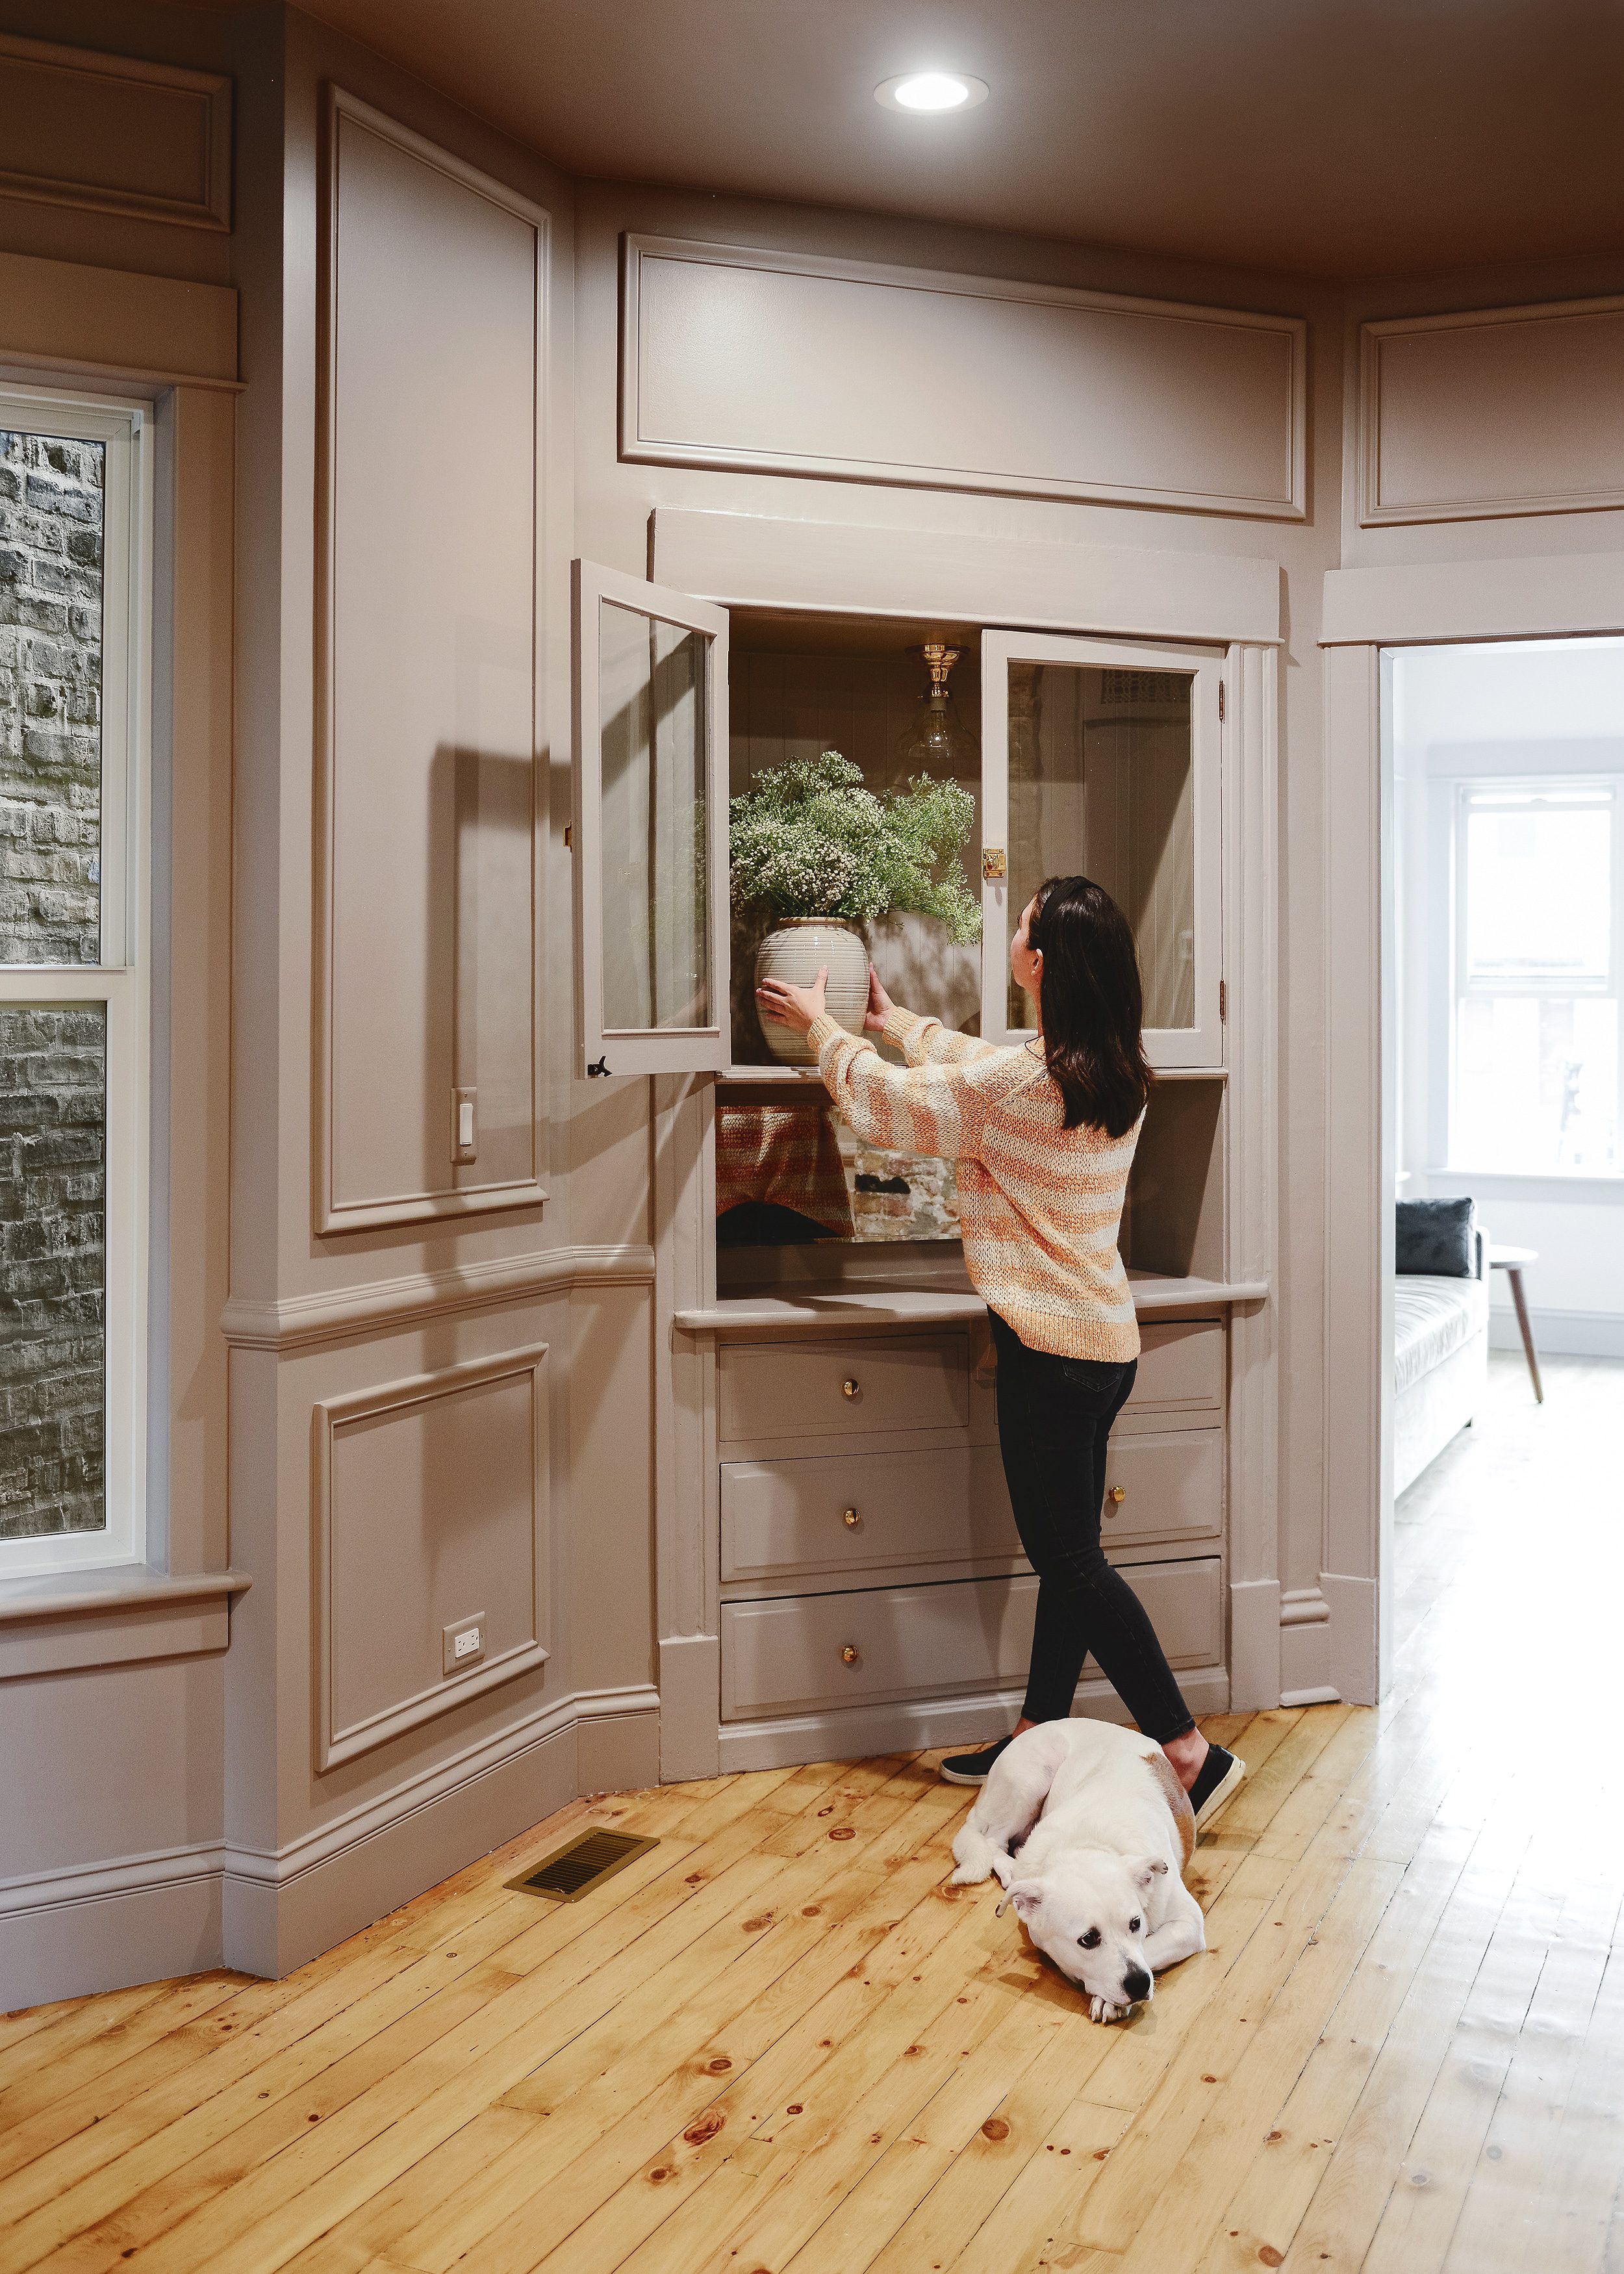
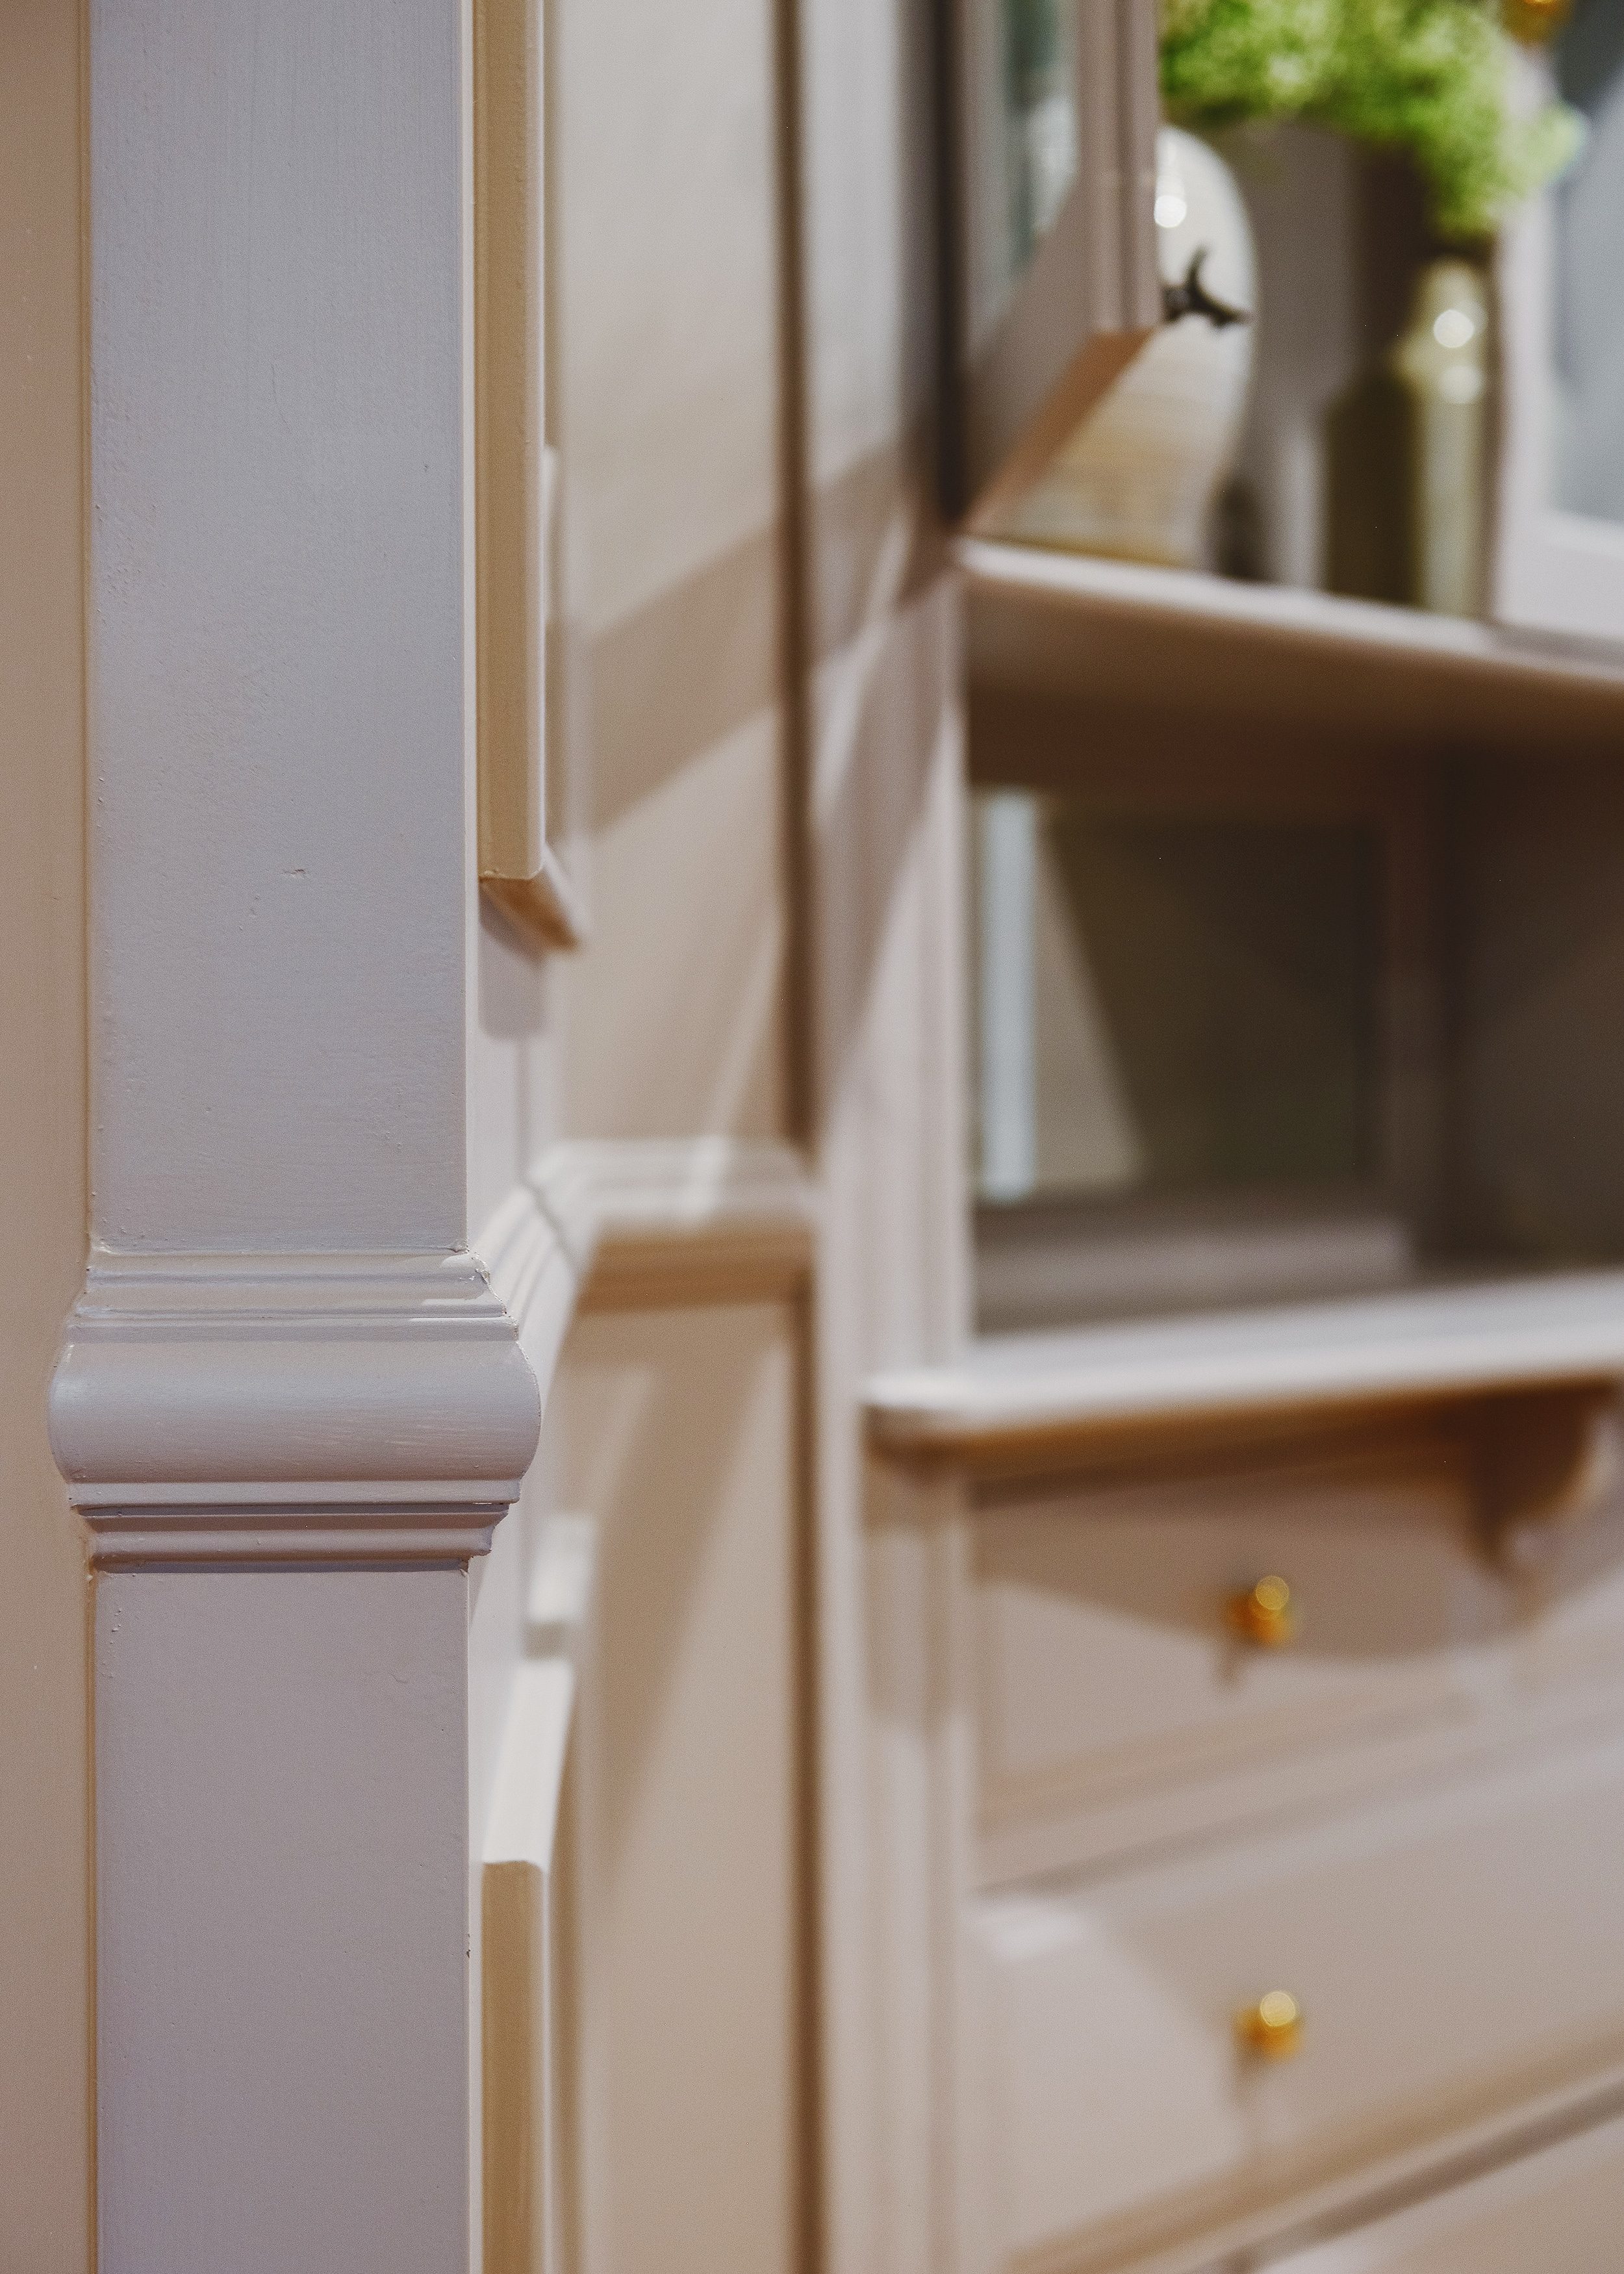
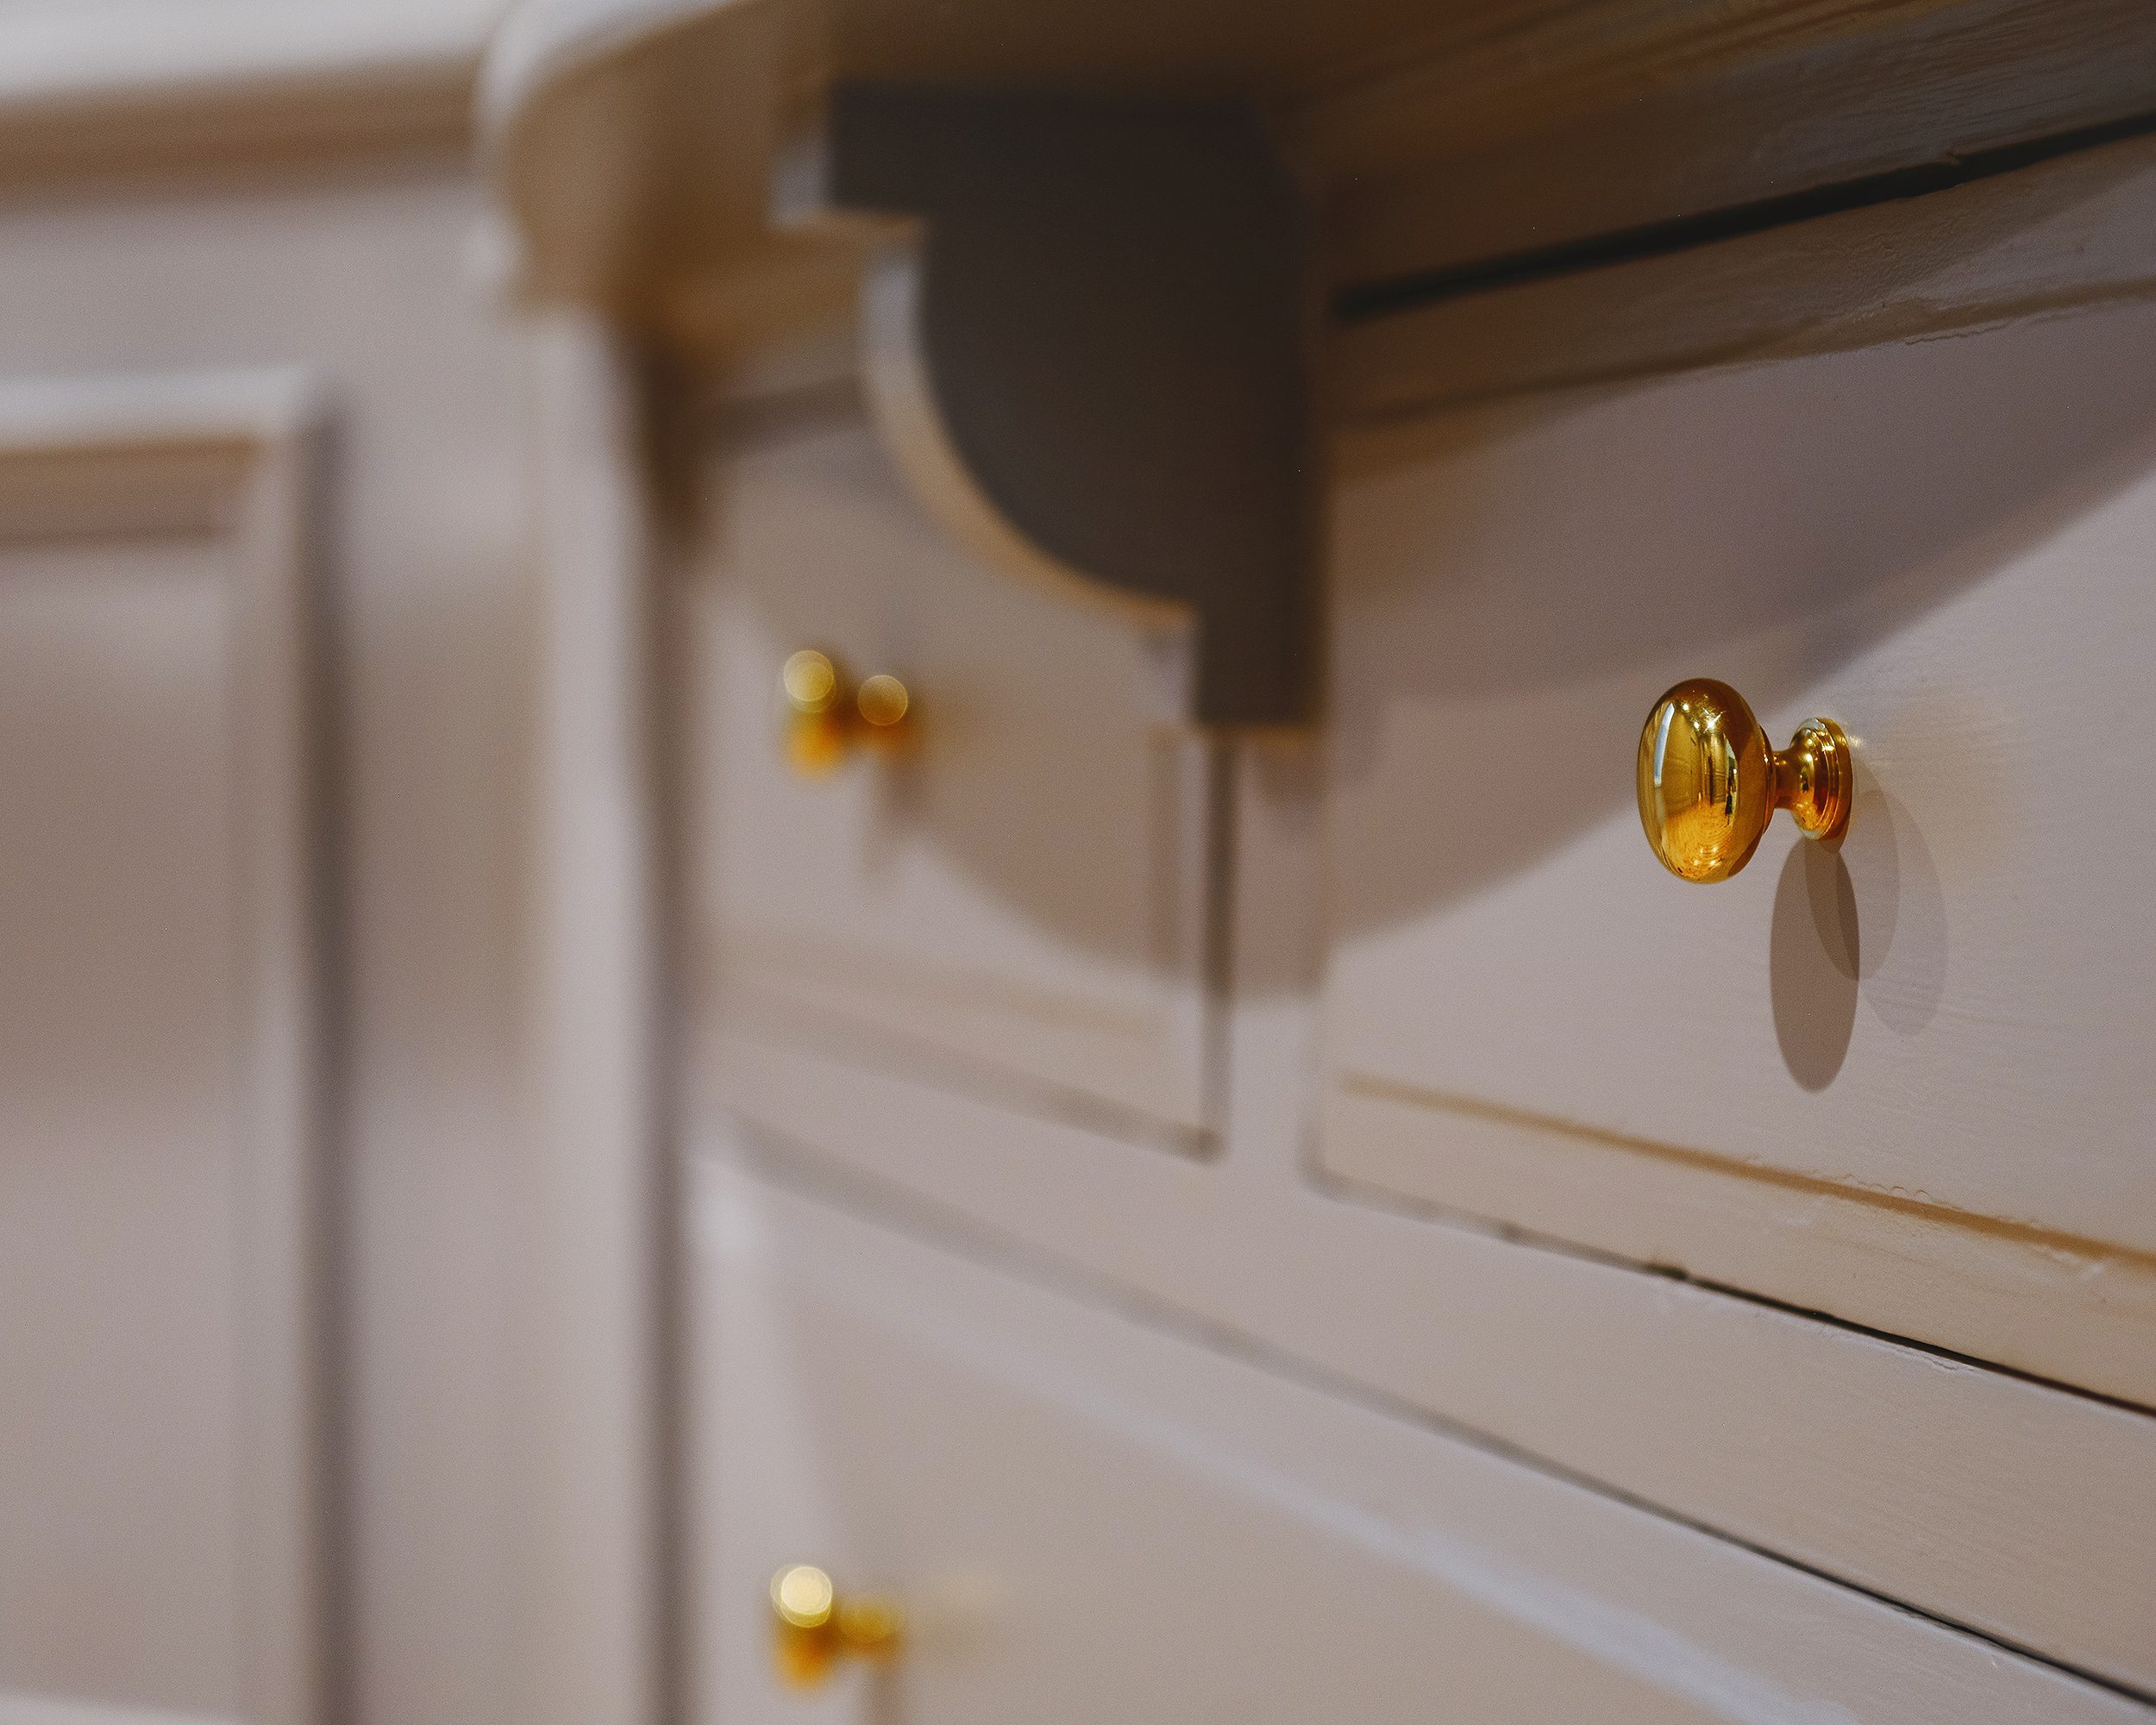
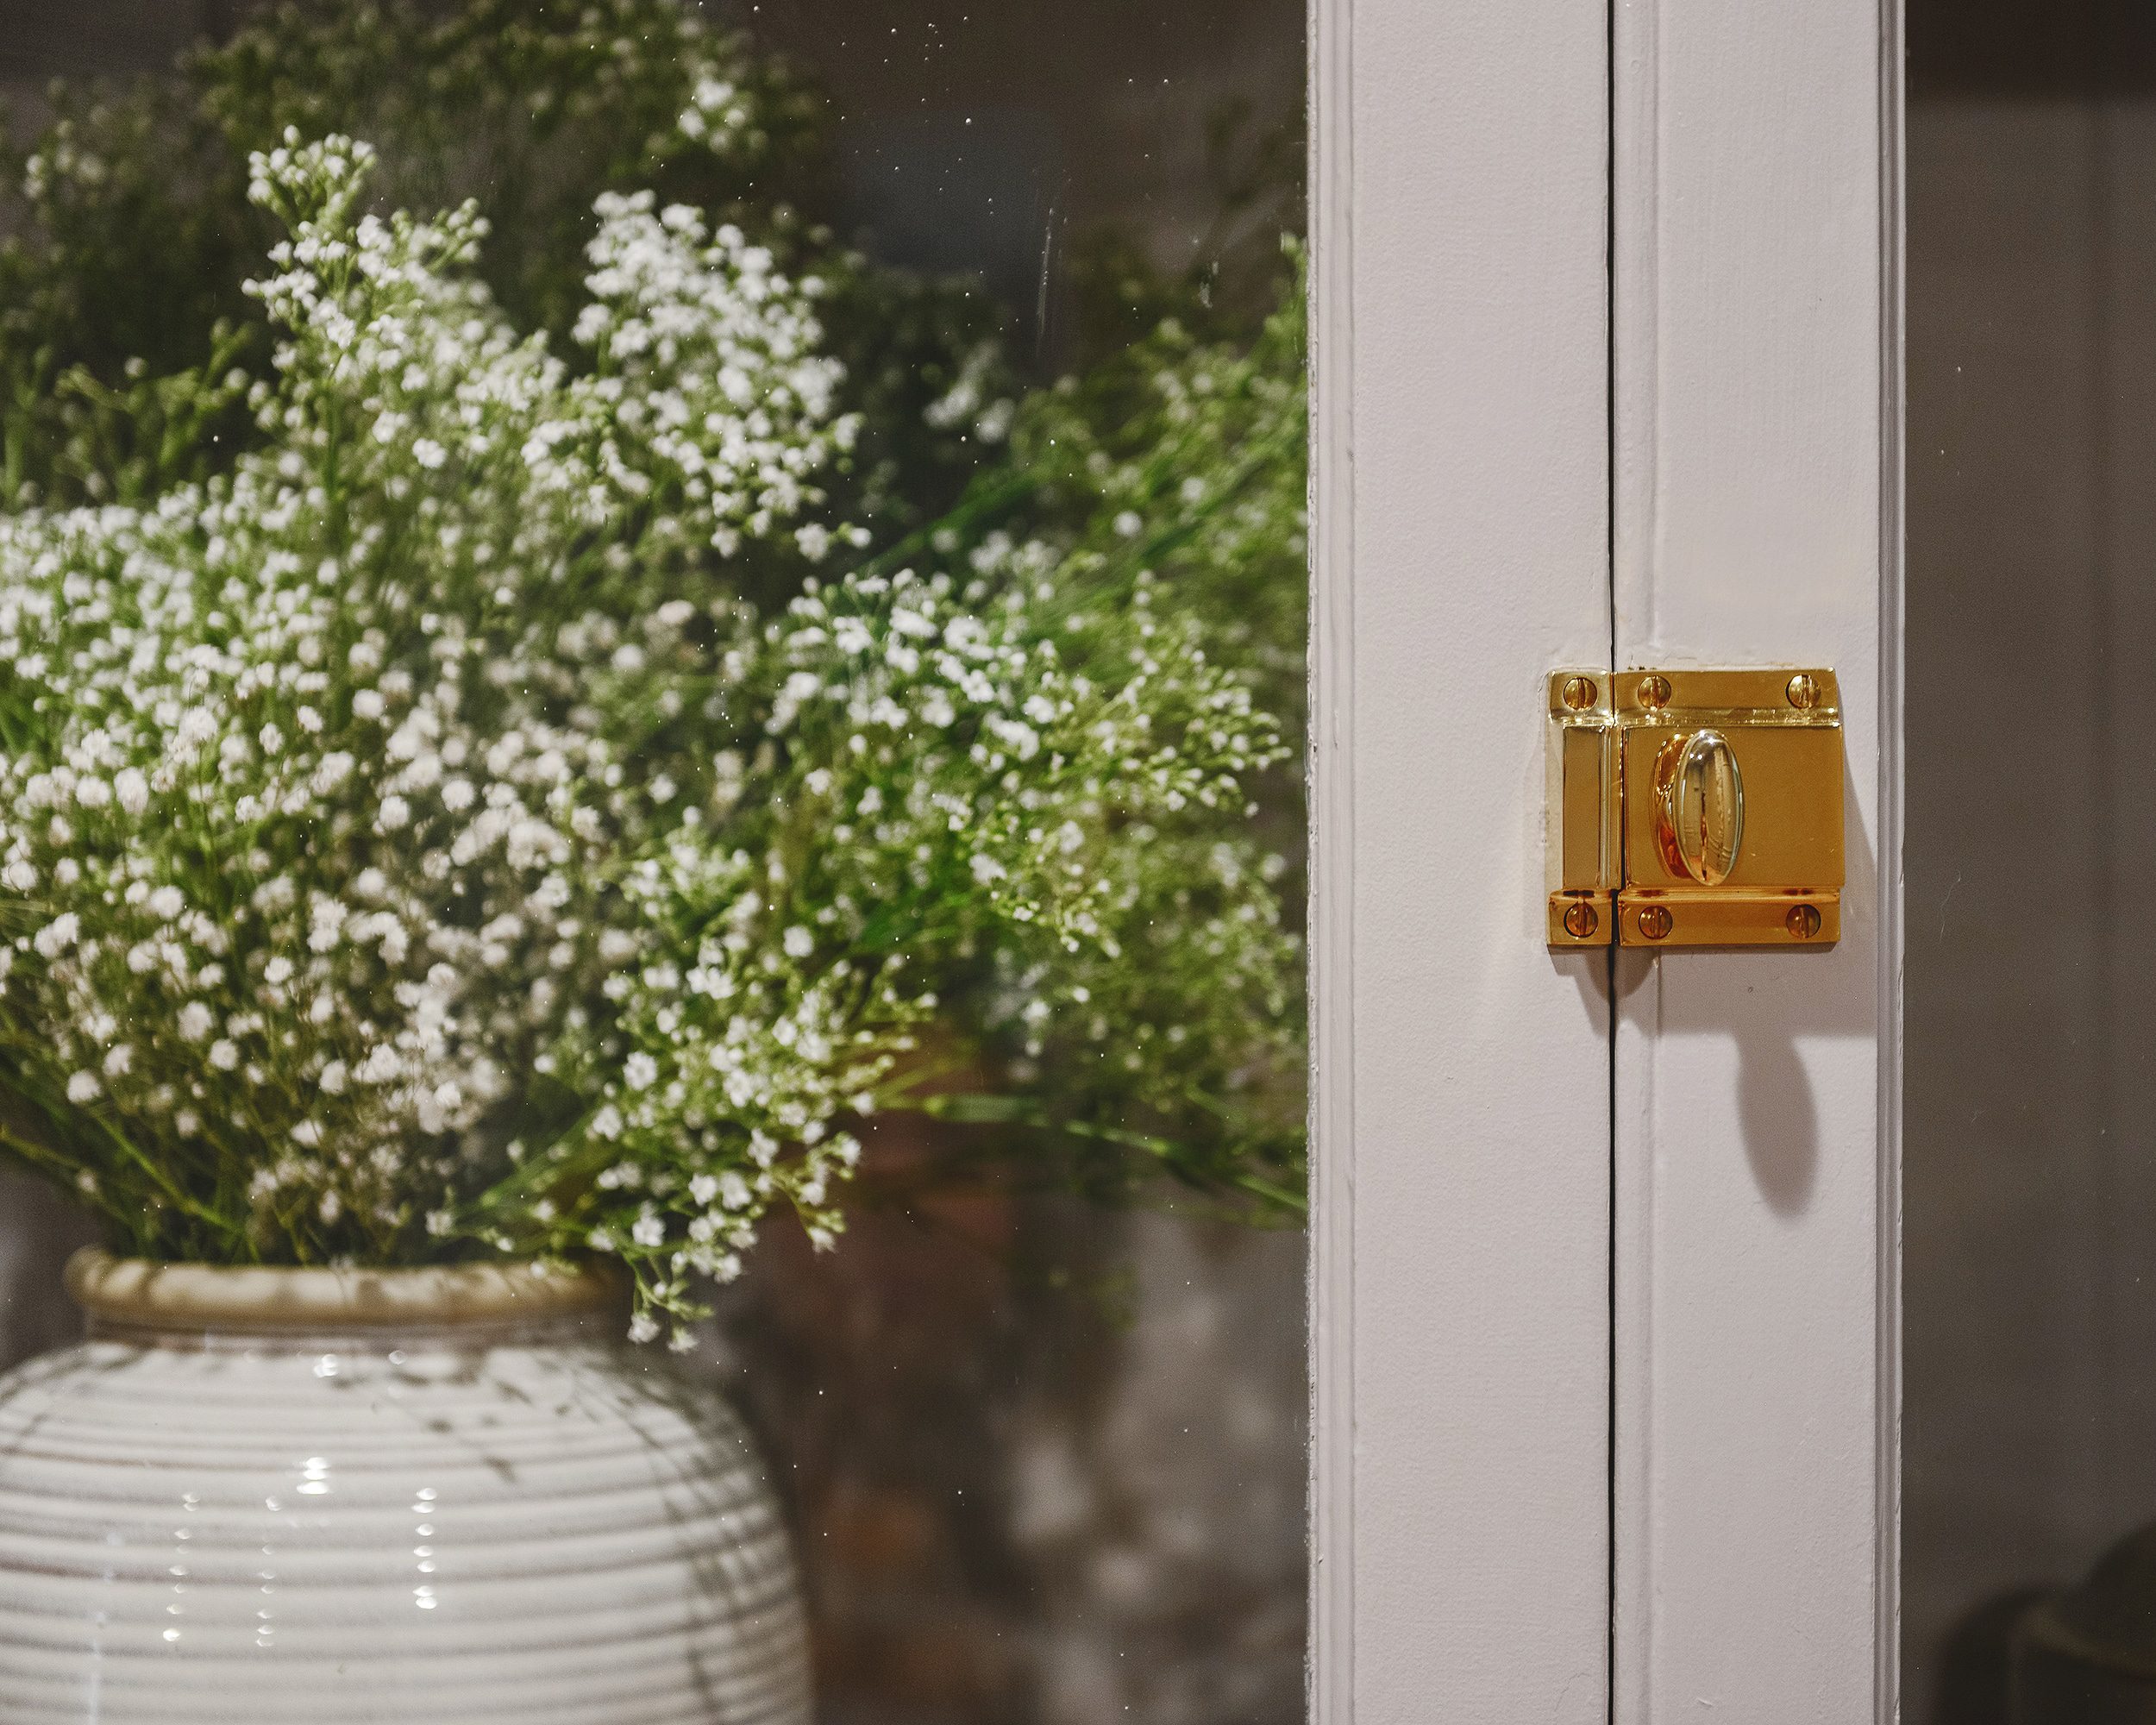
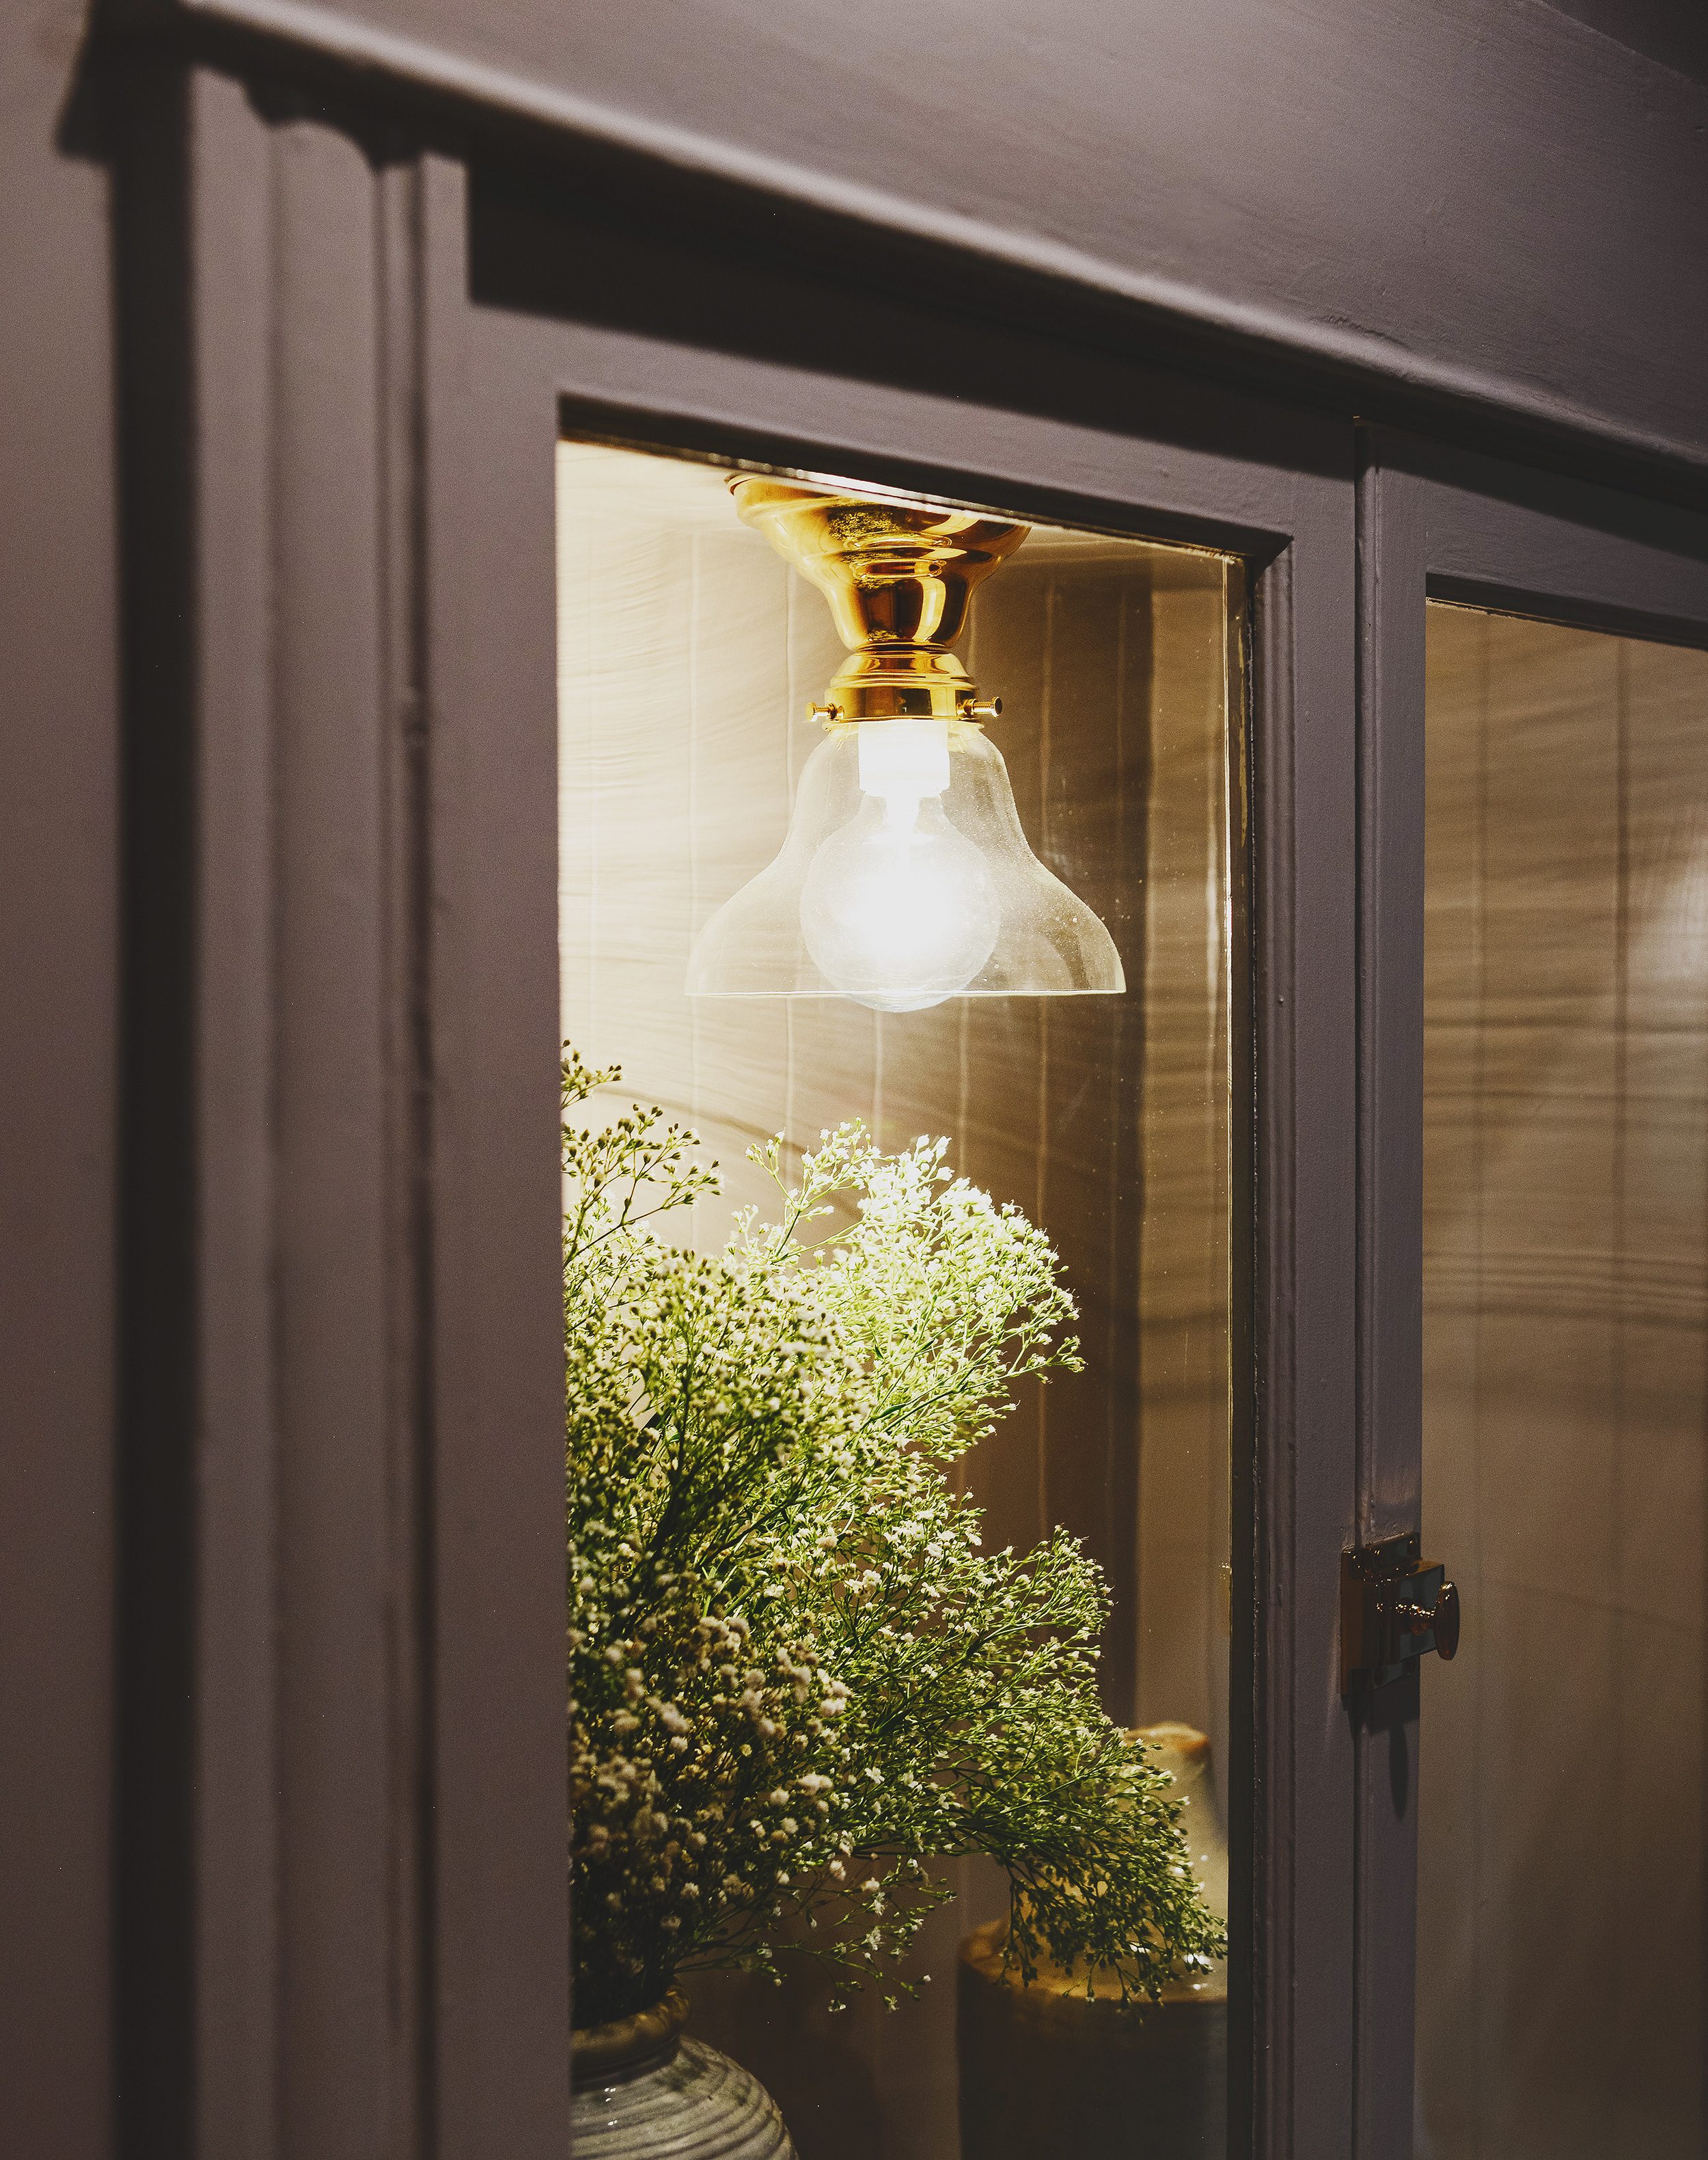
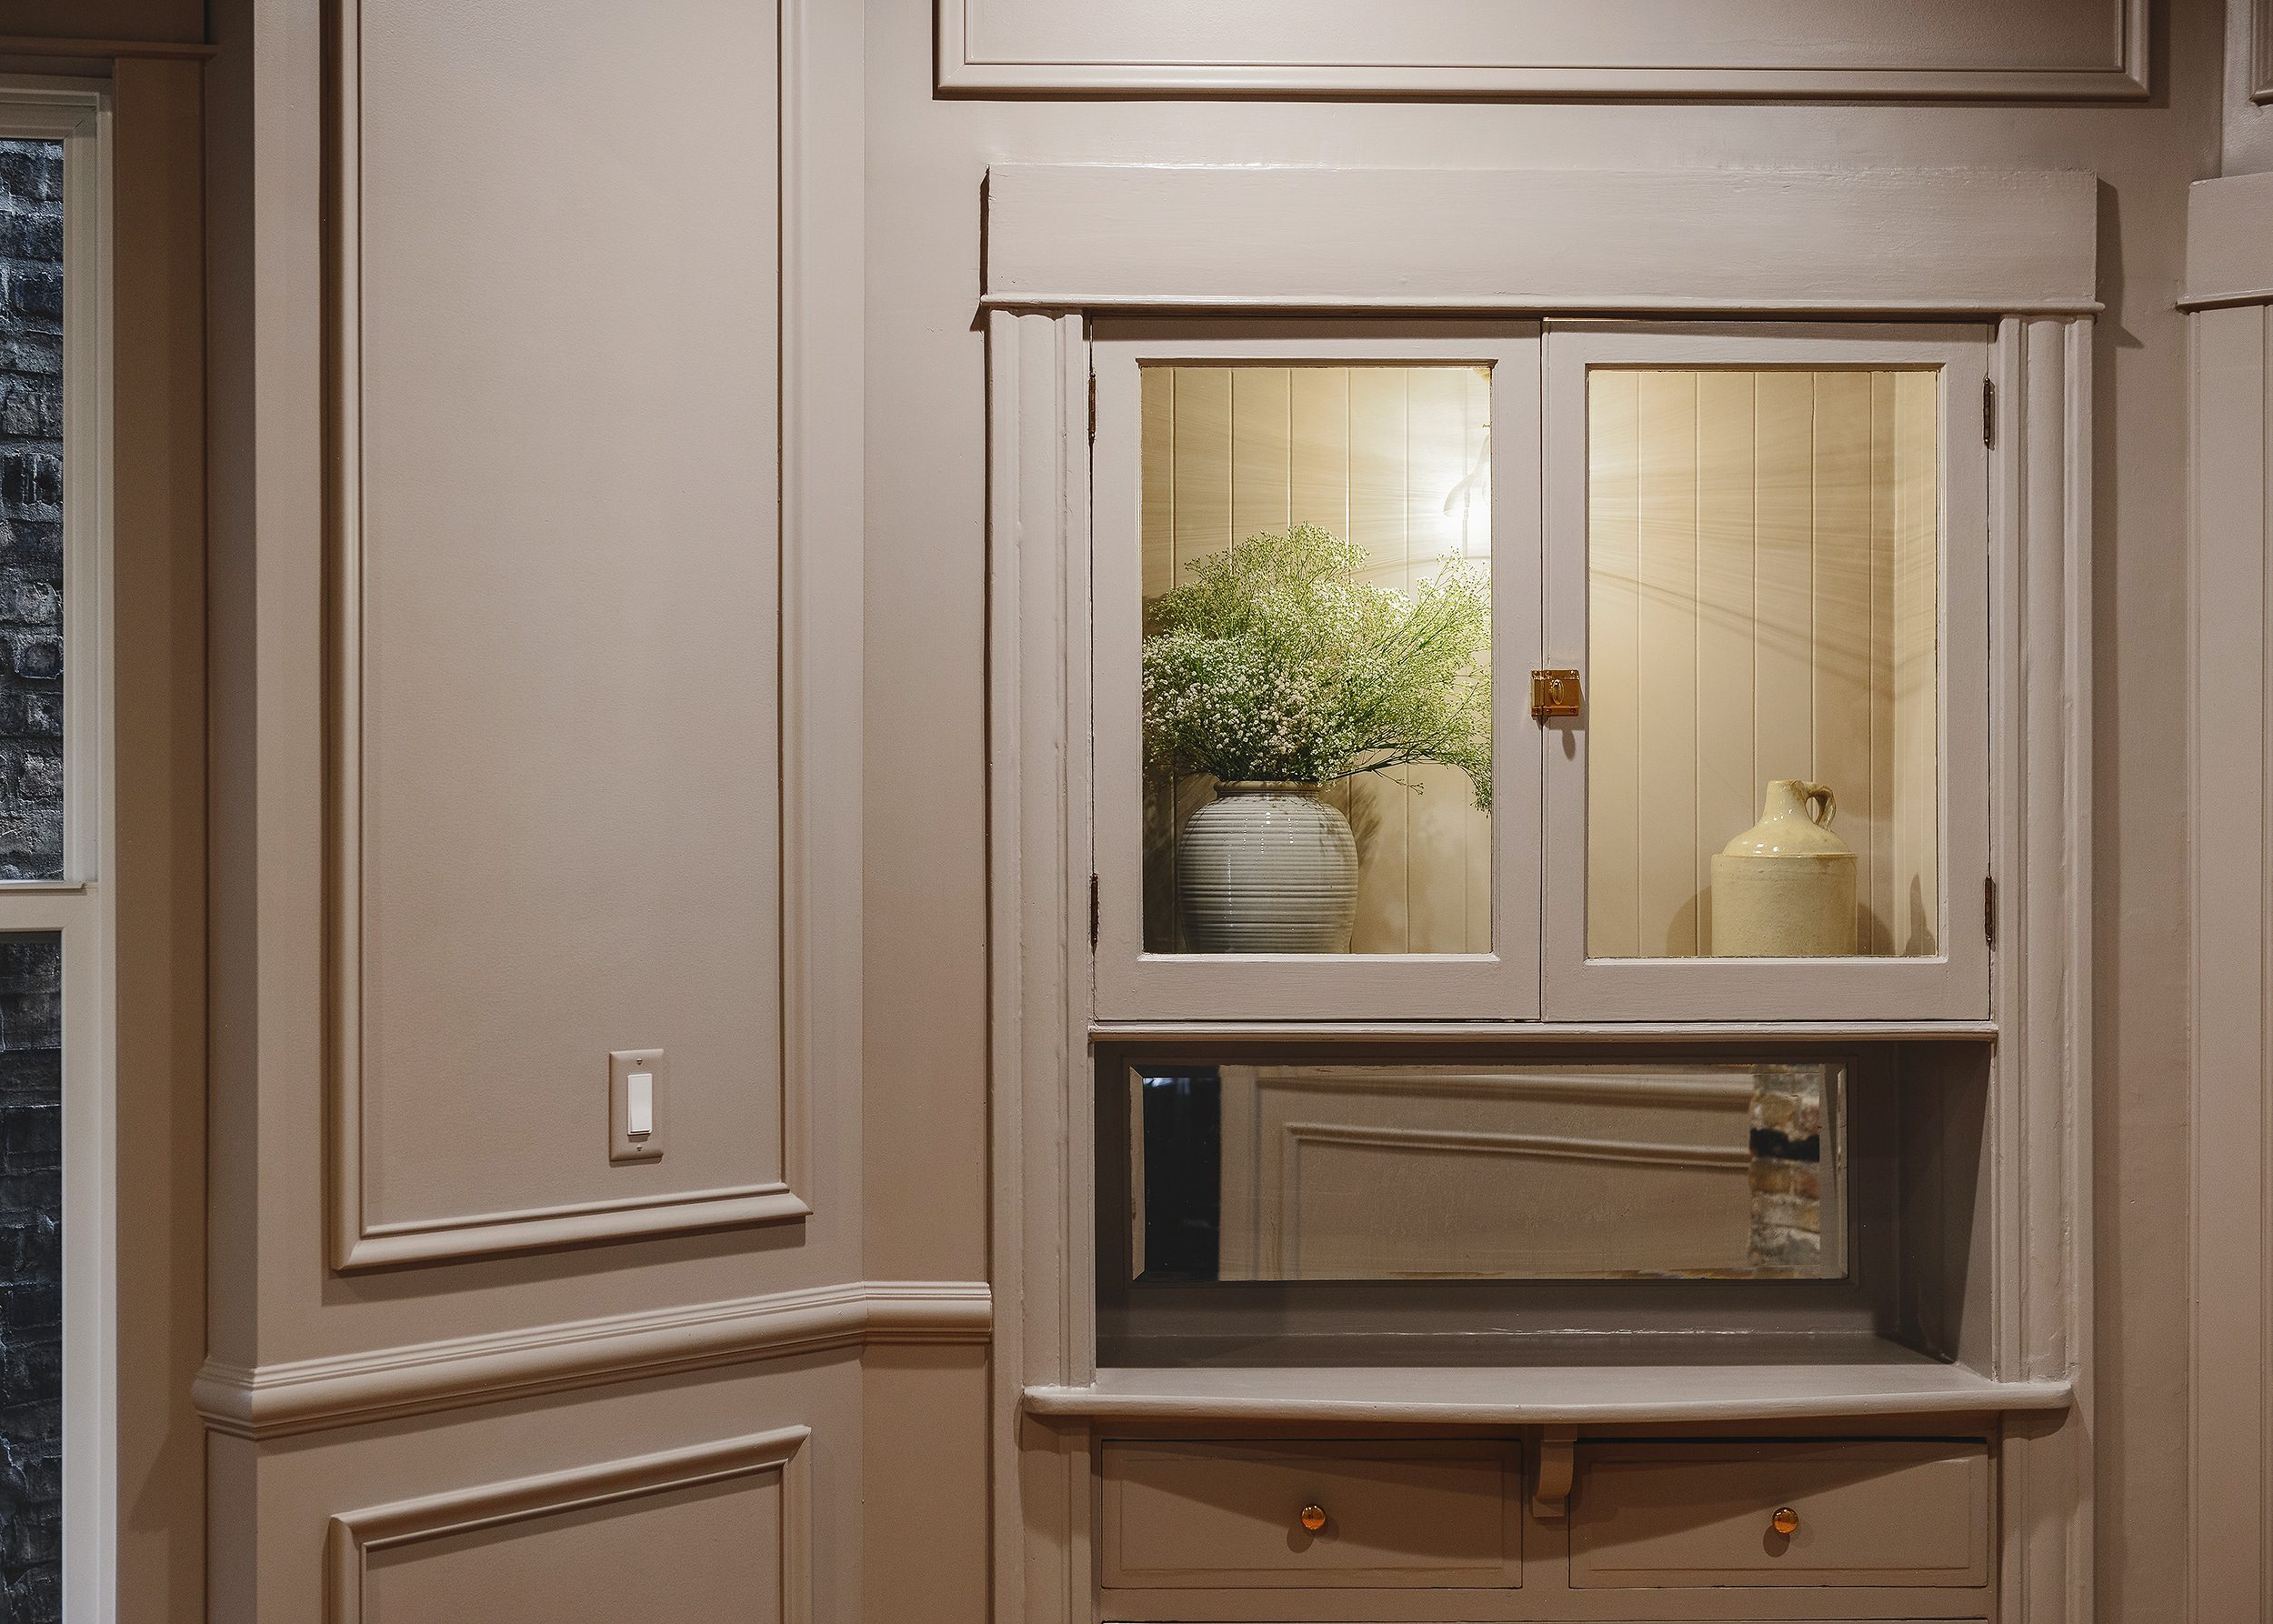
And my hutch! Isn’t she beautiful? The antique mirror on the back is the perfect amount of aged, with slight silvering. I added solid brass hardware, both on the drawers and cupboard doors, and a brass light fixture inside with a clear shade.
In the evening light, the light fixture gives us a soft, warm glow:
We completed this room over several days and over the course of many weeks. Some may say the kitchen is the heart of the home, but may I throw a vote for our dining room into the hat? Some day, friends and family will gather in here with a warm meal and cold cocktails, and I’ll know that it was worth every ounce of effort.
You can purchase KILZ® Tribute color sample pots and paint directly from Amazon! See the options right here.


Never in my life would I think “yes, mauve and old bricks. Absolutely” but this color and that chimney look incredible together! But honestly I think the millwork is what makes this room – I love how chunky (hunky?? ????) it is and how the light and shadows exaggerate that even more. You did a truly gorgeous job on this space!
Thank you! The color with the brick is what sold us. And the hunky-ness ???? of the molding is a game changer for sure.
^^^ This exactly
Love this room, especially the view from the dining room into the kitchen. The molding is perfection and the hutch makes me swoon!
The room is beautiful and the hutch is my fav. What I’m having a hard time figuring out is how to decorate with this wall color? Seems to me you would have to use neutrals because everything else would clash. What would you guys do?
With it being a dining room, I think there’s less to worry about – a wood tone or white or black table, fresh greenery in a vase and you’re done!
Blues, grays, moody dark pinks and maybe burgundy would be my choices to work with that paint color.
I was going to ask this same thing! I know you guys are going back and forth on the two flat, but if you did….. what would the layout be? Or what furniture would you pick? Would you consider doing a decorating post for this too, even with just a mood board and sample layout?
That would be fun! But we probably won’t do a post like that for a while… we may need a little bit of distance from the Two Flat when we’re done, it has been a roller coaster.
Wow! All of your persistence and hard work definitely paid off. Looks great.
ahhh this is so beautiful and just rich. What a beautiful job you all did. I’m so glad the design world is loving all these muted colors right now. My eyes feel so warm and rested in them
Such a great way of putting it.
Couldn’t agree more! Such a beautiful space.
It’s beautiful! Adding the moulding was a bit of genius. And painting the walls and ceiling the same color creates a special mood.
I was hoping for this color and so happy to see that you chose it. I’m dreaming up room designs ????
????????
Wow wow wow! This looks amazing. All that hard work paid off!
The hutch!!! It. Is. So. Beautiful.
My baby!
It’s amazing, Kim. Congrats! The color with the brick, the hutch, all of it…just gorgeous. It feels exciting and new but timeless all at once.
Yay! Just what we were going for!
This is truly gorgeous. And that color with the chimney is perfection.
Meadow Mauve is my new favorite neutral! Man this room turned out beautifully from the paint color to the molding Lay-out to that SWEET hutch! Perfection????
I’m in love with this room. I love that you did all the doors and trim too! So so good
It’s so so so beautiful!!!
So much YES!!! While I feel like this took forever (imagine how you felt), it was worth the wait. I want to live in this room, and I don’t even like mauve… or so I thought. It’s complete perfection.
What a transformation! Y’all should be proud of your patience, hard work, and excellent eye for design. She’s a stunner, for sure. ????
So sweet, thanks!
It’s just stunning! I can’t wait to see it with furniture… so dreamy! #nailedit
I think I would just sit in that room and soak up all of the moody-happy vibes. I absolutely love it.
????????
so absolutely beautiful!
Do you plan to use this as a long-term rental? This seems like a bold color choice for a rental. Curious whether you would allow renters to paint the room white or a similar neutral if this is not their personal cup of tea.
Well be sharing more about those plans soon!
So beautifully dramatic ❤ a cozy space with loads of charm!
This is JUST STUNNING!! The paint color with the exposed brick ???? and the the brass hardware and the lighting—it’s so perfect and twinkly and seems to honor the age of the house so we’ll. Beautiful!
I love the muted complementary color scheme with the yellow floors and purple walls. Colors from opposite sides of the color wheel bring such energy but toning them down makes them sophisticated. What a great vibe for a dining room!
It’s beautiful. Reflects the time spent
Love this room! Quick question regarding scraping the old paint: do you need to test for lead? Thank you so much!
Yes, you can get 3m lead kits at the hardware store!
Such a lovely outcome. It’s been fun way chi i got this progress— I’m always so impressed by your vision. Do you have any good sources for exploring the “endless designs and layouts” other than just google?
Pinterest, modsy, Instagram!
Never ever would I have picked that color but seeing it in action, it’s PERFECT. I love that it’s different than the typical grey and that you guys just went for it. Stunning. Thanks for the never-ending inspiration.
I do not like Mauve…and yet this room is just beautiful! I have looked at this post 3 times and cannot get over how lovely it looks, the brick with that color, the ceiling, the moldings, and that hutch! You have outdone yourselves. Now I can say “yes” I like mauve! 5 stars for this makeover!
Hooray! Thank you!
And that is jus SO beautiful! Well done.
Absolute perfection.
Hi – is the ceiling the same paint color too? What a work of art!
It is! EVERYTHING is Meadow Mauve!
What a transformation! It turned out… trying to find the right word… exquisite! And by that I mean every detail is beautiful. You deserve all the compliments headed your way.
I seriously thought that was Kim with all those tattoos and I was like “How have you kept this from us all these years?!” Haha :)
Hahaha!
I have to admit the color probably wouldn’t be my first choice, but wow. The panels look so good!! I actually don’t even mind the color because of the millwork you guys did. And the hutch is absolutely stunning. Would love to live in a place with a hutch like that! ????
[…] I am absolutely obsessed with this gorgeous mauve dining room makeover! […]
[…] Proof that “moody” is not synonymous with “dark”! […]
Everything is stunning! The paint, moldings, exposed brick. Tell us more about the molding and trim and where to find it!
Thank you! More info on the trim in this post here.
The room is stunning. I’m redecorating one very similar and am looking for inspiration for window treatments. Can you share what you did for your windows in this room?
[…] Inspiration via Yellow Brick Home […]
Do you have links to the moulding you used? I love the way it looks!
Hi Aloura! Unfortunately we don’t have links to the specific moulding, but it was all from Metrie.