

Today we’re breaking down the steps to build a shaker peg rail with an integrated shelf. We’re using it for our 3 year old daughter’s dress-up area, but it would also be great as a coat rack in an entryway or a towel rack in a bathroom, among countless other applications!
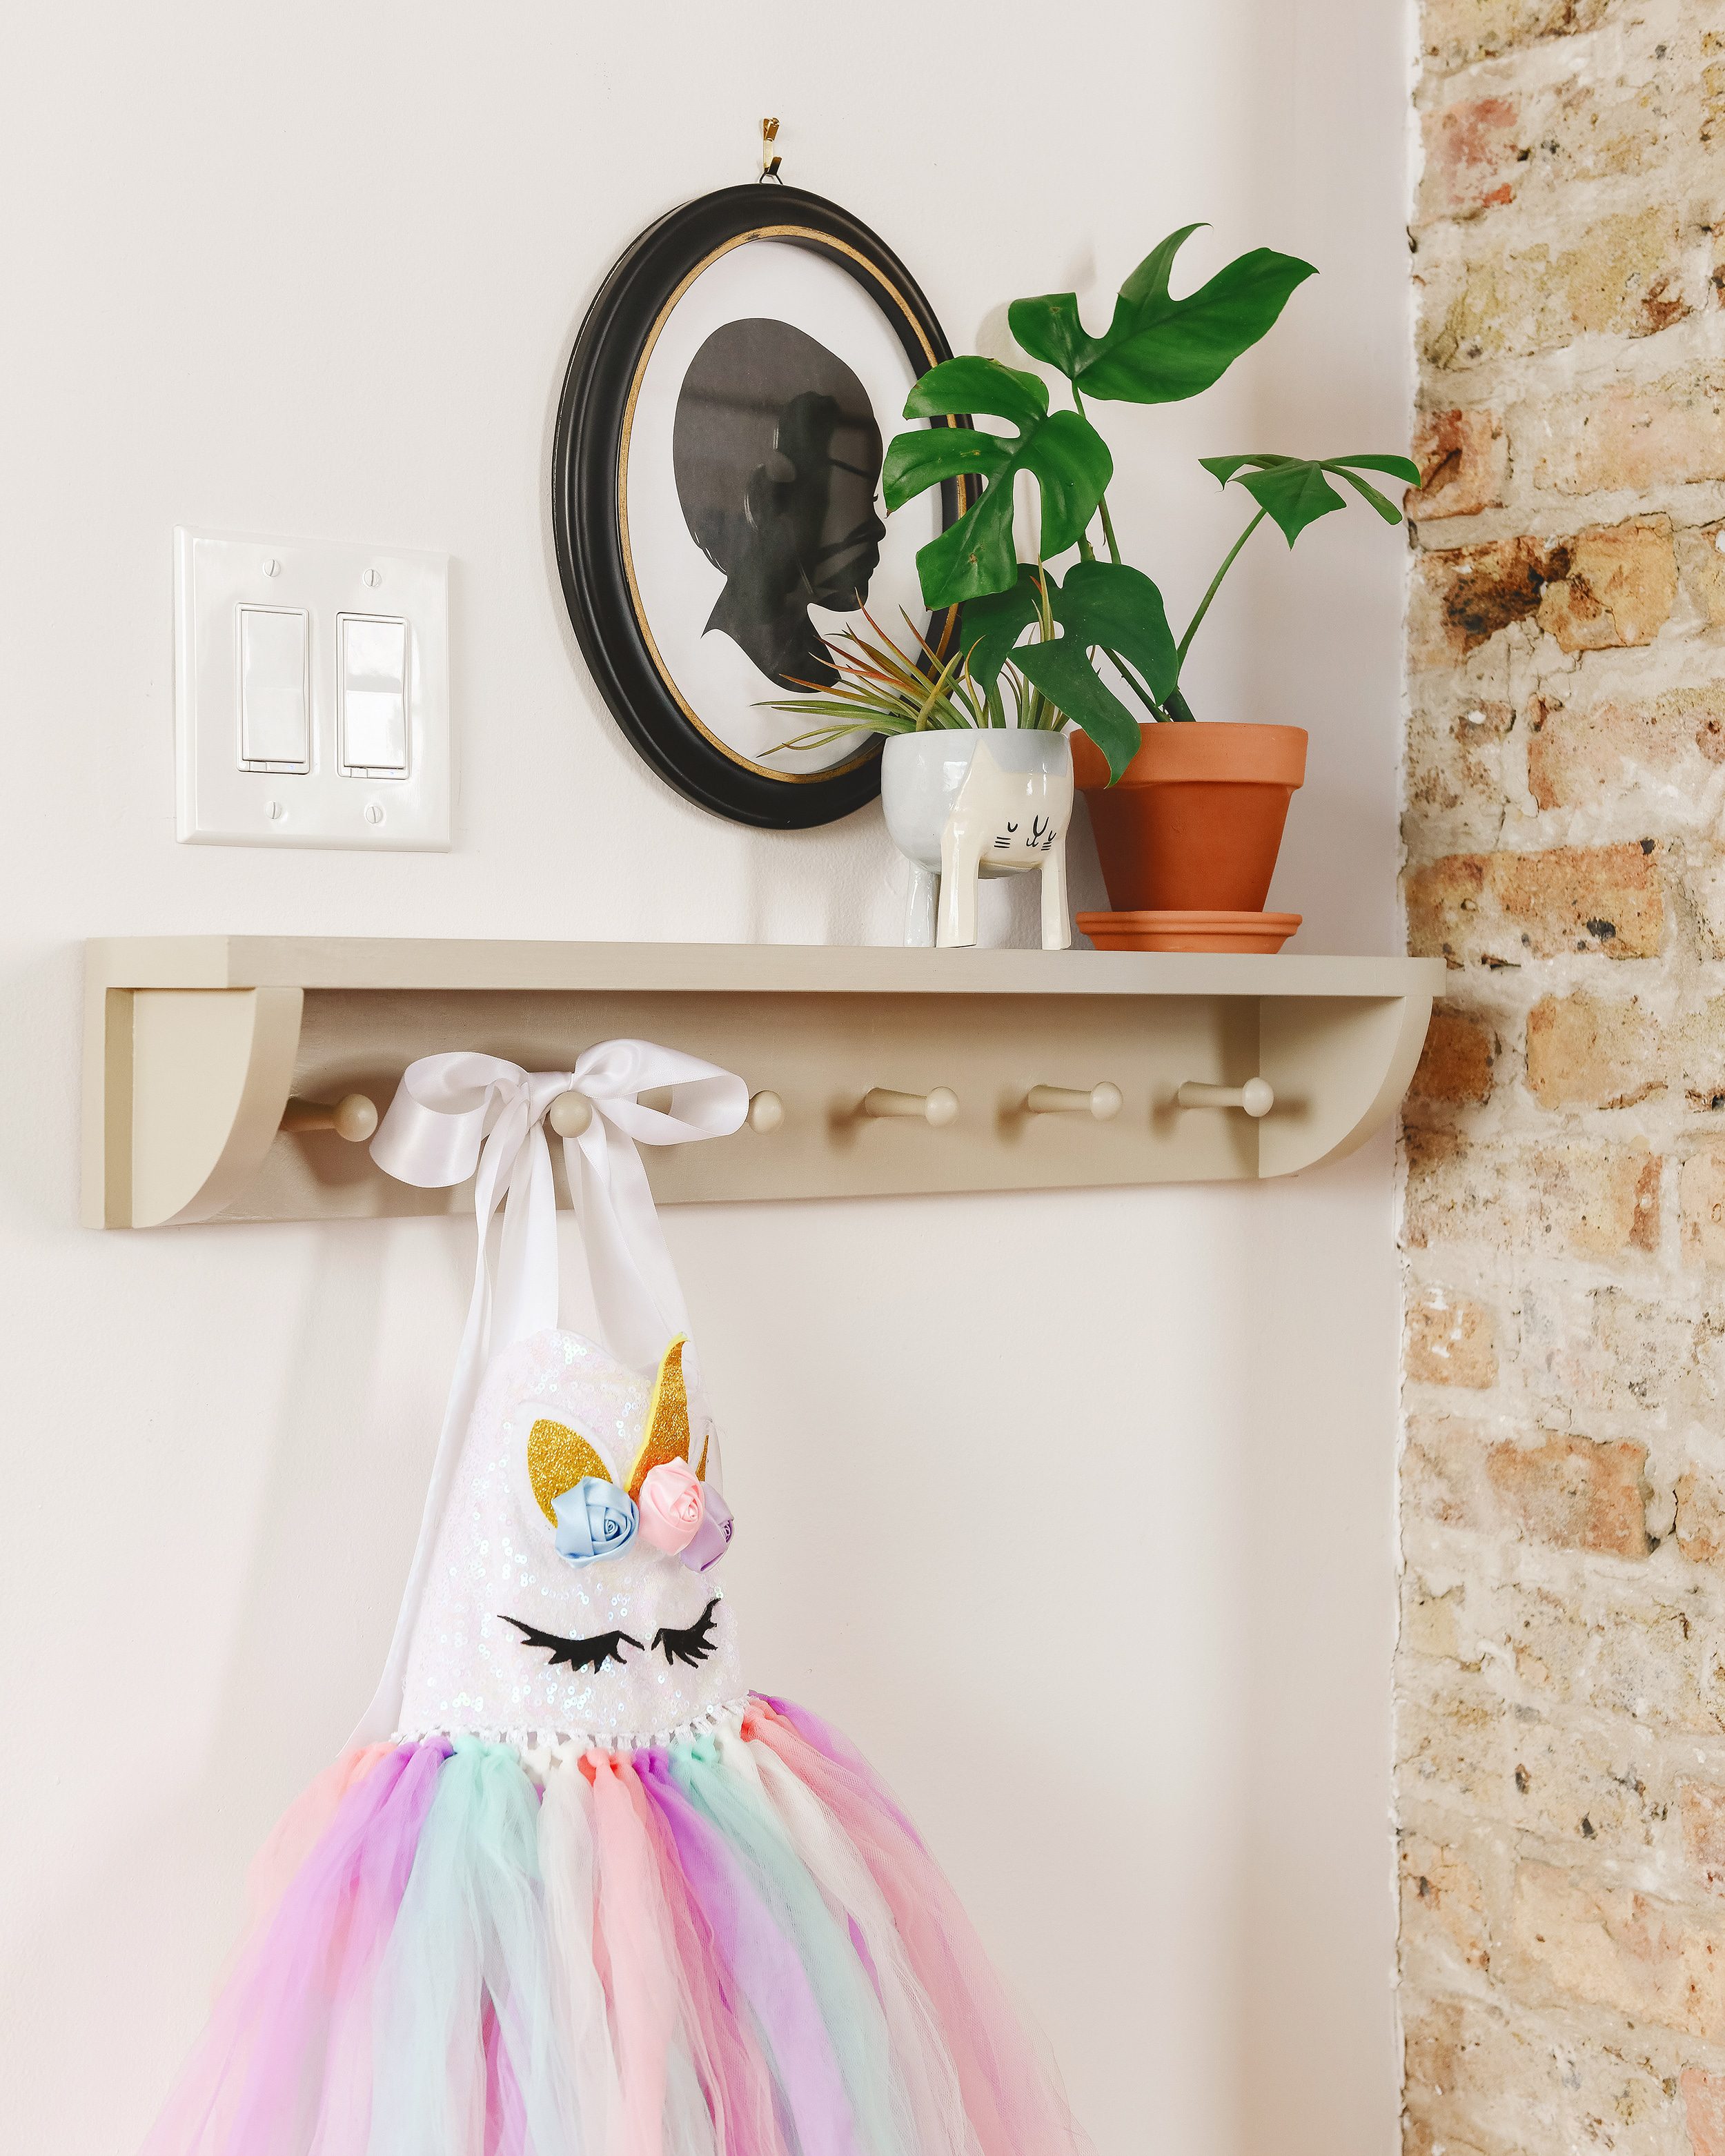
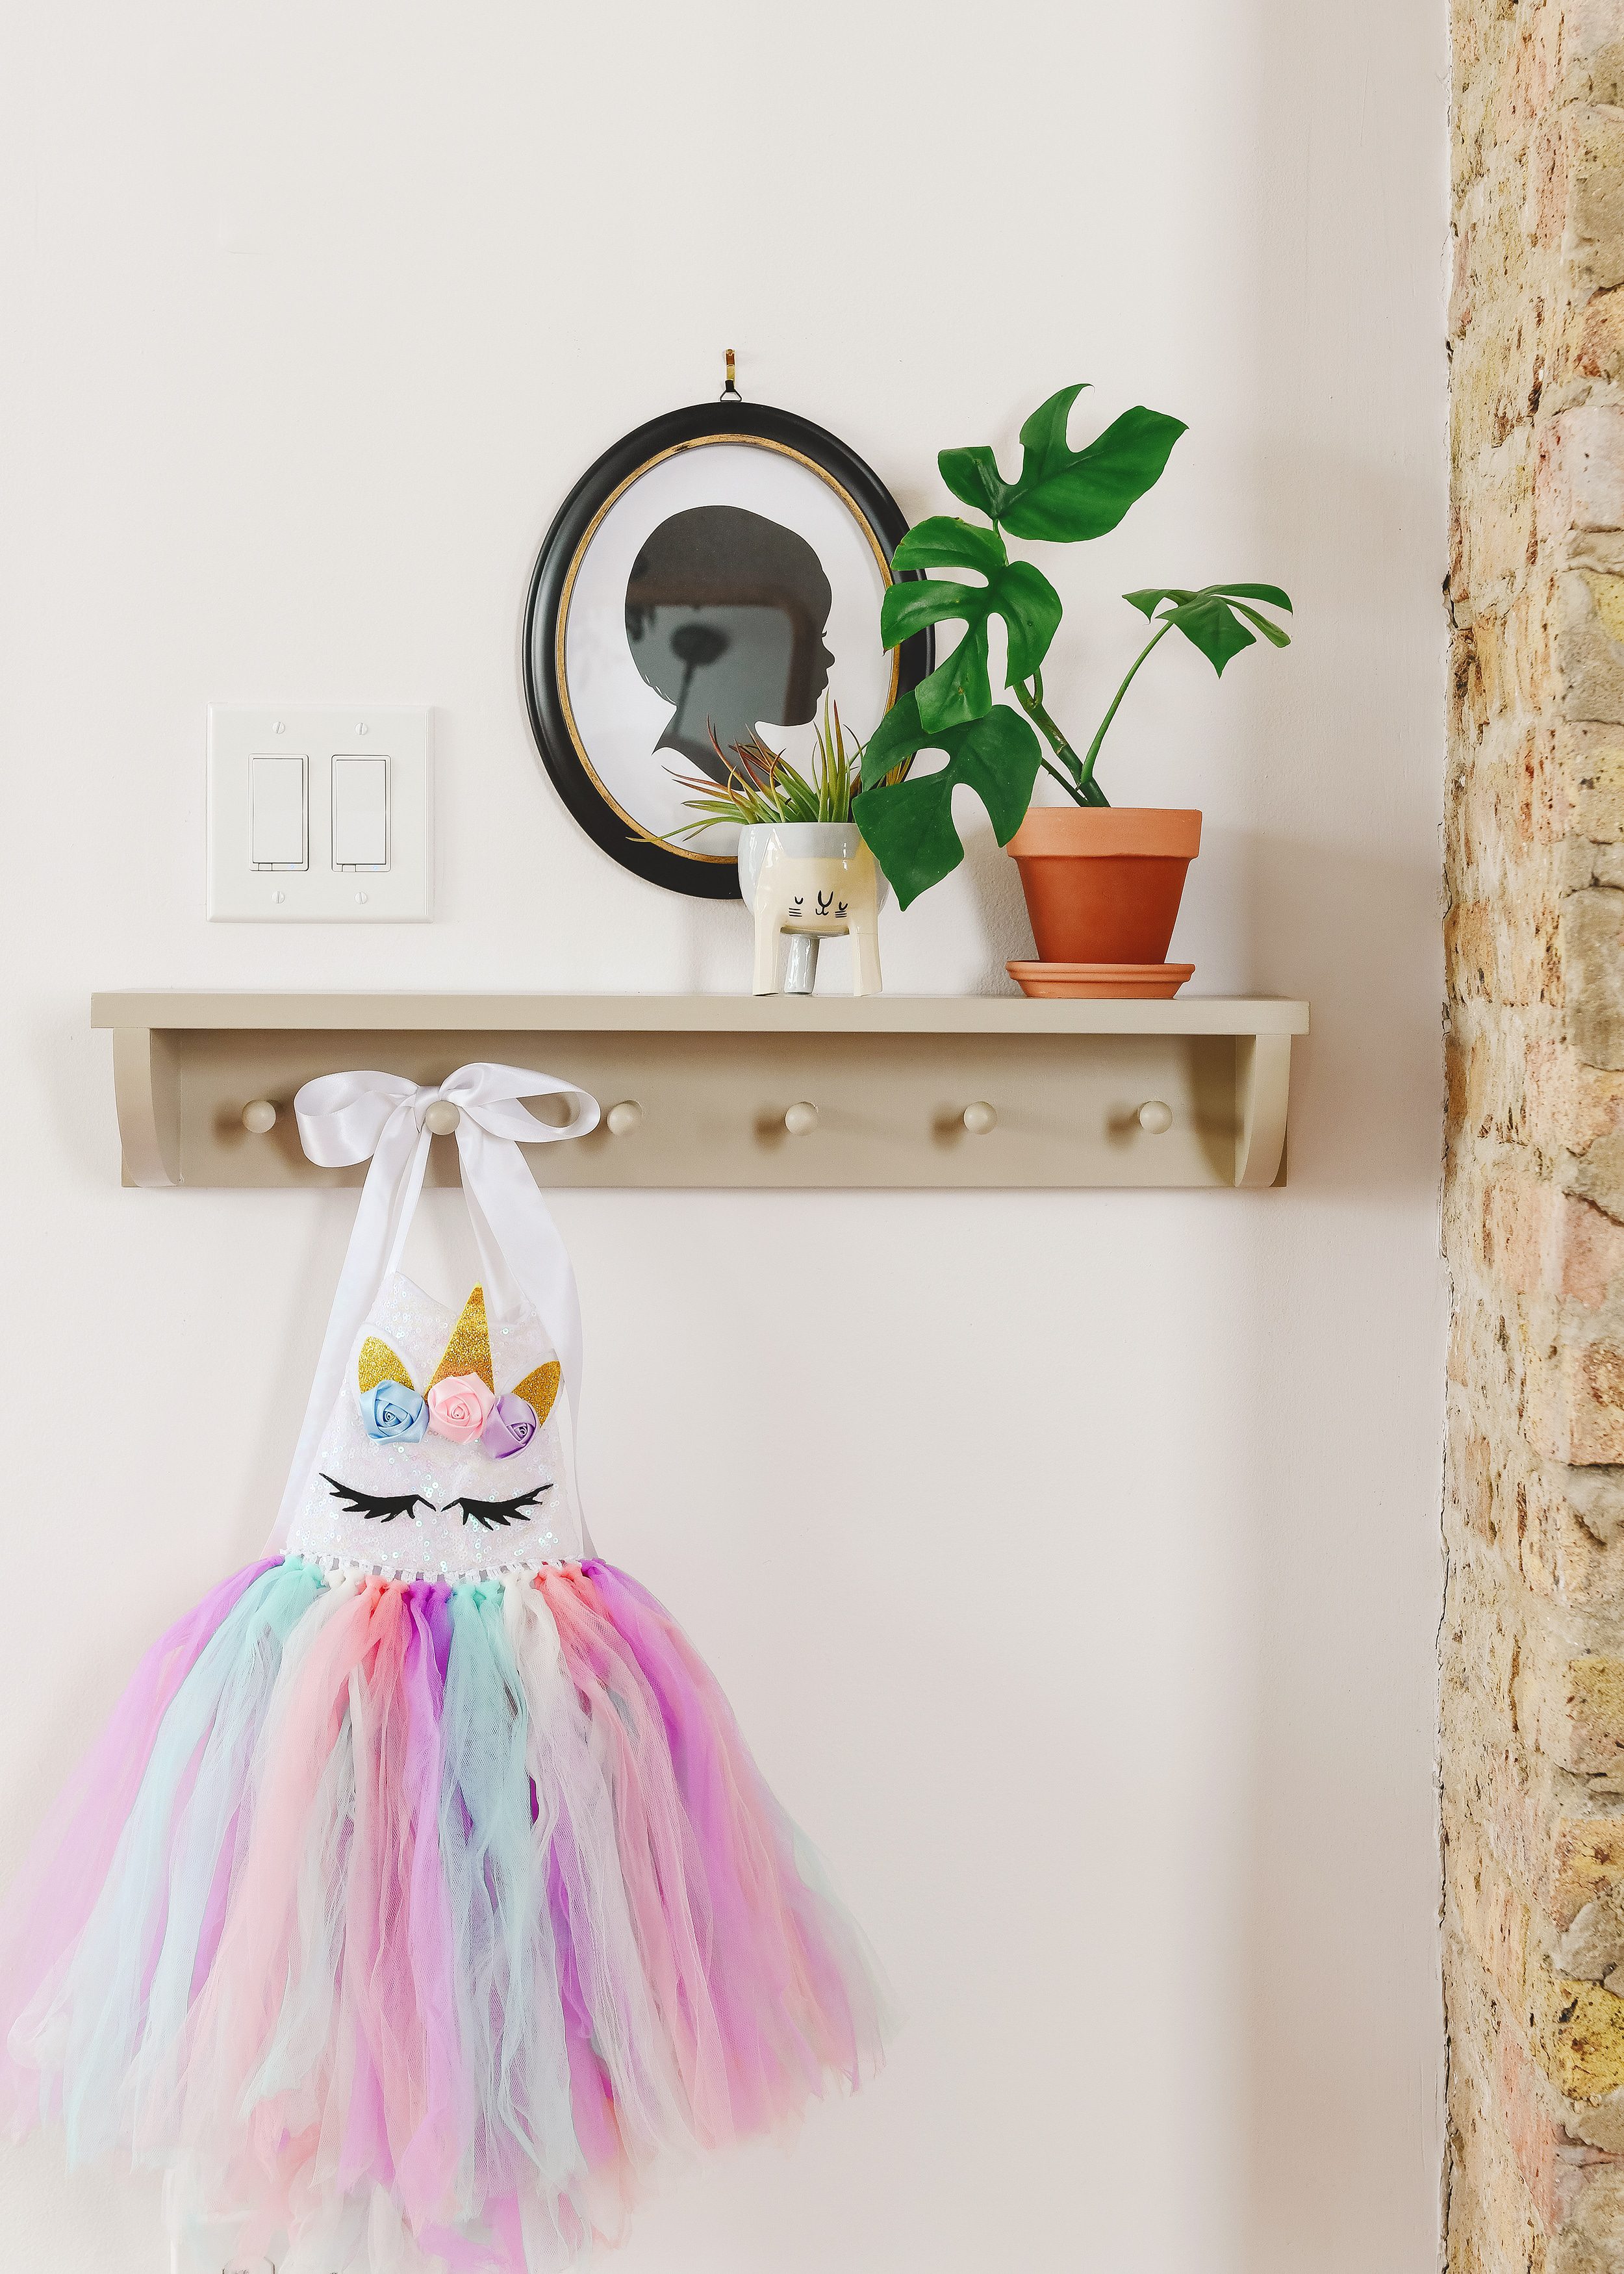
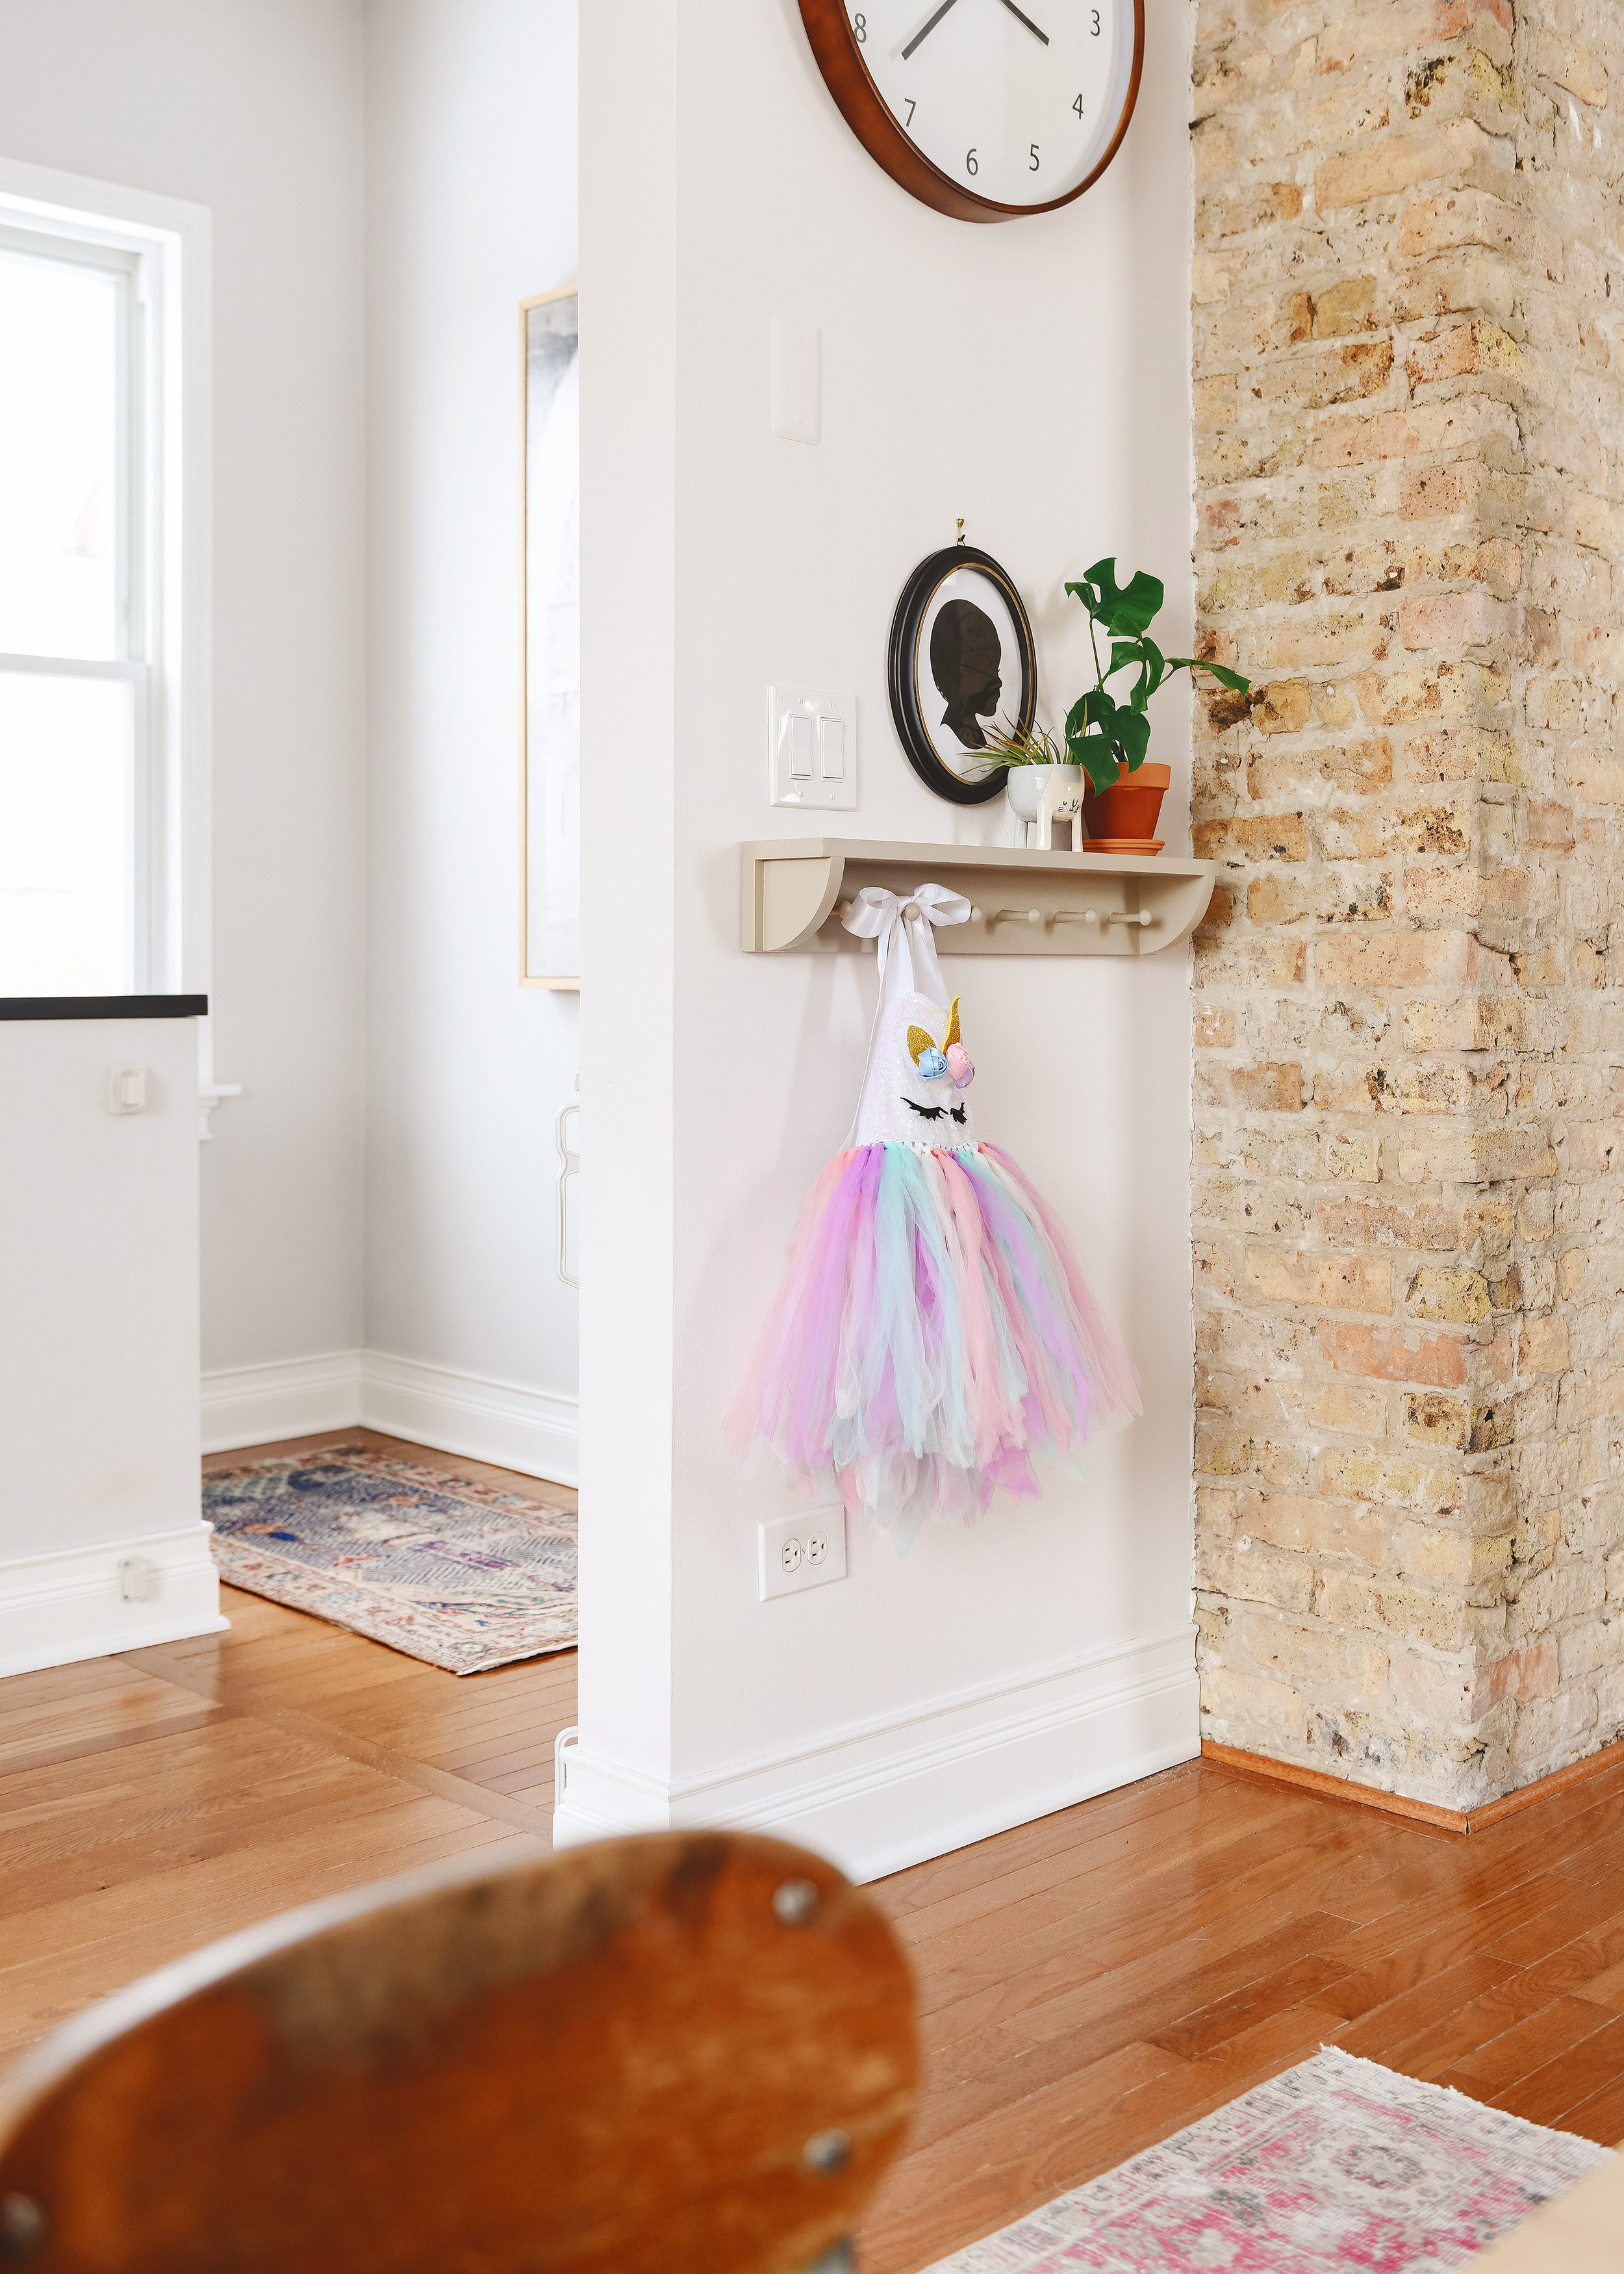
Lucy’s playroom is soooo close to being complete! One of the final steps was this DIY dress-up station that now gives her a convenient place to store her unicorn wings, chameleon costume and ballerina tutu (which she’s definitely attempted to wear all at once). This little lady would wear a costume all day, every day if given the choice!
This versatile DIY is an afternoon project that can be tweaked and changed based on size, style and materials you have on hand. Here’s what we used, and how we got it done.
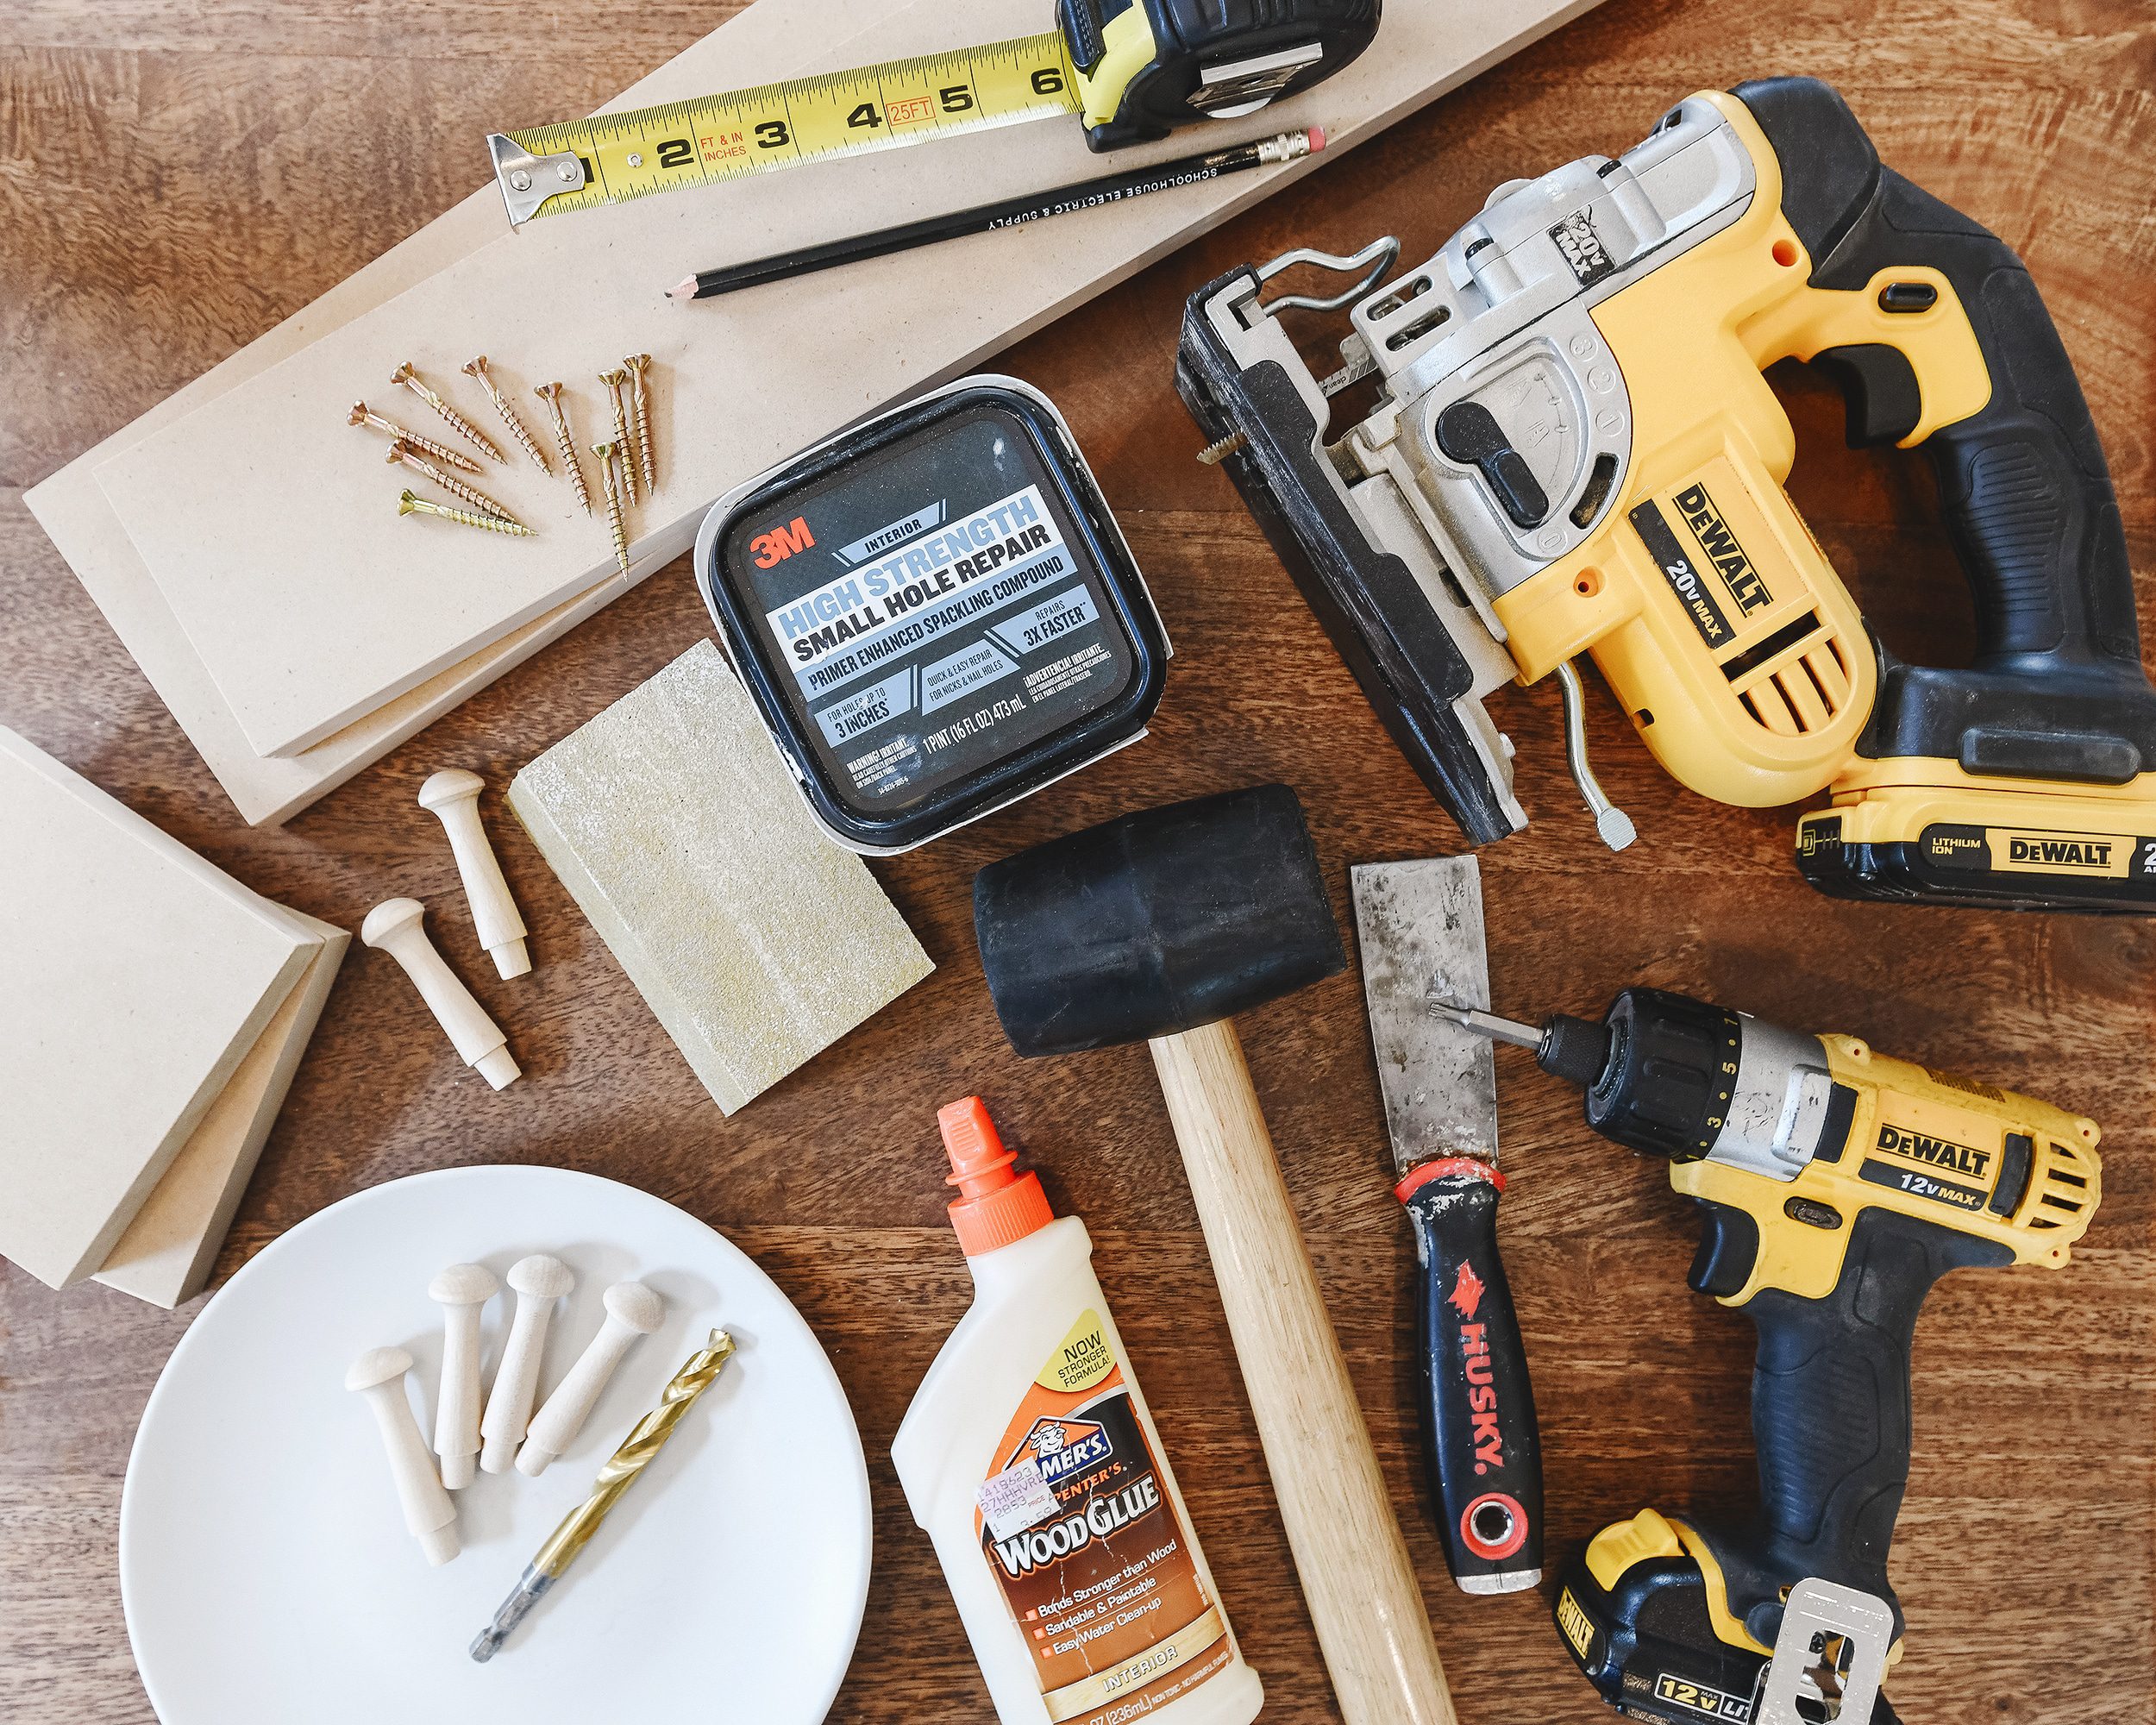
Tools + Supplies Used
- Wood or MDF, cut to preferred length and width
- Shaker Pegs (here’s a screw-in alternative)
- Drill and appropriate bits
- Jigsaw (optional)
- 1 1/2″ wood screws (we prefer Power Pro for the cleanest drive)
- Wood Glue
- Clamps
- Rubber mallet
- Sanding block
- Spackle + putty knife
- Tape measure + pencil
1| Cut + Fasten Top and Back
The first step in the process is to determine the right size for your install location and cut your boards to length. We decided on a width of 26″ for the space between the arched opening and the chimney in the playroom. We opted to have a wider top (shelf) than peg rail (front-facing), so for reference, our top is 5″ and the peg rail board is 3 1/2″.
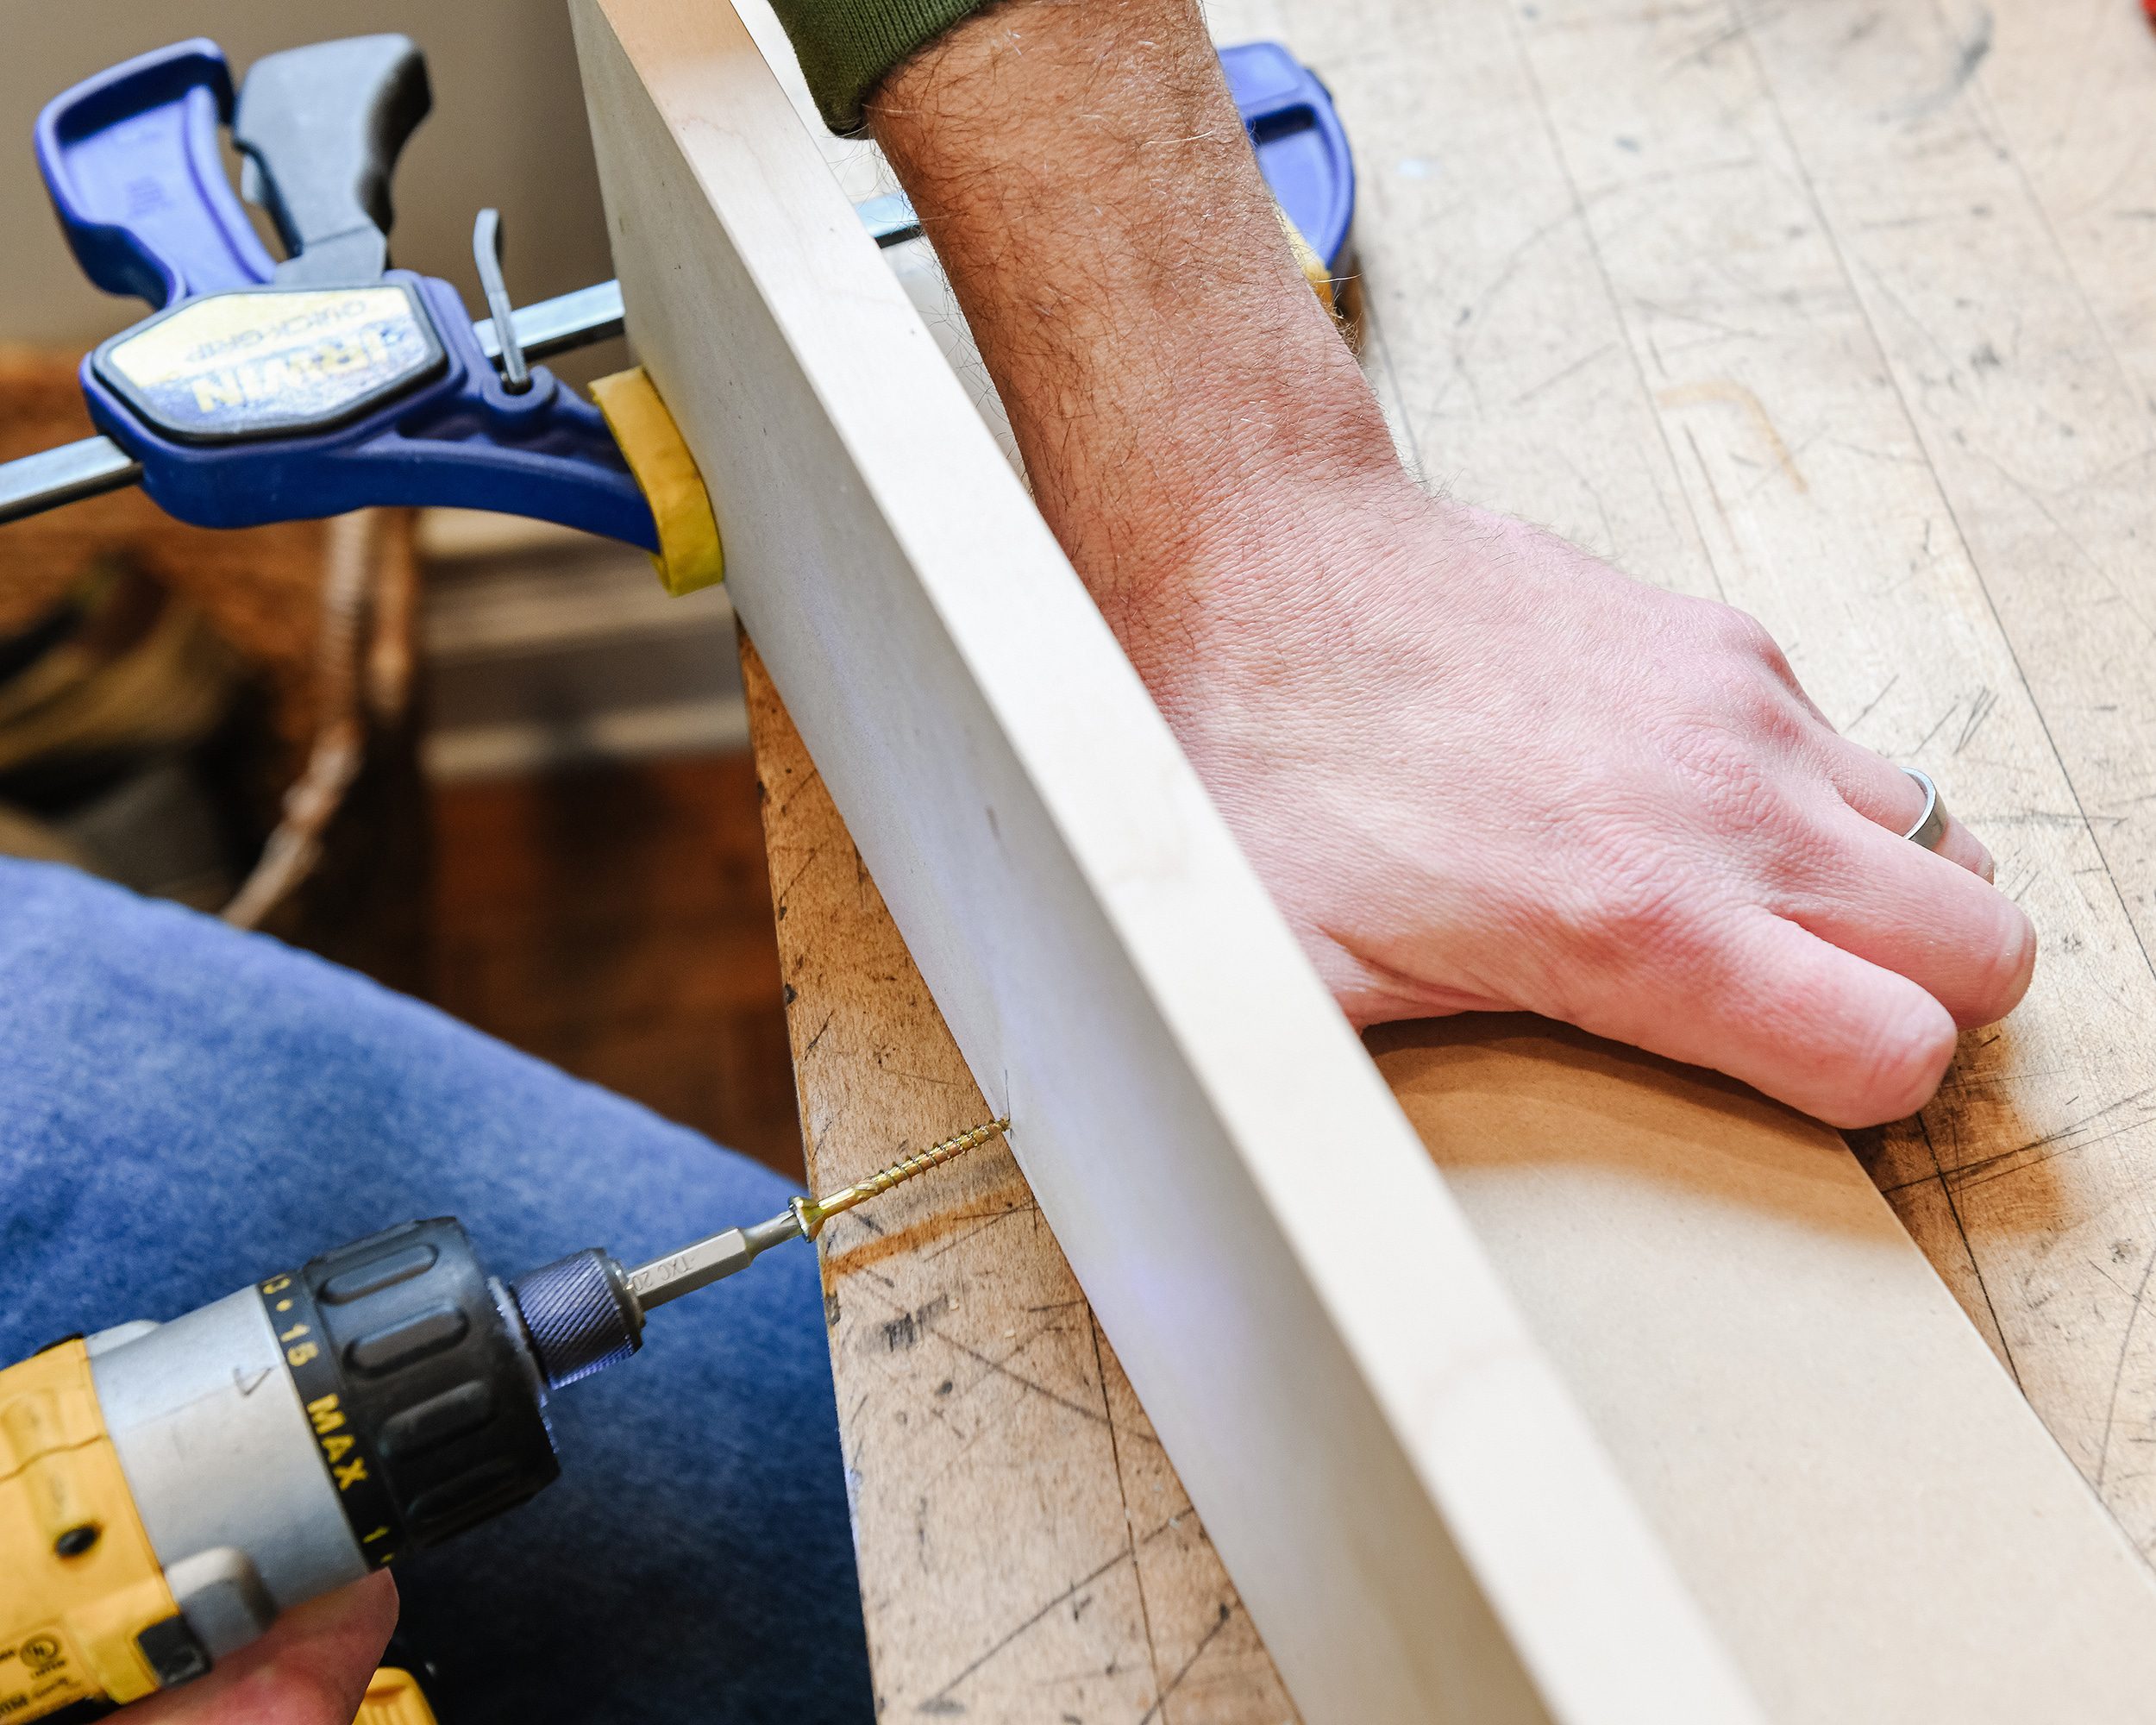
Keep in mind that the beauty of this project is that it can be scaled to fit any space! Once we were happy with the size, we clamped the boards together and used a drill to attach them with screws. Note: Pilot holes are always a good idea, especially in MDF.
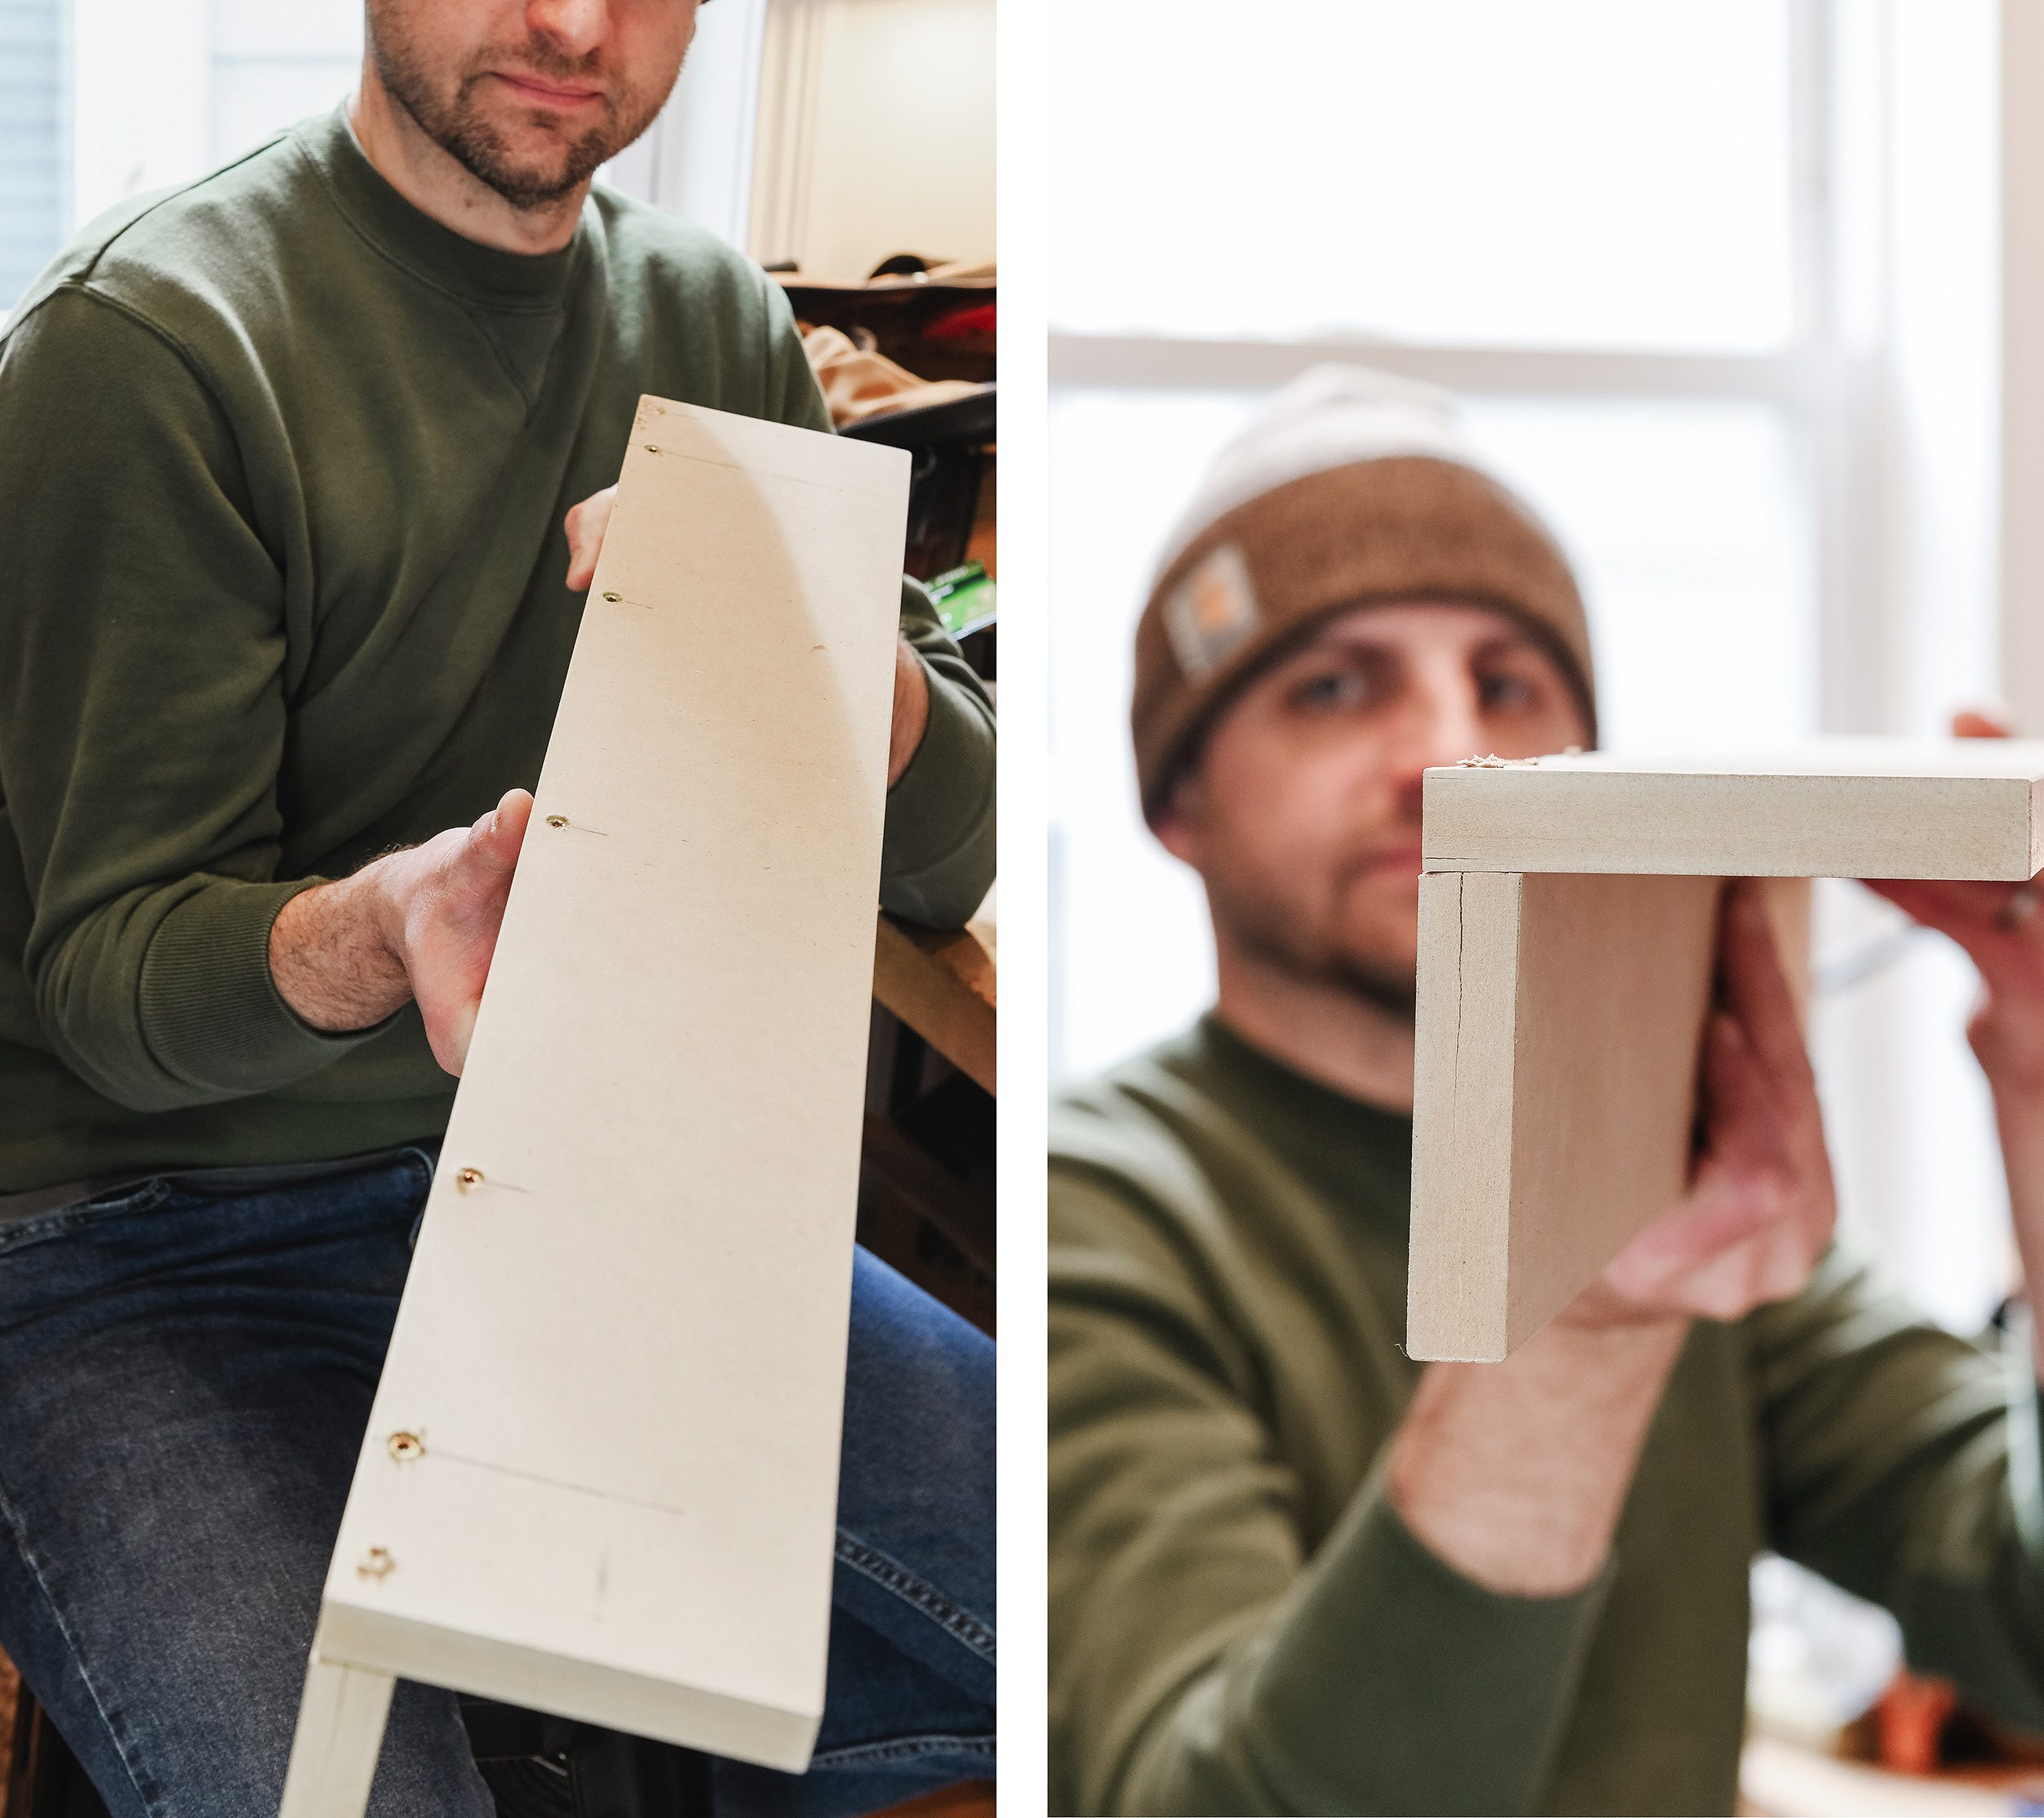
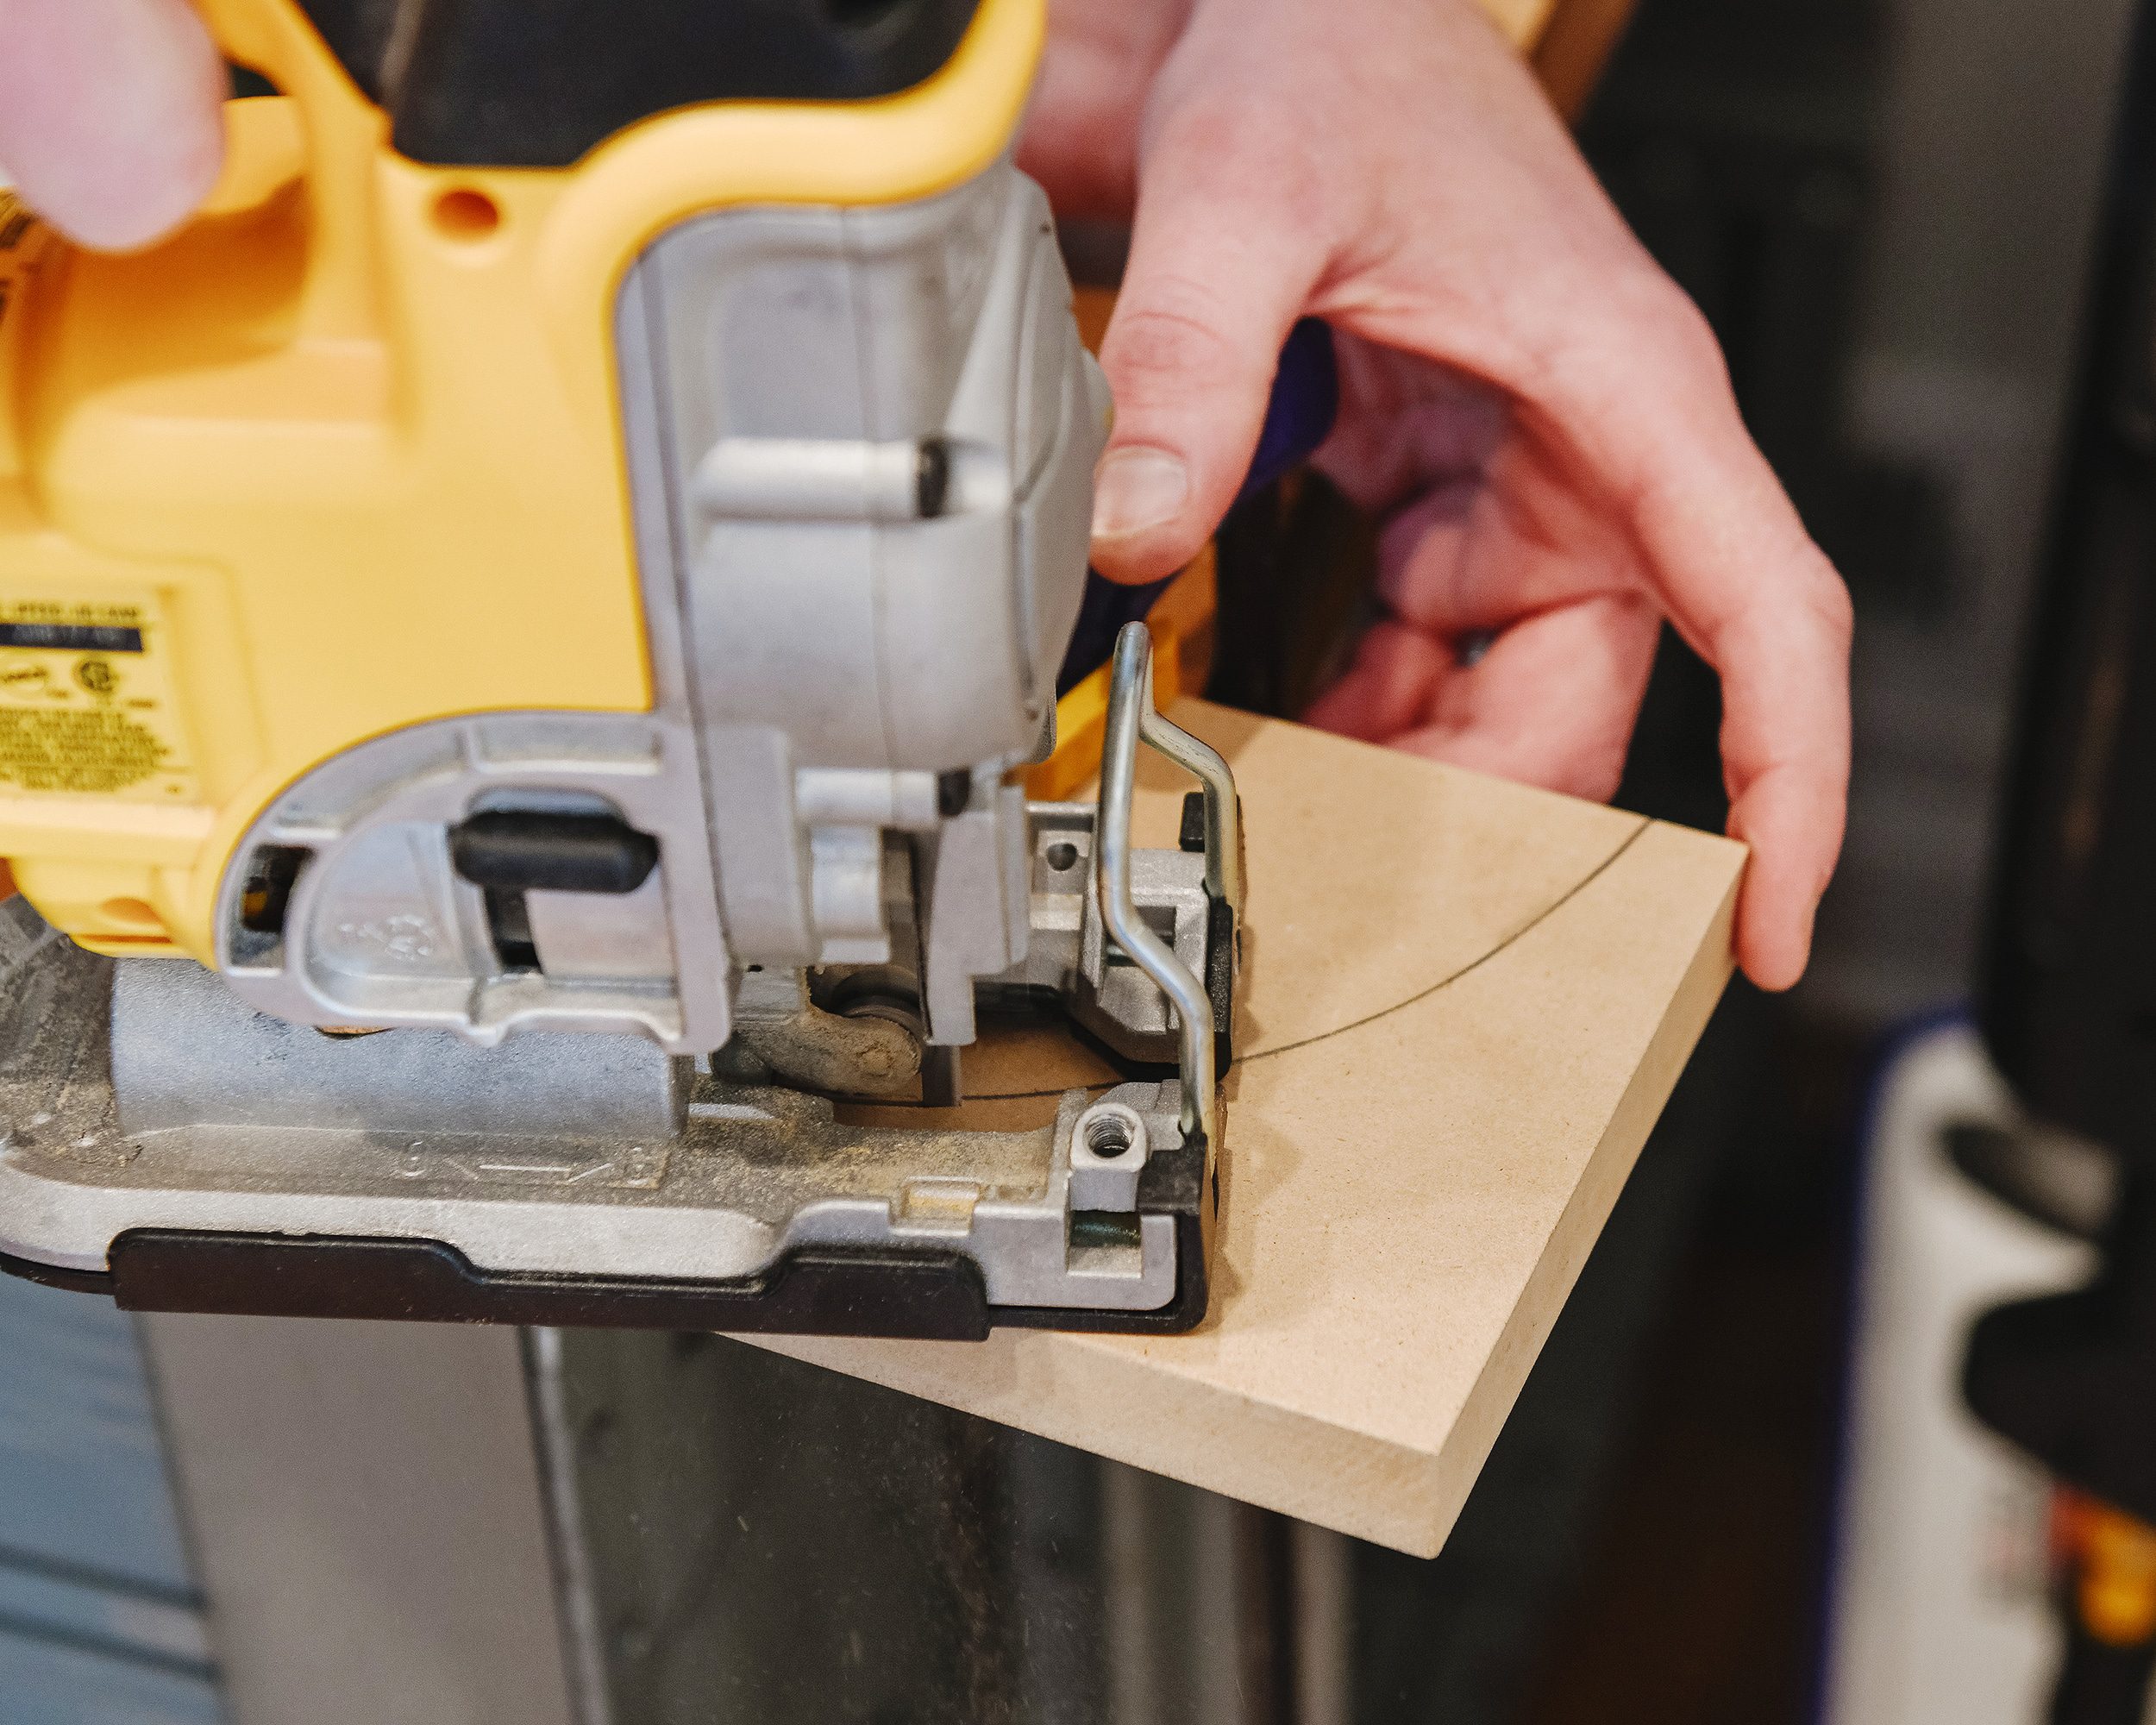
2| Trace, Cut + Fasten Rounded Shelf Supports
Fun Fact: This step is completely unnecessary, but it sure did add some charm! Once the back and top were connected, we scoured the kitchen for a round dish that would make the perfect shape for our side supports.
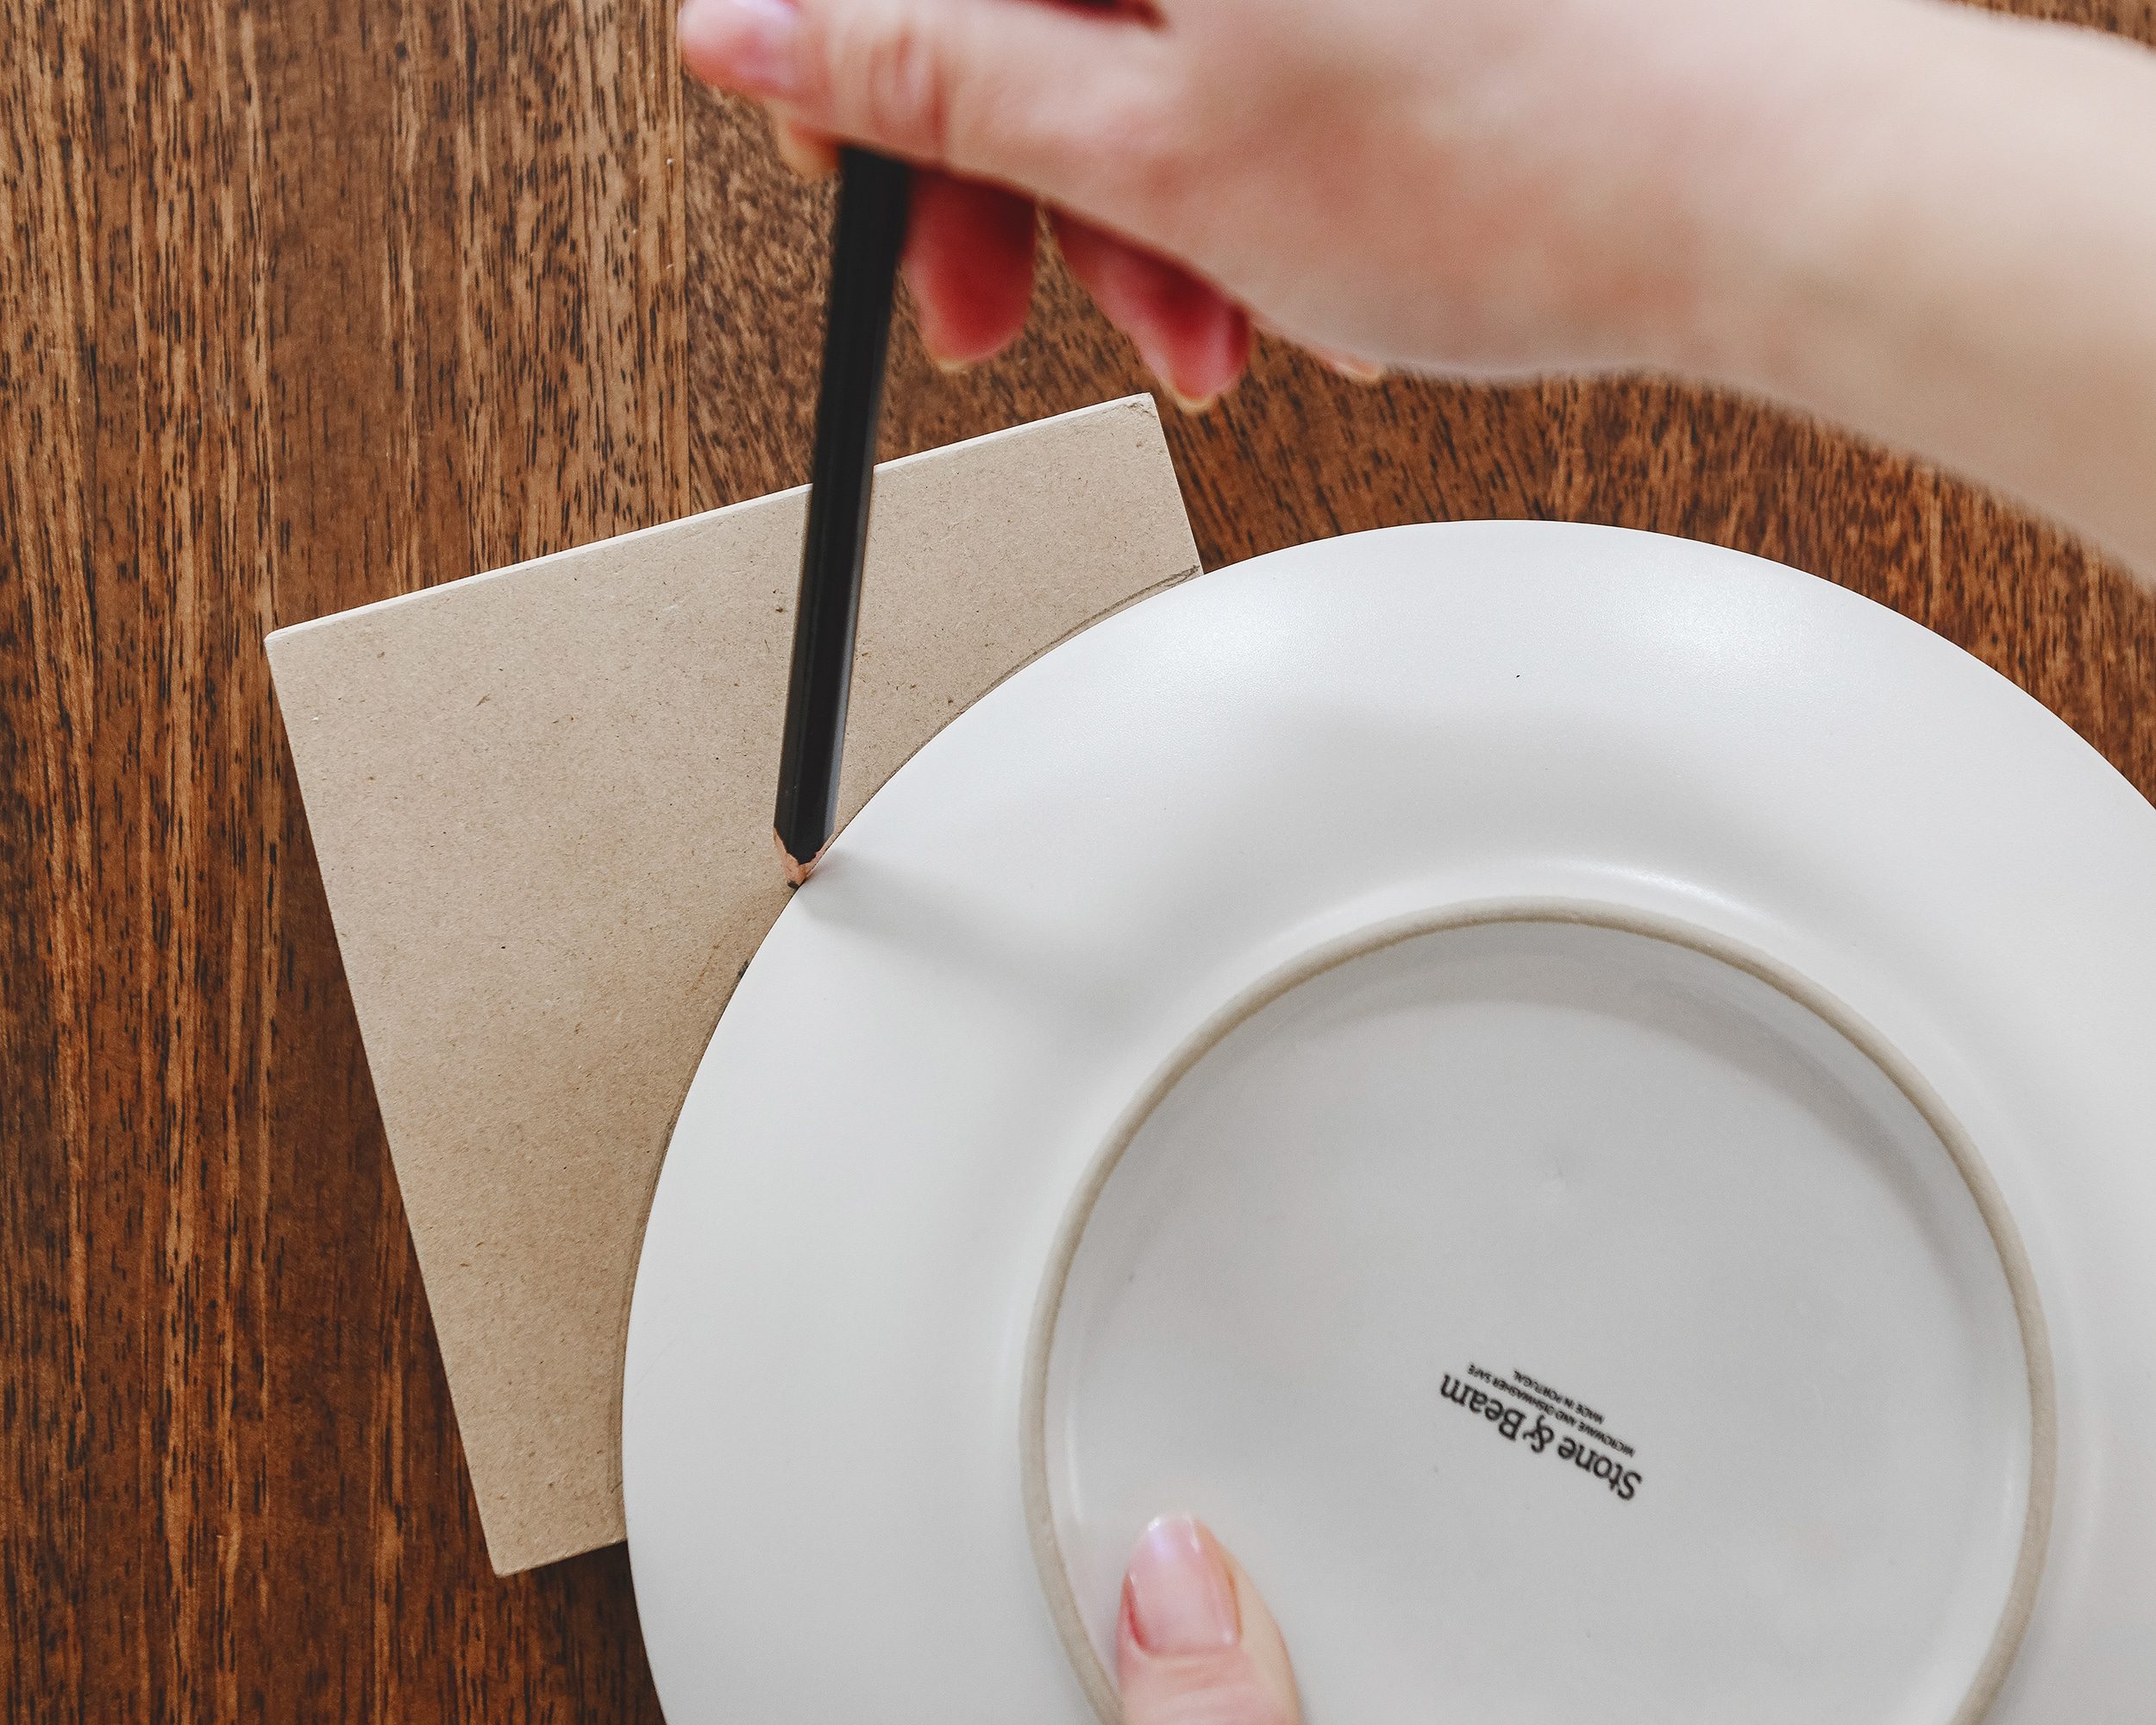
A small dinner plate ended up being a great fit, so we traced the 1/4 round profile and then cut it out with a fine finish blade on our jigsaw. We sanded the cut later in the process, so we weren’t after perfection here, but we got pretty close!
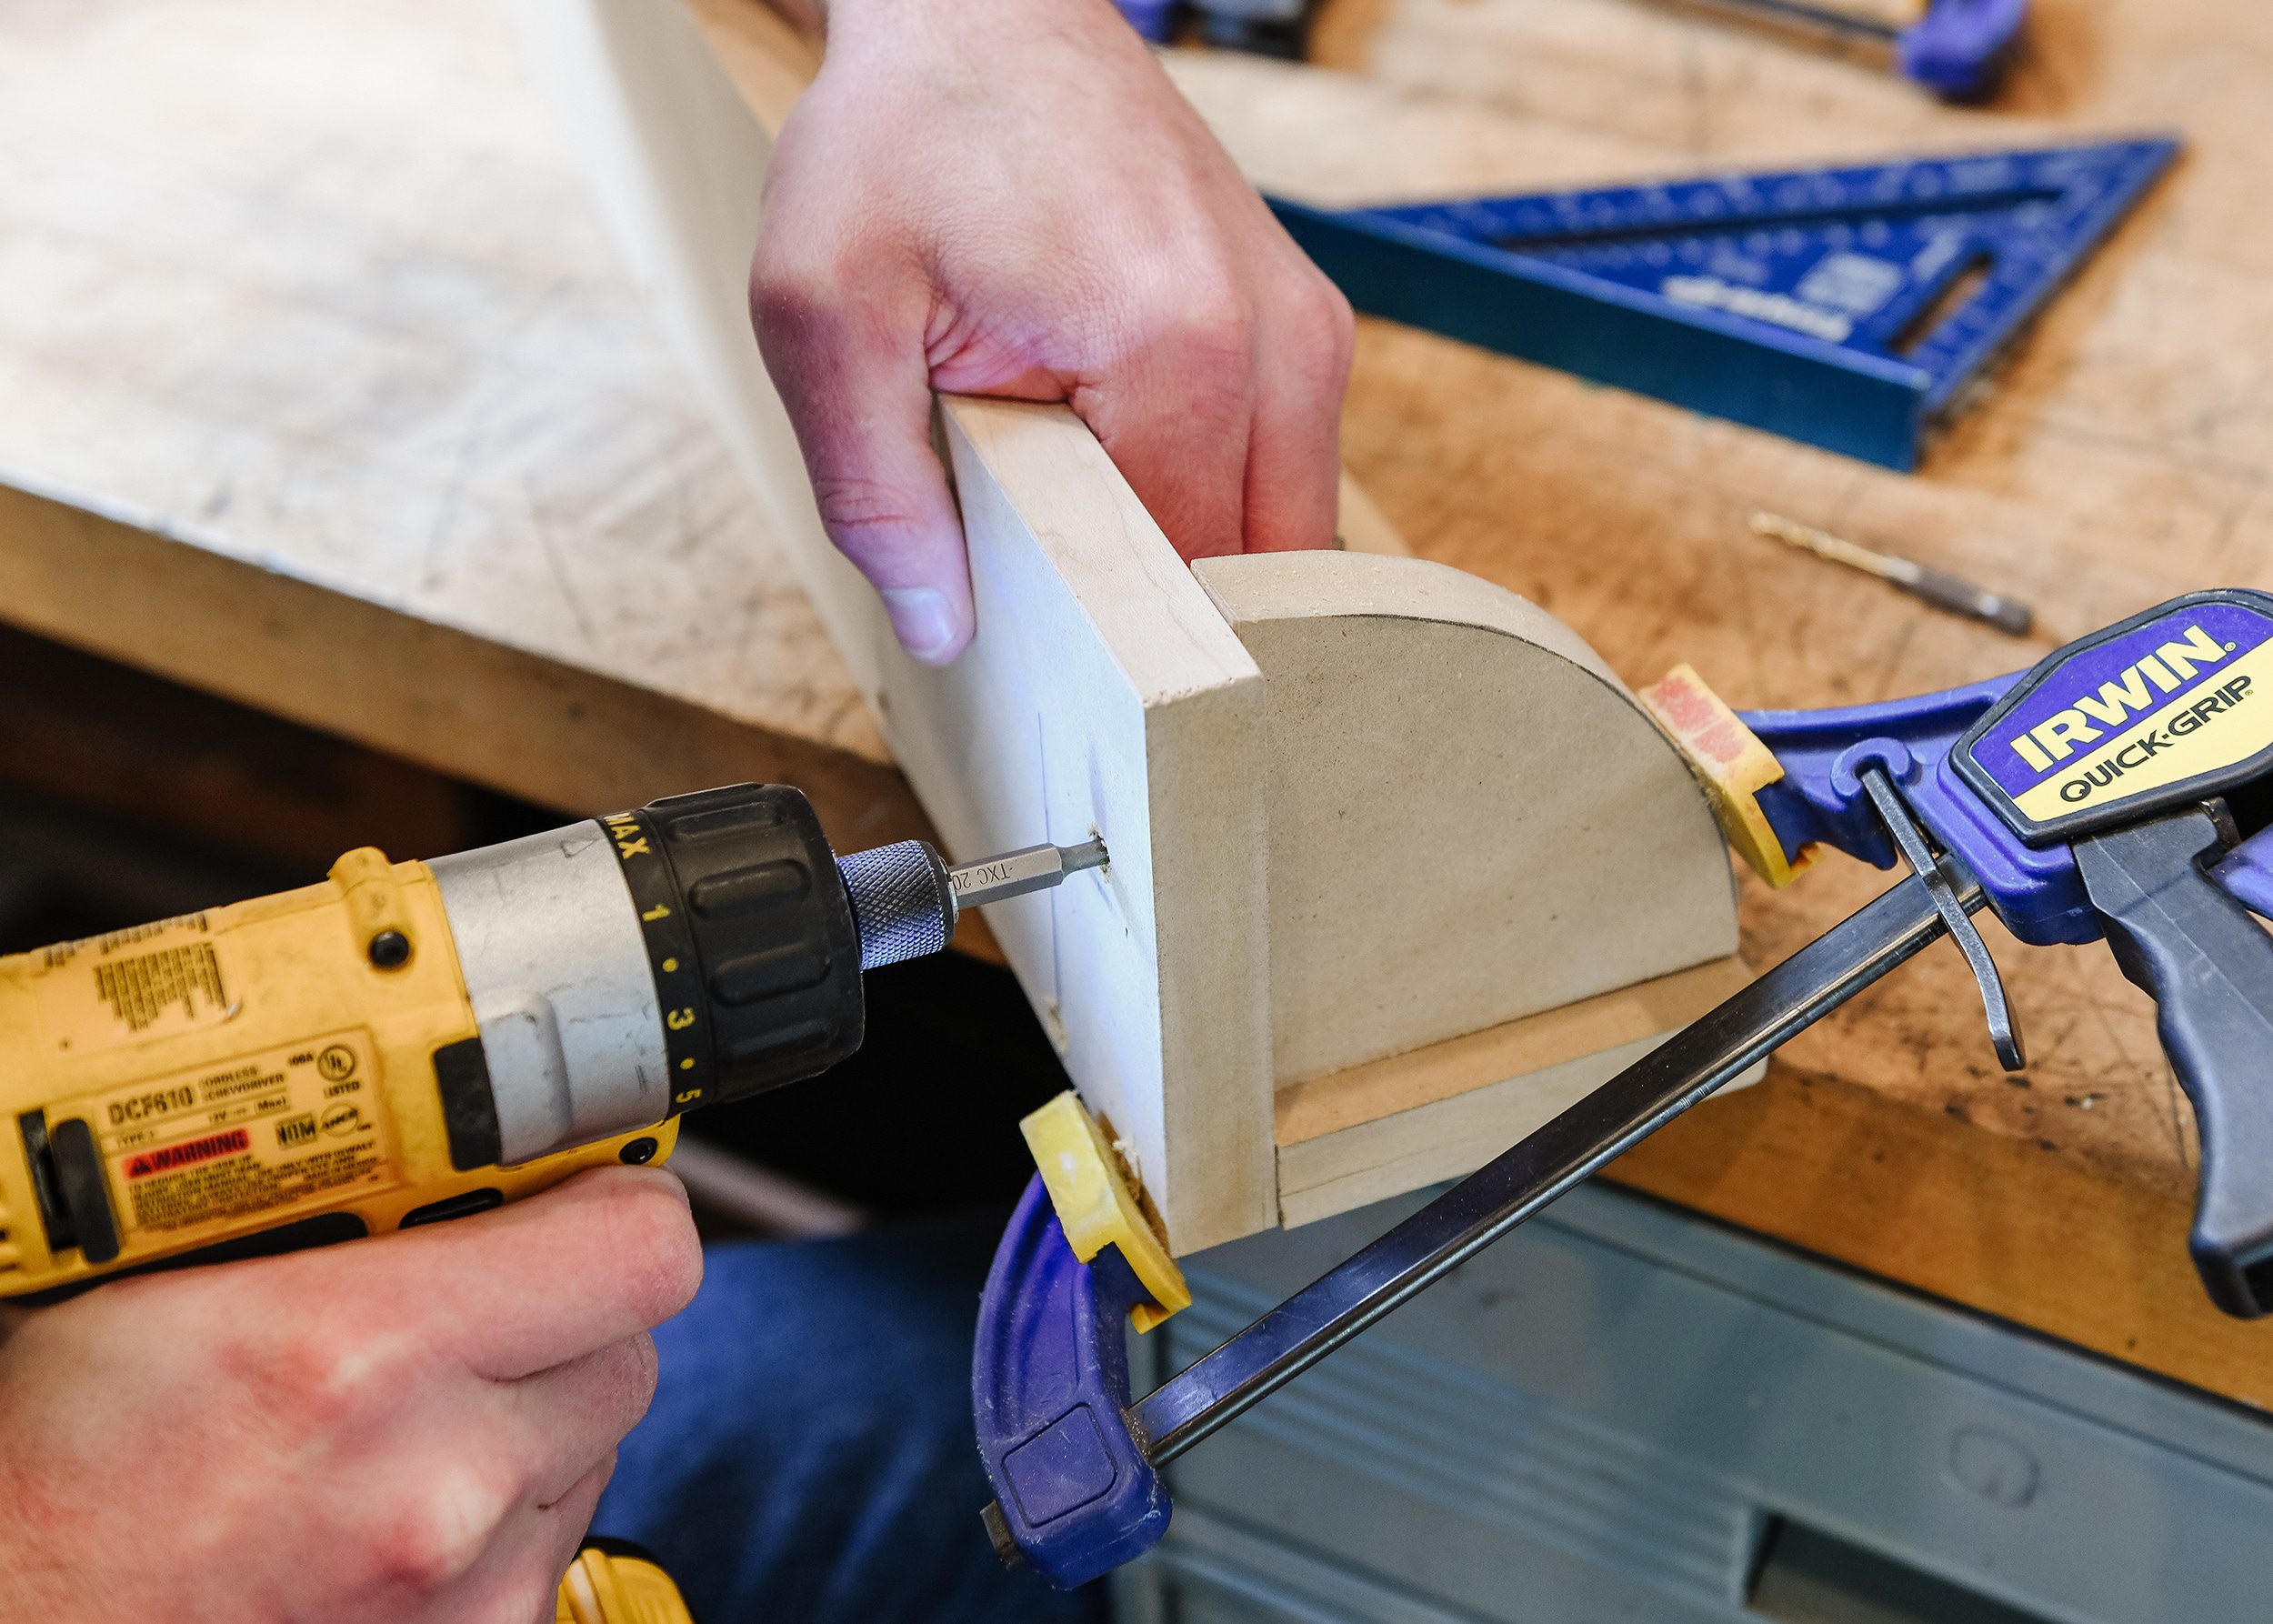
We then screwed the quarter round supports into the top and back using the same 1 1/2″ screws as earlier. Notice the angled clamp that kept the support snugly in place as we drilled? Clamps are helpful to keep things stationary when applying fastening pressure, so we always recommend using them where possible. They’re like an extra set of hands! We’ve had these exact clamps for the better part of a decade.
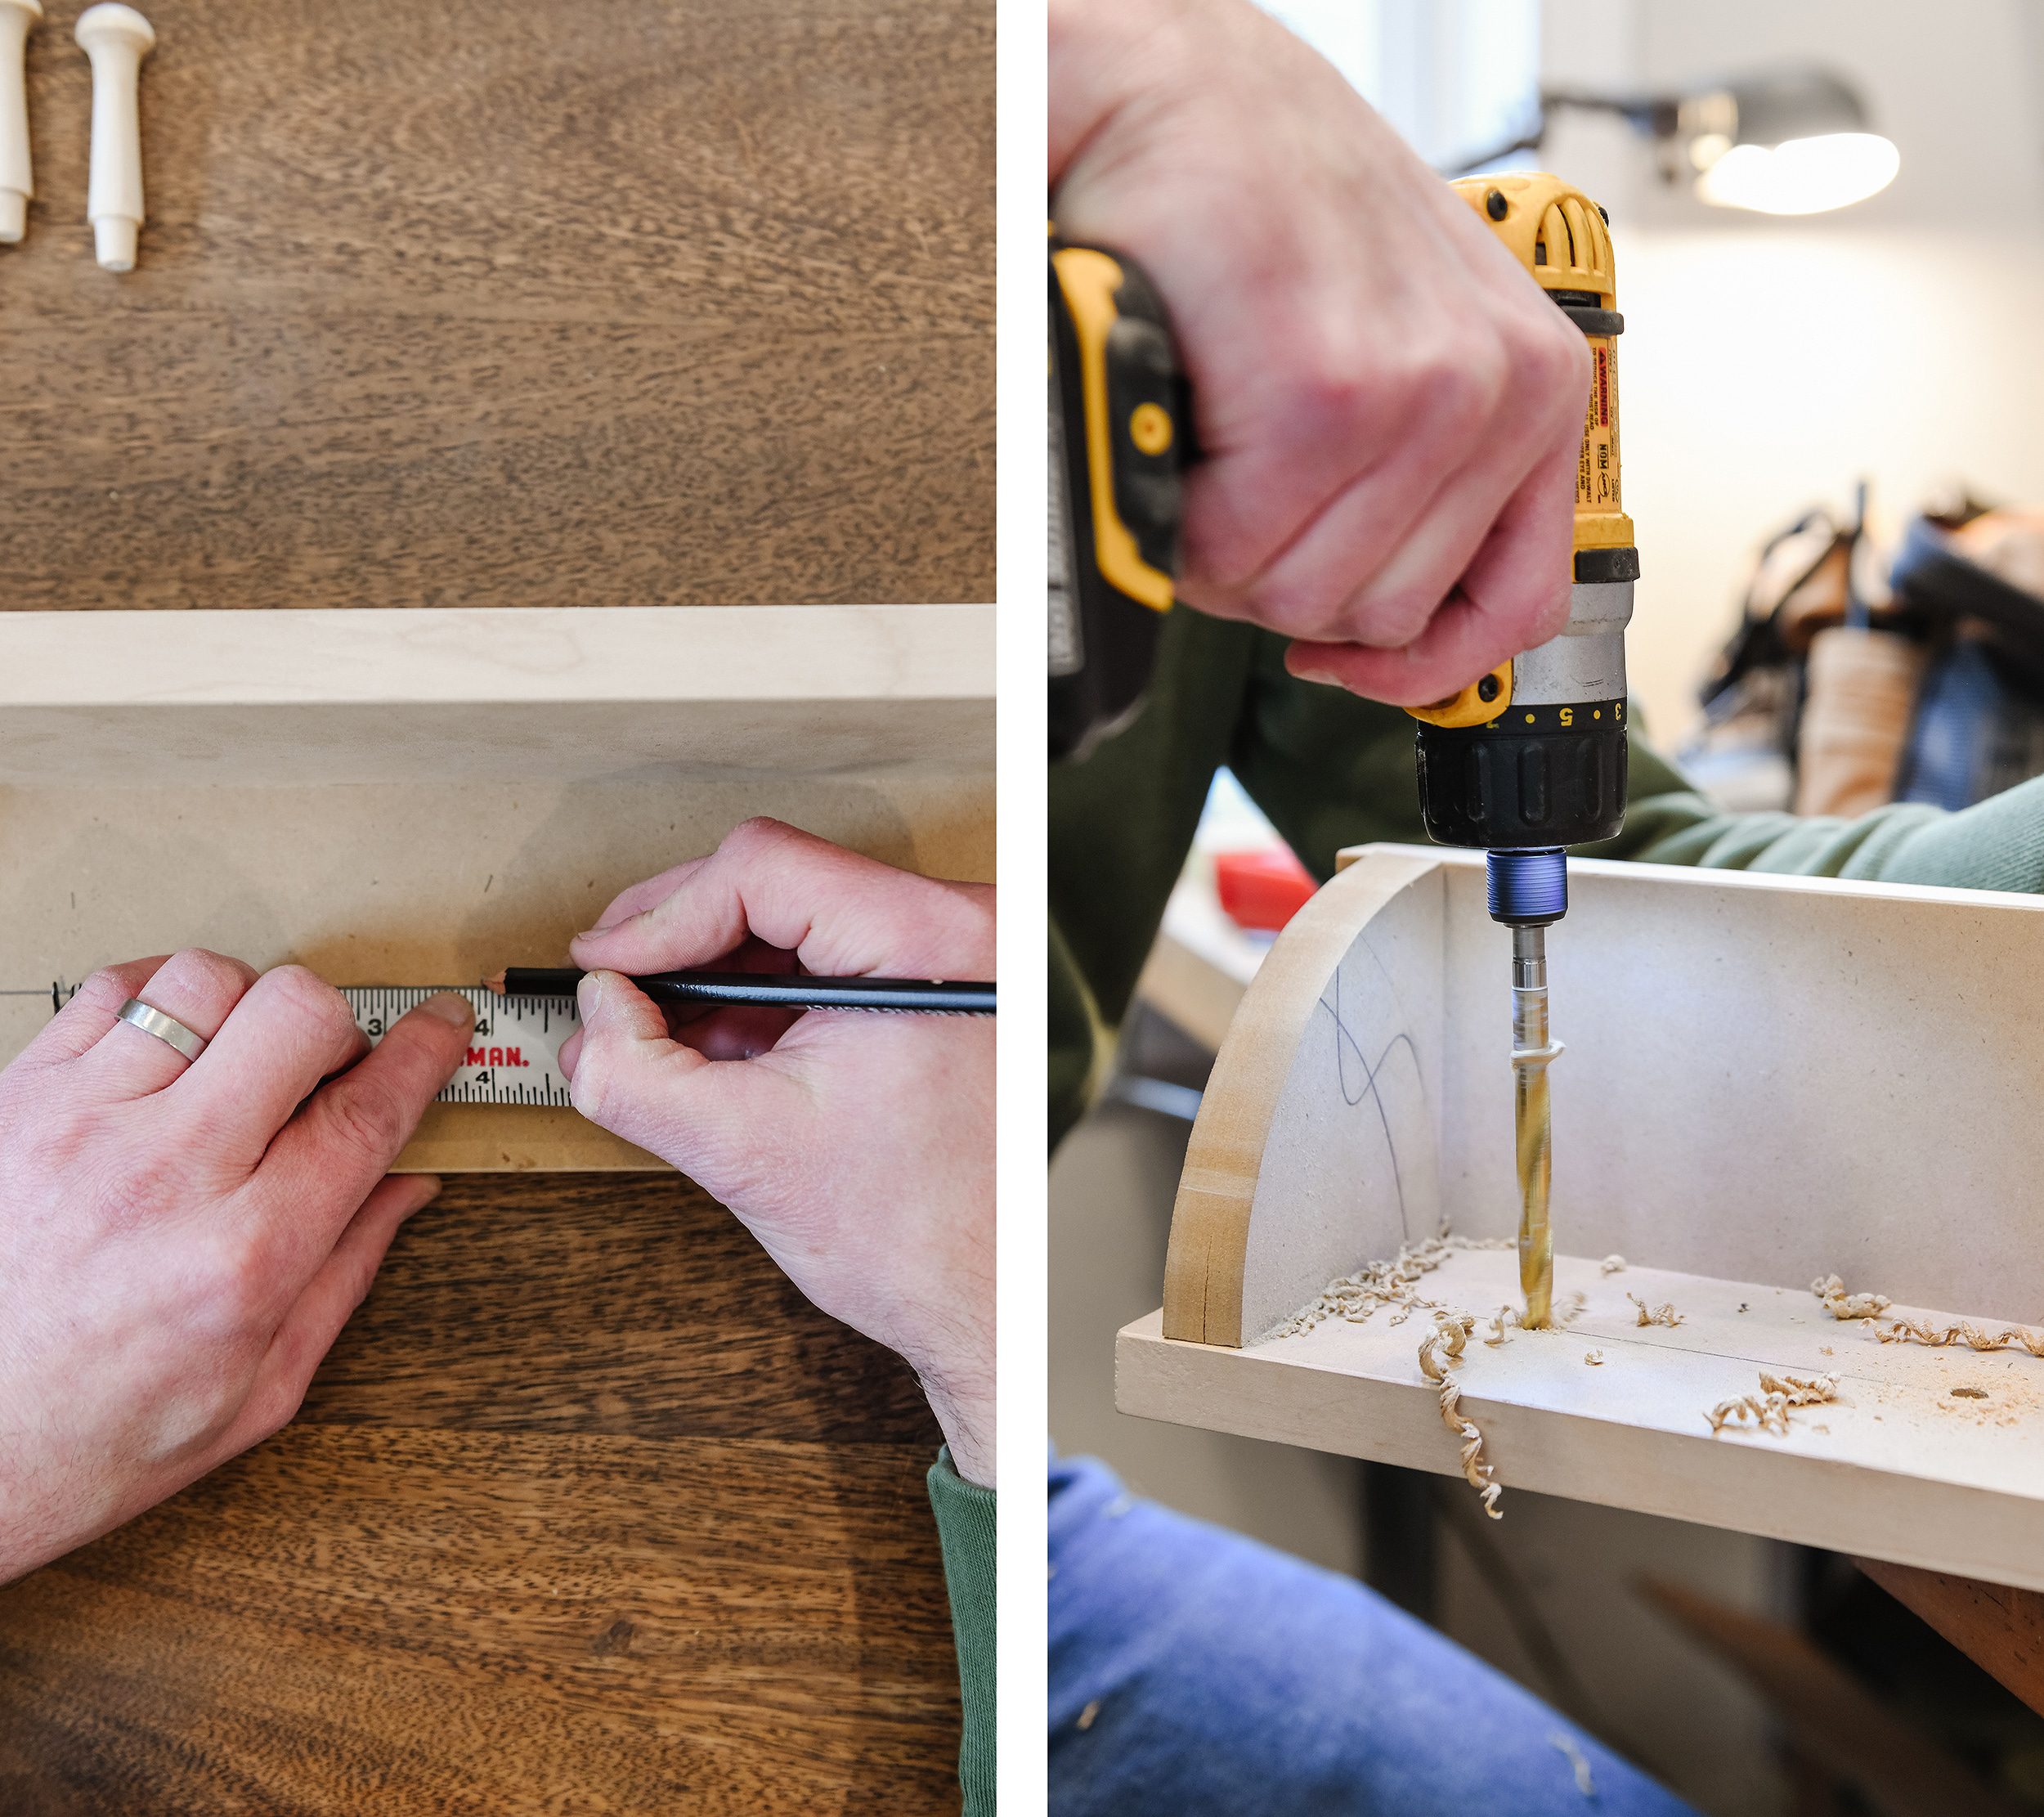
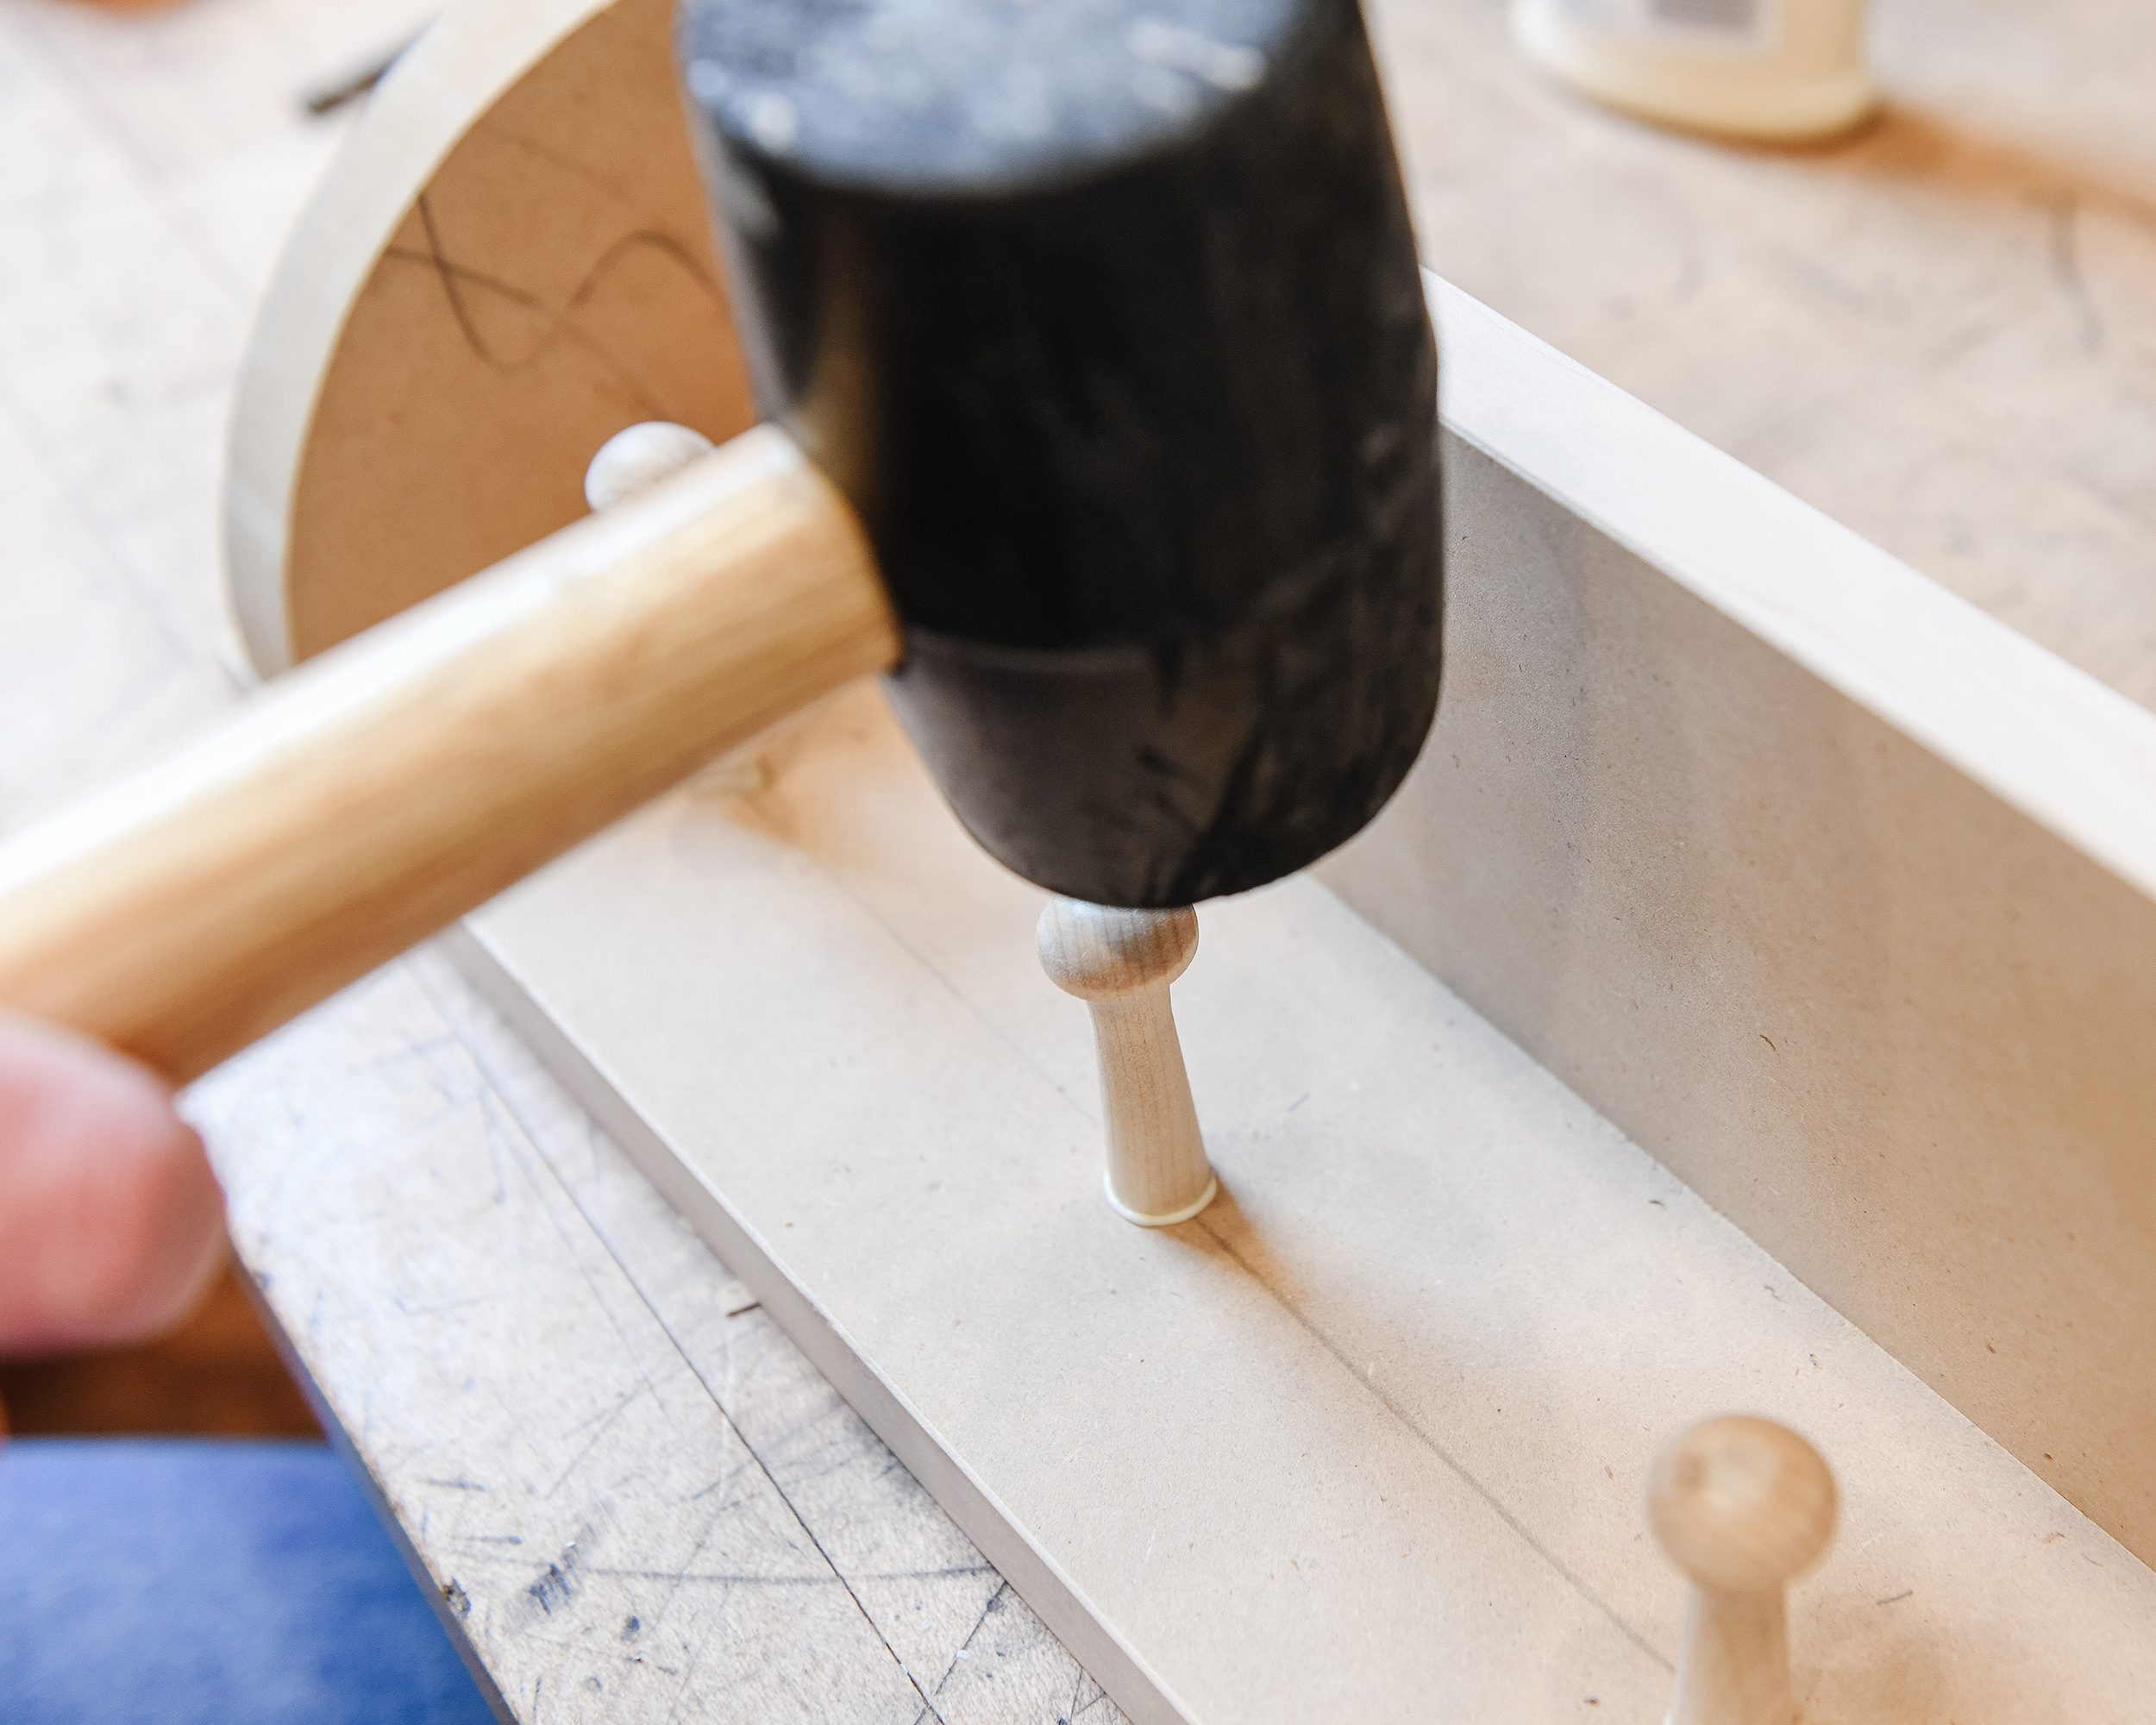
3| Measure + Install Pegs
This step will also vary based the pegs you choose and the width of your peg rail. We spaced our six pegs (we used these) just shy of 4″ apart with about 2″ between the outermost pegs and the rounded shelf supports. For our pegs, we used a 3/8″ drill bit which gave us a snug fit.
Since our pegs utilize a tenon as opposed to threading into place, we applied a small amount of wood glue then tapped them in with our rubber mallet. Note: Our pegs are also available as a screw-in option!
4| Spackle, Sand + Paint
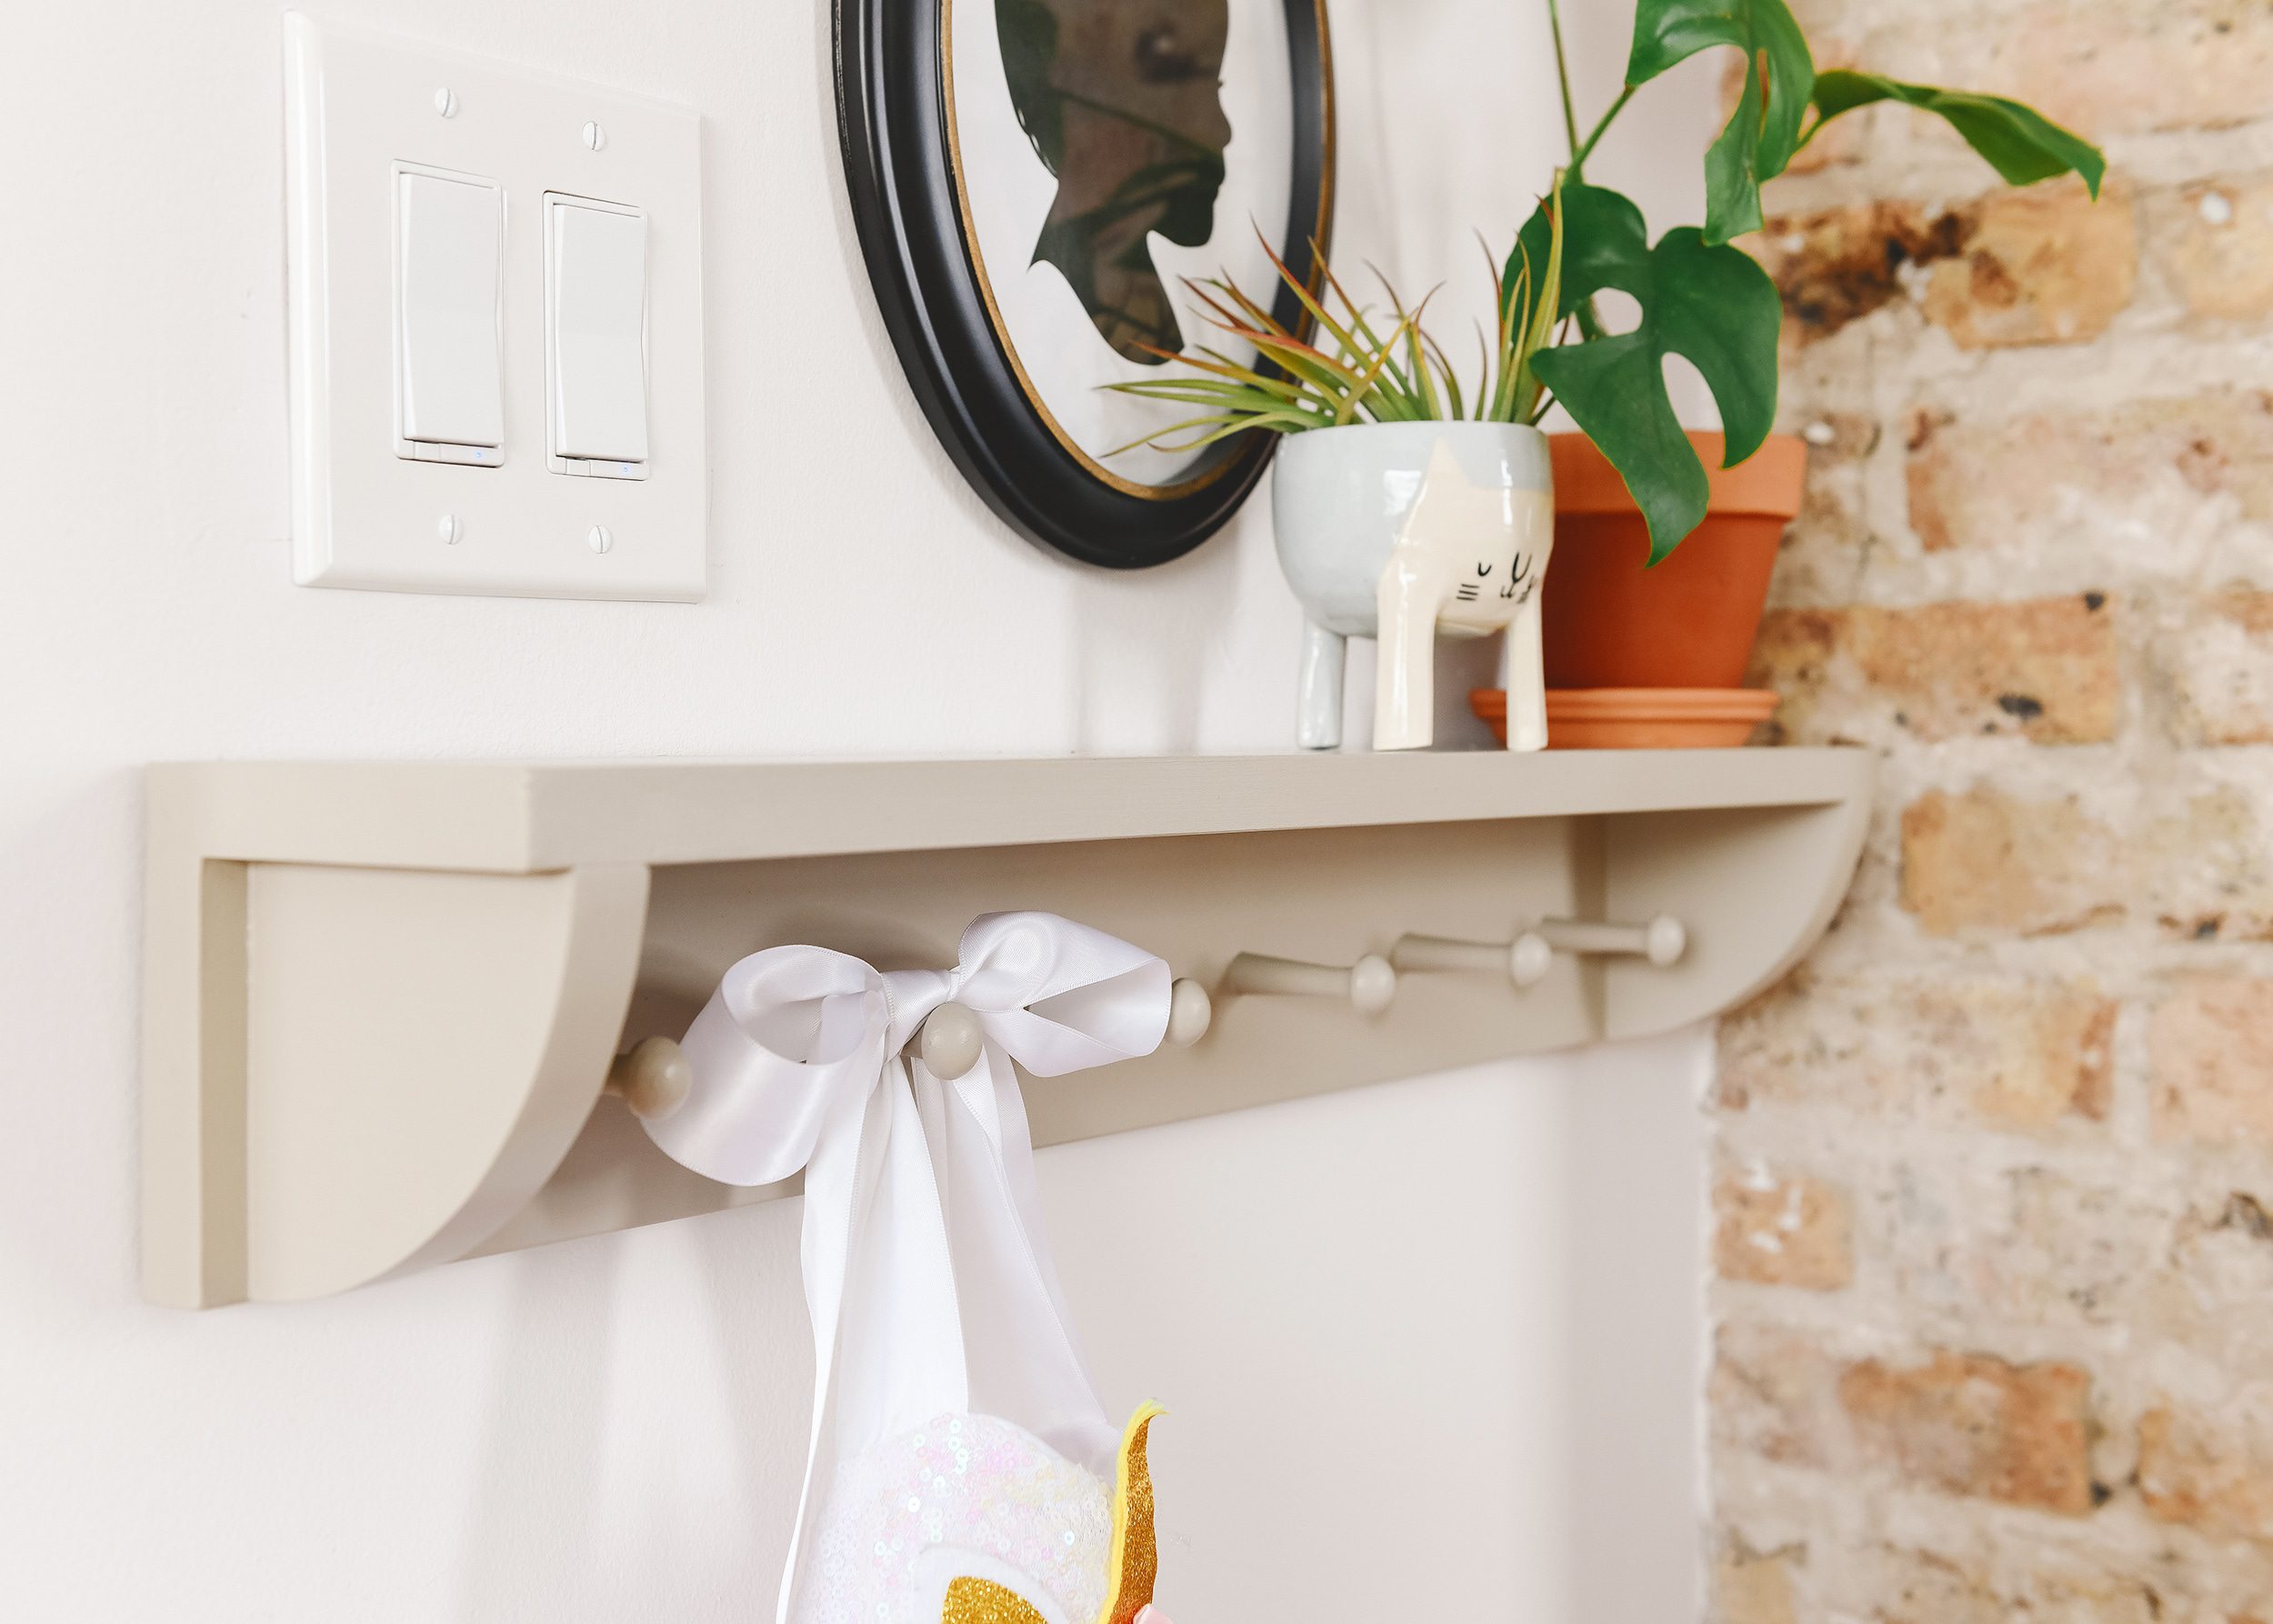
This finishing step is totally up for customization. Built your peg rail out of beautifully grained wood and want to stain + poly it? Go for it! Made it out of MDF? Spray paint it. Brush paint it. It’s all up to you! This project is truly a choose your own adventure. We selected the same taupe color that we used for the custom base on our recently-hacked IKEA dresser. It plays nicely with the multi-tonal chimney next to it and fits the overall vibe of the room well.
To hang the peg rail, we used the keyhole hangers from this multi-pack of hanging hardware, but choose what best suits your needs and construction method! If you’re looking for a more permanent method, might we suggest the ‘straight through the back method’ that we used for our DIY laundry sorter?
Peg rails like this are pretty easy to find, but they can be costly, especially if you’re looking for something custom. Plus, building something yourself is always way more fun!
We still have a storage truck en route to our home, which will go under the rail and act as a permanent home to our girl’s dress up clothes. The peg rail will hold accessories such as hats, capes, wings and all the magical things.
If you decide to take on a version of the project as a towel rack, hall organizer or anything else (anything at all!), remember to tag us @yellowbrickhome and #YBHDIY so we can take a peek. We’d love to see what you create!


What a lovely shelf. It’s looks like so useful I mean you can put your hobby things or just you can use for decoration thing.
I love this! It’s so cute!I’ve always been curious about something that makes me nervous to use MDF – if someone manages to scratch/do damage through the paint layers down to the MDF, how hard is it to fix to patch and re-paint to get back to that nice finish? Is damaged MDF really fibrous-y?
It’s so easy! Just spackle, sand and touch up paint. MDF is so smooth, so it’s really great for small painting projects.
Thanks Kim!!